|
Before the new year, I made a resolution to try not to blow my money on needless skin care items. I have an abundance of lotions, lip glosses, and more, and felt that I really needed to take stock of what I am putting on and in my body.
After spending an afternoon gutting my bathroom, I saved a few skin care items from each category, and even added in a DIY or two for something a little more natural! It’s easier than you think to create body butters, scrubs, and balms, and you probably have almost all of the ingredients in your pantry so why not give one of these recipes a try! 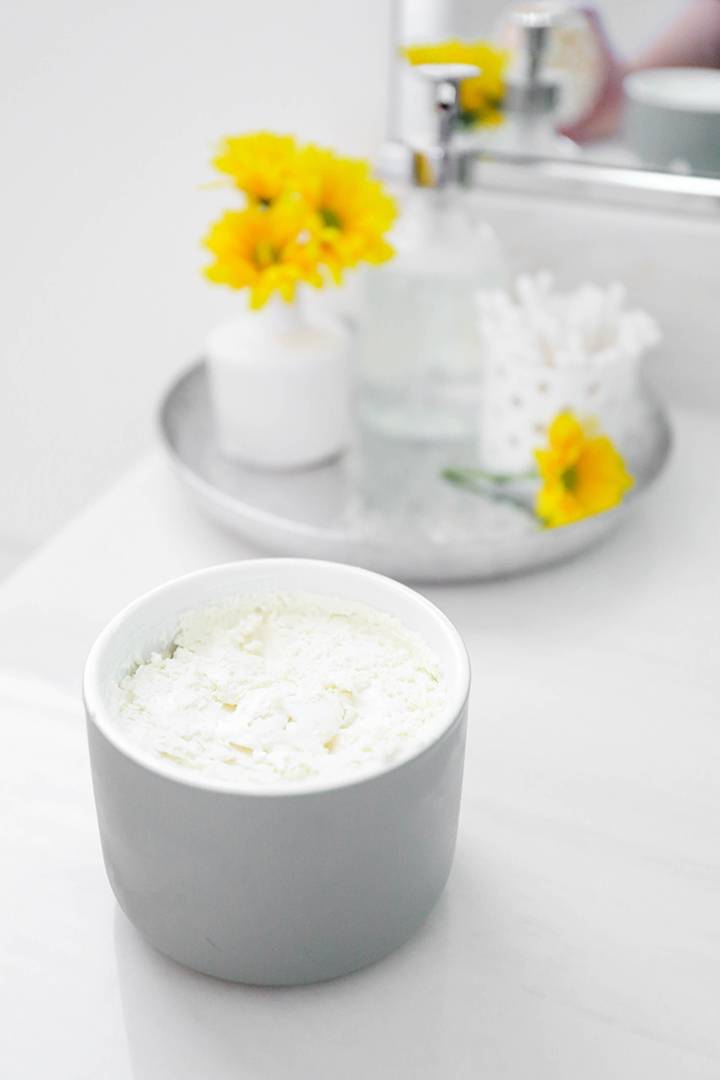 Photo: Lexy Ward Photo: Lexy Ward
Whipped Body Butter RecipeFirst up, the most delicious and moisturizing body butter made from 3 ingredients. It stays solid while stored, and immediately melts when it comes into contact with your skin. Some body butters can leave you feeling oily, but this absorbs right into the skin leaving behind a supple feel and nice sheen! 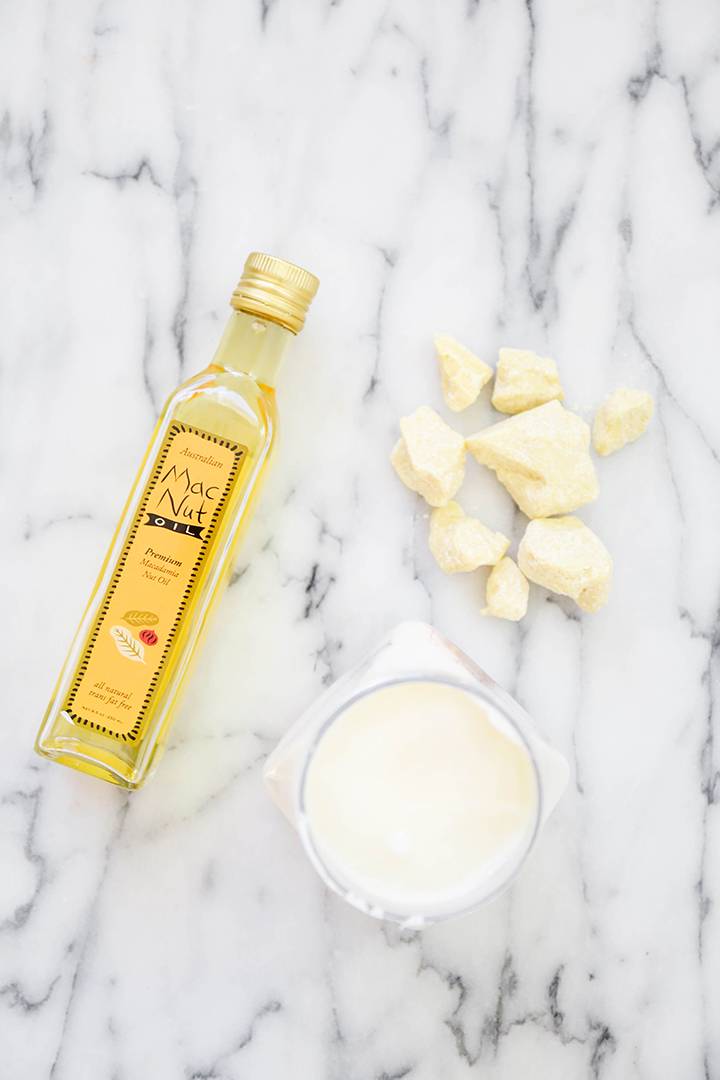
Photo: Lexy Ward INGREDIENTS
Combine the butter and oils in a microwave safe bowl. Either melt everything in the microwave or place the bowl in a pot of boiling water. 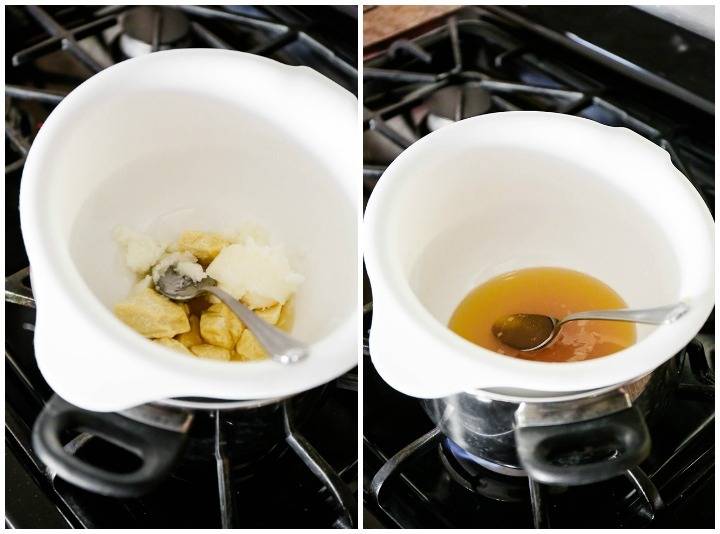 Photo: Lexy Ward Photo: Lexy Ward
Once everything has melted, place the bowl in the freezer for 20 minutes to allow it to cool and partially solidify. Remove the bowl from the freezer and beat with a hand-mixer for 3-4 minutes until the mixture is nice and fluffy. It will also take on a nice white color! If you’d like to add in vanilla, do it just before mixing to give the body butter a sweeter scent! 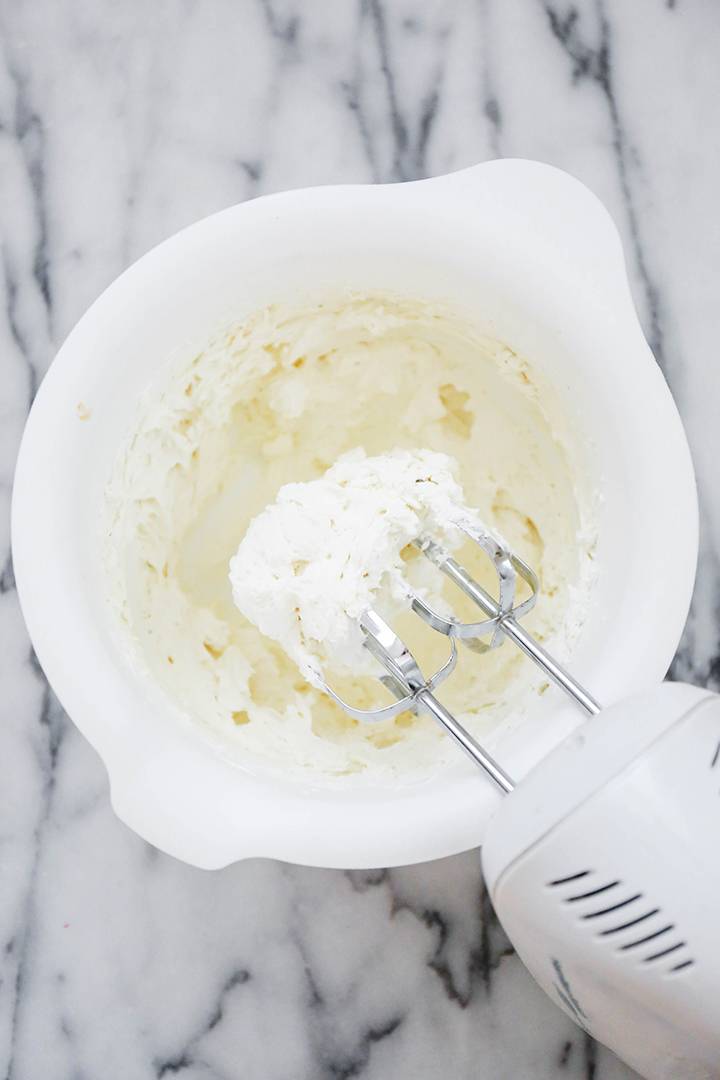 Photo: Lexy Ward Photo: Lexy Ward
Place the butter in a jar or container and keep in your bathroom to apply right after a shower! 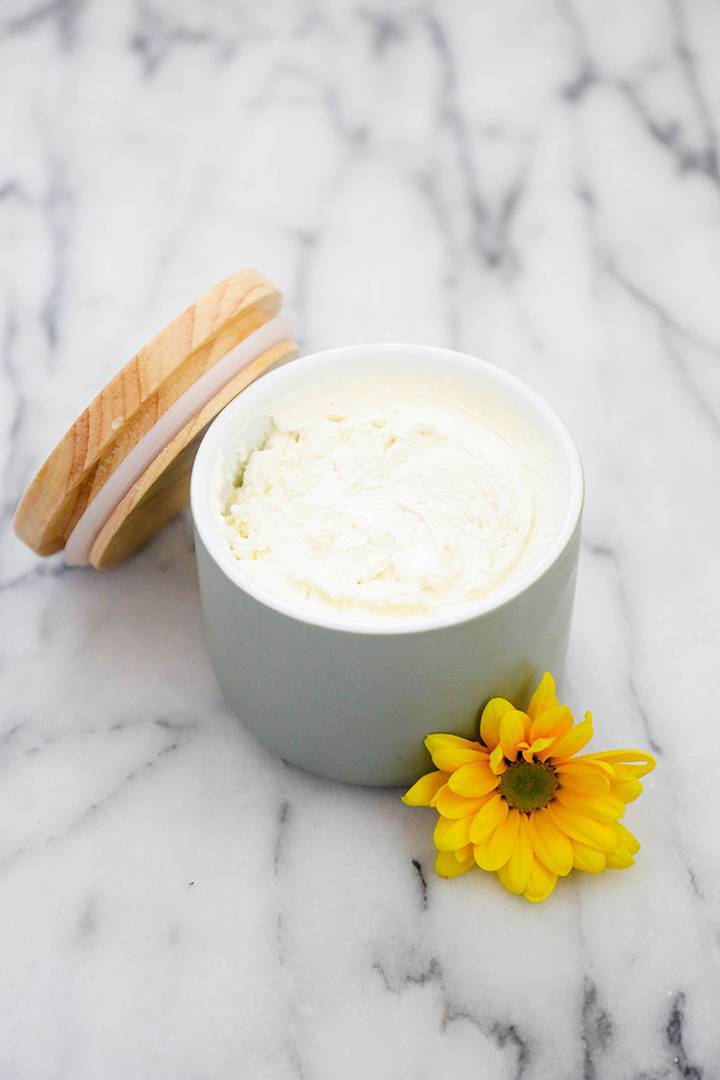 Photo: Lexy Ward Photo: Lexy Ward
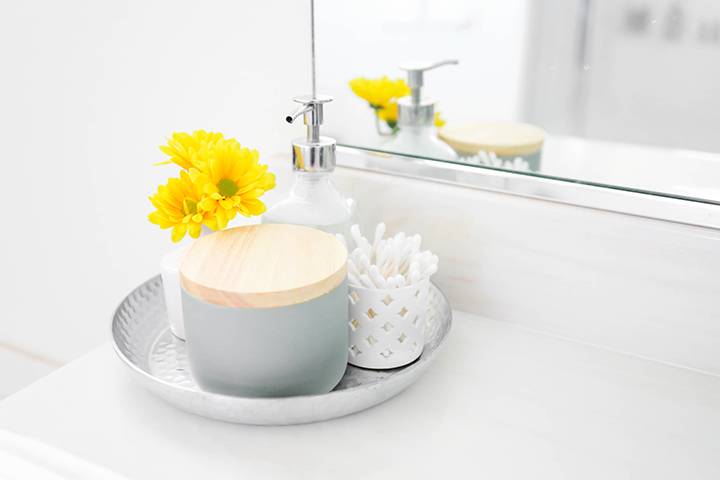 Photo: Lexy Ward Photo: Lexy Ward
The cocoa butter creates a chocolate-y smell so there’s no need to add any additional scent if you don’t want! 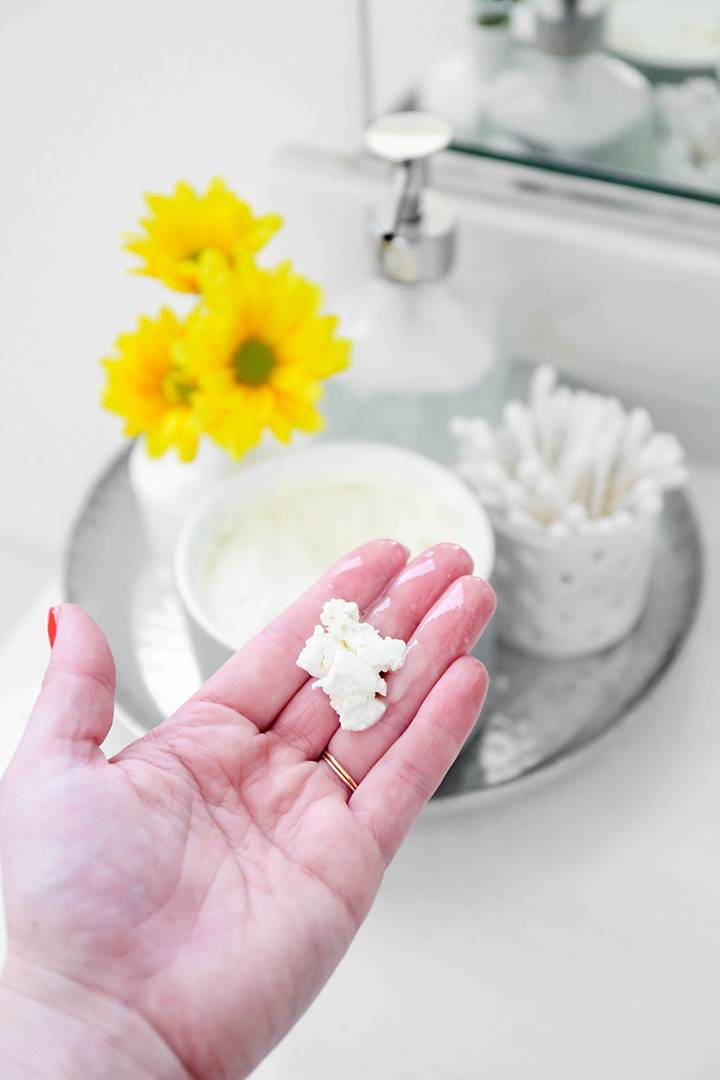 Photo: Lexy Ward Photo: Lexy Ward
This also makes a perfect gift for friends and loved ones! 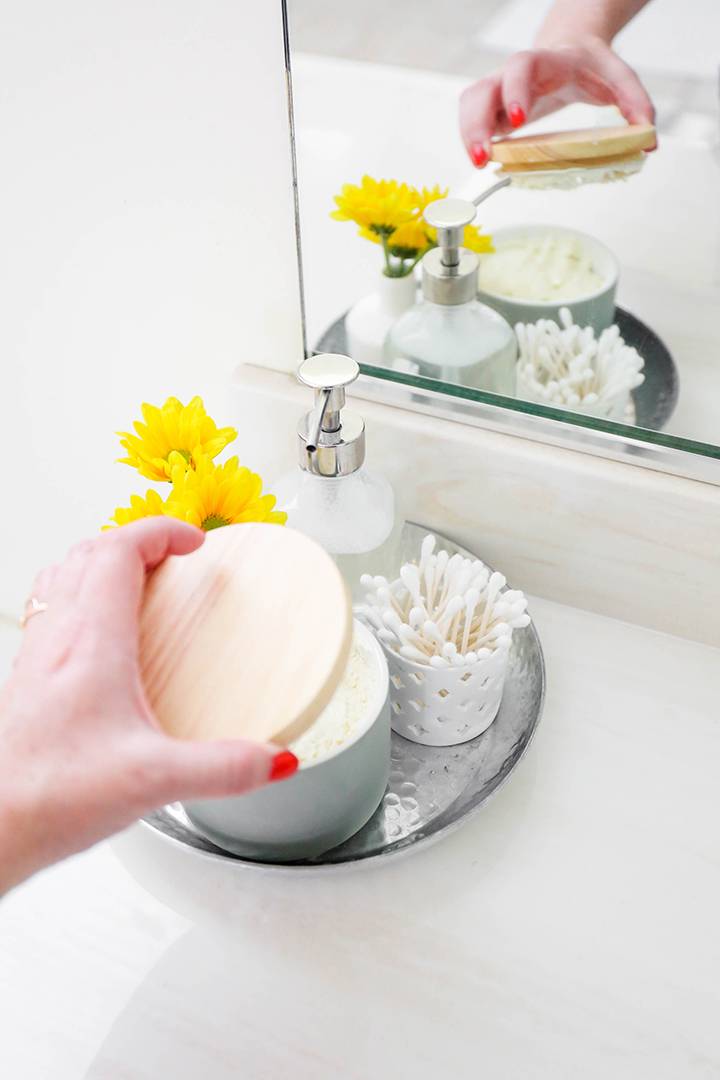 Photo: Lexy Ward Photo: Lexy Ward
DIY Grapefruit Floral Lip BalmThis lip balm smells delicious and sets up so quickly you can make it in an afternoon! I think it’s every bit as good as anything you could buy from EOS or Burt’s Bees. It’s made with coconut oil, so it’s best to keep in a lip pot rather than in a tube. INGREDIENTS
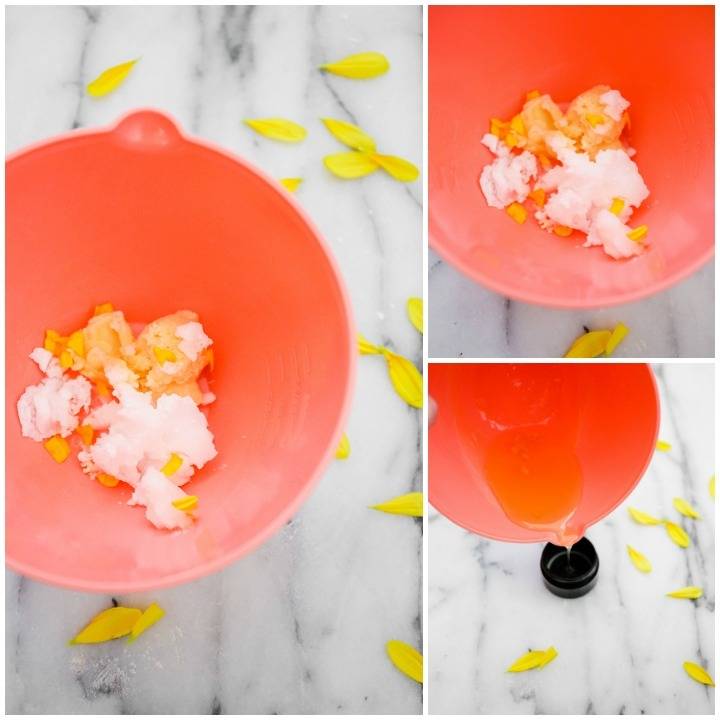 Photo: Lexy Ward Photo: Lexy Ward
Place all the ingredients in a microwave safe bowl and microwave for 30-40 seconds. Stir to mix everything well and immediately pour into a lip pot. Place additional lip petals on top if you like and wait for the balm to set. 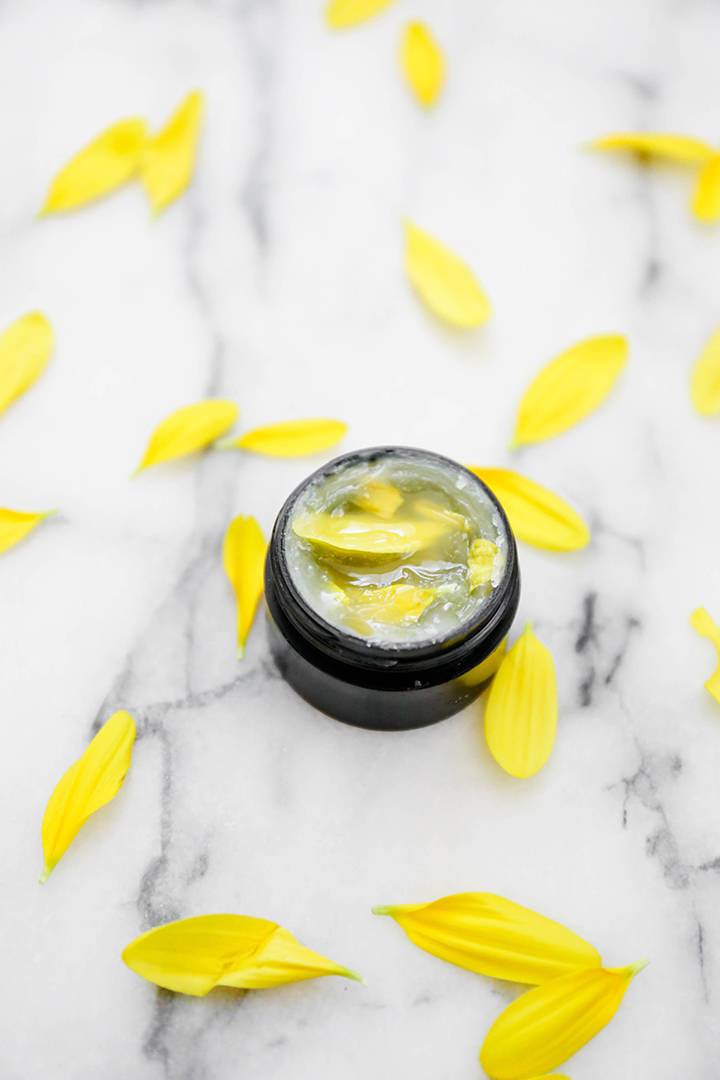 Photo: Lexy Ward Photo: Lexy Ward
Once it’s set, carry in your purse, pocket, or keep a pot in a drawer in your kitchen or office for those dry-lip situations! Grapefruit Pastel Bath BombsYou’ve probably seen the internet popularity that is the bath bomb. These fun little bath accessories fizz when they come in contact with water and create an explosion of color and a delicious smell. My homemade lush bath bombs take about 24-48 hours to set up, but are worth the wait! INGREDIENTS
How to make bath bombs: Start by combining all the dry ingredients in a large mixing bowl. Combine the wet ingredients and slowly add to the dry ingredients. Mix continuously with a whisk and your hands. Be sure to add the ingredients slowly so the dry mixture doesn’t fizz out of control. 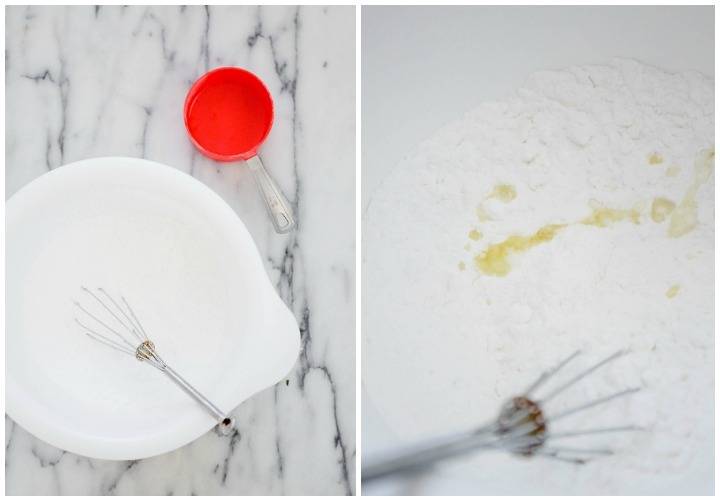 Photo: Lexy Ward Photo: Lexy Ward
Once you’ve incorporated the wet and dry ingredients, you should be able to squeeze the mixture into a solid shape and it will hold. It’s time to add some color! 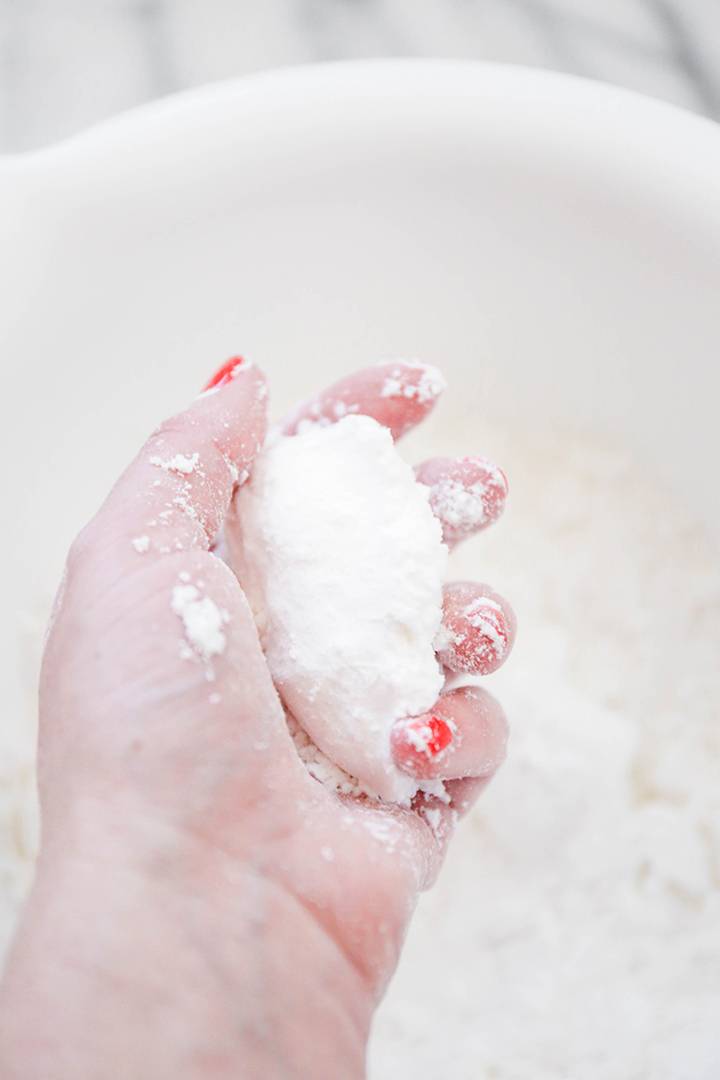 Photo: Lexy Ward Photo: Lexy Ward
Separate the mixture into two bowls and add some of the food coloring. Mix it well with your hands until the color is completely mixed in.  Photo: Lexy Ward Photo: Lexy Ward
Purple and orange look so good together!  Photo: Lexy Ward Photo: Lexy Ward
Sprinkle the mixture into silicone molds in a cupcake tin. Alternate the colors until the molds are full. Firm things up by pressing down with your fingers to pack the molds tightly. Sprinkle the disco dust on top and press firmly with your fingers. 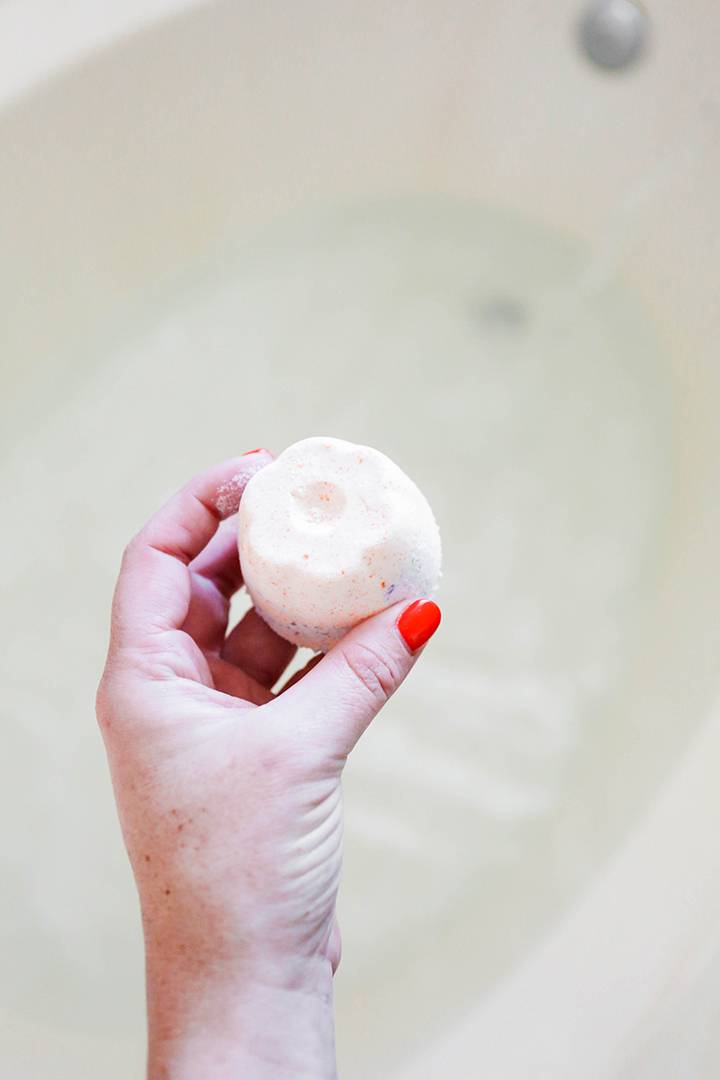 Photo: Lexy Ward Photo: Lexy Ward
Allow the bath bombs to dry for a day or two and then keep them on hand when you need a colorful bath! 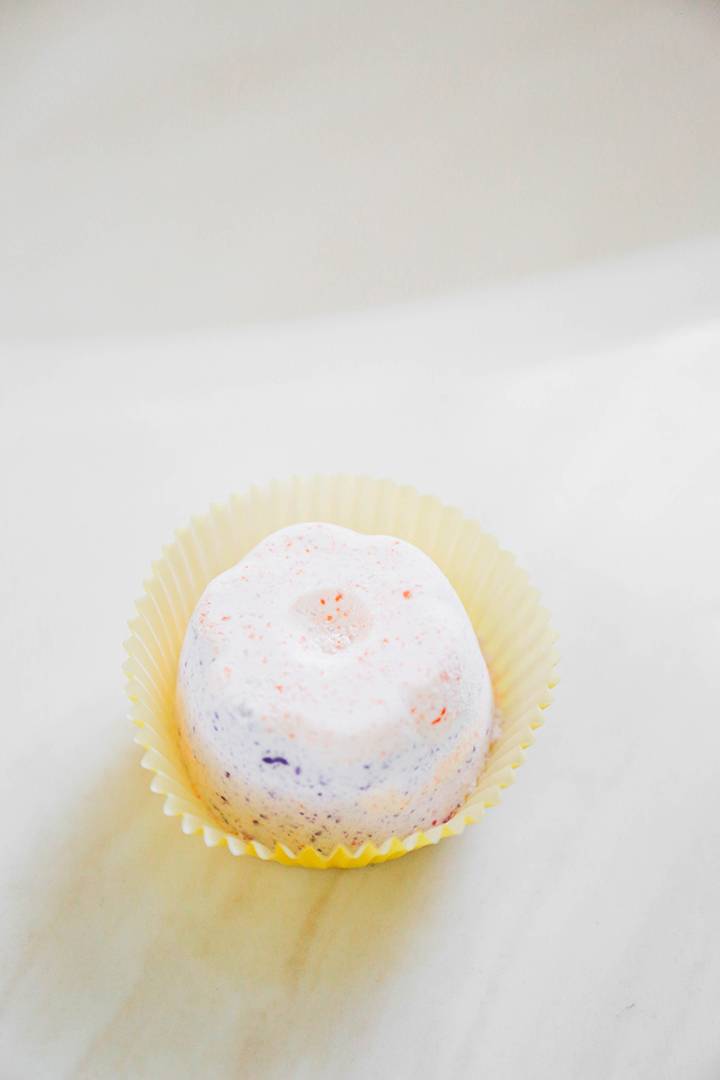 Photo: Lexy Ward Photo: Lexy Ward
Citrus Coconut Sugar Scrub RecipeThis sugar scrub is a great exfoliant and the grapefruit coconut smells delightful. Keep a jar of this in the shower to reveal your best skin daily. INGREDIENTS
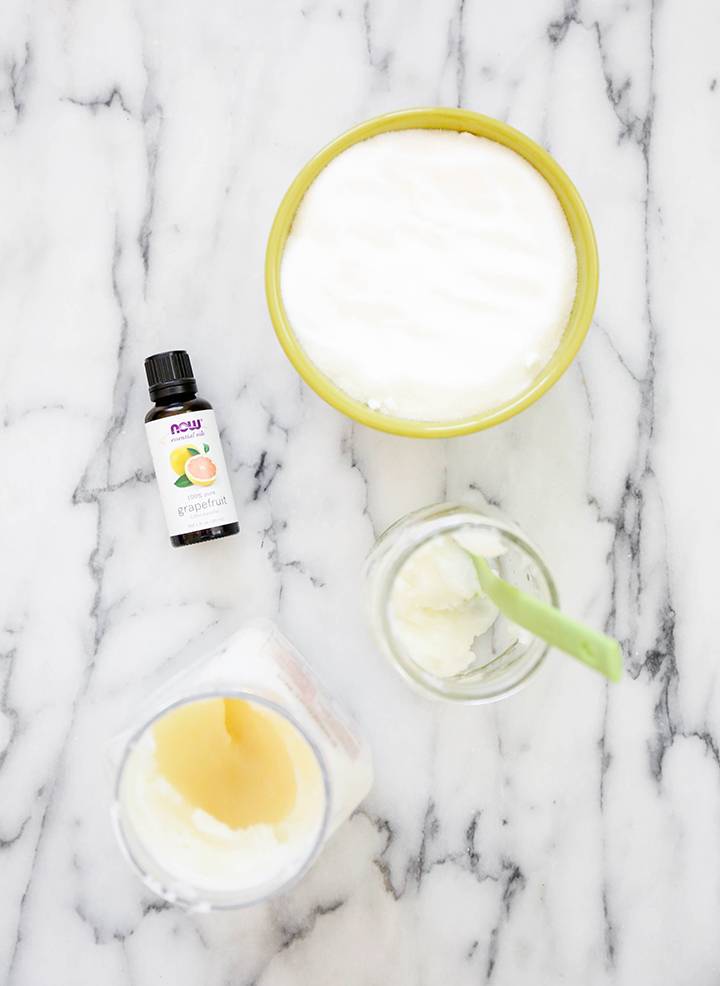 Photo: Lexy Ward Photo: Lexy Ward
How to make homemade sugar scrub:Combine all of the ingredients in a mason jar and place in a pot of boiling water. It will melt fairly quickly. 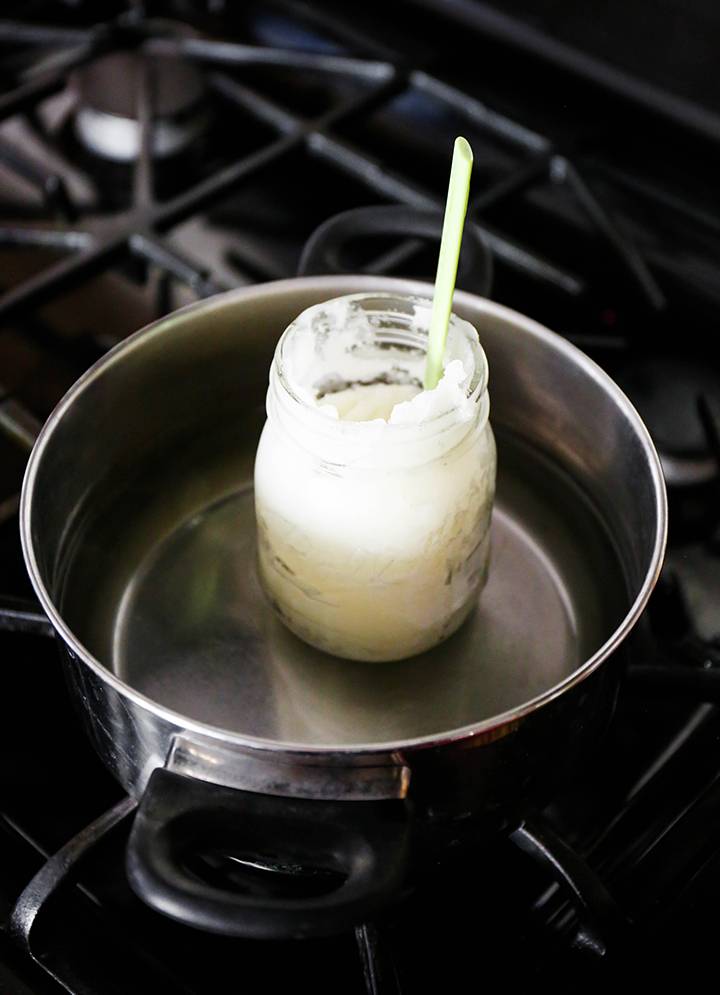 Photo: Lexy Ward Photo: Lexy Ward
Stir everything well. Place the lid on and let it set. To speed things up, place the jar in the refrigerator. 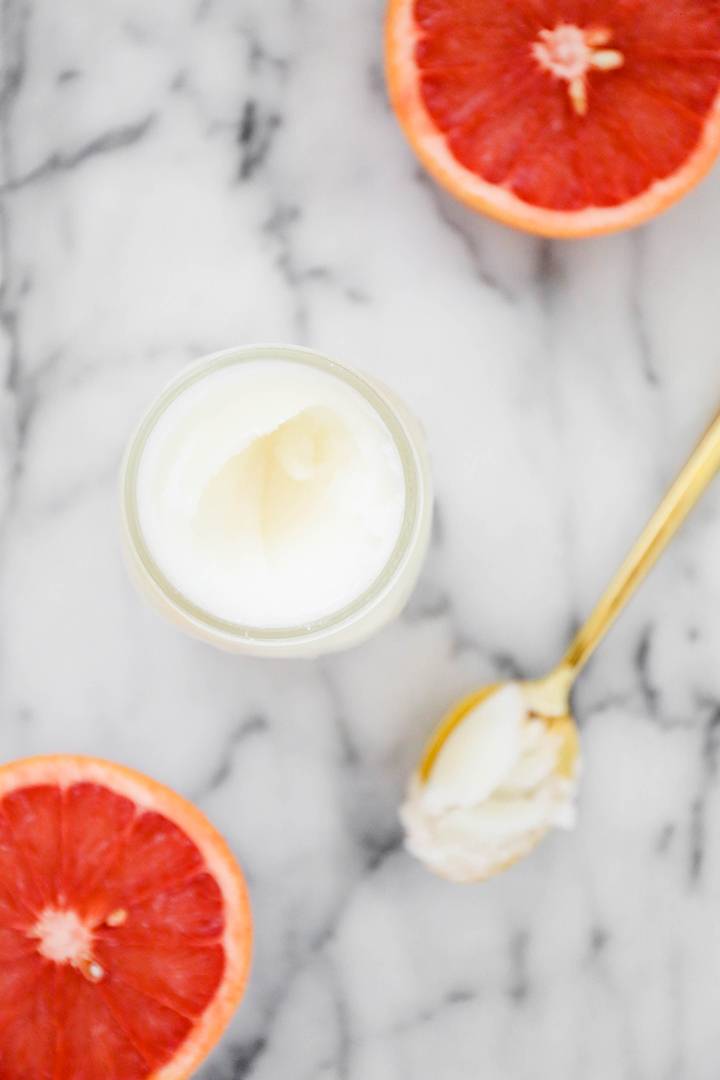 Photo: Lexy Ward Photo: Lexy Ward
I keep a jar in my shower and just reach in and scoop some out with my fingers when I’m ready to use it.  Photo: Lexy Ward Photo: Lexy Ward
The sugar dissolves and washes away. You’ll have to fight the urge to eat this because it smells so amazing! 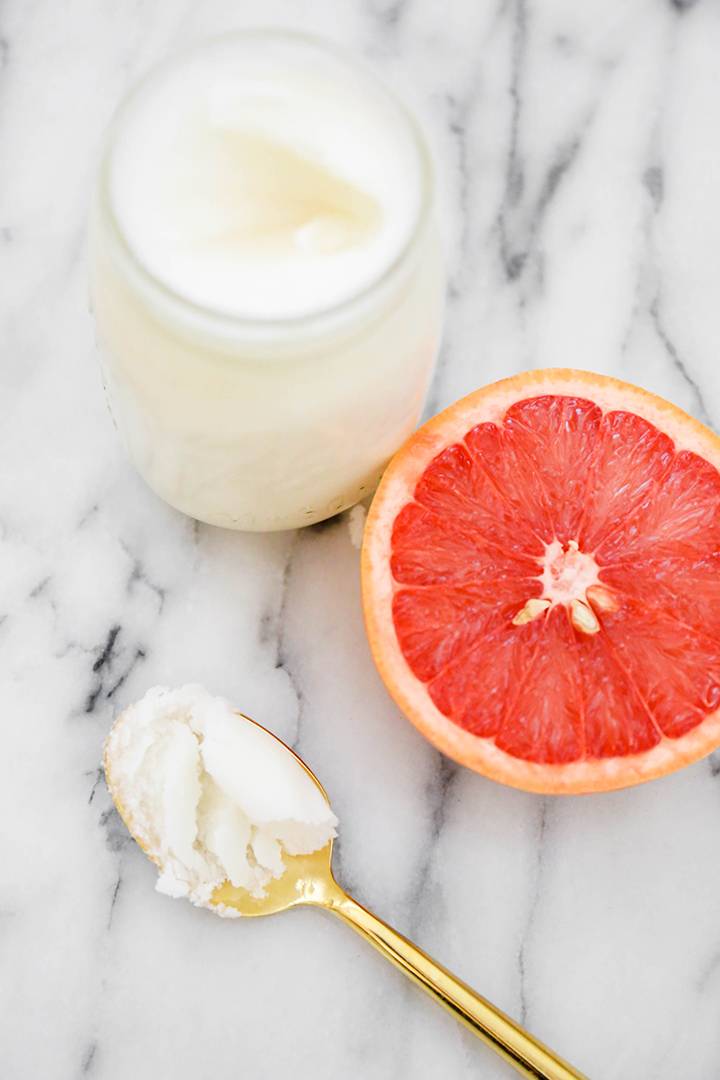 Photo: Lexy Ward Photo: Lexy Ward
All of these products make excellent gifts and you can rest easy knowing that these were created with all-natural ingredients! The post Four Natural Skin Care Items You Can Make from Super Simple Ingredients appeared first on Curbly. Via https://www.curbly.com/diy-natural-skincare-recipes
0 Comments

If you’re like me, you probably have a craft closet full of leftover supplies from past projects… yarn scraps, small pieces of fabric and lots of random bits of paper. So today we’re going to share ten genius projects that will help you use up those scraps – which will also help you get your space organized! Read on to check them out.
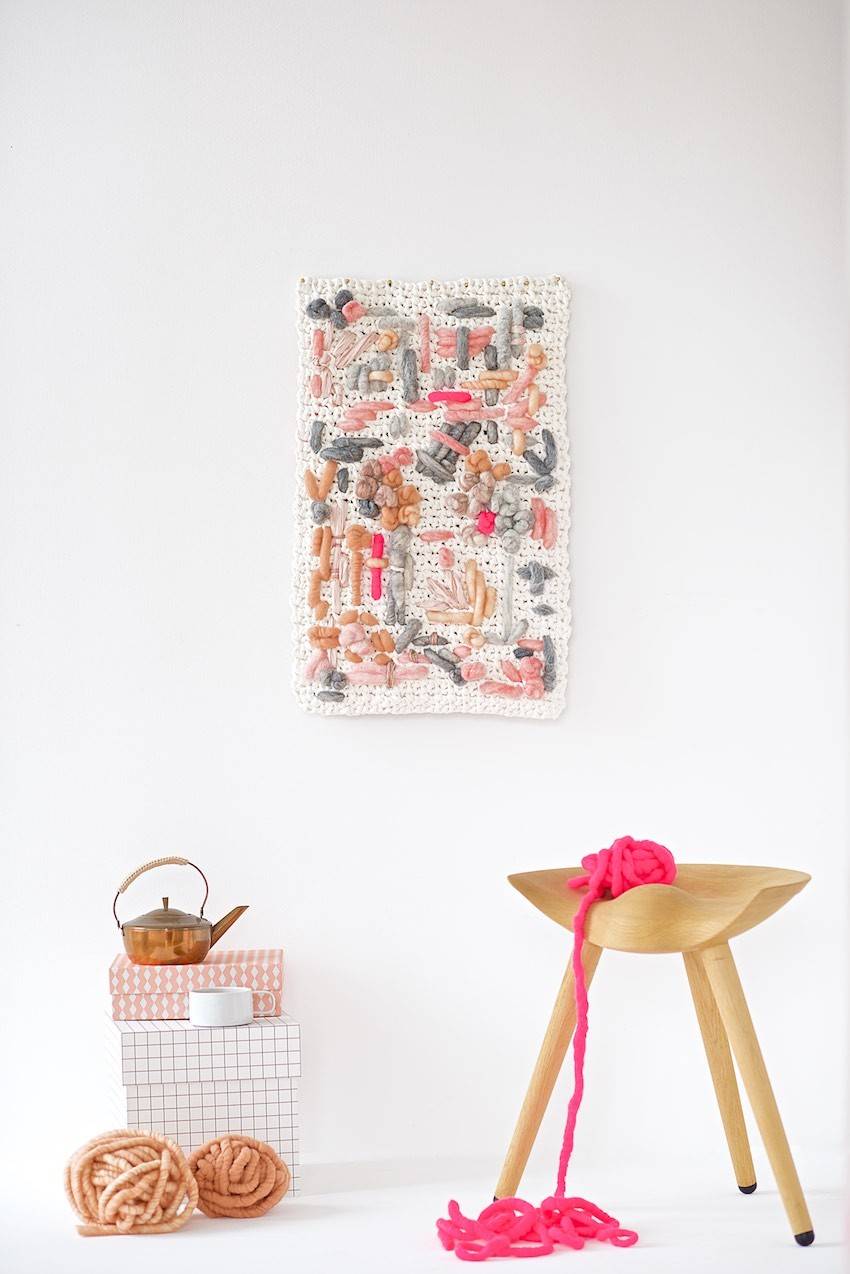
1. Find out how to make this beautiful wall hanging out of yarn scraps here. [Photo: Lebenslustiger] 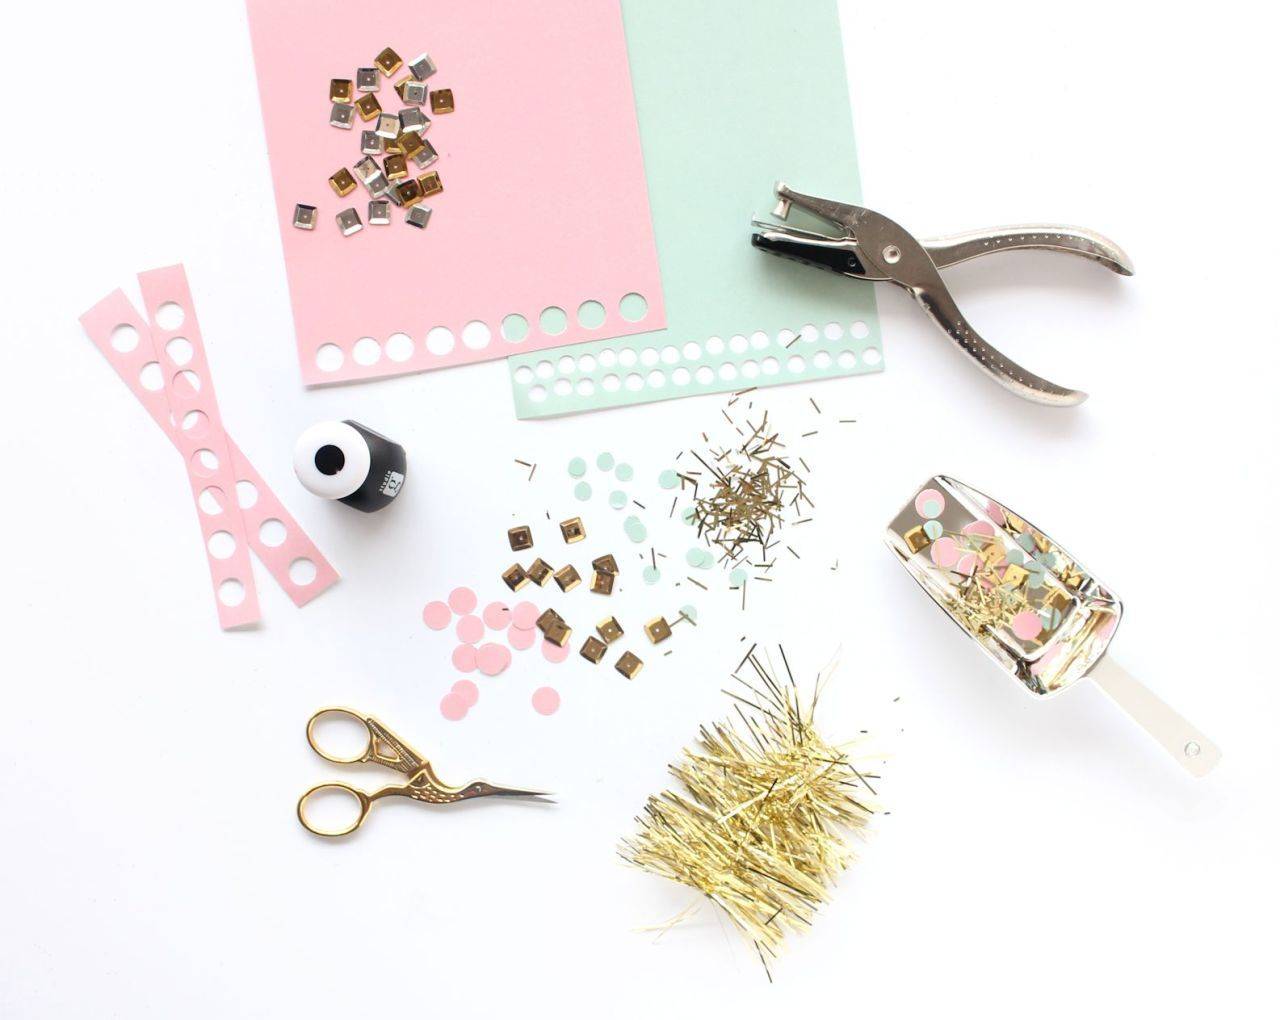
2. Use up all those paper scraps you have lying around by making a batch of confetti! Here are the instructions. [Photo: Lines Across] 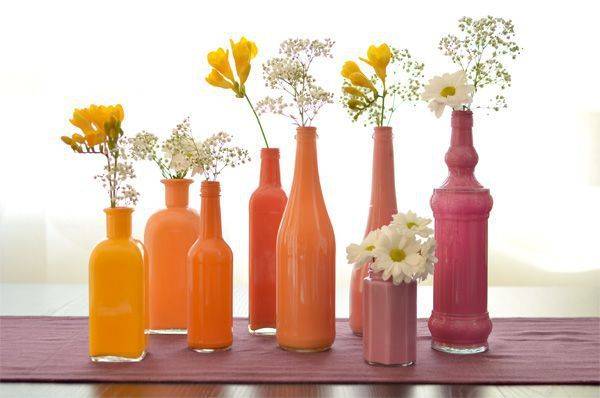
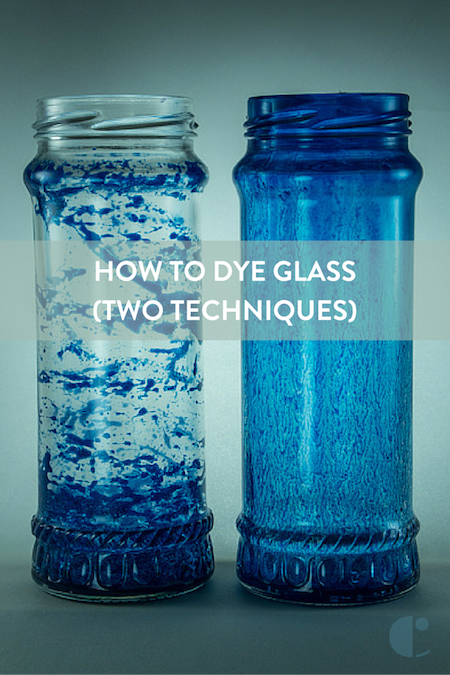
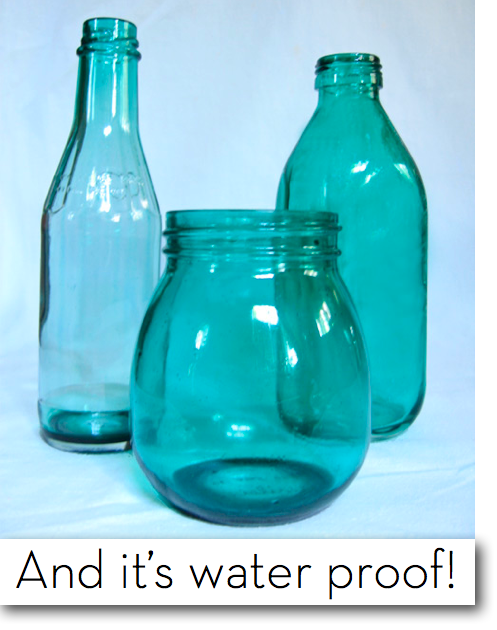
3. Do you have lots of leftover paint taking up space? Mix them up and transform old glass bottles with this tutorial. [Photo: Rustic Wedding Chic] 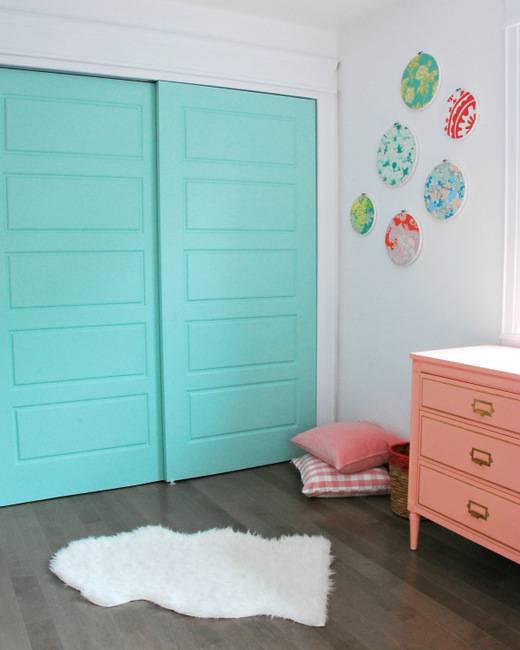
4. Who knew that fabric scraps could look so pretty on the wall? Find out more about these round fabric wall art pieces here. [Photo: The Sweetest Digs] 
5. Use up all those scrapbooking leftovers by making a pretty paper garland. Get the tutorial here. [Photo: One Bunting Away] 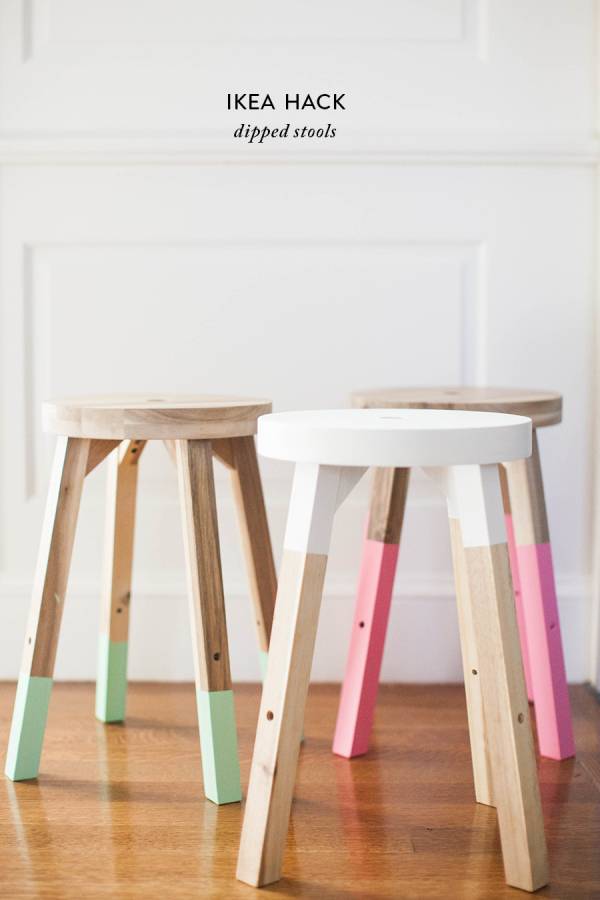
6. You might also consider dipping your furniture in all that extra paint you have lying around. Learn more here. [Photo: Style Me Pretty] 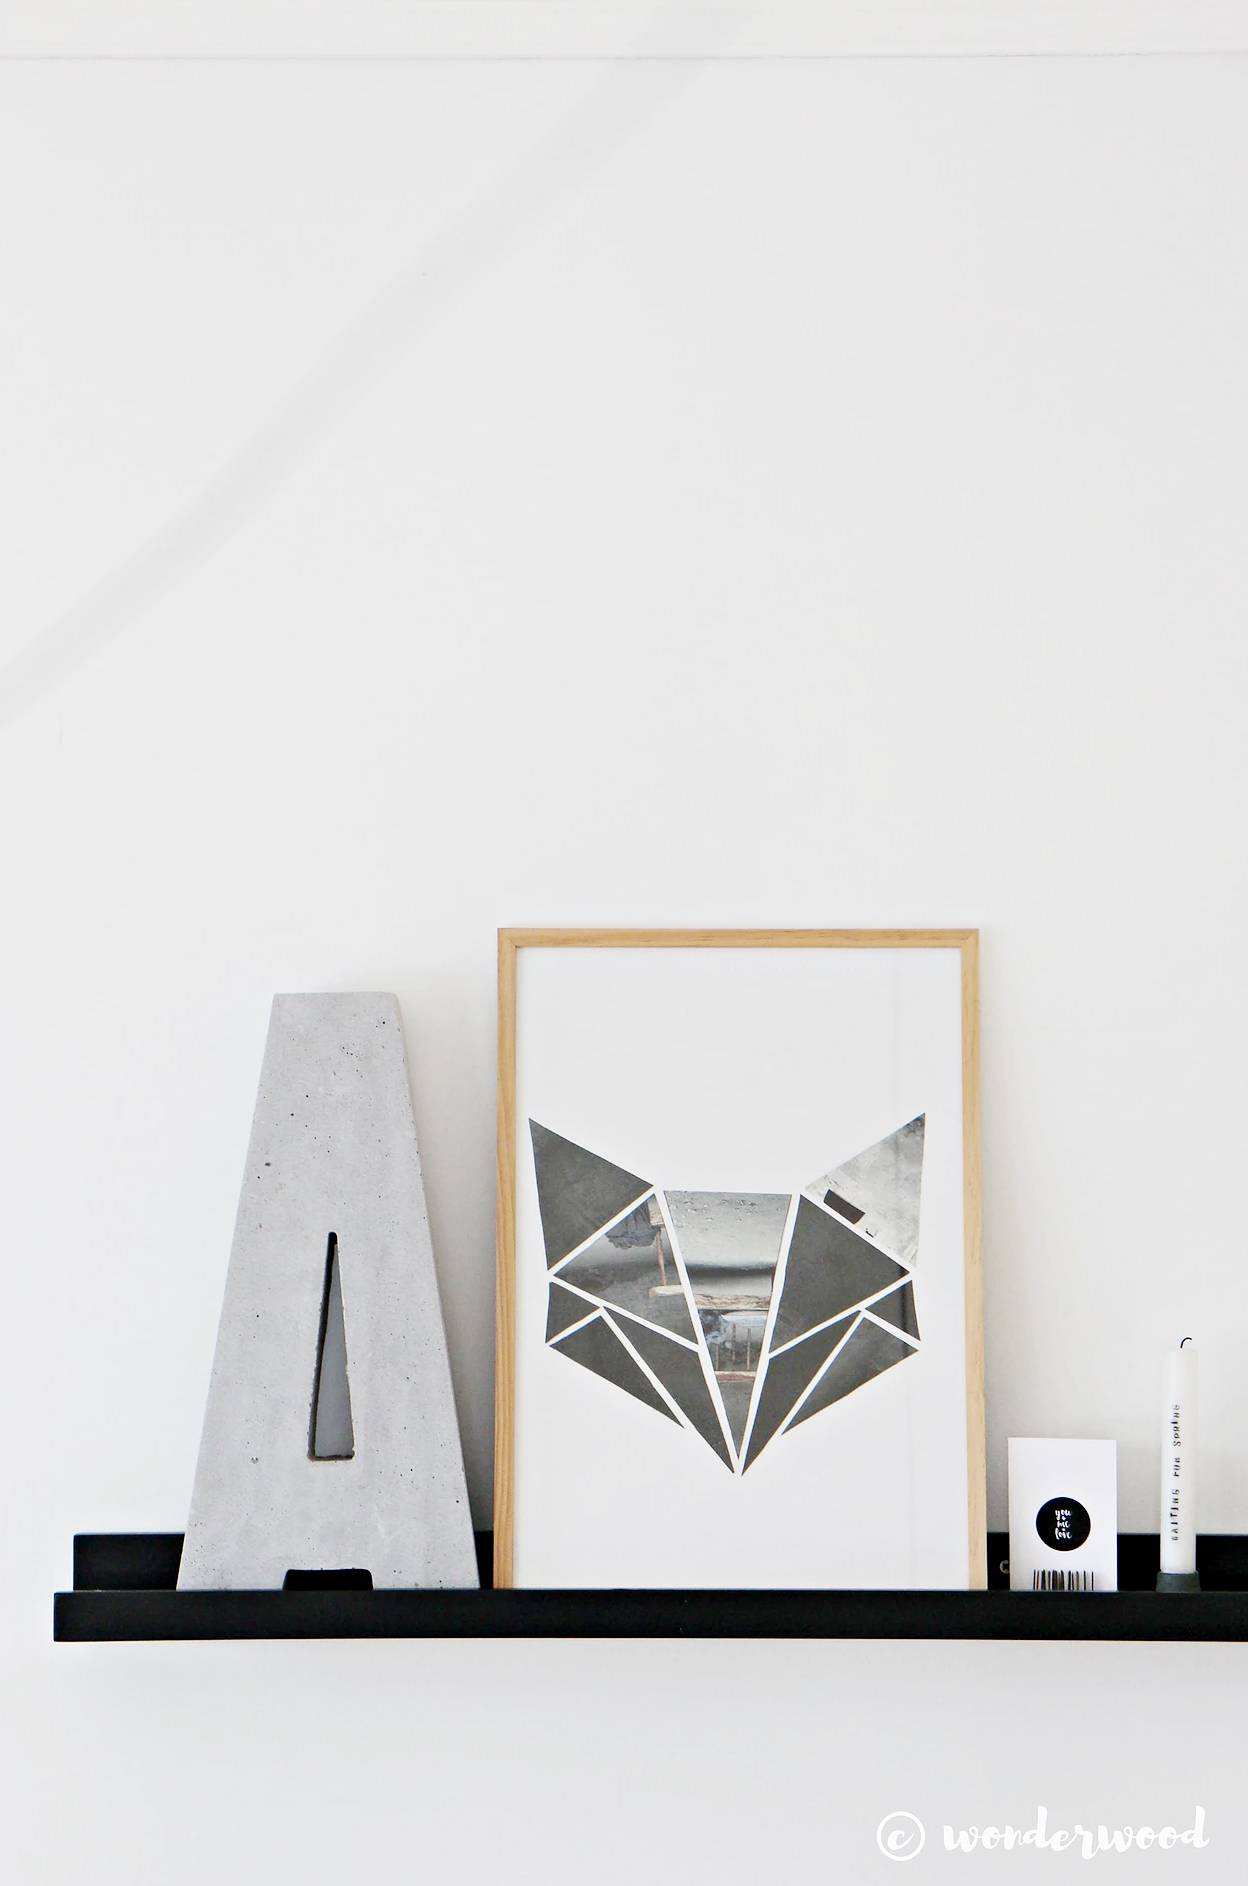
7. Here’s another smart way to use up paper scraps (or even old photos). Learn more here. [Photo: Wonderwood] 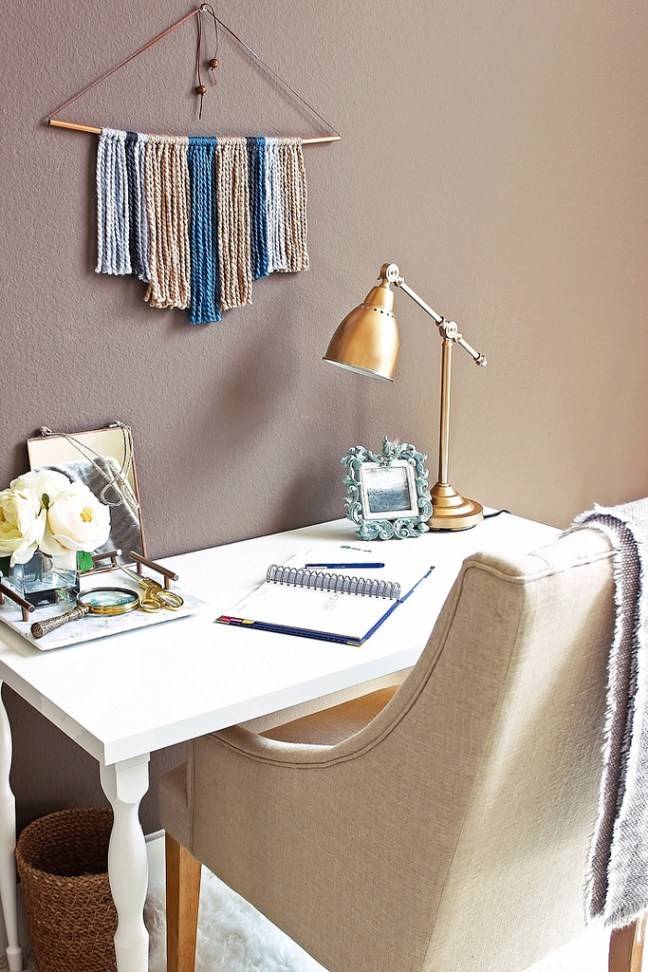
8. Turn yarn scraps into a beautiful fringe wall hanging using this simple tutorial. [Photo: Pennies For A Fortune] 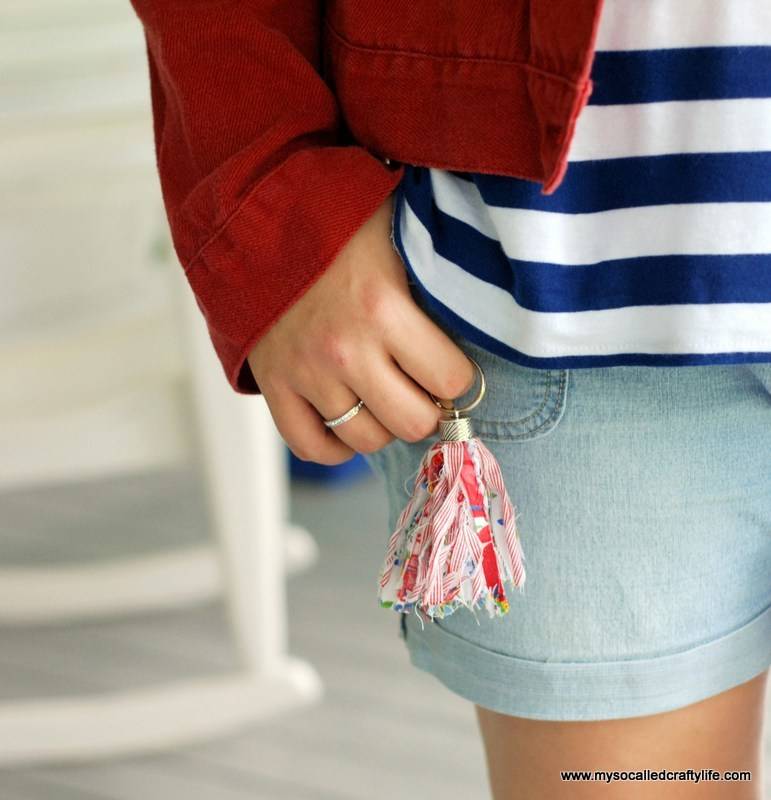
9. If you have lots of tiny fabric scraps, then you might consider turning them into a few of these fun little tassel key chains. Get the tutorial here. [Photo: My So Called Crafty Life] 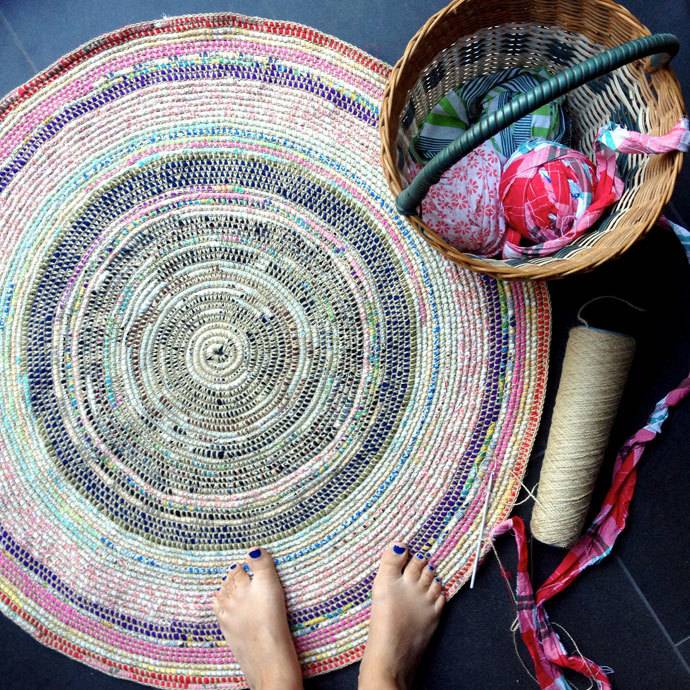
10. And if you have tons of larger fabric scraps, then this is the tutorial for you. Learn how to transform fabric and twine into a gorgeous area rug here. [Photo: My Poppet] 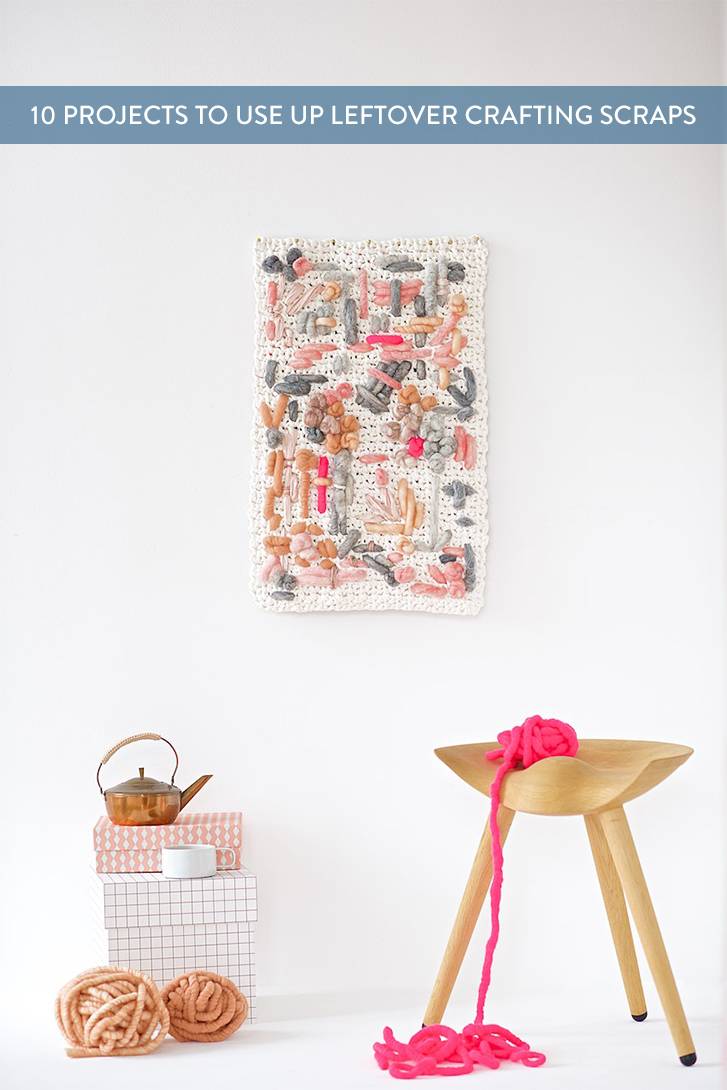
The post 10 Bright + Colorful Projects to Use Up Leftover Crafting Scraps appeared first on Curbly. Via https://www.curbly.com/10-projects-to-use-up-leftover-crafting-scraps 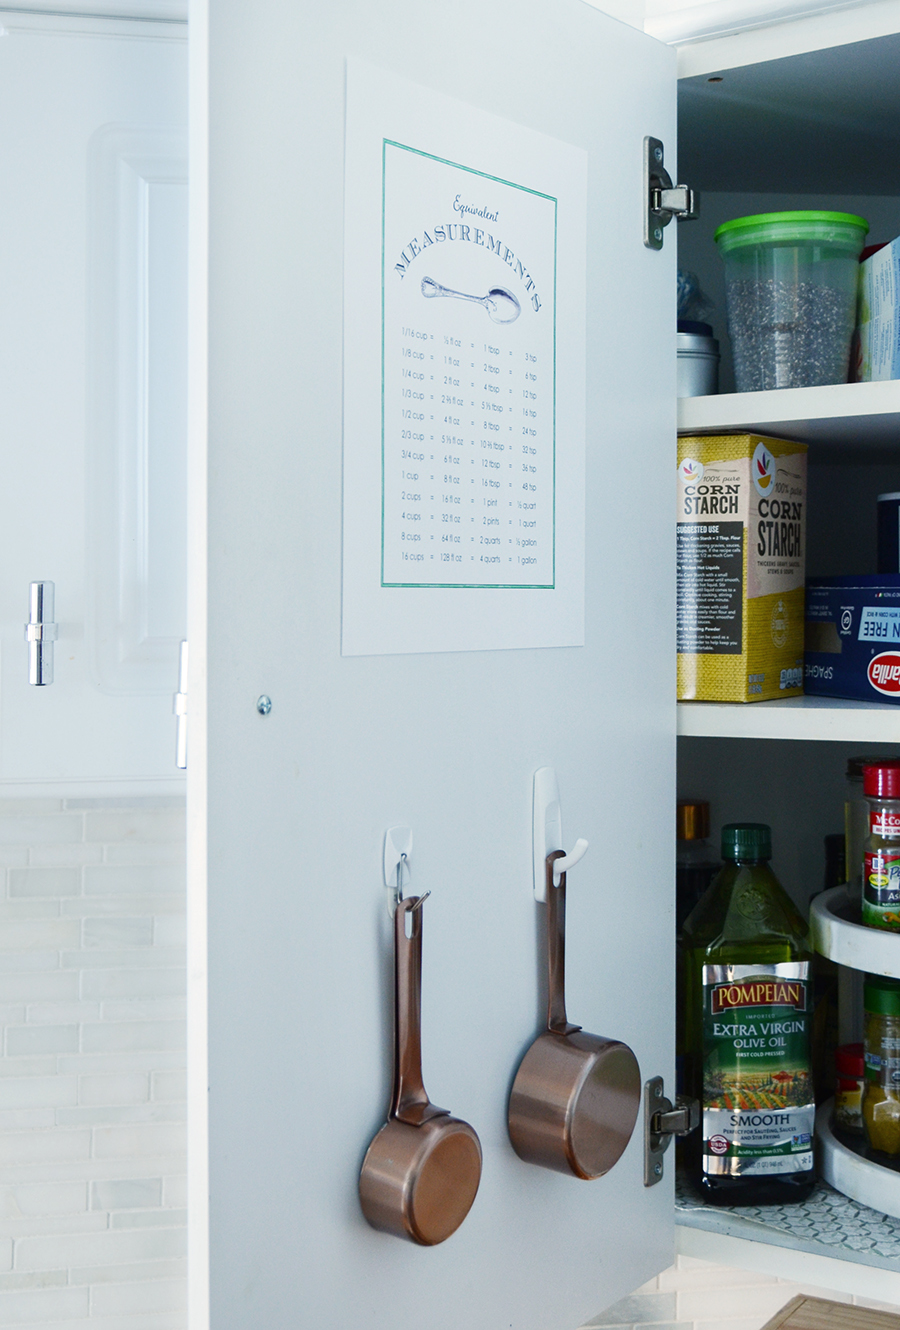
Pinterest is filled with organizing hacks, promising to help you achieve your wildest organizational dreams. But just how good are they? I set out to test 10 of them, and today I’m sharing the results with you. Click through to compare their versions with mine, and to read my thoughts on the functionality of each one.
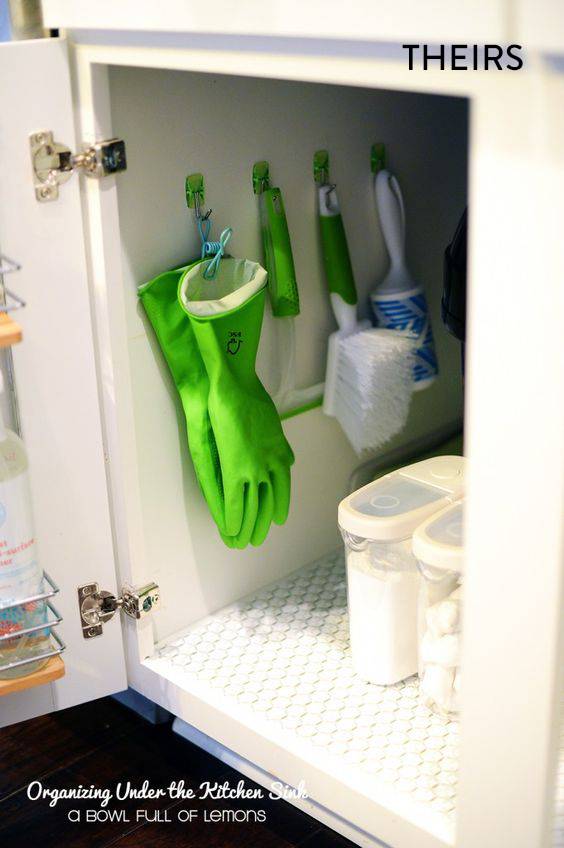
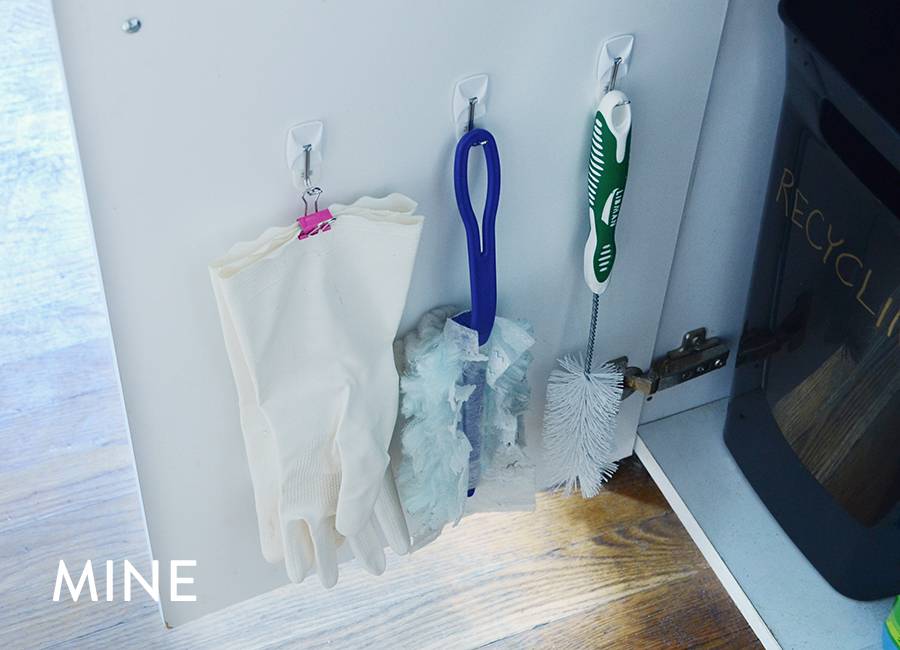
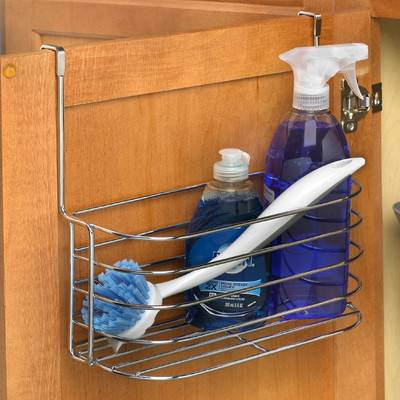
1. This hack worked quite well. I’m always struggling to find my rubber gloves in the deep dark depths of the cabinet, so I love that they are now easily procured. I mounted my hooks on the cabinet door, so the setup also eliminates some clutter underneath the sink. Verdict: Fantastic, especially if mounted on the cabinet door. 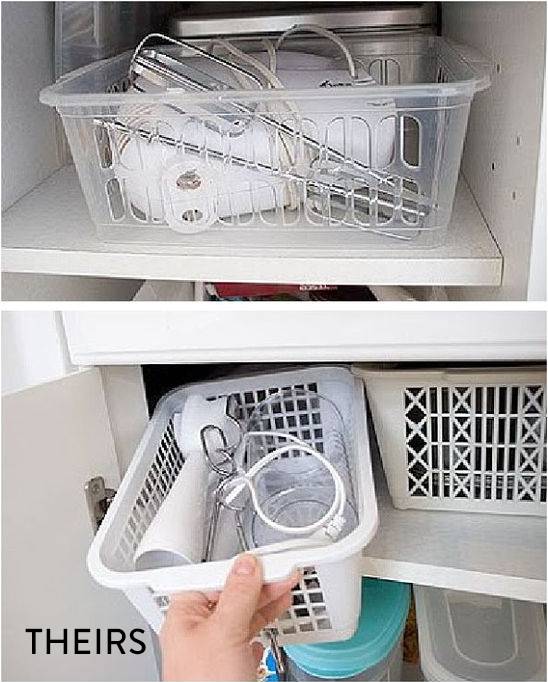
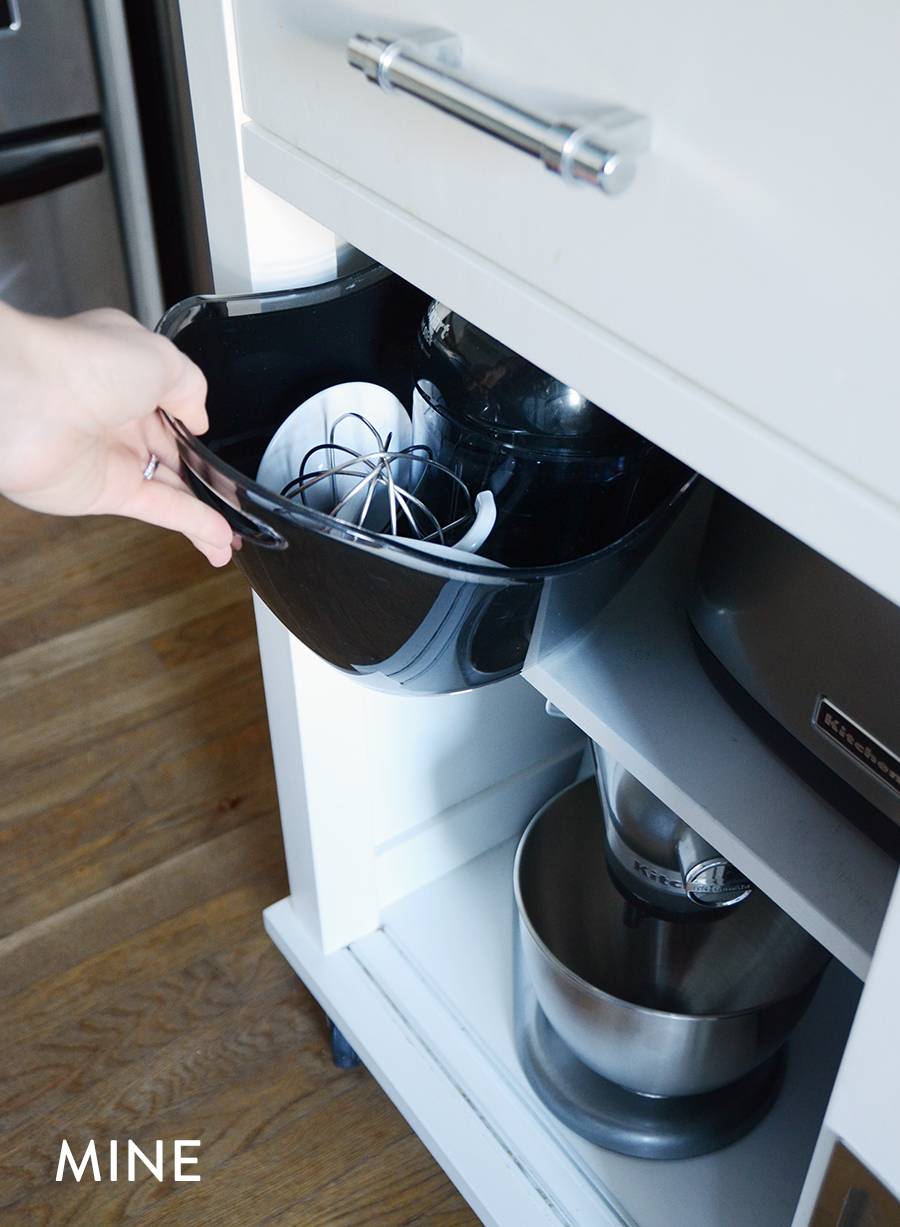
2. Corralling appliance accessories in a basket does indeed make it easier to locate what you’re looking for, but it doesn’t really save space because these items are so irregularly shaped. Verdict: Easier to find things, but not a space-saver. 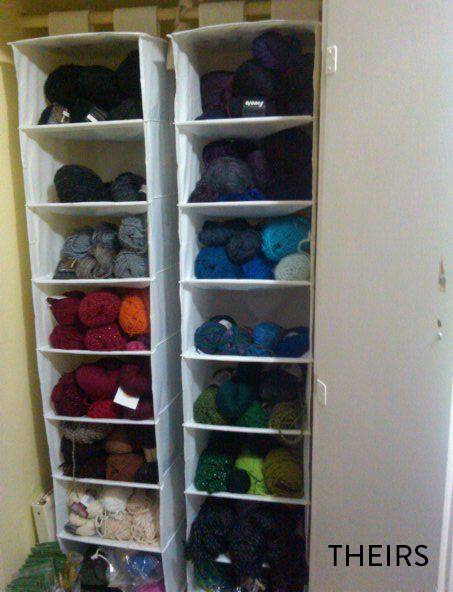
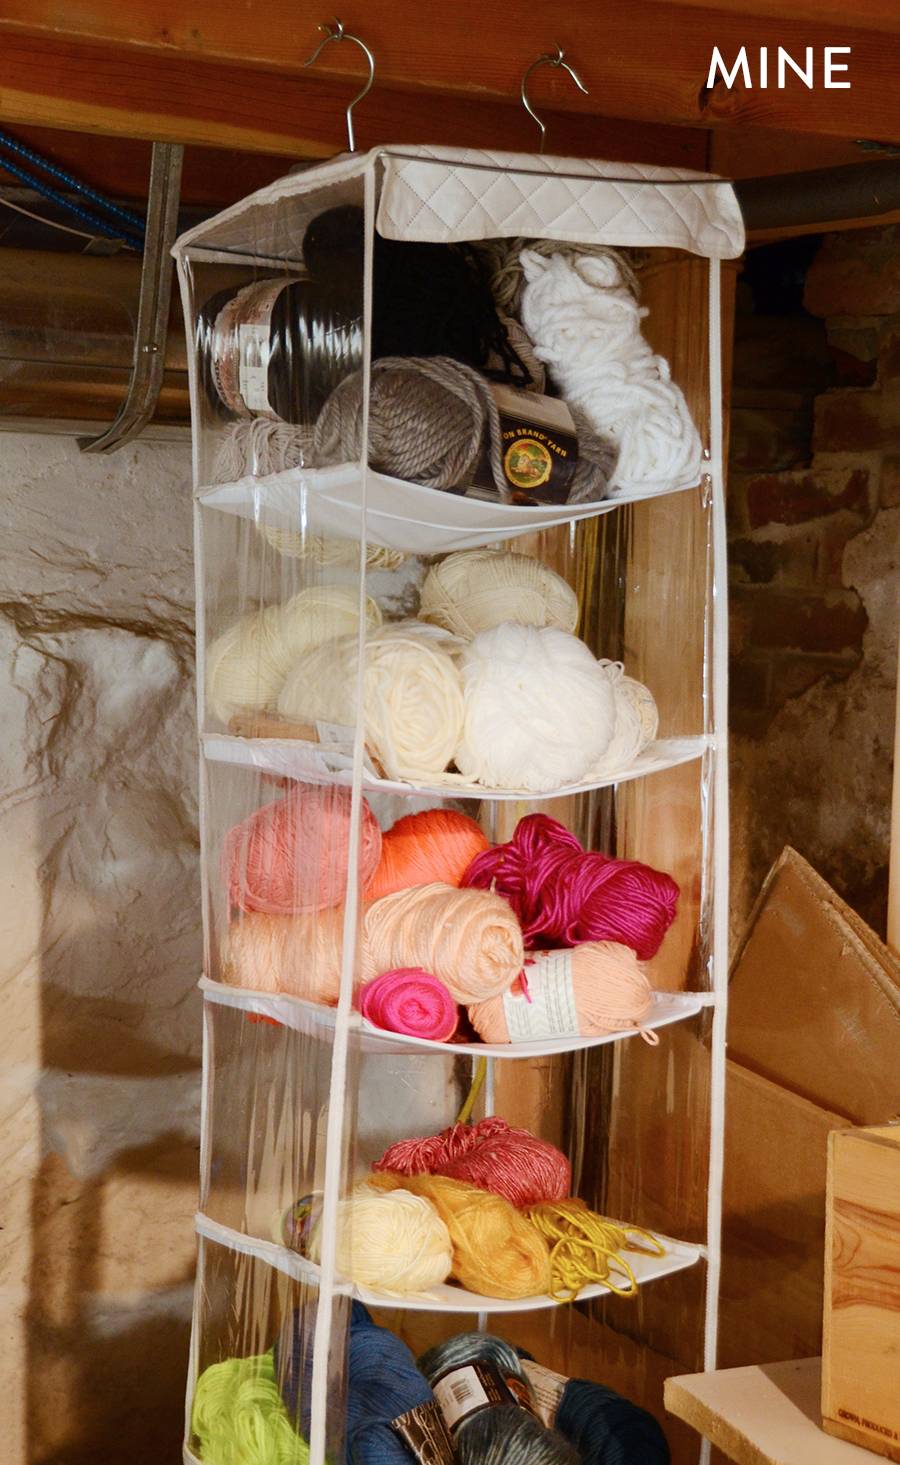
3. My yarn used to be in a giant trash bag, so this is a major upgrade. Having the yarn organized by color also makes it easy to find exactly what you’re looking for. And three cheers for taking advantage of vertical space! Verdict: Awesome solution and great use of vertical space. 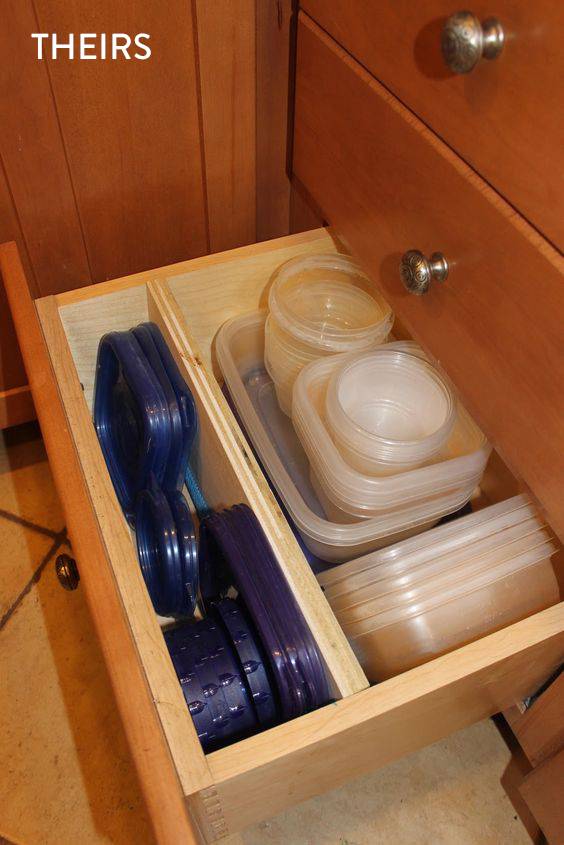
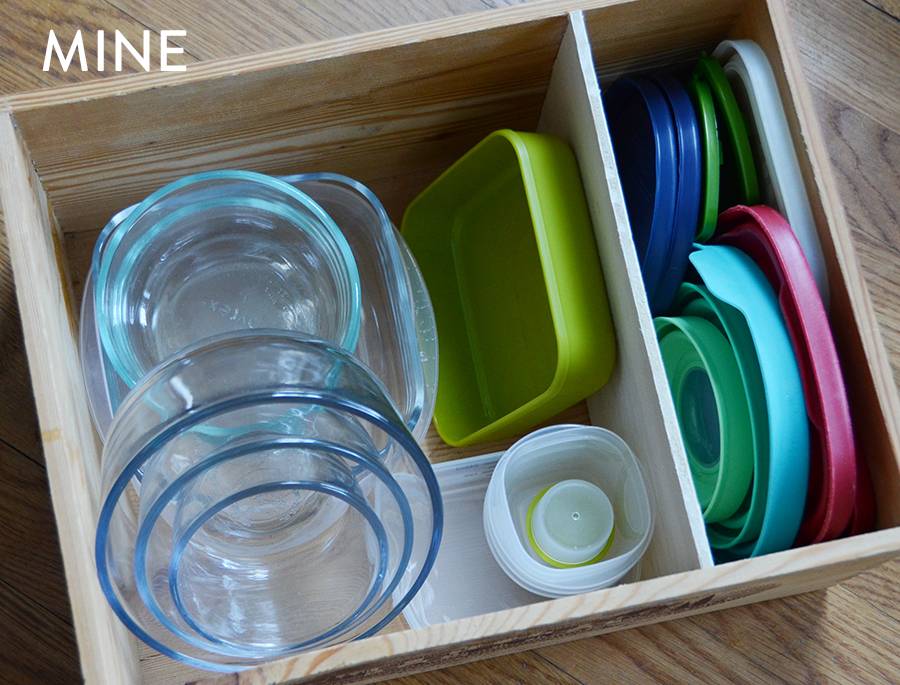
4. I’m not lucky enough to have a big drawer like the one on Pinterest, so I used a wooden wine crate to store plastic containers. Dividing a mess of tupperware into two sections allows you to find the top that you’re looking for quicker, and it makes things a bit more organized… but you still have to be diligent about stacking similarly-shaped containers with each other. Verdict: Somewhat helpful. 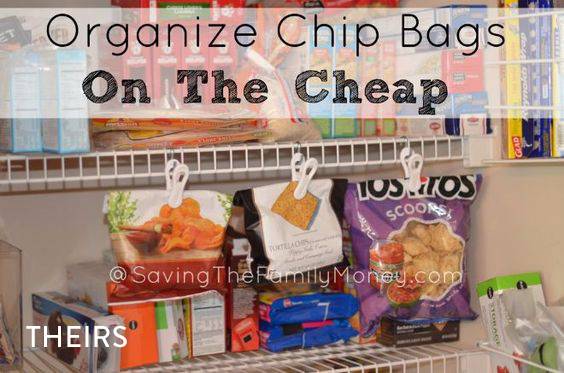
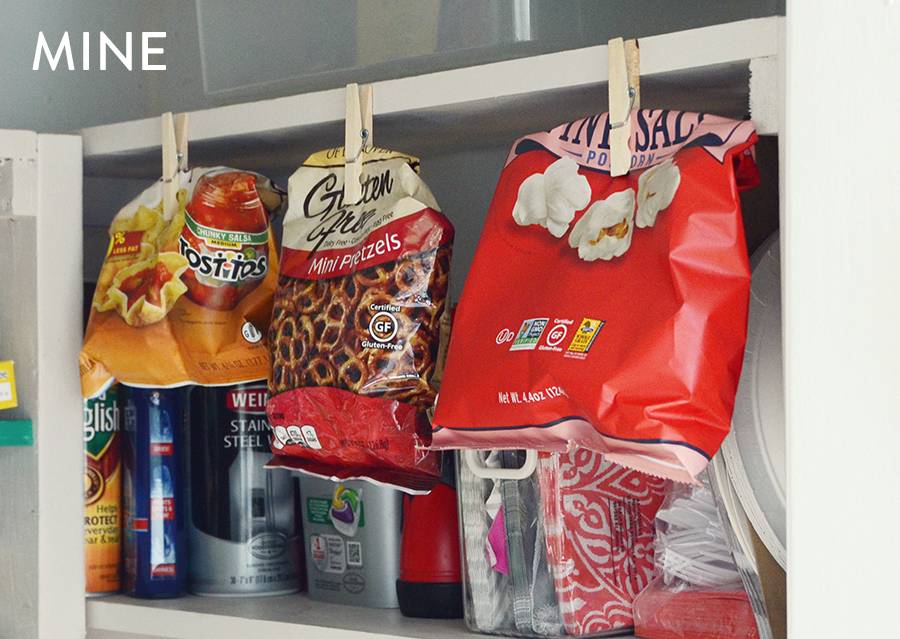
5. I have wooden shelving in my pantry, so I glued clothespins to the shelves using E6000 glue instead of hanging clips from wire shelving. This hack is totally clever, assuming you have the right setup. Also: the clothespins don’t hold super heavy bags. It’s best to do it on a shelf that holds things you don’t use very often, because as you can see, the bags block what’s behind them. But being able to see what you have open is a total game-changer. Hopefully it will cut back on waste by preventing the chips from going stale because we forgot about them. Verdict: A major improvement, especially with strong clips. 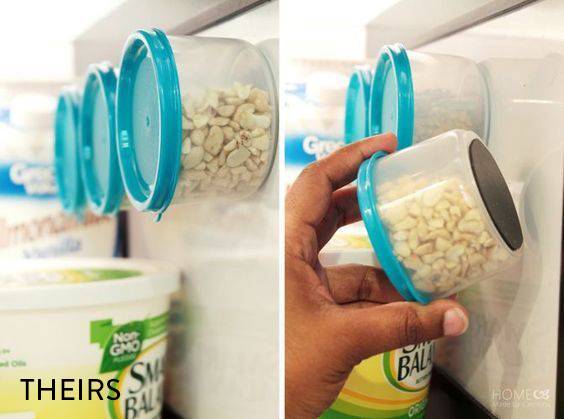
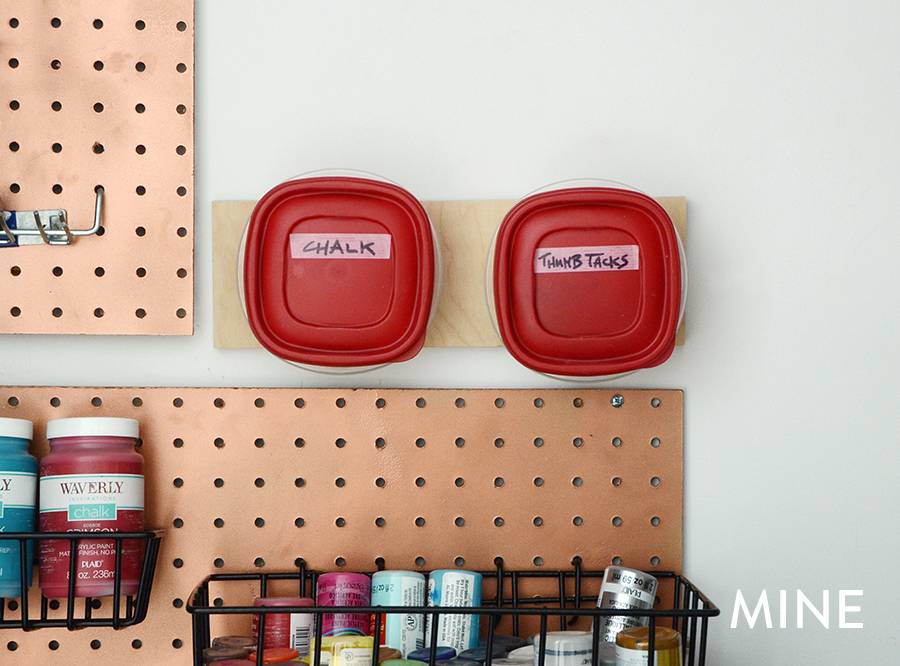
6. I decided to use this hack in my craft closet, because I didn’t see it being useful in the kitchen (in our house anyway). So I glued magnets to the back of tupperware containers using E6000 and then glued the other magnets to a piece of wood which I then mounted on the wall. It’s a good use of wall space, but it could get expensive to buy a ton of containers and magnets. Verdict: If you have a lot of small items in need of organization, this would be helpful. 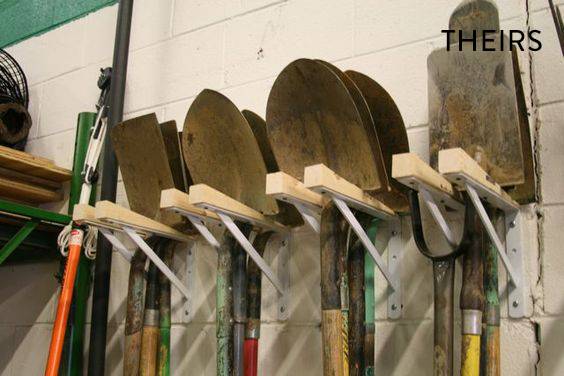
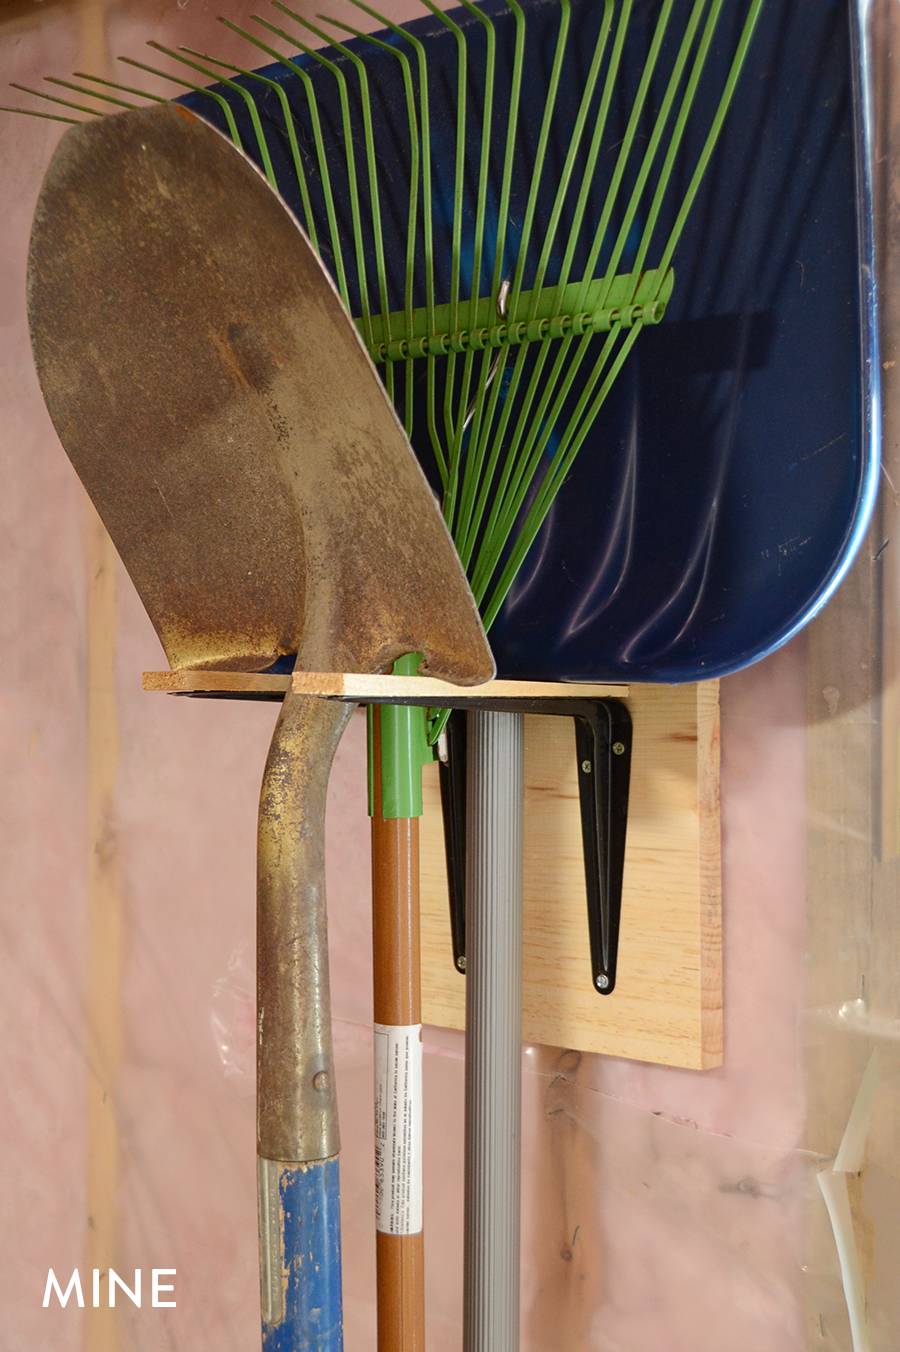
7. This was my favorite! I used wooden shims instead of the larger triangular wedges they used, and it worked out well. It’s a great way to get shovels and rakes up off the ground and organized. And again, an excellent use of vertical wall space. Verdict: Genius! I might even make another one. 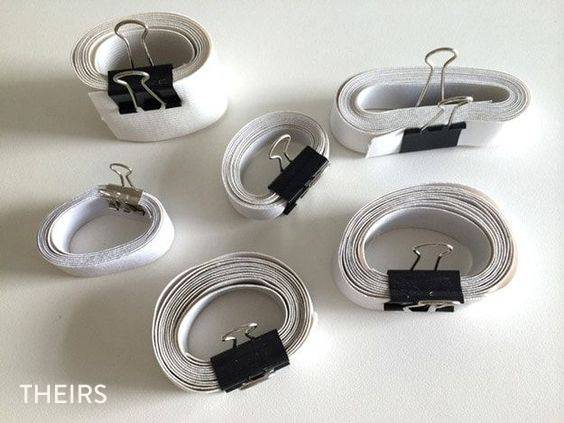
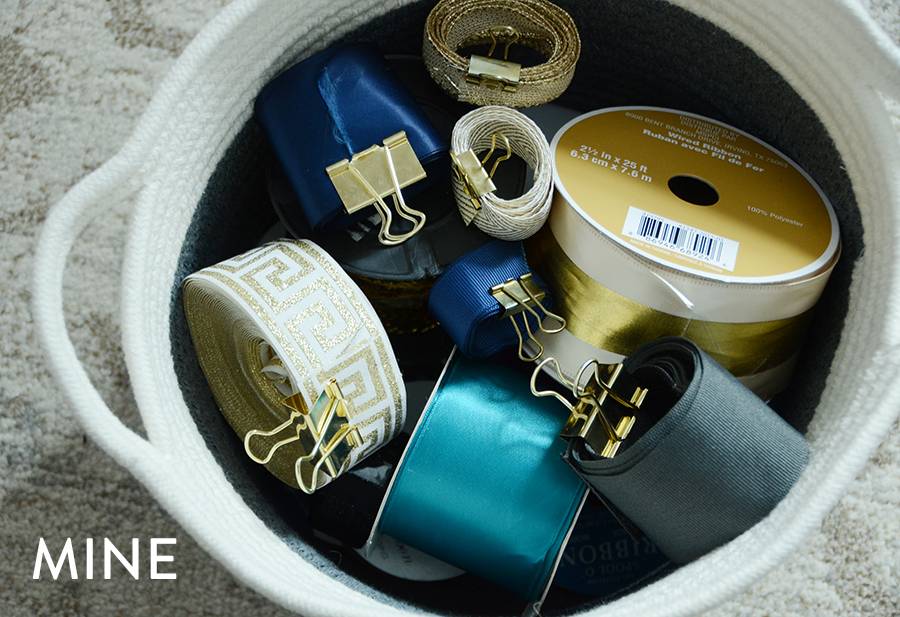
8. This worked quite well, but my only concern is creasing over time. If it’s something like elastic that you’re clipping it won’t matter. If it’s ribbon, like in my case, it may need a quick pressing with an iron. Verdict: Quite clever if you don’t care about creases. 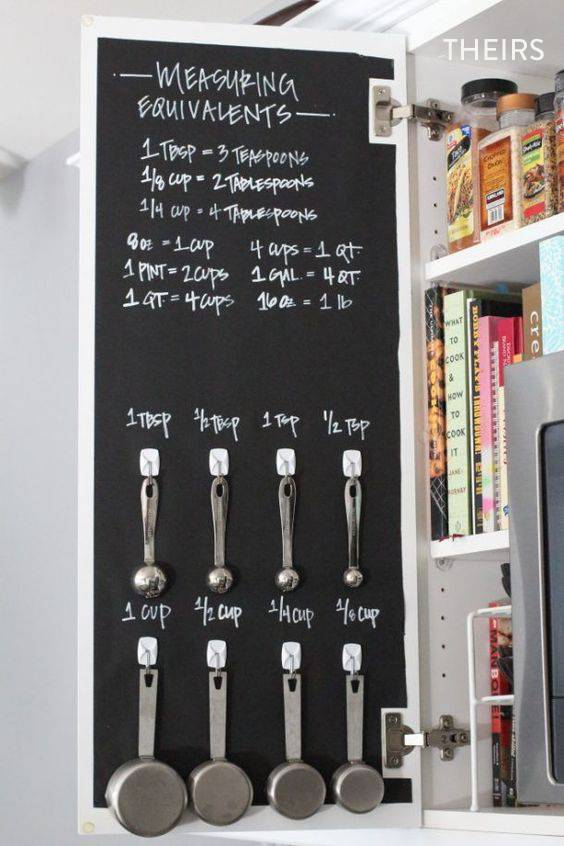
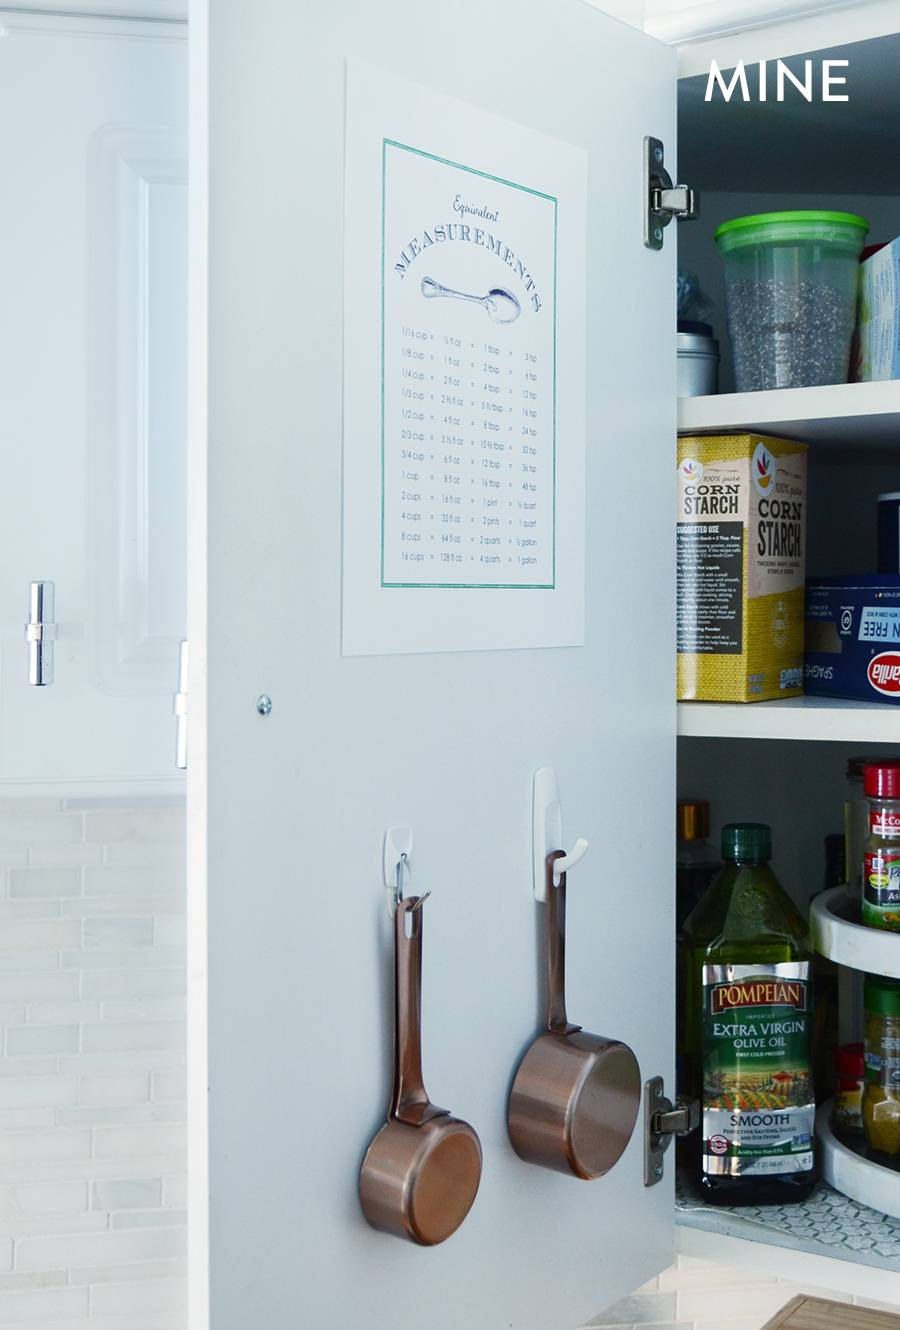
9. I printed out a measuring equivalent chart here instead of doing something permanent like chalkboard paint, and it has come in handy a few times. And I like having the measuring cups right next to the spice rack, however they do clang around when you open and close the cabinet door. But I’ve gotten used to it. Verdict: Helpful but loud. 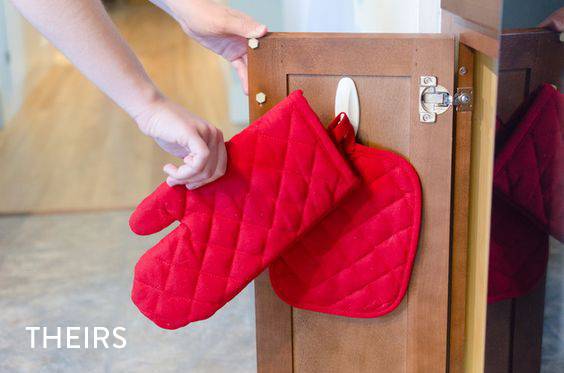
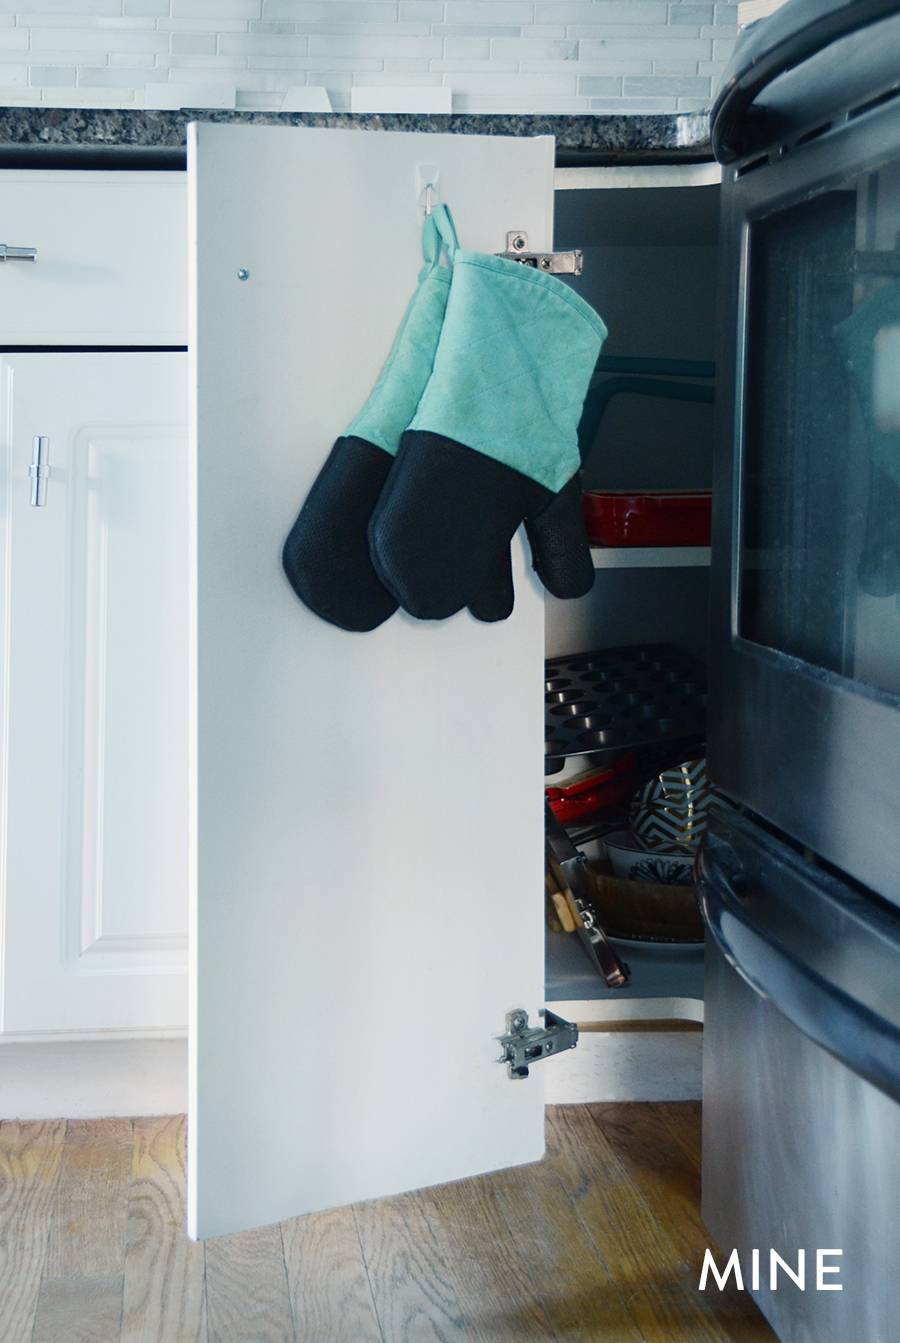
10. I love this hack because my oven mitts are more easily accessible than they were before, but I placed them on the door of a corner cabinet and the first time I attached the hook on the door it wouldn’t shut because the mitts got caught. But I just redid it and placed the hook off center, more toward the hinges and it works well now! Verdict: Handy, with some modifications. Do you have any organizing hacks that work well in your household? If so, please feel free to share them in the comments section! 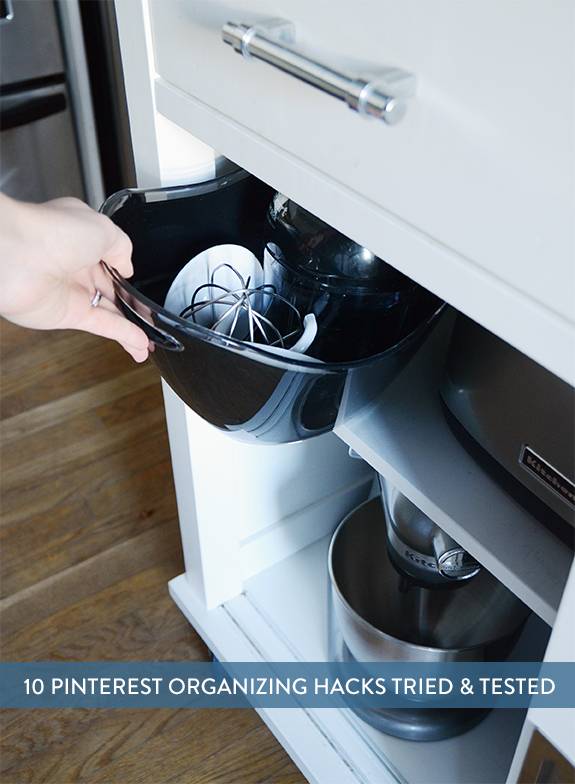
The post Tried And Tested: Do These 10 Pinterest Organization Hacks Actually Work? appeared first on Curbly. Via https://www.curbly.com/10-pinterest-organizational-hacks-tried-and-tested
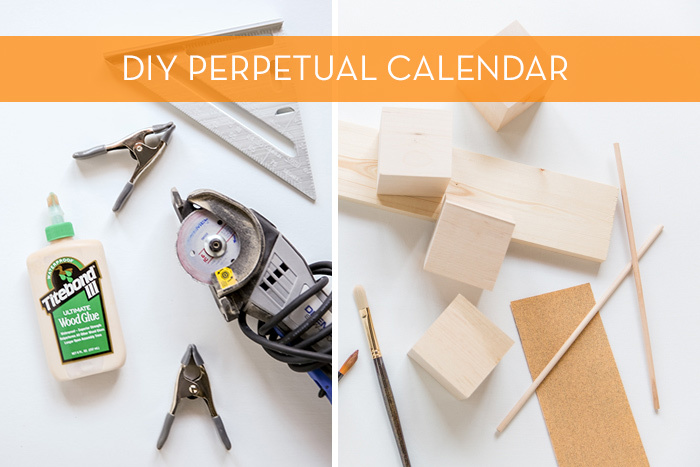
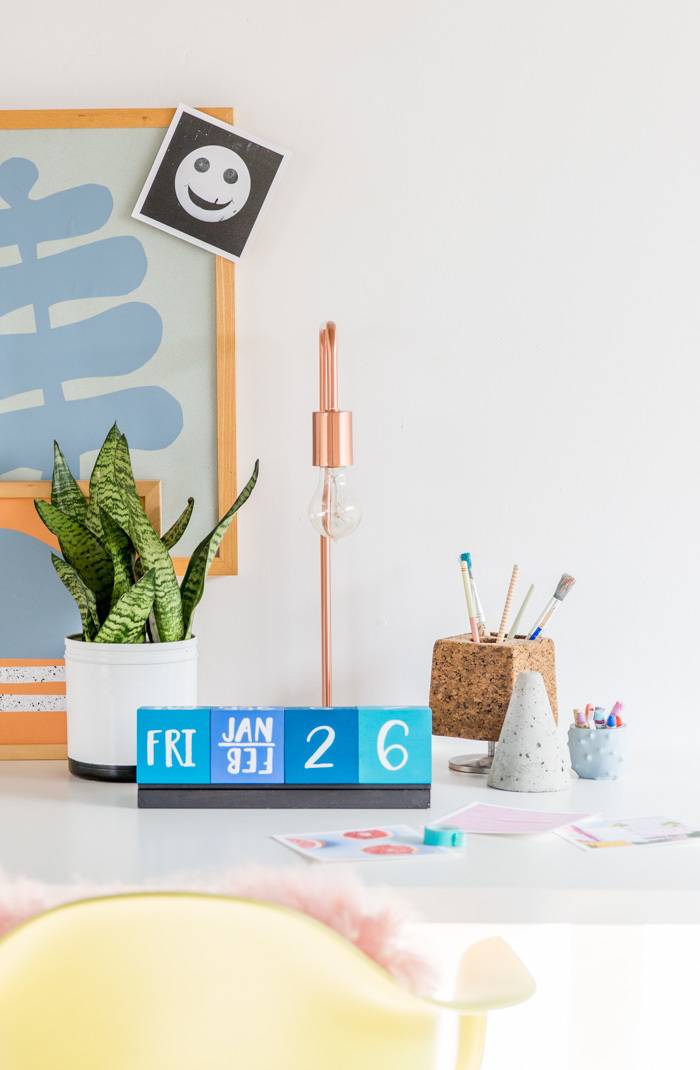
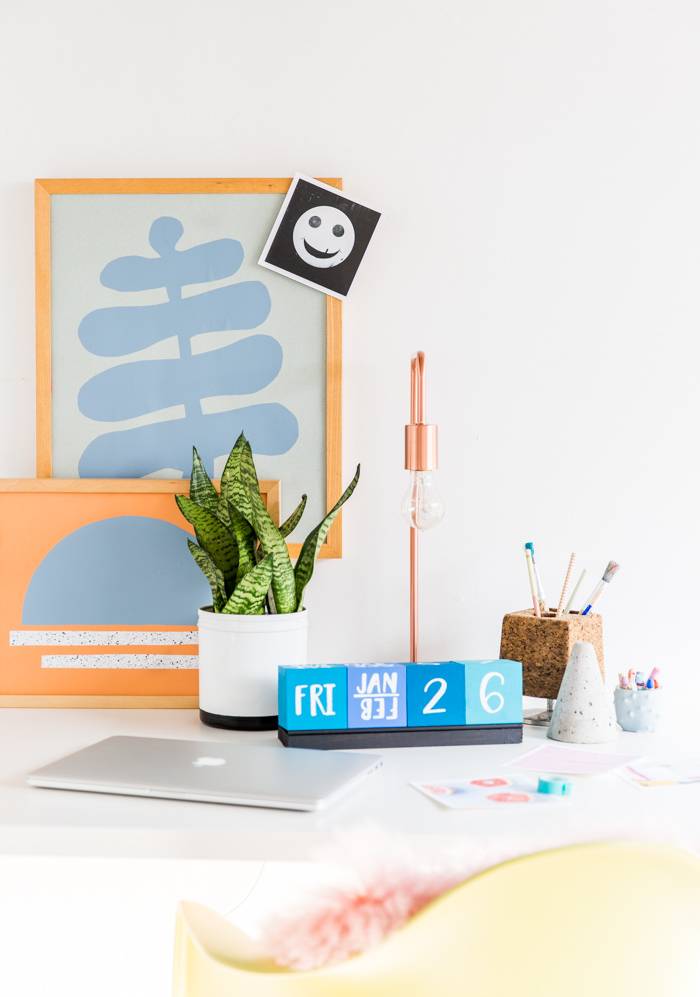
Photo: Brittni Mehlhoff In an effort to get organized early in the new year, I’ve been making myself little desk accessories to get excited about computer work. And I’m happy to say, it’s actually working. So, I thought I would share one of the projects that I recently made, for a jumbo wood block perpetual calendar. The larger size makes this calendar a statment piece and adds a fun playfulness to the typically bland work station. Click through for the step by step tutorial.
Photo: Brittni Mehlhoff
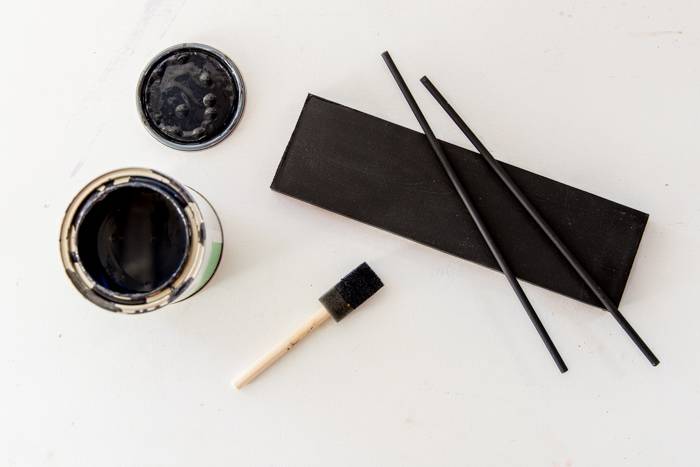
Photo: Brittni Mehlhoff Materials:
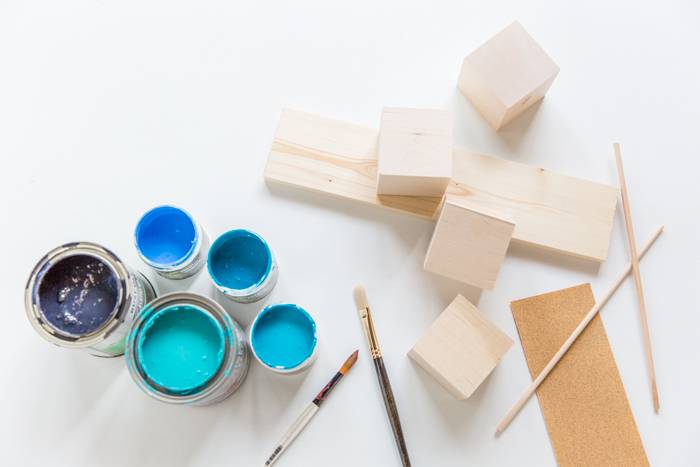
Instructions: 1. Start by painting each of the 4 wood blocks a difefrent color. You’ll want to paint all sides of each block. And come back with a second coat if necessary. Tip: Be sure to use a paint and primer in one to save yourself the extra step of having to prime the blocks first.
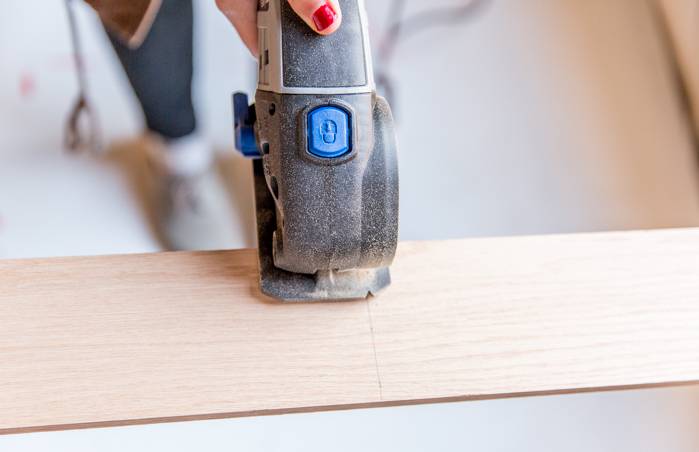
Photo: Brittni Mehlhoff 2. While the blocks are drying, cut a piece of 1×4 scrap wood down to 12 inches in length. This will keep the base length lined up with the dowel rods. *If you already have a piece of scrap wood that is 12 inches in length, you can skip this step.
Photo: Brittni Mehlhoff 3. Next, paint the pieces that you’ll be using as the base all one color (wood dowels and 1×4 wood from step 2). I went with black for mine, if you’re looking for suggestions. Set aside and wait for the paint to dry completely before adding another coat (if necessary).
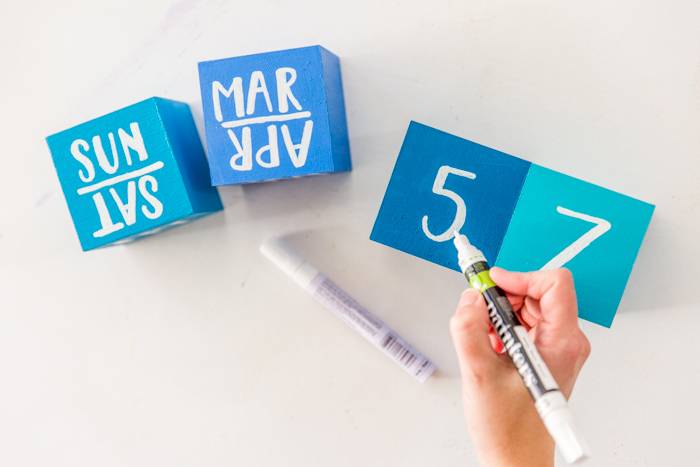
Photo: Brittni Mehlhoff 4. Once the wood blocks from step 1 are completely dry, it’s time to start the lettering process with a paint pen. If you don’t have great handwriting, find a friend! That’s what I did.…Lettering for this project was done by Rachel Brewer. Knowing exactly what numbers, days, etc to put on each block can be a little tricky. So, I’ve included exactly what you’ll need to write on each block to take out the guess work… Day Block: Write Sat / Sun together on one side of the first block. Then Monday, Tuesday, Wednesday, Thursday, and Friday each on their own sides. Month Block: Write these month combinations each on their own side of block two: Jan / Feb, Mar / Apr, May / Jun, Jul / Aug, Sep / Oct, Nov / Dec. And be sure to write the second month in each combination upside down from the first. This will make more sense if you refernce the photos. Number Block One: On the first number block, write the following numbers (each number on it’s own side of the block): 0, 1, 2, 3, 4, 5. Number Block Two: On the second number block, write the following numbers (each number on it’s own side of the block): 0, 1, 2, 6, 7, 8 (an upside 6 will make a 9).
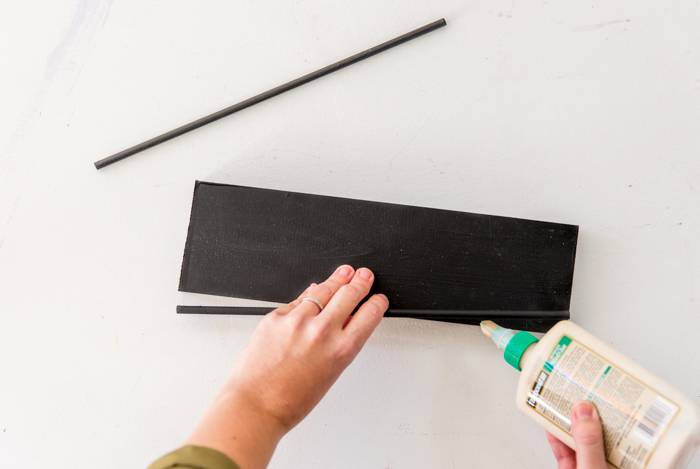
Photo: Brittni Mehlhoff 5. Once the blocks are finished, set them aside. Then, using wood glue, glue the painted dowels to the painted wood. And clamp the rods to the wood for at least 30 minutes to insure proper adhesion. *One dowel will be on the edge of each long side of the wood. This will keep the wood blocks resting comfortably inside the lip, instead of just sticking on a regular block of wood. Note: If after the glue has dried, the blocks don’t perfectly fit inside the rails, no worries. The blocks can also rest on top of the front rail (dowel rod), for an elevated look.
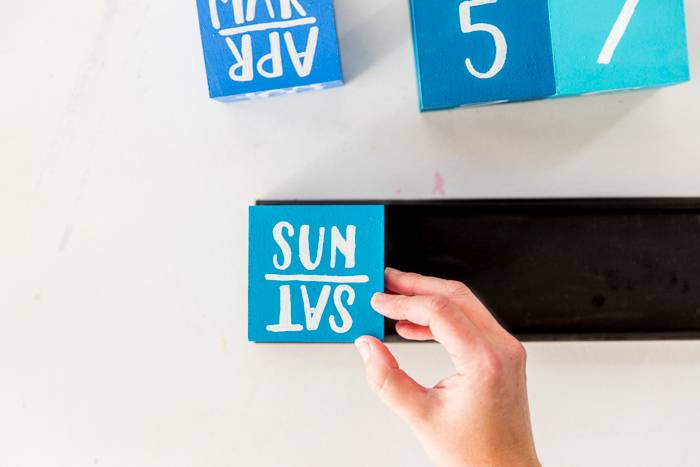
Photo: Brittni Mehlhoff 6. Lastly, now that the blocks and base have been completed, place the blocks into the base and place on your desk. And each day, you can switch out the proper date, day, etc.
Photo: Brittni Mehlhoff And that’s all there is to it. Pretty simple. Right?
Photo: Brittni Mehlhoff
Photo: Brittni Mehlhoff What do you think of this project? Think it might be something you’ll tackle in your own home or office? P.S. You may recognize the artwork in this post from this 30 minute DIY art project I shared last month. The post Modernize Your Boring Desk with this DIY Giant Wood Block Calendar appeared first on Curbly. Via https://www.curbly.com/17704-modernize-your-boring-desk-with-this-diy-giant-wood-block-calendar 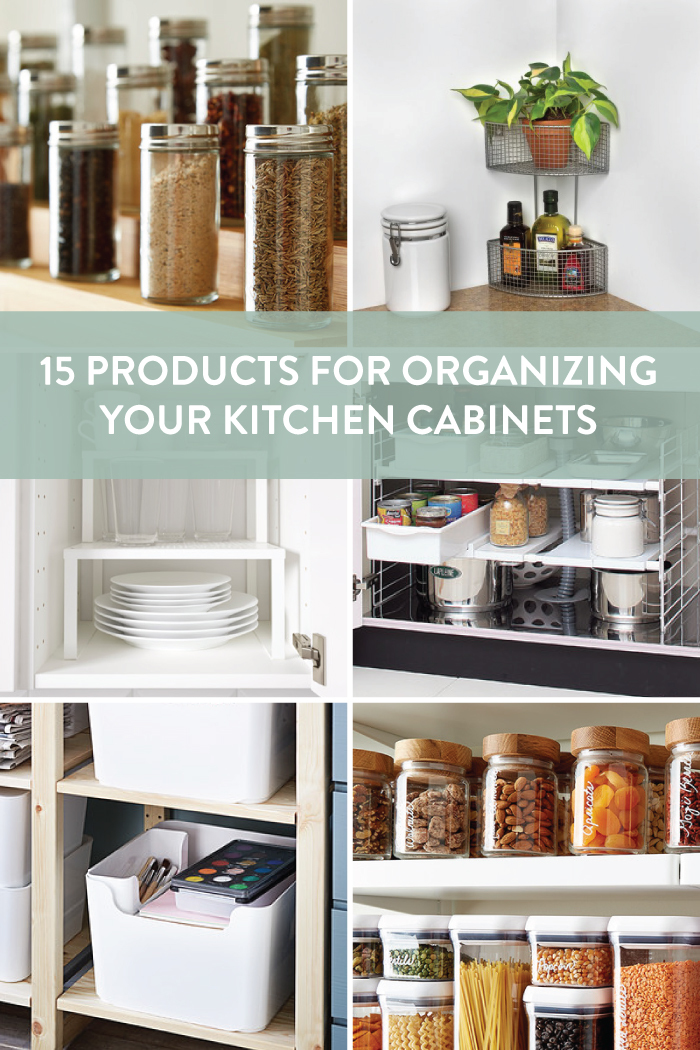
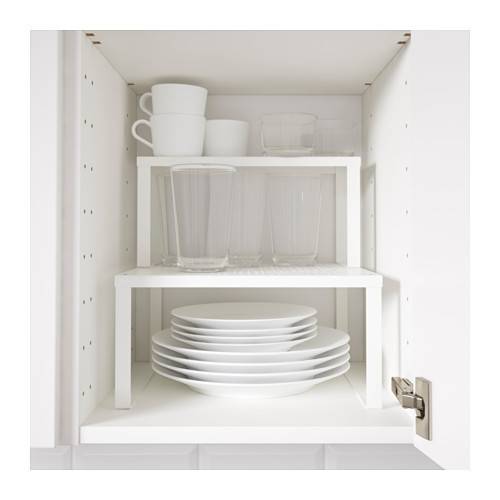
Small space living is not ideal, but I make it work thanks to the abundance of helpers out there that 1) support my slight hoarding habits and 2) keep my house somewhat organized. I have a small rental kitchen, and despite the fact that I have way too much stuff (and I own it!), I stay extremely organized and you can too! These 15 products are perfect for organizing your kitchen cabinets, so no matter how much or how little space you have, you experience Zen at home.
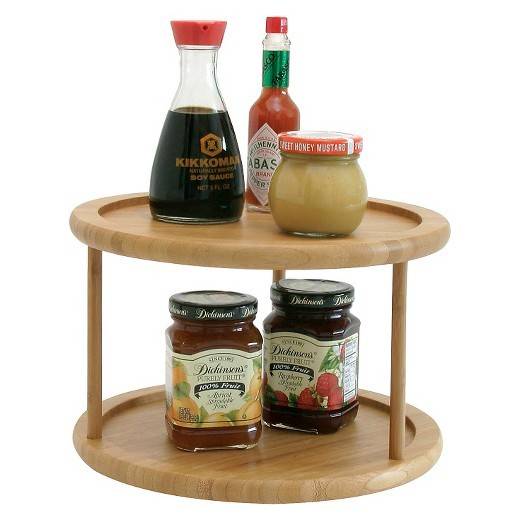
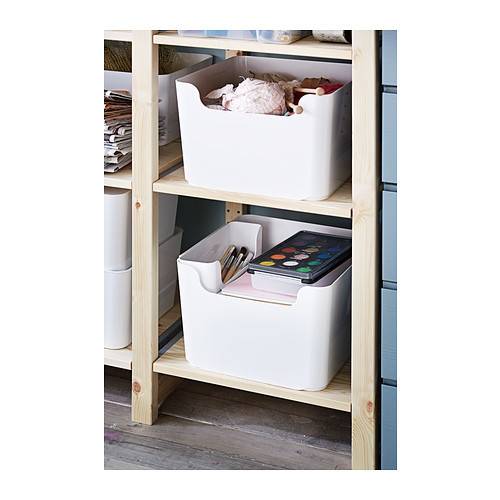
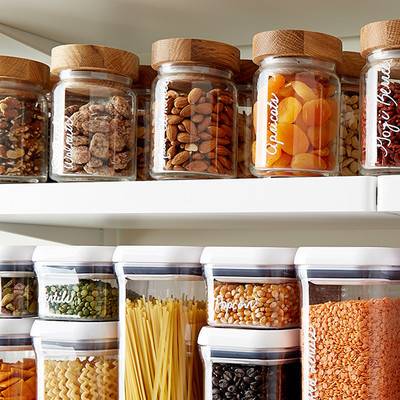
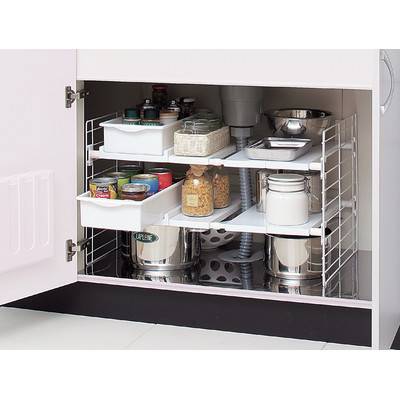

The post 15 Ways to Guarantee You’ll Keep Your Kitchen Cabinets Organized appeared first on Curbly. Via https://www.curbly.com/15-products-for-organizing-your-kitchen-cabinets 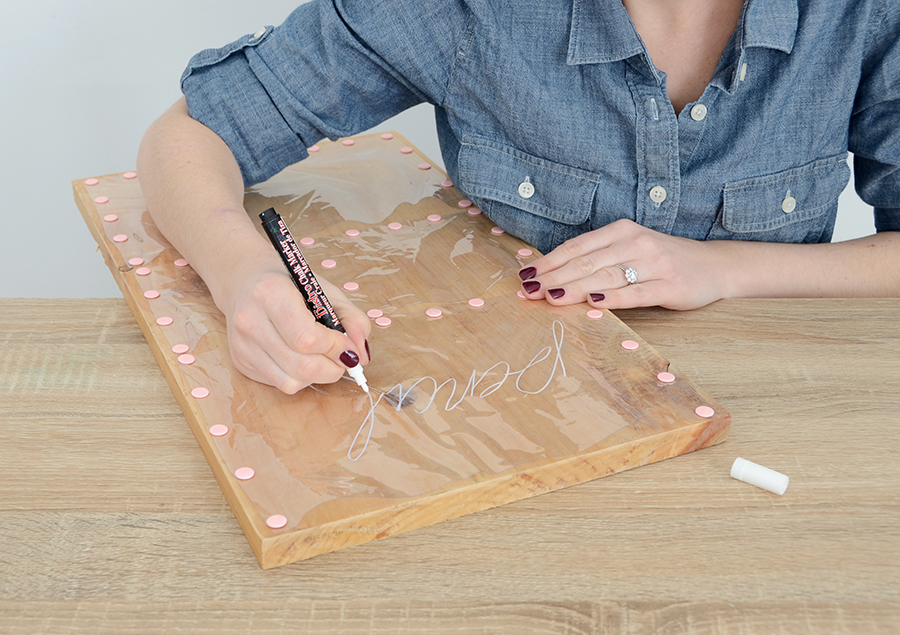
Everyone I know is on an organizing kick, myself included, now that the new year has rolled around. And one of the places that I have the hardest time keeping clean is my home office and craft space. So I thought it would be fun to create a wall-mounted organizer for my office supplies and share it with you guys. Keep reading to check it out.
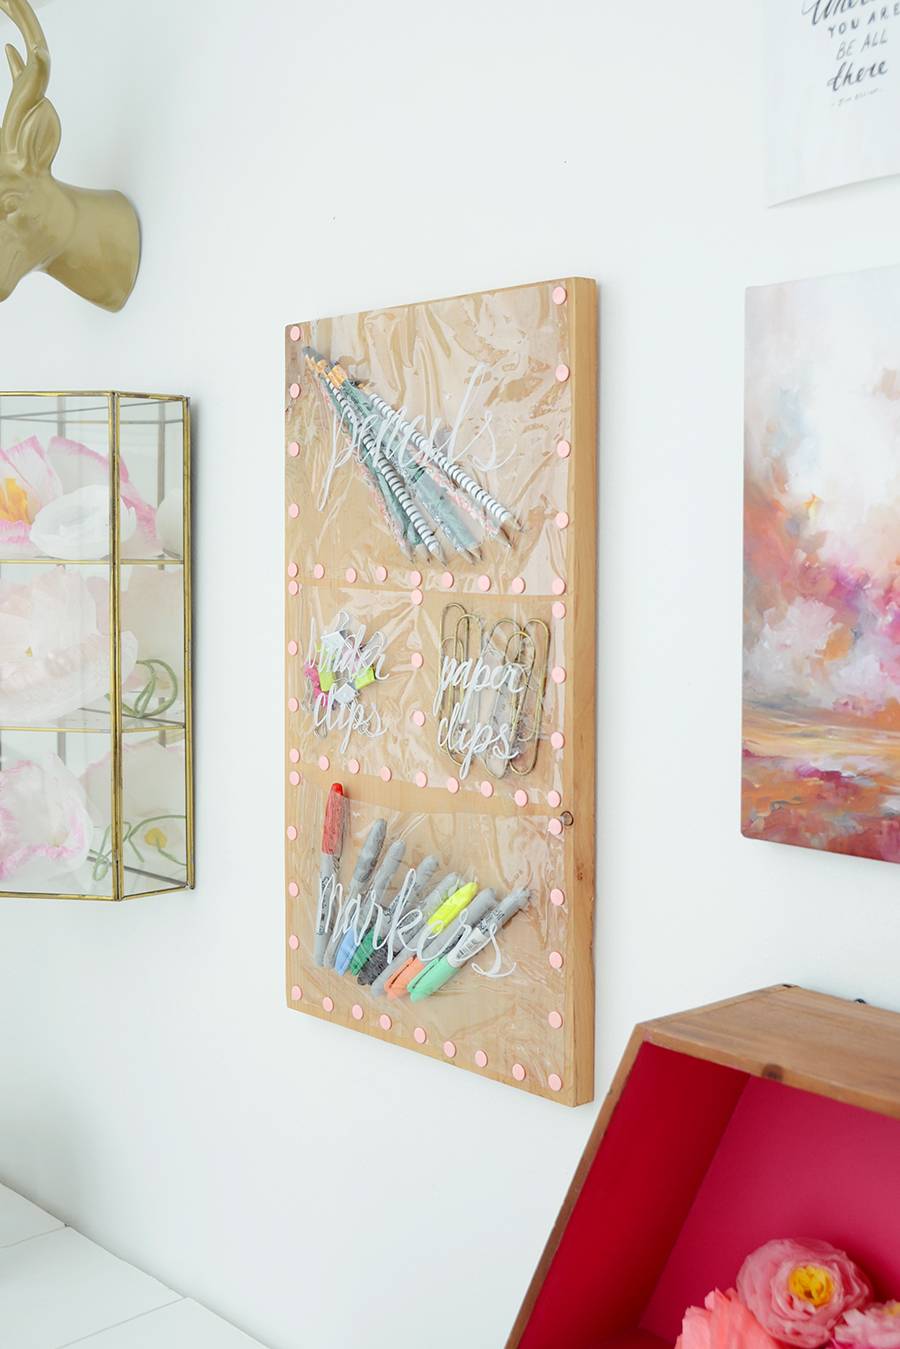
The clear vinyl pockets make it easy to see what’s inside, and the colored pushpins add some serious character. So let’s get started! 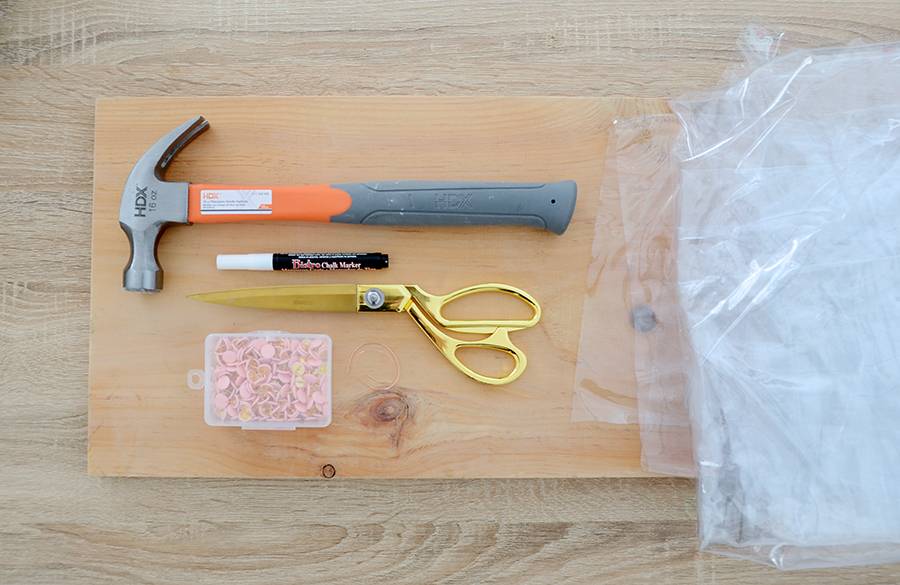
Here’s what you’ll need for your organizer:
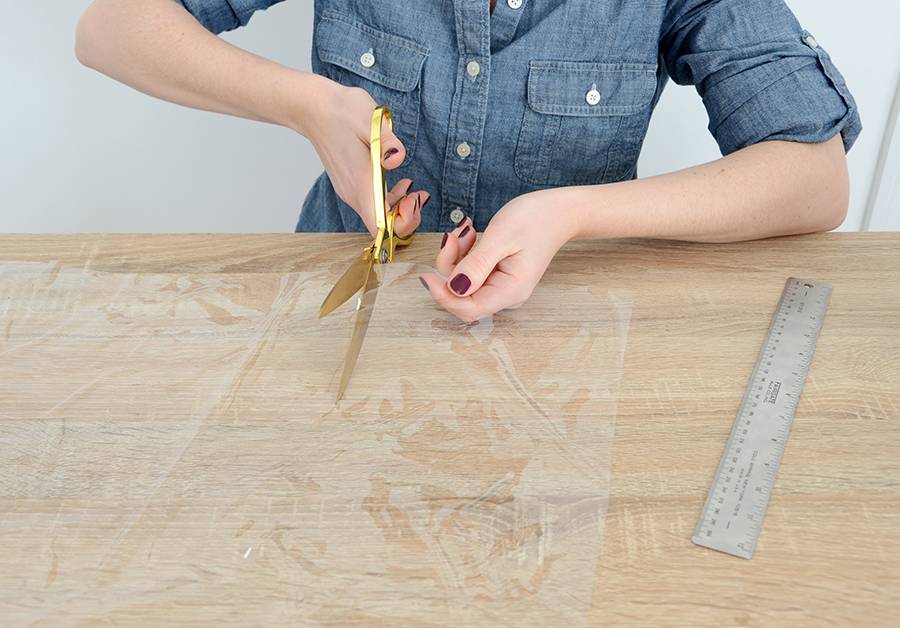
Begin by cutting a piece of vinyl that is 12 x 9 inches. Mark the measurements with the chalk pen. It wipes off easily with a paper towel if it’s still wet. Once it has dried, use a damp paper towel to remove the marks. You can buy vinyl at many fabric stores, but you can also cut up a vinyl shower curtain liner if you’re having trouble finding it by the yard. 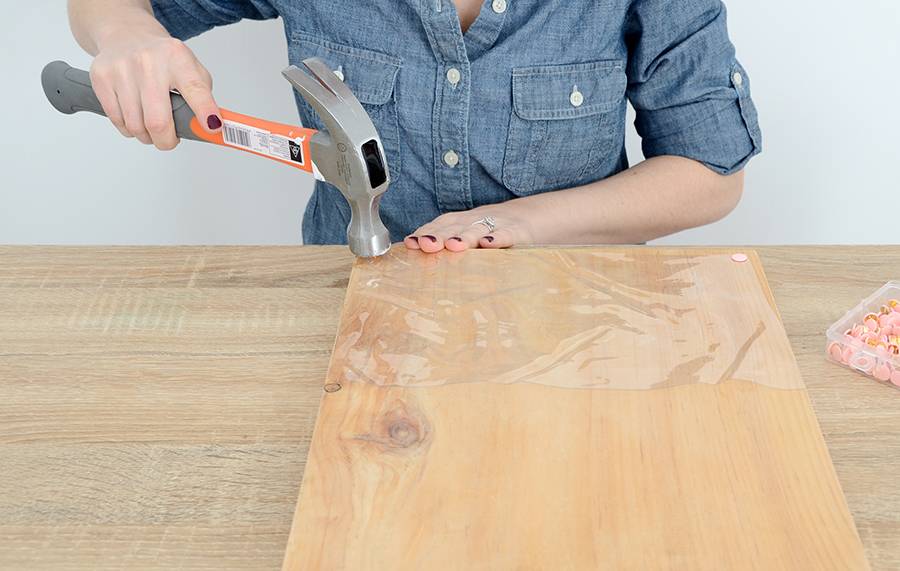
Lay the vinyl on the bottom section of the wood. You’ll want to trim the edges so that it forms a slight trapezoid – begin cutting 1/2 inch from the side up to the top corner on each side. This will give you a bit of extra vinyl at the top so you can fit items into the pocket. Gently hammer in a pushpin on each corner. 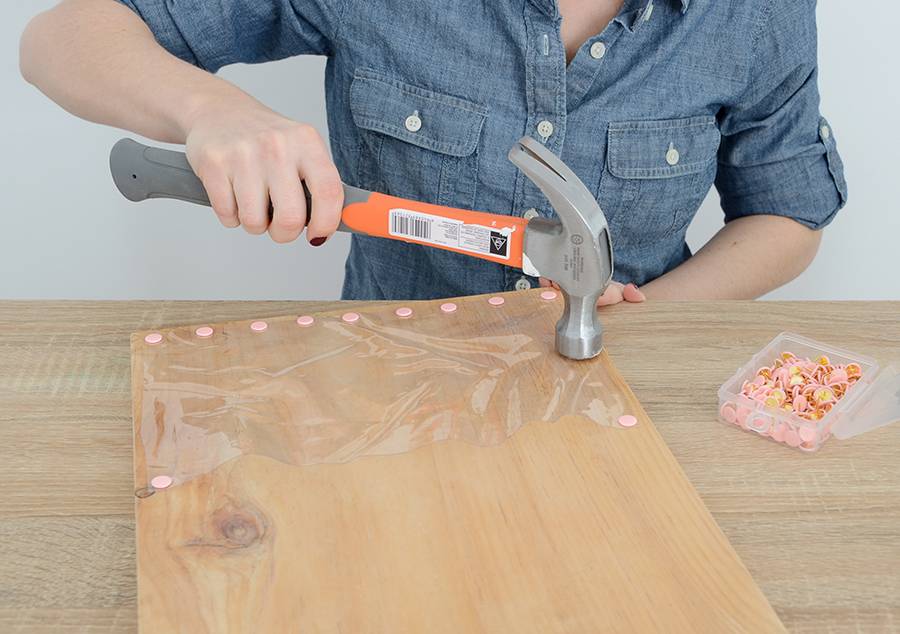
Add pushpins around the bottom and sides of the pocket. Space them out so that they are about an inch apart. 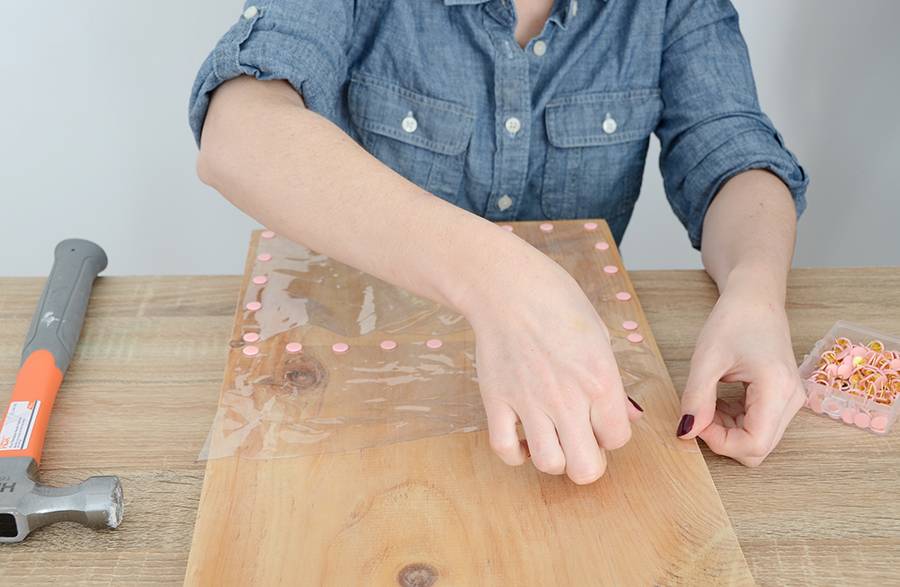
Next, cut a piece of vinyl that is 12 x 5 inches and trim it so that the bottom edge is a bit narrower than the top, just like you did before. Repeat the process of adding pushpins, this time putting a row up the middle to form two pockets. 
Create a third pocket for the top with the same instructions as the first pocket, size 12 x 9. You can write on the pockets using a chalk marker – just let it dry before you touch it. If you want to remove the text later, just dampen a paper towel and wipe it clean. 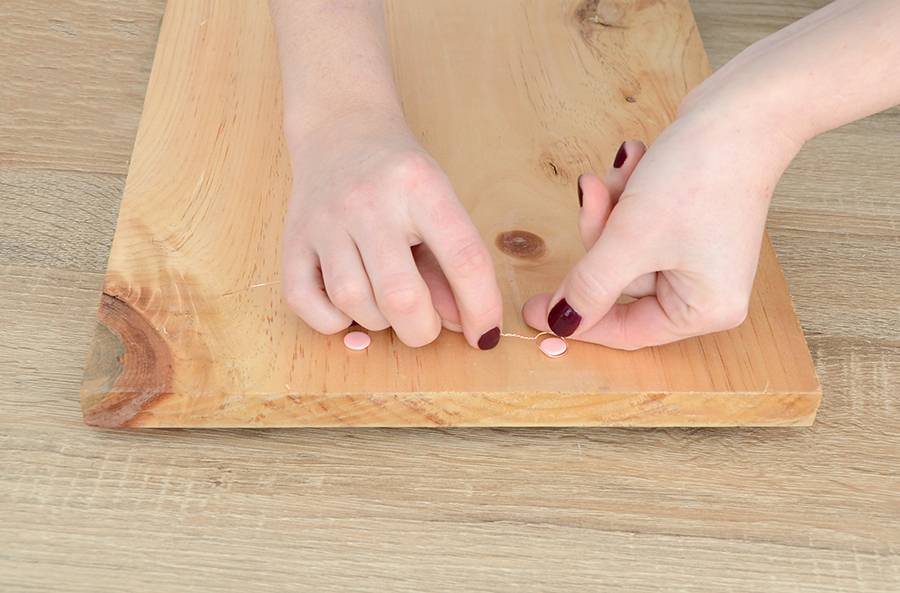
The last step is to create a hanger on the back. Place two pushpins on the back at the top, but don’t push them in fully. Form a loop at one end of the wire and hook it around one pushpin, pulling it tight. Make a loop on the other side, wrap it around the other pushpin and pull it taut. Hammer the pins in fully. 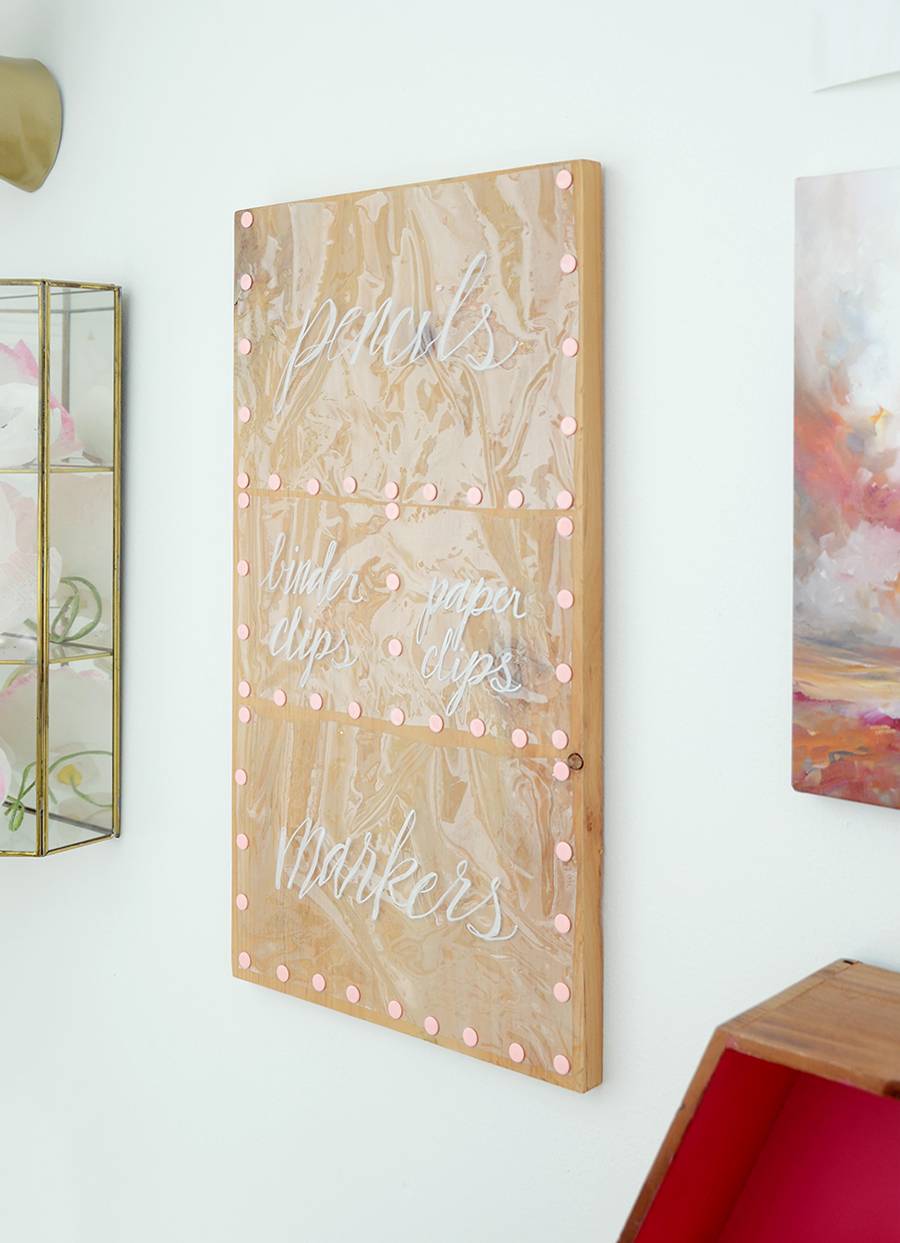
Hang it on a nail on the wall, and you’re ready to get organized! Fill it up with all of the office supplies that normally litter your desk and your workspace will be nice and tidy for the new year. 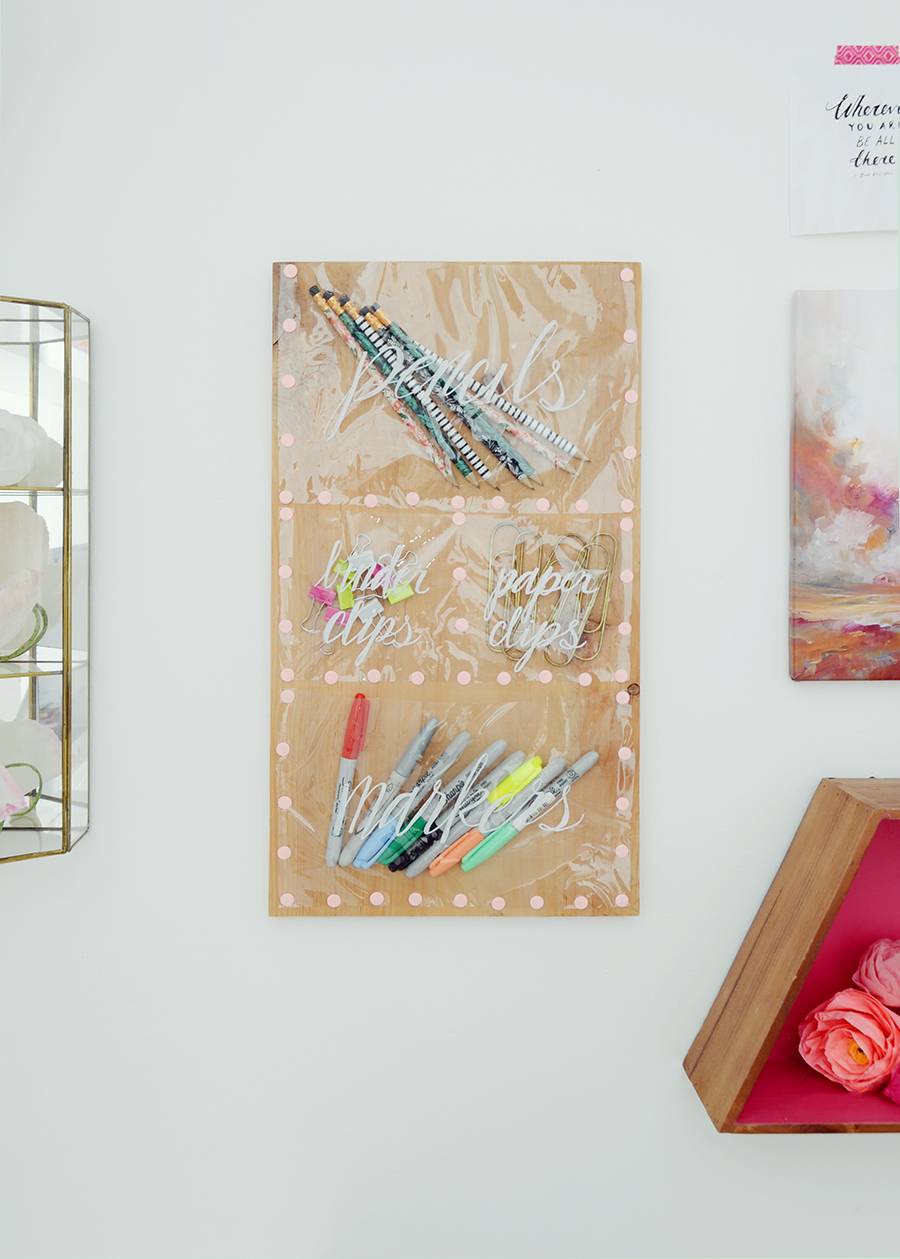
You can customize this project in lots of different ways – paint the wood, choose different pushpin colors, or you might even choose to write a quote on the vinyl. 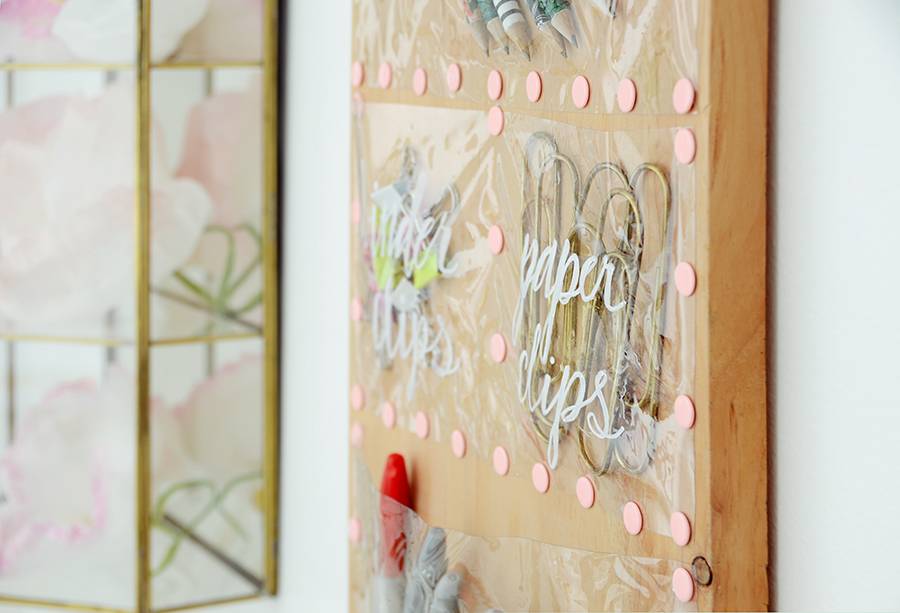
You could also make a larger version for even more storage! 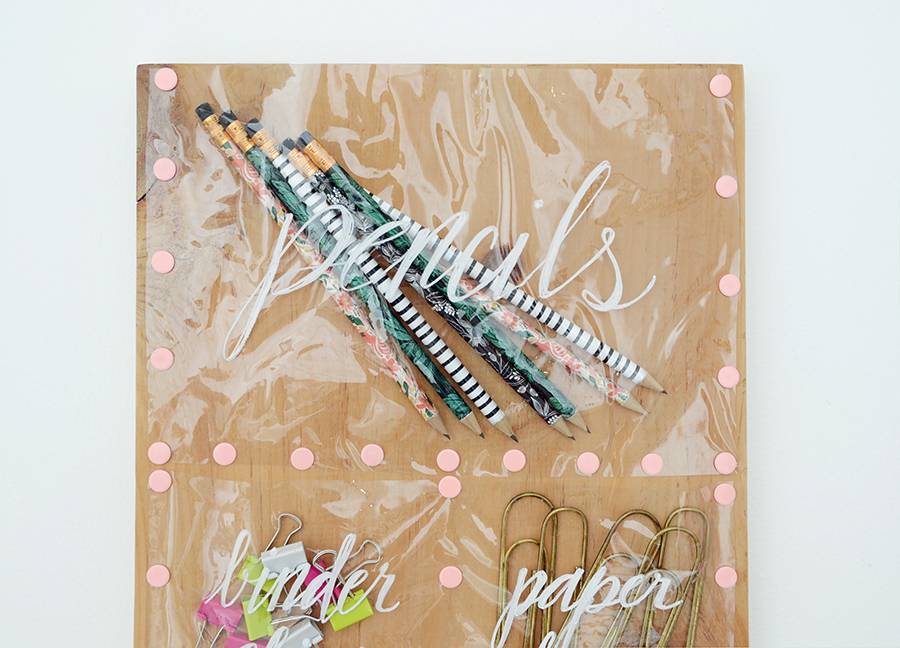
Have fun making your new organizer… and don’t forget to share it with us on Instagram using #CurblyLoveWhereYouLive. 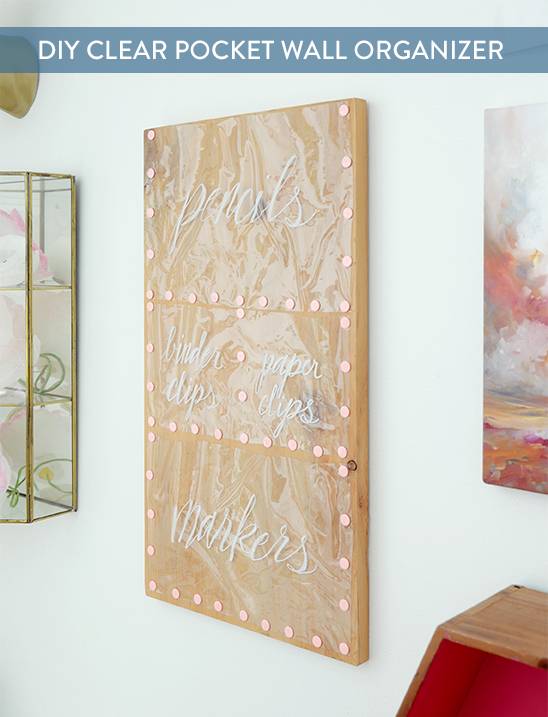
The post DIY Clear Pocket Wall Organizer appeared first on Curbly. Via https://www.curbly.com/diy-clear-pocket-wall-organizer
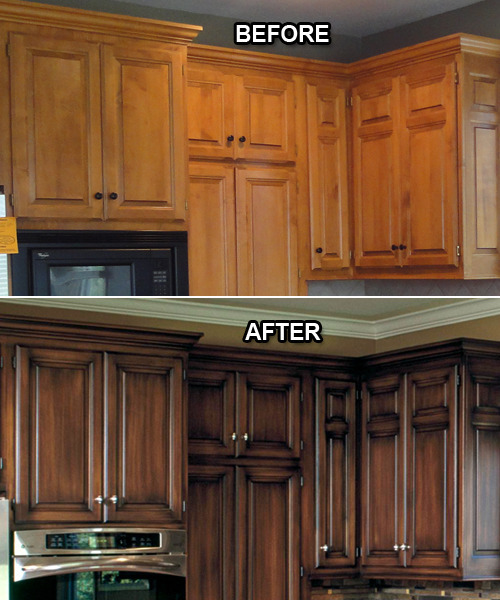
The owners of this kitchen saved big bucks giving their old kitchen cabinets a faux finish. The new treatment gives the cabs a whole new feel to be sure, but I kinda liked the old feel better. How about you? Do you take to the darker color? And just so the rest of the kitchen doesn’t feel left out, here’s a shot of the ‘before’:
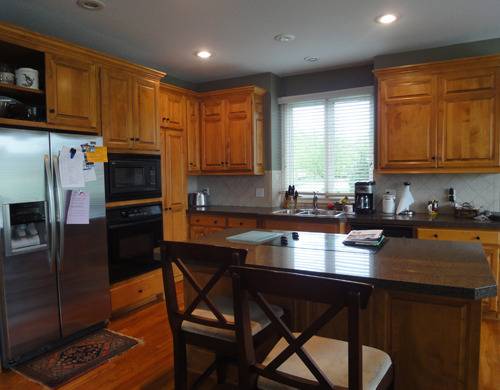
And here’s the after:
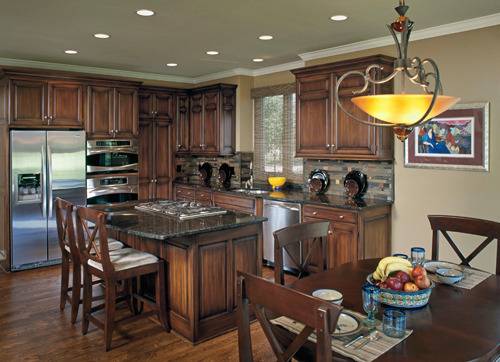
To see more individual details of the makeover, visit this page. (Seeing the backsplash up close is worth the trip. It’s a pretty cool treatment.)
The post To Faux or Not to Faux: Which is Better? appeared first on Curbly. Via https://www.curbly.com/13338-to-faux-or-not-to-faux-which-is-better
Update: We’ve tested two new techniques for dyeing glass jars. Check them out here! |