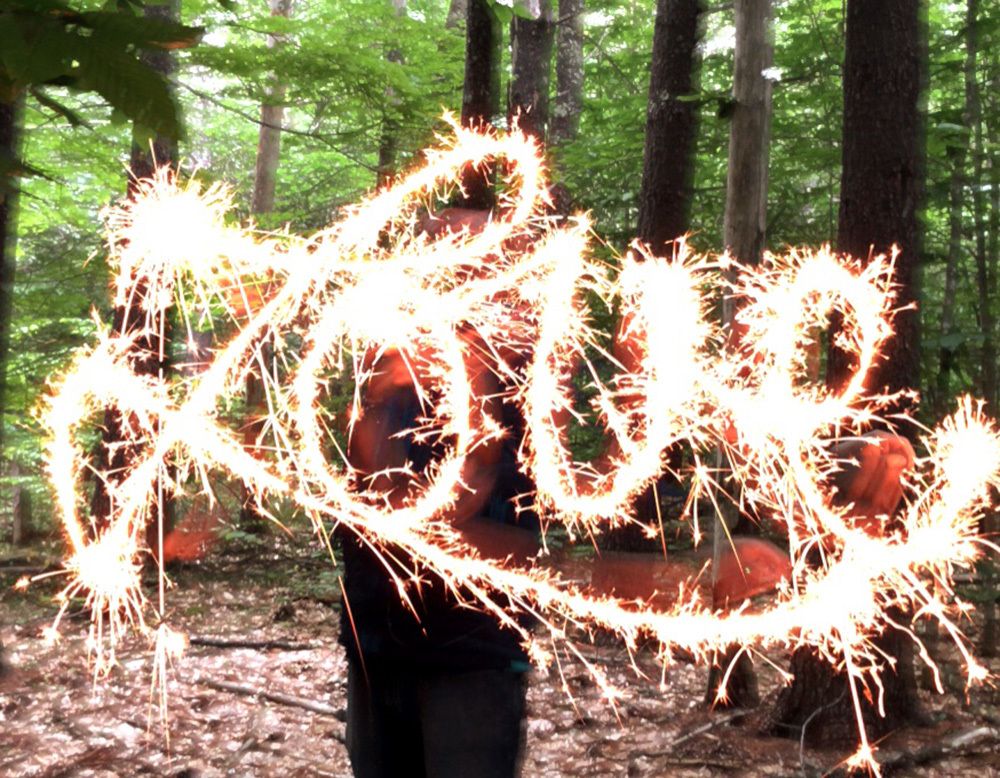
Sparklers pictures are a fun and festive part of any 4th of July gathering. Find out how you can document the day by taking long exposure photographs on your smartphone. Your Instagram feed is going to shine! Step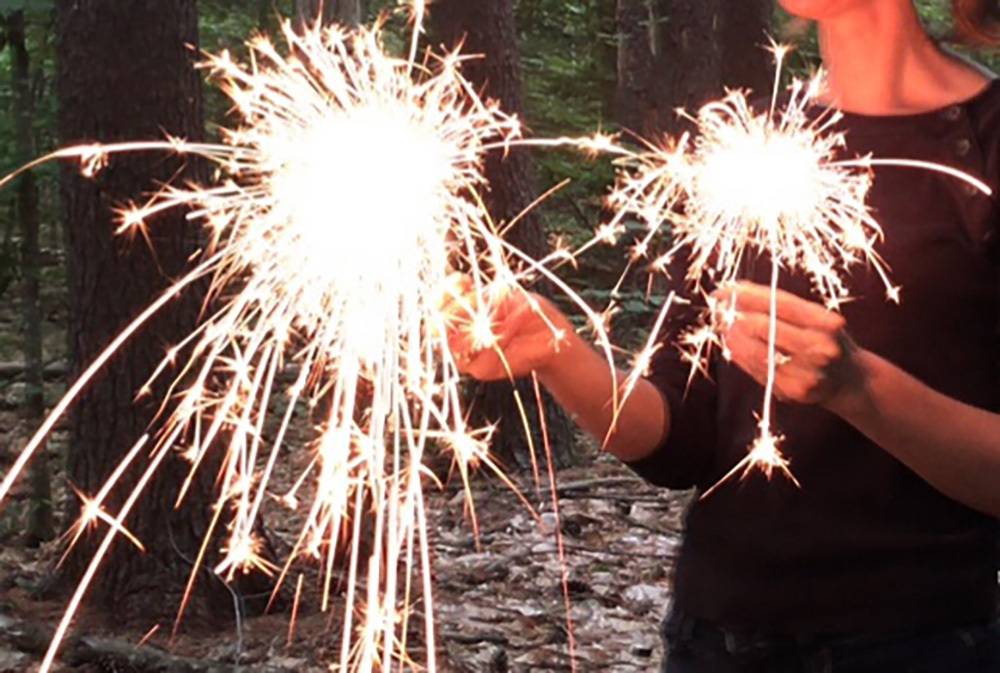
Safety First When Creating Sparkler PicturesThe most important step is insuring your safety and that of the people around you. Always make sure any children are closely supervised. Sparklers can reach temperatures above 1800 degrees Fahrenheit and need to be handled carefully. Use caution both when they are lit and after they finish sparking. It is so much better to end the night ooh-ing and aah-ing at fireworks as opposed to waiting at the ER to get a burn treated. Step
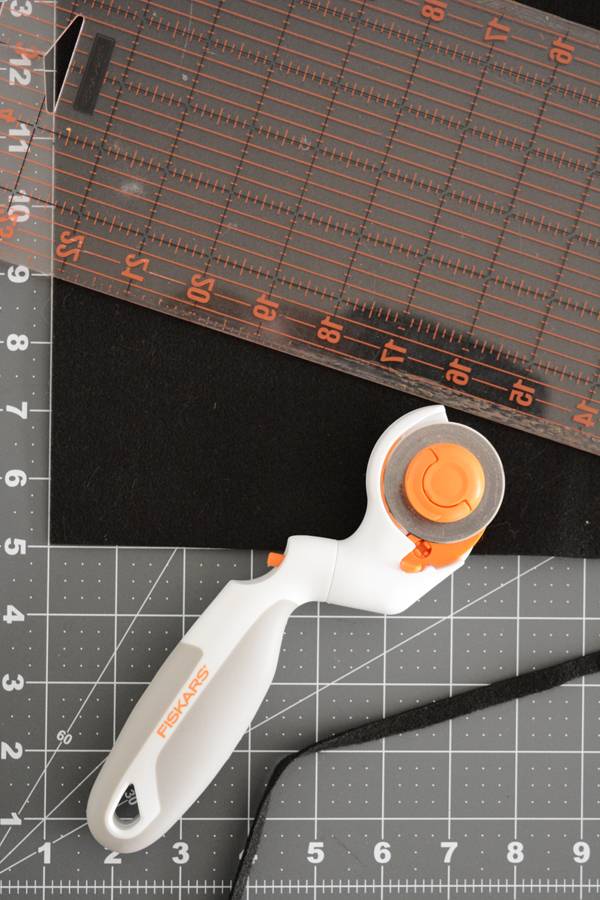
Stability is KeyNormally, your camera records a picture in a mere fraction of a second. Long exposure photography creates the image over the course of multiple seconds. Unless the goal is to create an abstract image, your phone needs to be stabilized. Even if your current beach body has 18-inch biceps, you will not be strong enough to hold it completely still. A tripod or some other method of bracing the camera is necessary when creating sparkler pictures Step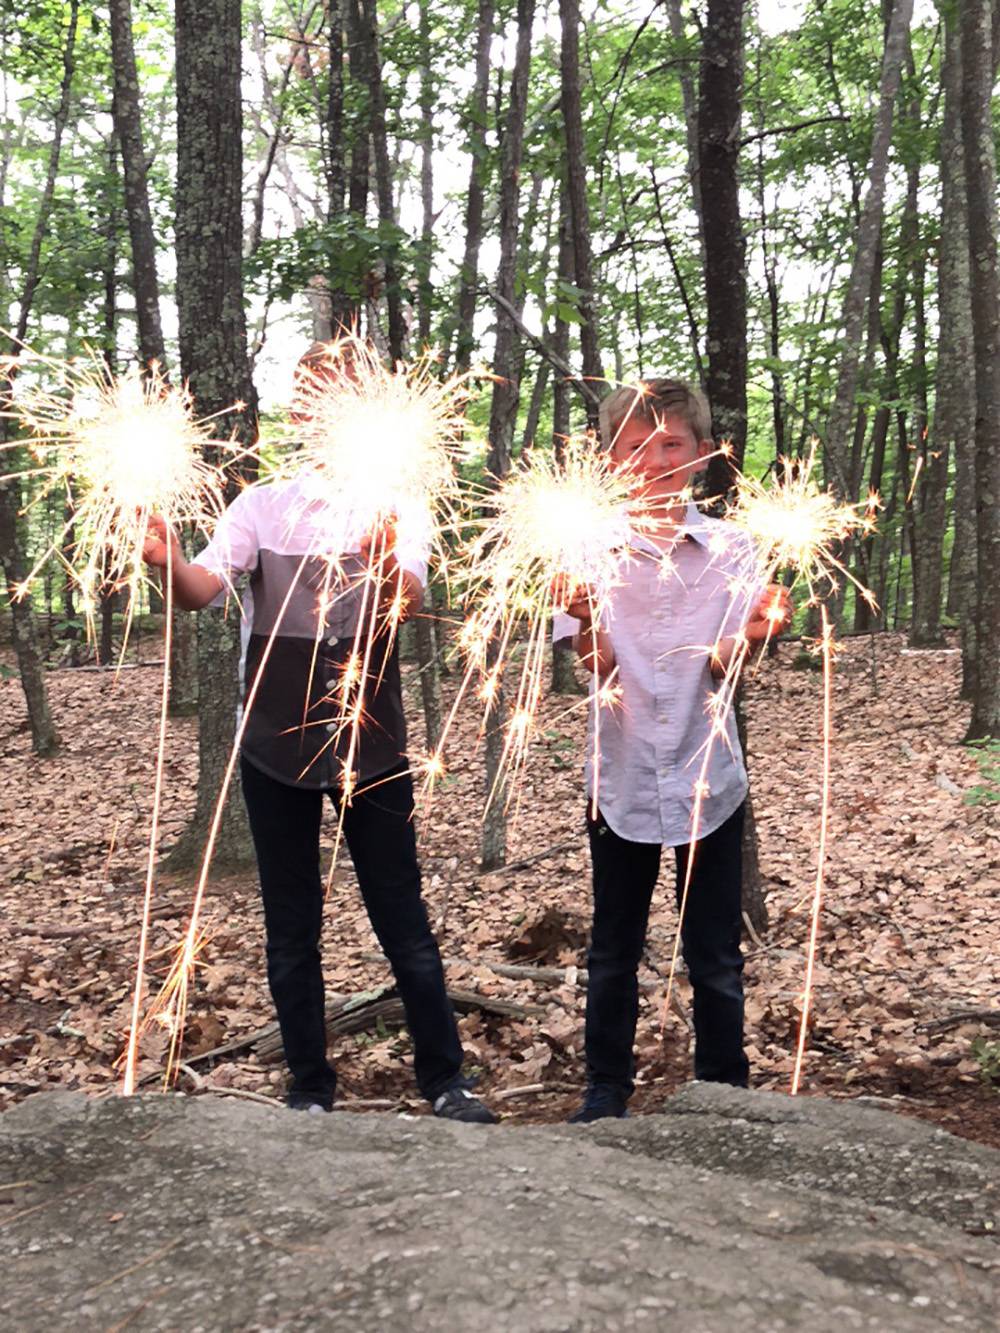
Capturing Sparklers in a PhotoThere are three ways to capture your image using a smartphone instead of DSLR camera. Manual ModeLater model Android phones have a ‘manual’ or ‘pro’ mode. Initially, set the shutter speed between one and three seconds and the ISO between 100 and 400. Experiment with these settings to get the shot you want. iPhone LiveIf you have an iPhone operating with iOS11, another option is to use the Live mode in the camera app. When enabled, the camera captures 1.5 seconds before the picture is snapped and 1.5 seconds after. To create your image, compose your shot and take a Live picture. Select it from the cameral roll and swipe up to reveal the Effects menu. Select ‘Long Exposure’ and a new image will be made by layering all three seconds of Live footage. Third Party AppsThe last option is to use a third-party app. Search ‘long exposure photography’ in the app store to explore your options. Slow Shutter Cam is one of my favorite apps to use. It has a capture mode specifically for light trails and the interface is simple to navigate. Step
Get CreativeNow, pull out your imagination. It’s time for some fun! Consider starting with something simple. A two-second exposure shot of a single sparkler in total darkness is easy to create but still yields magical results. Gradually add people and multiple sparklers as you get the hang of your camera. Make sure to experiment with settings. You are sure to stumble accidentally into some great shots this way. Keep in mind that the longer the shutter speed, the more sparks and light trails you will capture. However, if getting a clear and focused image of someone’s face is your goal, the shutter speed needs to be limited to one second. When using sparklers to ‘write’ with light, it is much easier to flip the image in a photo editor than it is to form the letters backward as the picture is taken. 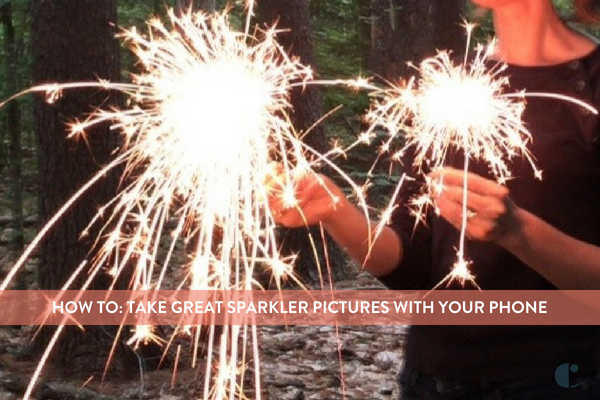
Remember, sparklers do not have to be relegated solely to the 4th of July. Keep some on hand for backyard barbecues, impromptu picnics on the beach, and even a run-of-the mill weeknight at home. They are guaranteed to add, well, sparkle to everything. Want more for the 4th? Check out bonus project ideas here!
The post How to Take Great Sparkler Pictures with Your Phone appeared first on Curbly. Via https://www.curbly.com/sparkler-pictures-how-to
0 Comments
In actuality this list is just a snippet of new years’ superstitions. To read more, visit here, here, here, here, here and for some really odd ones, go here. The post 20 Ways to Bring Love and Good Fortune in the New Year appeared first on Curbly. Via https://www.curbly.com/5883-20-ways-to-bring-love-and-good-fortune-in-the-new-year 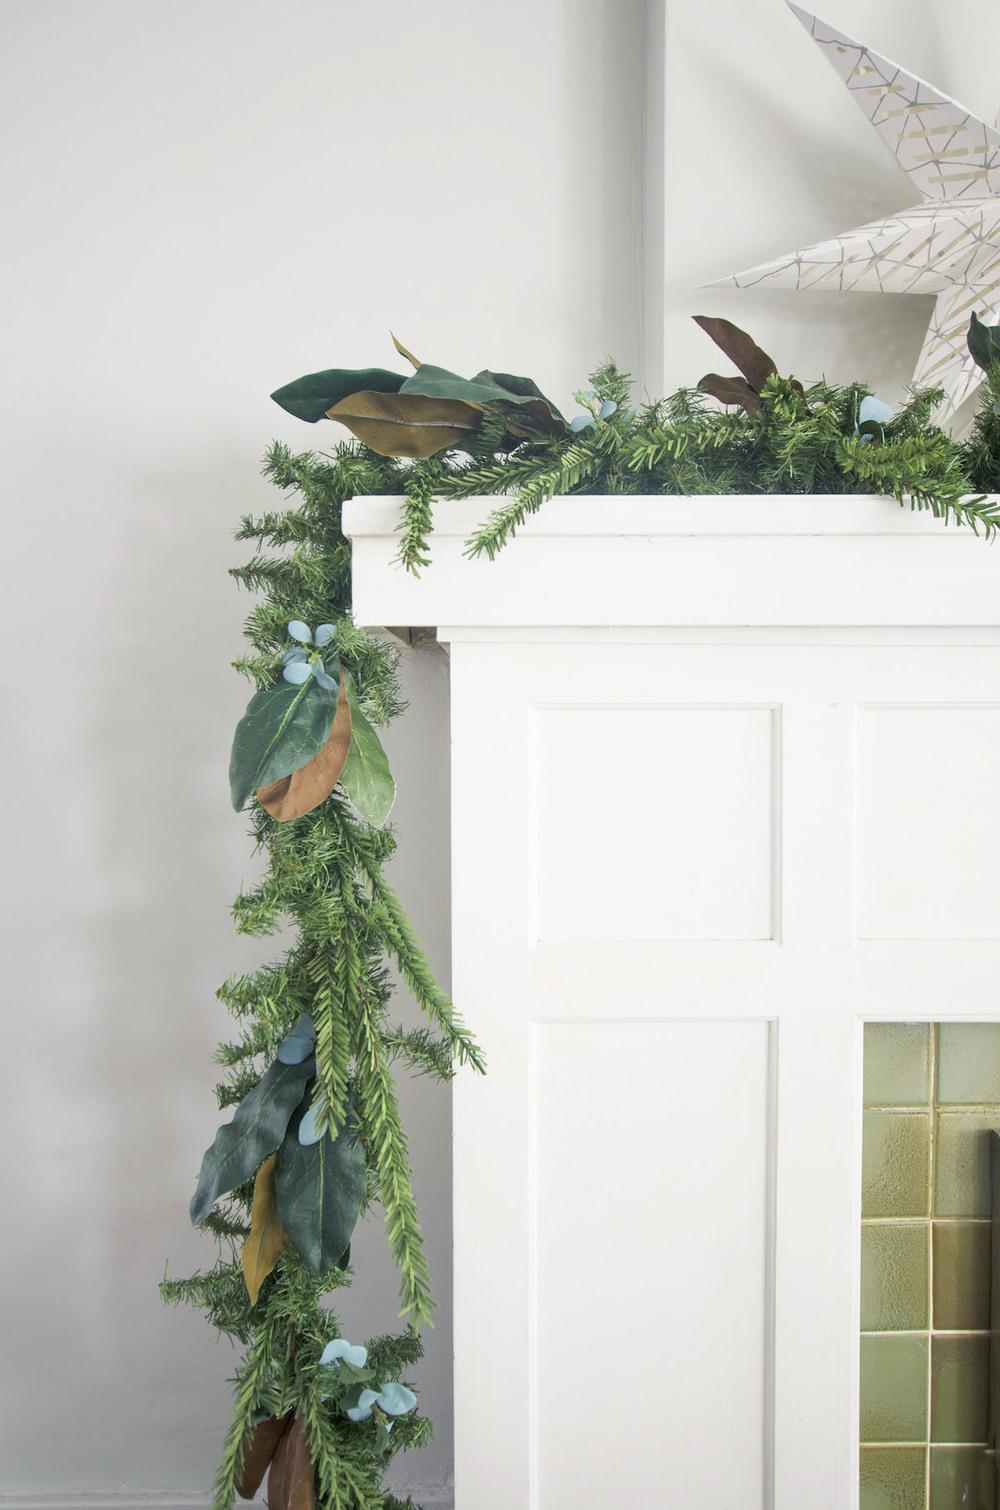
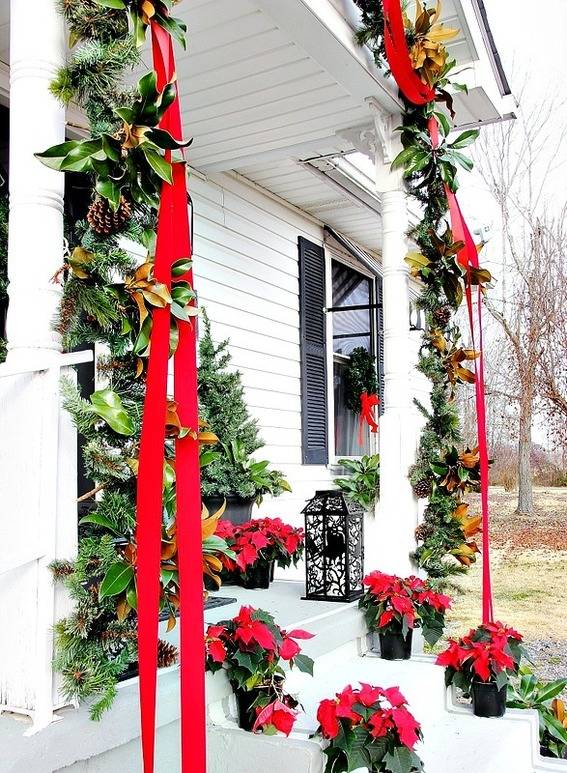
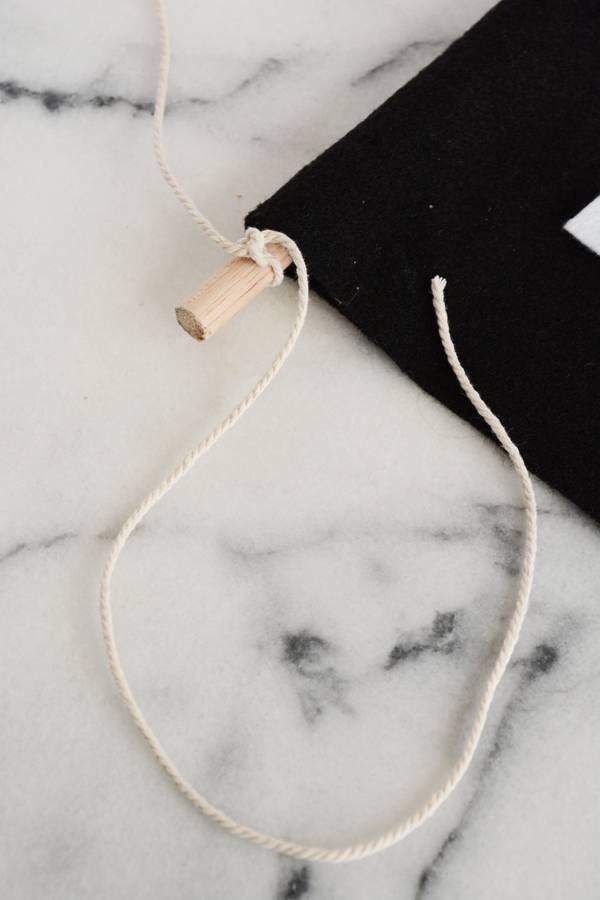
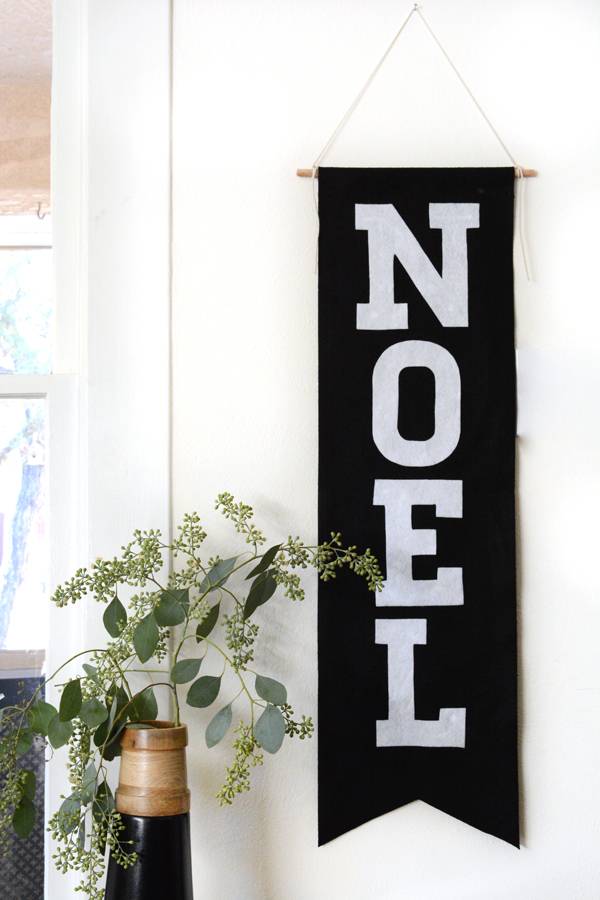
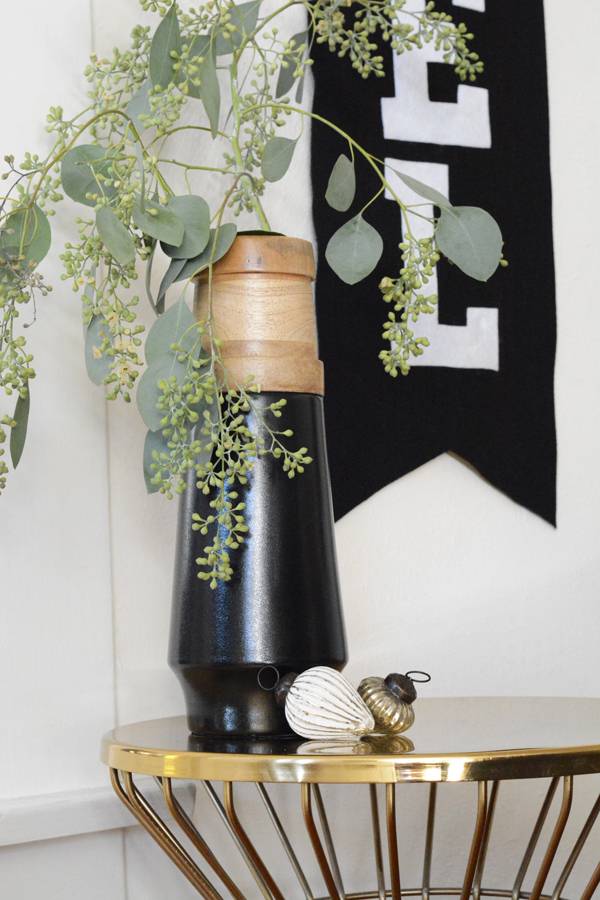
I love Christmas garlands. I drape them on doorways, my fireplace, and even my staircase banister. A few years ago, I decided to buy all fresh evergreen lengths of Christmas garland, and I worked hard to drape them everywhere, following all the instructions to make sure they’d last. But two weeks later … my garlands were dead and done. The heater vents and the heat from our fireplace fires killed that greenery dead. Everyone told me I should have waited until two weeks before Christmas before hanging real greenery, but I want my home to be decorated all Christmas season! I needed something a little more permanent, and the custom “fake” options were not cheap, ranging from $80-$300. So my solution was to take an inexpensive garland and make it look full, expensive, and as real as fake could possibly look. First things first, find an inspirational photo for this project. I wanted a mixture between the above garland… … and this garland with Magnolia leaves. Here’s how to transform a Christmas garland:Materials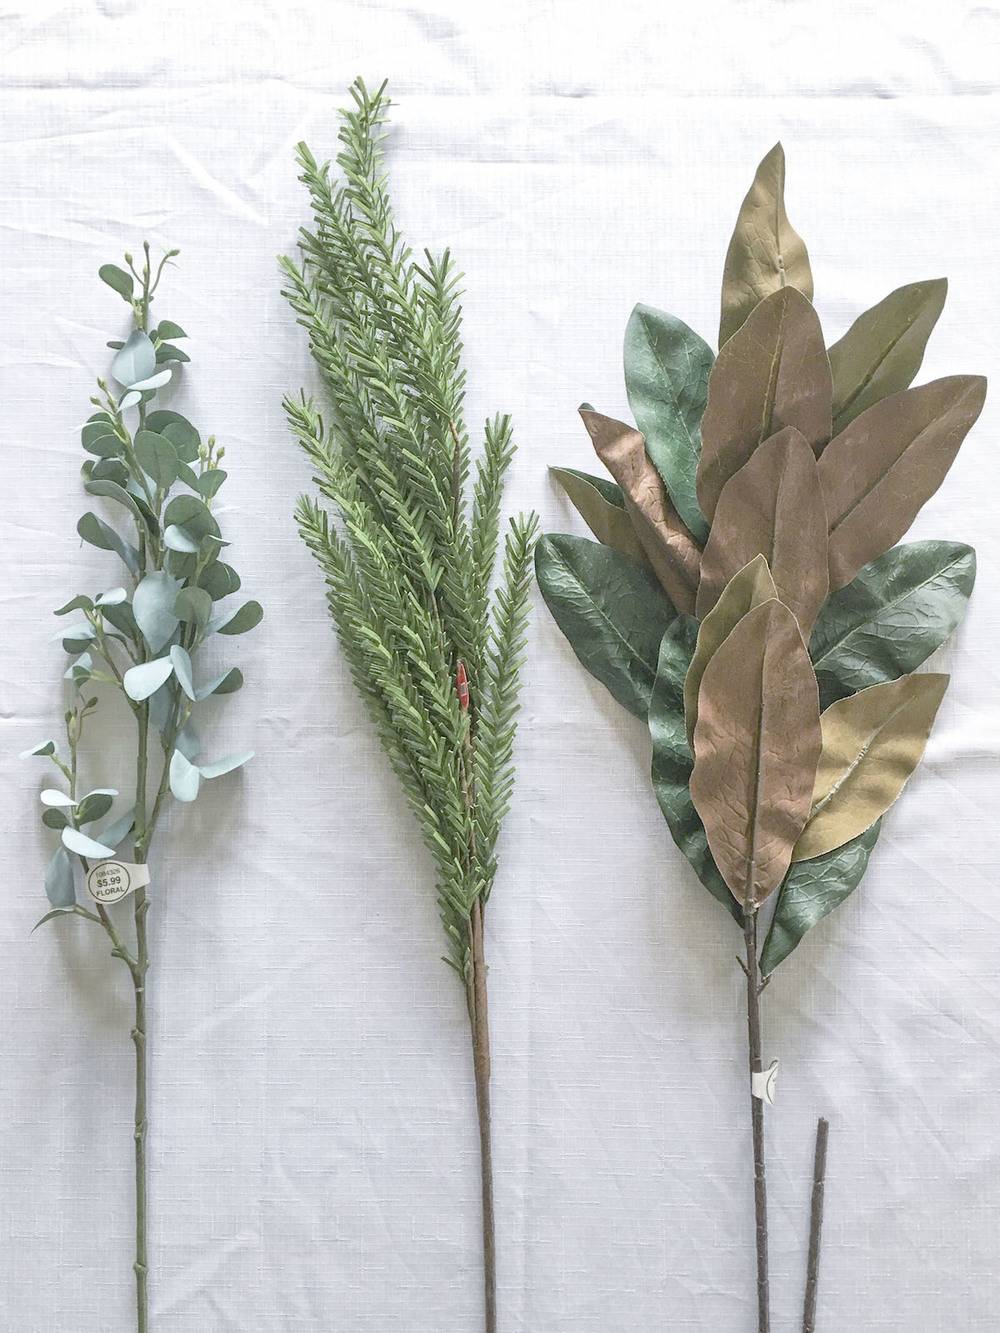
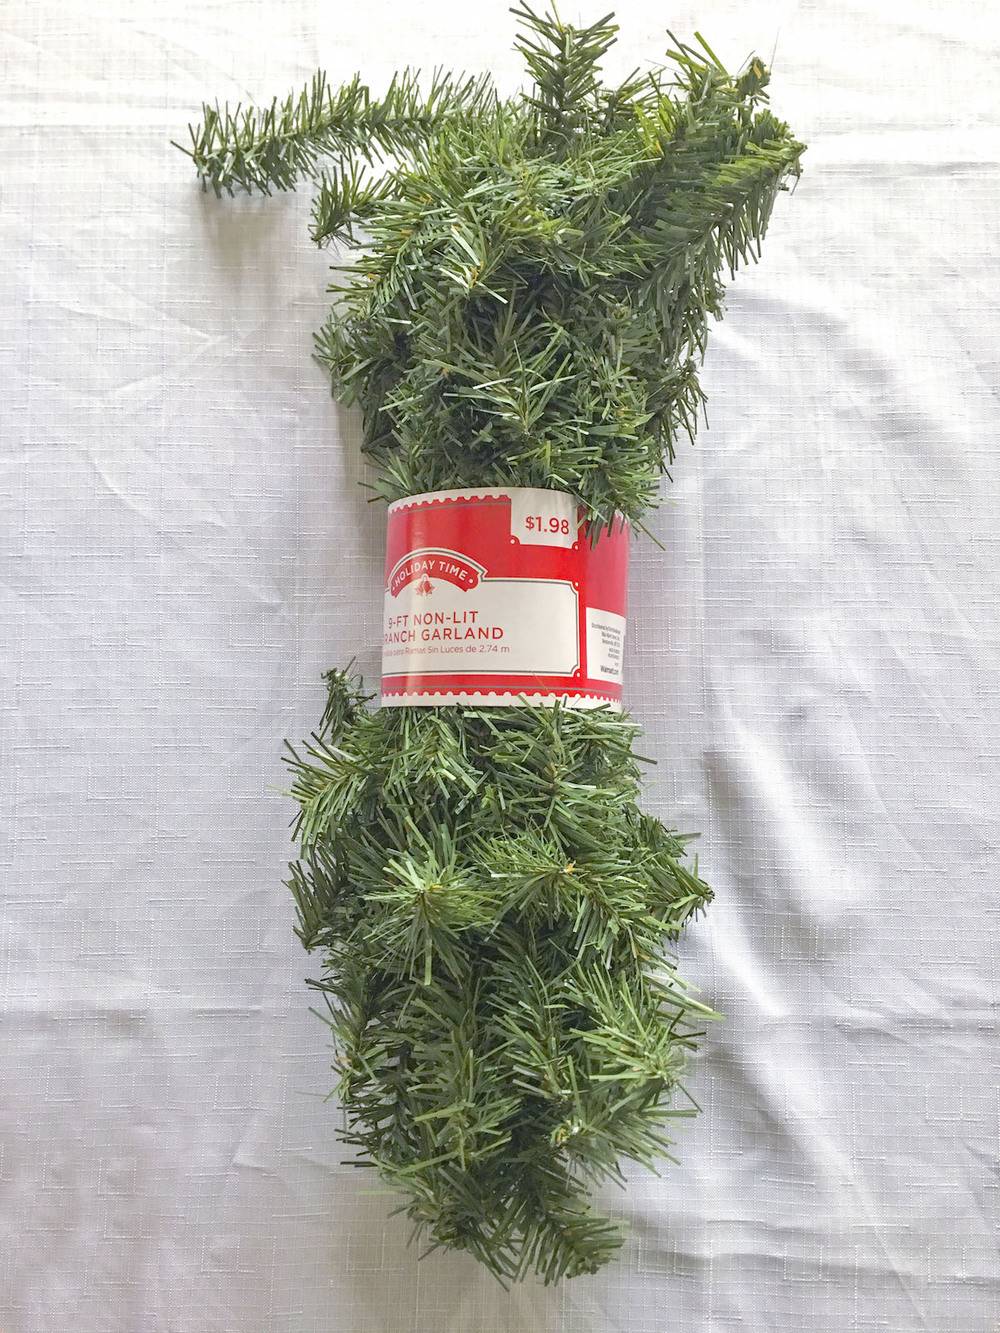
The inexpensive Christmas garland will be your base. You need at least two because really cheap garland is typically very skinny (you’ll be twisting them together). I happen to have a huge fireplace mantel so I needed 4 garlands for my base, which cost a total of eight dollars! I purchased two of each of the floral stems. Total Cost of my 18 Ft. Garland: $25.00 ….and some change Step
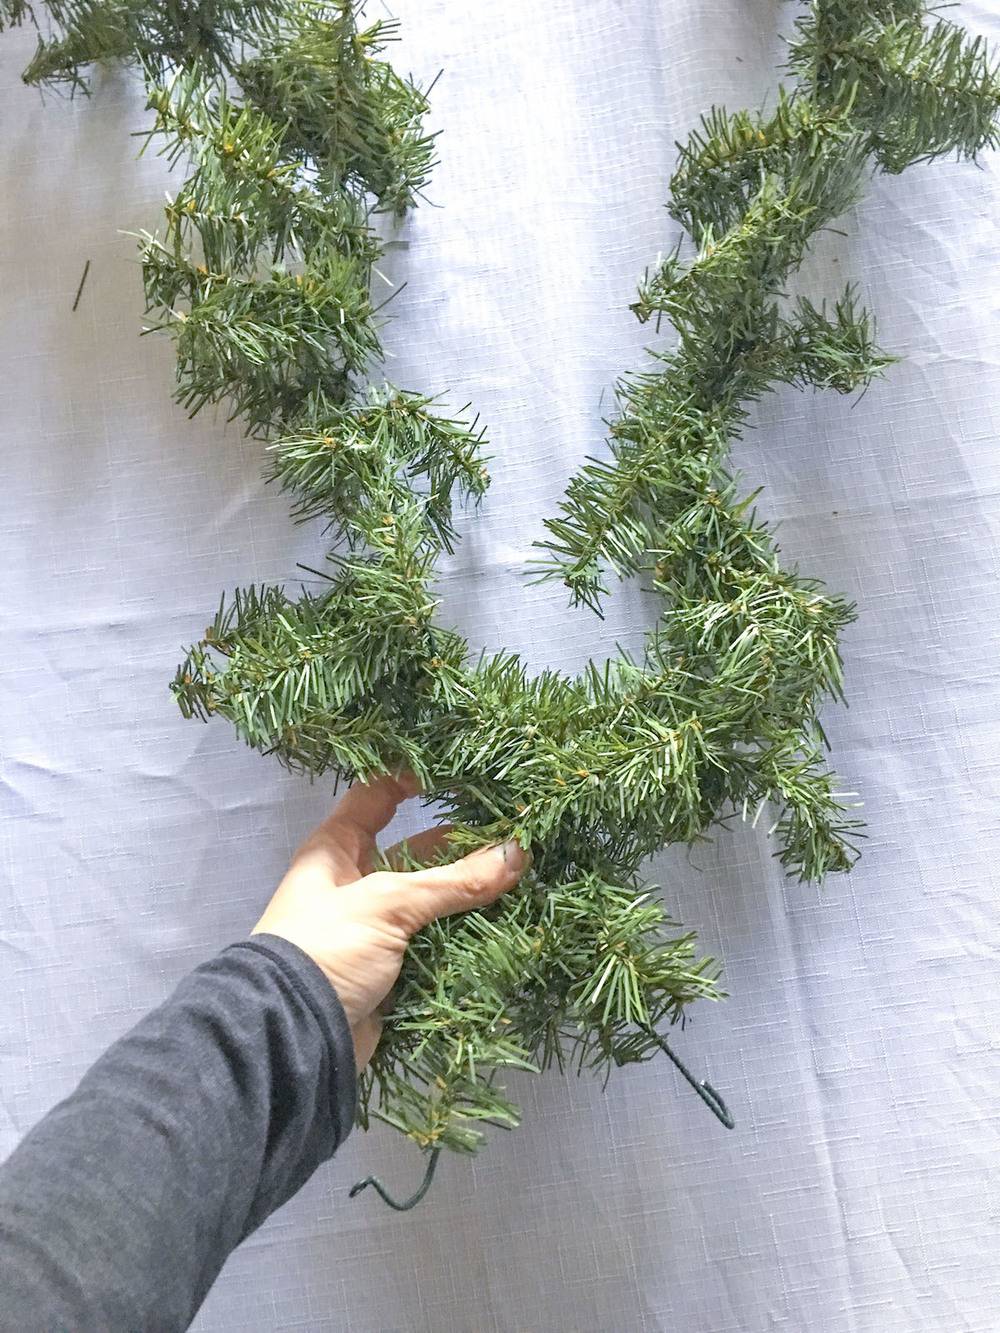
Unwrap your garlands and lay them side by side. Twist your garlands together. Begin and end your garland by twisting, but to keep the middle together, you can switch to using a single wired pine stem from one garland and wrapping it around the base wire of the other garland. Once your two garlands become one, fluff the garland.
If you need to make the Christmas garland longer, before you twist, use the wire on the end to wrap around the connecting garland’s middle wire then fluff your pine needles around it. After this, start twisting your two longer garlands together.
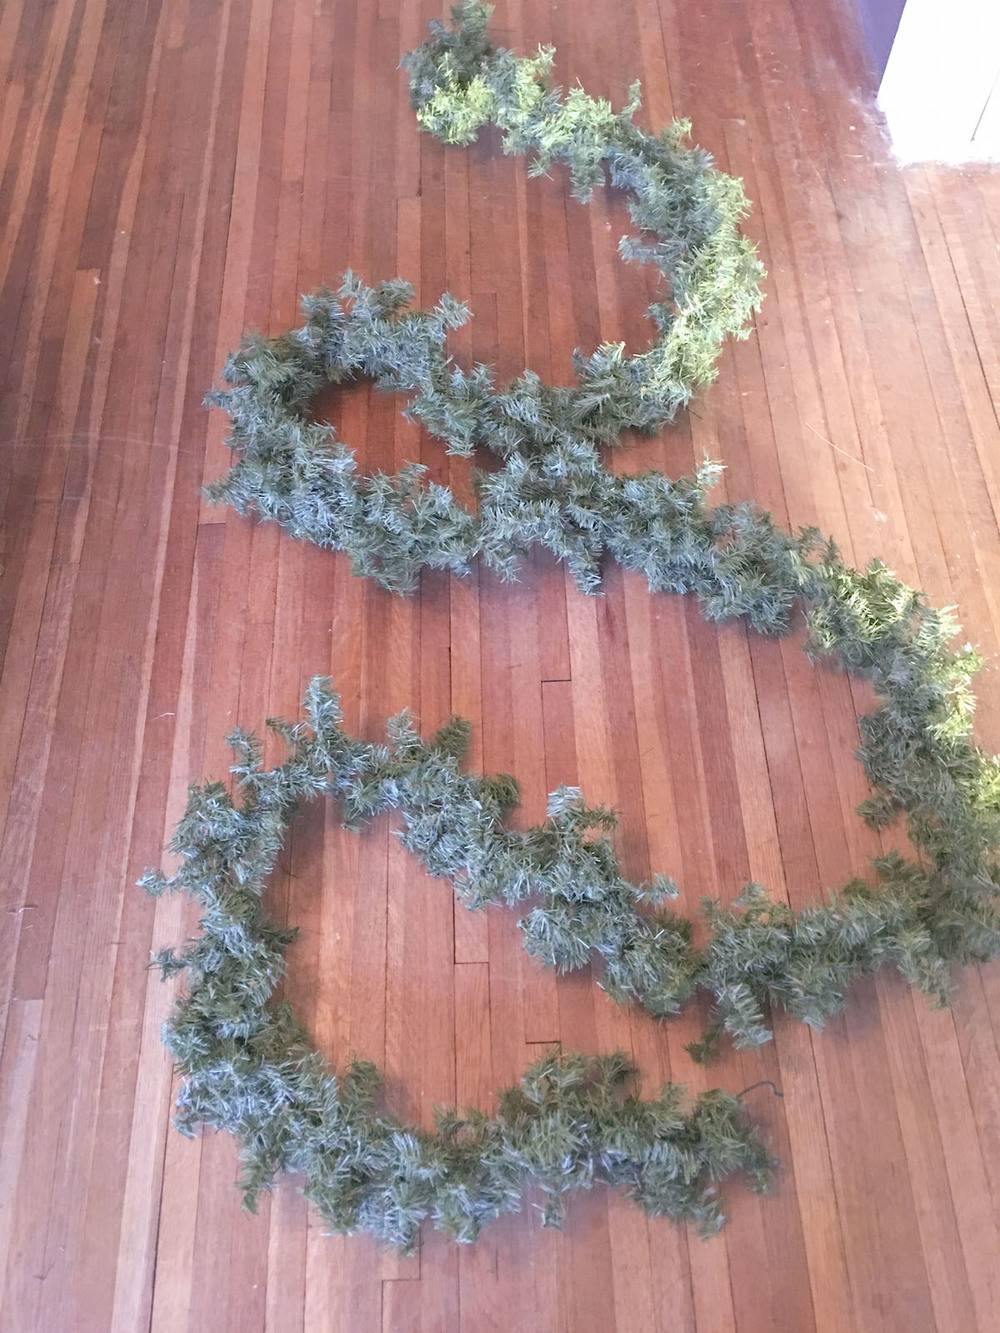
Here was my 18-foot garland after Step 1. Please excuse my unfinished wood floor in dire need of refinishing … someday.
Note: I didn’t want lights in my garland but if you do, at this point you want to add your lights.
Step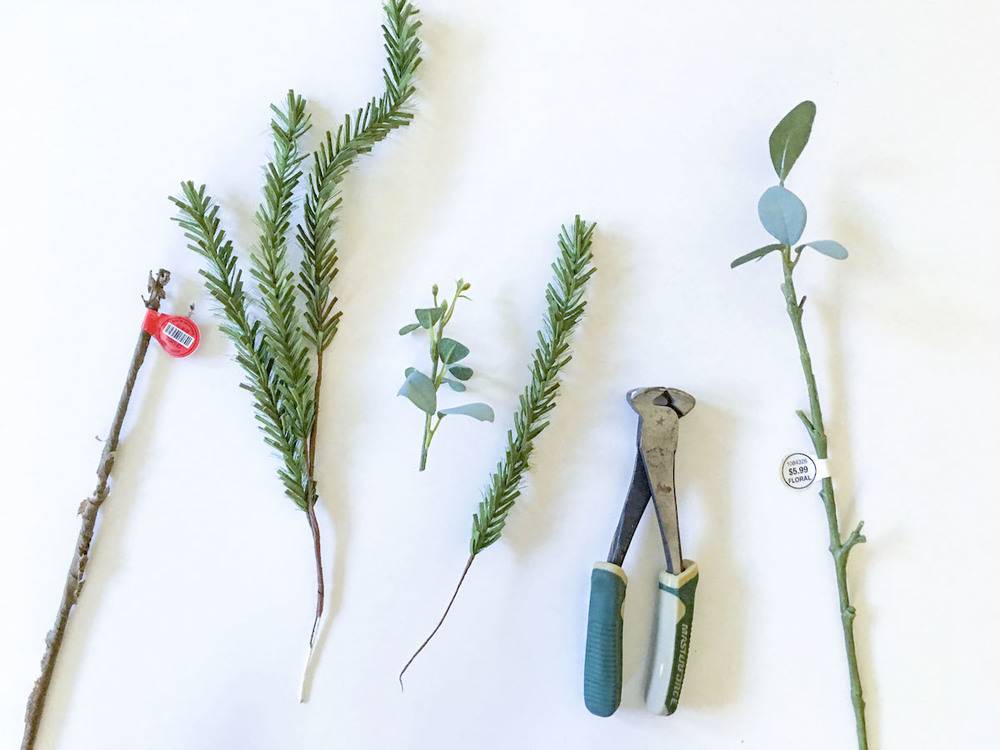
Clip apart your stems. I did this randomly, keeping some in a cluster and some as singles. This all depends on how your garland rest; you’ll have to play with it a little to get it just right.
Tip: Hang your garland from the first step on your mantel and secure it into place first, then add the cut floral stems.
Step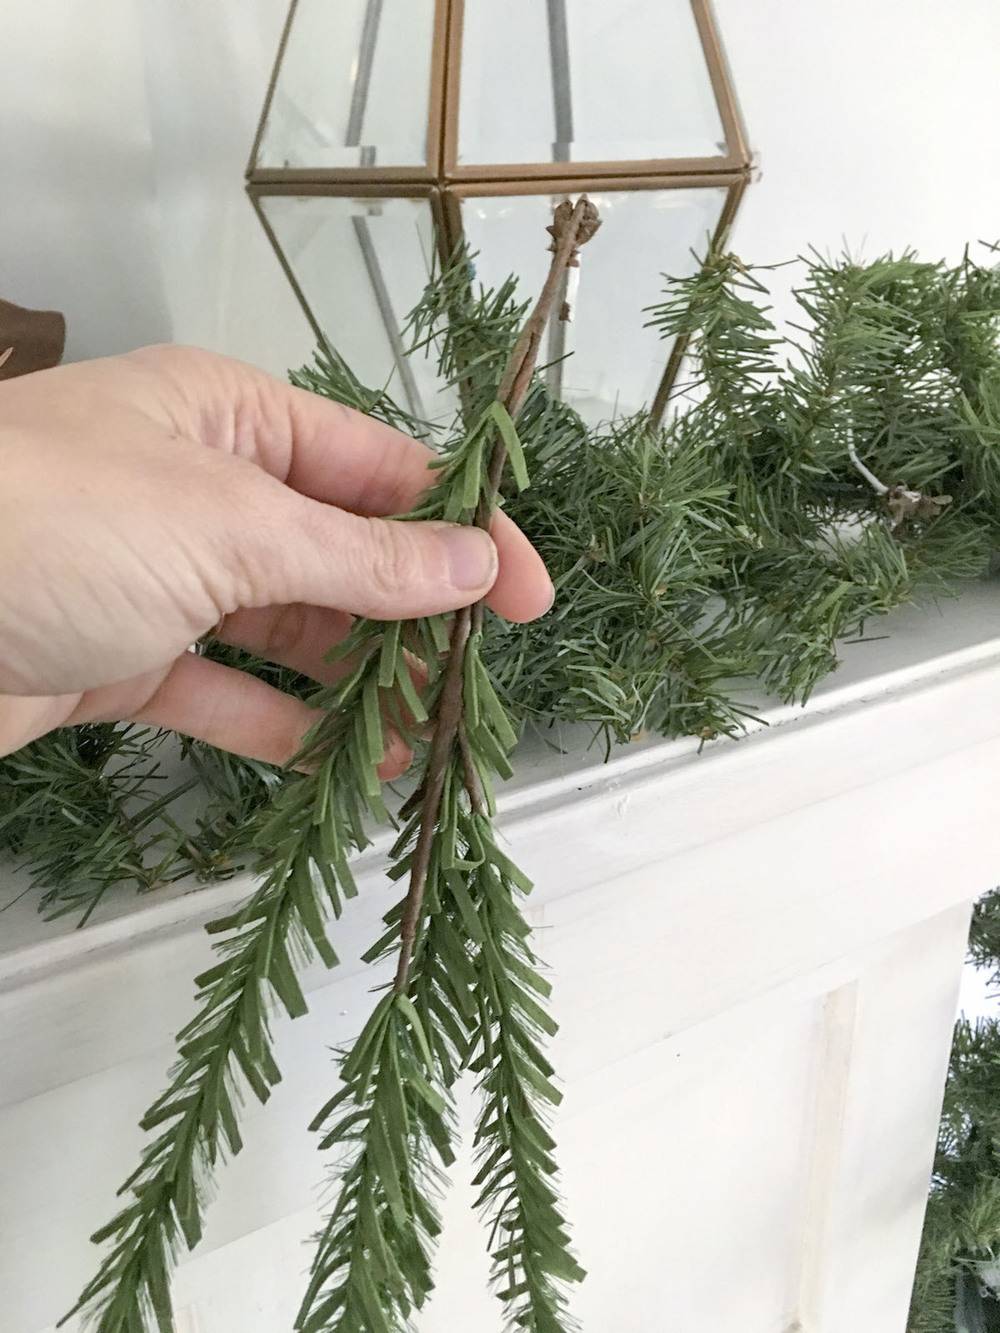
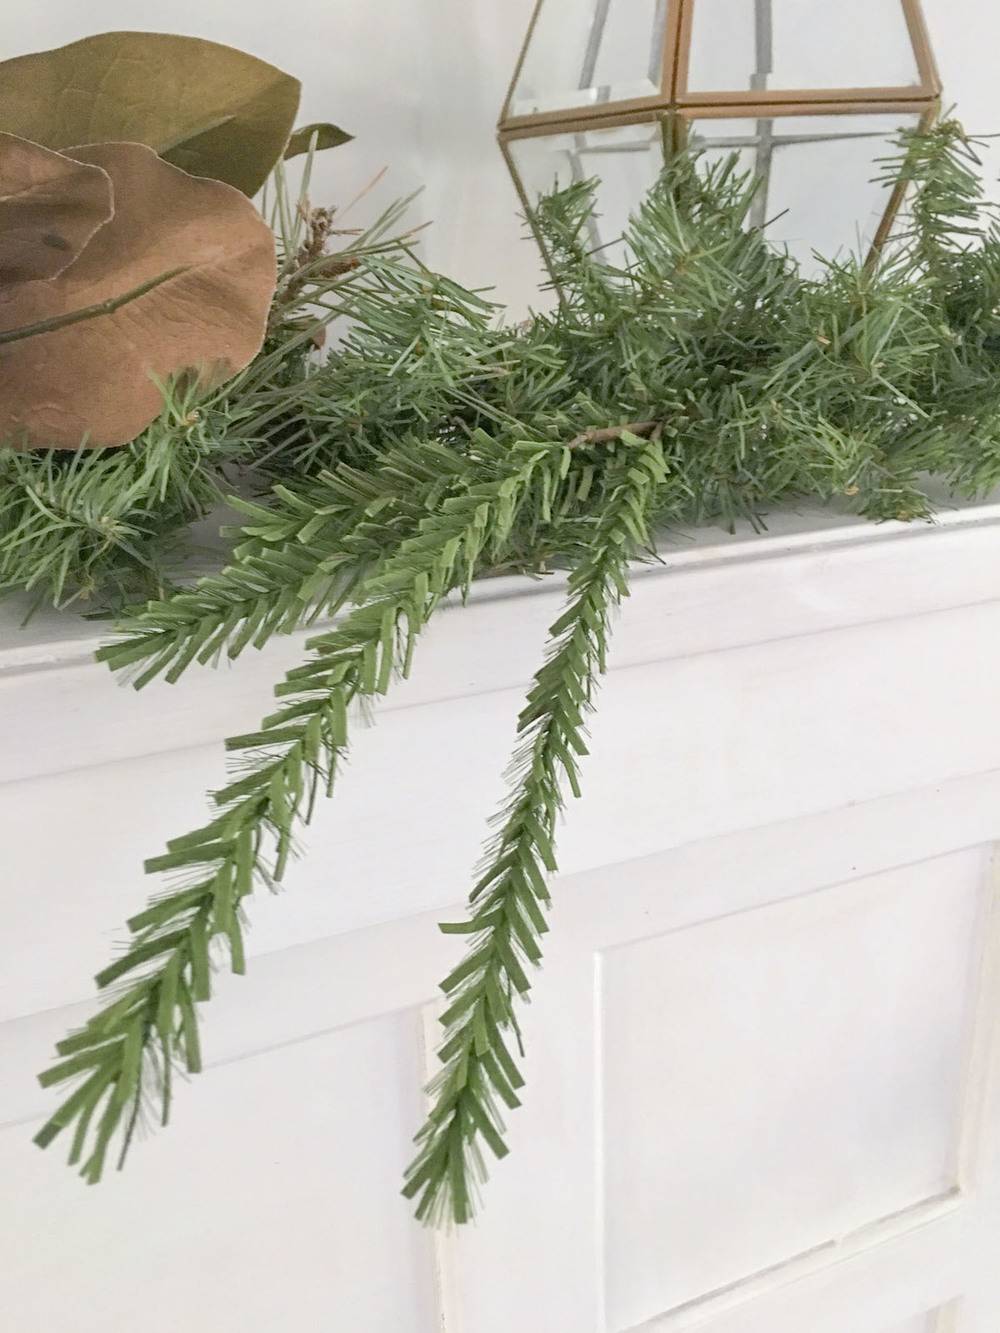
First add your draping evergreen. I added it in the places I wanted it to go along just the top of my mantel first. Save some for your sides. Step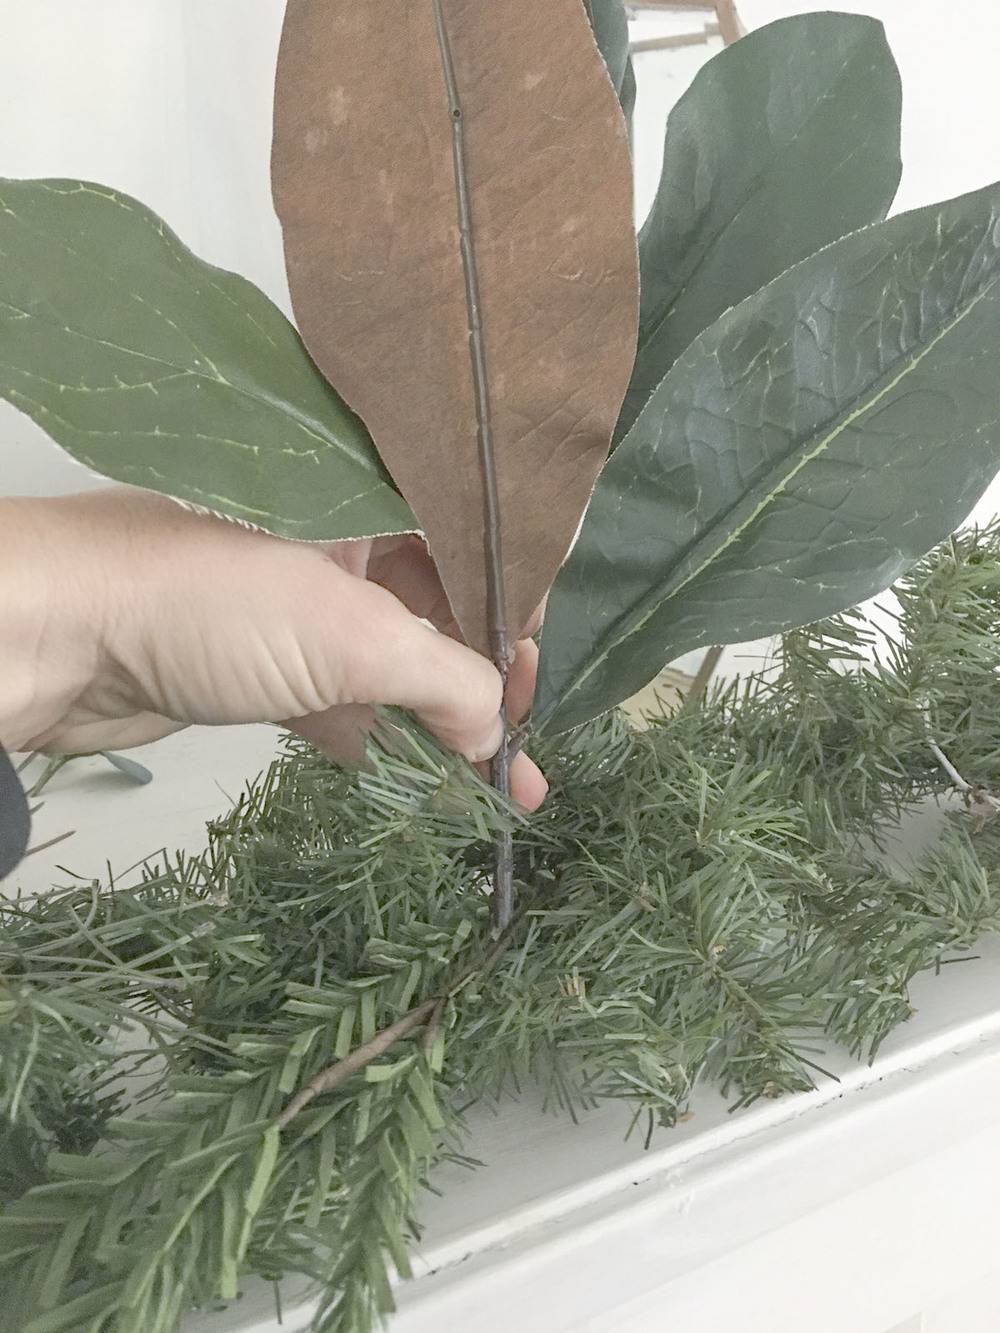
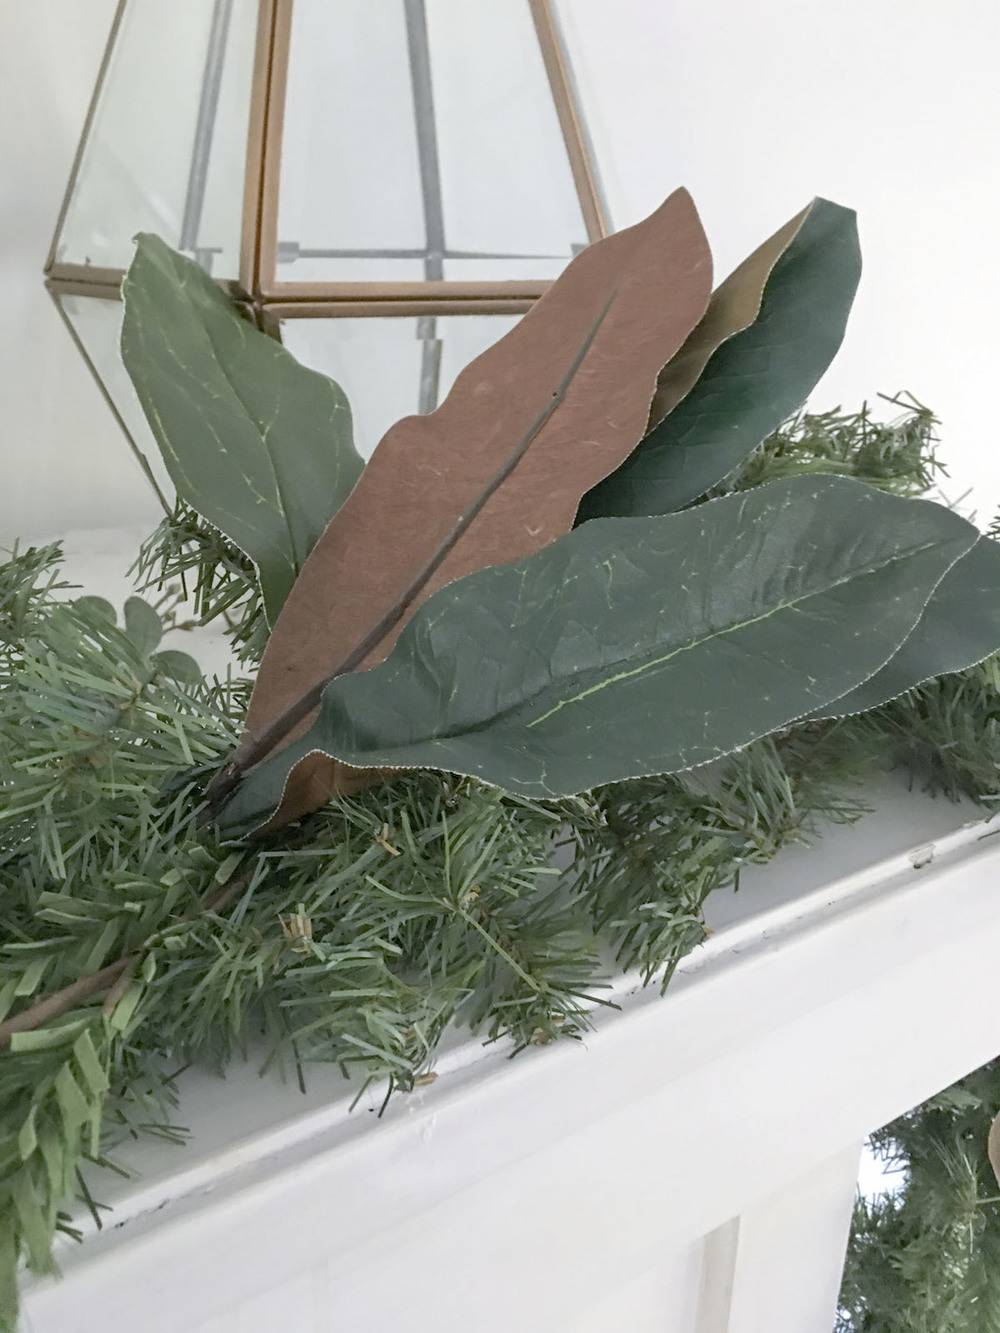
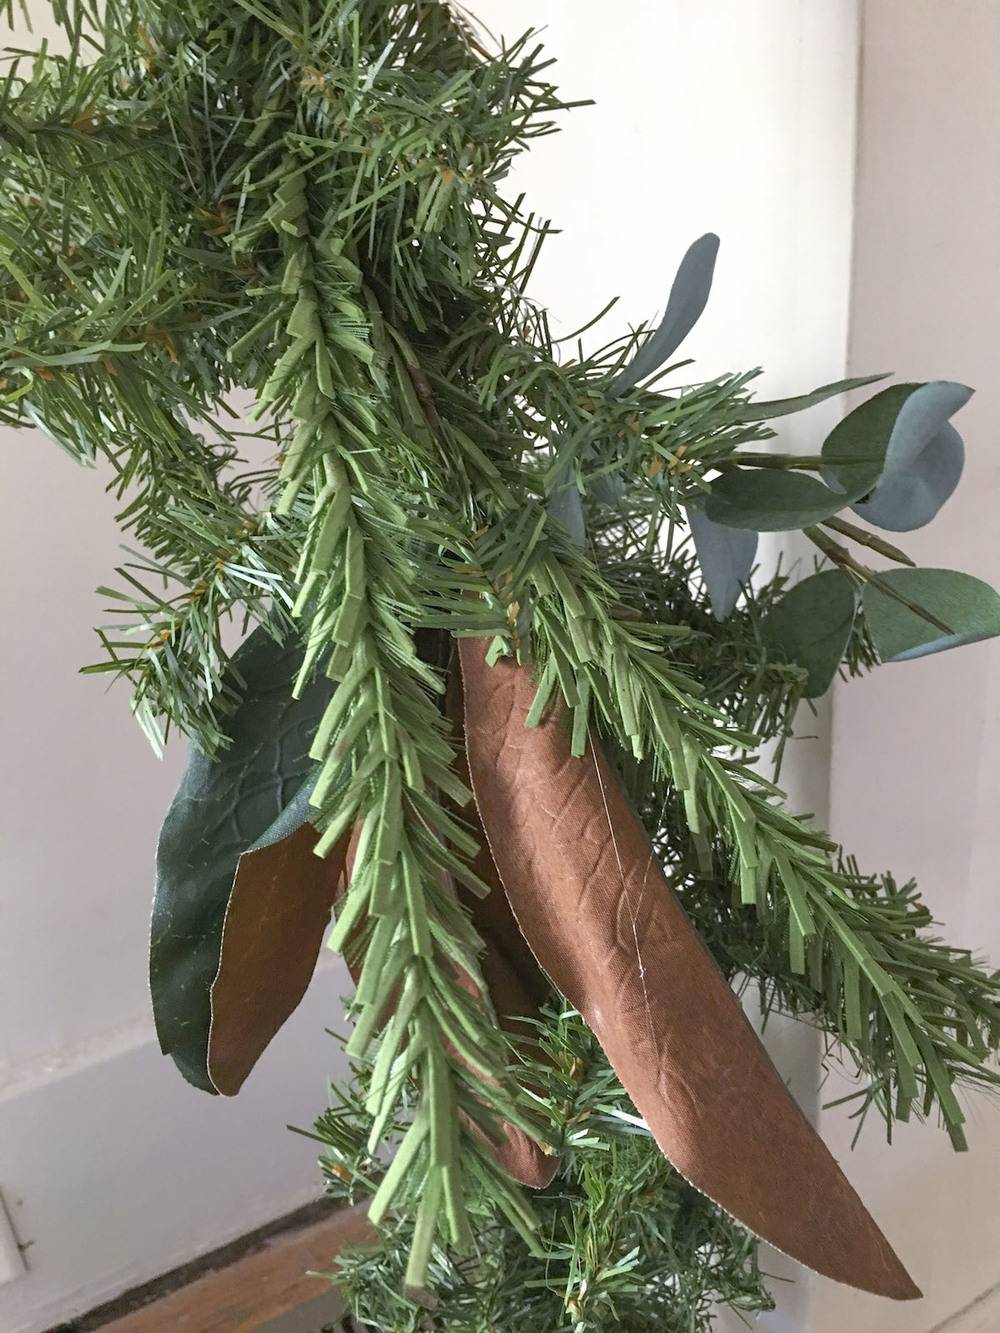
Next, cut bunches off your magnolia leaves from the stem and slip them into the greenery where you have placed your draping evergreen. You can secure them with hot glue. I just simply wrapped the excess stem of the magnolia bunch around the middle wire of the garland then fluffed the pine stems to hide it. Do this for the entire garland.
Note: You can easily take off the leaves of the magnolia bunch. I thought more than 4-5 leaves in a bunch looked a little crowded so I just simply took a few off. I used those single leaves as well (see step 6).
Step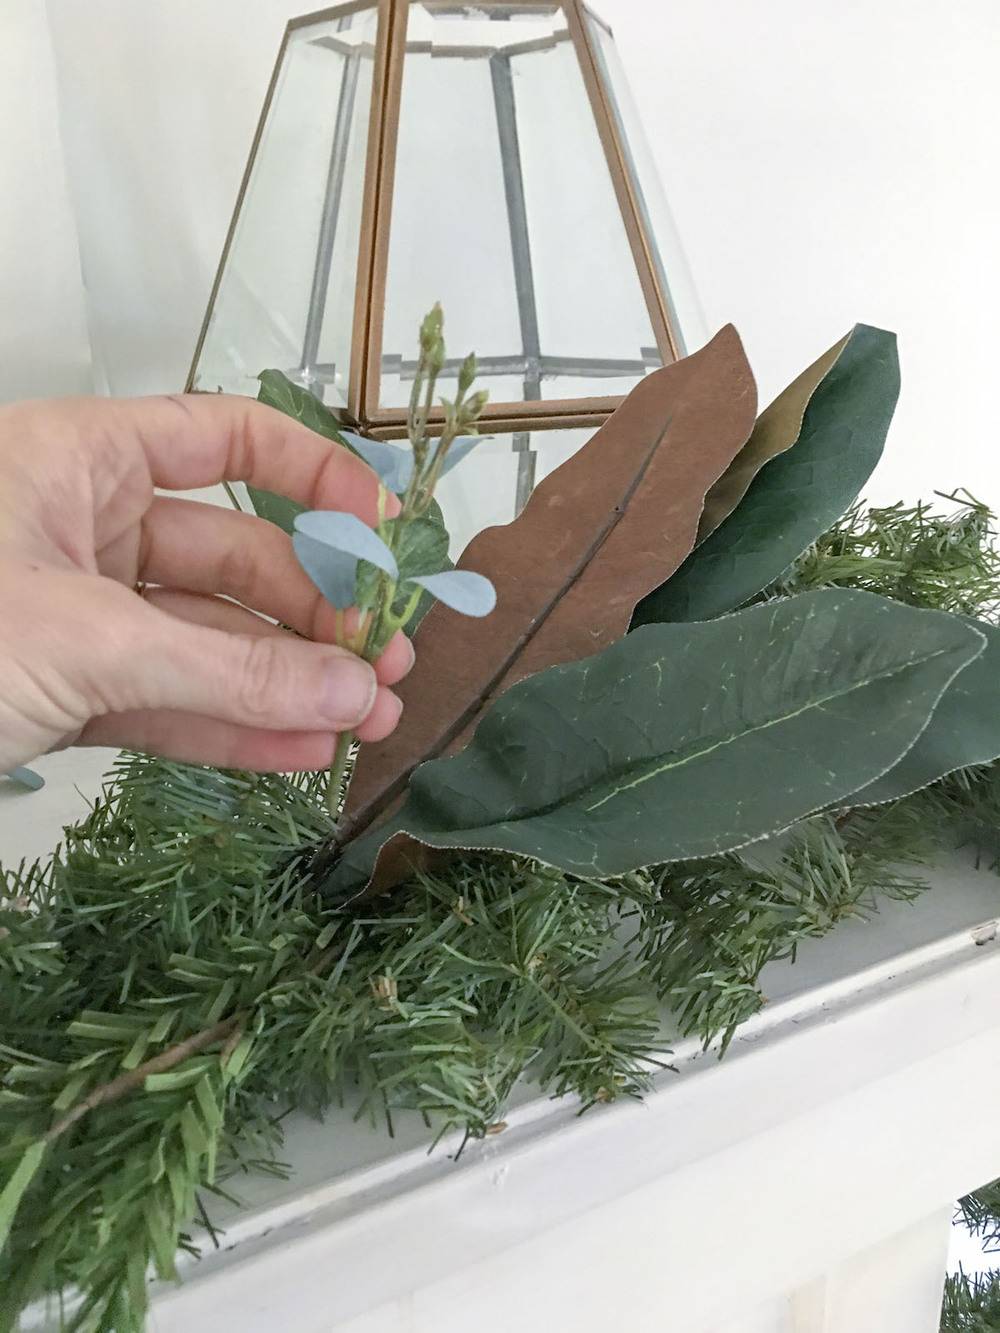
Add a little sprig of the Eucalyptus floral. 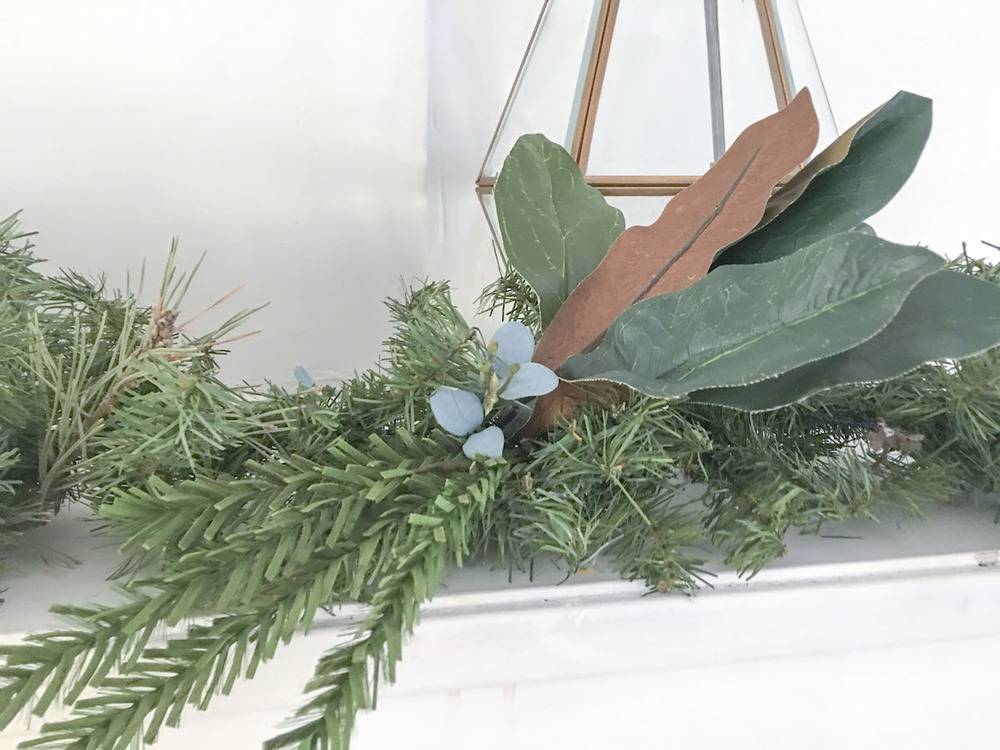
This was what each of my “bunches” looked like. Some were bigger and some were smaller. Step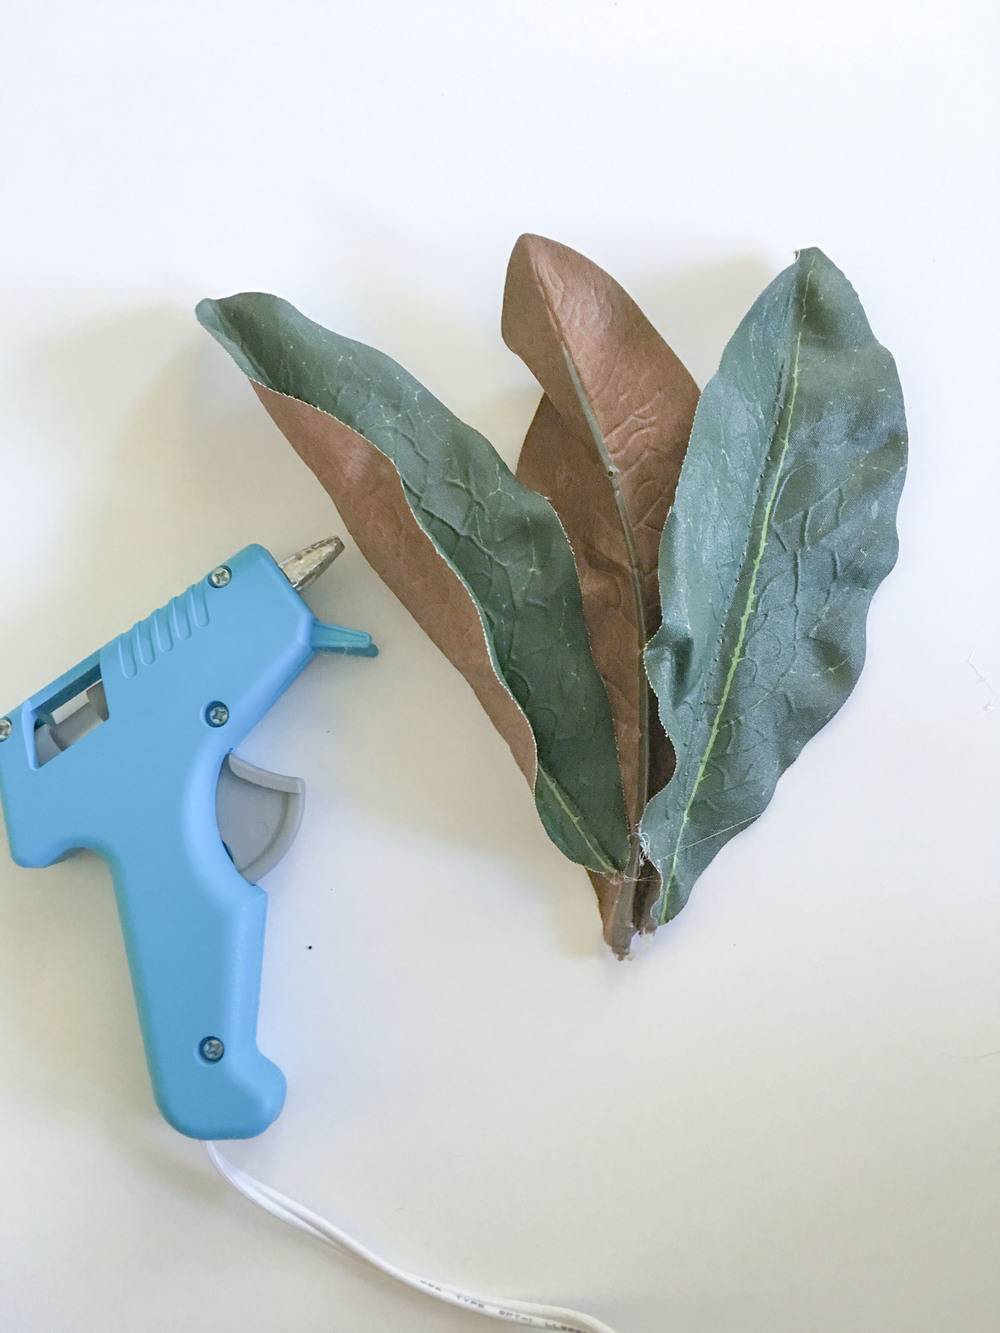
To make use of the single leaves I took off from a larger bunch, I glued them together in twos or threes. 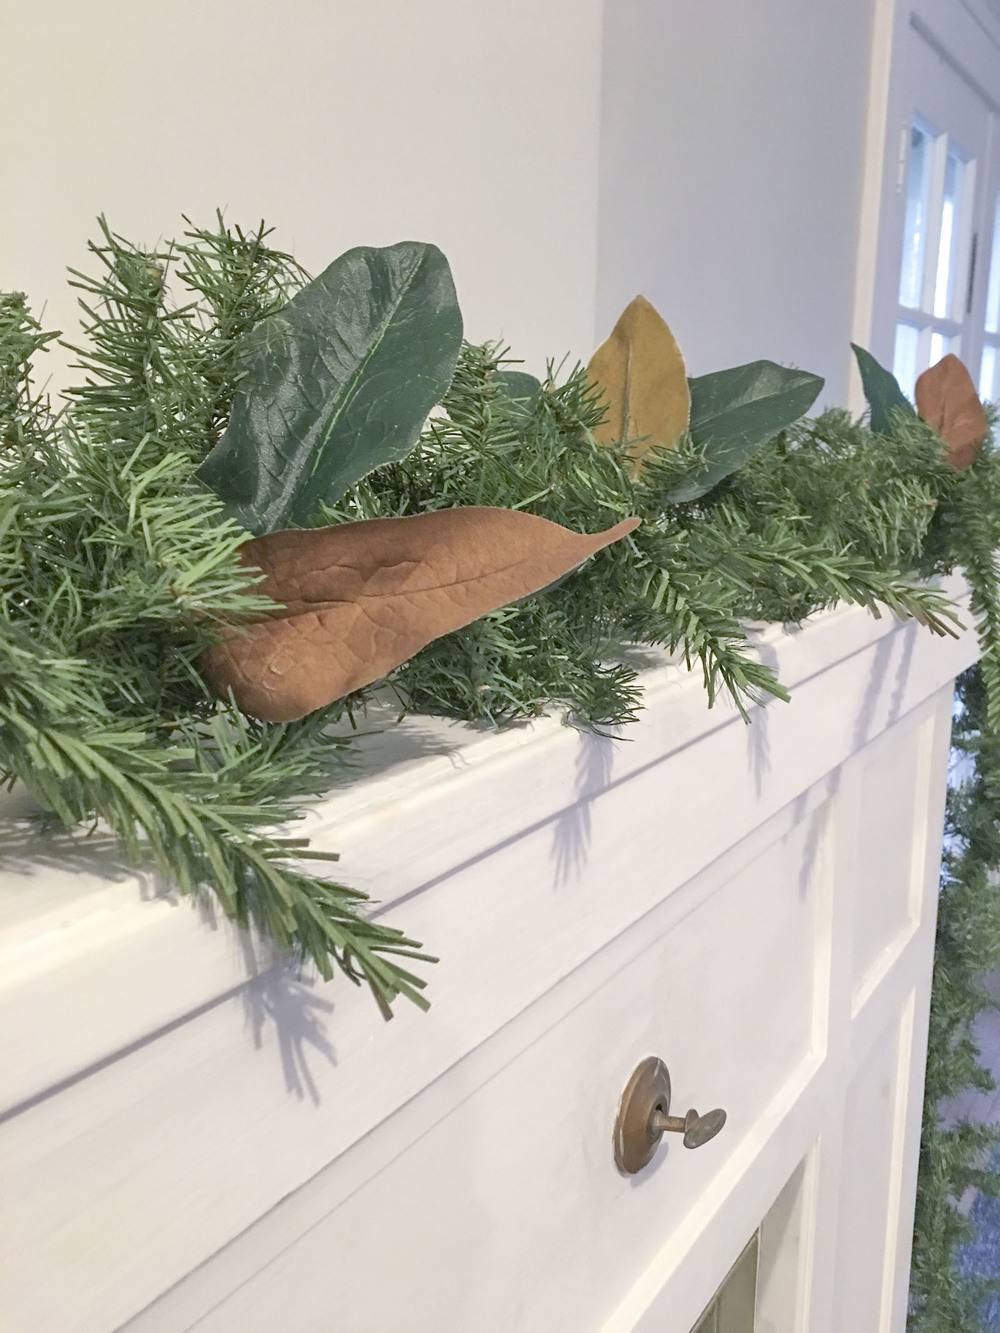
After gluing, I would add them into the garland. If they are not staying in place you could add a little dab of hot glue to your base garland. Step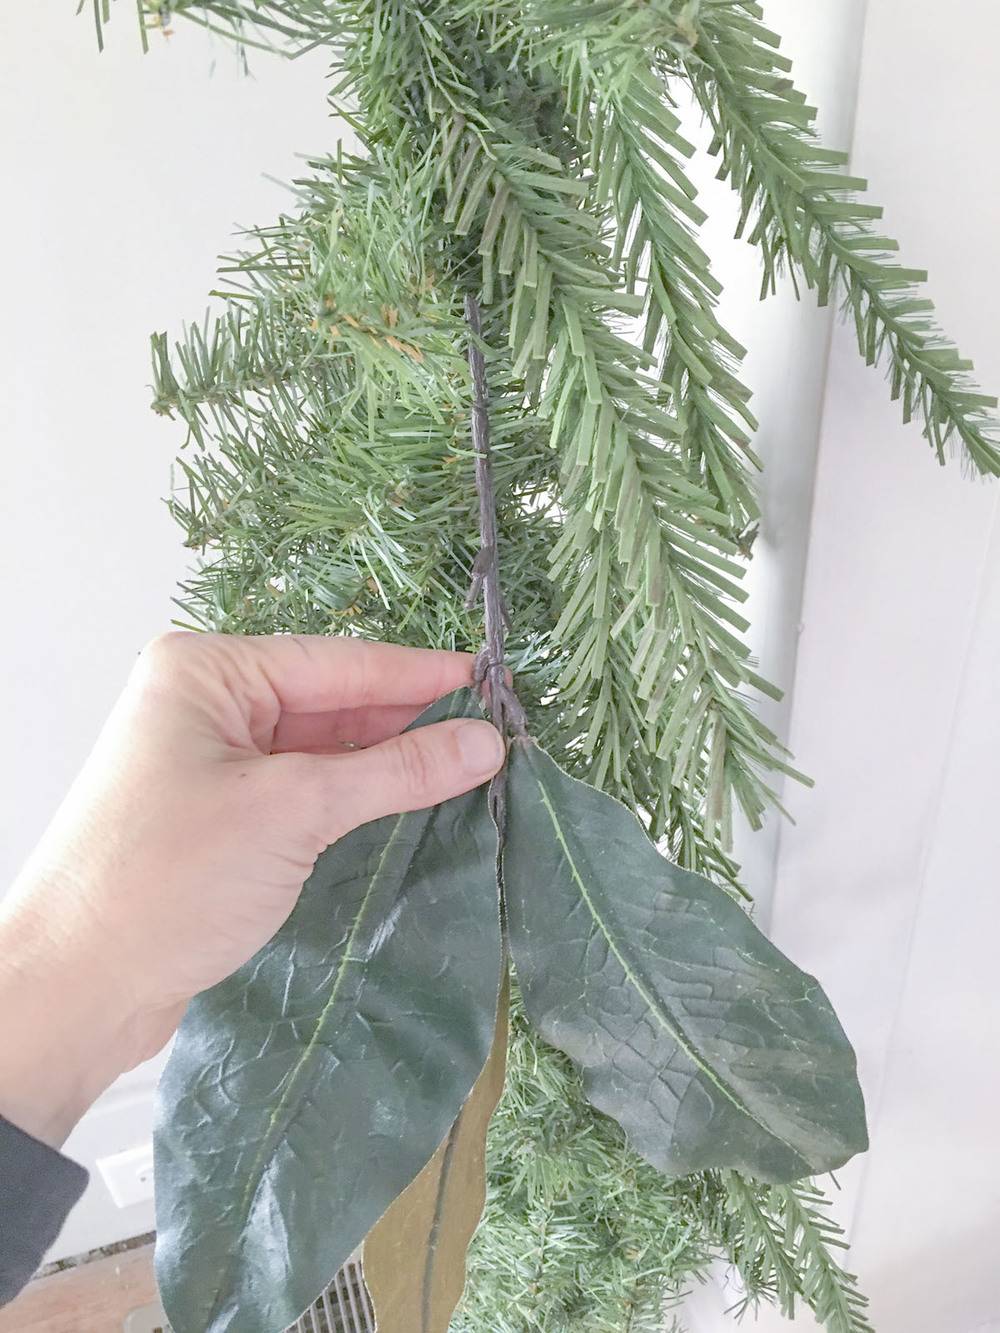
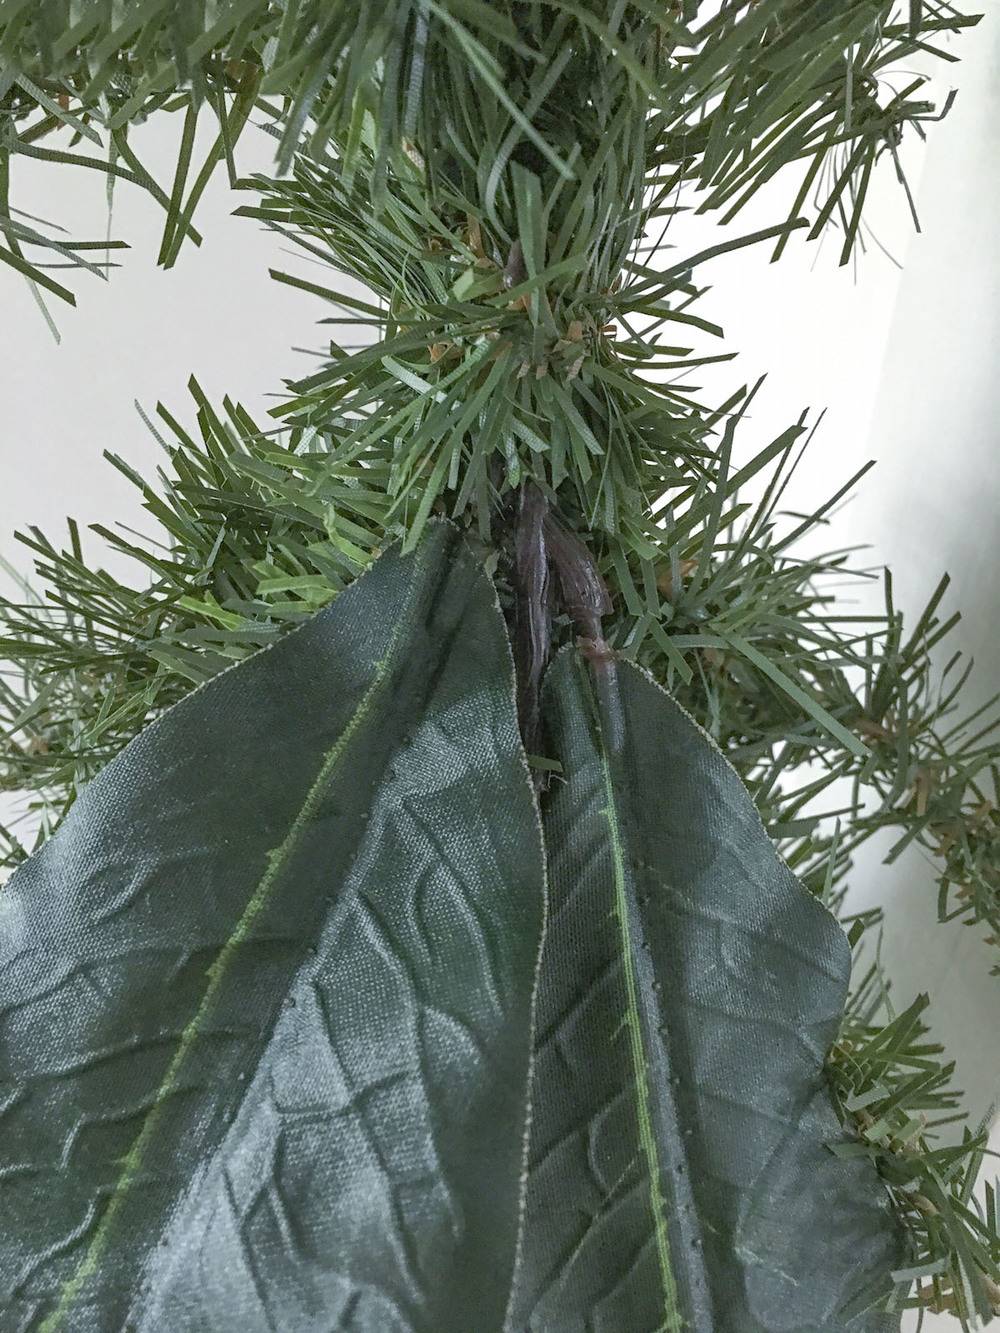
Now it’s time to add to the hanging part of the garland. For the draping evergreen and the Magnolia leaves, I simply wrapped a single pine stem around the cut stem of the floral. Fluff around the twisted stem to hide it. (Has anyone counted how many times I have used the word “fluff” in this post?) Step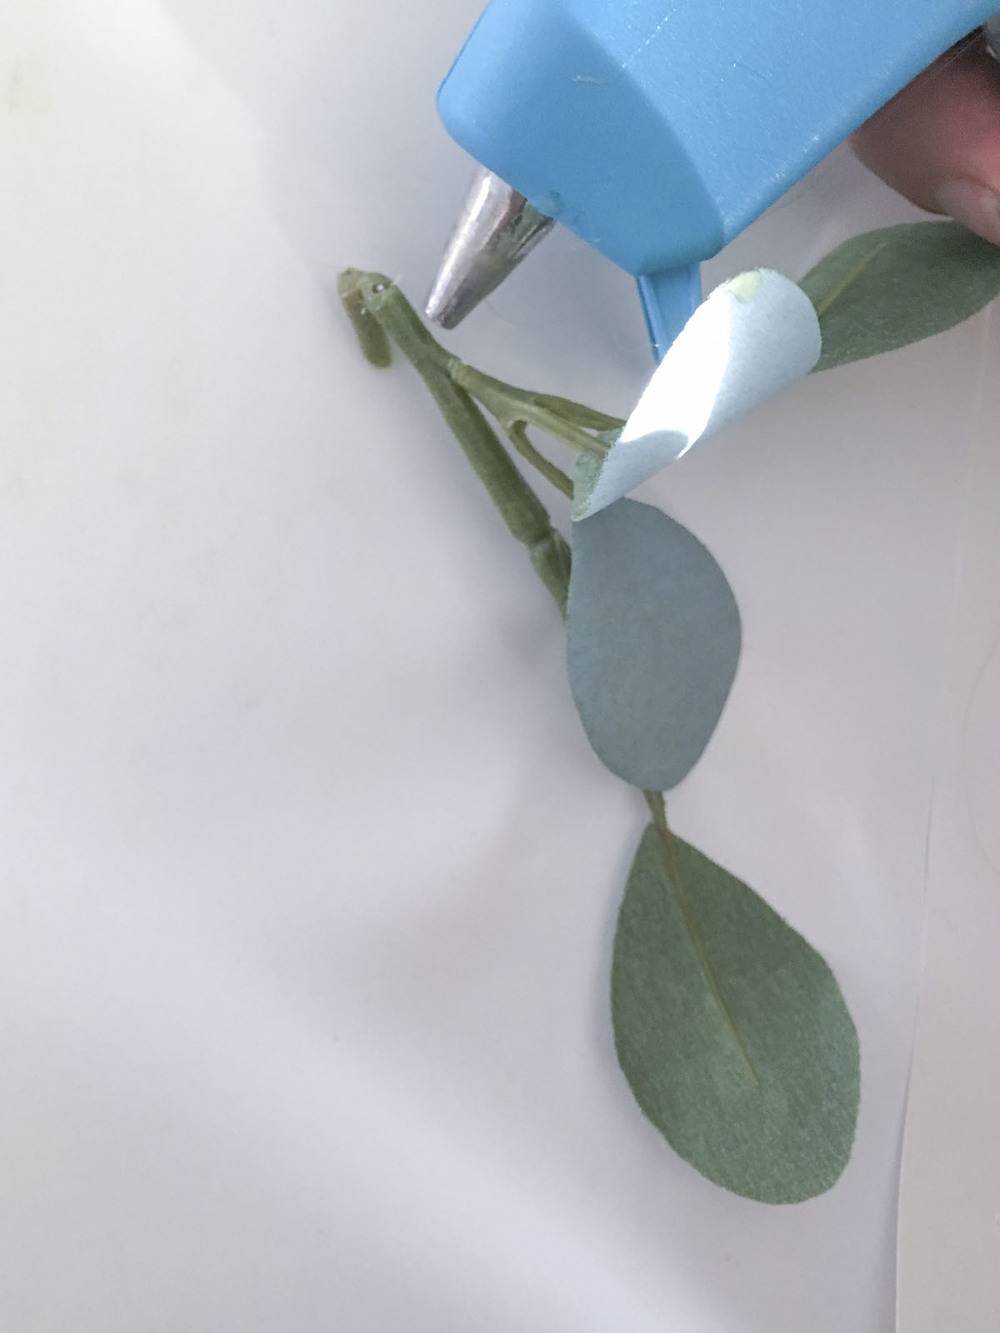
To keep the Eucalyptus stem in place you will have to add a little dab of hot glue. 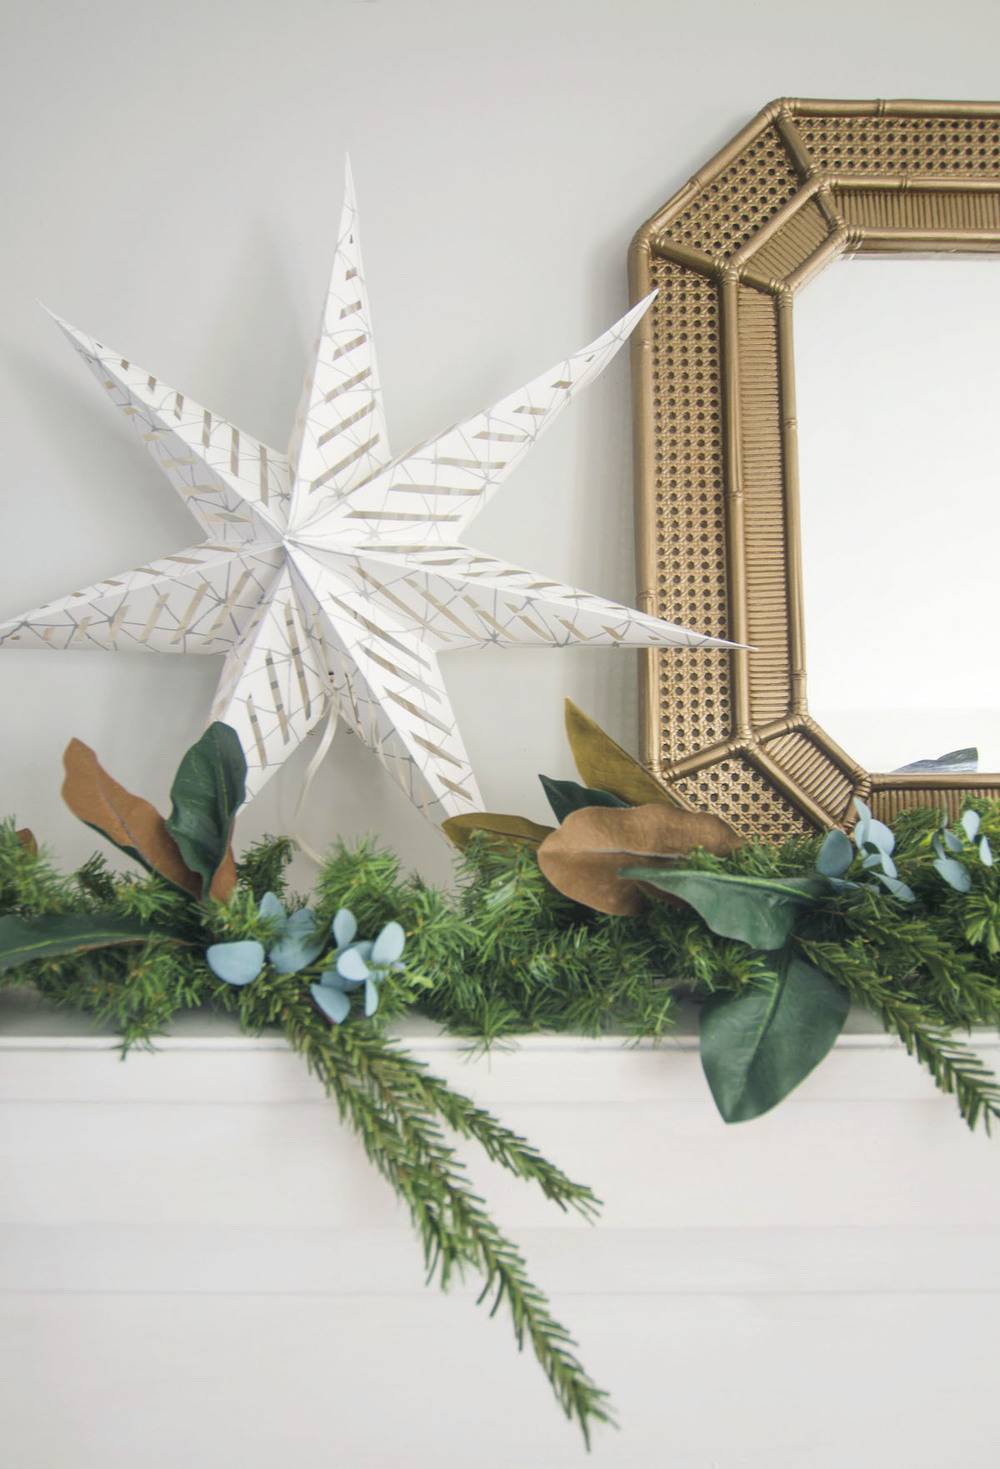
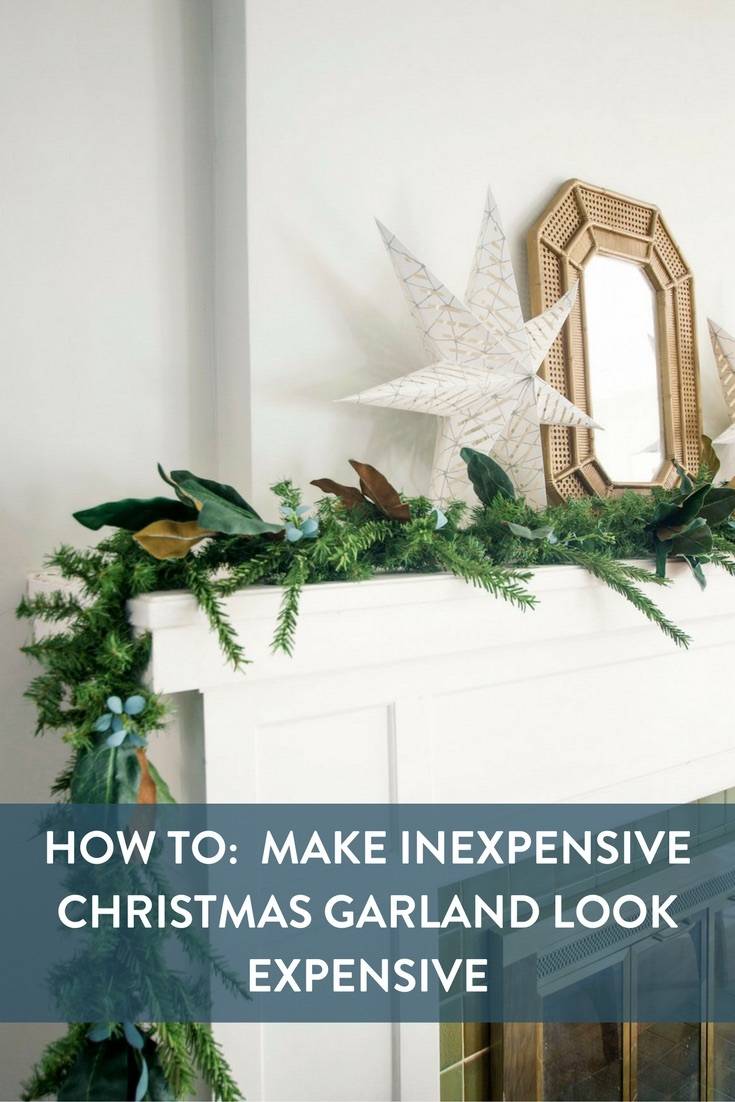
I love the way my garland turned out. It is unique and inexpensive. 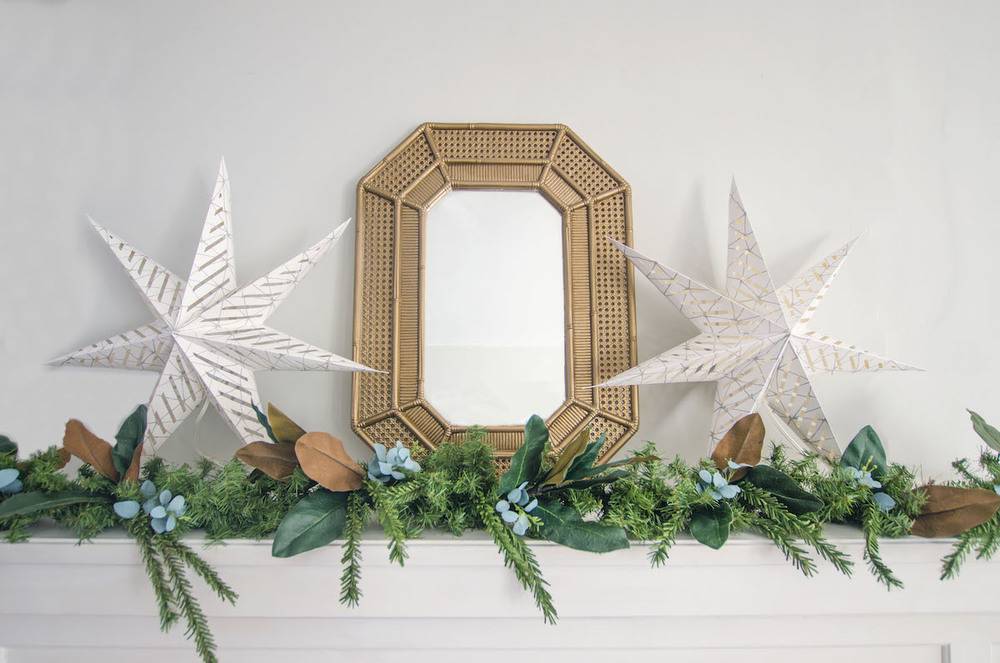
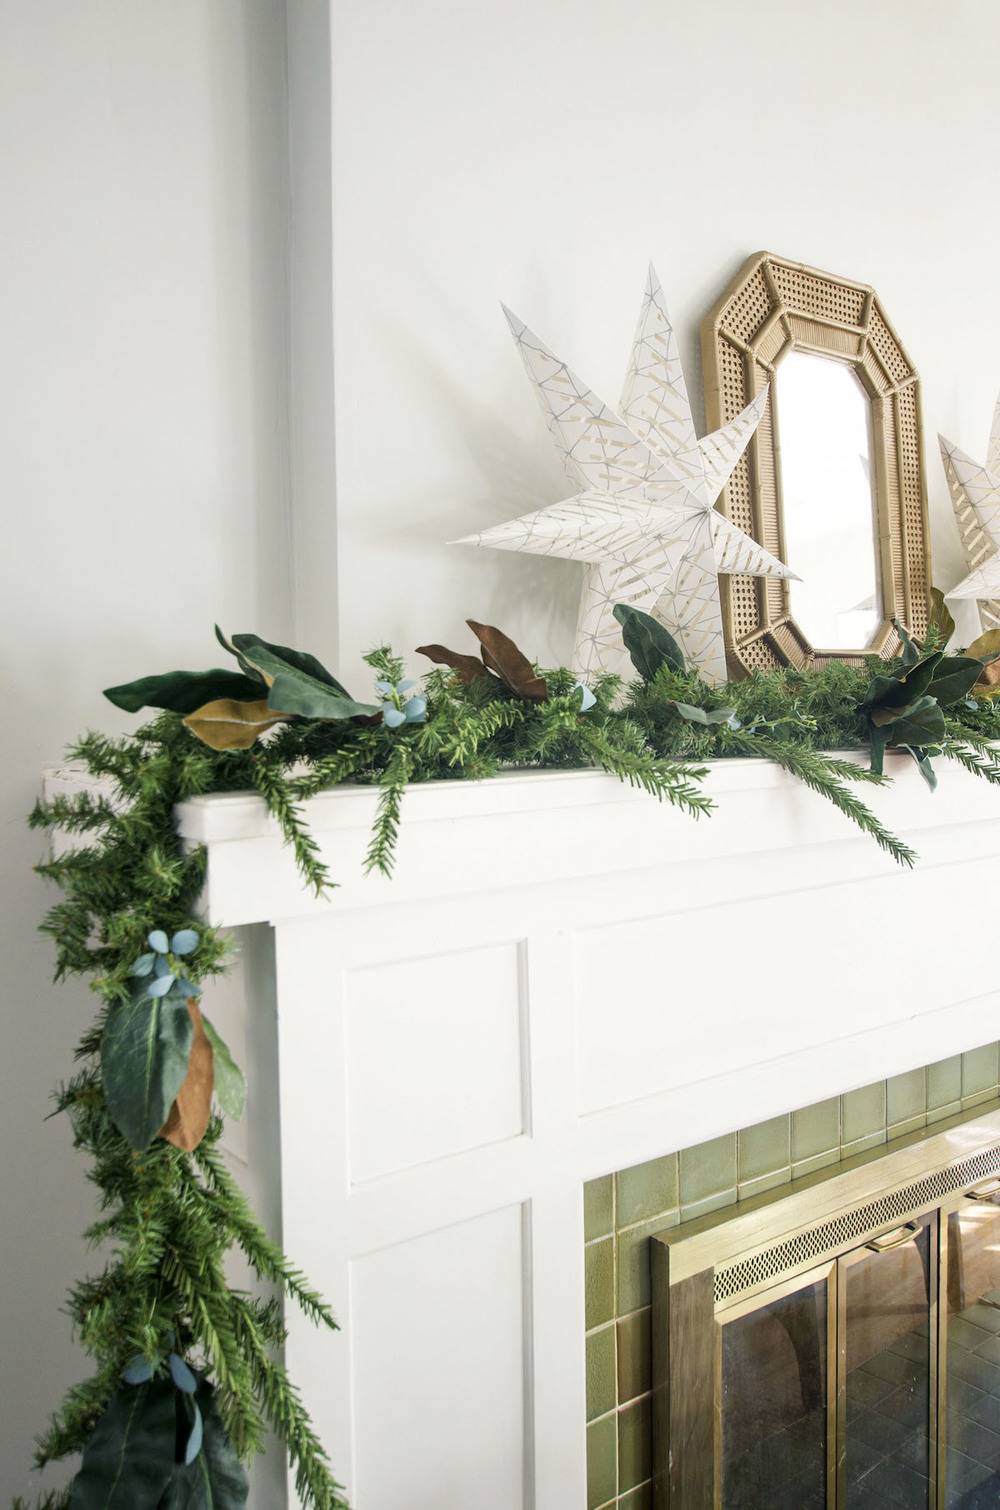
Yes, it is fake, but adding in the layered stems really helps to make it look real. 
When Christmas is over, I will deconstruct it (what is not glued) and store it all together. I might even add to it next year. I think these paper magnolia flowers would be a pretty addition. 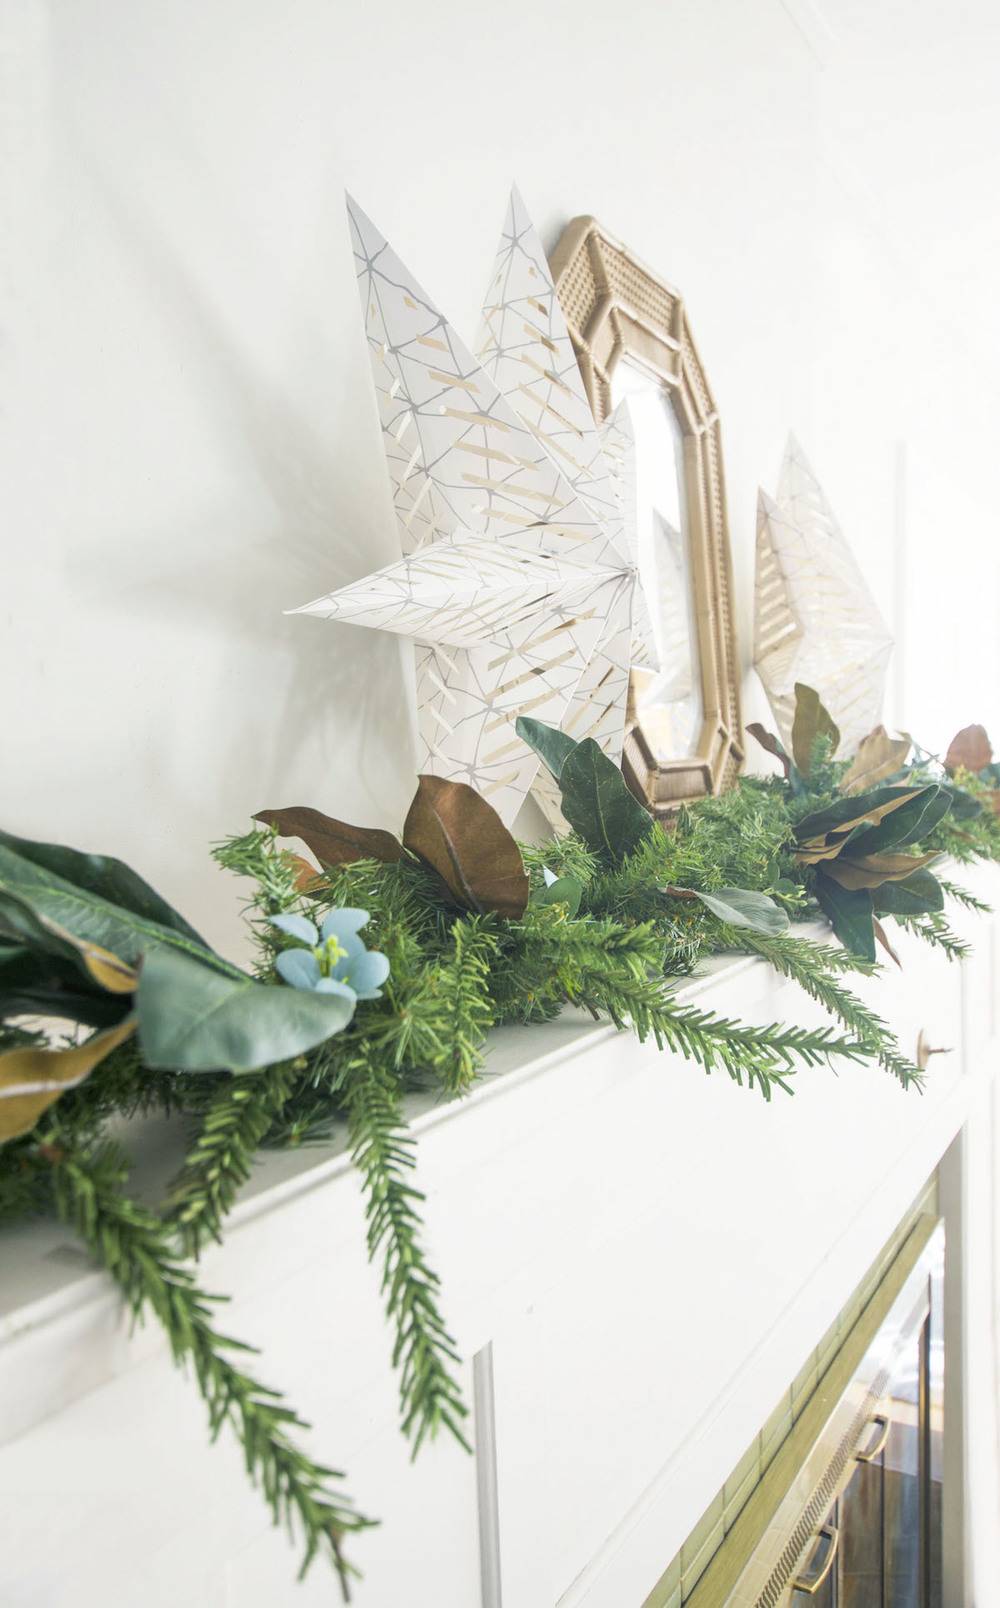
Have you had better experiences than I have with making real garland greenery last in a heated home? Please comment your tips below!
Want more Christmas DIYs? Here is a simple DIY Advent Calendar for your family to enjoy.
The post How to: Transform Christmas Garlands and Make Them Look More Expensive appeared first on Curbly. Via https://www.curbly.com/christmas-garland-improvements 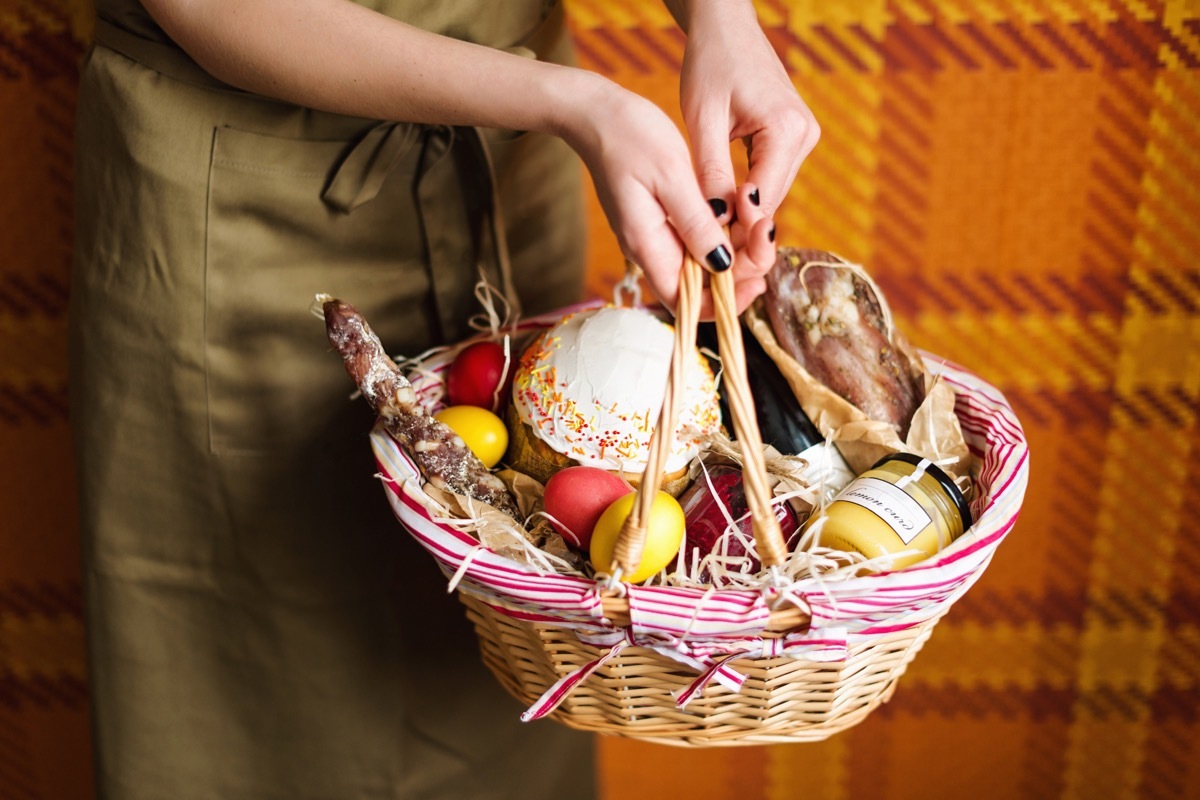
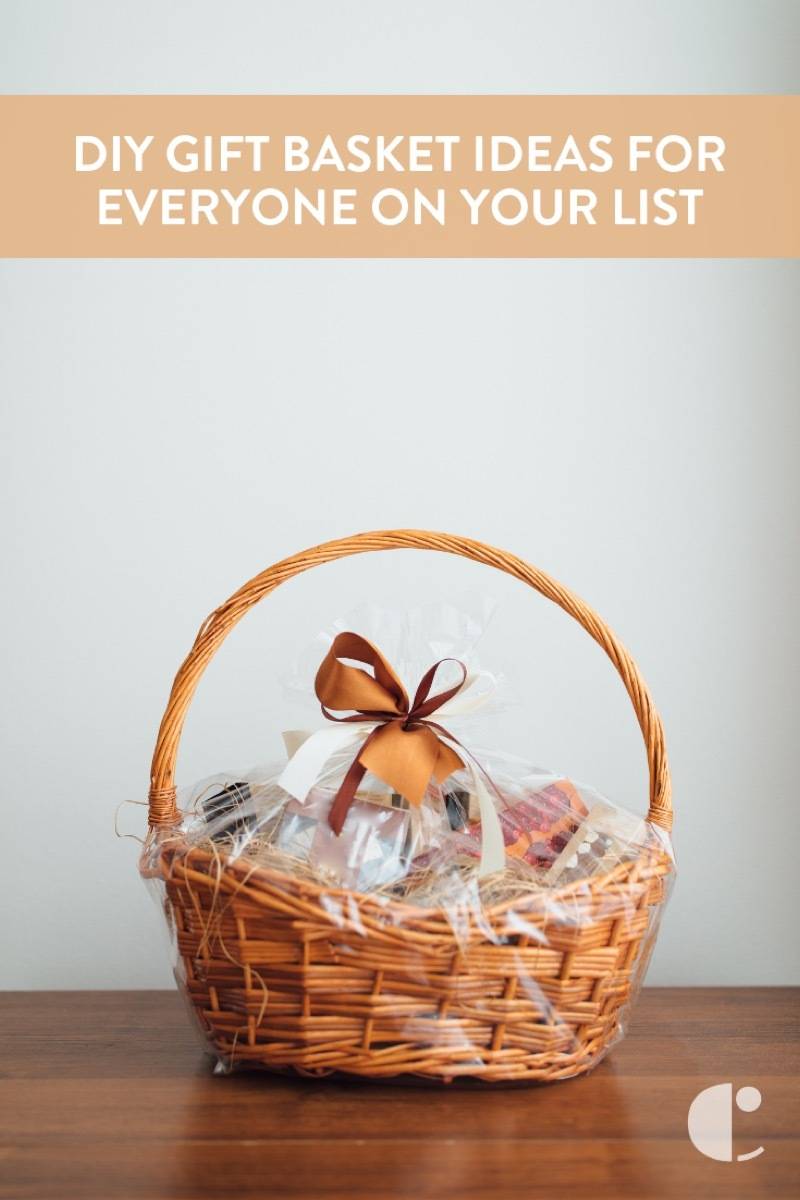
Themed gift baskets make amazing, affordable, and memorable gifts. The key is to pick the items carefully and to pay attention to the presentation. Here is a complete list of our very favorite gift basket ideas for everyone on your list, plus money-saving tips and tricks on assembling DIY gift baskets! Who likes getting gift baskets during the holidays? The better question is: Who doesn’t?! The best gift baskets are the ones filled with stuff we love. The problem with lots of gift basket ideas, however, is the expense. Costs can rack up quickly when you fill a big, beautiful basket with a little of this and a little of that. When all is said and done, that stuffed basket might blow your Christmas gift-giving budget to the moon. There are, however, some Christmas and holiday gift basket ideas that are actually budget-friendly, thanks to our DIY natures and some really great tutorials floating around on the internet. How to Choose a Basket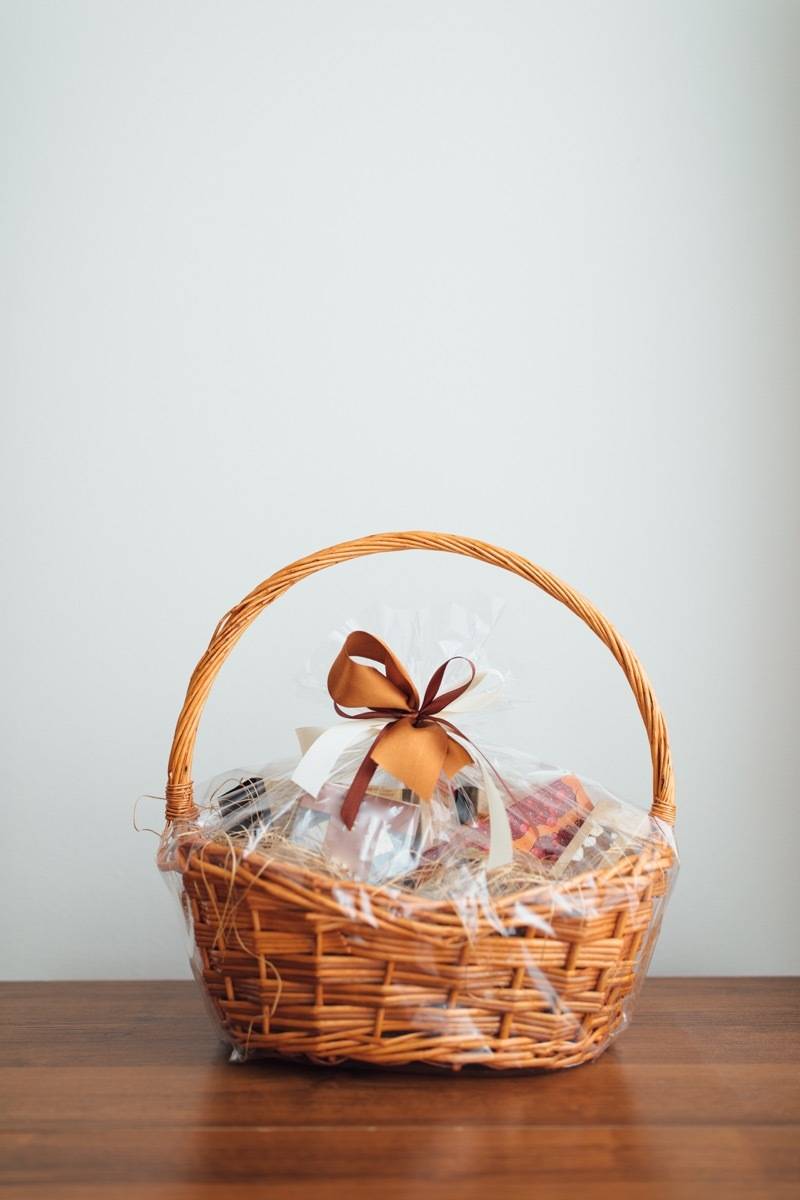
Before we get started, let’s talk about the baskets. The single most important thing to keep in mind when choosing a basket is size. Remember, a big basket is going to cost more to fill, and if you choose not to fill it, then it looks sad and you look cheap (Seriously. It does. You do.). A better rule to live by is ‘smaller basket filled largely.’ When choosing a basket, always opt for smaller rather than larger.They’re less expensive to fill, and a big basket scantily-filled looks sad. The better option is to go with a small basket and fill it to the gills. Opt for Inexpensive BasketsOkay, so you’ve decided to go smaller with your basket choice, but even those can be expensive. The trick is to find good-and cheap -alternatives. Here are some that come to mind:
Be sure to use the basket best suited for the occasion. If you’re making a Christmas gift basket, for example, use an appropriate material for the holiday. Useful and Utilitarian BasketsWe mentioned using cardboard boxes wrapped with pretty paper for a basket to keep costs down, as well as re-using gift baskets and thrift store baskets that can be given new life with a shot of spray paint. All still great gift basket ideas, but it started us thinking about more utilitarian objects we could use for baskets. You know, baskets that have further purpose:
Which Filler to Use in a Gift Basket?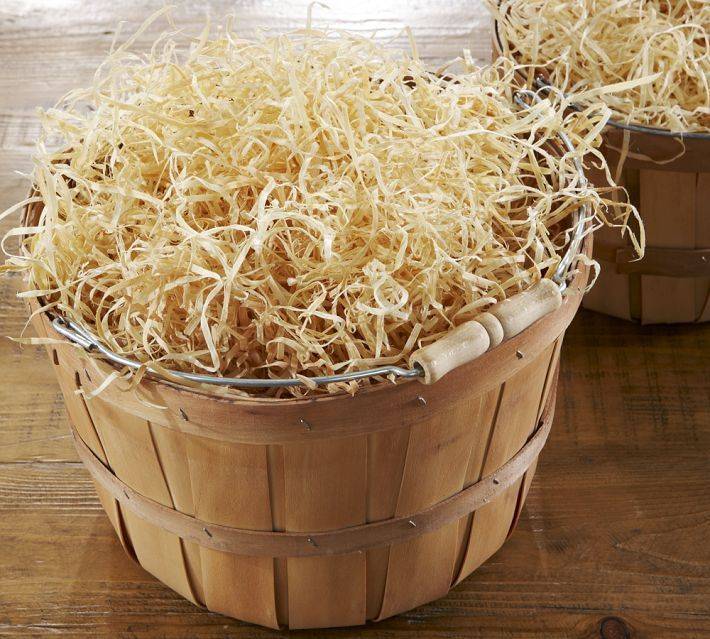
As for filler, we still really like the idea of used paper straight out of the shredder. To make it more interesting, run a couple of colorful sheets from an old magazine through the shredder to mix in with the mundane stuff! If you don’t have time to shred paper, you can purchase gift basket filler in bulk online, or at your local craft store. DIY Gift Basket Kits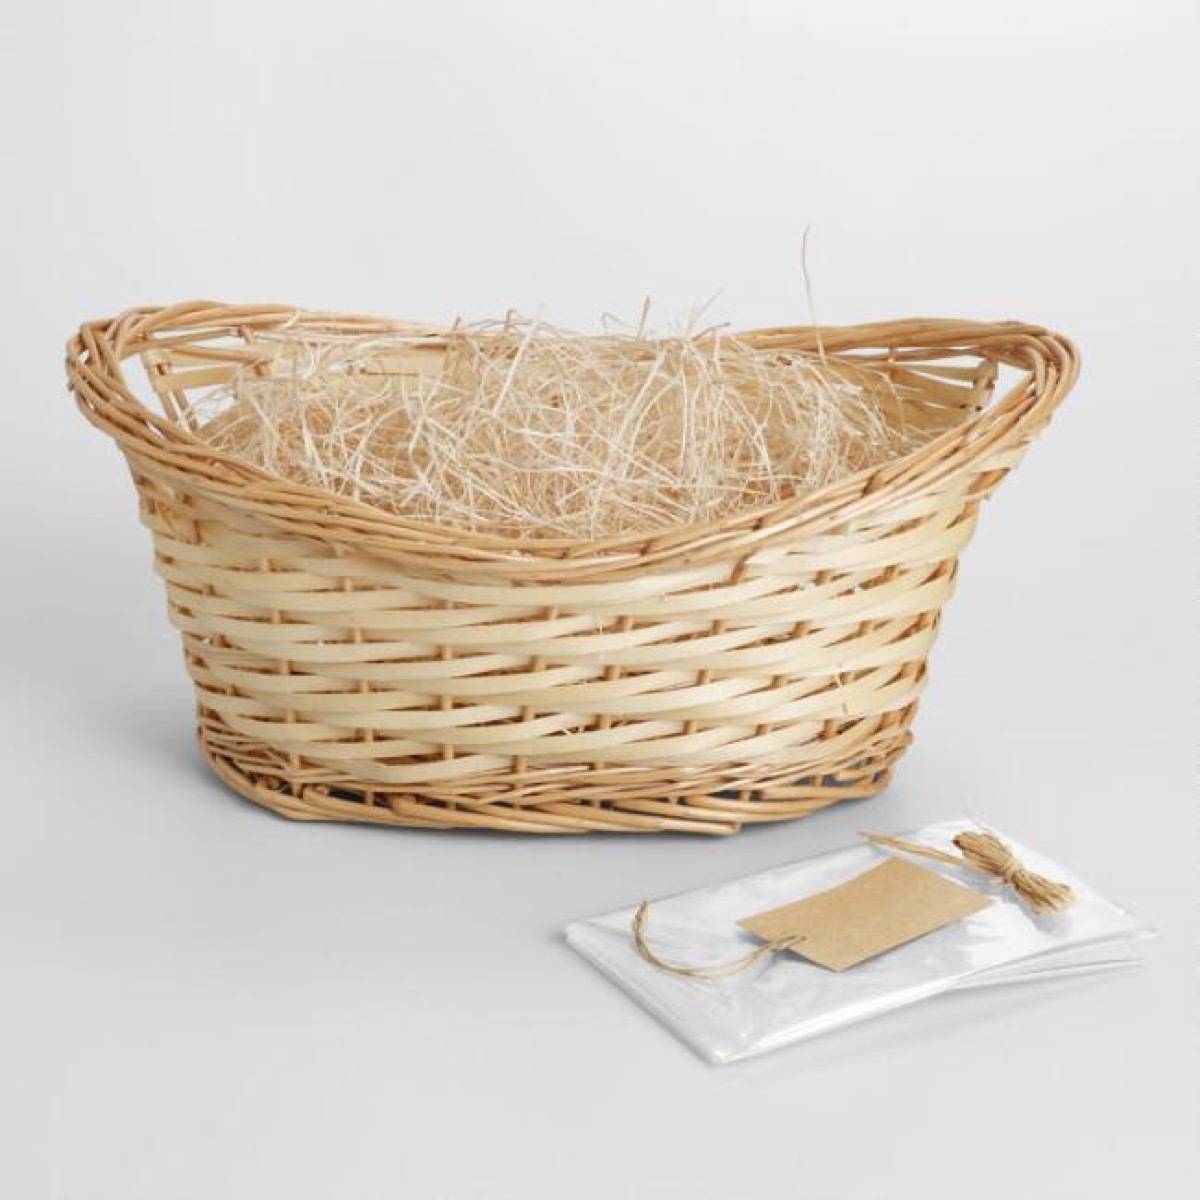
Don’t have time to gather all the supplies for your gift basket ideas? That’s okay! You can purchase pre-assembled gift basket kits, complete with cellophane and filler. Click here to check it out. Perfect for Raffles or Silent AuctionsGift baskets make great presents for coworkers. Or friends. Or those impossible-to-buy-for people on your list. Okay, they’re great for pretty much everyone. So don’t just think about using gift baskets for the holidays! These are great prizes for raffles (think: school, church or neighborhood fundraisers) or as things for people to bid on at silent auctions. Here’s What to Put in Your Gift BasketCheck the vast majority of pre-packaged gift baskets out there and you’ll see they have something in common: a lot of the stuff in them was made in some other far-flung land. (My apologies to all those in far-flung landers). For our budget-friendly gift basket ideas, we will be including things made with our own hands. Not only will this save us heaps of dough, it will also increase the points on the thoughtful scale as registered by the receiver. We’ve broken these homemade gift ideas into a few sub-categories. Stuff for her, stuff for him, and gift basket ideas for anybody. Let’s get started! Themed Gift Basket Ideas for Everyone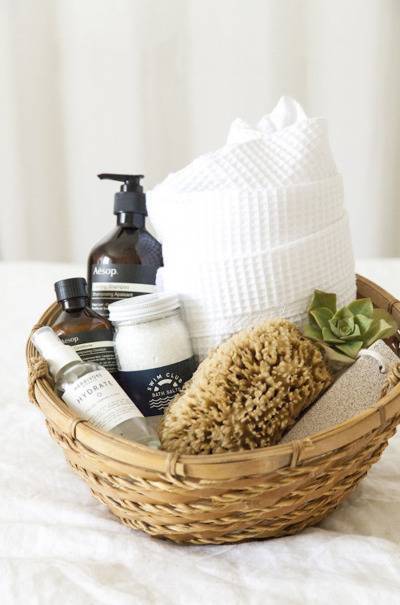
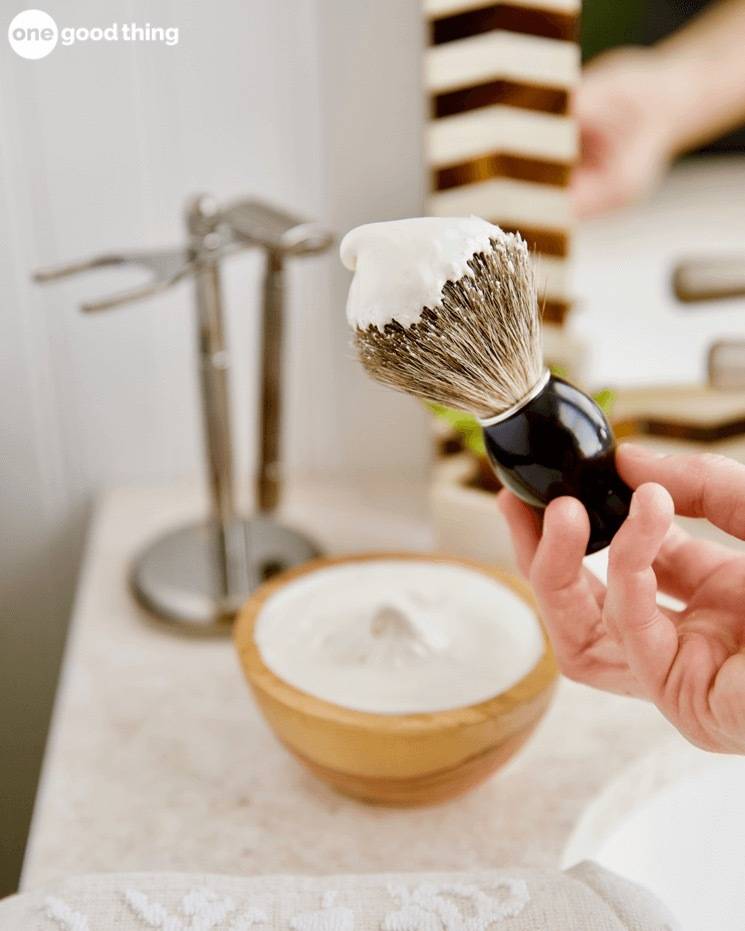
Spa Basket – This gift basket idea is perfect for that friend who needs a good excuse to relax. Fill it with loofahs, body washes, bath gels, candles, and a succulent for a pretty finishing touch. Head over to Style Me Pretty for more ideas. 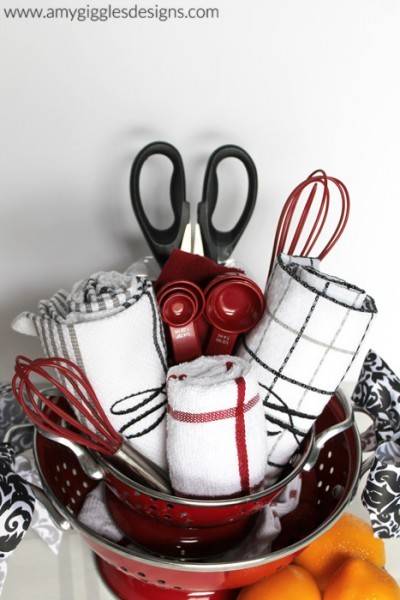
Color-Themed Kitchen Basket – Stick with two or three colors and make sure to add a personalized piece like the gorgeous monogrammed dish towel in this basket.  Hannah’s CT Kitchen Hannah’s CT Kitchen
Pancake Gift Basket – This might be my favorite… all the things you need to make a delicious pancake breakfast, complete with blueberry syrup. Go for store-bought pancake mix, or make your own (chocolate chips, anyone?). Also could include regular maple syrup, coffee beans, and fresh fruit. Check out the details here. 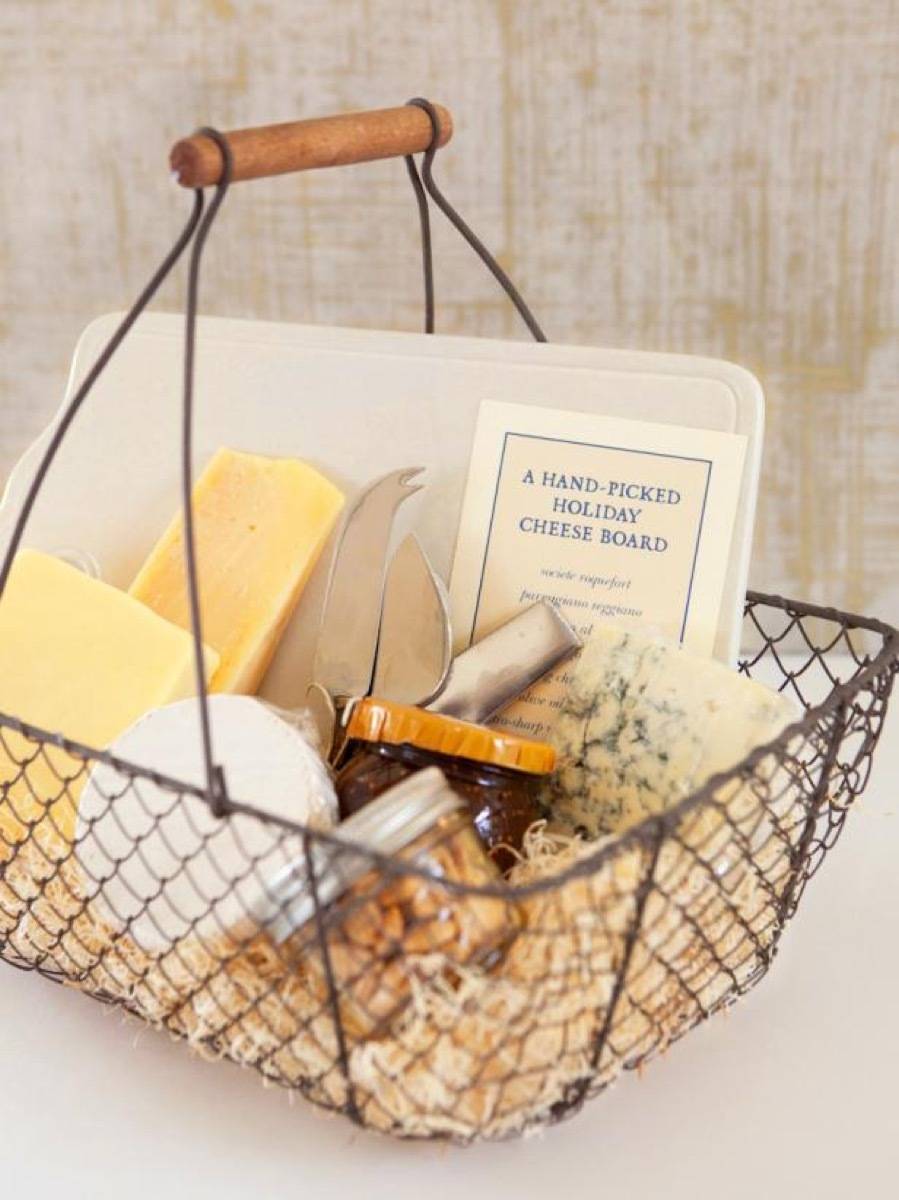
Do-It-Yourself Cheese Board Basket – Everyone loves cheese. Click here to find out how to make a vintage-inspired cheese basket. 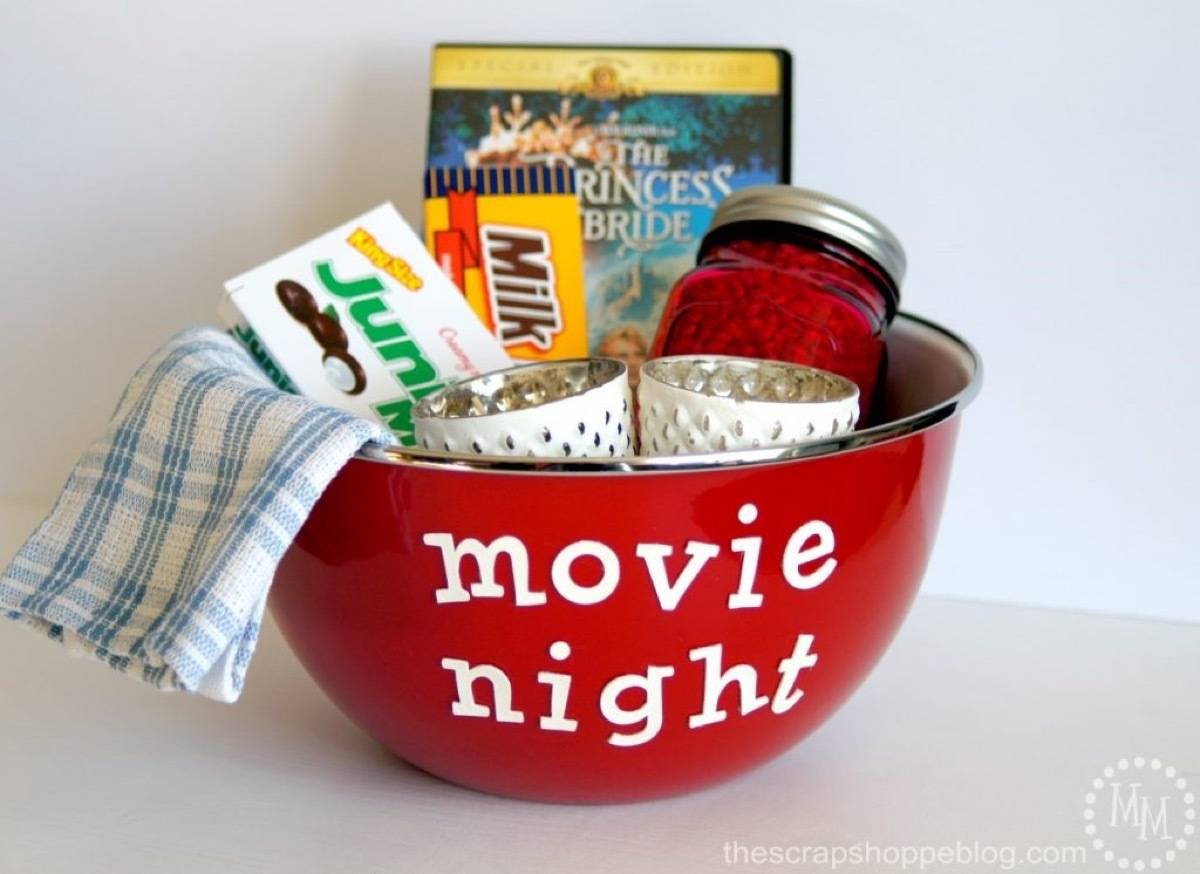 One Sewing Mommy One Sewing Mommy
DIY Movie Night Basket – DVDs, popcorn and candy… what could be better?! Wrap it in cellophane and add a big red bow to make it extra pretty. Here are the details.  Cheryl Style Cheryl Style
Girls’ Night In A Basket – This is a fun one… fill a basket with magazines, nail polish, bath gel, lotion and other relaxing goodies for the girlie girl on your list. Check out the original post here. 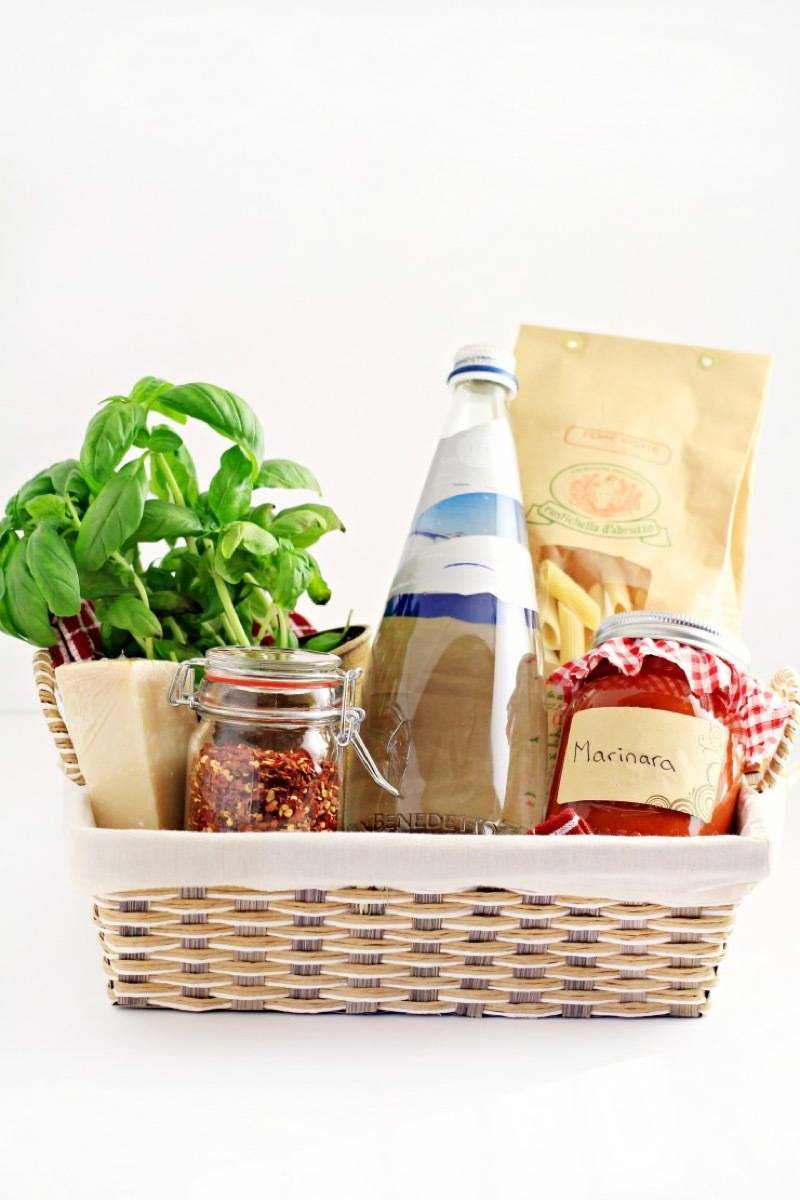 Young Married Chic Young Married Chic
Pasta Dinner Basket – Buy (or make!) a good bottle of marinara, some high quality spaghetti and a nice bottle of olive oil… and don’t forget the red wine! Read more about this gift basket idea here. 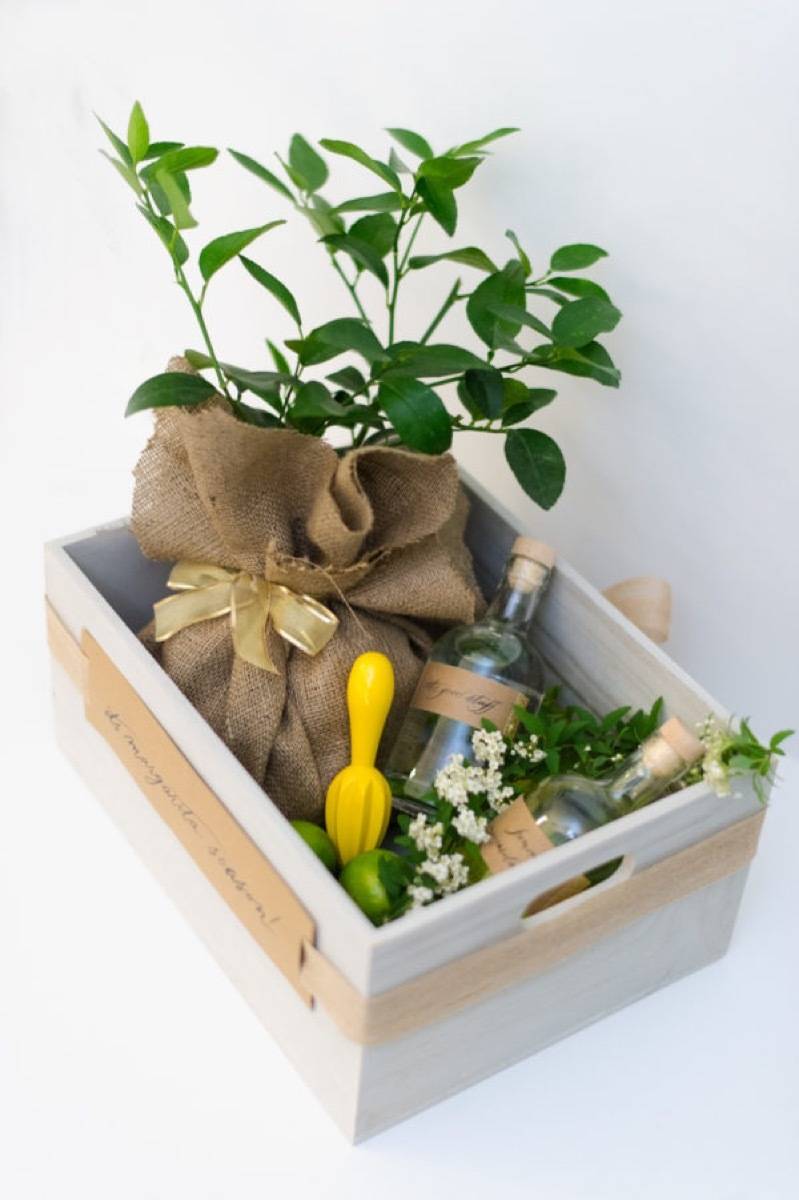
Margarita Basket – Pair a bottle of tequila with a good margarita mixer, and add a couple of limes and a yellow citrus juicer. Beautiful! This gift crate goes above and beyond by including a little lime tree, but we’ll let you decide if that’s excessive or not. More info can be found here. 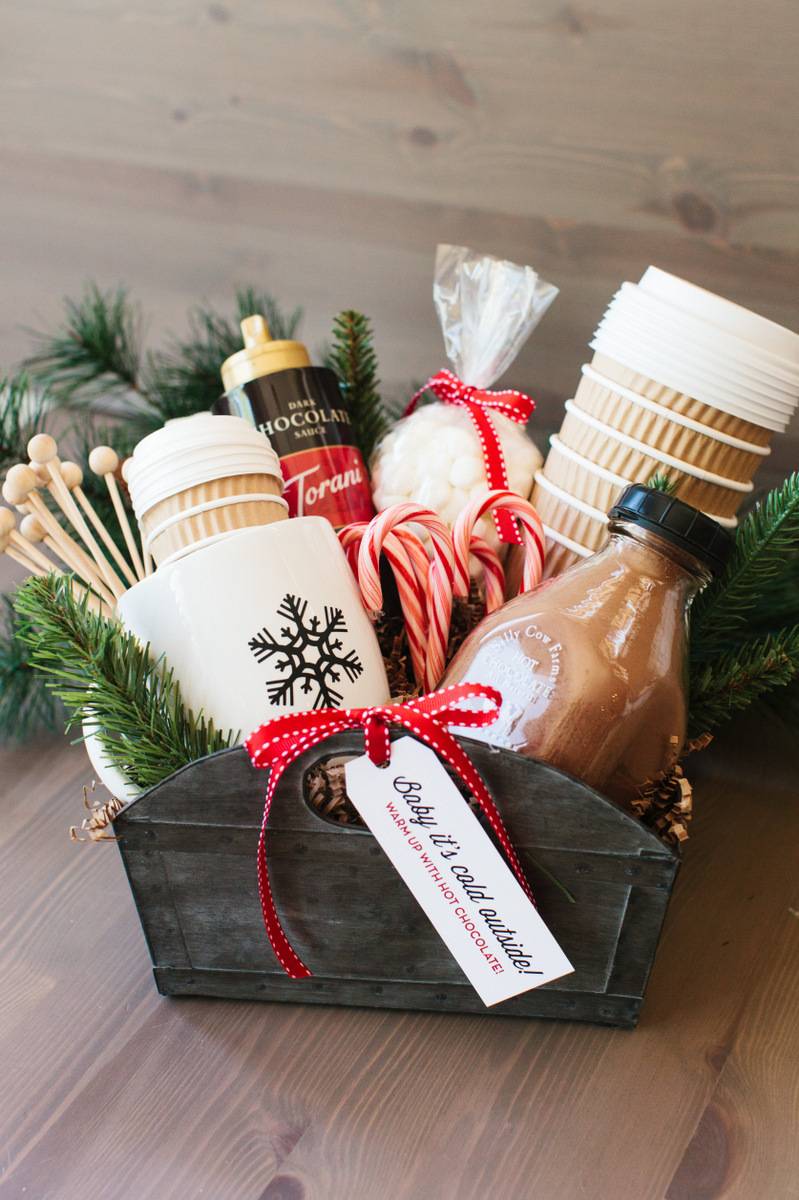 Crafts Unleashed Crafts Unleashed
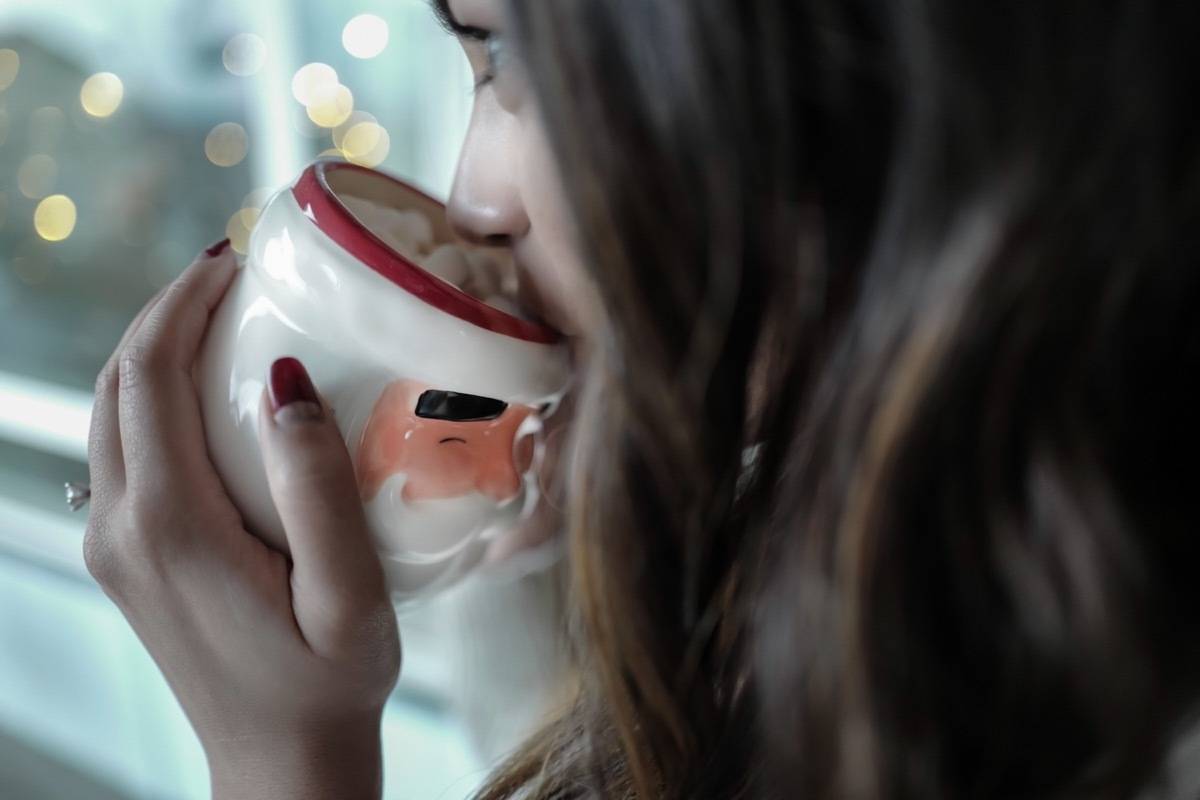
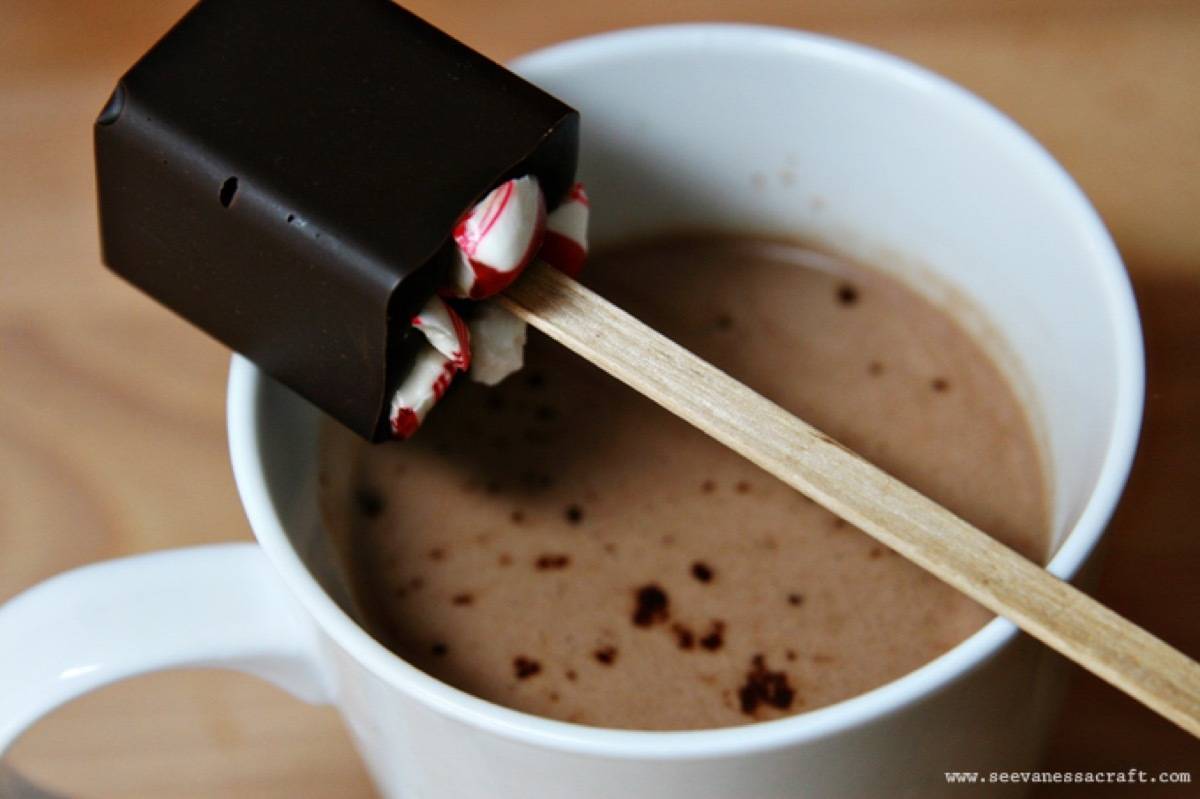
Hot Chocolate Gift Basket – This is the perfect gift to keep your friends warm on those chilly winter nights. Create a gift basket for one with a single packet of cocoa mix, or put together a basket for a crowd by adding extra supplies. Check out the full tutorial here. 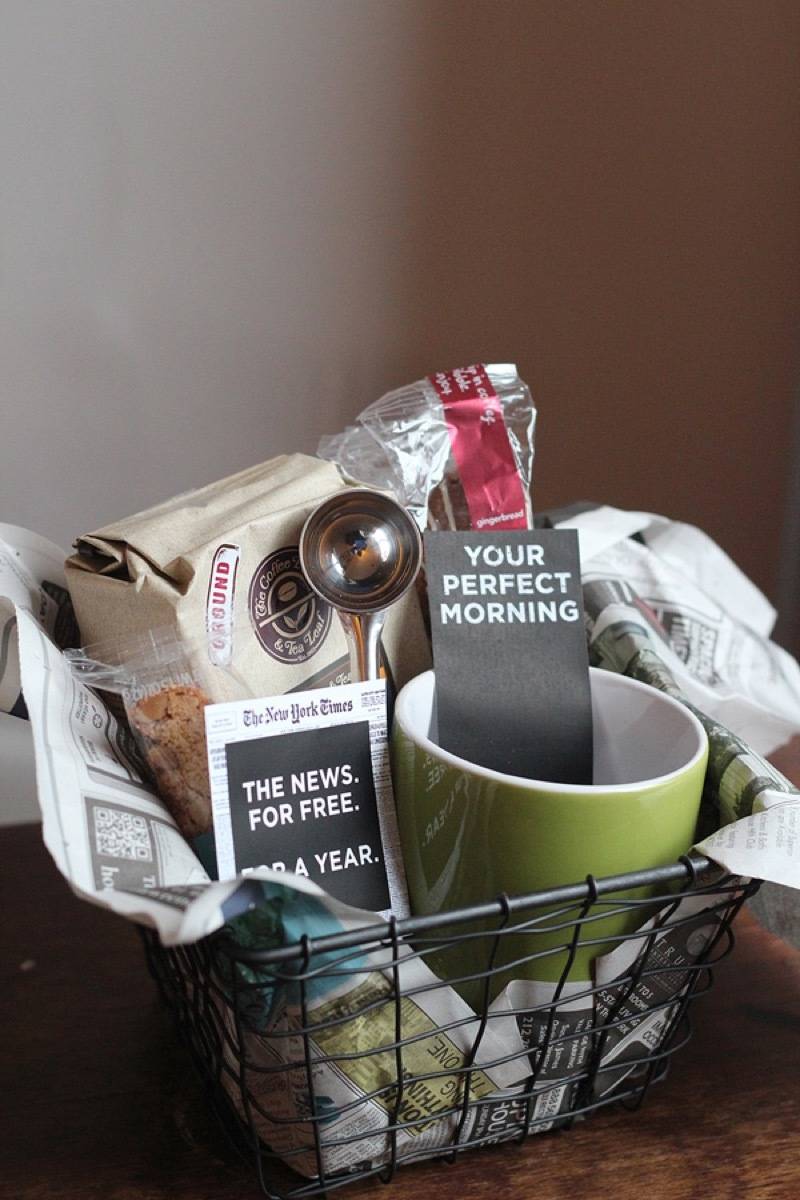
Perfect Morning Gift Basket – Make a “Your Perfect Morning” basket filled with ground coffee, a mug, reading materials, breakfast snacks, etc. Read more about it here. 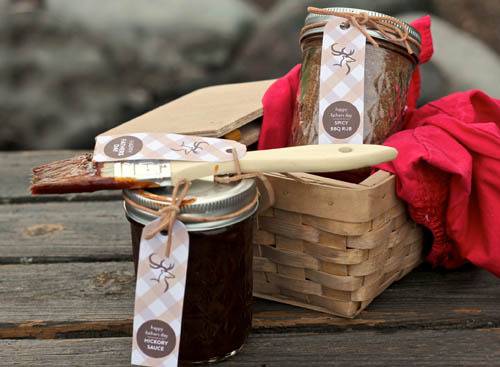 Design Mom Design Mom
BBQ Basket – Here’s a fun gift basket idea… fill a box with handmade BBQ sauce and a delicious rub mix. Here are the recipes. 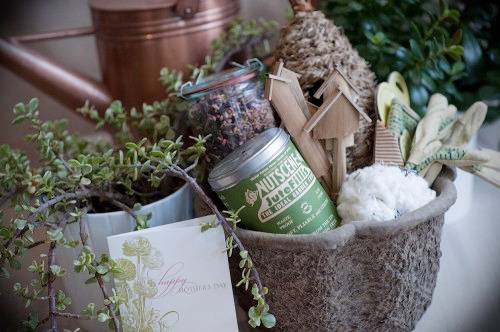 Elizabeth Anne Designs Elizabeth Anne Designs
Gardener’s Gift Basket – For the friend in your life with a green thumb… new gardening gloves, a watering can and a pretty plant to tide them over until spring. Read more here. 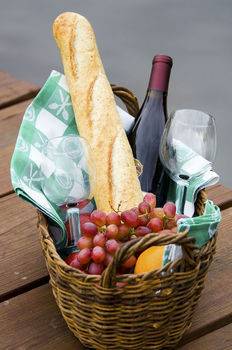
Happy Hour Basket – A bottle of wine, unique glasses, a pretty tea towel, a baguette, grapes and other snacks are perfect for this one. Read more here. 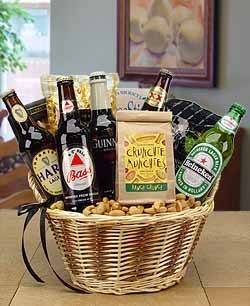
Beer Lover’s Basket – Assemble this one according to the recipient’s taste; stick with domestic beer if that’s what they usually drink, or go with a mix of unusual craft beers if they like to try new things. Check out more good ideas here. 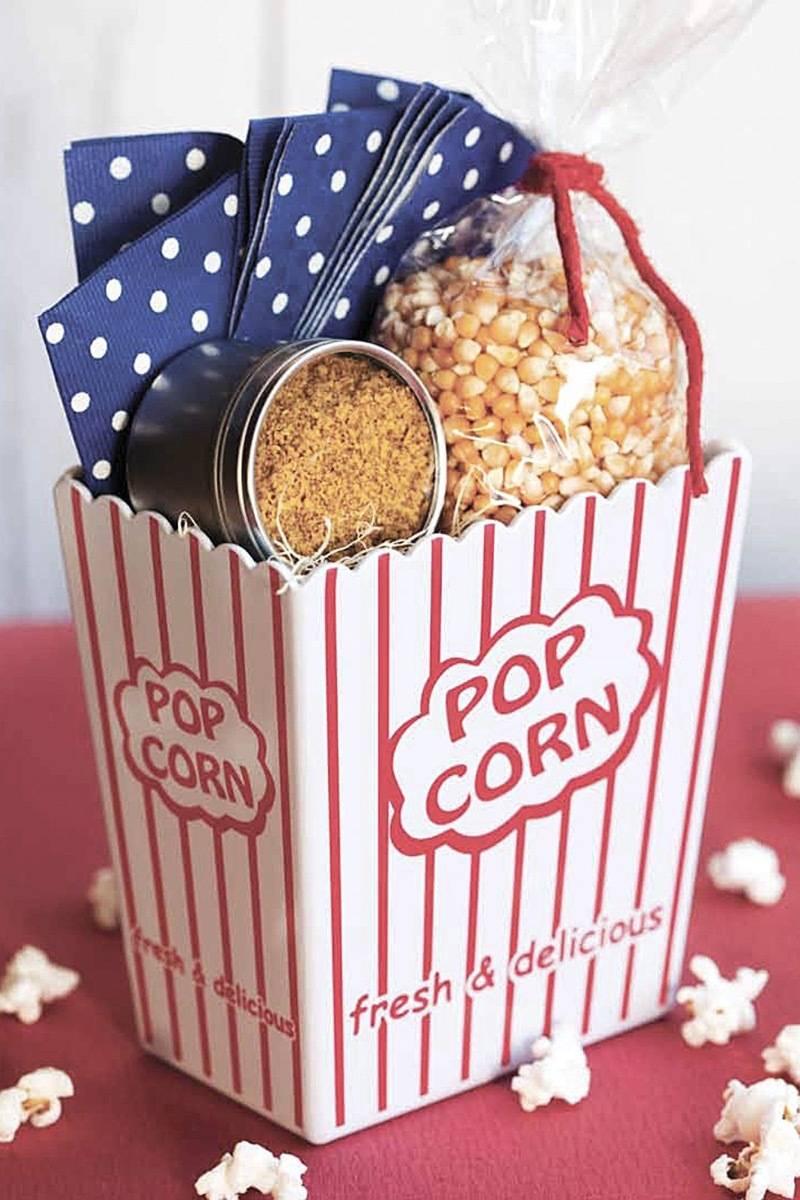
Fresh Popcorn Gift Box – Similar to the Movie Night basket! You can use popcorn boxes as the “basket” for this fun little gift, and throw in some homemade seasoning mix. Find details here. 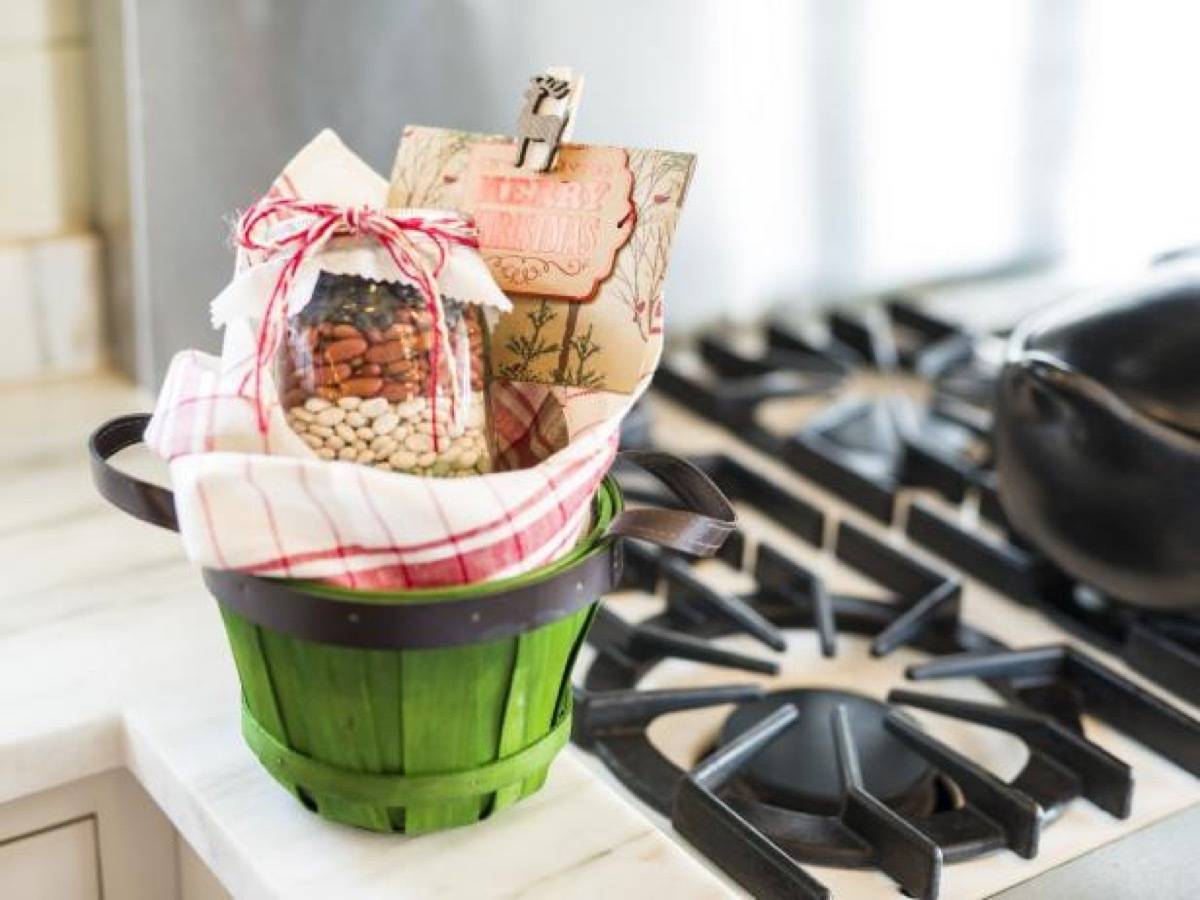 Coborn’s Blog Coborn’s Blog
Soup Basket – You’ve probably seen the soup-in-a-jar idea, but why not take it a step further and include everything needed for a soup-tastic meal? Add a pair of cute bowls, spoons, and some artisan bread, and don’t forget the recipe to cook the soup! 
Breakfast For Two – This one has to be made right before, but it will be worth it… the recipient is sure to love it! Click here to read up on what to put in a “Breakfast in Bed Basket.” 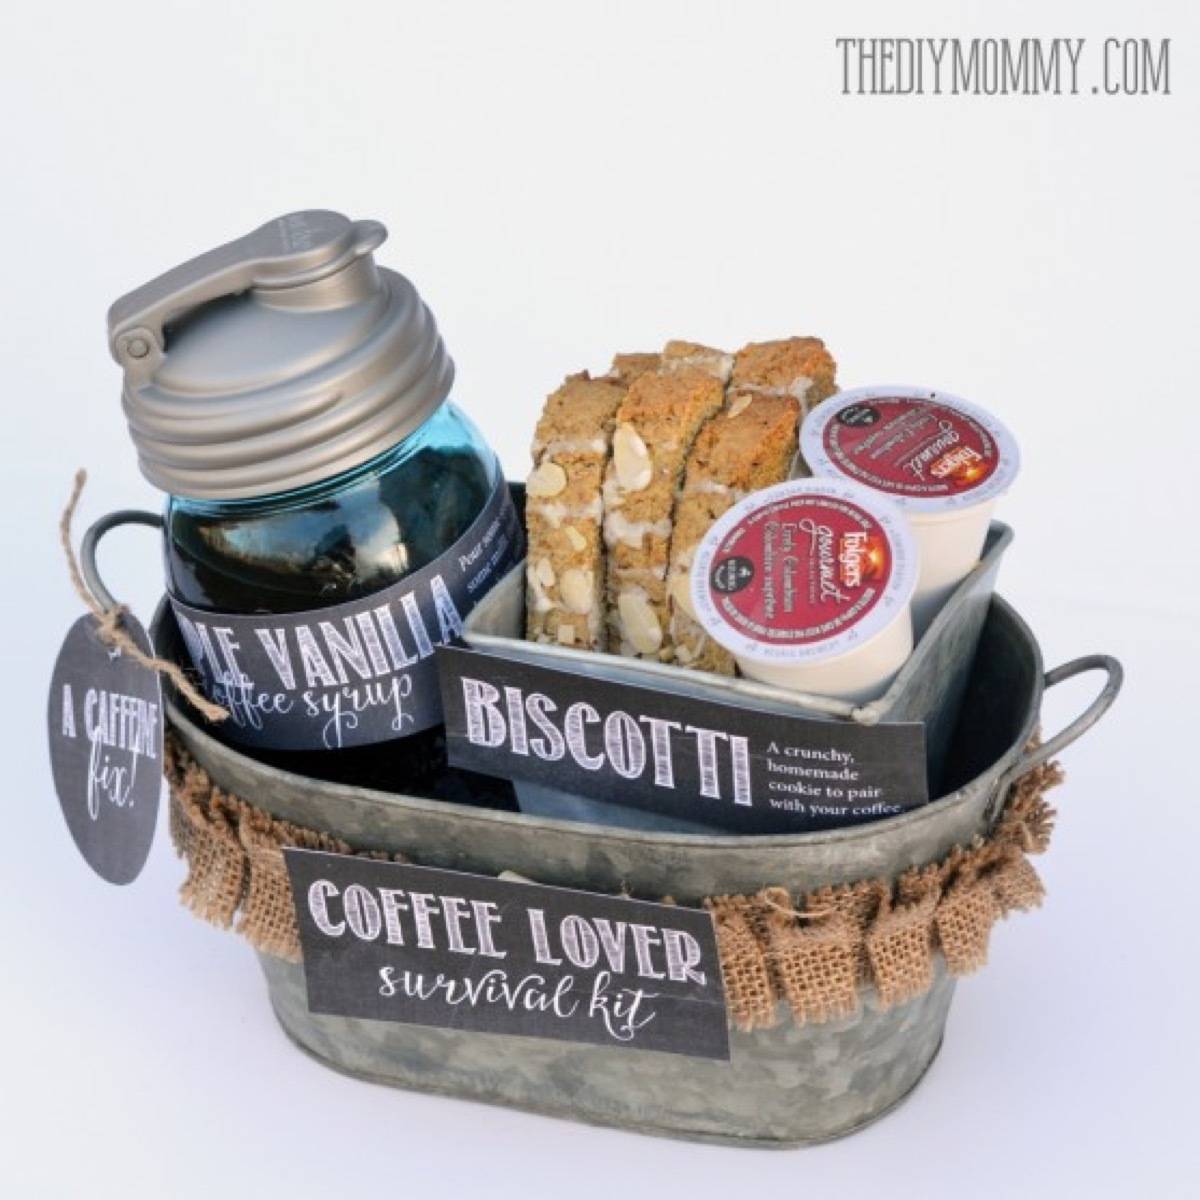 The DIY Mommy The DIY Mommy
Coffee Lover’s Basket – This gift basket idea is super fun. Combine K-cups, vanilla syrup, and delicious biscotti for a coffee lover’s dream gift. Check out the instructions (and free printable tags) here. 
Winter Weekend Escape Basket – Make a wintry weekend escape basket filled with a deck of cards, a cozy blanket, and hot cocoa. Check out the tutorial here. 
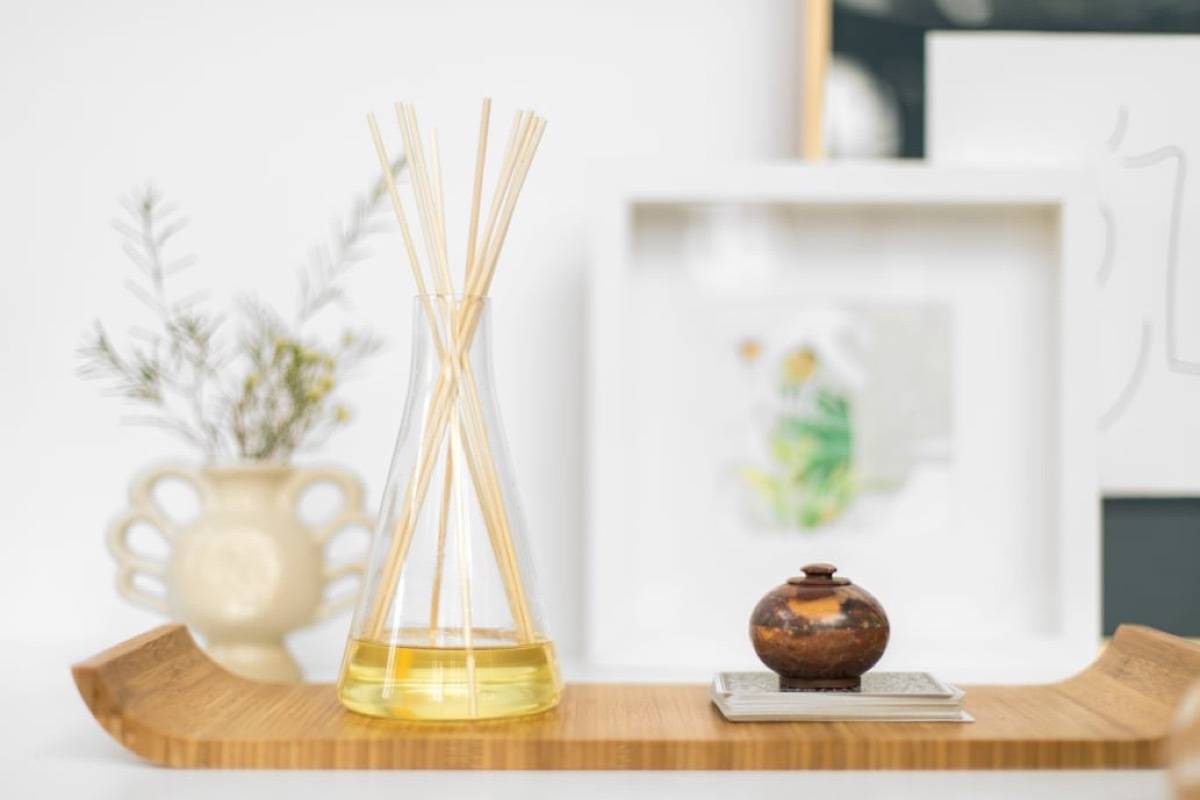
Moscow Mule in a Box – And last but not least – a cocktail kit! Find all the information you need here. Gift Basket Ideas for Women – What to Include in a Gift Basket for a Female FriendIf you aren’t keen on the idea of a themed basket, and are looking for gift basket ideas for a female friend, coworker, or relative, here are some things you could include. We’re linking out to the DIY-version of these gift basket items, but you could just as easily purchase them if you’re in a rush: 
Gift Basket Ideas for Men – What to Include in a Gift Basket for a GuySo, you need to put together a gift basket for a male friend? Here are our best dude-inspired gift basket ideas. We’re linking out to the DIY-version of these gift basket items, but you could just as easily purchase them if you’re restricted by time: 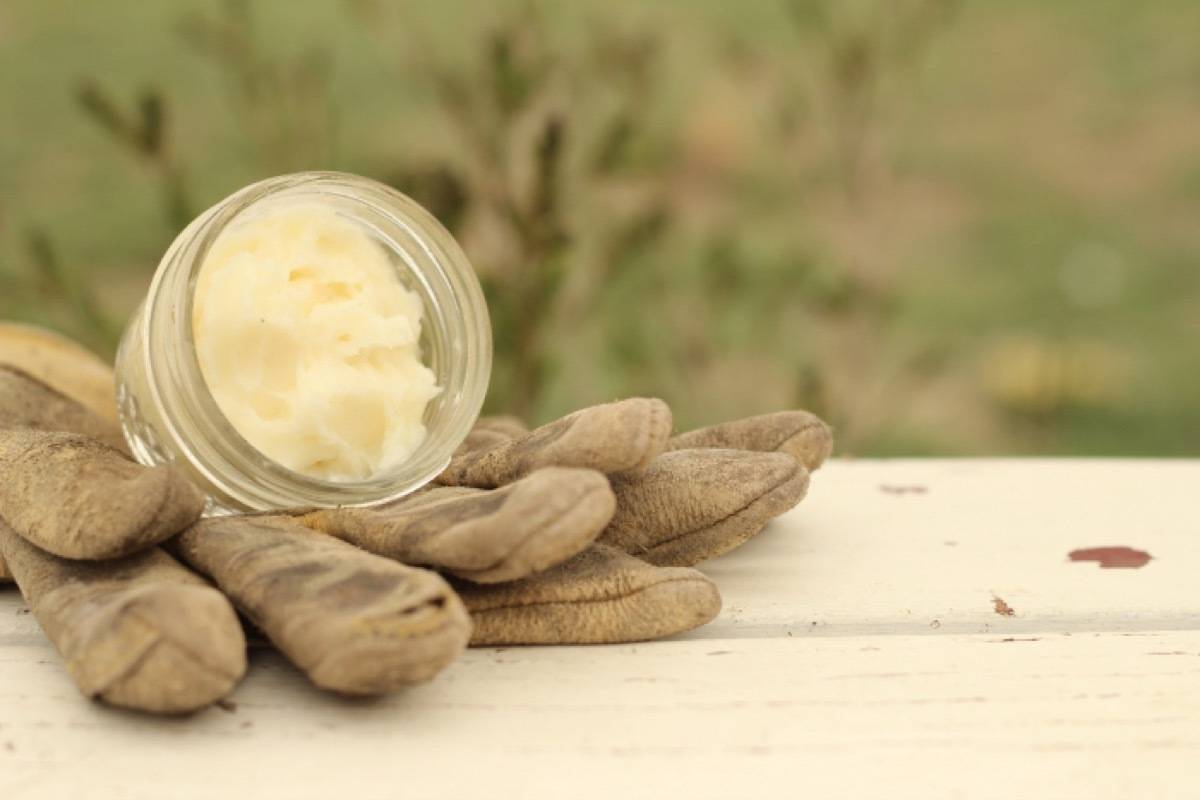
Gift Basket Ideas for Everyone – What to Include in a Gift Basket that Anyone Will LoveIf you’re trying to put together a gift basket for someone that you know nothing about, the most sure-fire solution is to go with food! Everyone loves a sweet or savory treat, and you can’t go wrong with a DIY gift basket filled with some of these goodies. Again, these links are to the DIY-version of these gift basket ideas, but you could just as easily purchase them if you’re dealing with a time crunch: 
Money-Saving Tricks and Ideas for DIY Gift BasketsGift baskets are a wonderful solution to a gift-giving quandary, but are especially impressive when their assembly doesn’t stretch the budget. Here are a few tips and tricks for you DIYers who are crafting most of the components in your gift baskets:
The post The Ultimate List of Perfect DIY Gift Basket Ideas appeared first on Curbly. Via https://www.curbly.com/diy-gift-basket-ideas 
Giving cash this Christmas? (We still think it’s better than a gift card.) Instead of just sticking the bills in a card, how about festively folding them into a Christmas money tree shape? With this simple technique, you’ll have the whole project done in less than five minutes. Here’s how to make a money tree for the holidays this year…
Start this easy money origami DIY with a bill of your choosing (a dollar bill works great, but for a better effect and bigger smiles, go for the twenty or fifty dollar bill). Don’t worry, folding a dollar bill is completely legal!
How to make a money tree in eight simple stepsStep
Start by folding the bill in half lengthwise. Make sure your folds are crisp and clean. Use a bone folder to crease the folds perfectly. Step
Next, unfold the first step and fold in half the short way. Step
Fold the top layer down about two-thirds of the way. Step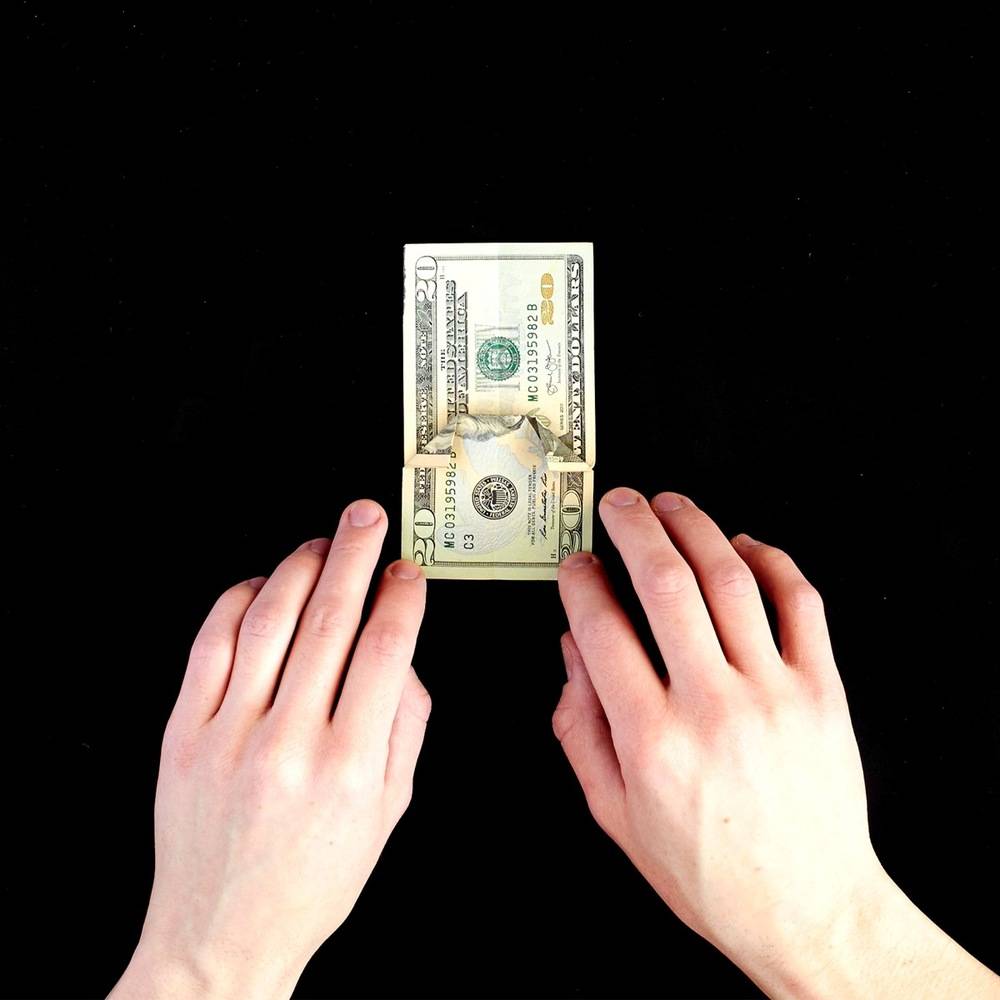
Fold the corners down as shown in the photo above. The space between the folded corners should be about 3/4 of an inch wide. Step
Fold the bottom left over, unfolding the corner you just made. Flatten the corner and then repeat the step for the right side. Step
You should have two flattened corners, and a ‘tree trunk’ beginning to take shape. Step
Fold down the top corners to the center as shown. Step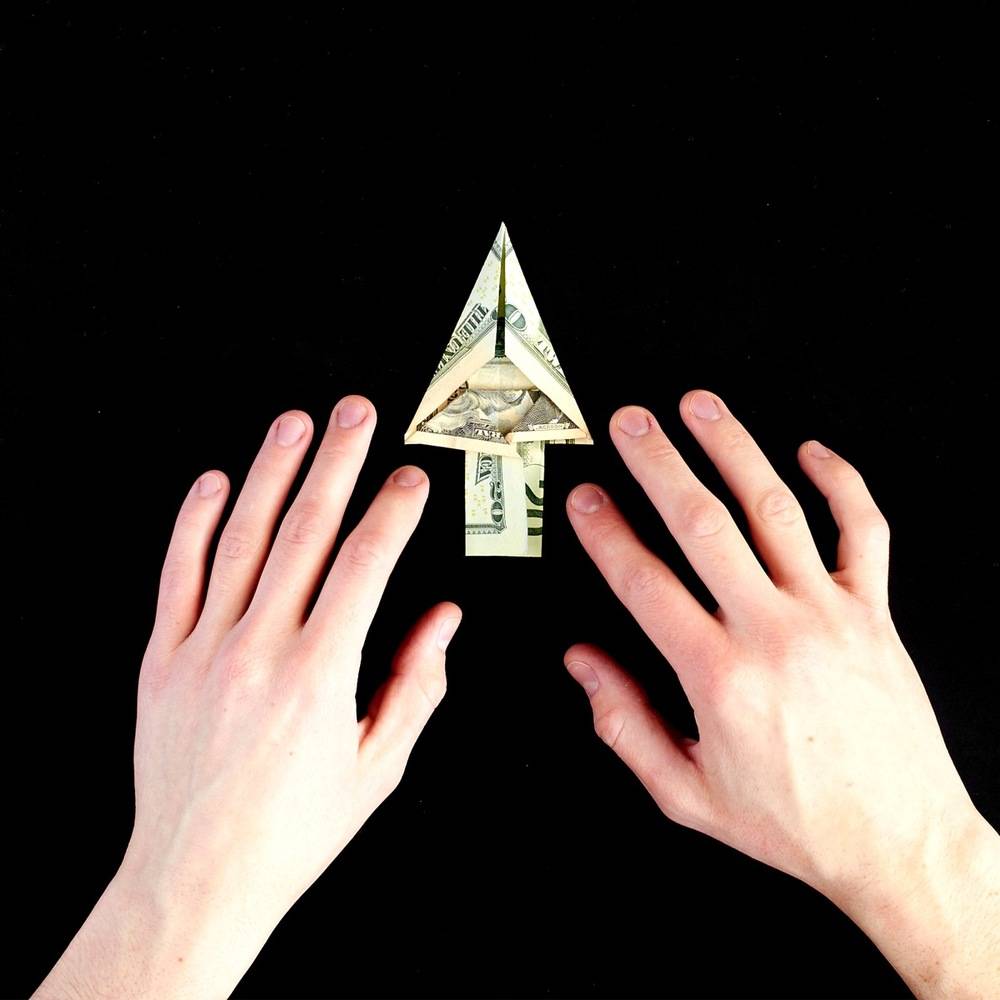
Fold the top corners down one more time. Flip the tree over, and you’re done! 
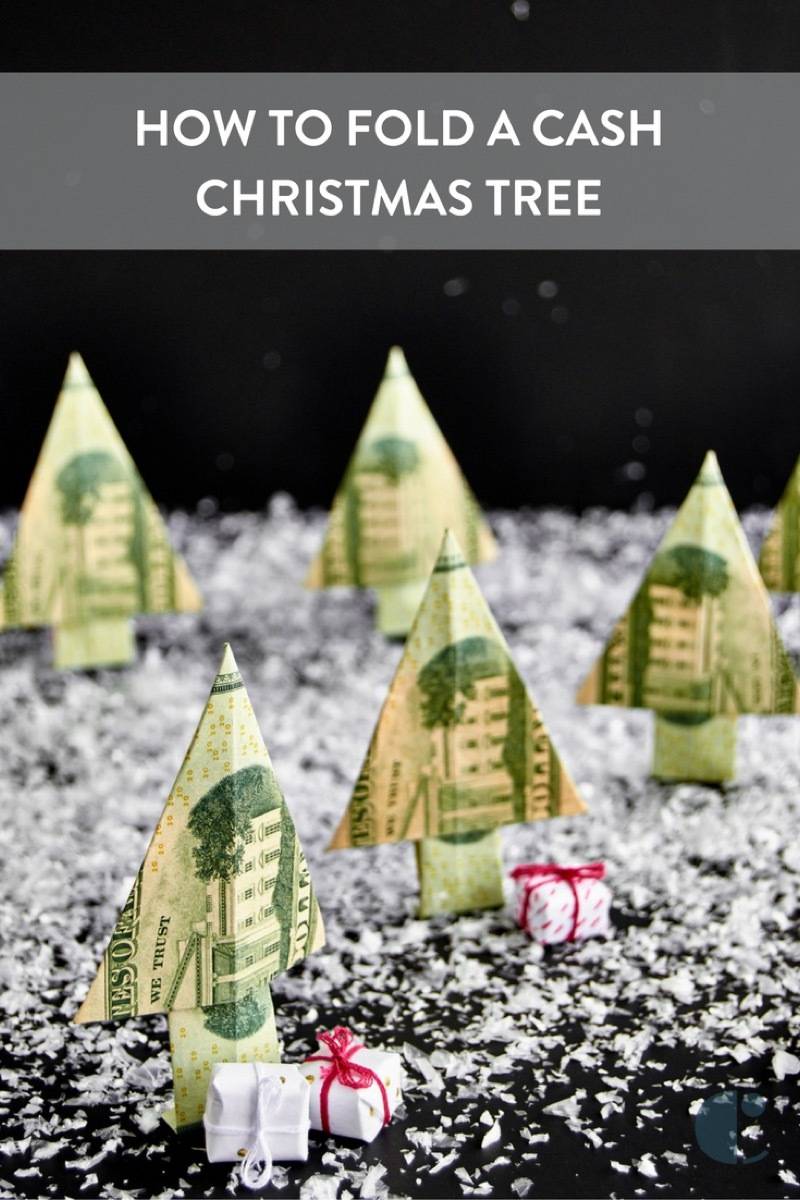
You could also hang these as ornaments on your tree, or use them as fun stocking stuffers for kids. Now that you know how to make a money tree, you have a fun way to give cash gifts for any occasion throughout the year. Have fun making your Christmas money trees! Looking for more seasonal DIY projects and ideas?
|
 Human beings, by nature, are superstitious. Perhaps because we live–and will always live–in an uncertain world. So, if having a lucky pair of drawers makes you feel better about the future, I say wear those grundies proudly on new years’ day! You might even want to try a few of these luck and love inducing dandies as well.