Here’s a summertime tip: Always make popsicles. And these popsicle recipes make it easy. Summer is here, which means the Fourth of July is on the way and you probably have a barbeque to host. Whether you’re holding a kid-friendly summer party or an adults-only celebration, popsicles will make everyone happy, including you! That’s because they’re ridiculously easy to make, you can prep them far in advance, and nothing tastes better on a hot day than a refreshing popsicle. We have two tasty recipes for you to prep this summer. The first popsicles are champagne-infused (adults only!), mimicking the colors in a bomb pop. The second are kid-friendly (but equally delicious) lemon-flavored fruity popsicles. Recipe 1: Adults-Only Champagne “Bomb Pops”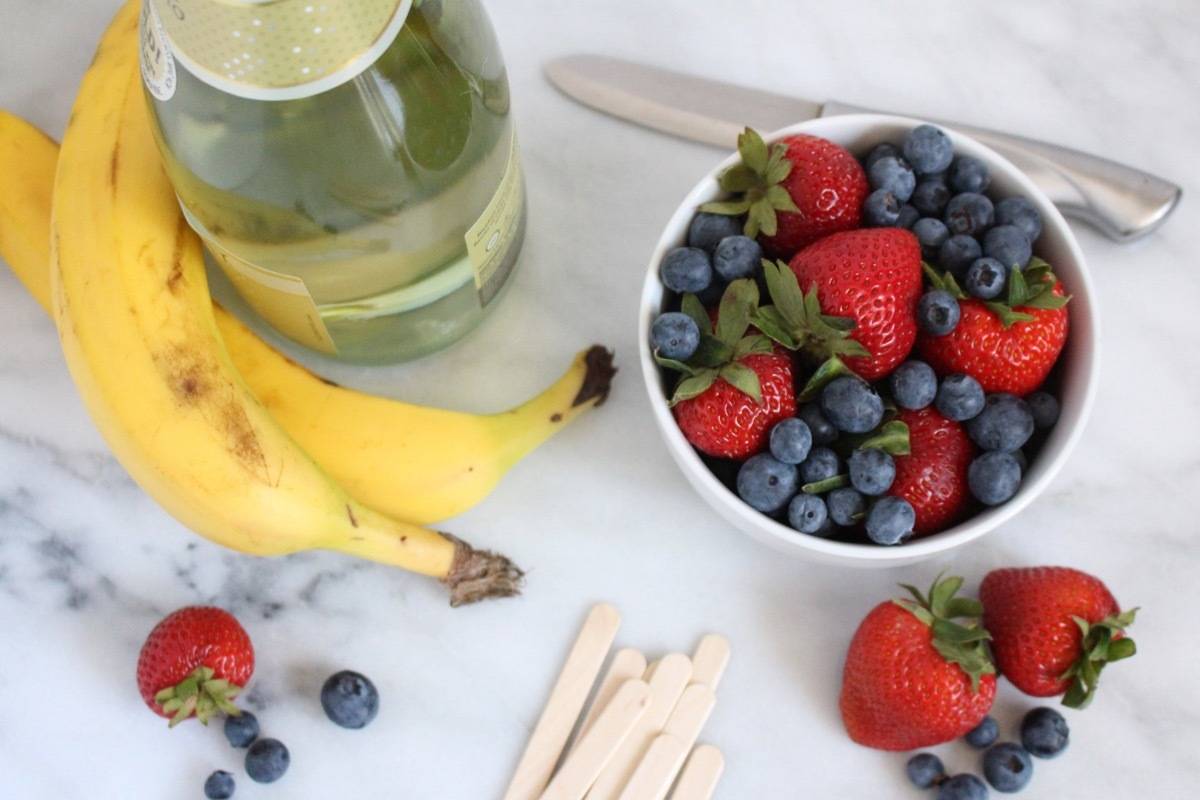
INGREDIENTS
*Use a champagne with an ABV below 12%. 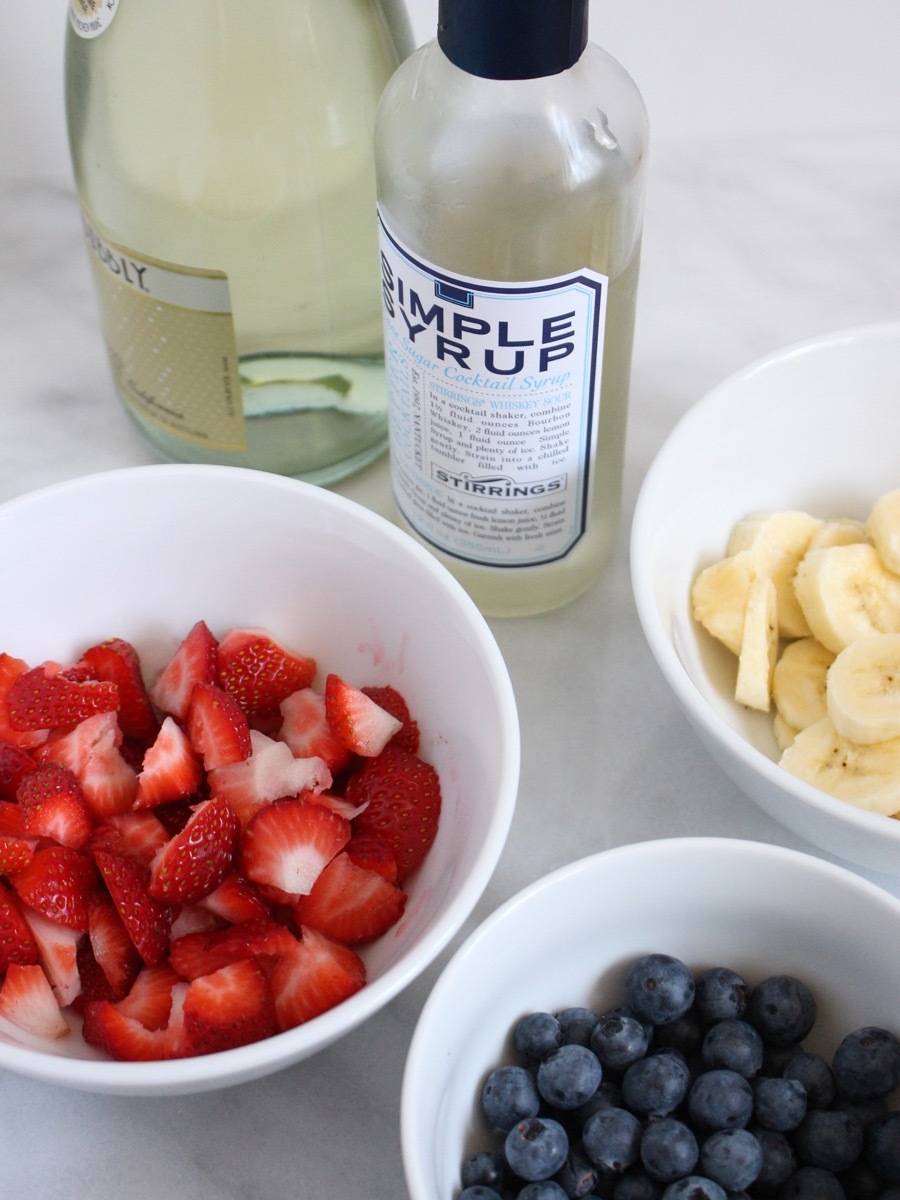

Mash each fruit separately in a bowl, using a blender, food processor, or with a fork. Add a dash of simple syrup, and mix in some champagne. The ratio of champagne to fruit should be one to four. Too much champagne and the popsicles won’t freeze! 
Layer the fruit mixes in a popsicle mold, and let freeze for at least 6 hours, or over-night. Enjoy! 


Recipe 2: Kid-Friendly 4th of July Popsicles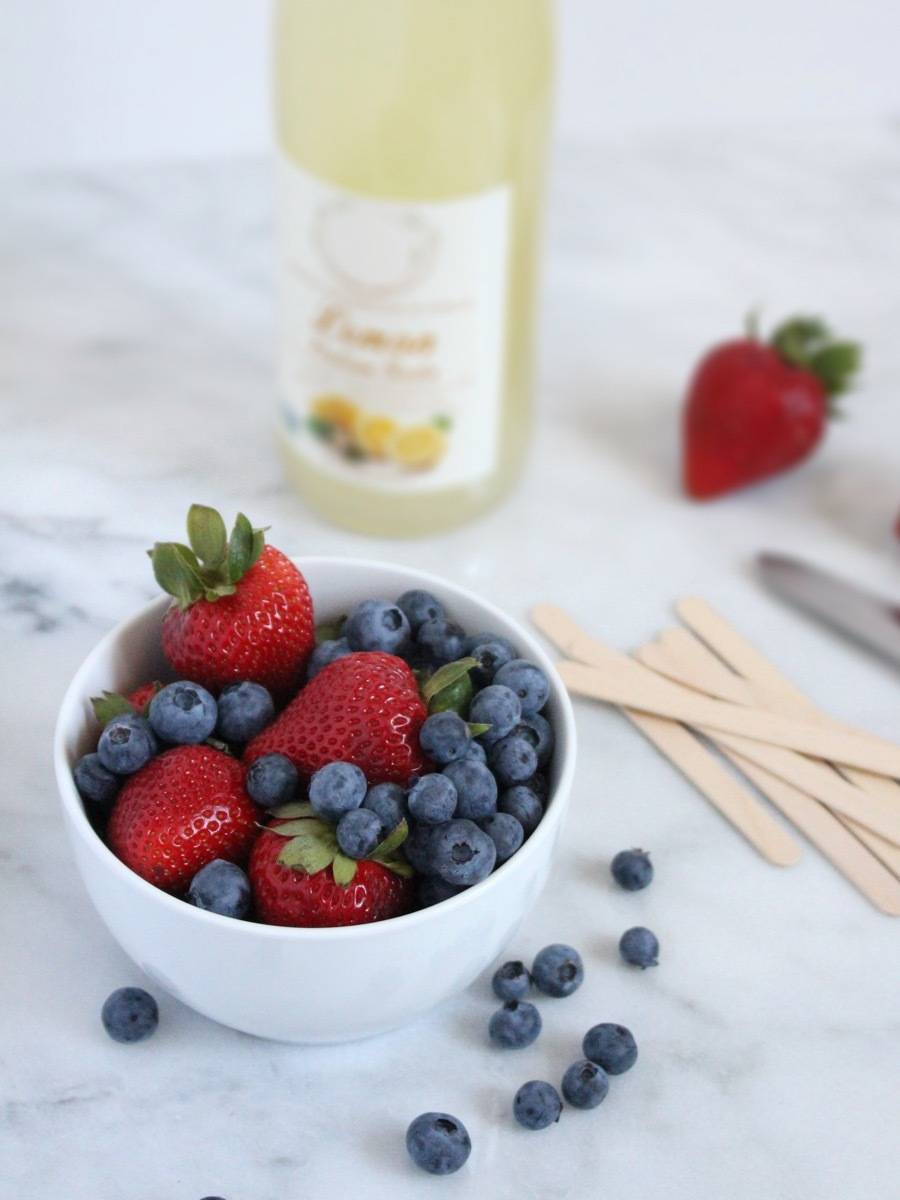
INGREDIENTS
*To cut back on sugar, you can substitute the Italian soda with lemonade 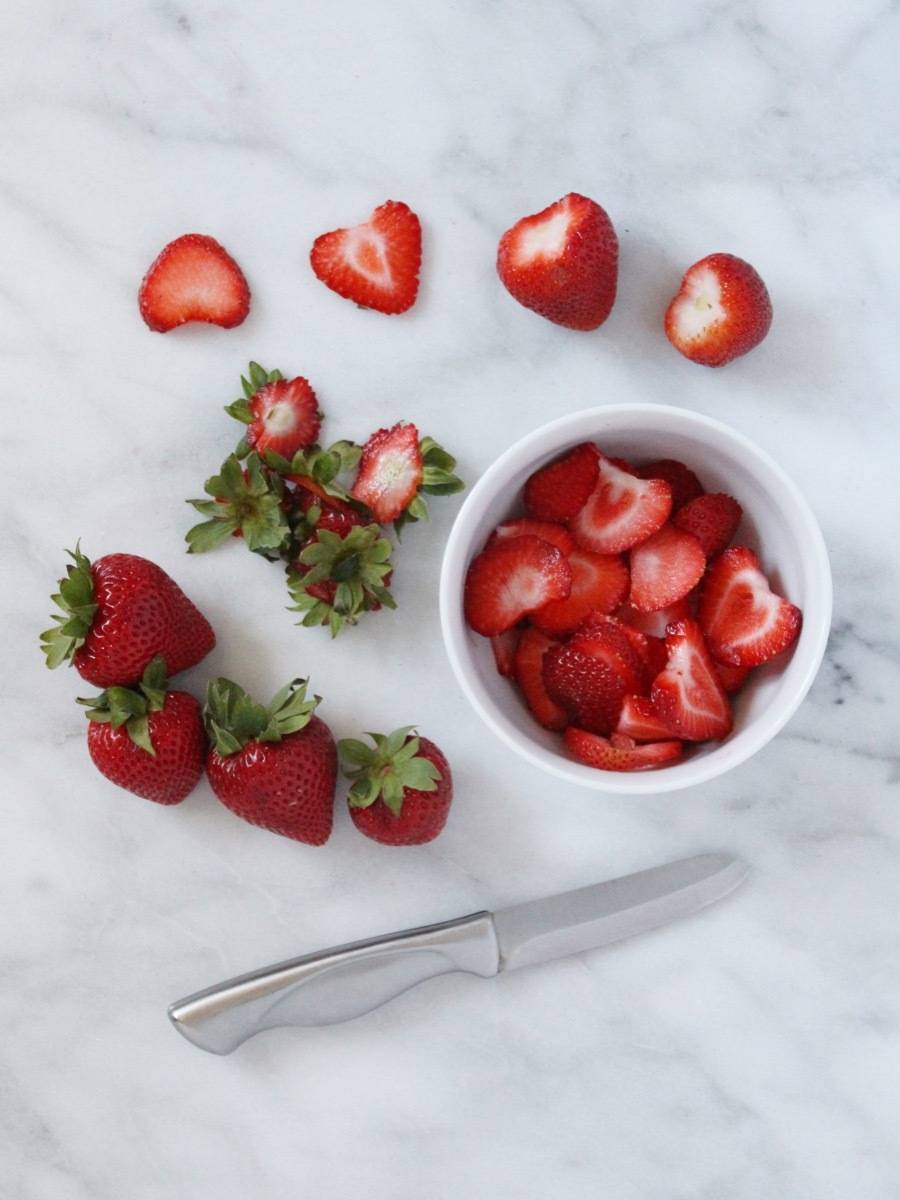
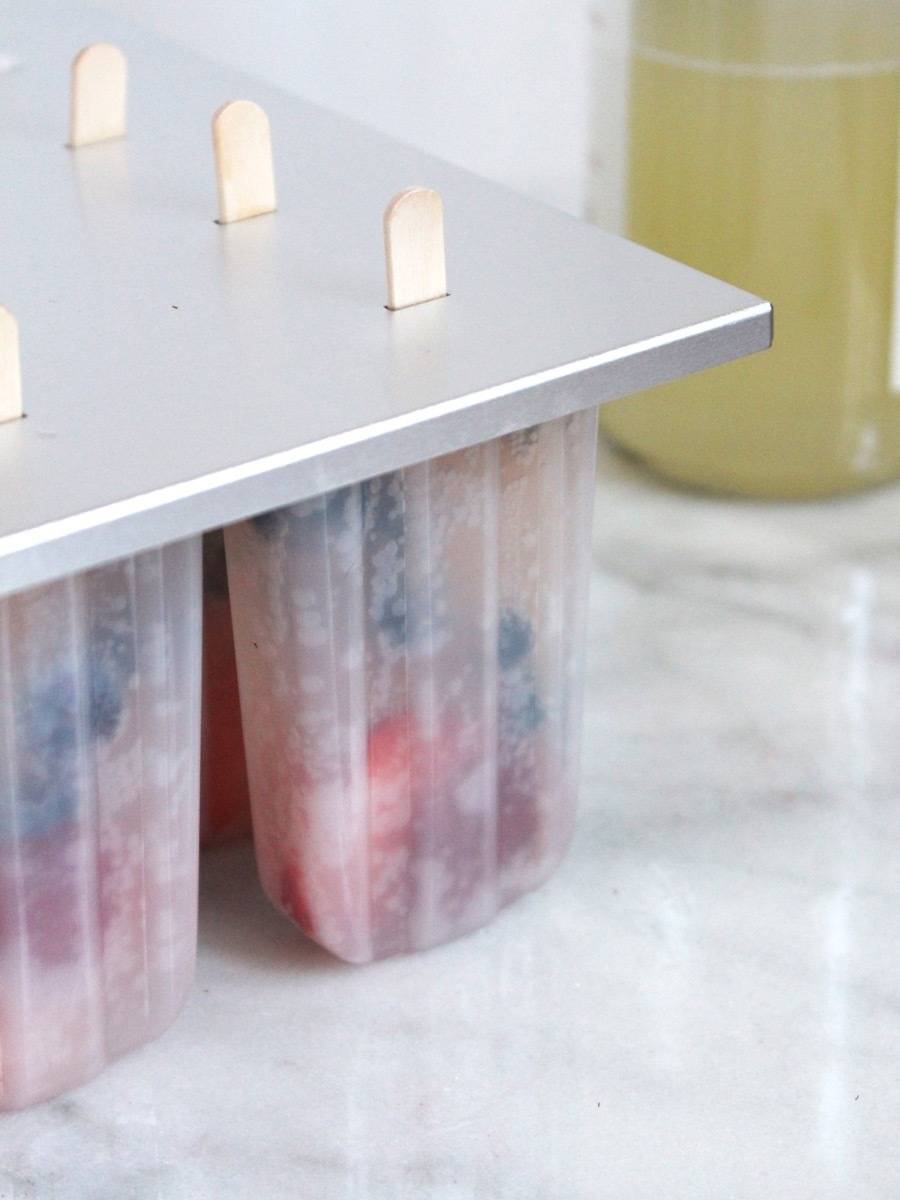
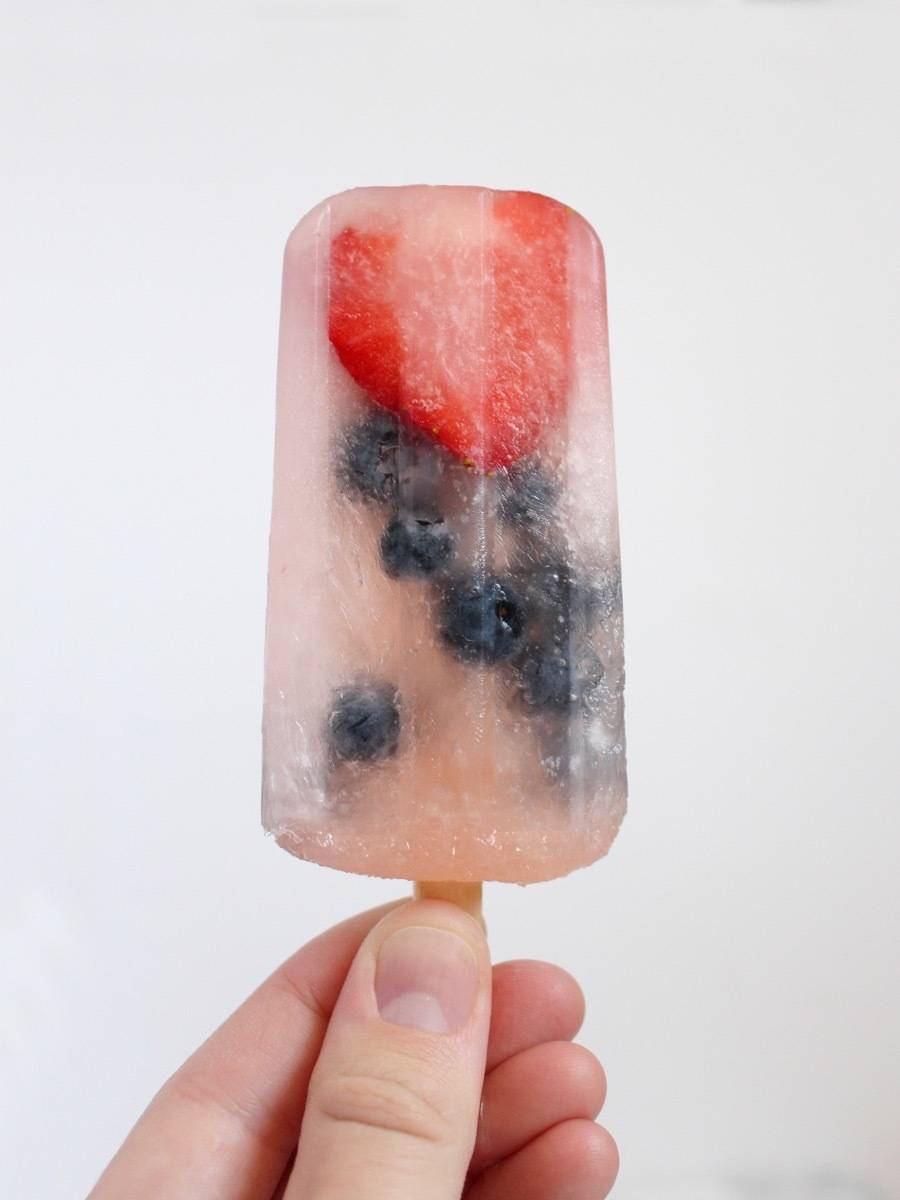
Cut the strawberries into slices. Set strawberries slices in the popsicle molds, then add a few blueberries until the molds are 75% full. Fill to the top with lemon-flavored Italian soda (you’ll probably need to pour a little bit first then wait for the fizzing to settle before filling to the top). Freeze for 6 hours or overnight. 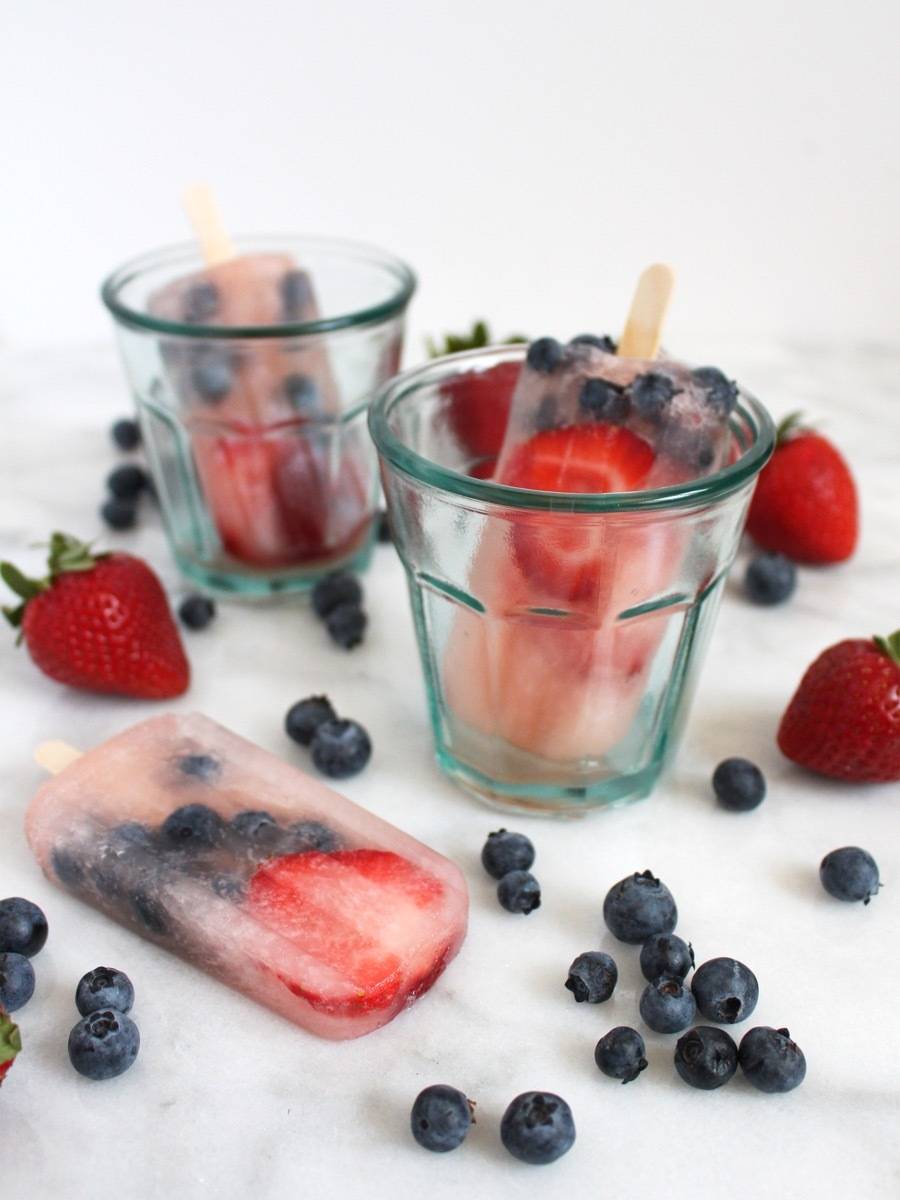

This Fourth of July, I’m glad I have a freezer stocked with popsicles ready for when the sun comes out. What’s your favorite way to stay cool in the heat? Be classy (not cheesy!) this 4th of July with our roundup of tasteful Independence Day decorations.
The post 4th of July Popsicle Recipes, Two Ways: One for Kids and One for Adults! appeared first on Curbly. Via https://www.curbly.com/champagne-popsicles
0 Comments

Perennials are springing up everywhere. And the herbivores are loving it. The hostas pictured above are always the first course. Around here, the biggest culprit of garden dining are deer. Don’t believe me? I took the following picture of our backyard two years ago. Apparently, we are living in the Grand Central Station for the Bambi crowd. 
Garden stores sell various deer and rabbit deterrents, but most are topical treatments that have to be applied after each rain or even heavy dew and, generally, they’re expensive. Since many are based on smells (a popular one is coyote urine), it’s not surprising a non-appetizing, odoriferous, rainproof thing such as Irish Spring keeps the critters at bay. $13.89 for 12 on Amazon. 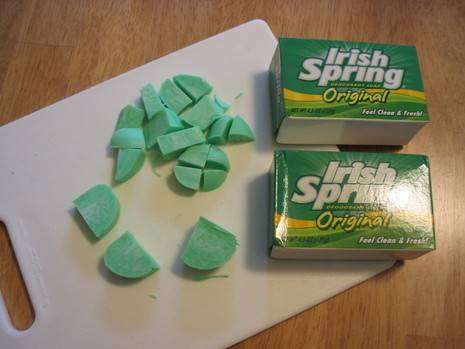
Just cut a bar into cubes, wrap the cubes in scraps of cloth, and staple them onto stakes. 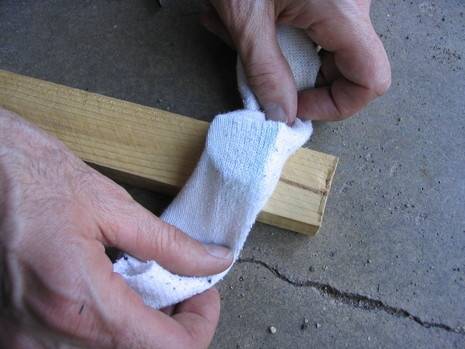
Drive the stakes in among the tantalizing vegetation. I also cut smaller bits to scatter along the ground. 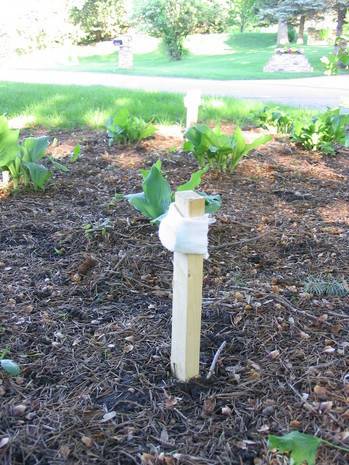
Yes, the yard smells ‘refreshing’ and no, the soap doesn’t suds up during a rain. Last year, I did the stake trick at the beginning of the year, but replenished my scattered pieces once a month or so. Together, they seemed to do the trick; the deer left my plants alone.
Having problems with other household pests?
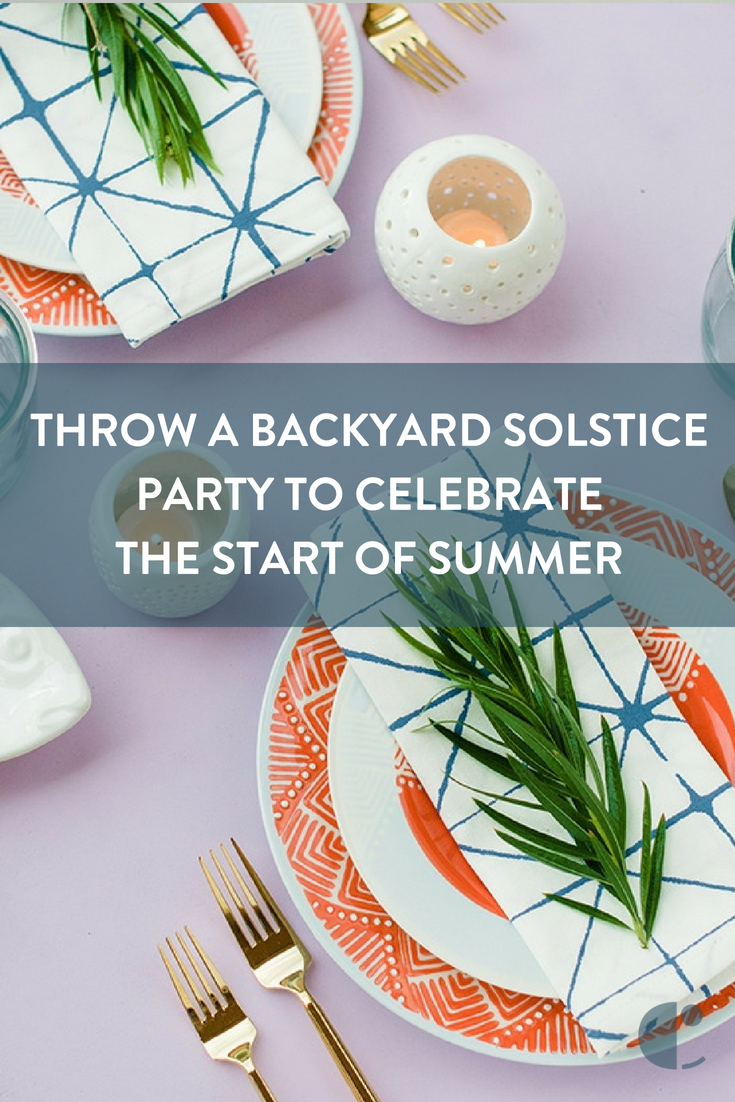
Here are 11 Natural Ways to Get Rid of Mice, and our best DIY Fruit Fly Trap. The post Use Irish Spring to Keep Out Garden Pests appeared first on Curbly. Via https://www.curbly.com/use-irish-spring-to-keep-out-garden-pests What Should You Do This Month? Throw a Backyard Solstice Party to Celebrate the Start of Summer6/22/2022 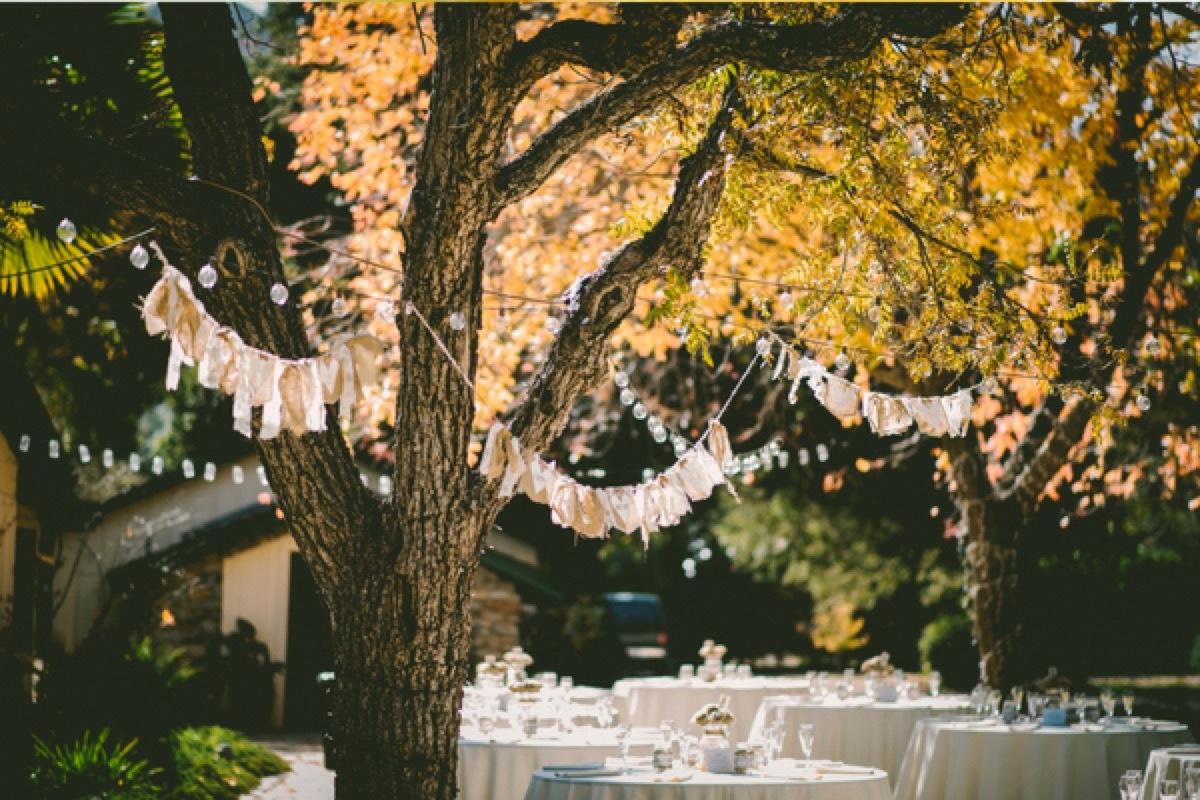
While many Americans think that summer starts on Memorial Day, it officially begins on summer solstice, usually June 21 in the Northern hemisphere. The longest day of the year seems like the ideal excuse for a party, so here are some ideas for a backyard celebration of midsummer. And if you don’t get around to throwing a summer solstice party, there’s no expiration date on these outdoor party ideas! For these summer solstice party ideas, I wanted to spotlight some of the things that are better in summer than any other part of the year. So I’m sticking with a theme of seasonal produce and flowers, accented with white lights and candles. You can keep it simple, or you can go all out with DIY projects if you’ve got the urge. The FoodGrilled pizzas are a great way to showcase summer produce, and it would be fun to let people pick their own toppings. 
This beautiful heirloom tomato and grilled vegetable salad is perfect for those tricky party guests who don’t eat meat, dairy, or gluten (and if you plate it this nicely, it might entice everyone else into eating more veggies.) A summer solstice party wouldn’t be complete without berries. This summer berry cake is a showstopper. 
Another option is this Swedish midsummer cake. Or you can always keep it simple with a classic strawberry shortcake. Adding edible flowers makes almost any dessert look midsummer-worthy. (Here’s a long list of edible flowers.) 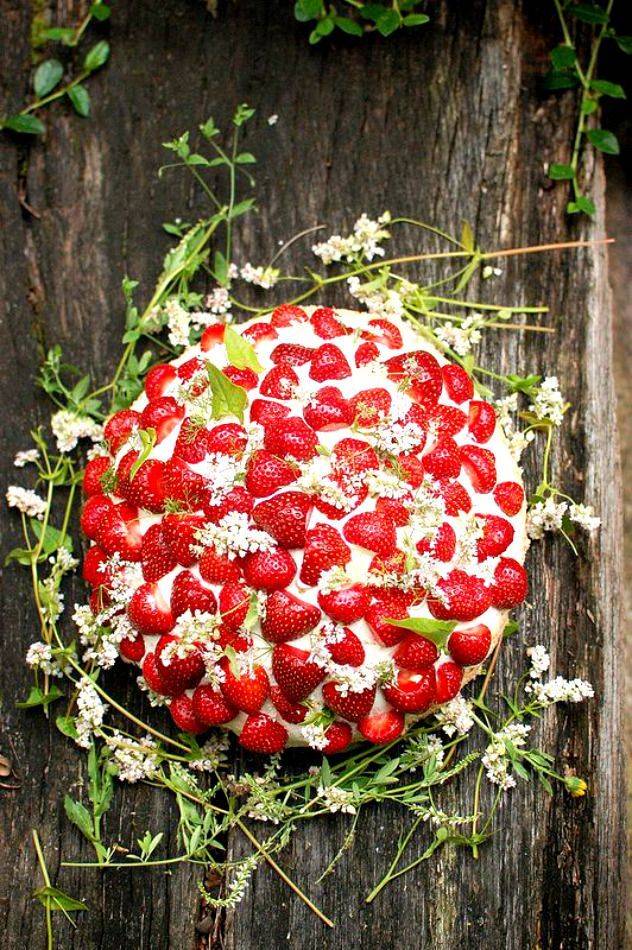
The DrinksIf you want to go the cocktail route, making up batches of drinks saves you the trouble of bartending during the party. Strawberry rhubarb sangria, made with sparkling wine, sounds light and refreshing. For a more savory cocktail, try cucumber-lime-infused gin and tonics. 
Don’t forget the non-drinkers in the crowd. Sparkling lavender lemonade or thyme lemonade sound like lovely options. 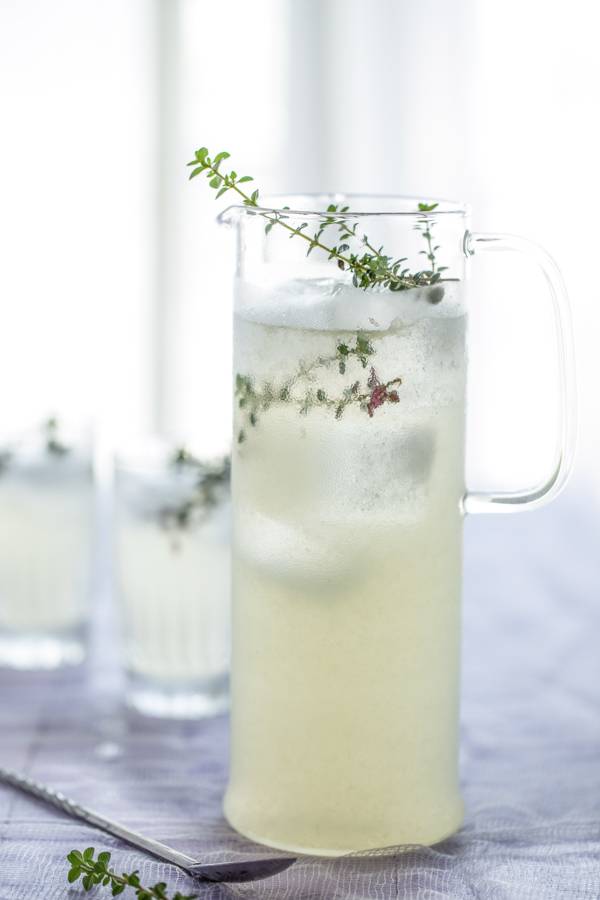
The DecorThese herb napkin rings are simple and organic, and probably smell wonderful, too. 
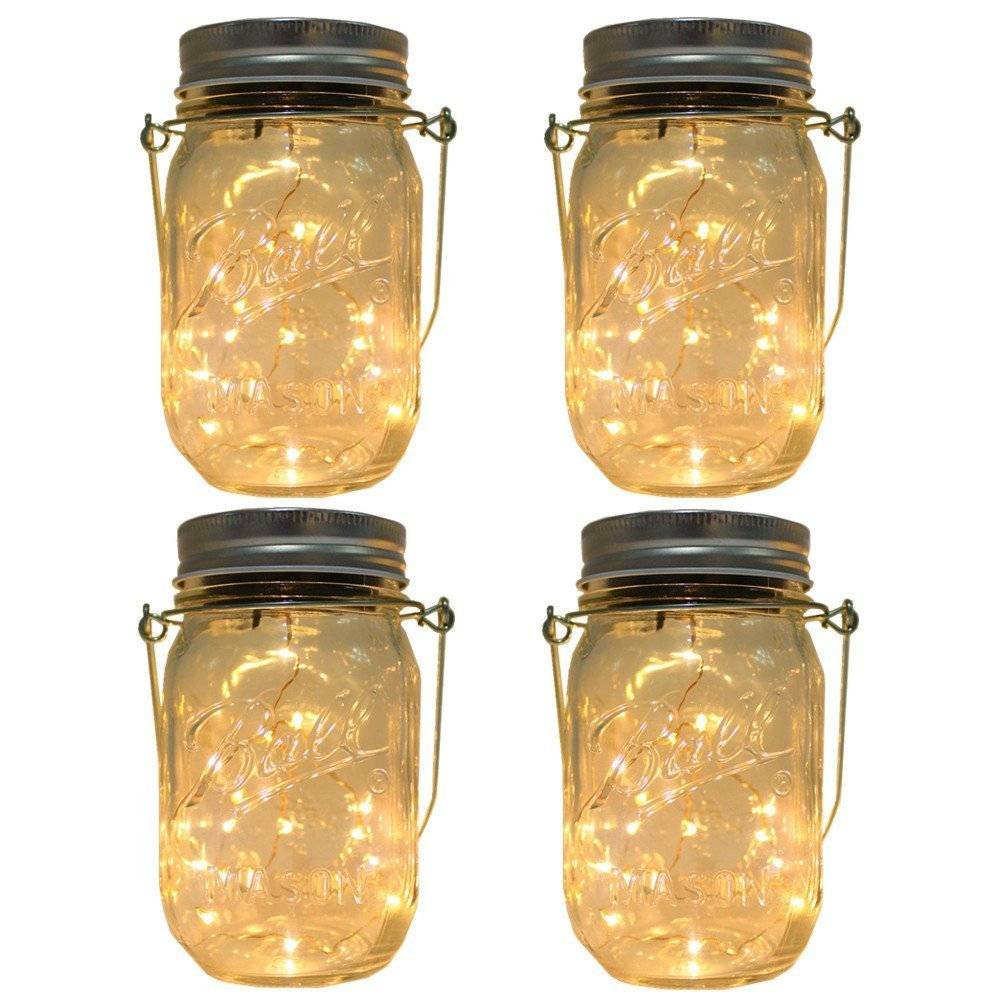
Solar-powered Mason jar lights are a charming option, and practical if you don’t have easy access to outdoor outlets. DIY floral ice buckets are a gorgeous way to keep your wine cool, and double as decor. Make as many as your freezer can handle, and scatter them throughout your yard, or use them as table centerpieces. For a much simpler variation, freeze fresh herbs and edible flowers into ice cubes for drinks. 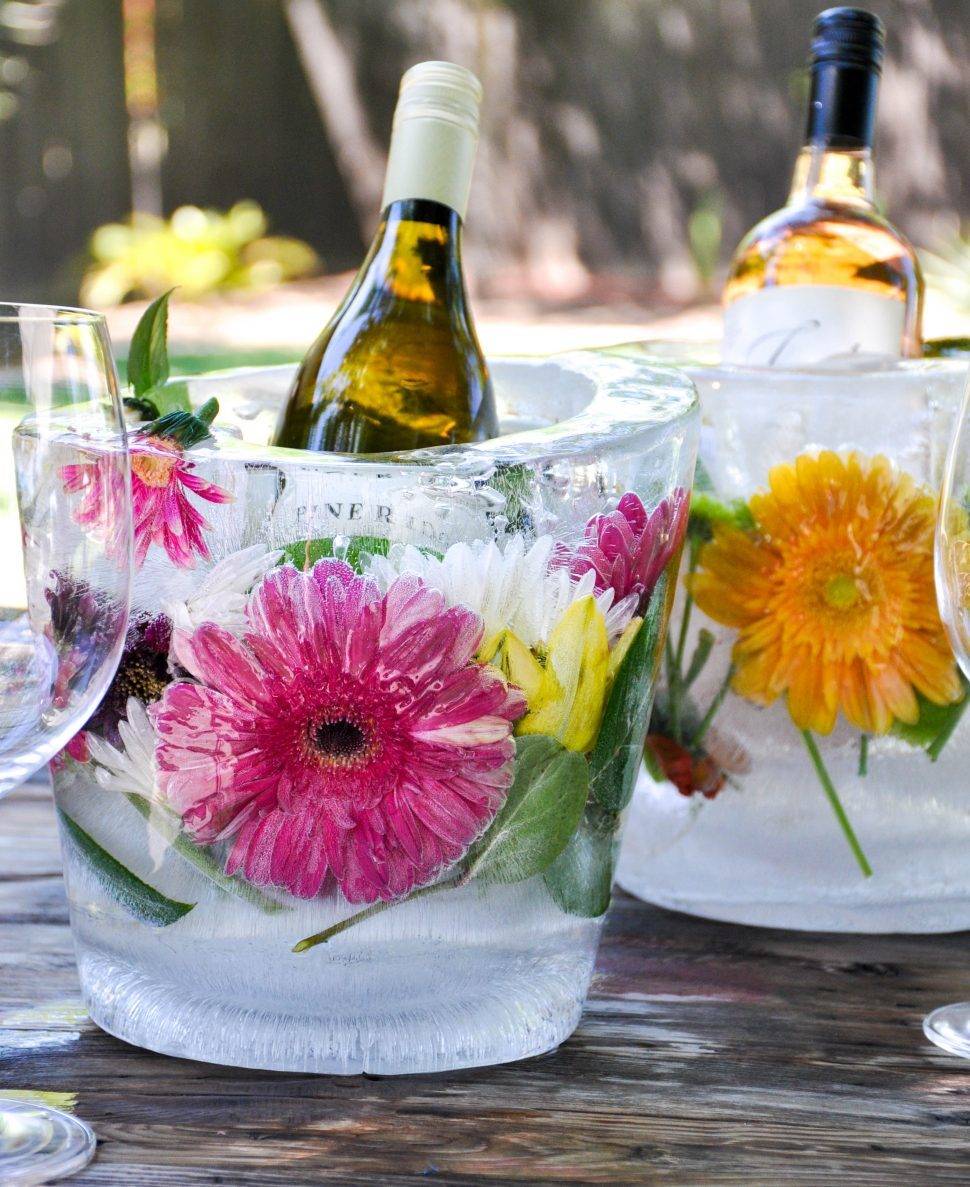
Strings of white cafe lights are perfect for that evening fairy-light ambiance. 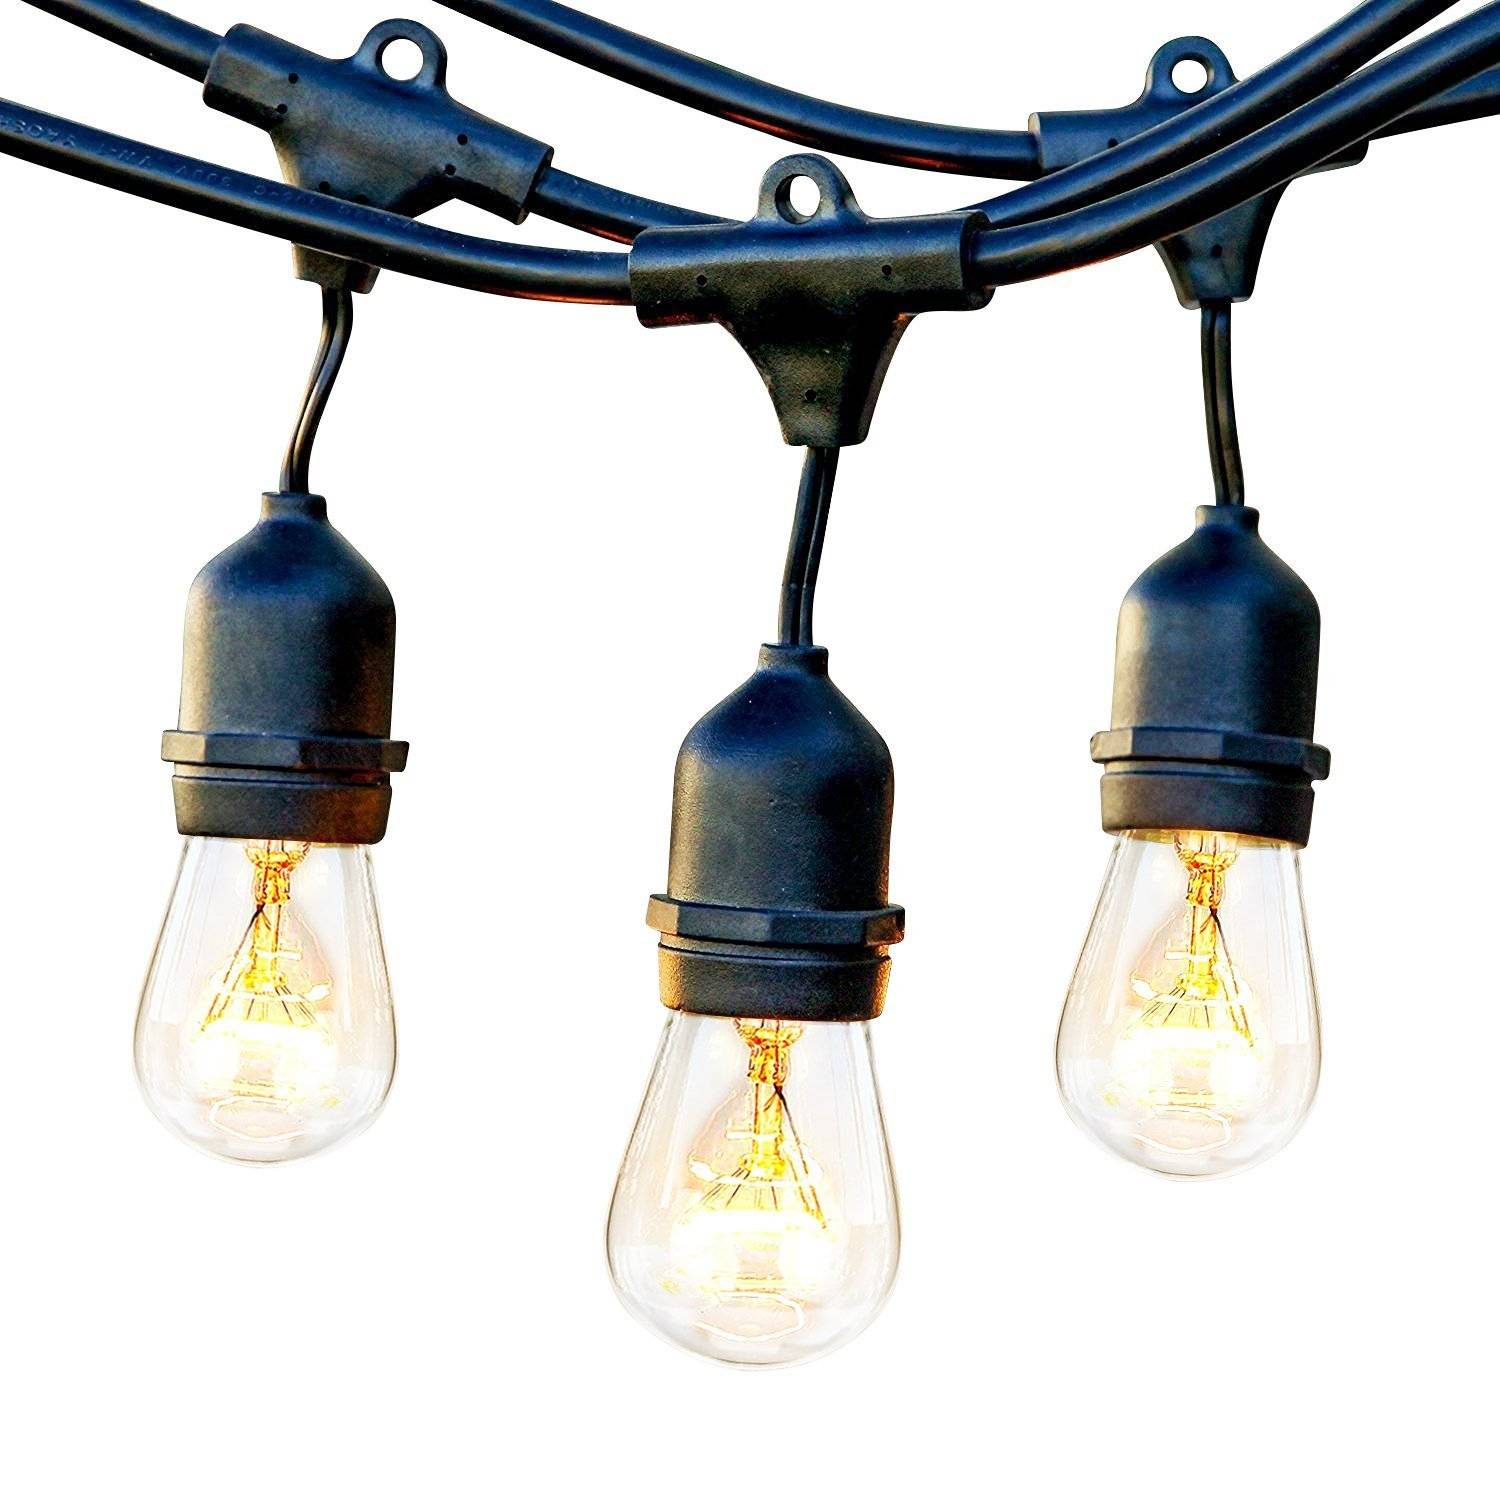
Go all out with a handmade floral chandelier. Bonus points if you grow your own flowers. If you’re not feeling quite so ambitious, just pile your tables with vases overflowing with flowers from the store. 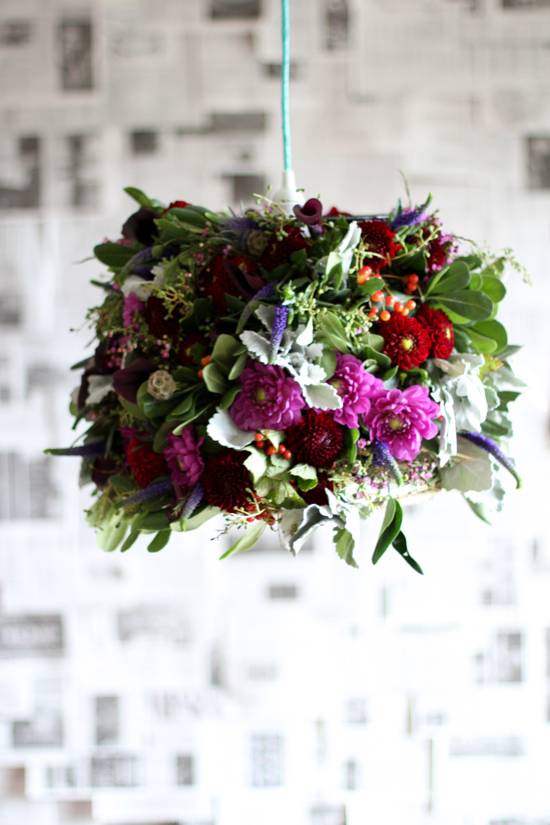
The EntertainmentWhether you turn it into a drinking game or not, giant Jenga is nearly always a hit at outdoor parties, and is the only entertainment you’ll need at your summer solstice party. With some 2×4’s, a saw, and some sandpaper, you can easily make your own giant Jenga set. You can always buy a set if you’re not inclined to make one. 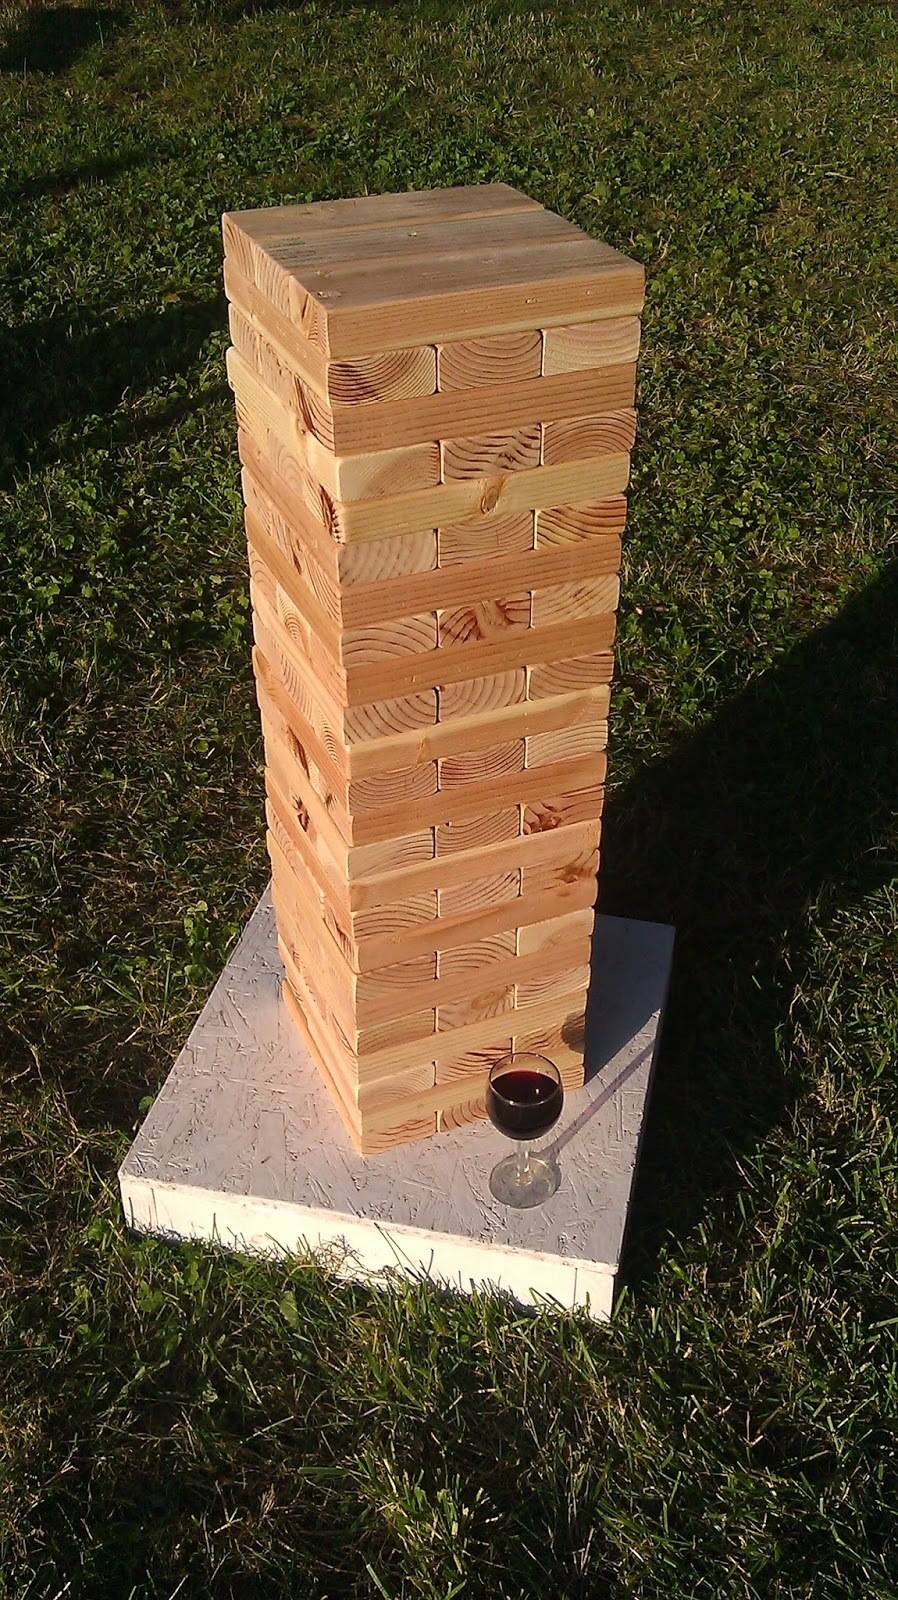
Searching for more lawn games? Check out these 11 unique projects you can make yourself!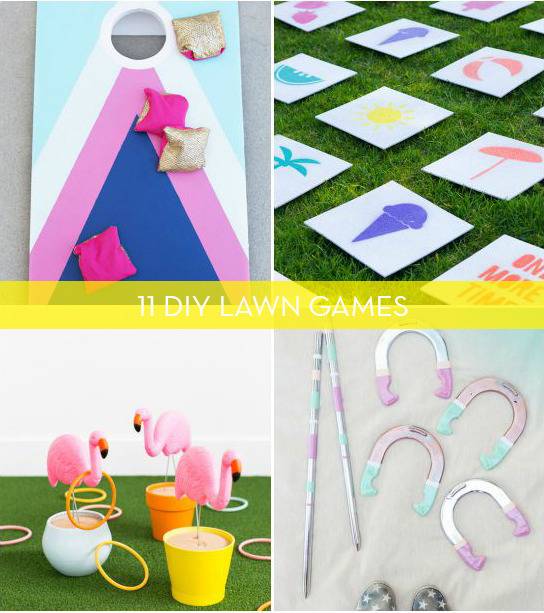
The post What Should You Do This Month? Throw a Backyard Solstice Party to Celebrate the Start of Summer appeared first on Curbly. Via https://www.curbly.com/summer-solstice-party 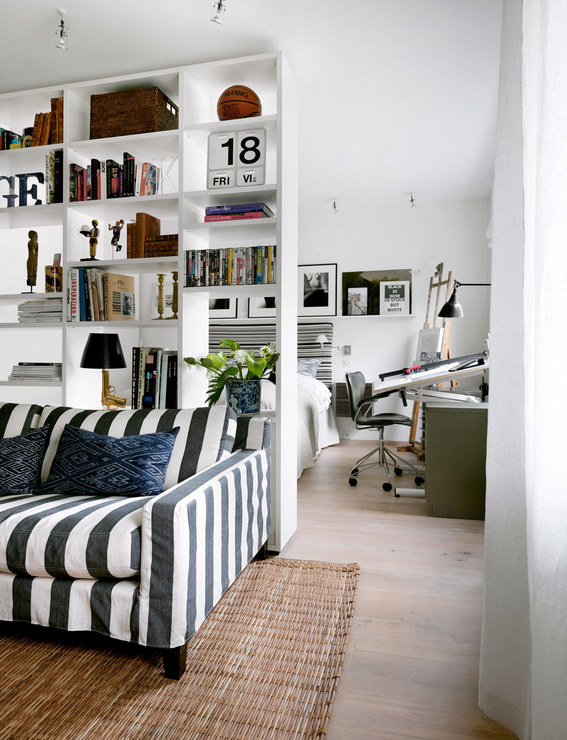
This is not a post about deceiving your landlord. This post is about updates you can make to your rental that more than likely don’t need your landlord’s permission. My husband and I are landlords. Rentals are a part of our full-time job; so here are some things WE wouldn’t mind you doing if you lived in our rentals … and I bet your landlord might feel the same way. If you’re sick of ugly apartment cabinets and want to cover them, or just can’t stand the light fixtures in your space, here are some simple ideas for you. 1. Create your own walls with pieces of furniture.Need more rooms or spaces? Create them with furniture. 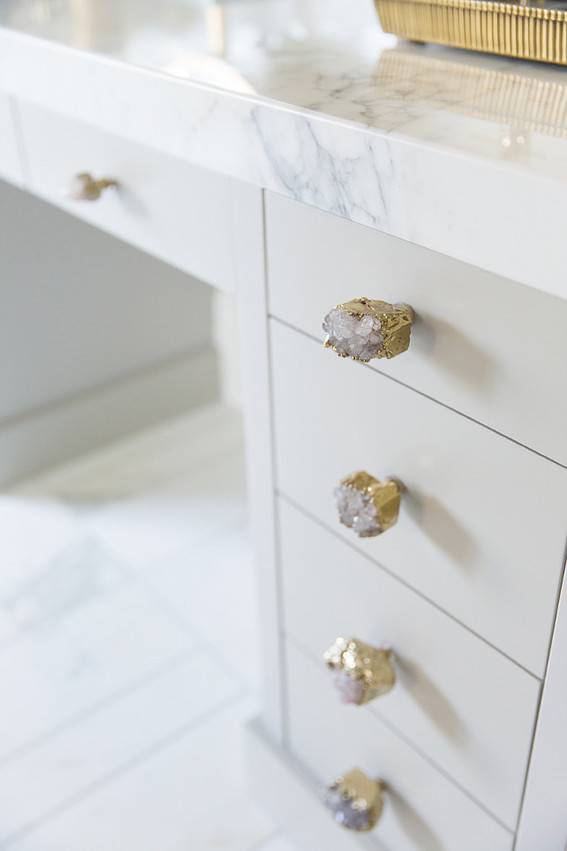
2. Change up the kitchen cabinet or bathroom vanity hardware.New knobs can change a bathroom or kitchen, and they are really easy to change. I would buy some fun ones that you might use again … maybe in your new home or on a piece of furniture. Make sure you store all the old knobs with all the screws so you can easily put them back on when you leave. Don’t do: Don’t drill new holes. You do need to ask permission to drill any new holes. Don’t switch the hardware out with something you would need to drill a second hole or a hole in a different place. If your cabinet does not have hardware then you need to ask to drill holes. 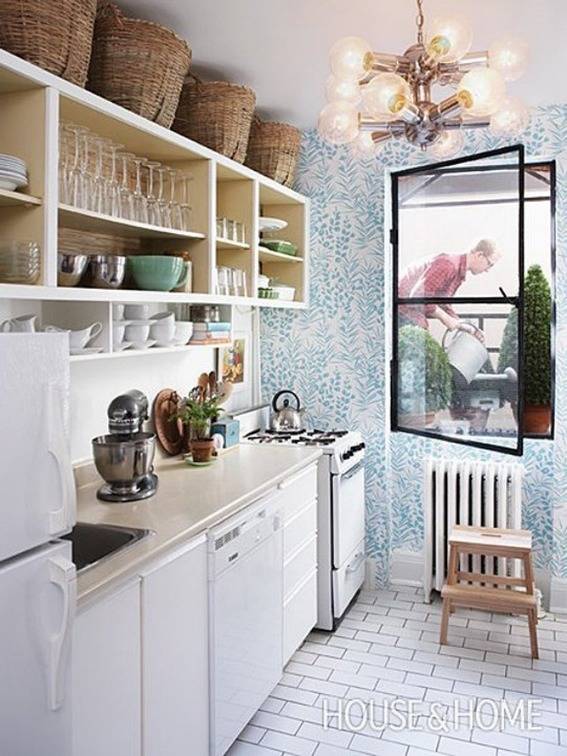
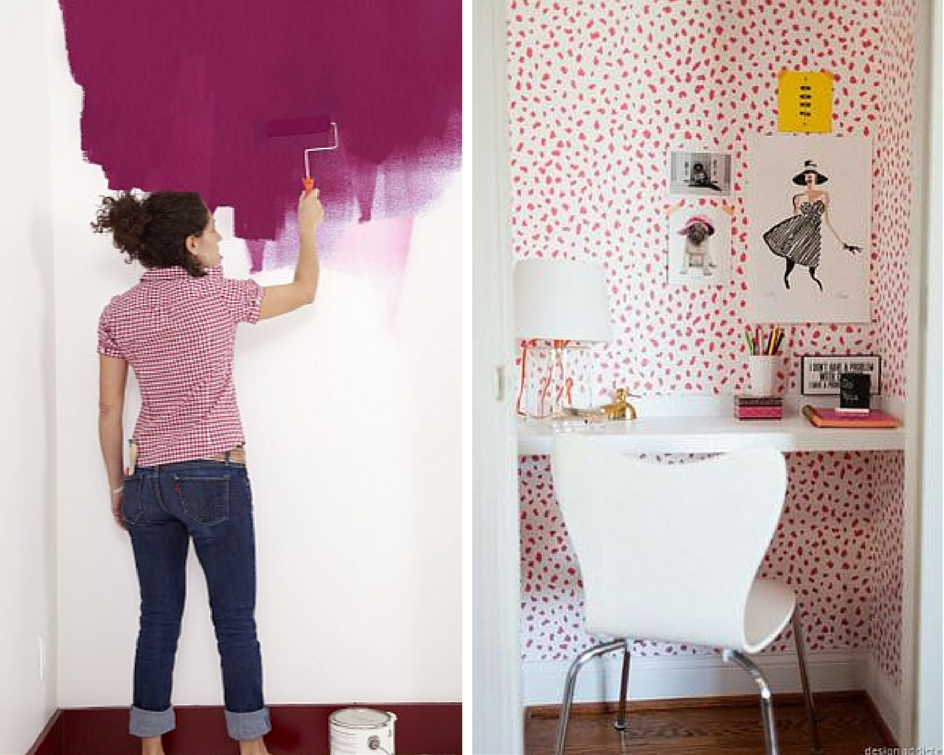
3. Remove your kitchen cabinet doors.If your rental has ugly doors and you happen to have some awesome kitchenware that needs to be displayed, then go ahead and remove them. Make sure you store your kitchen cabinet doors in a place where they will not be damaged. Make sure you are extra careful if they are painted just to be thoughtful. Don’t want to remove the doors? You can make temporary cabinet covers by concealing ugly doors with removable adhesive paper (contact paper). Don’t do: Don’t lose all the hinge hardware or putty fill the door holes. Remember, kitchen cabinets are a very expensive fix so store them well. Not storing them well will probably cause you to have to pay a hefty price. 4. Do use temporary wallpaper.If you have a landlord with a “no paint policy” check out the paint-able and totally removable wallpaper from Tempaper. There are many brands of temporary wallpaper and as long as it is installed and removed well it will more than likely be okay with your landlord. 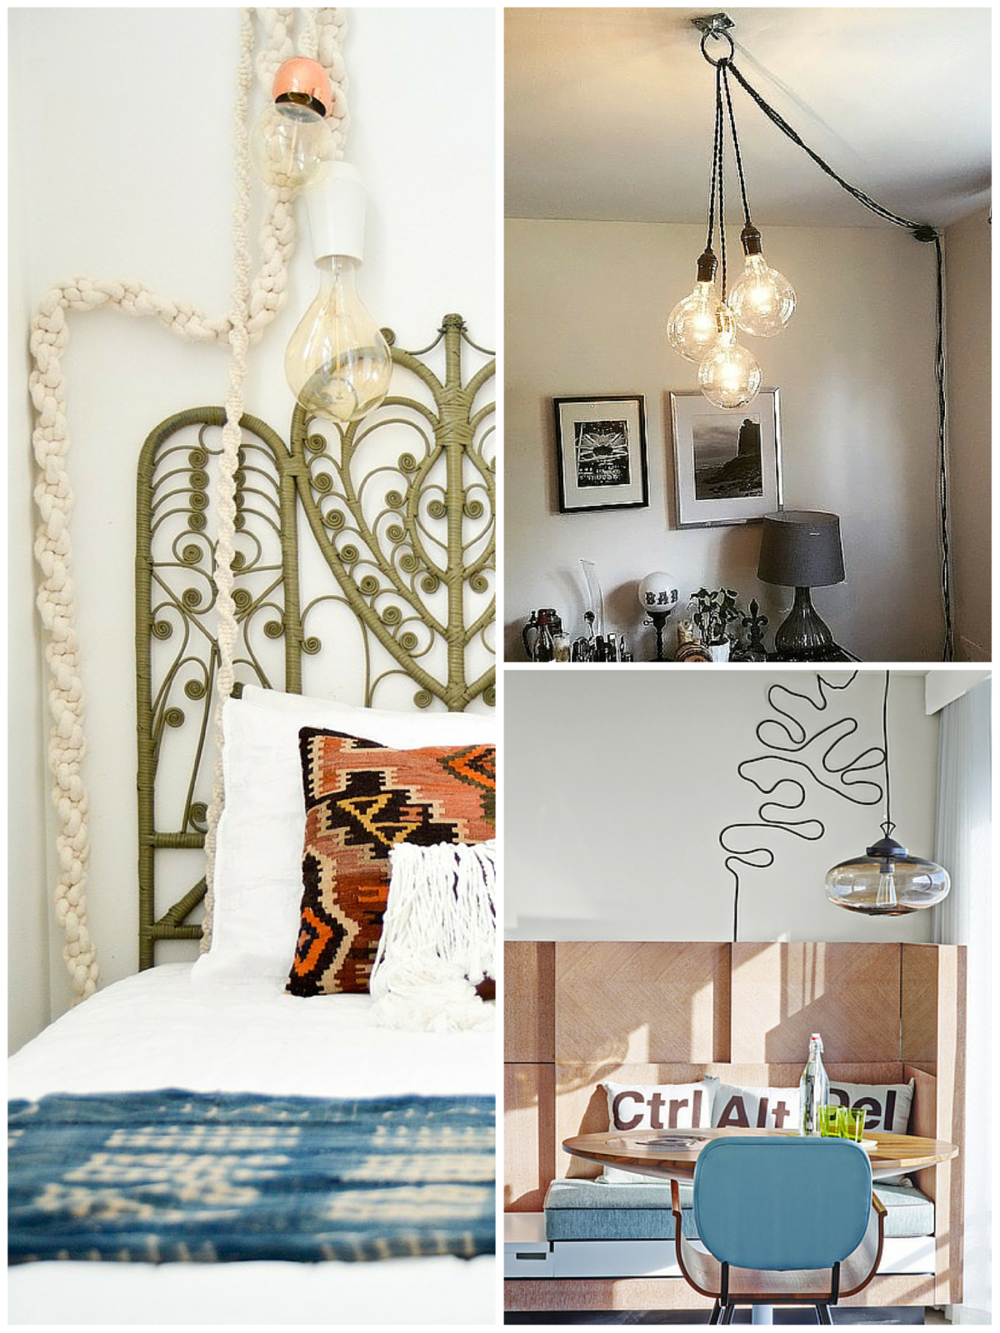
5. Install plug-in pendants.If you are allowed to drill into the wall then there should be no problem with installing a hook into the ceiling. This is an easy way to make your rental look custom and then take that custom look with you when it’s time to go. Don’t Do: Use the wrong hook or hardware to install into the ceiling. Doing this will make the hole bigger than it needs to be and a not so easy fix for your landlord. 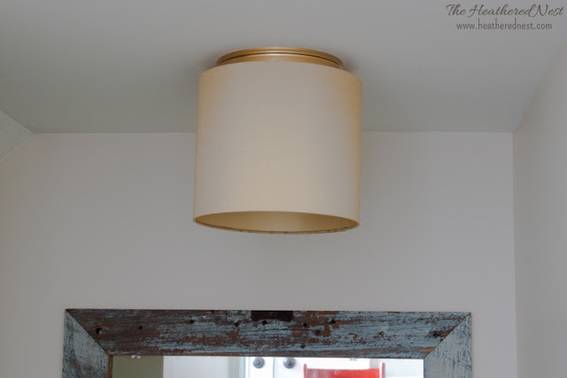
6. Do switch up the shades or bulbs of your light fixture.There are so many ideas out there to spruce up existing fixtures. Make sure your store the original shade or bulb so you can return it when you leave. Don’t Do: I think changing the light fixture without permission is a bad idea. It never hurts to ask but don’t be mad when your landlord says no. My husband is a general contractor and even he won’t install a new light fixture in one of his rentals. Why? If the licensed and insured electrical company installs your fixtures, then if something goes wrong, only they are liable. How do I, as your landlord, know you know electrical work? If something happens then I am liable. If you are that passionate about it, tell your landlord you will pay for his electrician to come install it and then re-install the original one when you leave. Safe people are happy people, right? 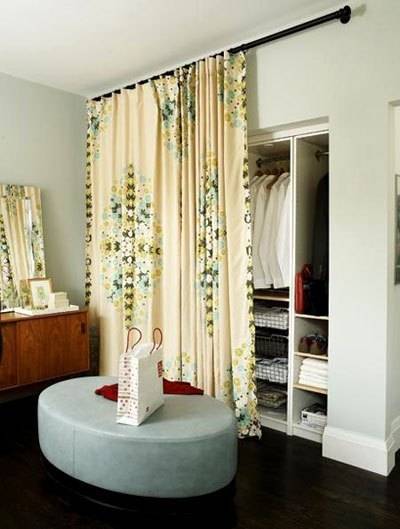
7. Do take the closet doors off.Again, as long as you store them well and put them back on when you leave then your landlord should have no problems with this removal. 
8. Do use rugs to cover ugly floors.Whether it is gross carpet or really ugly vinyl … a rug can right some wrongs. If you have ugly kitchen vinyl, buy a vinyl sheet remnant and cut it as large as you need it to be. Turn it over to the white side and paint it. Use rug tape and you have a water friendly and mop-able way to cover some serious ugly. 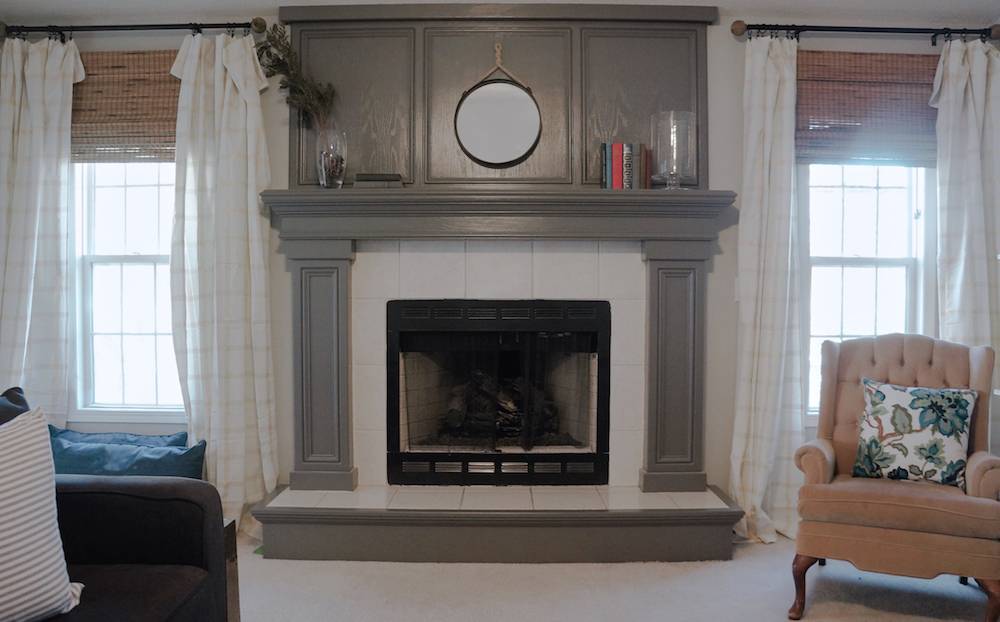
9. Do install outside mount roman shades to hide ugly or broken blinds.In this living room makeover I hid the white blinds by pulling them all the way up and installing this bamboo roman shade over the window trim. You didn’t even know they were there did you? The family uses the roman shades when they want privacy and the broken white blinds are completely hidden. 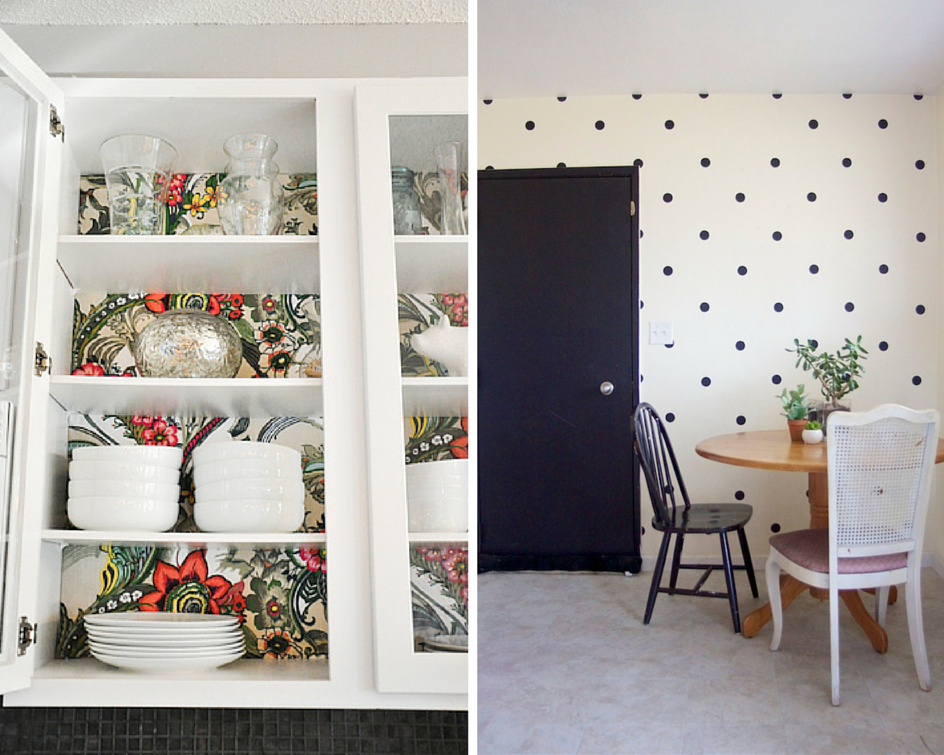
10. Do use contact paper.You can contact paper on walls, your kitchen cabinets, your fridge, your door and so many other places. You can even use frosted glass contact paper on a window to give you privacy. 
Your rental can feel like your home with these simple updates. On another note, while I would be fine with all of these updates, if you are not sure…go ahead and ask your landlord anyway. A trusting landlord will let you do more but you do have to gain the trust at first. Love this post and want more? You’re in luck, because we’ve got lots of great posts planned specifically for all you renters so stay tuned. The post You Can Do It: 10 Rental Updates Your Landlord Doesn’t Need to Know About appeared first on Curbly. Via https://www.curbly.com/10-rental-updates-your-landlord-doesnt-need-to-know-about 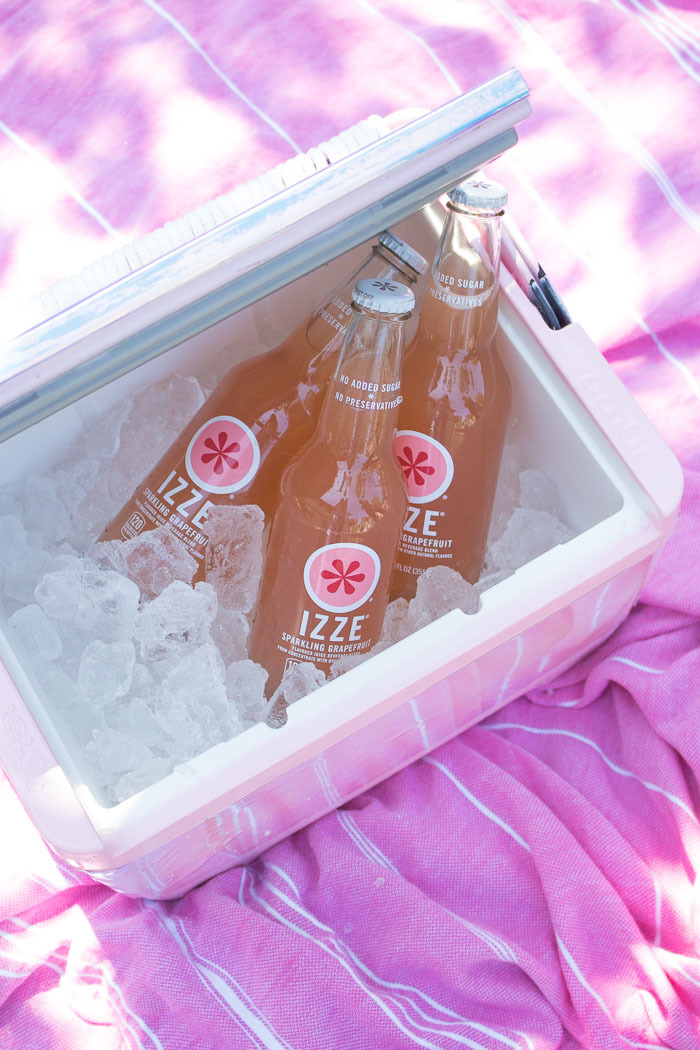
Summer is the ideal time of year for family outings, beach days, picnics, adventures in the park and so on. You probably bring along an ice chest to keep your drinks and a few snacks cold, but in the hot sun, that ice will be melted in no time. One sure-fire way to make the ice in your ice chest last longer is to add a simple household item…salt. Rock salt, to be exact. Much like salt helps freeze ice cream as it churns, it can help the ice in your cooler last longer because salt lowers the freezing point. Here’s how this technique and several others can help the ice in your ice chest last longer! 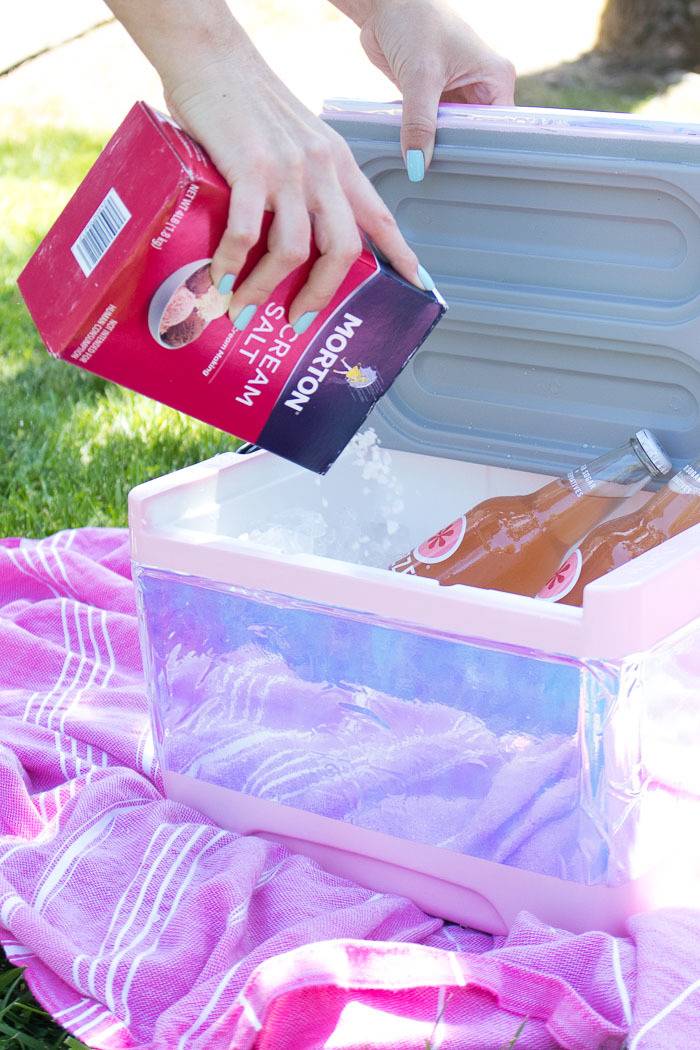
1. Add Rock Salt to your Ice ChestYou can either add rock salt to a cooler full of ice, or you can actually make ice by freezing salt water. Either can help reduce the freezing point so that the ice lasts longer. However, this will only help if you follow a few other tips as well. 2. Maintain Ice and Water LevelsDon’t drain your cooler as the ice melts! Keeping the water inside the cooler means that air won’t get between the ice, reducing melting. If possible, add more ice halfway through the day. 3. Bury your Ice Chest or Raise ItAvoid having the ice chest directly on hot ground if you can. Raise it to encourage airflow underneath or bury it into the sand at the beach (where it’s cooler). The other obvious way to keep your ice frozen is to open your ice chest as little as possible. You know when your dad yells at you for “air conditioning the whole neighborhood?” Well, the same is true for your ice chest. Keeping the lid closed keeps the coldness inside, so only open it when you need something! 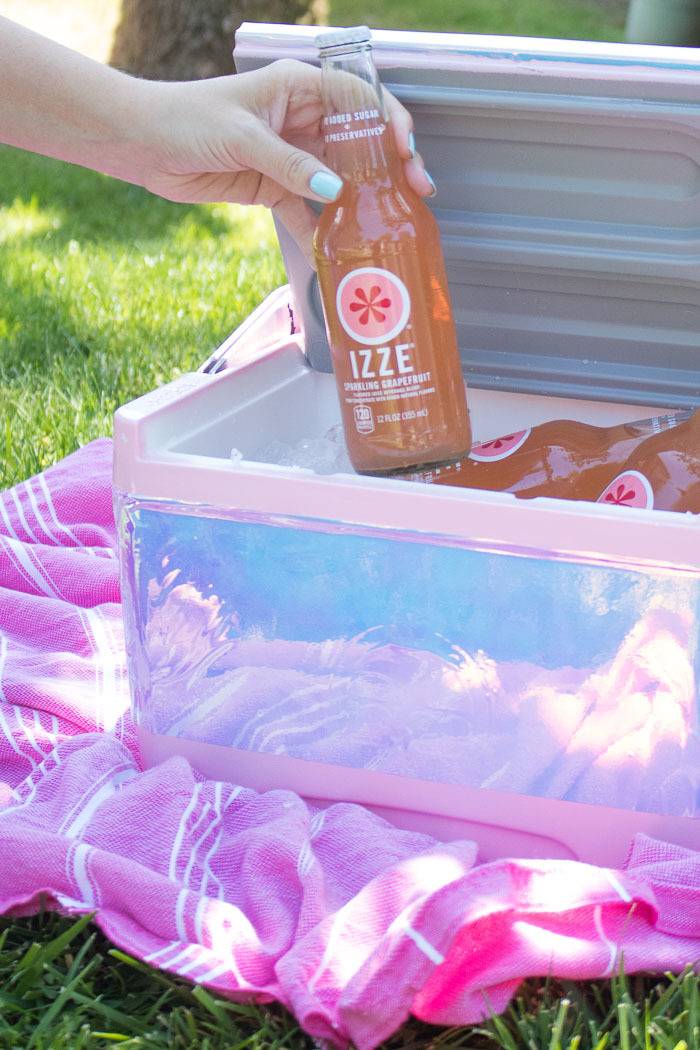
If you combine these three tricks, your ice will (hopefully) last all day or for the length of your event. Remember, the quality of your ice chest also makes a difference! The more insulated and high-end the cooler, the better it will cool your food and drinks, so don’t skimp if you really need something that will last. You can also help your cause by purchasing a lighter colored ice chest as it will reflect the light rather than absorb it. Personally, my mini cooler works perfectly for me, and as long as it’s kept in a cool place, my ice lasts more than a full day! PS, you can find this DIY holographic cooler on my blog! The post This Simple Trick will Make the Ice in your Cooler Last Longer appeared first on Curbly. Via https://www.curbly.com/simple-trick-make-ice-in-ice-chest-last-longer This tutorial will guide you through all the steps to making your own, large-scale DIY concrete planters at home. 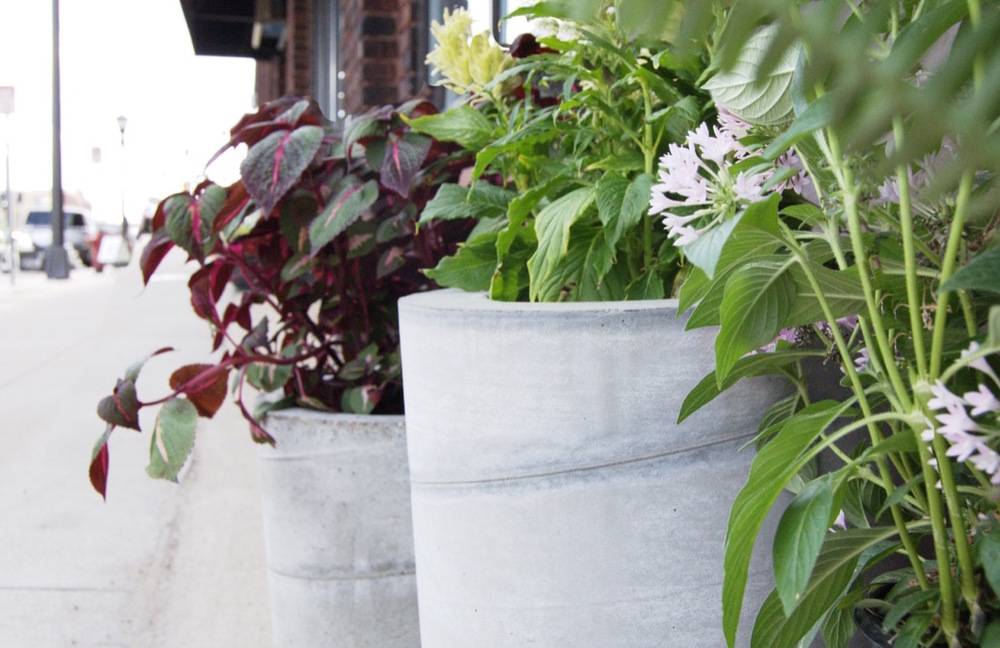
This summer, we moved into a new studio space on a bustling avenue that cuts right through the heart of St. Paul and Minneapolis. We love it; our huge floor-to-ceiling-windows look out into the sun-filled street and sidewalks where we can watch the light-rail trains go rolling by. But the people looking back at us don’t have as much to look at; our storefront is still looking a little shabby and unloved. So we decided to start out office transformation from the outside in: with a few large-scale DIY concrete planters. 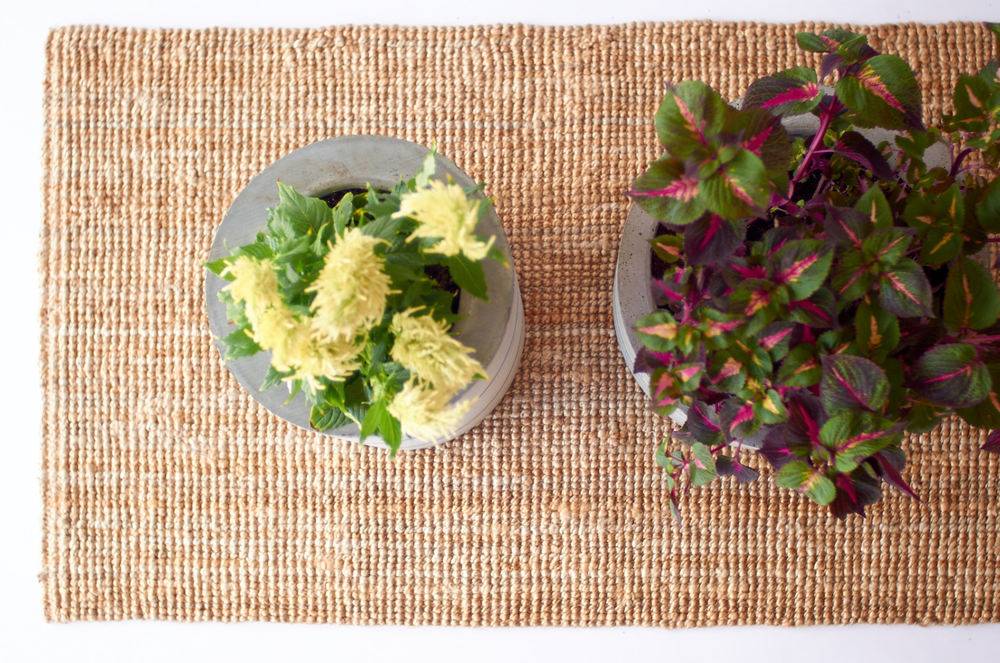
Ahh… concrete. It’s kind of a miracle substance. Look around, and you’ll start to notice that practically everything is made of concrete. It’s strong, durable, infinitely moldable, easy to work with, and looks oh so sharp!
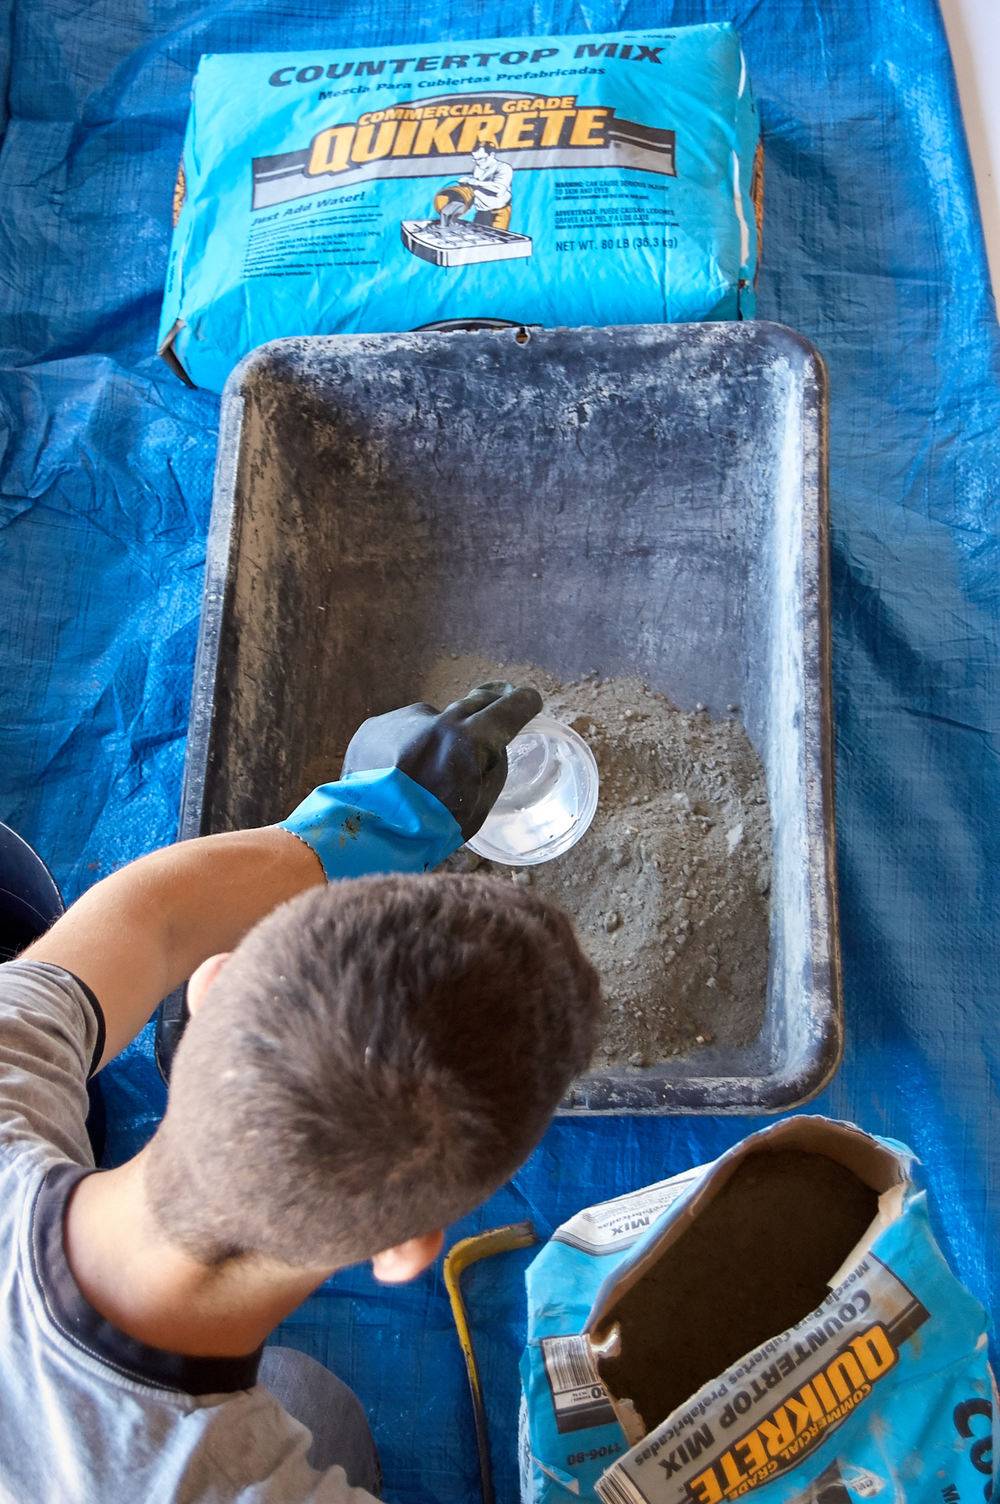
We partnered with Quikrete for this project, so we wanted to try out their countertop concrete mix, which has an additive that lets the mixed concrete flow and consolidate better at a lower water-to-cement ratio. It’s great for, duh, countertops, but also any other concrete project where you want a really nice finish.
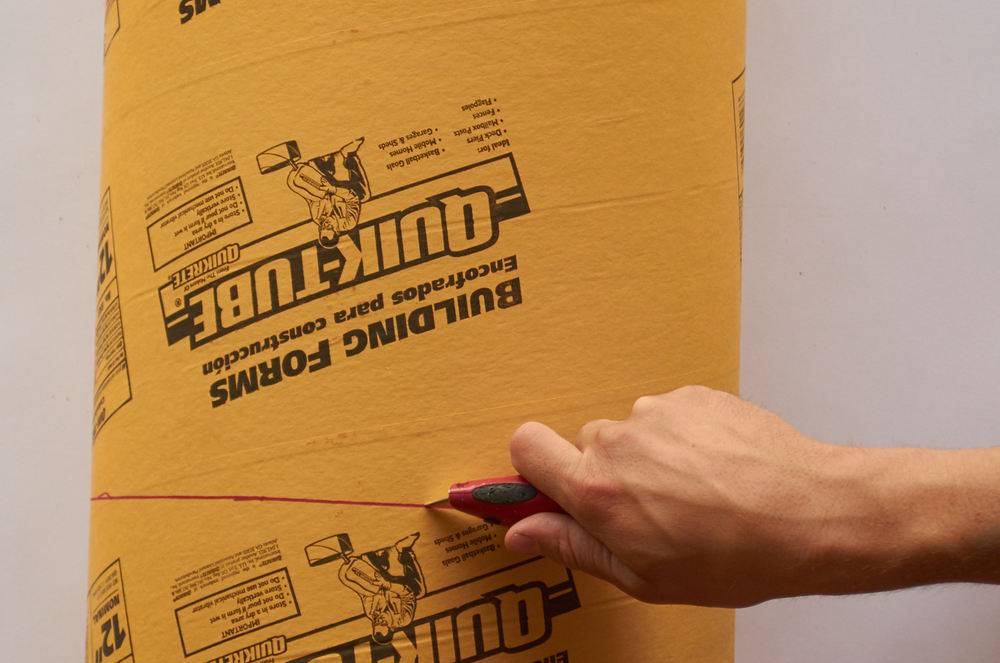
For this project, we wanted to build some planters that were large and impressive. They’re going to go out on the street in front of our office, where lots of people will see them. And we didn’t want to just go to the big box hardware store and buy a few faux Tuscan jobs; where’s the fun in that?! This is a DIY site, and it wouldn’t do to have some generic store-bought planters sitting in front of our HQ. So we came up with the idea of using concrete footing tubes … you know, those cardboard concrete tube forms you can use to make fence post footings? They’re perfect because they come in lots of sizes, and are easy to cut down to length. They make perfect concrete planter molds. We went with a basic cylinder-shaped planter; simple but stylish. Here’s how we did it: Materials

Tools
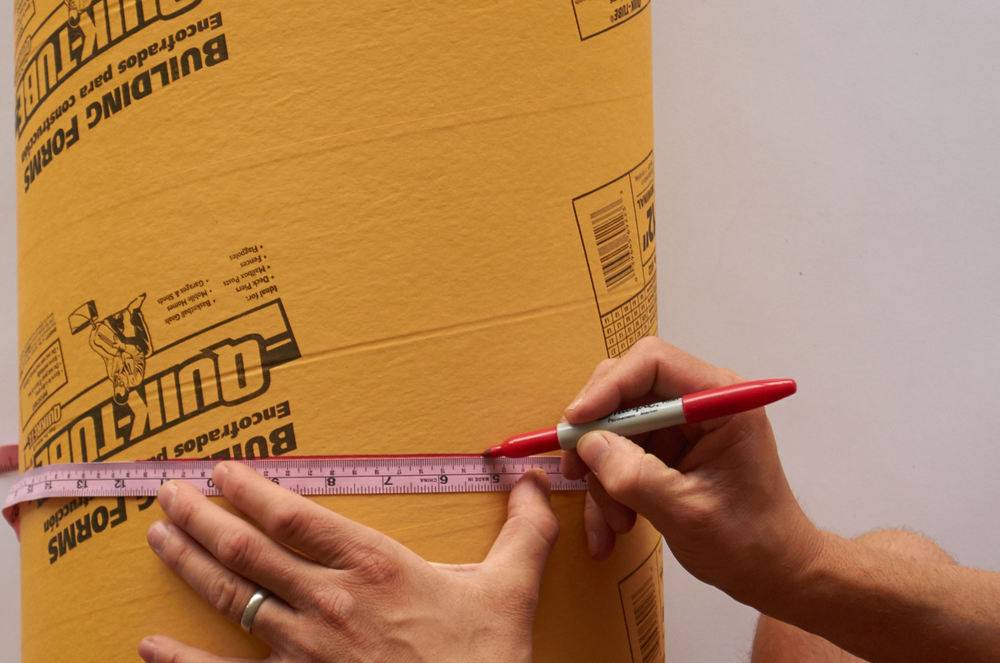
How to Make Your Own DIY Concrete PlantersStep 1Decide how tall you want your planter to be. We made our first one 24″ tall. Then mark that on the tube (in our case, I started with the 12″ diameter tube), and cut the tube at that length. You can use a sharp utility knife, or, to go faster, use a circular saw to carefully make the cut. 
Step 2To make the inside part of the form, mark your smaller tube at a length 1.75″ shorter than the first (this will account for the height of the PVC drain cap and also makes up the base of the planter. For example:
Our first planter was 12″ in diameter and 24″ in height. So our inner tube (8″ diameter) was cut to 22.25″ in height.
Step 3Now place the smaller tube (the one that will end up inside the larger one) on your plastic sheet and trace it. Then cut out that circle with a utility knife. This will be the base of the smaller tube. 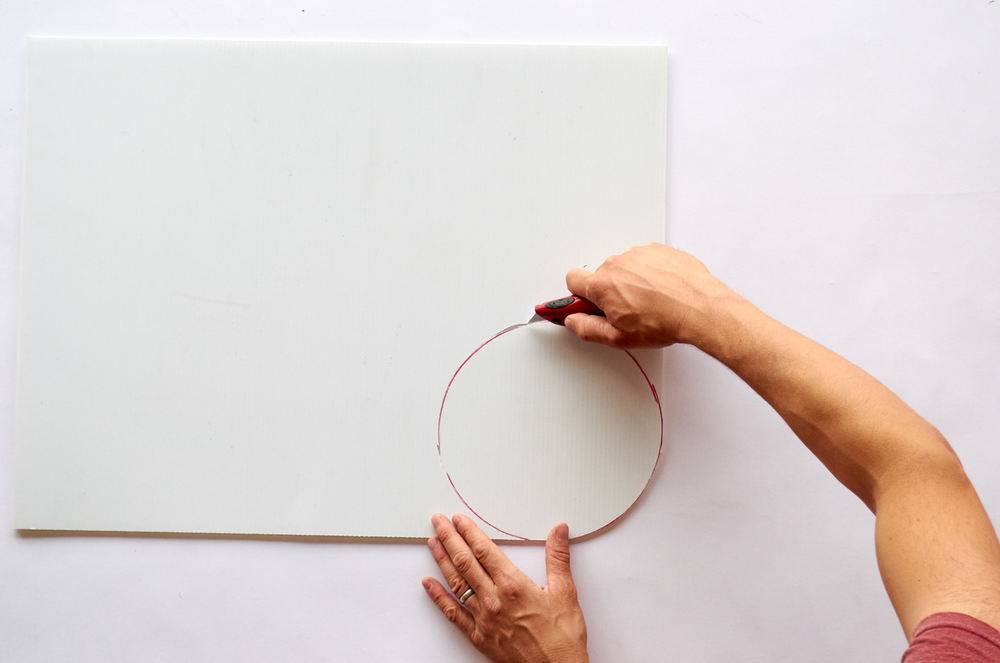
Step 4Tape the plastic circle you just cut out to the bottom of the smaller tube, taping it neatly all the way around so that it won’t let concrete through. Then wrap the whole cylinder in plastic, taping it on. This isn’t strictly necessary, but it’ll make the form easier to pull away from the concrete later. 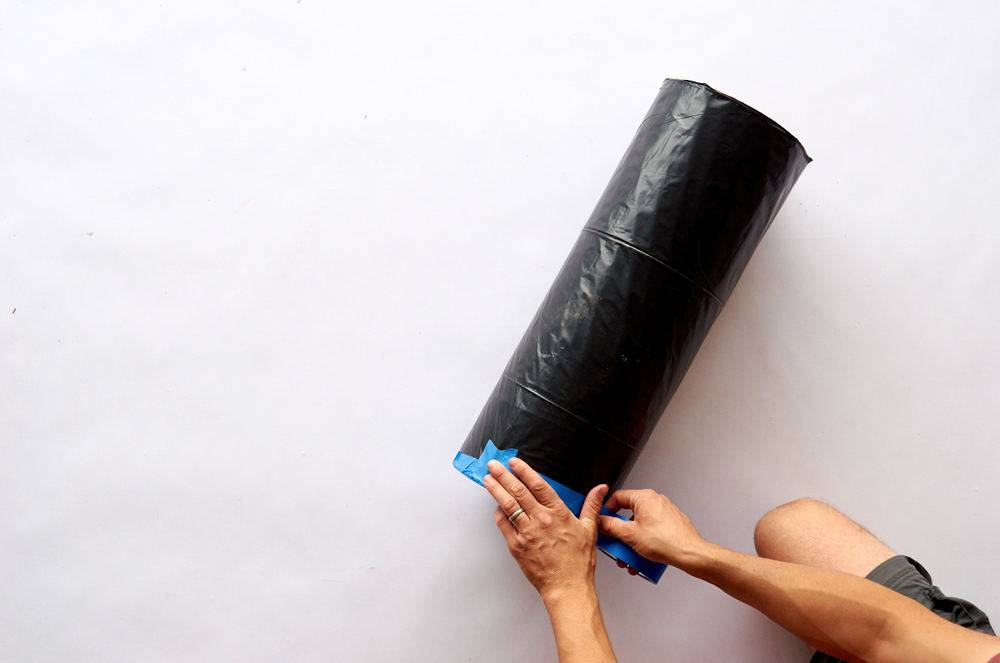
Step 5Now place the PVC drain cap in the center of the cylinder’s plastic ‘lid’, and screw it in place. Now your interior form is ready to go. 
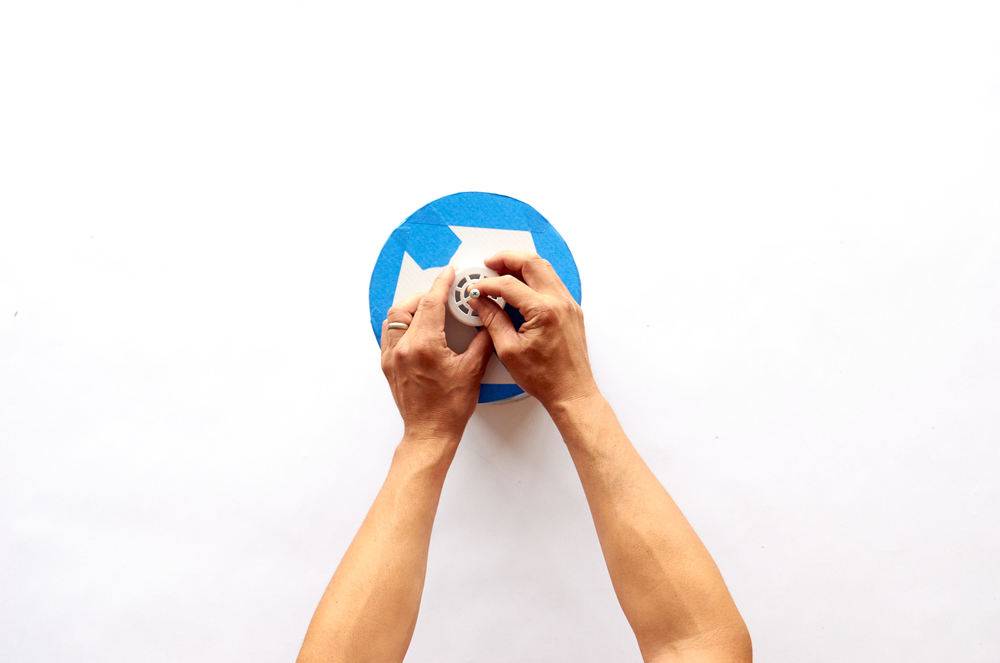
Step 6Place the smaller tube on top of a clean sheet of the corrugated plastic, with the ‘cap’ side up. You’ll adhere it to the plastic using the silicone caulk. 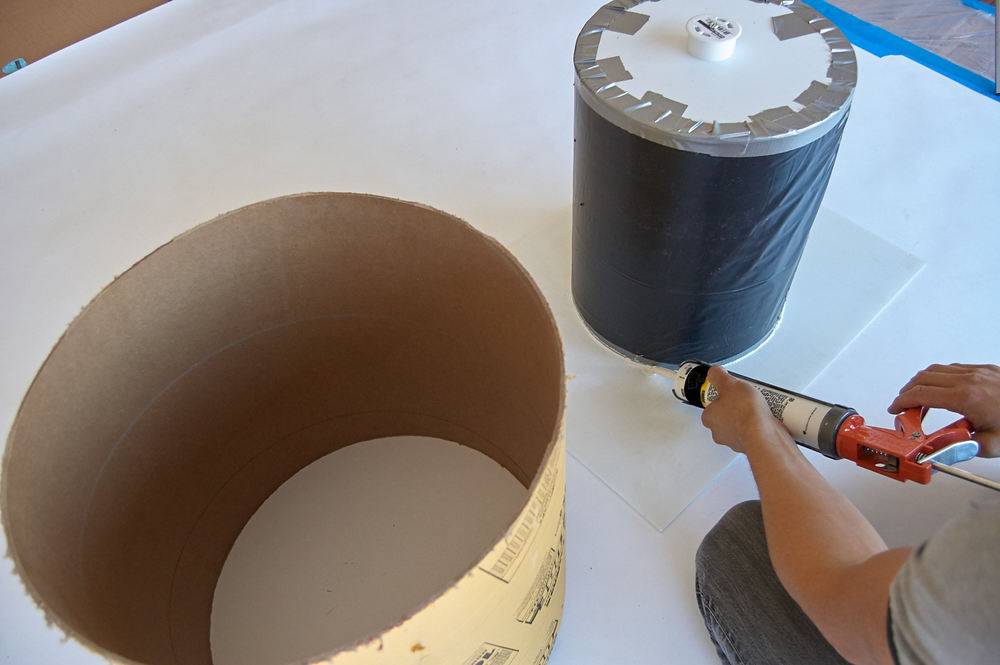
Don’t do this! 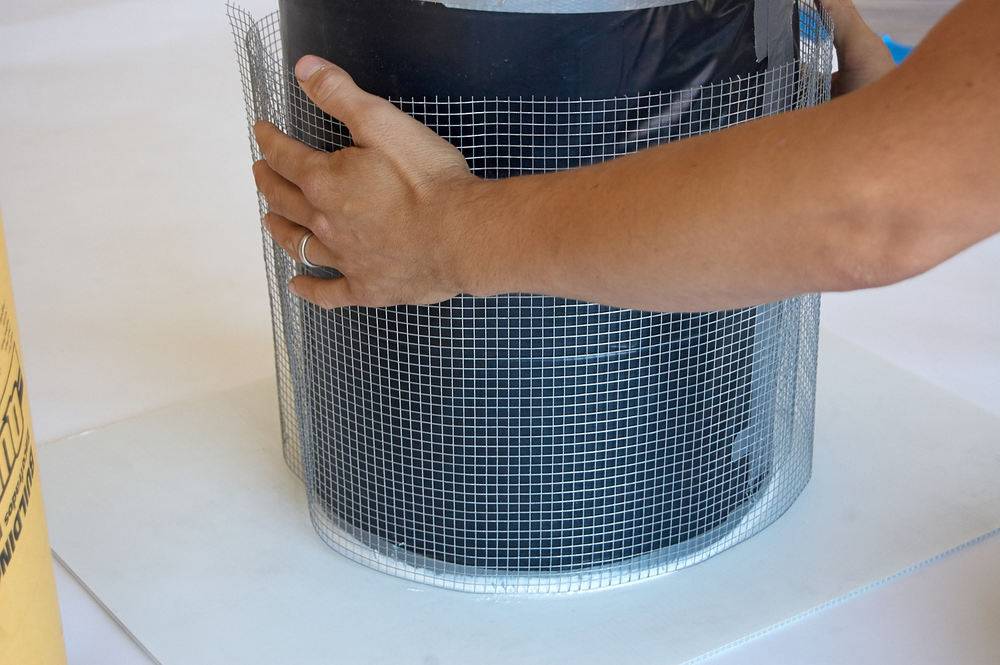
I thought this would add strength to the planter. It probably would’ve, but it also made it really hard to get the concrete distributed evenly within the mold, and, honestly, it’s a planter … it’s not like anyone’s going to be standing on it. So, if I were you, I’d leave the wire mesh out … the planters will be plenty strong without it. Here’s how the whole mold comes together: 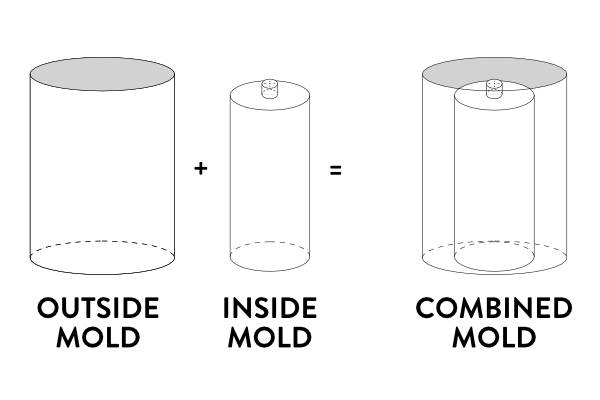
Step 7After spraying the interior tube with cooking spray, set the outside tube down around it and adhere it to the base with silicone caulk. Once the caulk has dried, your form is ready for concrete. Step 8Open a bag of Quikrete and mix it according to the directions on the back! I can’t stress this enough; unless you’re an expert concrete-mixer-guy/gal, just swallow your pride and follow the directions. Things will turn out much better. For a project like this, where a nice, even, smooth finish is most important, you want the concrete to be pretty wet (wetter even than it looks in my photos below). A wetter mix will flow into the form better and give a smoother, more even surface finish. 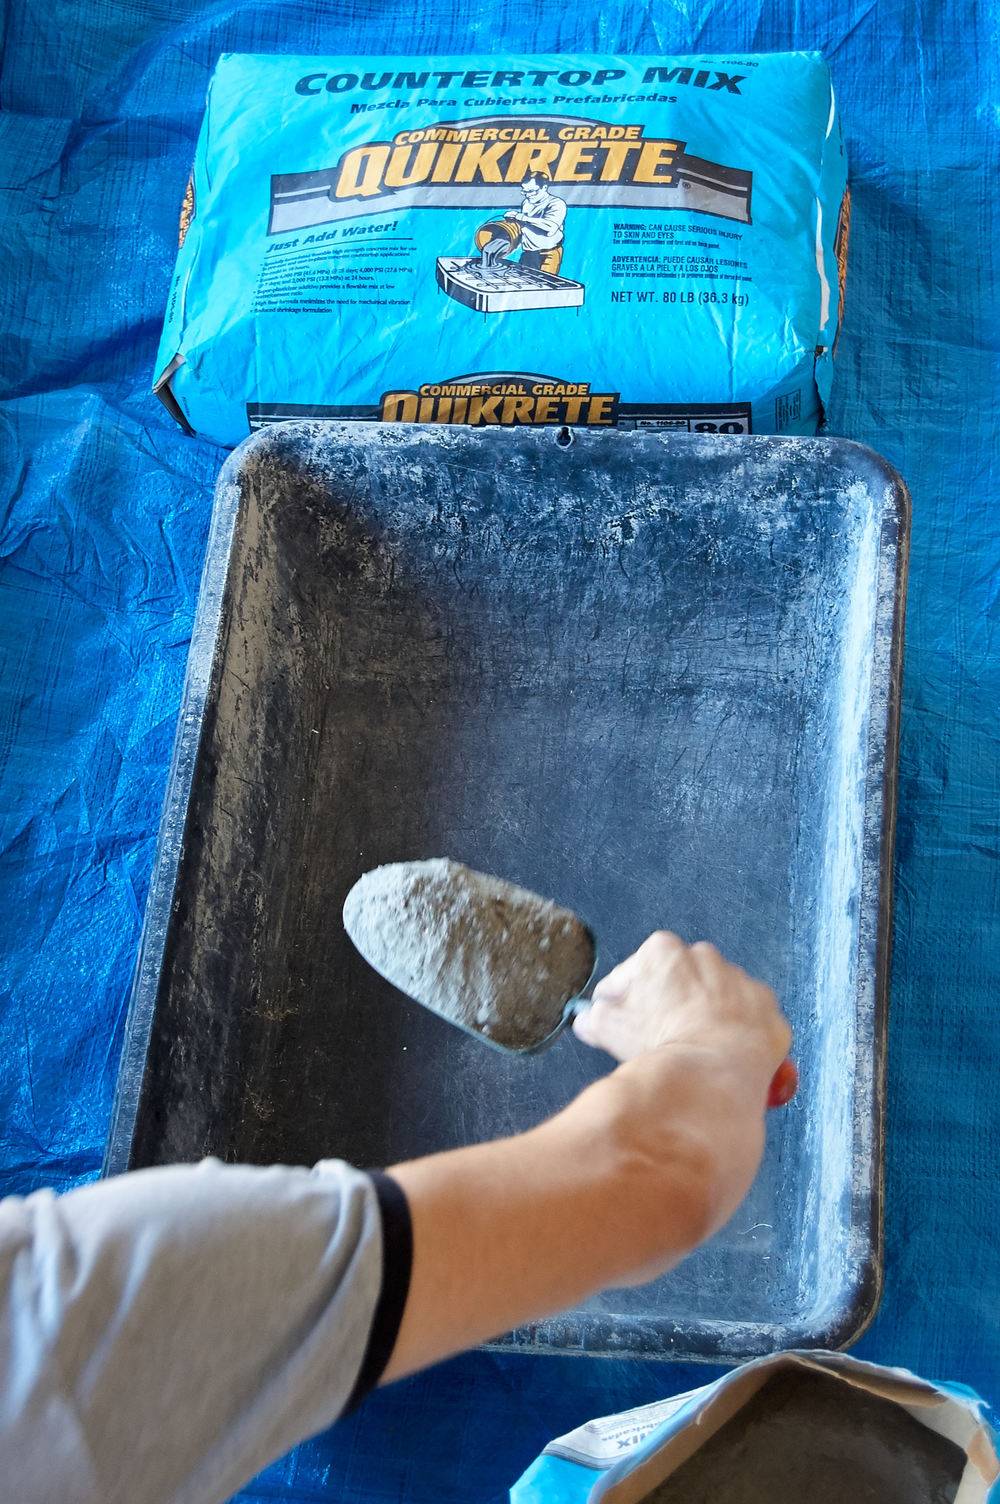
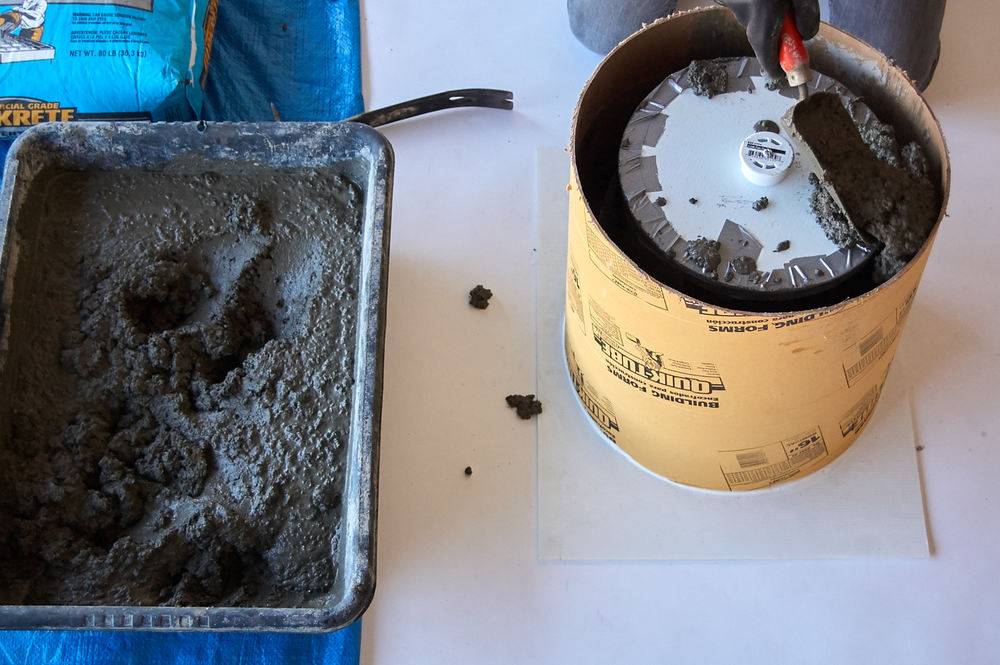
Step 9Fill the form all the way to the top, making sure to pack the material in well (you can use a dowel to make sure it all gets in there). At this point, you’ll want to vibrate the form with a rubber mallet, an orbital sander, or even a reciprocating saw (with the blade taken out). Vibration helps the concrete compact, eliminating air bubbles in within the mix. The ‘top’ here will actually be the base of the planter. Smooth it out with a trowel or rubber concrete float, making sure not to cover the drain (this face won’t be visible, so don’t worry about making it too perfect). 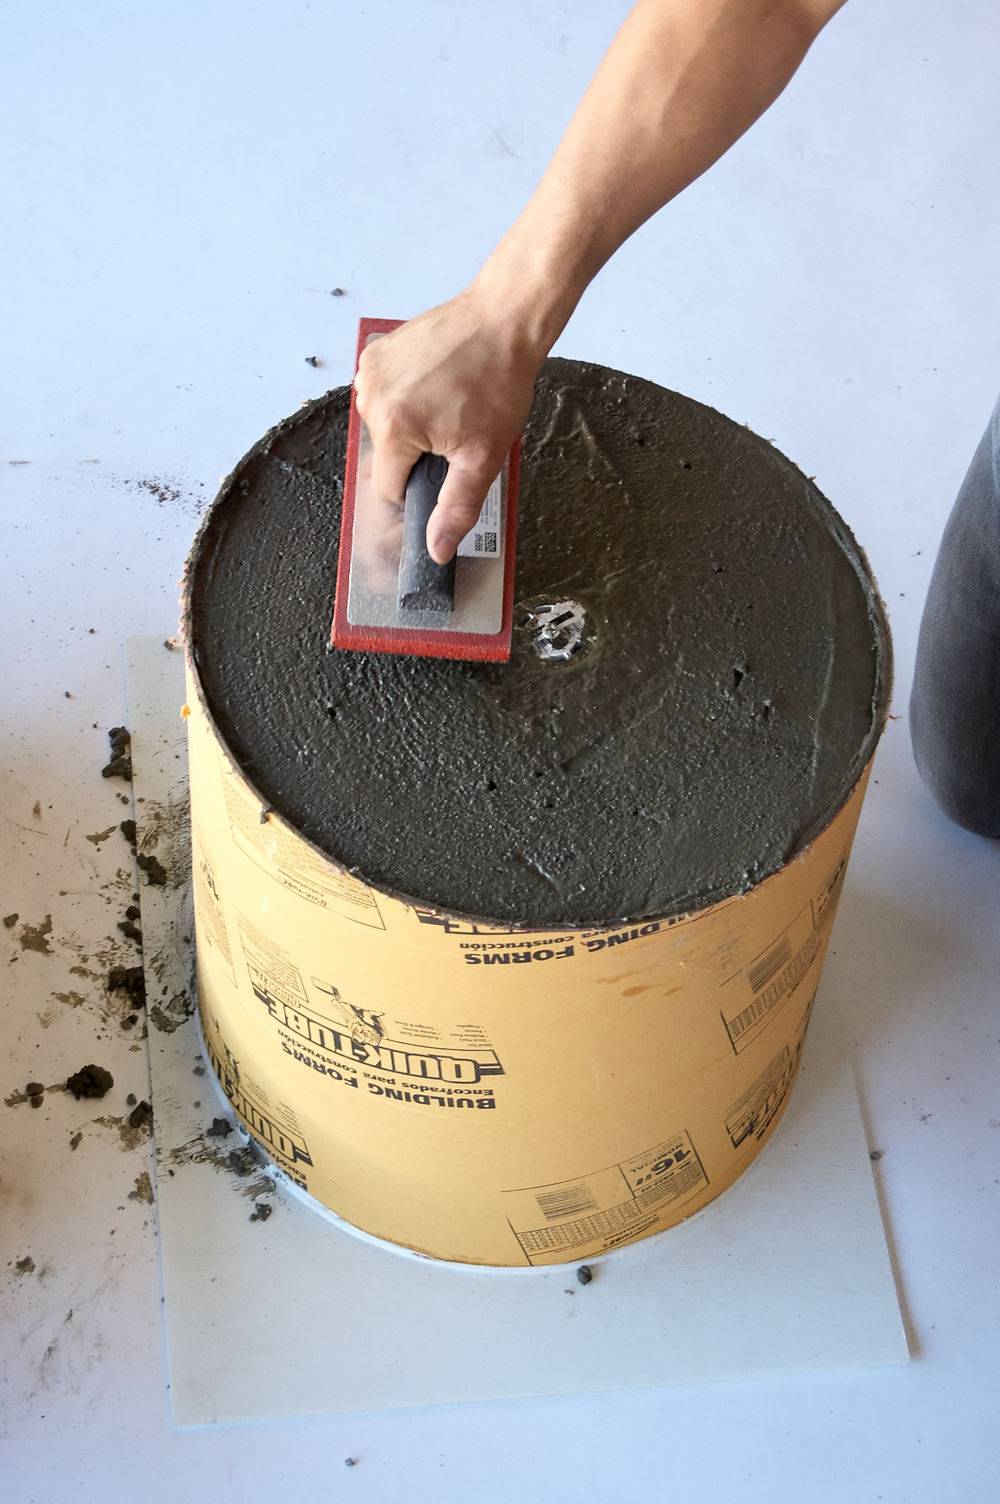
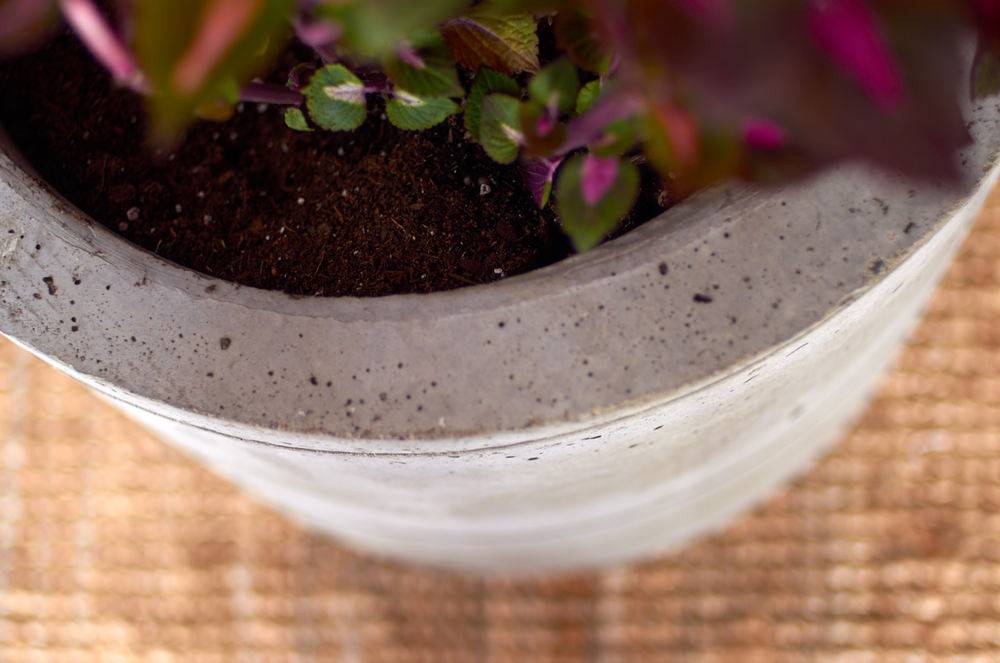
Step 10After letting your planters dry for 48 hours, take them out of the molds! You can cut the cardboard away with a utility knife, and then the mold should just peel off pretty easily by hand. 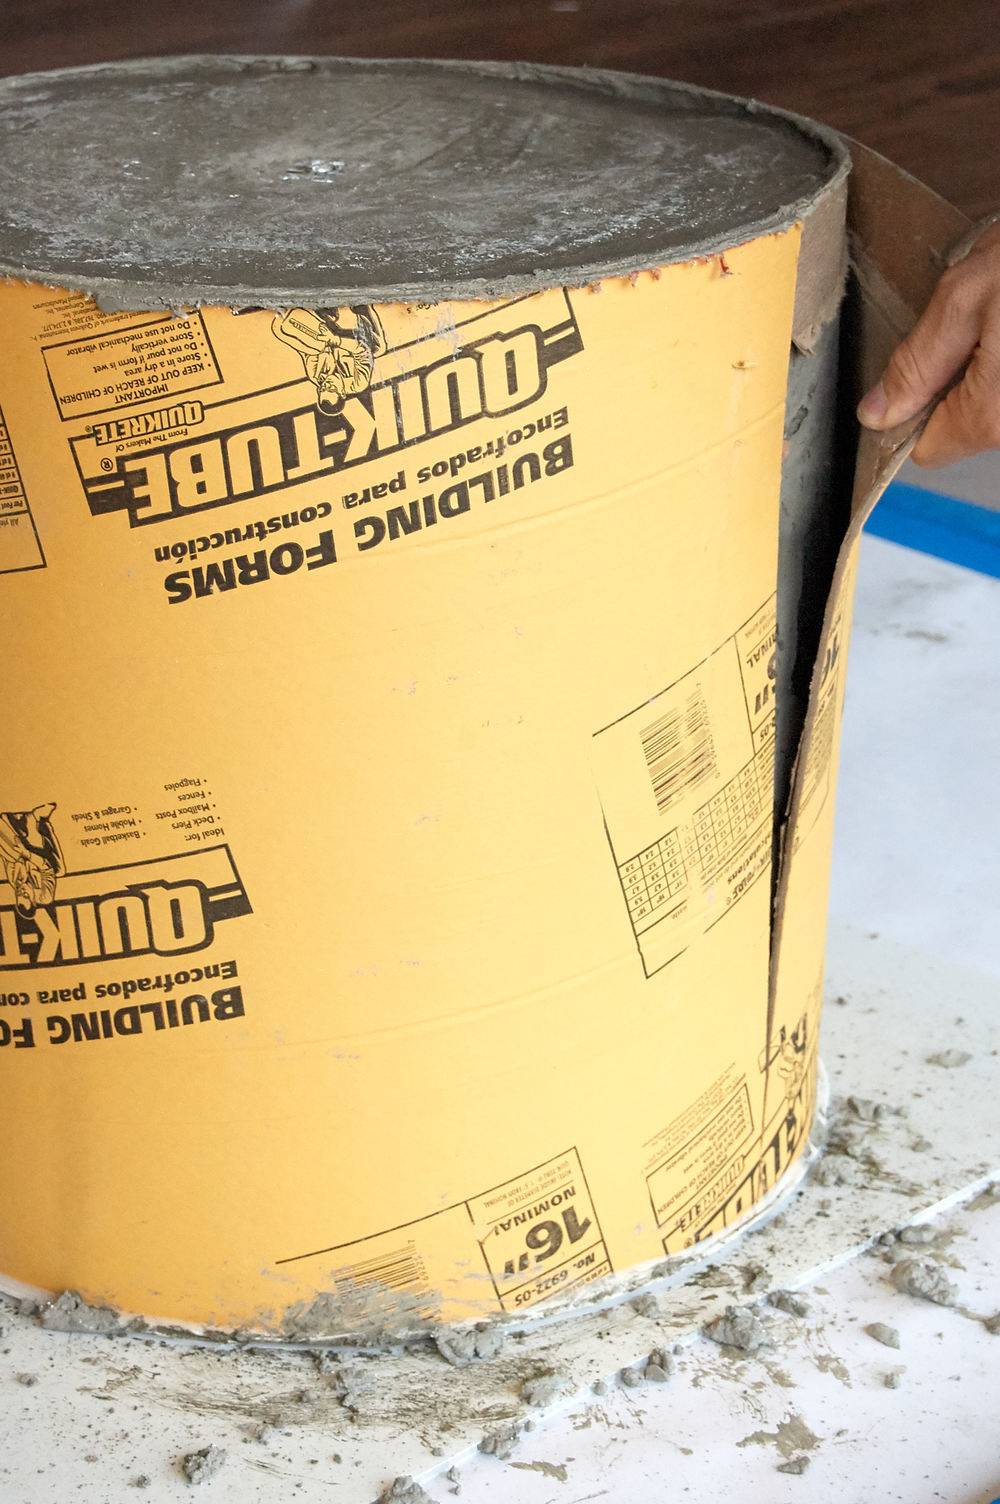
That’s it! Your planter is done. If there are any rough or sharp edges, you can knock them down with a bit of hand sanding.
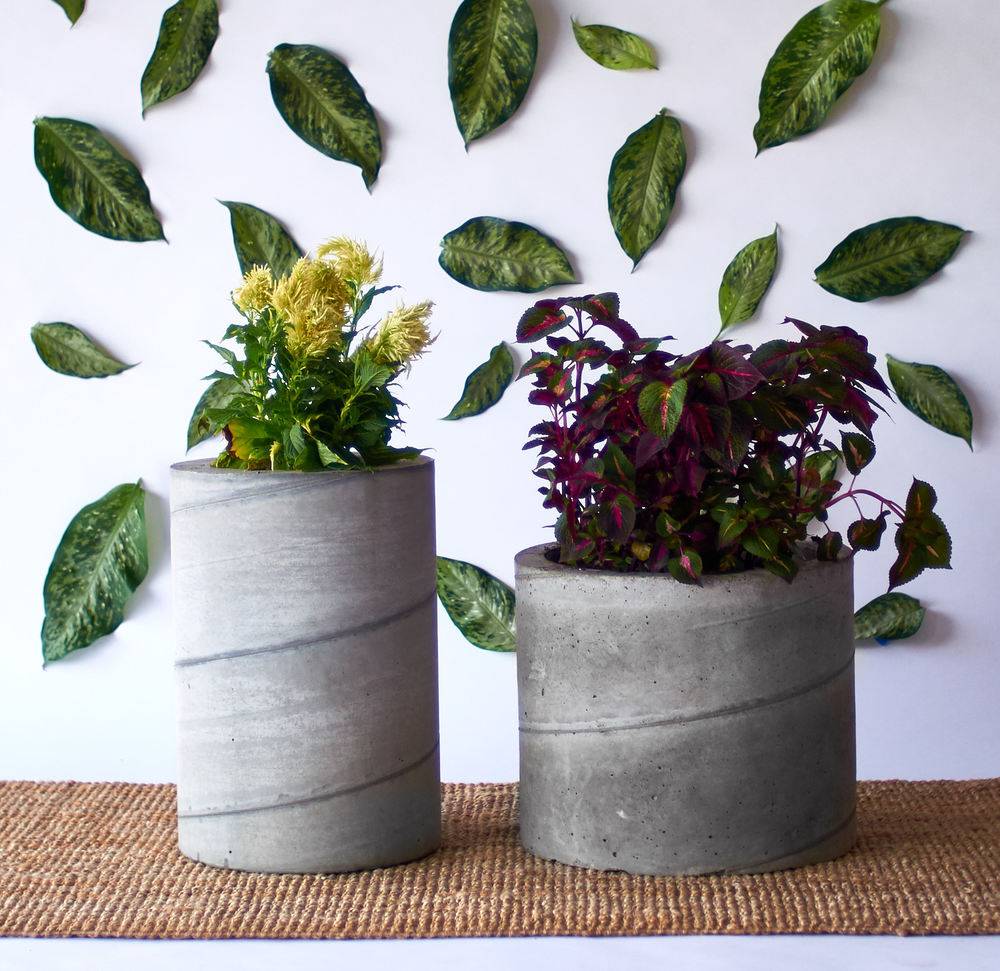
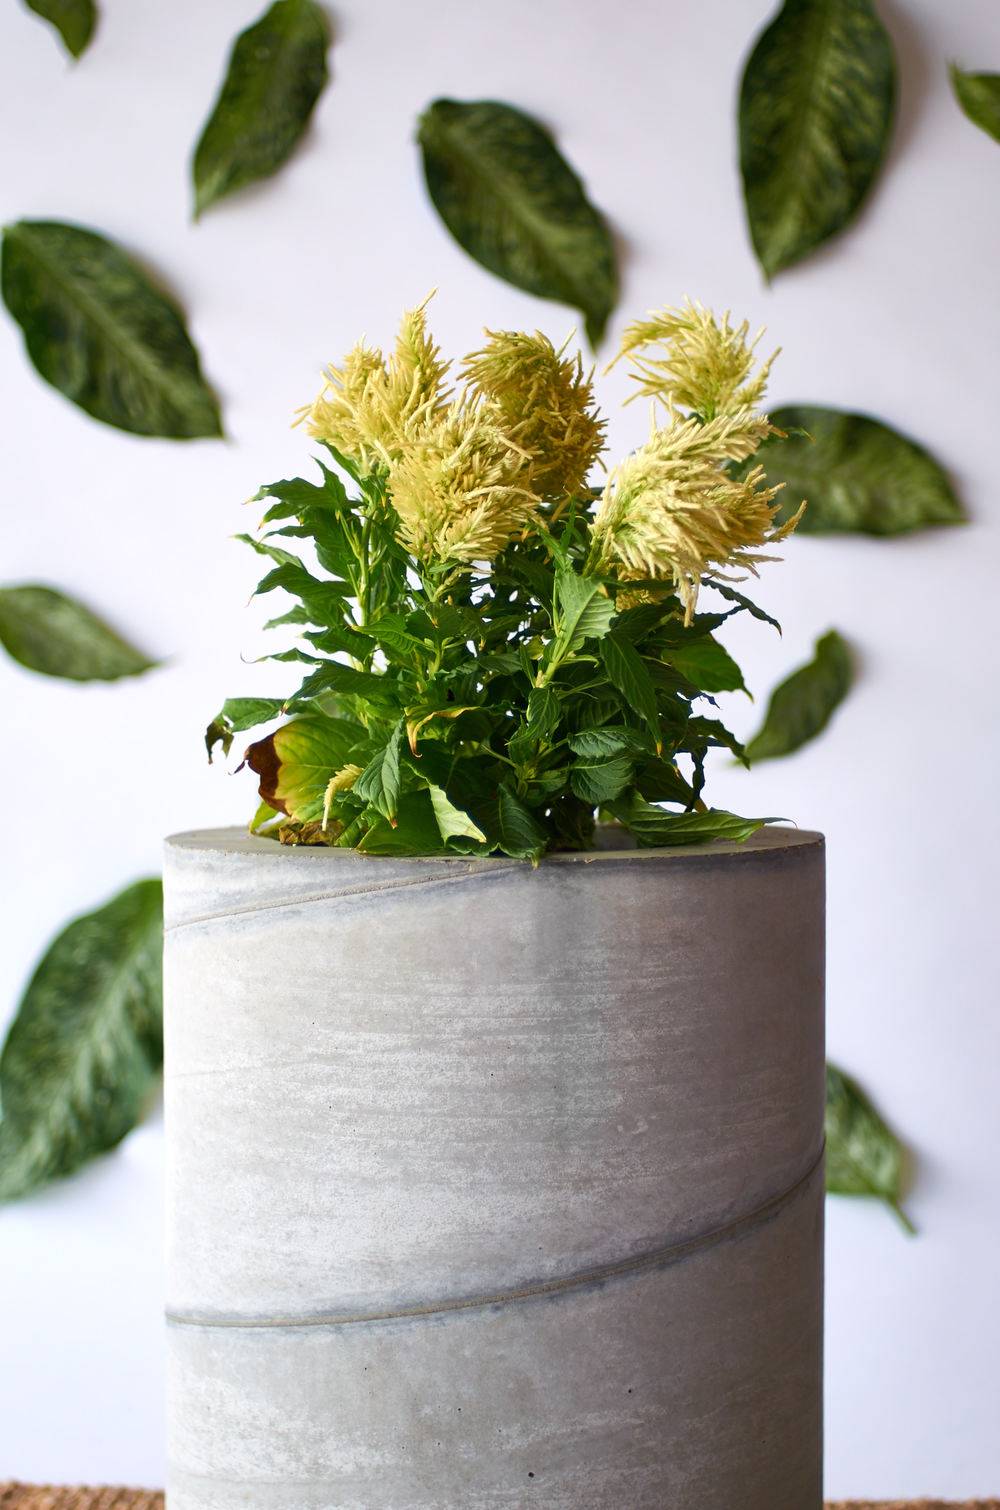
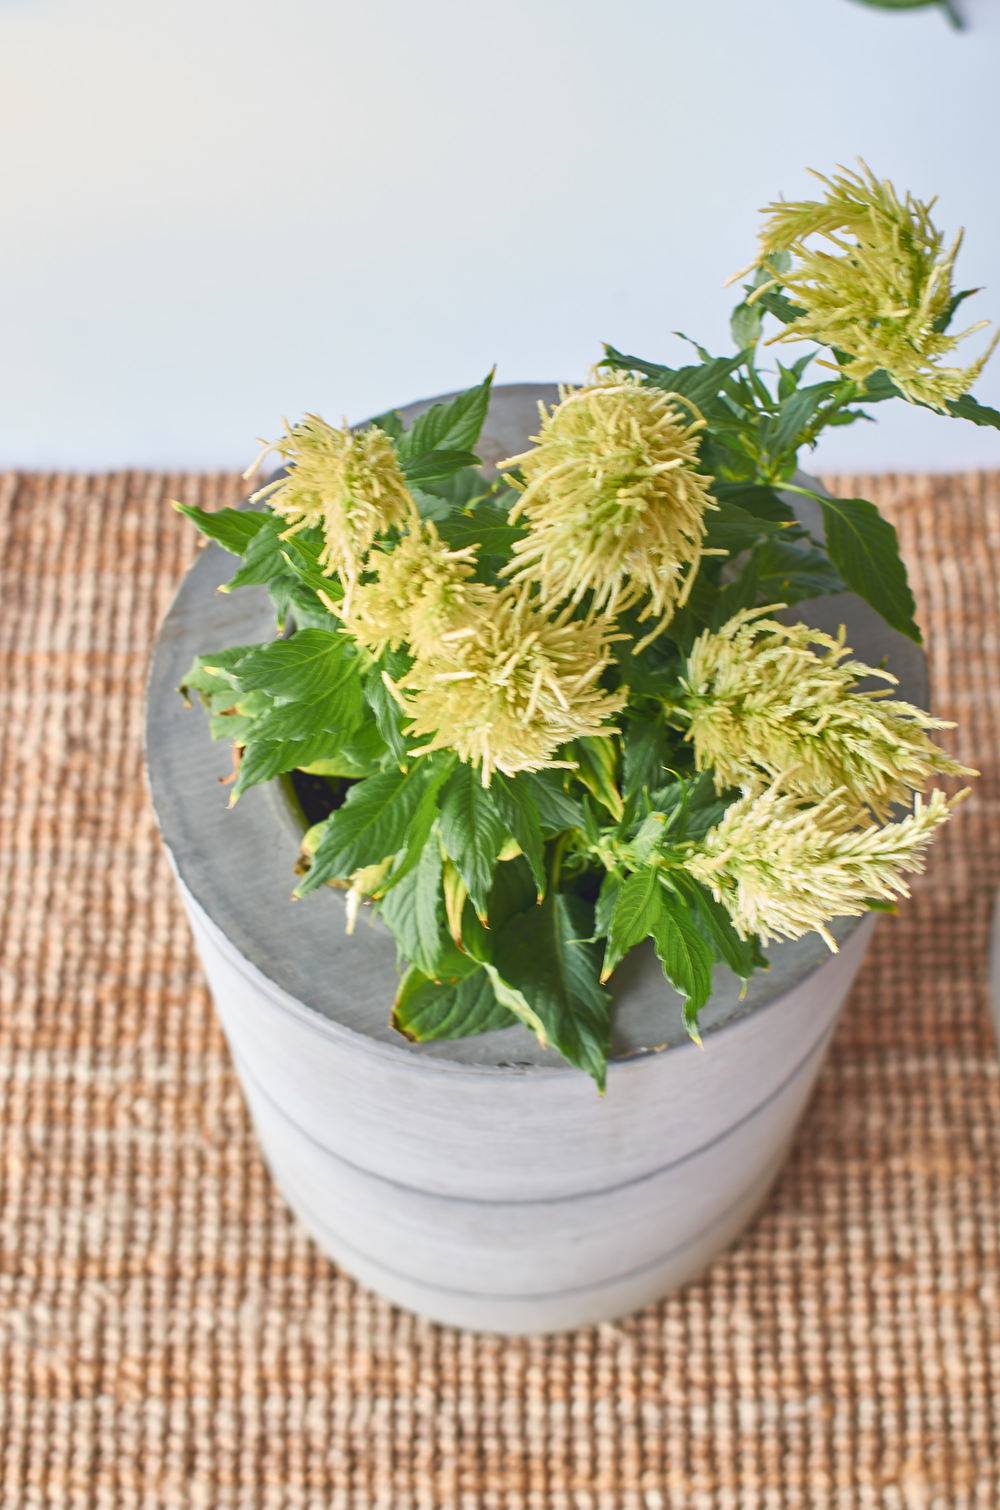

We love how our planters turned out. They’re crazy heavy, which makes them hard to move around, but perfect for an outdoor, public location. Once we get them into place, we’ll be ready to move on to our next office transformation DIY project: custom-printed window signage! 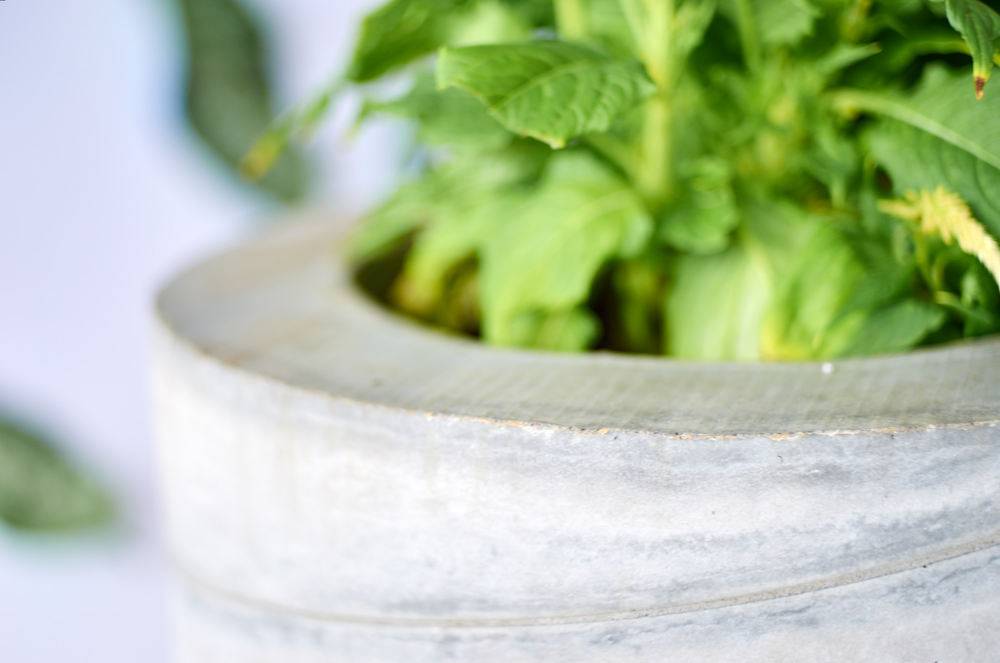

This post was sponsored by Quikrete, but all opinions are mine alone. Thanks for supporting the brands help that make Curbly possible. The post Weekend Project: Make These Large-Scale Modern Concrete Planters appeared first on Curbly. Via https://www.curbly.com/diy-concrete-planters 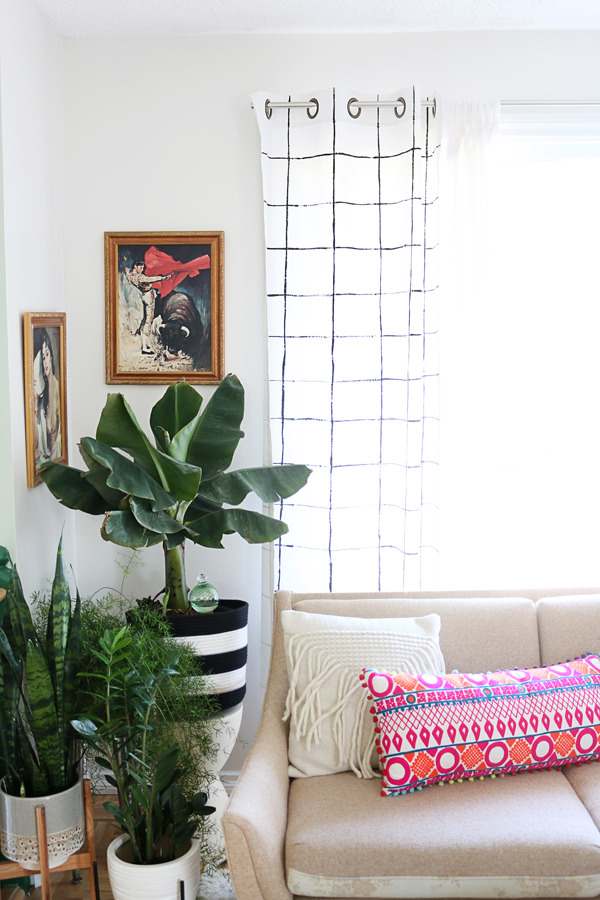
Is there a “right” option for curtain lengths? That depends on who you ask, and often just asking the question can leave you more confused than you were before. The long and short of it is (no pun intended): it’s up to you. But we’re here to help as you answer the question, “How long should curtains be?” We’ll be taking a critical look at curtain lengths, tall and small. What side are you on? Basic Curtain Lengths: To the Floor
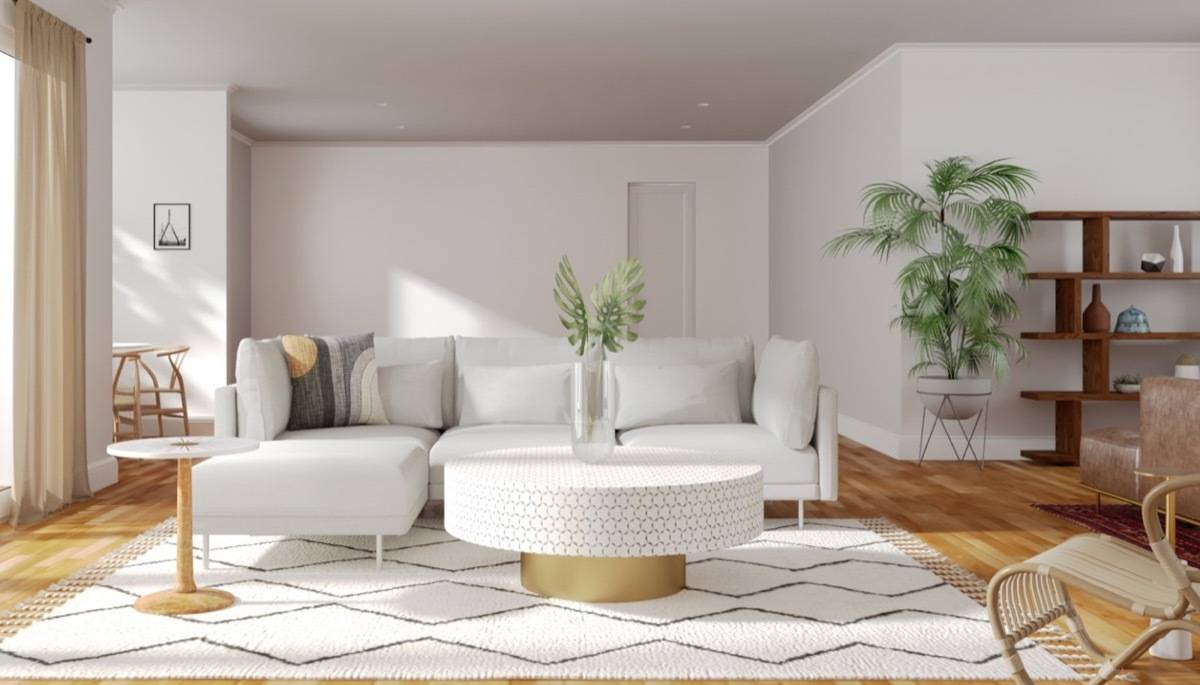
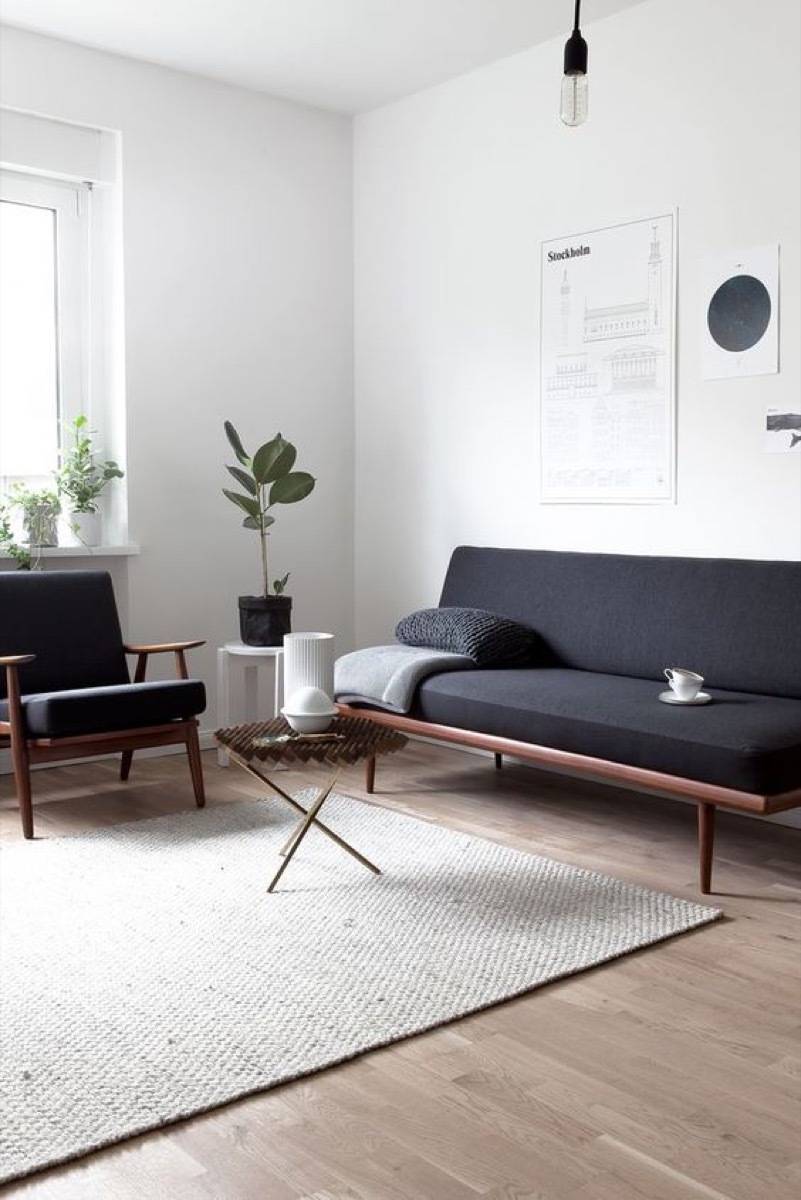
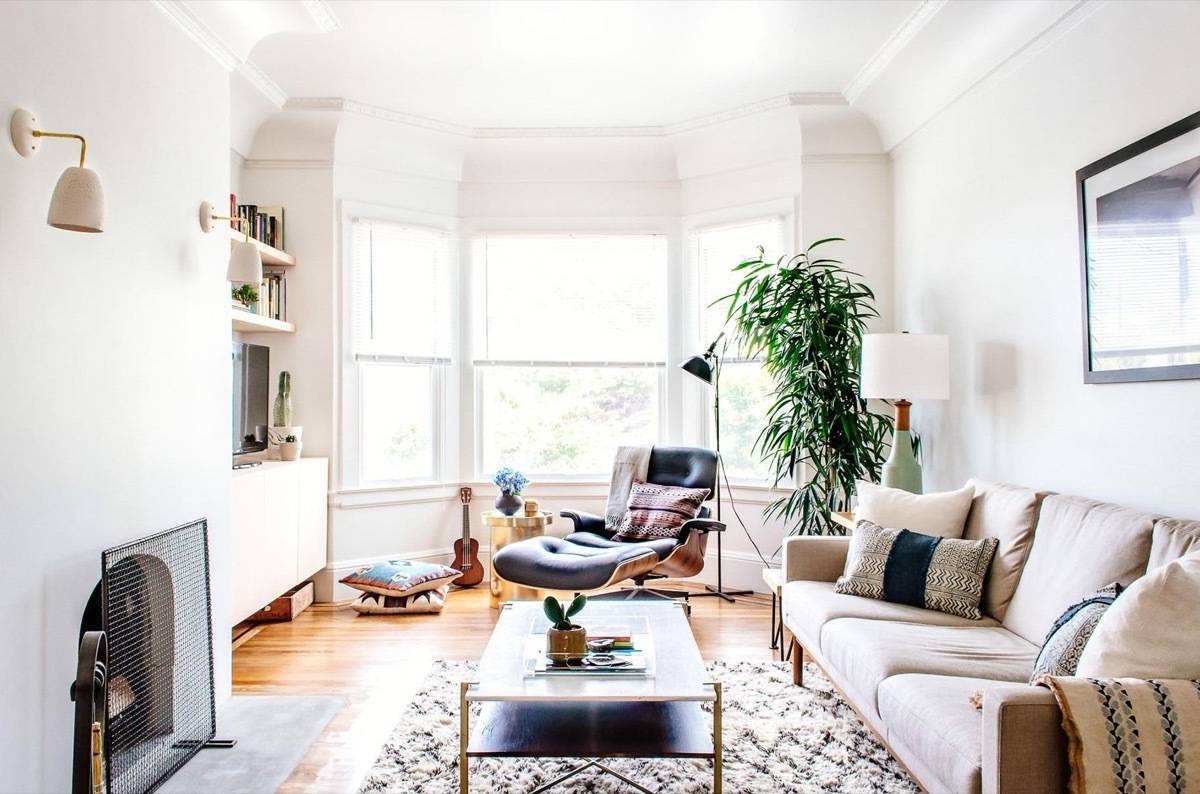
Let’s start with what’s probably the most common of the curtain lengths: to the floor. This is the standard length for hanging curtains – either hitting the floor exactly or hovering a half inch off the ground. Sheer white curtains hung like the ones above (from Little Green Notebook) and the ones below (via A Cup of Jo) are both modern and classic. The curtain lengths make the ceilings seem taller and the room more polished, maybe even a bit formal. 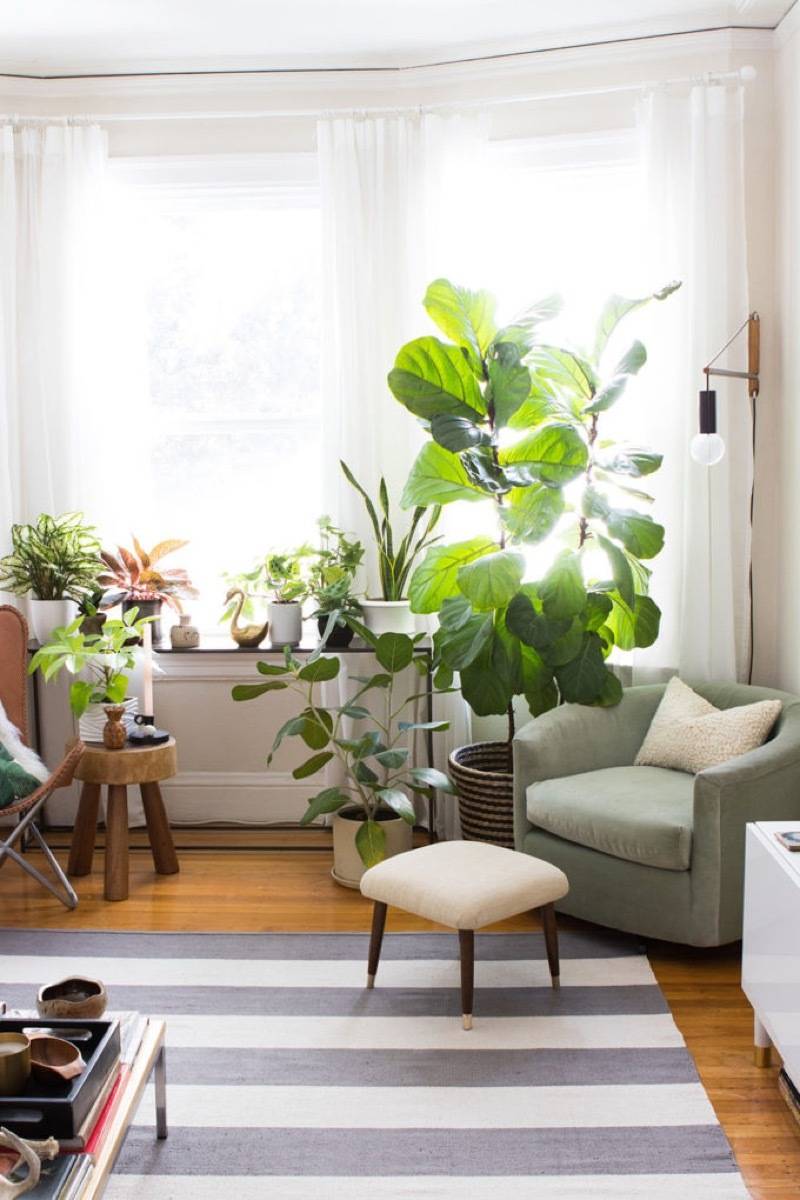
Cons to floor length? They may make your room look too formal for your liking. Dust will inevitably collect around the bottoms. Also, children may be more likely to grab them and use them as a climbing rope. If you’re asking yourself, “Should curtains go to the floor?,” and kids, pets, and dust aren’t a concern, then floor length is probably your best bet. Floor-to-Ceiling Curtains
You may have heard that hanging your curtains from the ceiling will make your living space appear taller. But how? Visually, your eye tends to follow lines. Whether it’s the double yellow line on the highway, or the walkway to your front door, your eye is drawn towards (and up) pathways. By hanging your curtains from the highest point on the wall, your eye travels up the line, causing you to notice that there is height in the space you are standing in. 
If your living space has high ceilings already, compliment them with tall curtain lengths. Floor-to-ceiling curtains can also help to divide space, whether you’re tucking away a window seat (like the floor-to-ceiling curtains via Lonny) or cutting a whole room in half. Heads up: The worst thing you can do when hanging curtains from the ceiling is to hang them too short. The heightening trick-of-the-eye doesn’t work well if the curtain line abruptly cuts off before it hits the ground.
Short Curtains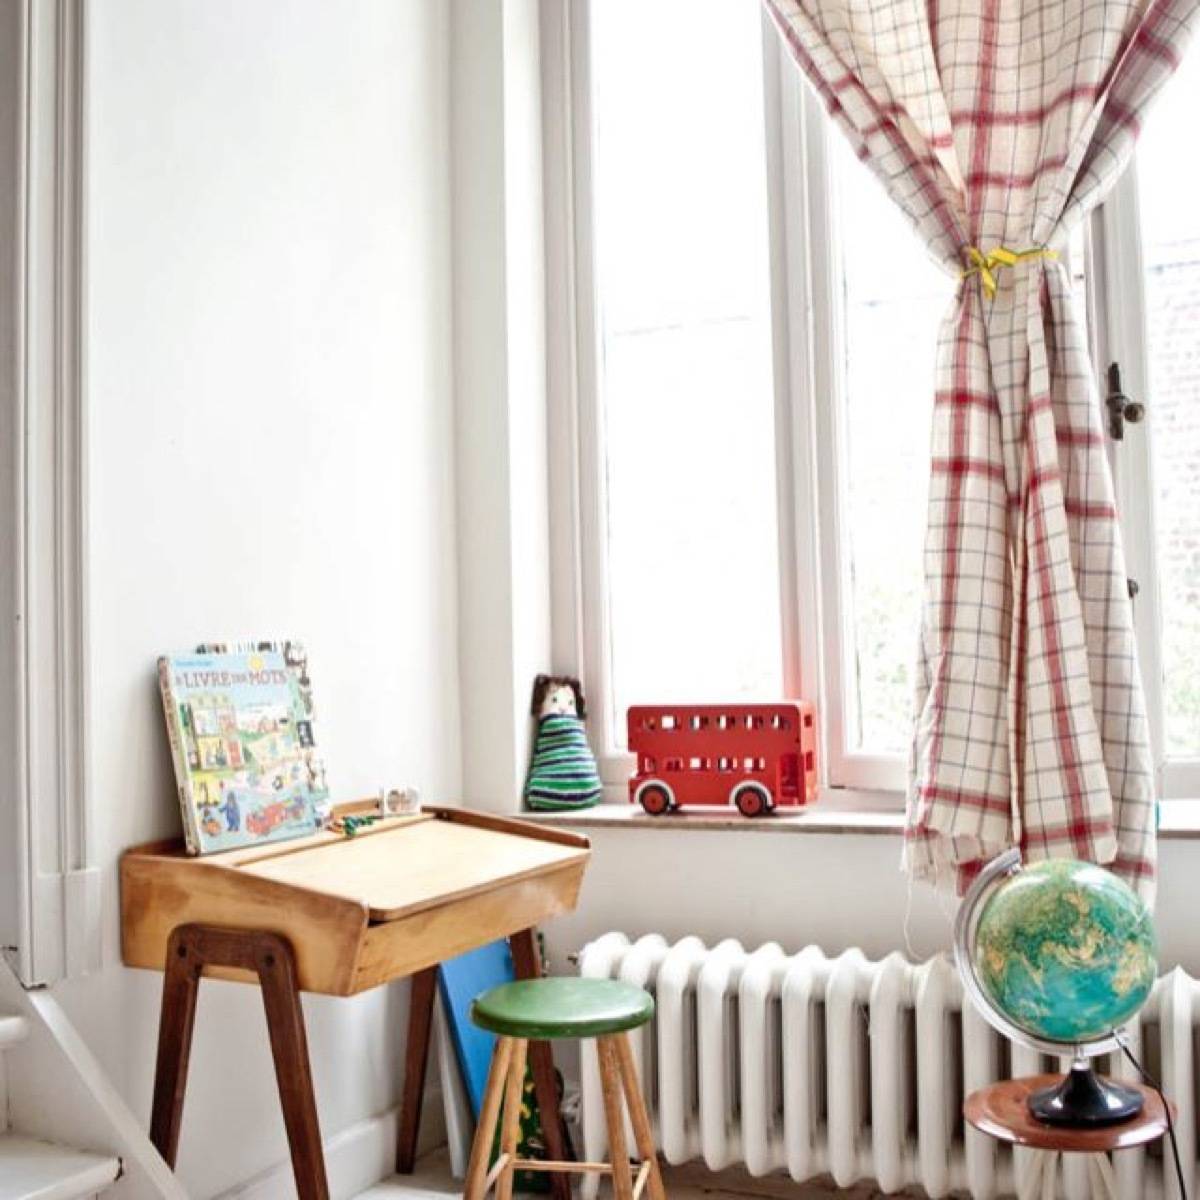
Then there’s the other end of the curtain lengths spectrum: short curtains. Visually speaking, high-water style is not the most appealing way to hang curtains. The shorter length can appear dated. Also, it can cut the visual height of your room in half. From a purely practical standpoint, however, short curtains are sometimes the best option. In the home, it seems like many parents choose shorter curtains for kids’ rooms, probably to avoid the whole Tarzan situation, or just to limit sticky fingers from touching the window treatments. You may also be forced to hang short curtains by the presence of heat-producing radiators or heaters. 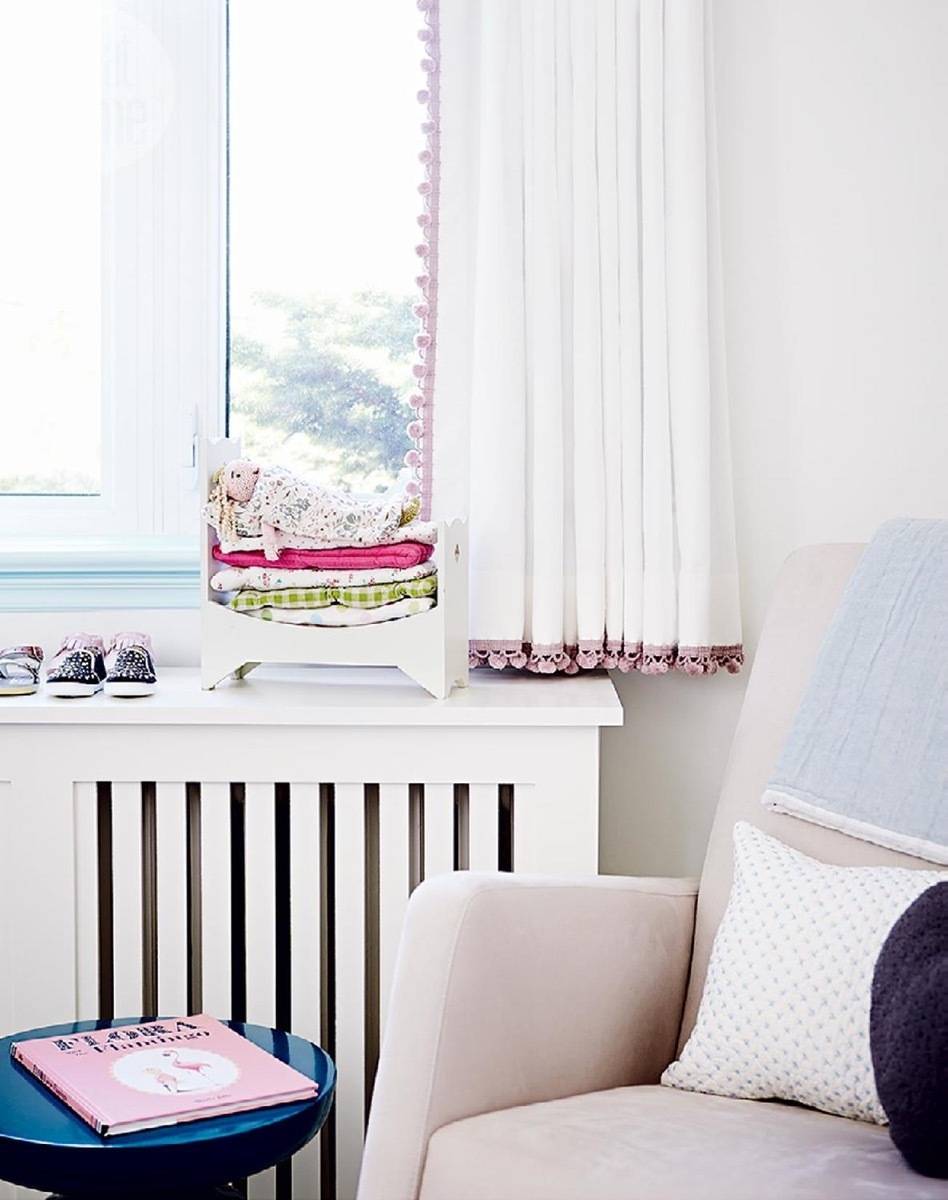
If you hang short curtains, aim to hit a perpendicular mark on the wall. For instance, the curtain lengths should meet at the top of the baseboard, or the bottom of the windowsill. Café Curtains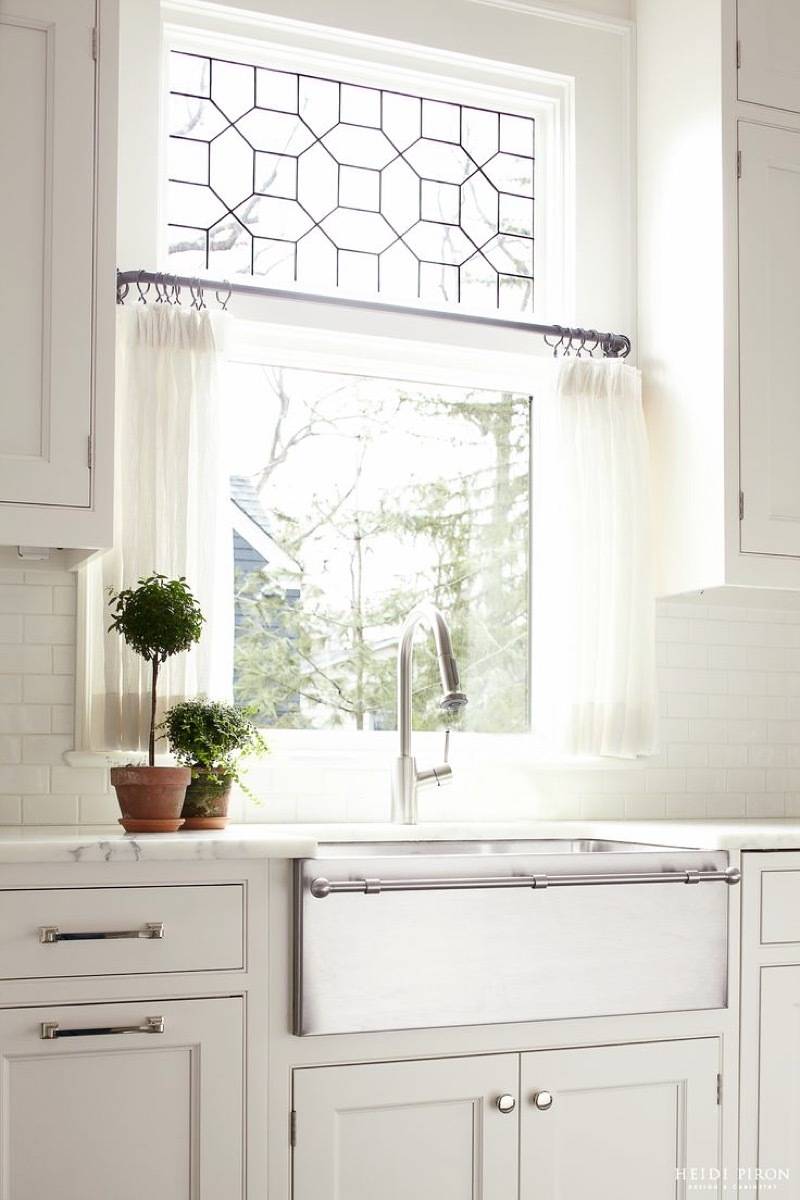
Café curtains are fairly common where there’s a window sill over, say, a sink in a kitchen. Or, in their namesake, cafés, where you wouldn’t want curtains dragging the floor of such a busy, public place. 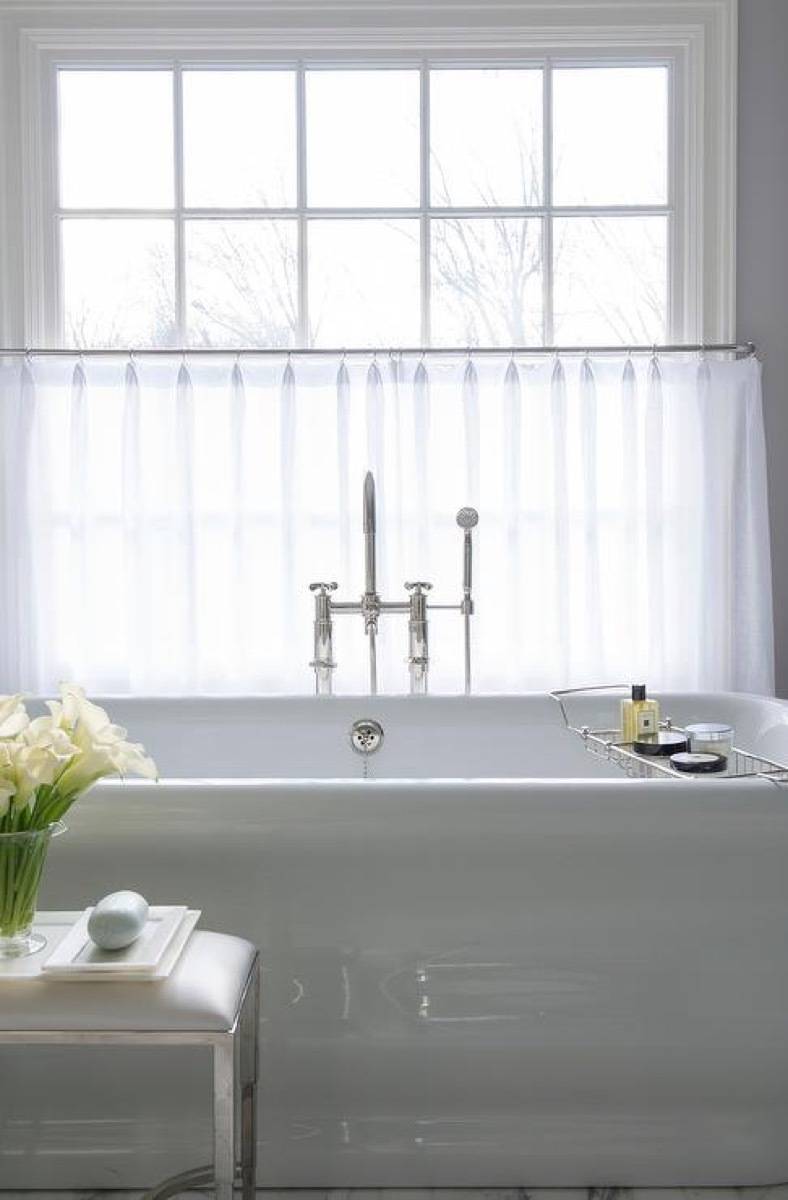
Café curtains are hung usually at the halfway point of a window, or on the bottom pane of a two-part window. They’re great for when you need a bit of privacy (like in this bathroom pictured above), but don’t necessarily want to block out all the natural light coming through the window. Because café curtains are short and cute, they can give a room a more casual vibe. Breaking at the Floor
We’ve discussed short curtains, and curtains that hit the floor perfectly. What curtain lengths are left? Long curtains. The more billowy a curtain becomes as it breaks at the floor, the more dramatic it will look. A simple “kiss” to the ground, like the curtains pictured above (via Amber Interiors), adds a touch of flair to this otherwise simple window treatment. This option is similar in style to floor length, but will require more care – dust bunnies like to live in the folds of the billowing curtains! 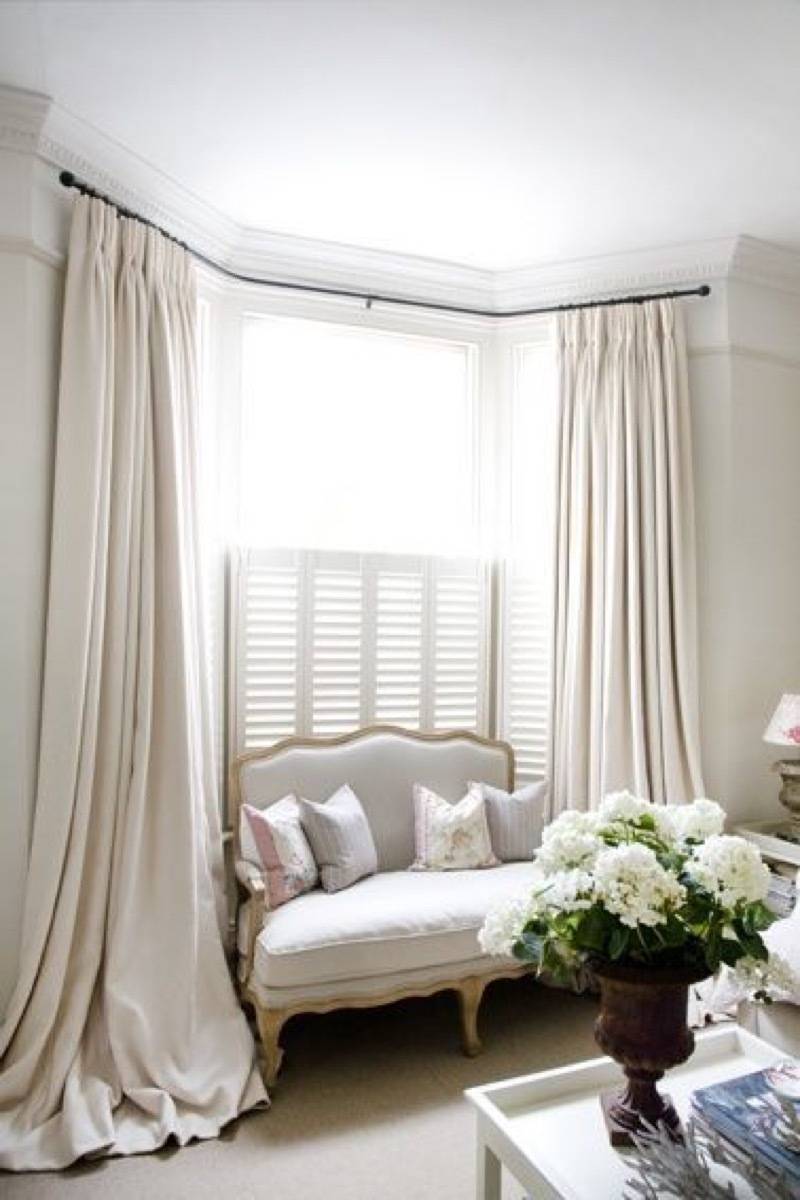
Last, there’s the most extreme curtain length: puddled. This is a typical French look (think the Rococo period), and is most successful with high ceilings and, usually, expensive fabric. Typically silks are going to billow the best, being both lightweight and a natural fiber. Obviously, this look adds a lot of glam to even the simplest decor. But, you really need to have the right architecture to pull it off. So, how long should curtains be?The answer is up to you, your style, and your needs. Hopefully this primer on curtain lengths will help you pick the best window trimmings for your home! 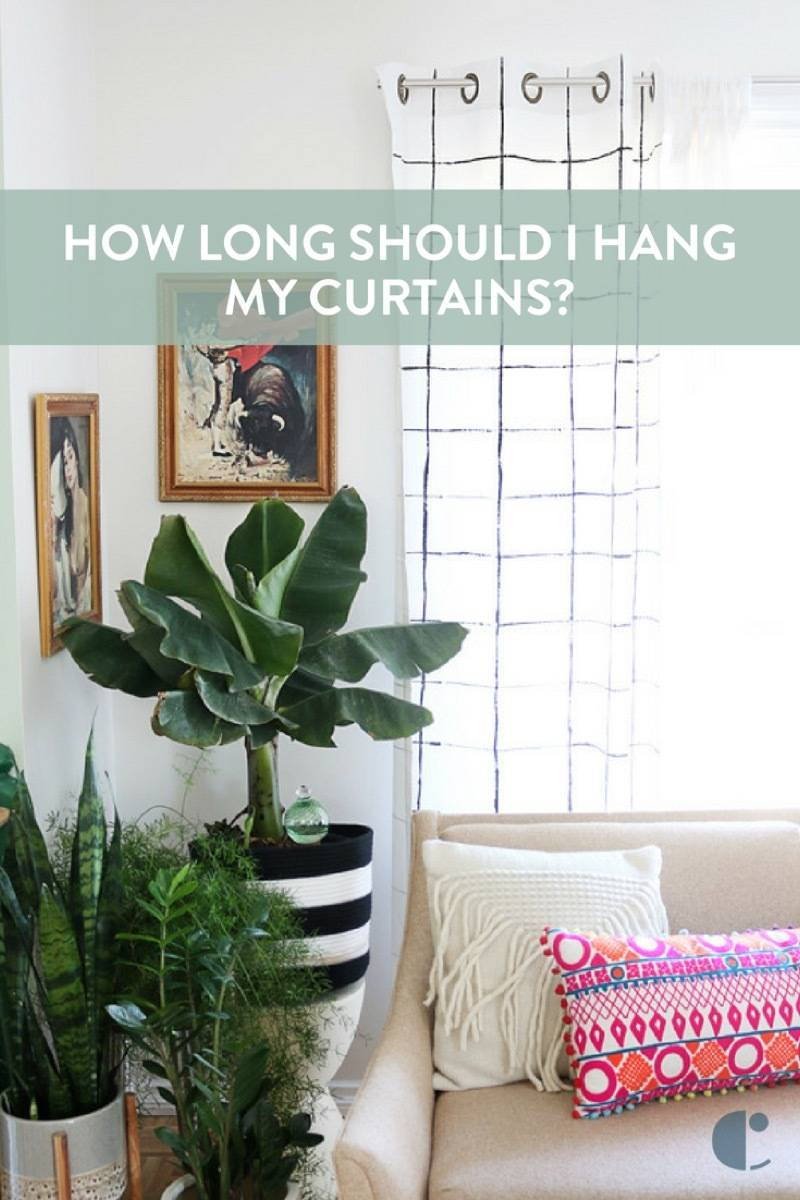
So, what are the best curtain lengths for your space? Are you Team Shortie? Puddler? Somewhere in between? Leave us a comment and let us know!
The post Curtain Lengths: How Long Should Your Curtains Be? appeared first on Curbly. Via https://www.curbly.com/curtain-lengths
What is your interior design style? Everyone has their own unique taste when it comes to decorating, furnishing, and accessorizing their own home. But how do you bring those preferences together into a cohesive décor style? Whether you love bright colors or shades of white, natural materials, or tons of pattern, understanding your interior design style means making better interior choices. (And fewer, potentially costly interior mistakes!) Ready to start your search? These interior design style quizzes are a great way to figure out what style suits you and your home. 8 of the best interior design style quizzes
1. Apartment Therapy: Find your Style QuizThis quiz couldn’t be quicker or simpler. Just grab a pen and paper and take a look at each set of interior images. Pick the design style you like best (as quickly as you can — no overthinking it!) and record your preferences.Depending on your choices, you’ll find out that your style is Warm Industrial, Classic Glam, Happy Modern, or Eclectic Collector. This Apartment Therapy quiz also gives you some great tips on where and how to shop in order to master your preferred style.
2. The DecoristWant the eye of a professional interior designer for your house? Use this simple quiz to get matched with one! You’ll answer five questions put together by Decorist’s online interior designers and then find out what kind of style suits you best. Just share your email at the end to access your results.
3. SheKnowsAnswer these easy questions to discover your interior design style. This style quiz uses everything from your fashion sense to your favorite vacation destination to figure out your interior design preferences. It’s simple, quick, and super fun.
4. BuzzfeedAnother beautiful, visual interior design quiz to try. Select your must-have items from an interior wish-list and you’ll discover your home style aesthetic. Will yours be industrial, farmhouse, eclectic or shabby chic? Take the quiz to find your style and then make use of Buzzfeed’s handy sharing functions to send your results to a friend.
5. LonnyWhat are your interior faves? A jungle of houseplants or a neutral color palette? Vintage finds or sleek lines? This interior design style quiz asks a rich mix of questions to help you find out how to furnish your dream home. We particularly loved the all-important and hugely divisive question, what are your thoughts on wicker?
6. HouzzDon’t think your favorite restaurant, your choice of pet, or your go-to tipple have anything to do with your interior design style? Think again! This Houzz quiz is lots of fun and full of questions totally unrelated to interior design. This means you can’t predict your results. And you get a totally fresh look at how your interior design style could work.
7. Apartment Therapy: One Question QuizBack to Apartment Therapy here for another great quiz. Get ready to discover your interior design style with just a single question. The first step is the only step for this interior design quiz. Take a look at eight sets of sofas, rugs, and room accessories. And then choose your favorite items to find out your specific design style. It really is that simple!
8. Designer Society of AmericaThis interior design quiz has been put together by the Designer Society of America, so you can trust that these people are at the cutting edge of interiors. To complete the quiz, take a look at imagery of furniture and differently decorated rooms before selecting your preferences. You’ll pick your favorite area rug, tables, wood flooring, kitchen, and sofa before finding out which style suits you best. Along with your quiz result, DSA also suggests some great interior magazines suited to your interior design style.
If you’re struggling to realize your décor style, why not try one (or all!) of these interior design style quizzes today?Pick the Designer Society of America or Apartment Therapy quizzes and you also get some great tips on how to put your newly discovered interior style into action. Once you’ve got a handle on what your style is all about, redesigning a room or finding those perfect finishing touches is sooooo much easier. A cohesive style gives you the focus to confidently pick out the right colors and pieces for every room. And for a little extra interior inspo, don’t forget to check out Curbly’s extensive library of design articles. The post 8 Online Interior Style Quizzes That Are Actually Worth Your Time appeared first on Curbly. Via https://www.curbly.com/8-online-interior-style-quizzes-that-are-actually-worth-your-time
For me and just about every gardener I know, low maintenance garden plants are first and foremost perennials. Plant them once and reap their benefits for years to come. (Equally important for me are plants that are deer/pest resistant. Check this post out to see what I mean.) Therefore, when I began putting together this roundup, perennials were the focus. Other than the perennial requirement, I decided to break the list into two parts: the best low maintenance garden plants for sunny locations and the best low maintenance garden plants for shady locations. If I’ve personally had experience with the plant and its deer resistance, I’ve added a notation to identify it as such. Also, for further information, please “click” on the plant’s name in bold, which will take you to an outside link. Low Maintenance Garden Plants for Sunny Locations
Black-Eyed Susan. Around these parts, Black-Eyed Susan is grown in ditches by the DOT. Rugged, impervious to drought, they just might be one of the toughest flowering plants in the country. 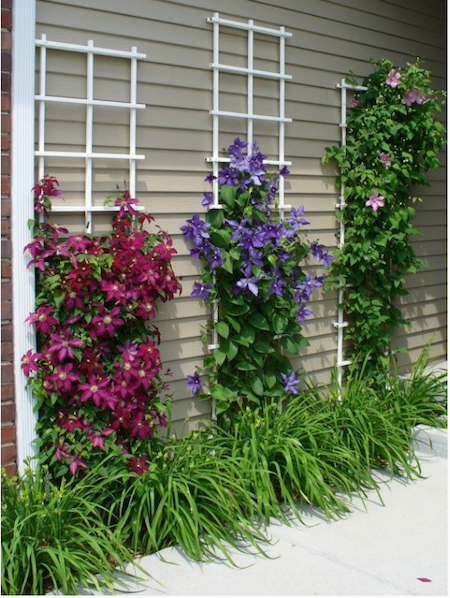
Clematis. For a showy climber, it doesn’t get much lovelier than clematis, but keep in mind, some varieties should NOT be cut back hard. (I did that once and all but killed a gorgeous plant.) 
Coneflower. Coneflower, also known as “echinacea” are about as durable as Black-Eyed Susan and are native to just about everywhere in the United States. 
Coreopsis. These darlings don’t care how hot or dry it is outside, they’ll grow just about anywhere. They also come in some luscious tropical colors too. 
Daylilies. Daylilies multiply like weeds as well, but they’re easily divided. (I do it anytime after they’ve bloomed with no issue.) They tolerate a fair amount of abuse—including drought conditions. Only thing is, deer LOVE them. Especially their flowers. 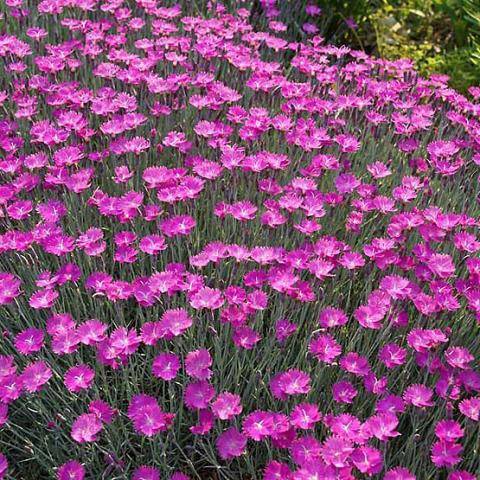
Dianthus. These beautiful little blossoms also called “pinks” have a spicy scent that I adore. Super easy to grow and drought-tolerant, they only get to be about 6” and 18” tall. Deer, as well as bunnies, love them too. 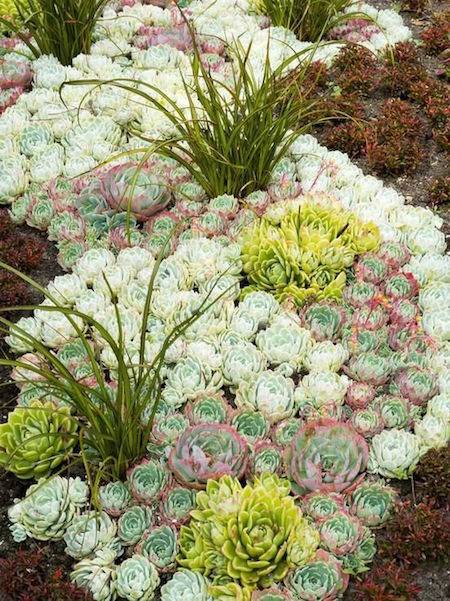
Hens-and-Chicks. I find these plants fascinating, as they come across as misplaced desert dwellers that just happen to thrive in my zone. Actually, the more challenging the soil the better they grow. 
Peonies. I have dozens of peonies in my yard, and I can attest to their deer and rabbit resistance. (Whoop! Whoop!) They multiply well and they tolerate drought conditions too. Downsides include the need for cages as their blossoms are heavy and will cause the stalks to bend. (Mine are planted next to my garden shed, which provides suitable support, so I don’t have to use cages.) Also, peonies attract ants as the blossoms start to open. After they’ve done their job, the ants disappear, so it’s no biggie, but some people don’t plant them too close to the house for this reason. Note: to keep peonies looking healthy and vibrant past the blooming season, clip the spent blossoms off the plants. 
Phlox. Common to North America, phlox is another plant that will grow just about anywhere if the right variety is chosen. (Check with your garden center to find out which is right for your area.) Showy and fragrant, it attracts hummingbirds and butterflies too. 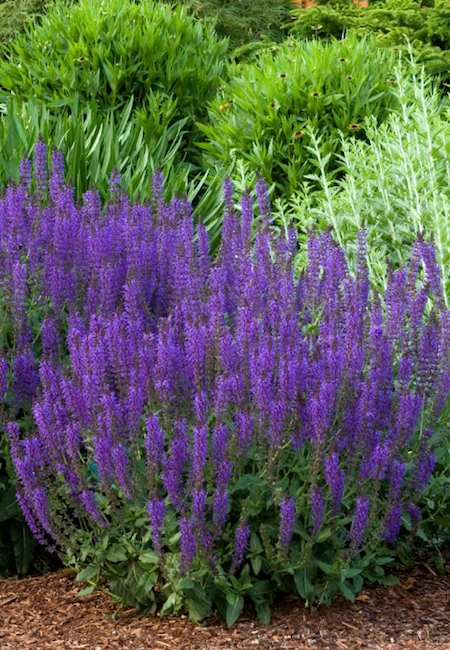
Salvia. This one needs to come with a warning label. First, it’s a psychoactive plant. Second, I’ve heard you can’t buy it in all states because it IS a psychoactive plant. But this is the deal, it’s super hardy, grows like a weed (pun not intended), and blooms all summer long. Another downside or perhaps upside, depending on how you look at it, it multiplies like nuts and can easily take over a garden space in no time. 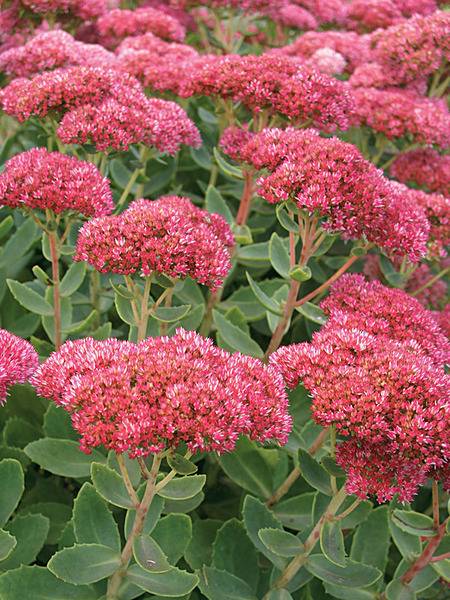
Sedum. Sedum is kind of like Hens-and-Chicks. It doesn’t seem to belong up here in my zone. Besides looking like they should be growing in a warmer climate, they look like a vegetable (to me), until they bloom, that is. Sedum also attracts bees like nobody’s business. 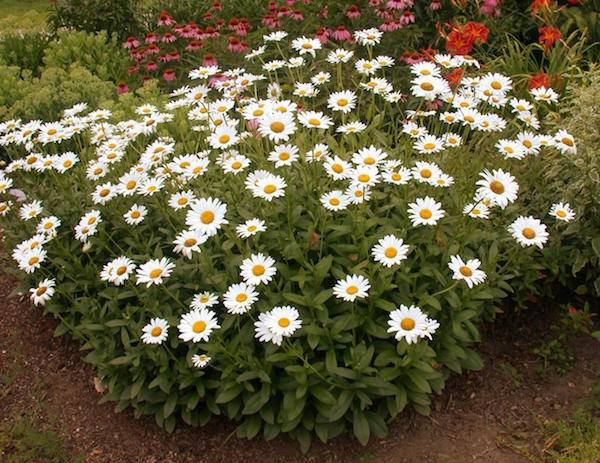
Shasta daisies. Where I live, Shasta Daisies are akin to weeds. Seriously, plant one in your garden and suddenly they are everywhere—and in places where they aren’t supposed to be. But that’s the definition of a weed, isn’t it? A flower that’s not in the right place? Drought tolerant and as rugged as rocks, daisies are one of my favorite flowers, and they are perfect for cutting. 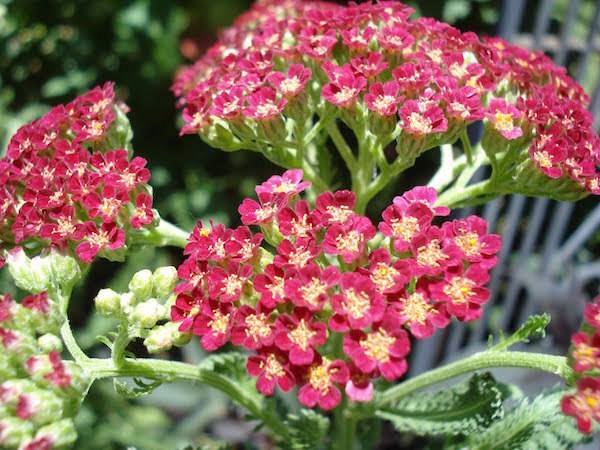
Yarrow. Don’t let the delicate flowers fool you, Yarrow is another indestructible plant. Again, it multiplies easily, attracts butterflies, tolerates dry conditions and is perfect for cutting. Oh, and it comes in pink, red and yellow! Low Maintenance Garden Plants for Sunny Locations
Astilbe. Think of astilbe as ferns that flower. Although they look delicate, they’re super easy to grow and provide lovely pops of color in shady places. 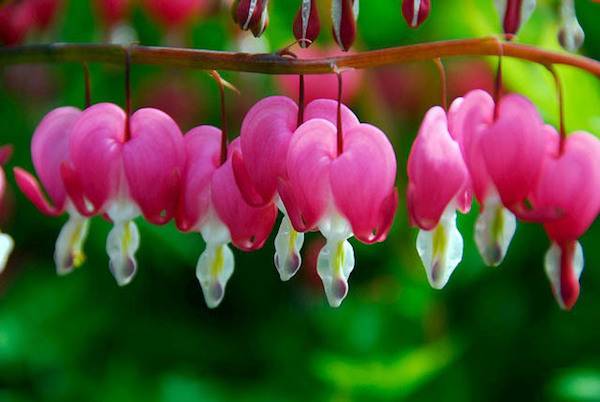
Bleeding Heart. I ADORE bleeding hearts. They’re so unusual, so colorful, so perfect, they look like they might be native to Pandora. Lucky for us they are native to earth and are a delight to grow. 
Coral Bells. Coral Bells give it all they got with colorful foliage that delights the entire growing season long, but they also offer delicate flowers in late spring or early summer that some might consider inconsequential. Coral bells don’t mind abuse, but they do mind when the deer much them down to nothing. 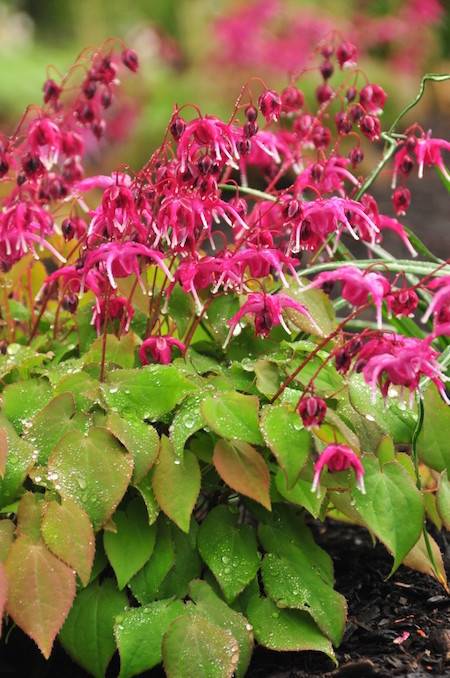
Epimedium. Don’t think you can grow ANYTHING in the shady areas of your garden? Think Epimedium. They can also tolerate sunny spots too. How’s that for hardy? 
Ferns. Can we have a shout out for my favorite fern, the Fiddlehead? I mean, the name alone makes me love it. These things grow like crazy in shady areas around where I live. Even in the middle of the forests. Visit your local garden center to pick varieties adaptable to your situation. 
Hosta. (Oh, hosta, how you delight and aggravate.) Delight because they are super easy to grow, they multiply like crazy, they’re a snap to divide, they come in endless varieties (tiny to huge, variegated to not), they produce interesting spiky flowers in late summer, AND they’ll grow right next to a building in the deepest of shade. So why are hosta aggravating too? Because they are like Godiva chocolate to deer. Although, the Irish Spring trick works to keep them at bay. It also seems to depend on where the hosta is planted too. Those plants very close to the house are safe, those that are just a few feet away will get munched down to the dirt in one deer-pass. 
Lily of the Valley. Although the blossoms of these hardy darlings give off a heavenly scent, keep in mind they are toxic. (Which means the deer don’t eat them and neither do the bunnies.) It’s best to have some sort of barrier around these buggers because that can easily take over a garden. 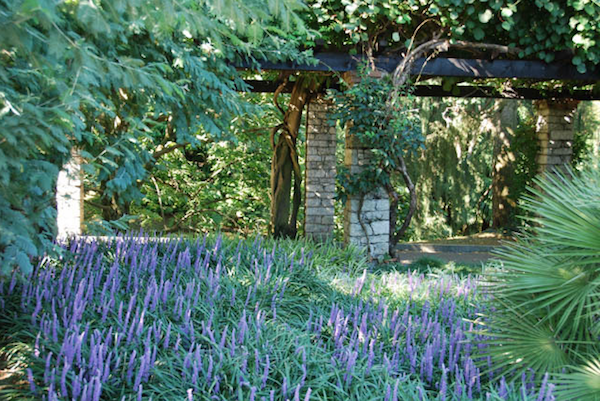
Lily Turf. If it sounds like a ground cover, it is. It has the features of ornamental grass with the benefits of showy purplish flowers in the late summer. 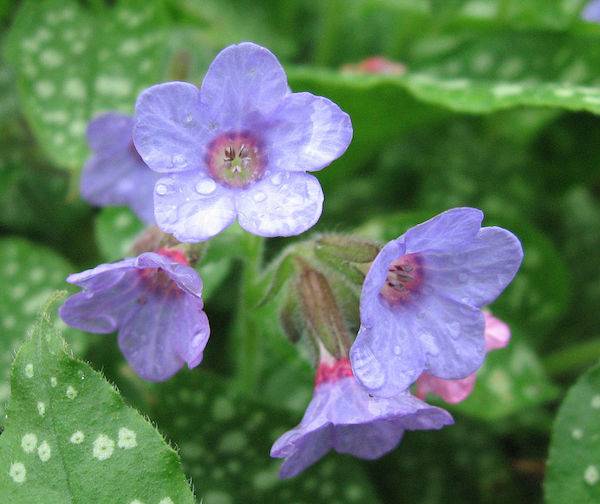
Lungwort. An unfortunately-named plant with beautiful blossoms, lungwort can be grown in shady to sunny areas. 
Monkshood. A wildflower, Monkshood is also known as wolfsbane, which means it repels werewolves! Considered a wildflower, Monkshood can grow from 2 to 4 feet tall and produces lovely purplish-blue flowers. (Blue flowers in the garden…swoon.) (Note: Monkshood, or Acontinum napellus, is a poisonous plant, so you should handle it with care. It’s toxic if any part of the plant is swallowed, but is generally not dangerous to handle in the garden, according to Poison.org) 
Yellow Corydalis. Another plant that can take a lot of abuse, Yellow Corydalis is adaptable to just about any condition and zone. But be warned, it is aggressive. One More Thing!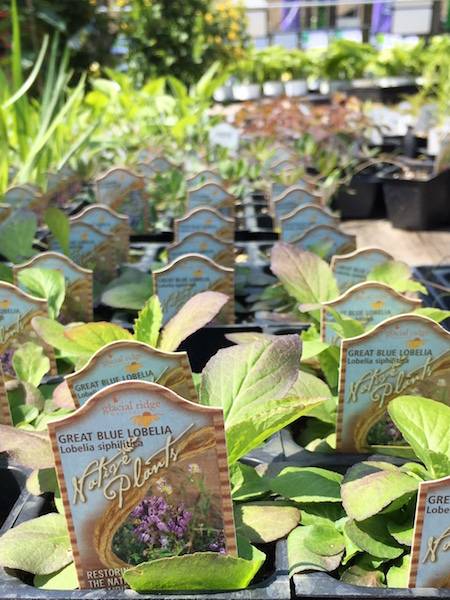
Native Plants. Any roundup of low-maintenance garden plants wouldn’t be complete without mentioning native plants. According to The United States National Arboretum, a native plant is defined as “one that occurs naturally in a particular region, ecosystem, or habitat without direct or indirect human intervention.” Because they are native to the landscape, they are easier to grow which is secondary, really, to their importance to the environment. You can find natives at reputable garden centers near you. And for more information about natives, visit the National Wildlife Federation. 
The post Round Up: 24 of the Best Low Maintenance Plants for Your Garden appeared first on Curbly. Via https://www.curbly.com/17957-round-up-24-of-the-best-low-maintenance-plants-for-your-garden |