|
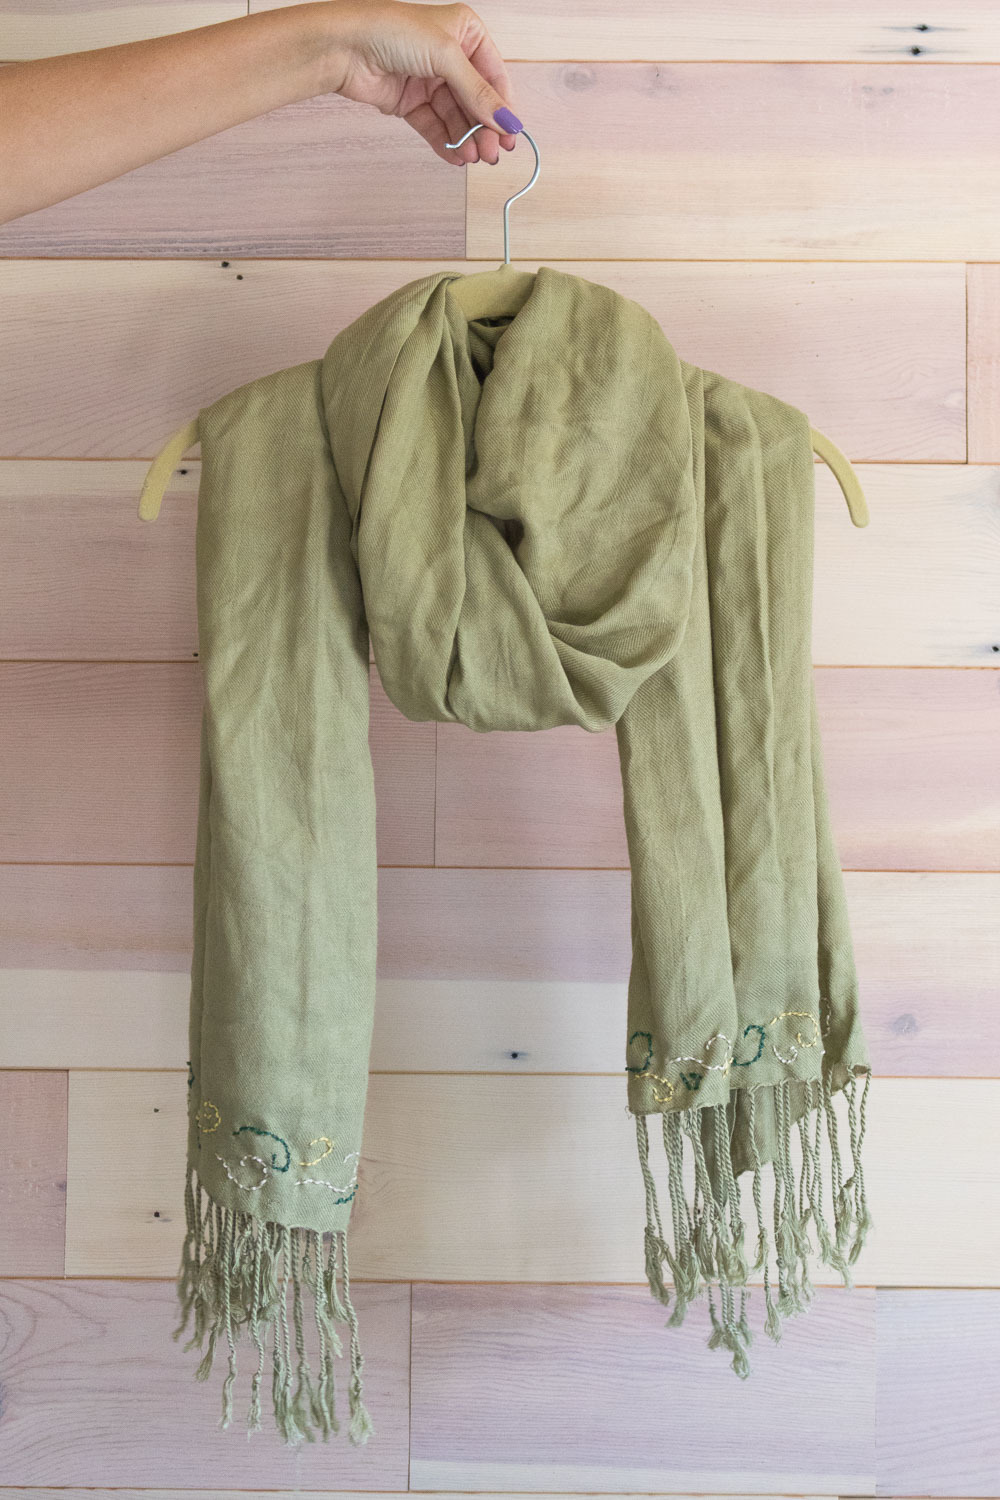
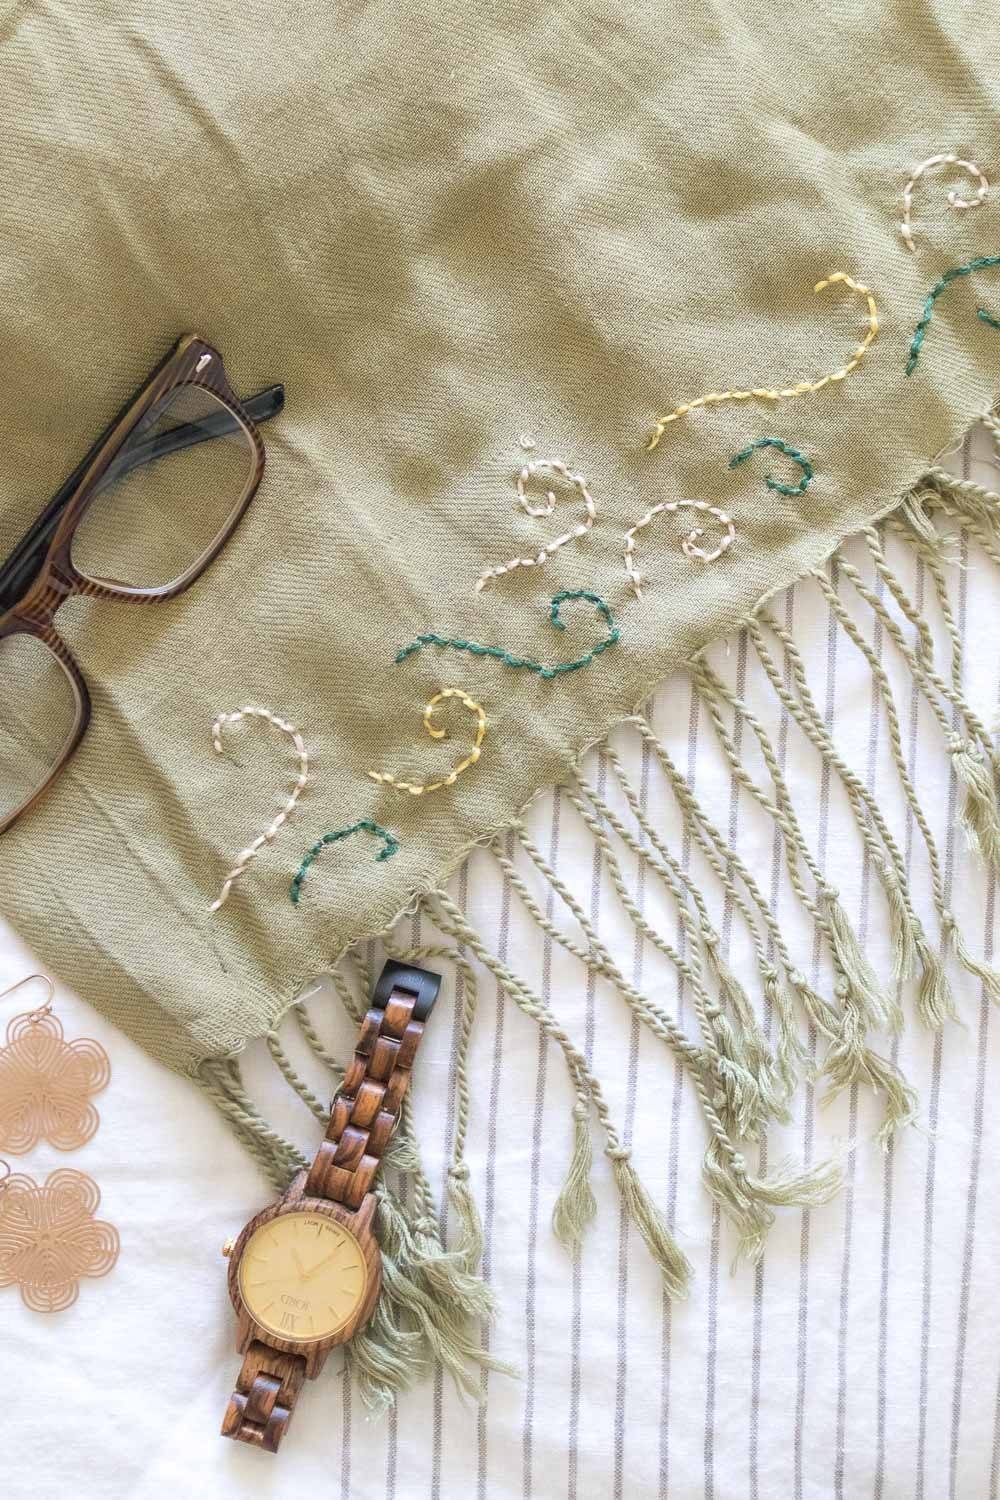
I can feel the fall weather approaching, which means it’s almost time for scarves, blankets and all things pumpkin spiced! Rather than buying new clothing I don’t need this season, I’ve been looking for ways to revamp the clothes I already have to make them feel like new. I’ve had a light green scarf for years, and it turned out to be the perfect piece for making this DIY embroidered scarf with a hand-drawn wind pattern along the edges. This project is one that you can work on mindlessly in front of the TV, which makes it perfect for cool evenings at home. Using three different colors, I managed to turn my plain scarf into a brand new piece I’m excited to re-incorporate back into my wardobe this season. Bring on the fall weather!
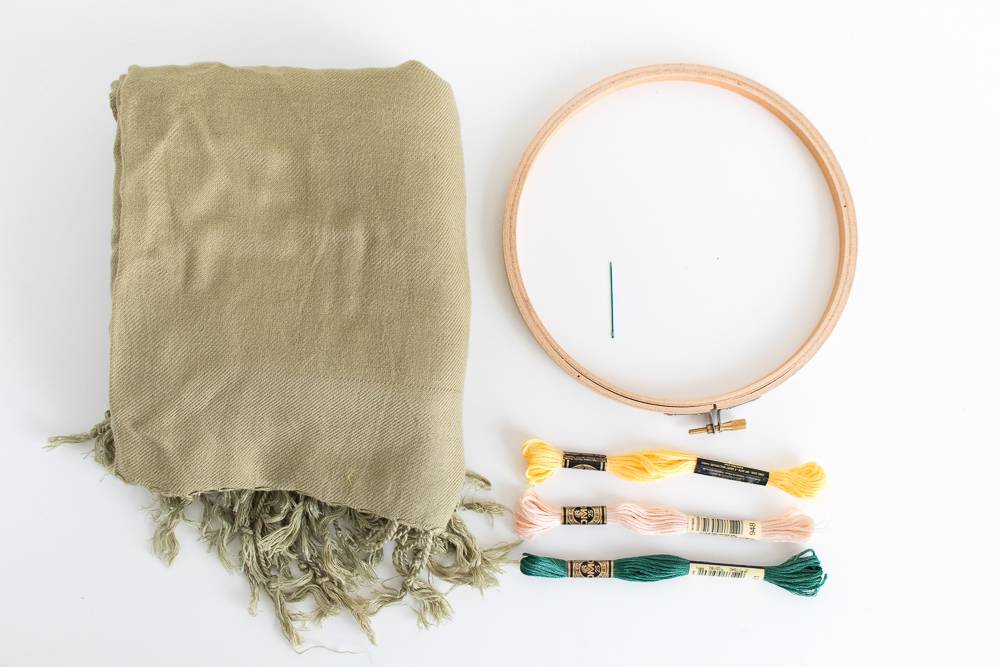
Materials:
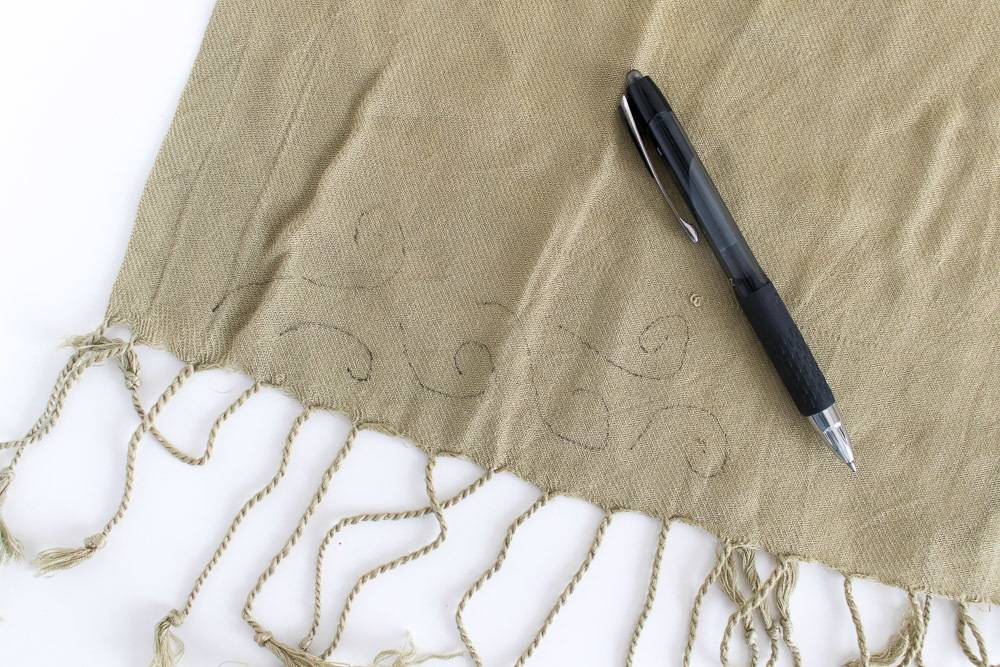
StepLay out the scarf on a flat surface and gently draw a pattern along the bottom edges with a pen or pencil. This will be the outline you’ll follow. StepSecure one section of the outlined area inside of the embroidery hoop and thread a long piece of embroidery floss (several inches) through the needle.
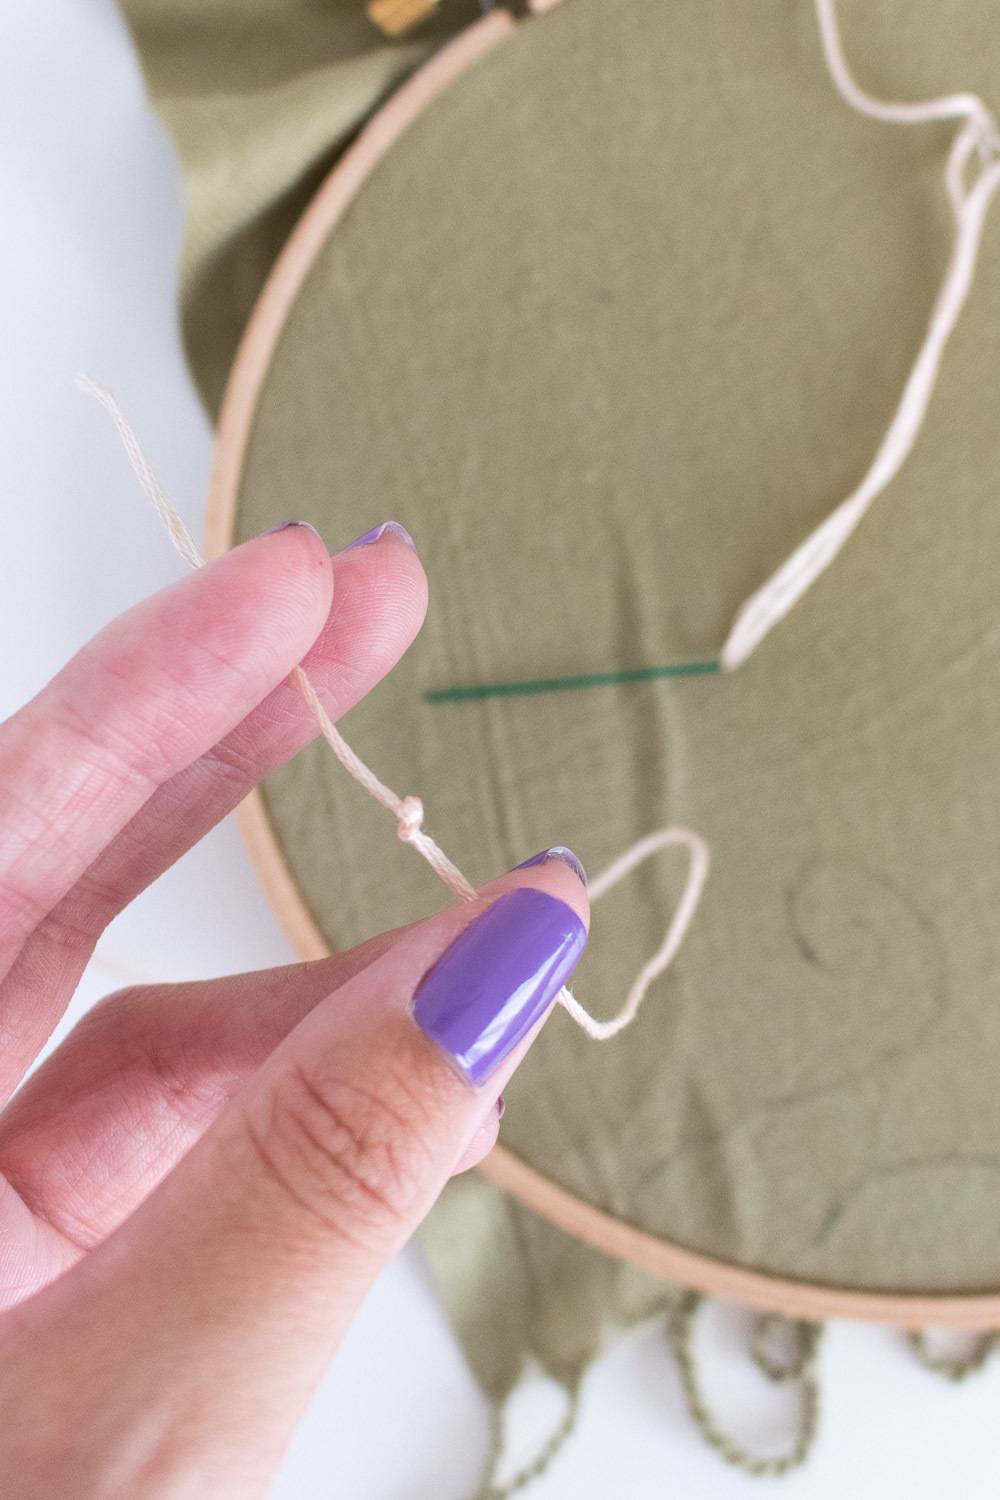
StepAt the opposite end of the thread, tie a double or triple knot. StepStarting from the underside of the hoop, poke through the fabric at the base of your outline and pull the thread until the knot catches.
StepThis pattern follows a backstitch embroidering pattern. Following the outline, poke through the fabric again and pull from the underside to create one stitch. Poke up through the bottom again to create another. In order to fill in the empty space left by the stitch, back stitch down and pull back up through the original point. This will ensure you have a fully embroidered section.
StepTo finish the section, poke through to the underside and thread the needle under a previous stitch, then through the loop of thread. Pull to knot. Continue all the way across the scarf, switching colors as desired and moving the embroidery hoop to pull each section taught. When finished, trim loose thread from the underside of the scarf.
Now your new fall scarf is ready to wear or even gift! The homemade stitches makes a huge impact on a plain scarf and make it feel like new! The post Make an Embroidered Scarf for Fall appeared first on Curbly. Via https://www.curbly.com/make-an-embroidered-scarf-for-fall
0 Comments
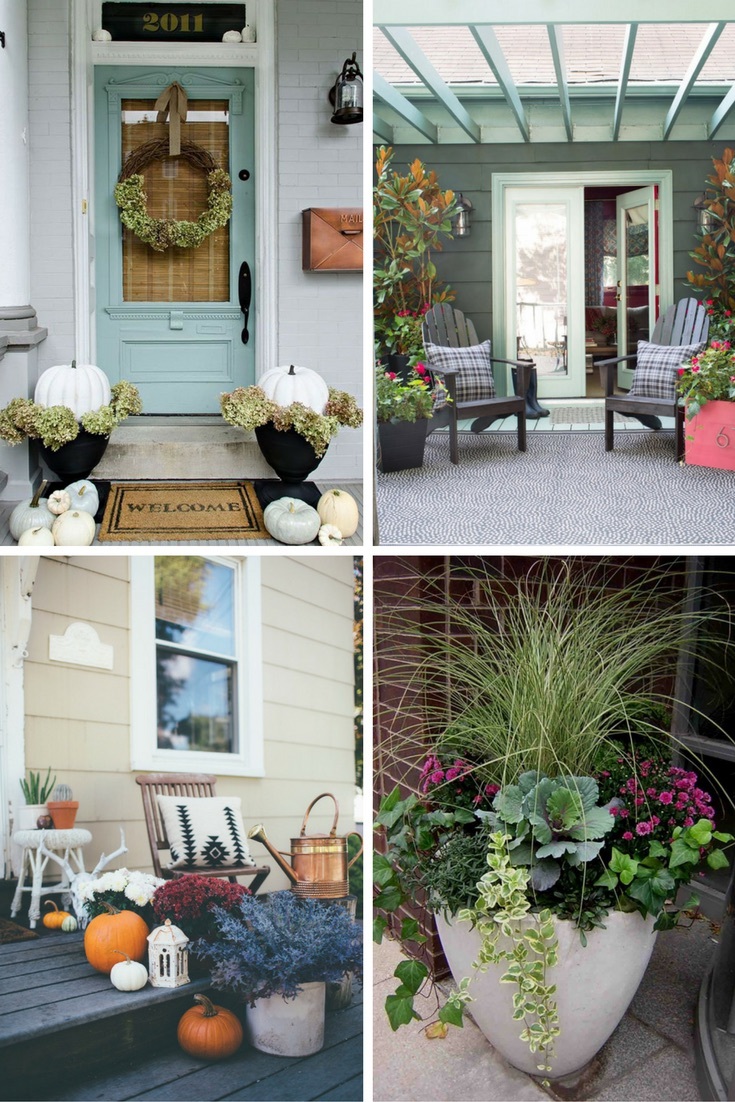
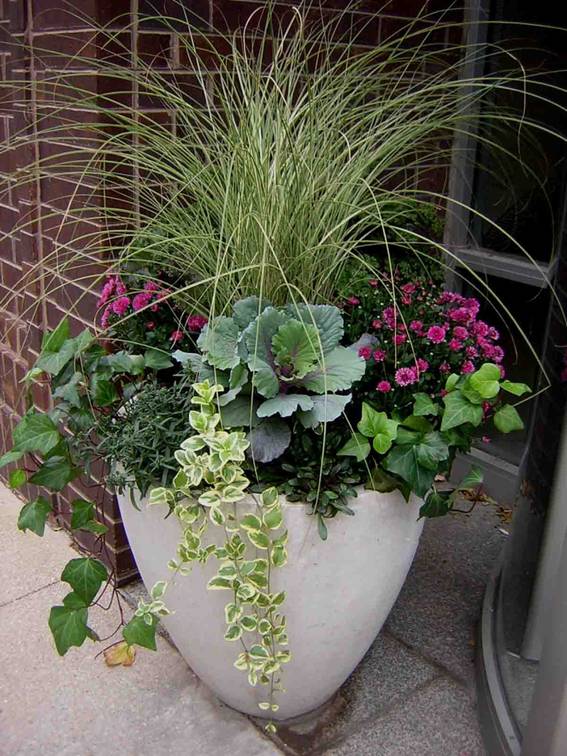
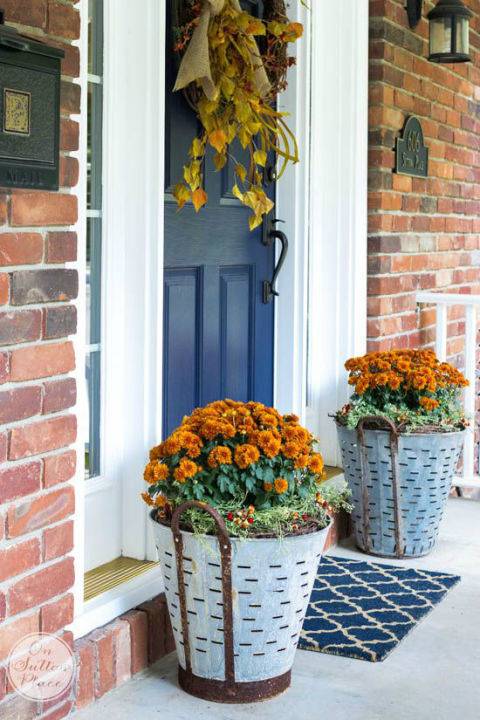
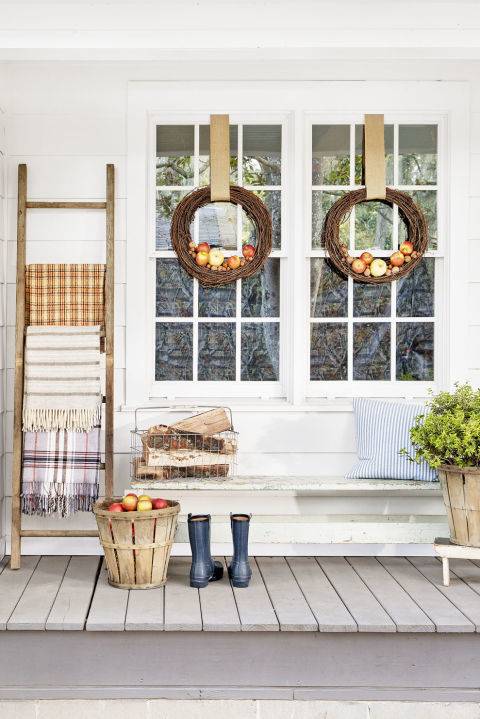
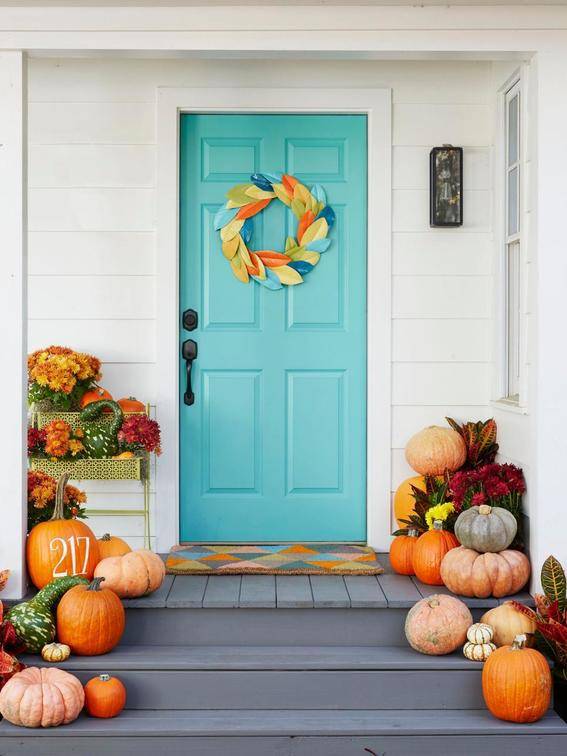
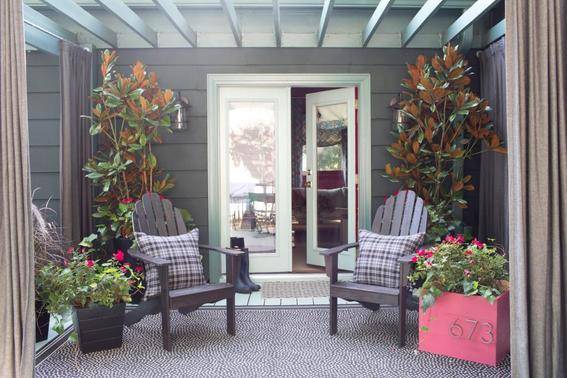
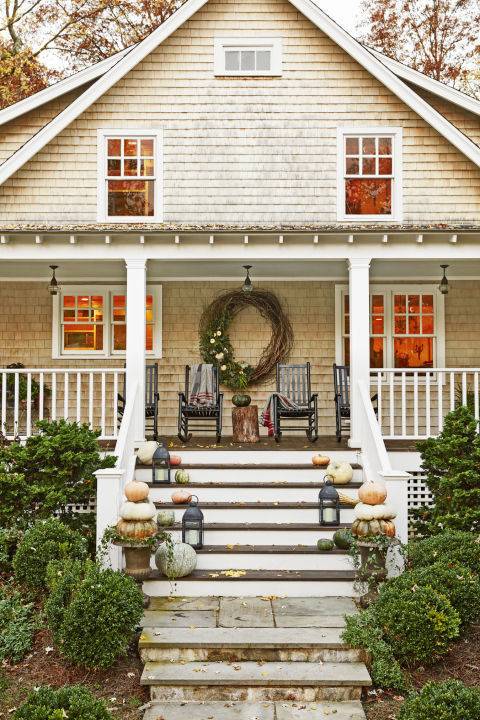
The leaves are falling, the temperature’s dropping, and the weather is perfect for spending some time outdoors. If you’re like me, you want your porch to be as inviting as the weather around you. Here are some of my favorite fall porch decorations to help get you in the season.
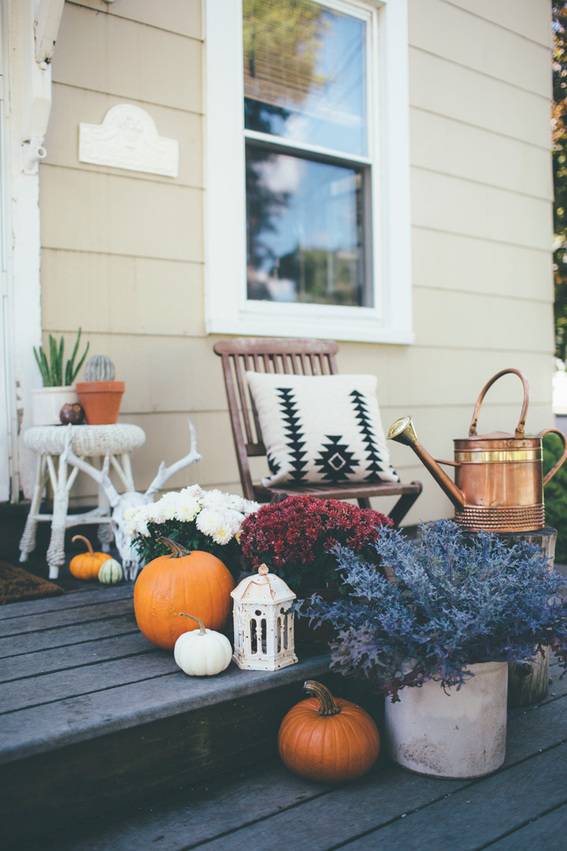
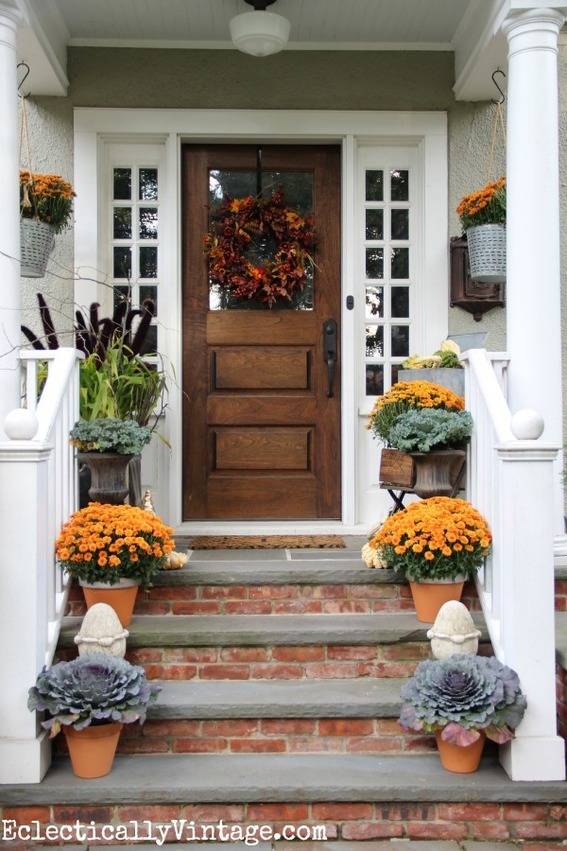
1. This Boho Fall Porch is simple and not over the top orange. 2. I love the mixture of colors on these steps, including the fall lettuce plants. I have to admit I am kind of obsessed with fall lettuce plants. 3. If you don’t love fall colors then this “cool color” fall porch might be the inspiration you’re looking for. 4. This mixture of greenery and draping vines is a modern inspiration for your fall porch planters. 5. This porch is simple and rustic. It’s a good reminder that you don’t have to go over the top to be inviting. 6. If you have a wrap around porch with seating, the ladder with blankets is stylish and functional. Can’t you just see yourself “cozying” up in a blanket, drinking some cider, on a brisk fall night? Also: those window wreaths! Fantastic! 7. This is a bright modern take on a fall porch. I love the plant stand instead of a planter! 8. This porch proves that fall doesn’t have to be rustic. I love the potted magnolia trees. 9. If your porch doesn’t lead to the front door…no problem. Hang a large wreath on the exterior wall or window at the top of your steps. 10. This is seriously a fall porch dream. I would never go inside if I lived here. 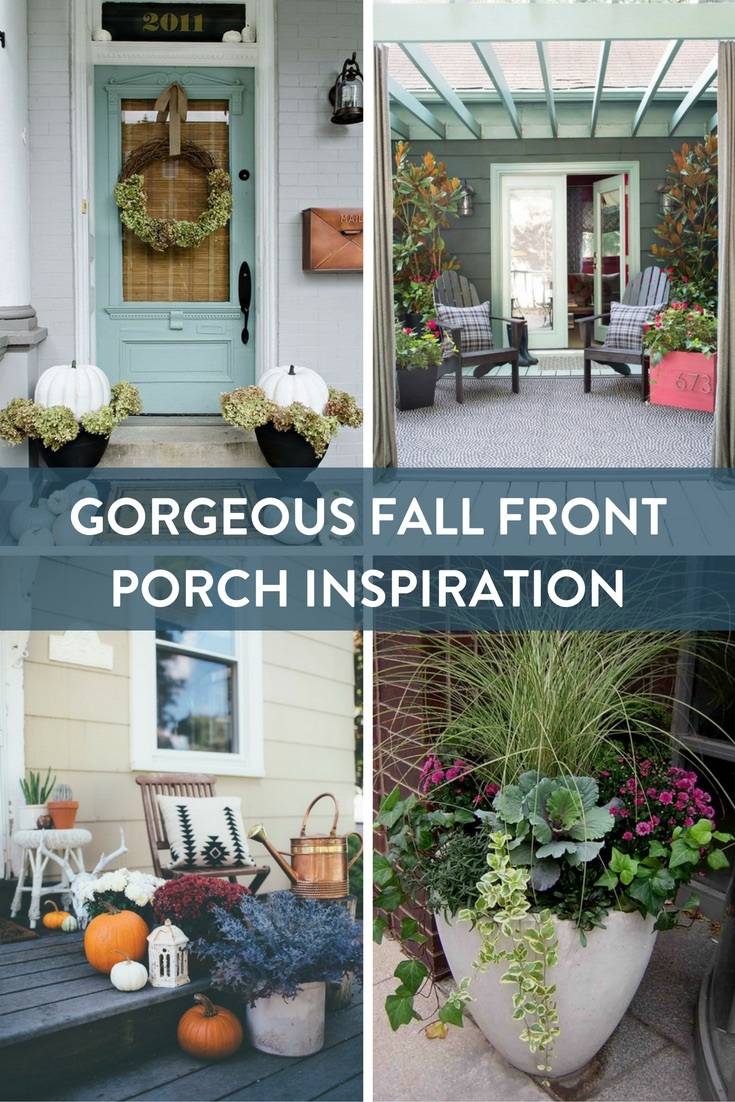
Ready to make your fall porch decor happen? Here’s a simple DIY Halloween doormat for your front porch decor.
The post Eye Candy: Fall Porch Decor Inspiration appeared first on Curbly. Via https://www.curbly.com/18280-eye-candy-fall-porch-decor-inspiration 
September is a transitional time of year… the kids are going back to school, the weather is getting cooler and the landscape is changing. Which means that it’s a great opportunity to give your living room a refresh too. One of the best ways to do this is by adding texture – so take a cue from Scandinavian decor and add some beautiful layered texture to your space this fall.

1. Add Faux FurToss a faux fur throw on chairs and/or sofas to add some depth to your furniture as Lacey has done. Not only will your space look more inviting, but it will feel extra cozy too. I love the Tejn from IKEA… it’s affordable and super versatile. 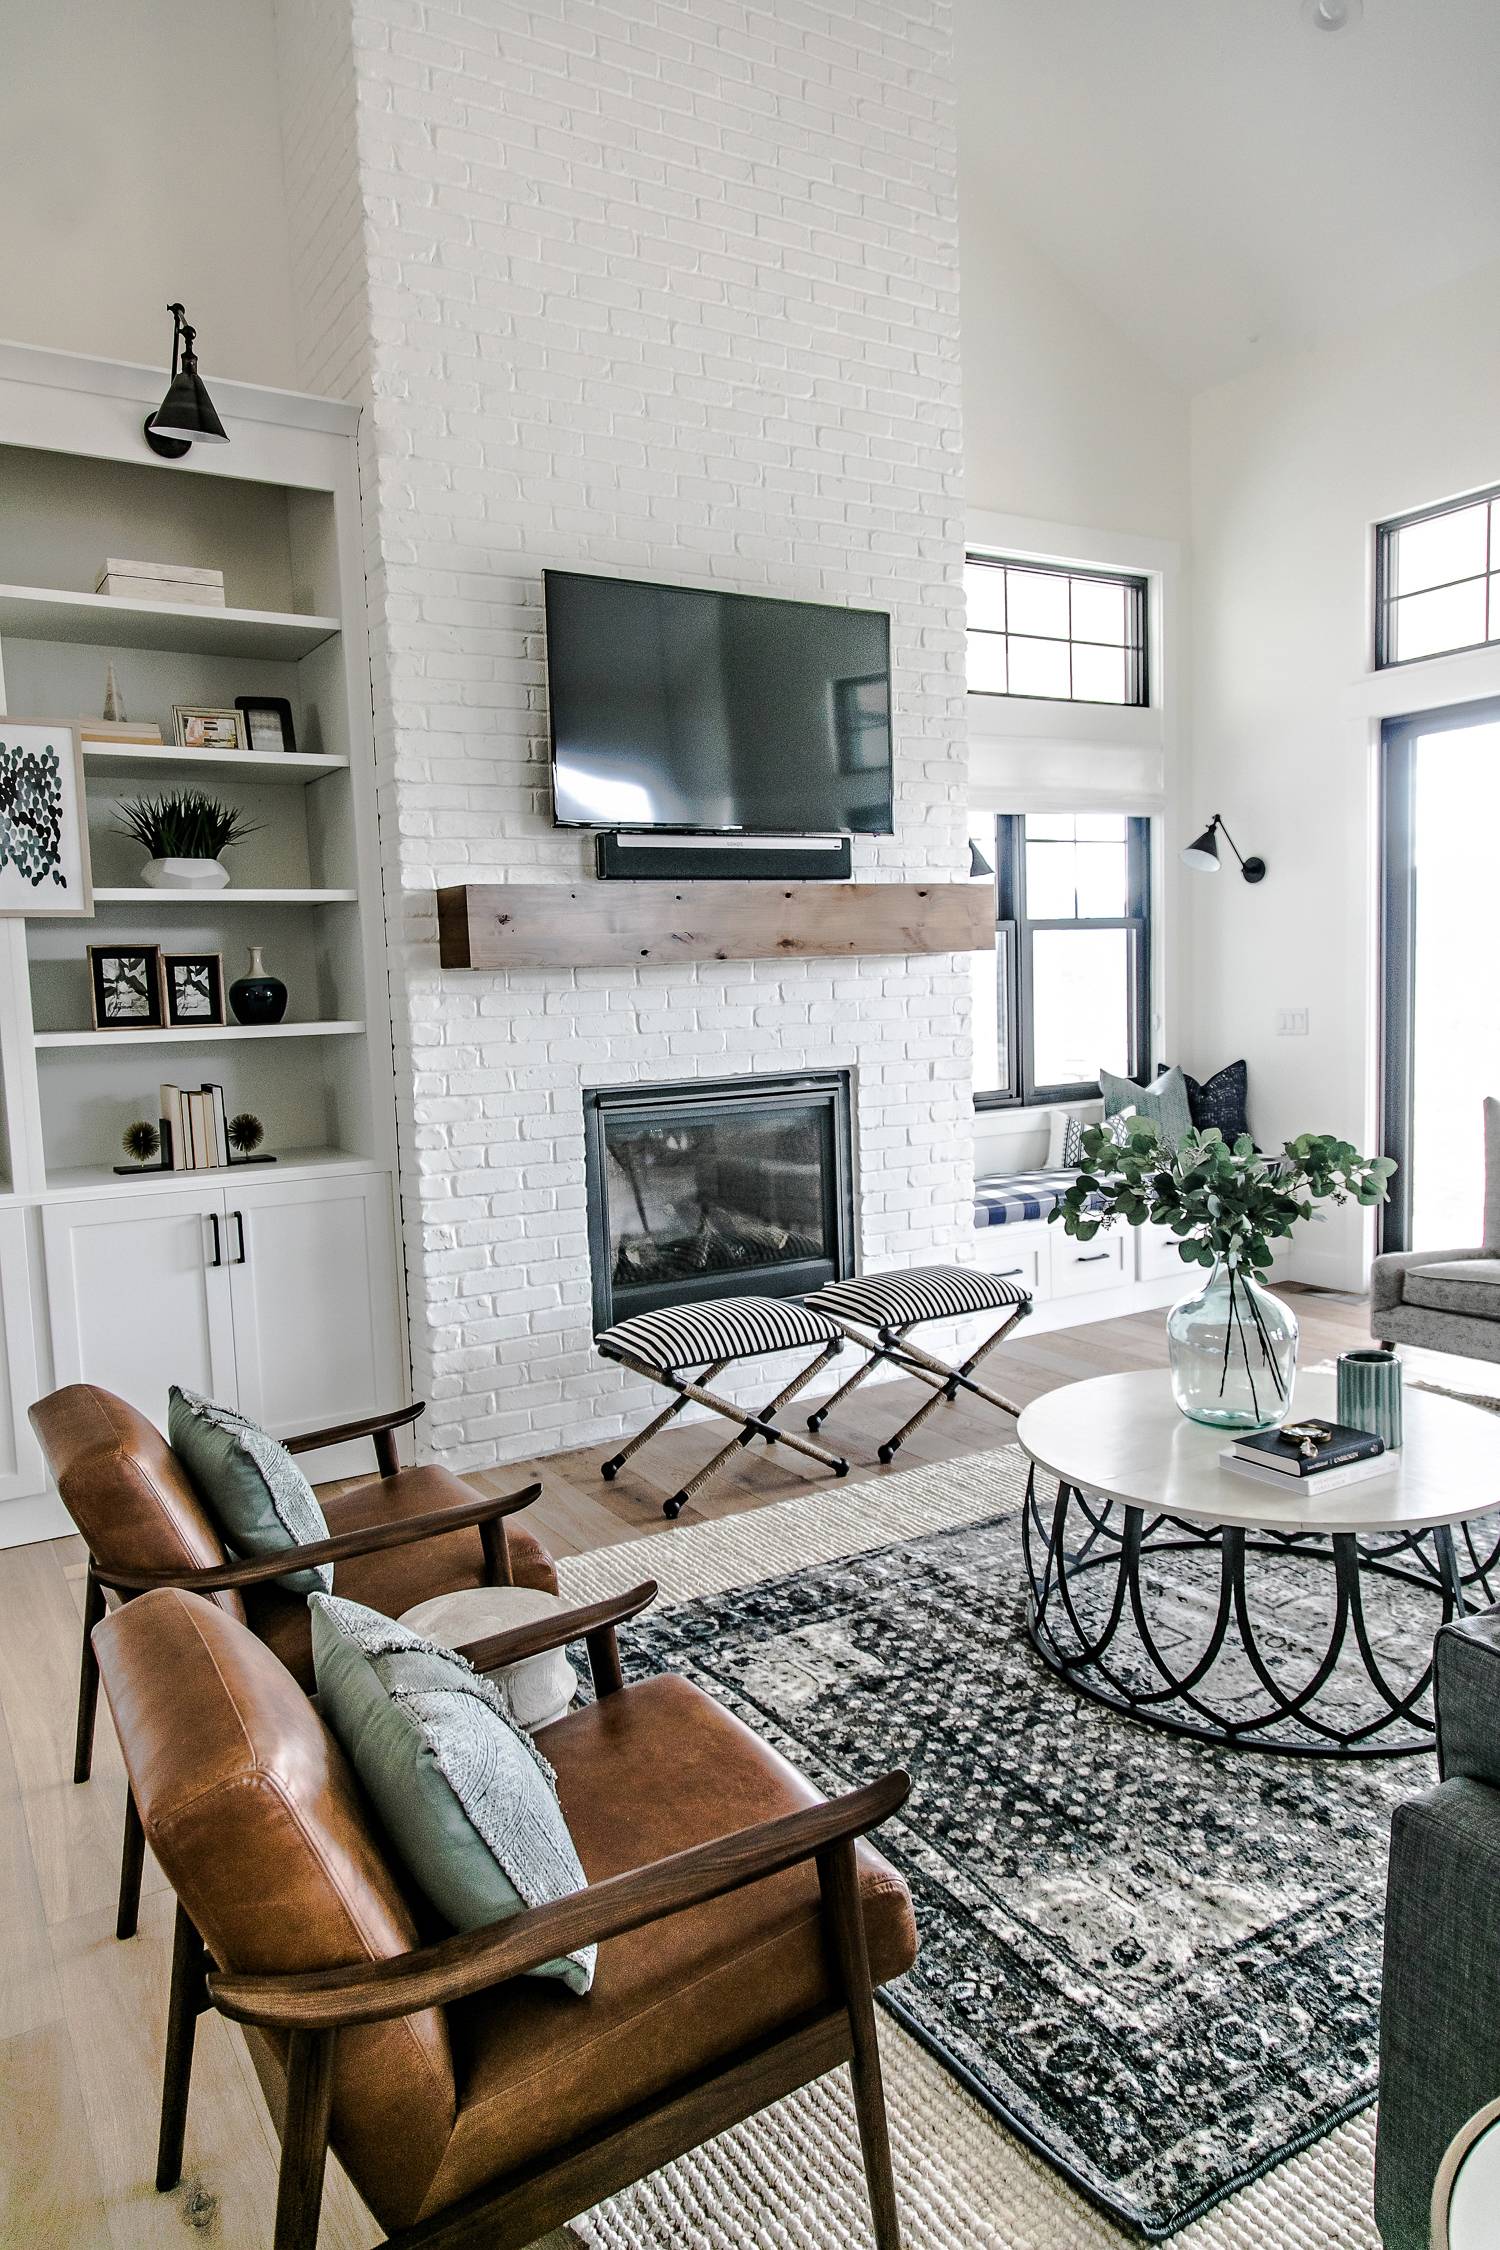
2. Layer Your RugsDo you have a jute rug in your living room? Add a smaller patterned rug on top as they’ve done in this modern farmhouse style living room, leaving a couple of feet of jute showing on all sides. You might also consider an irregularly shaped rug for the top layer, like a faux animal skin rug. 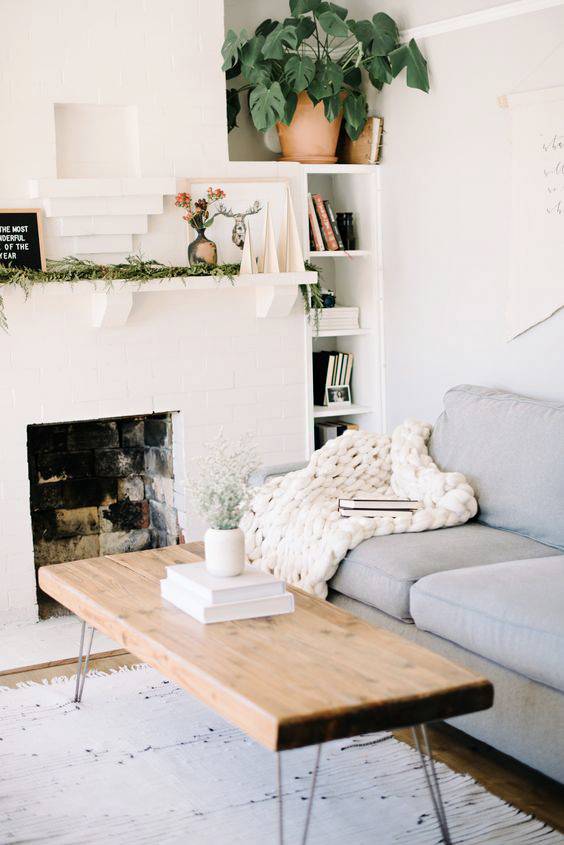
3. Swap In Chunky BlanketsPut your thin summer throws in the closet and add a couple of thick, chunky blankets to your space. Drape them over the arm of the sofa, hang them on a blanket ladder or put them in a basket. Don’t you just want to climb underneath the one in the image above? 
4. Add An Accent WallSet aside an afternoon to paint a textured accent wall on one side of your living room. We love this denim technique, but there are all kinds of different textures you can achieve using only paint. Just hop on Pinterest and search “textured wall painting techniques.” 
5. Beef Up Your Window TreatmentsIf you don’t have window treatments at all, adding curtains is a surefire way to add some serious texture to your living room. But even if you do, you could always add blinds or decorative shades. Check out what a difference it makes. 
6. Layer Throw PillowsThrow pillows are a great way to experiment with texture and pattern… there are plenty of affordable options available, so you can mix and match different styles without blowing your entire paycheck. Try combining textured pillows (cable knit, faux fur, etc.) with patterns as they’ve done here, making sure to vary the scale. 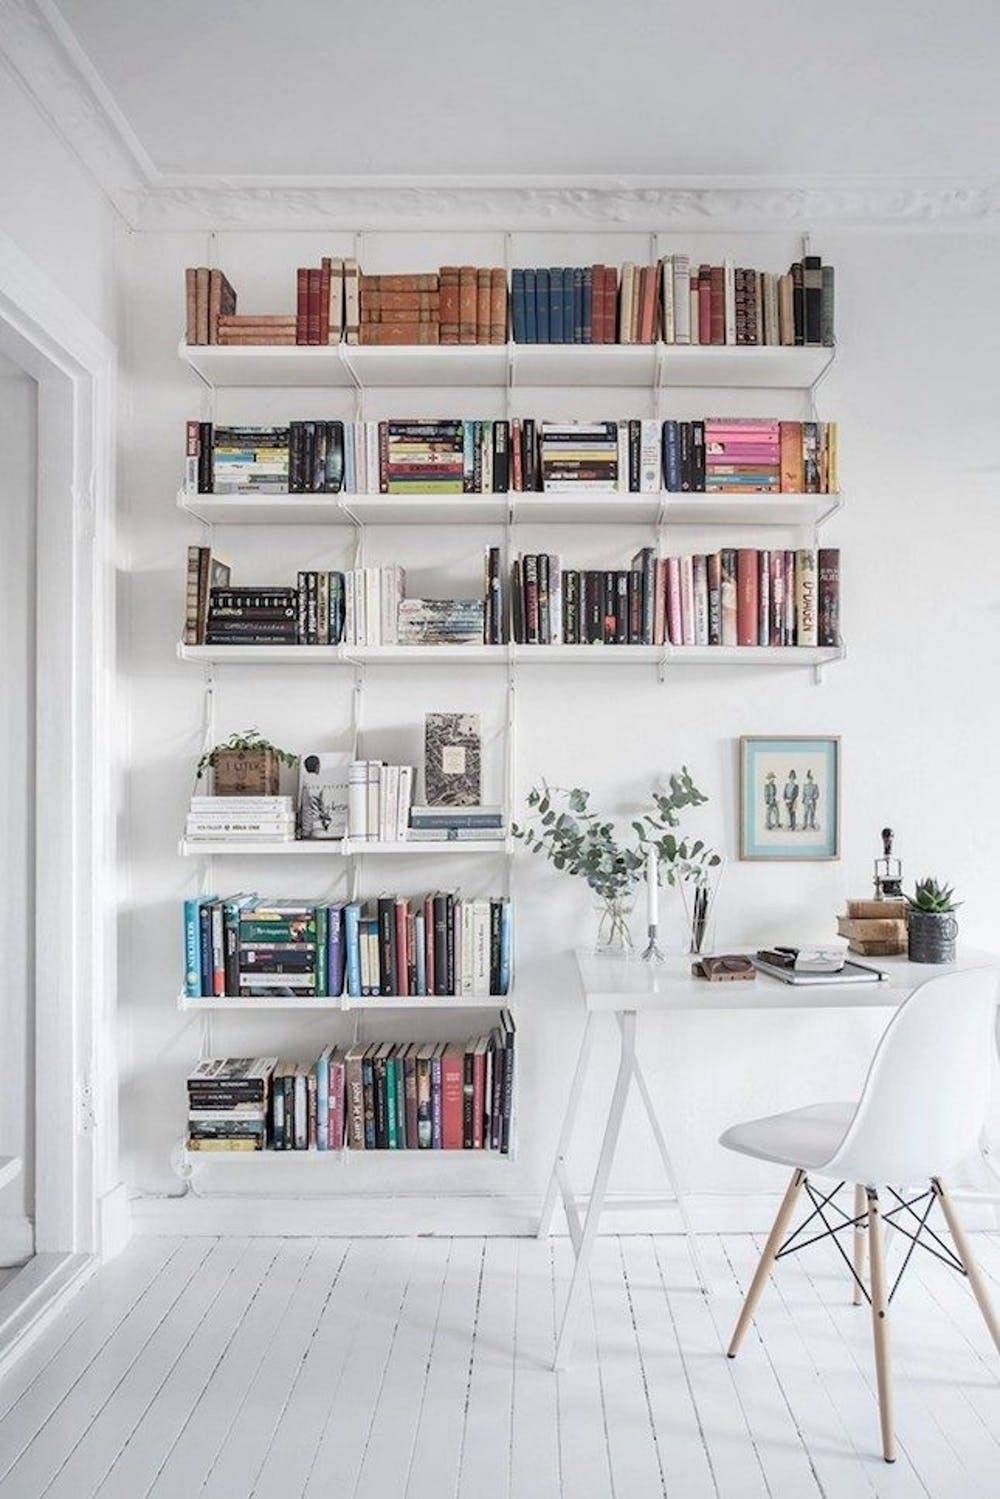
7. Just Add BooksDo you have lots of books laying around? Perhaps you’re like me, and you have boxes of them wasting space in your basement? Use them as texture! Add them to existing shelves, orienting them both horizontally and vertically or even as risers underneath interesting objects. Check out more ideas here. 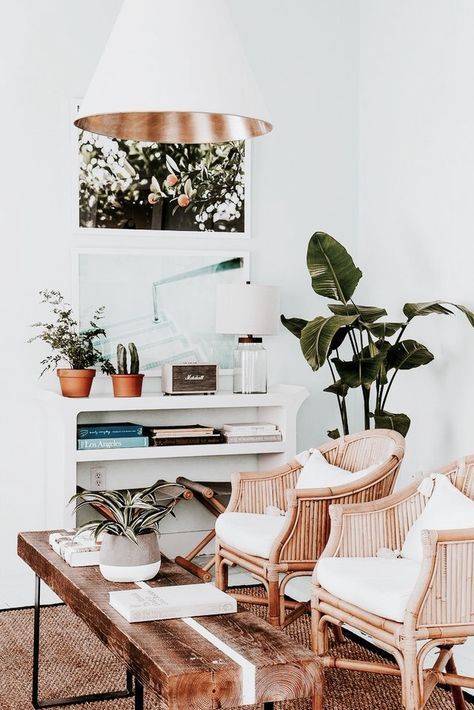
8. Experiment With Interesting MaterialsRattan is popular lately, and velvet is a very tactile material that can elevate a space. Distressed wood and jute are other good options. If you’re in the market for new furniture, consider these sorts of items… or you can start with accents for a smaller financial commitment. 
9. Add Natural ElementsPlants are a great place to start… add a large potted plant in one corner, and put a couple of smaller ones on a bookshelf or end table. Live edge wood, crystals and floral patterns would work well too. This living room from New Darlings has many of these elements. 
10. Add More LightingLighting might not be the first thing you think of when you’re trying to add texture to your living room, but it can really add a new dimension to your space. The key is to vary your light sources… make sure you have at least three different kinds, i.e. floor lamps, table lamps, ceiling lights, candles, etc. How do you add texture to your living room? Feel free to share your ideas in the comments section! The post Fall Refresh: 10 Ways To Add Texture To Your Living Room appeared first on Curbly. Via https://www.curbly.com/fall-refresh-10-ways-to-add-texture-to-your-living-room 
Leather is one of those materials that seems intimidating… but once you start working with it, you’ll realize that it’s not. I promise. So in honor of this sophisticated material, today I’m sharing ten of my favorite leather DIYs for your home. (And if you’re not into using the real stuff, you can substitute vegan leather for any of these pieces!).

1. Turn a plain old wooden bowl into a beautiful hanging planter using some long leather strips. Get the how-to here. [Photo: Made In A Day] 
2. These leather catch-all caddies are super versatile… and totally easy to make. Check out the tutorial here. [Photo: Lia Griffith] 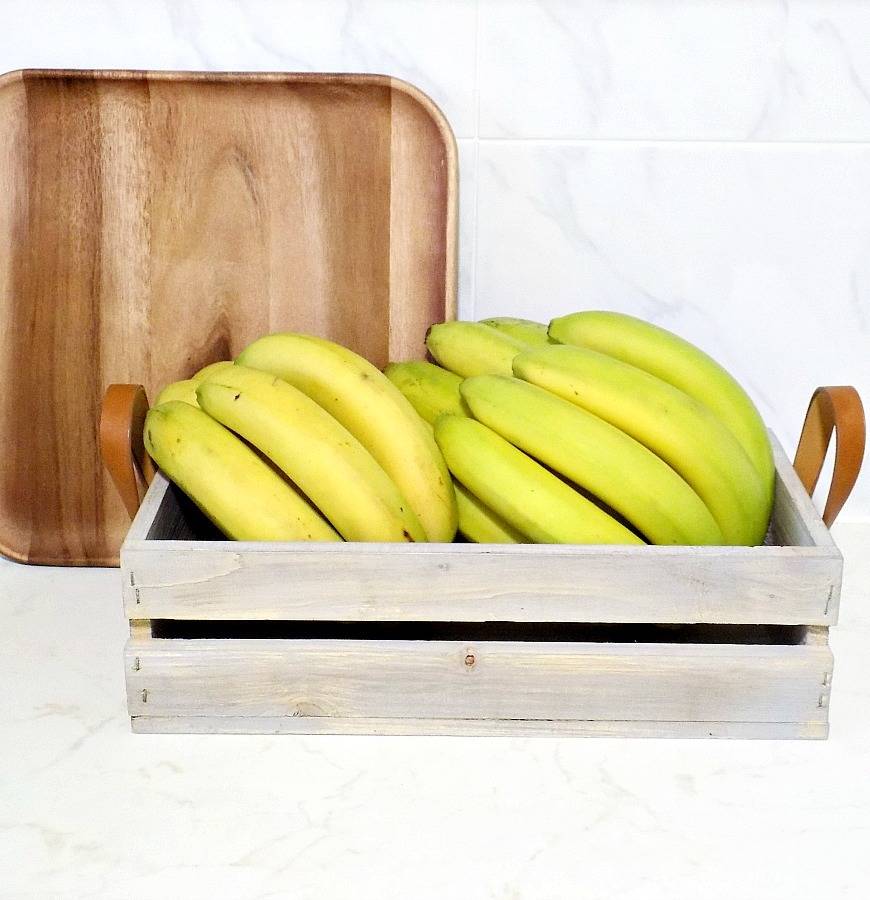
3. Add leather handles (made from old belts!) to a wooden crate for this simple yet gorgeous project. Learn more here. [Photo: Art, Decoration & Crafting] 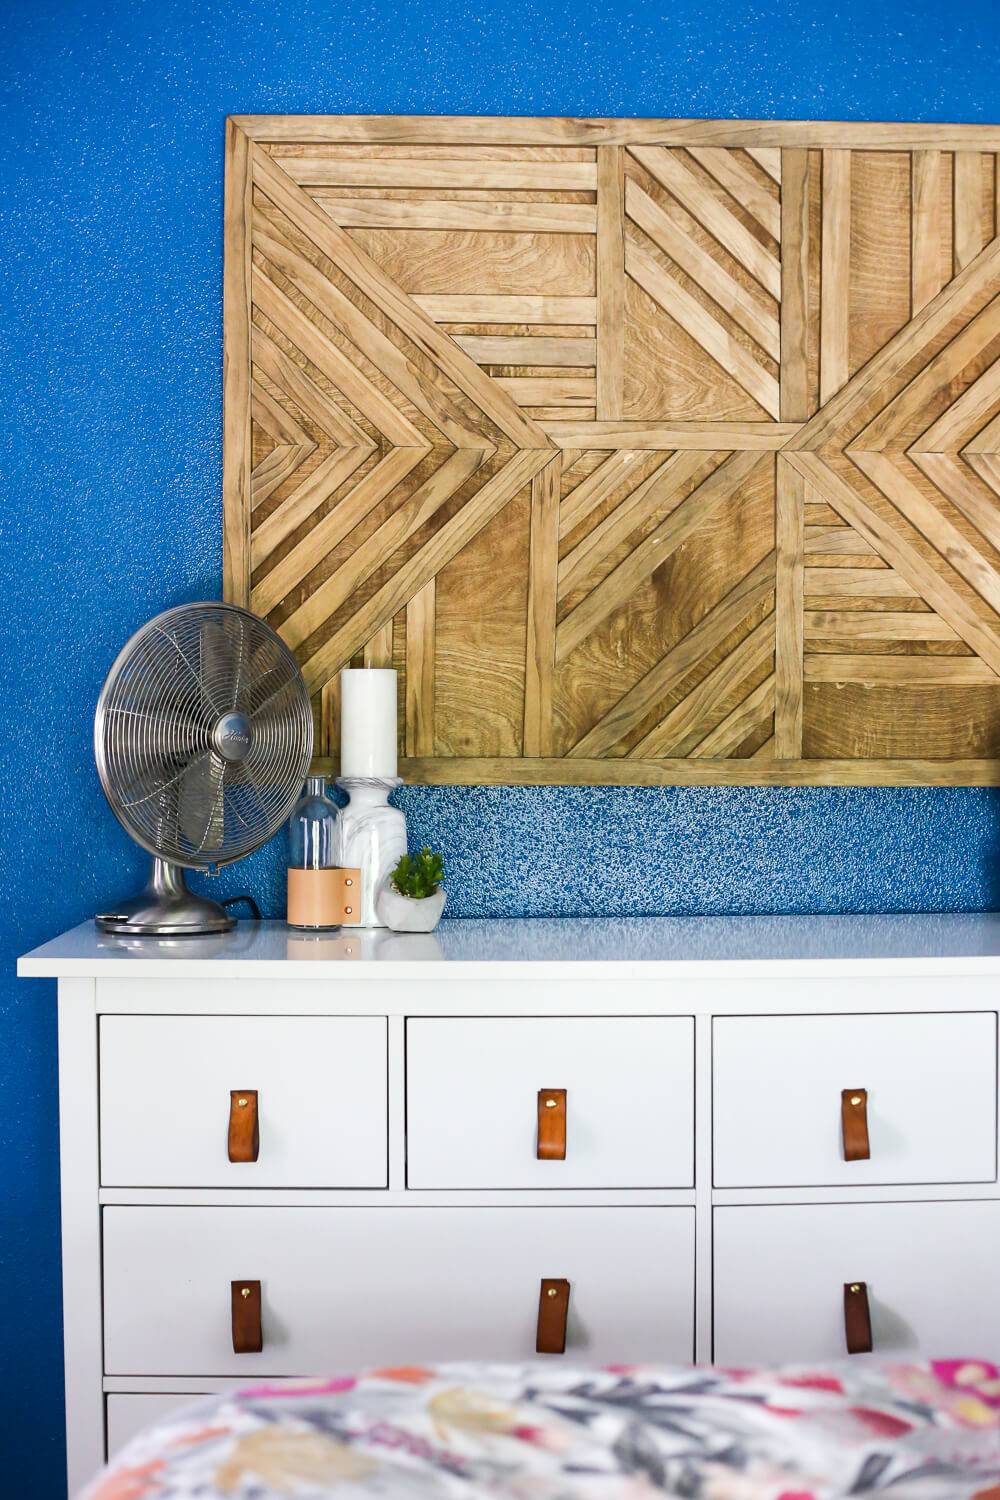
4. Leather drawer pulls elevate the look of this basic white dresser… learn how to make them here. [Photo: Love and Renovations] 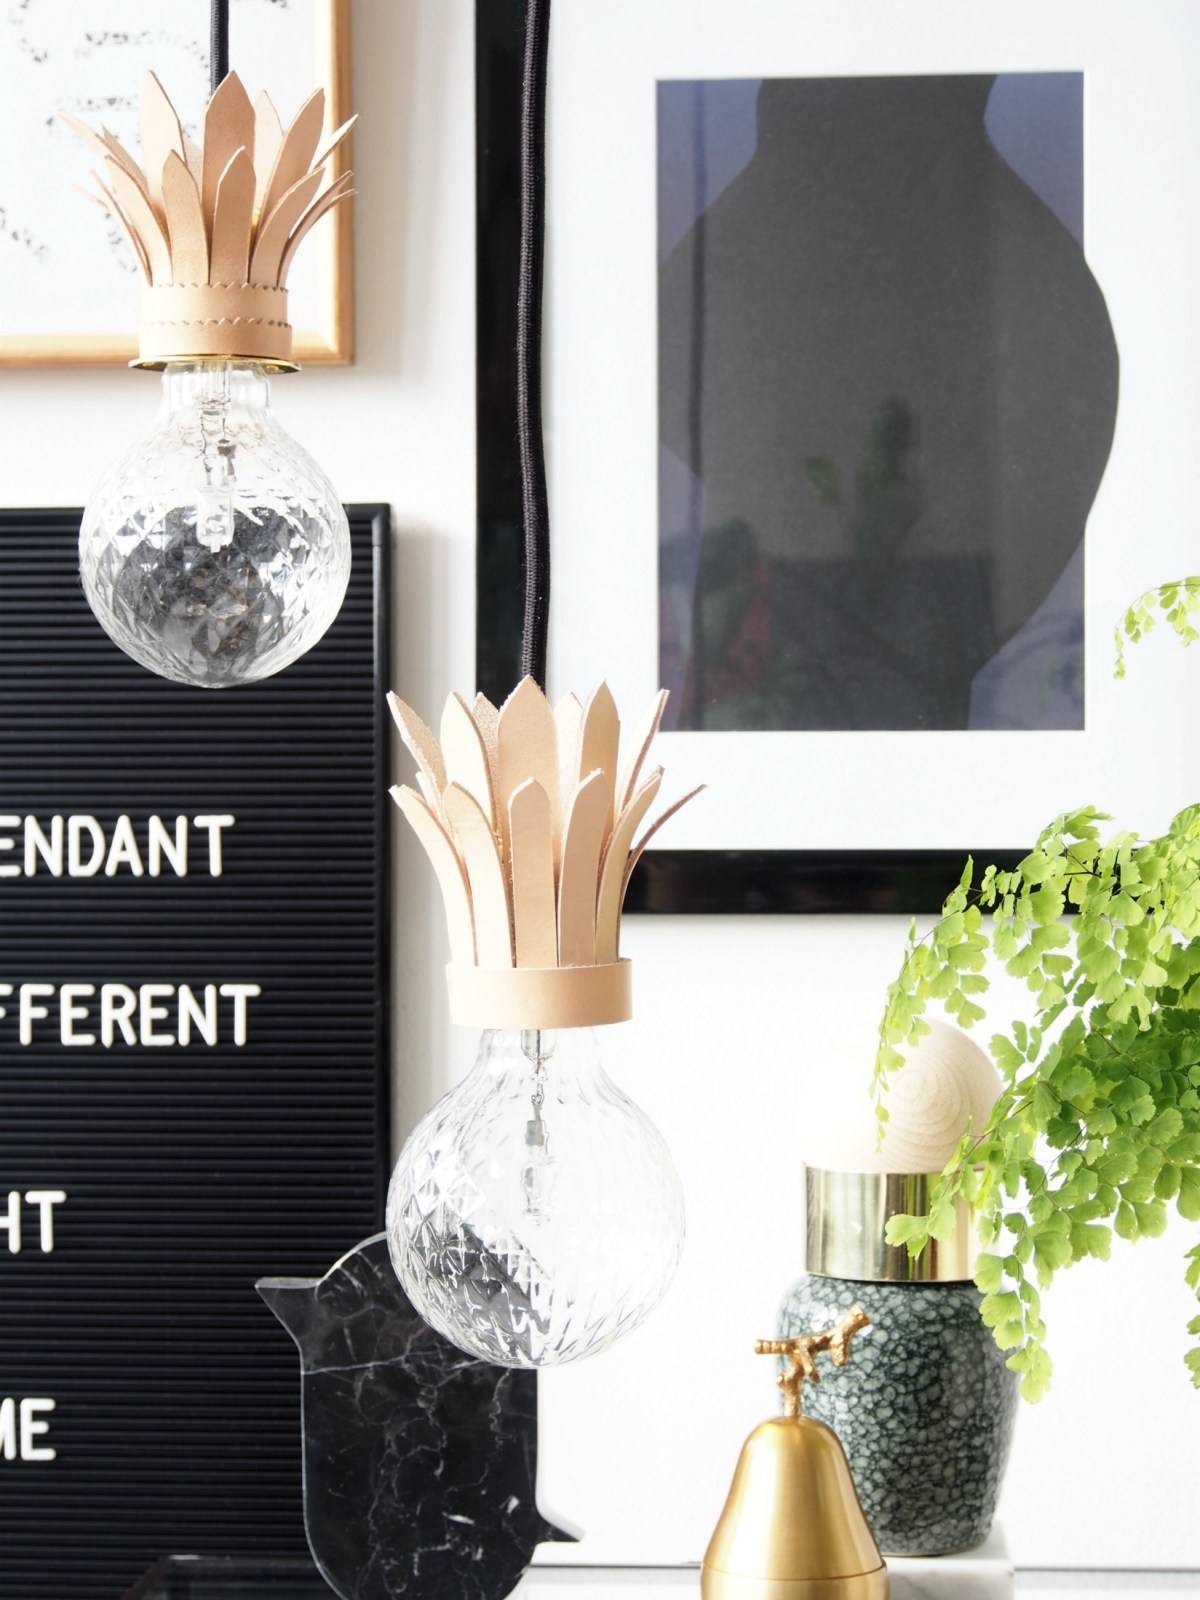
5. This one might be my favorite… leather accented light bulbs that look like pineapples! Find out how to make them here. [Photo: Monsters Circus] 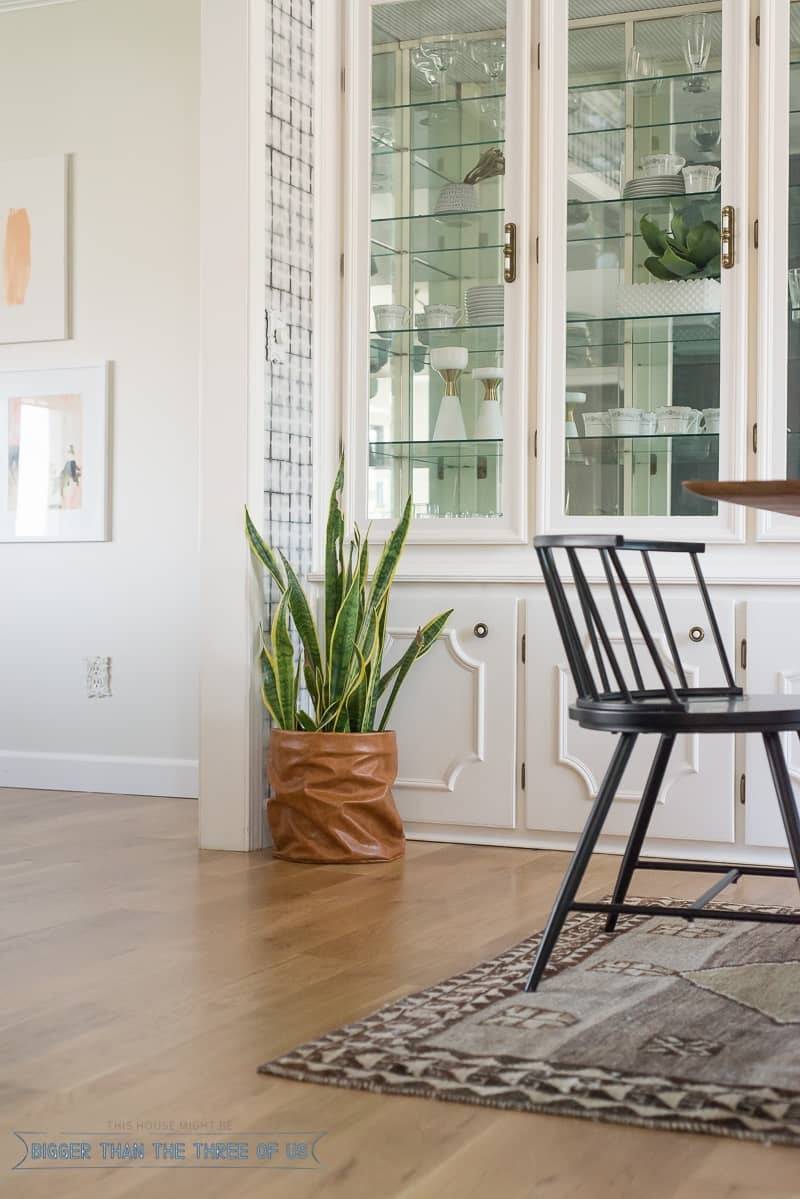
6. Give your potted plant a new look with this sophisticated leather plant bag. [Photo: Bigger Than The Three of Us] 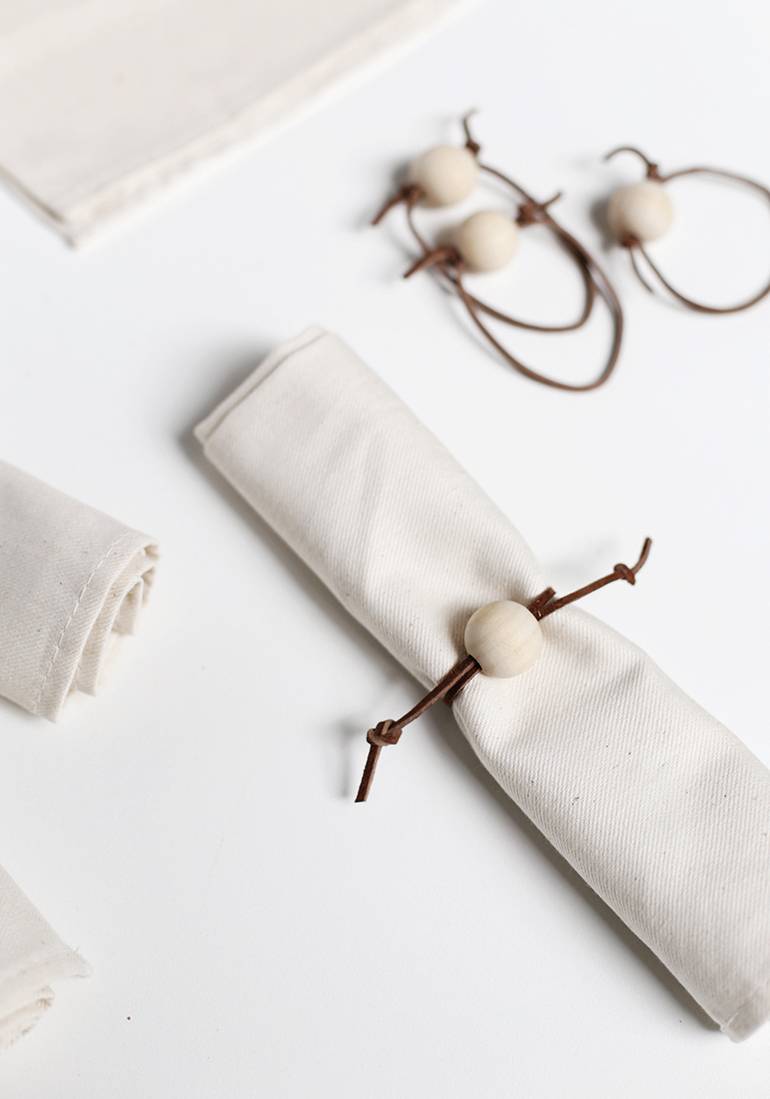
7. Who would have thought that you could make something so awesome out of wooden beads and leather cord? Check out the tutorial for these napkin rings here. [Photo: The Merry Thought] 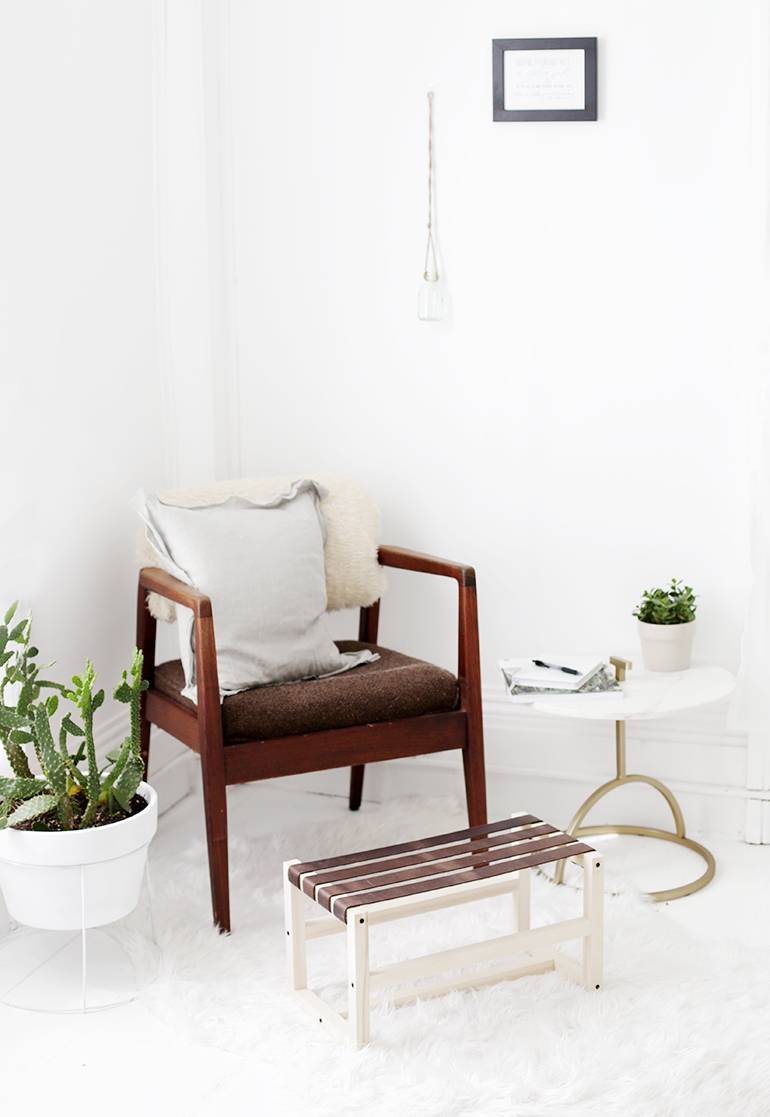
8. This gorgeous leather footstool would be a beautiful addition to any living room. Get the how-to here. [Photo: The Merry Thought] 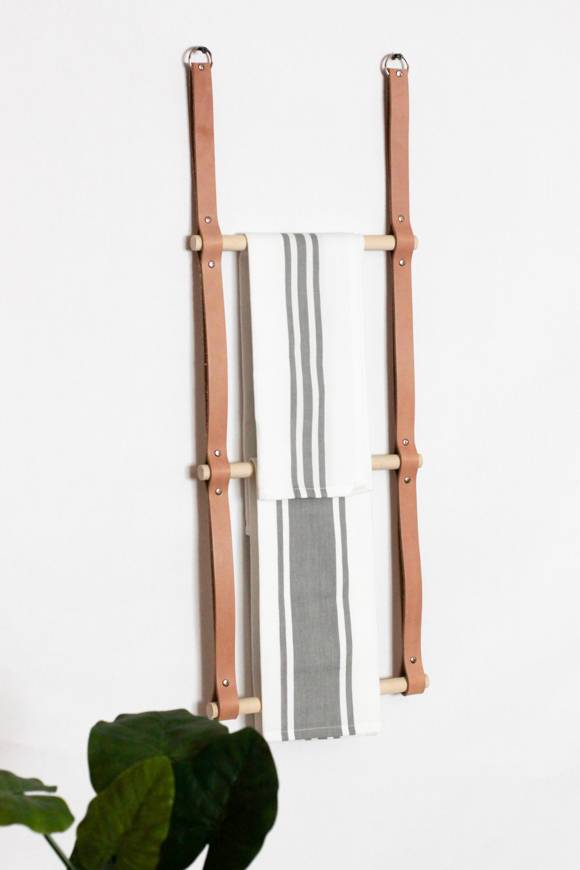
9. Find out how to make this lovely hanging leather rack here. [Photo: Why Don’t You Make Me] 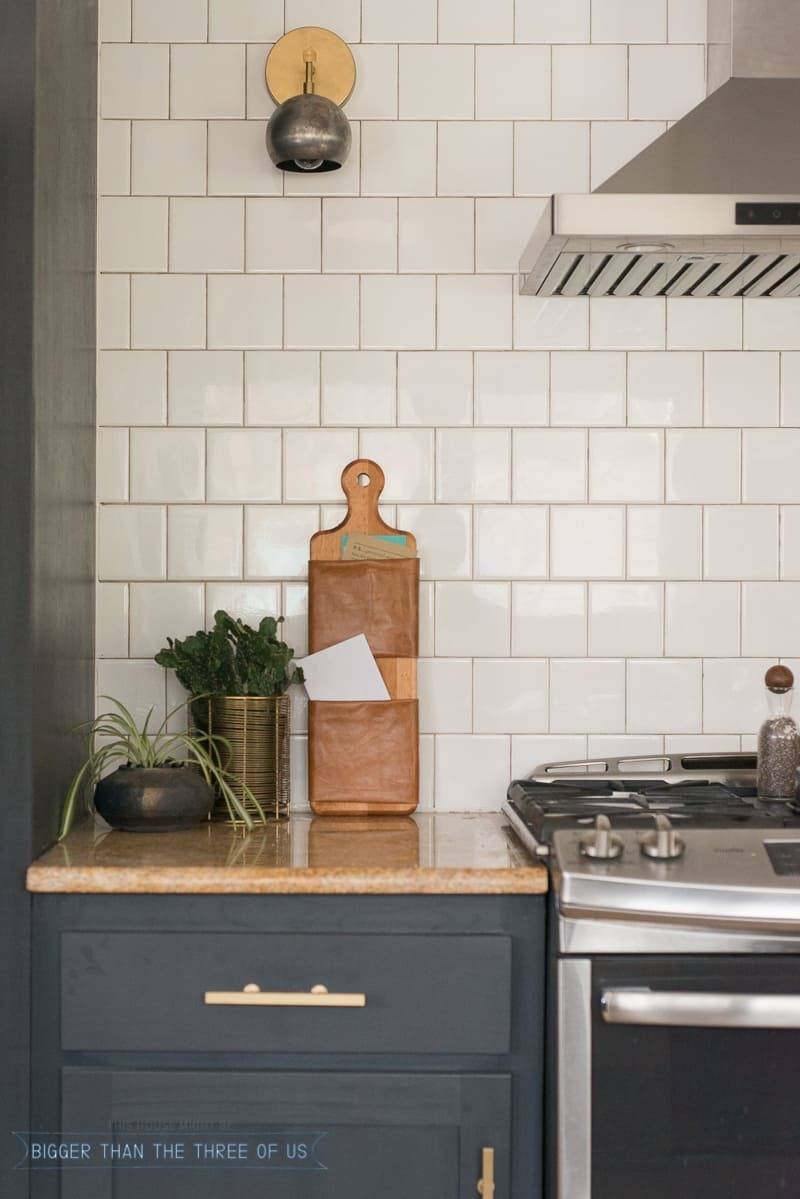
10. Sort your paperwork in style with this wood and leather mail organizer. Get the how-to here. [Photo: Bigger Than The Three of Us] 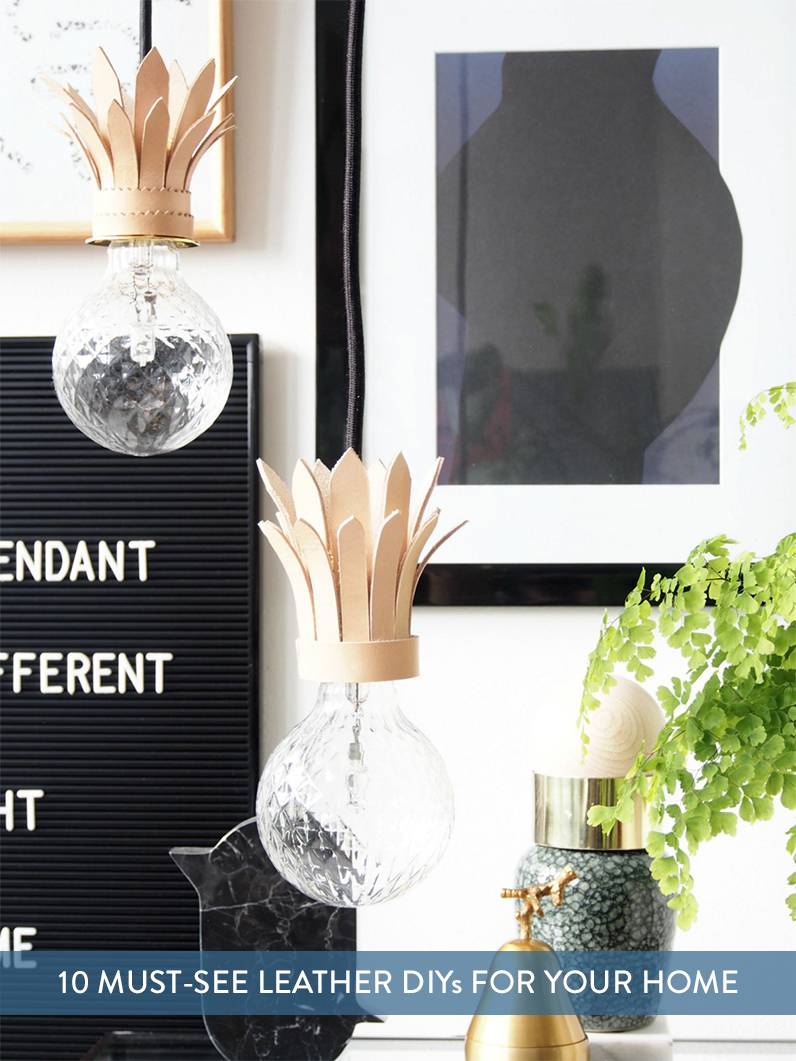
The post 10 Sophisticated Leather DIYs For Fall appeared first on Curbly. Via https://www.curbly.com/10-sophisticated-leather-diys-for-fall 
Landscaping can be pricey, but there are ways to lessen the expense if you exert a bit of extra effort and some ingenuity. Here are our favorite ways to landscape on a budget. 1. Choose plants with bright colored blooms for big impact.Flowering plants with big, bright blooms (as shown in the first image above) help fill space and draw the eye in. Look for colors that complement or offset the shades of your home’s siding or stucco. 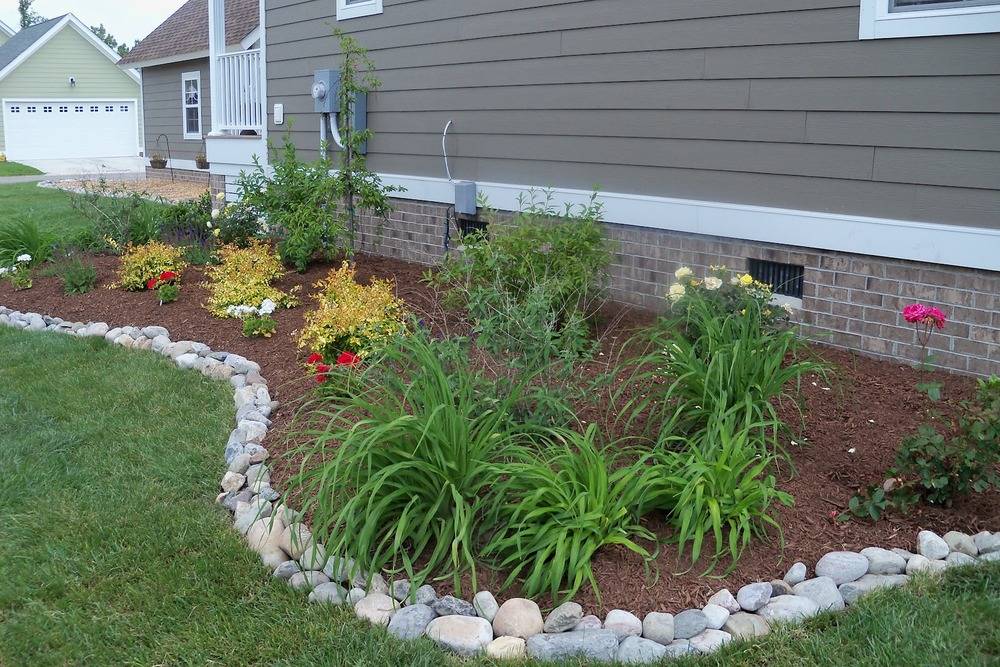
2. Collect rocks and use them to edge the gardenRather than buying brick or other garden border materials, find stones for free and use them to create an attractive divider between the garden and the lawn. 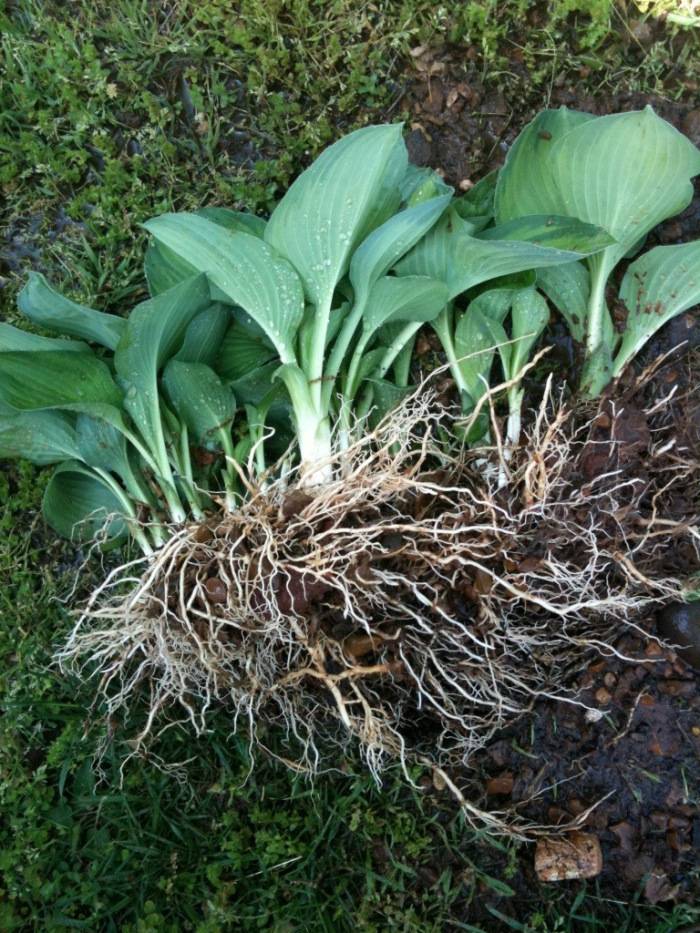
3. Instead of buying 5 plants, buy one and divide it.Divide plants, like hostas or lillies, and spread them throughout your yard. You’ll save money by turning one plant into several. Dividing plants is pretty easy; just dig up the entire plant, making sure to keep the root-ball intact. Then carefully split up the roots and stems until you have separated the plant into several chunks. Each group can be re-planted, and should continue to grow if watered and maintained appropriately. Read more here. 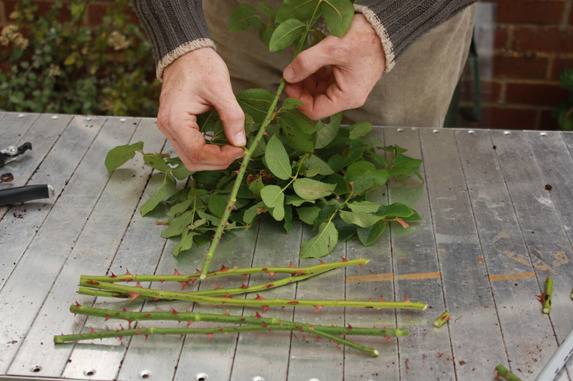
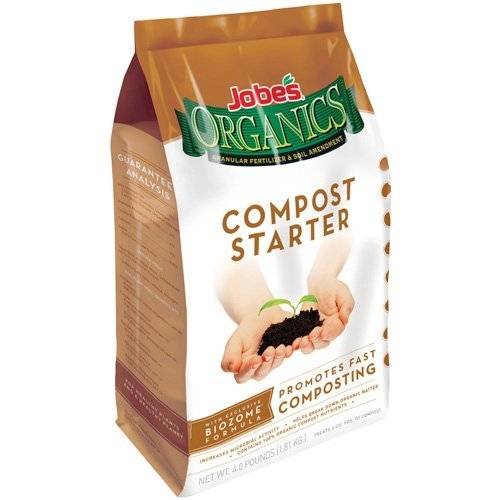
4. Ask a neighbor for rose-bush cuttingsAsk your neighbor if you can take a few cuttings from their rose bushes, then use this tutorial to learn how to propagate them. 5. Turn kitchen refuse into compost to improve garden soil qualityLearn to compost! Put garden and kitchen waste to good use and help add important nutrients back into your topsoil. Learn more here. Curbly Tip: Compost starter is extremely useful. We like Jobe’s Organic Compost Starter because it’s inexpensive and gets great reviews. 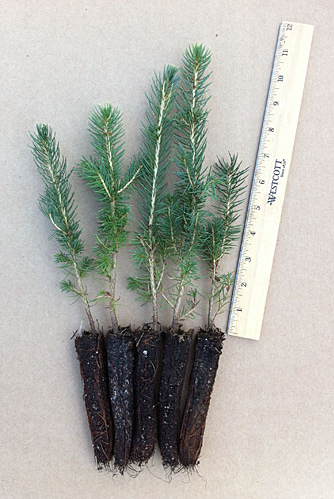
6. Buy evergreen seedlings instead of larger potted trees.Seedlings will take a bit longer to grow, but they’re much less expensive. 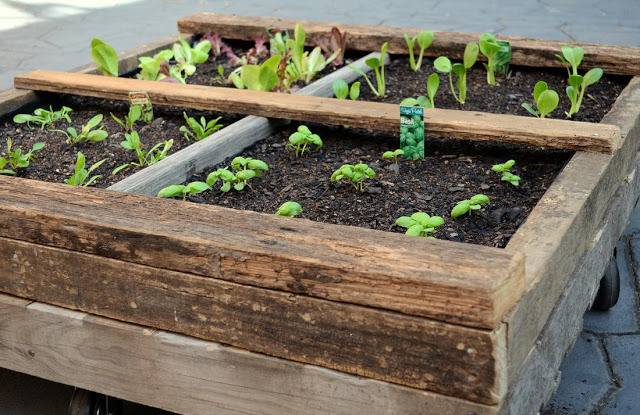
7. Upcycle old materials.Use this tutorial to find out how to make a rolling raised garden bed out of a couple of wooden pallets. Wooden crates can be turned into planters! 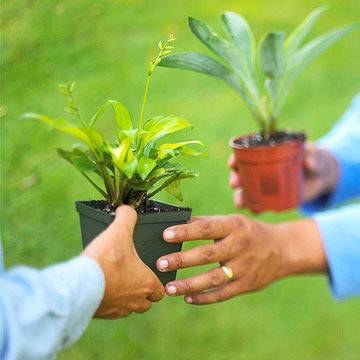
8. Trade resources with friends and neighborsTool sharing is a gray way to save money. Rent a wood chippers or soil aerator, and split the costs with friends. You can also split seed packs, plant packs, and more. 9. Buy pots and planters used or on sale.Yard sales, flea markets, and Craigslist are all great resources for finding really affordable pots and plant containers. 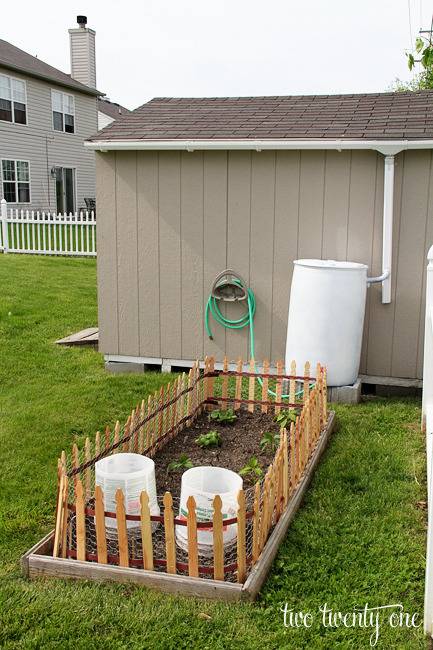
10. Construct a rain barrel to collect rain to water your garden and lawn.This will lower your water bills (and help the environment too!). Get the rain barrel tutorial here. Use a downspout adapter to direct water flow. 
11. Add some color by painting rocks, bricks, or landscaping pavers.You know how sometimes you just get tired of looking at boring, plain, red bricks? Well, guess what? Other people do to! Which is why those materials can often be found for cheap, or free. But with a fresh coat of paint, you can turn them into something special. Try painting river rocks white for a clean, modern-looking ground cover option. Or add pops of bright color to an old brick wall. Here’s a good primer on how to correctly paint these type of materials so that the top coat will last. 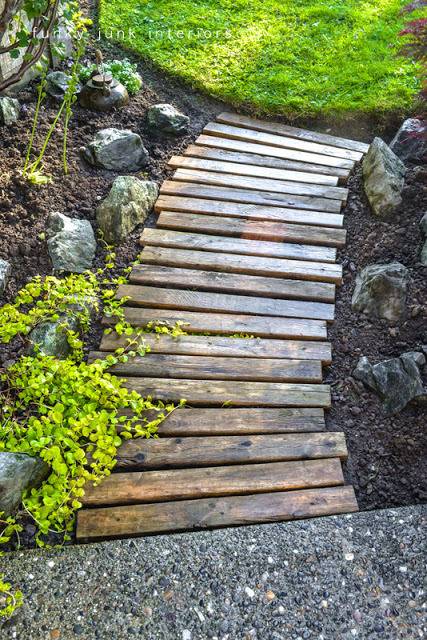
12. Use pallets for cheap stepping stonesWood shipping pallets can be found for free almost anytime (or bought for cheap). Look for them by the side of the road, or at warehouse loading docks (make sure to ask before you take them; usually people will be happy to let you have them). These wood structures are built to be used outside, and can easily be turned into simple pathways (as above) or other outdoor landscaping features. 
13. Add lighting elementsSimple, carefully-placed lighting can make even the most ordinary yard look amazing. And the best thing? Lights have gotten really affordable over the last ten years, thanks in part to the advancement of LED technology. In many cases, you may not even need additional electrical wiring, because LEDs use such little electricity that they can be solar powers. Try a rope light along the edge of a garden, or spot lights to feature large plants or trees. Check out our other landscaping and gardening posts here! This post was originally published in May 2015, but we’ve updated it with new information for this year. The post 13 Tips For Landscaping On A Budget appeared first on Curbly. Via https://www.curbly.com/tips-for-landscaping-on-a-budget
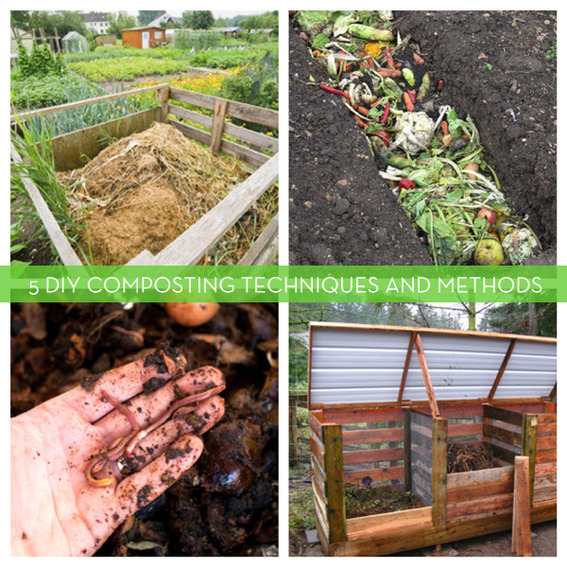
As a gardener and urban farmer you come to appreciate and treasure compost, or as I affectionately call it, “Black Gold”. Composting itself is actually pretty easy and there are several methods and solutions. Whether you own a full-on farm, or live in a tiny apartment, there is no reason you can’t or shouldn’t be composting. In a world obsessed with “greening,” it’s scary to think about how much food we throw away. A friend of mine started a small scale composting business last year by collecting food scraps from local restaurants and was able to save 111.3 tons of food waste from ending up in the dump and turned it into glorious, nitrogen rich compost. If that’s not motivation to start composting, I don’t know what is! Here a few of the options available when composting. 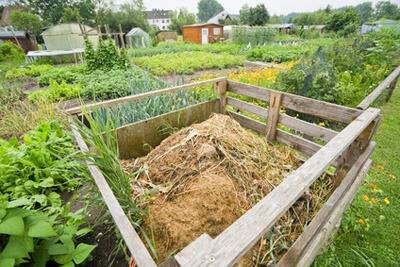
Basic CompostingThe most straightforward way of composting involves dedicating an area, usually 25 sq. ft or so to being a compost pit, any larger and it makes it pretty difficult to aerate. You start by adding layers of organic material, usually browns (old leaves, bark, etc) followed by greens (grass cuttings and vegetable scraps) topped by soil. Continue on building the layers until it’s around 4 to 5 ft high and then turn it every 2-3 days with a fork for the first month, keeping it moist, but not wet. After the first month taper off till you’re turning once or twice a month and in 3-4 months you’ll have a soil-ready compost, less if you decide to add a commercially available compost activator. See more at Nature Hacks. 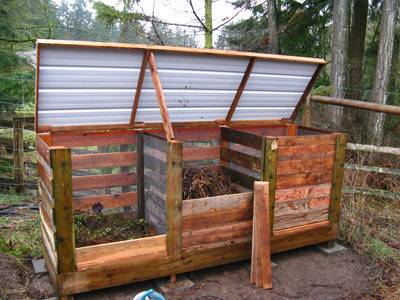
Bin CompostingAlso known as the “no turn” method. It’s similar to the layered method above, but the idea is you have three bins, you keep adding to the first until it’s full, then move to the next bin. While it’s the most effortless method, it’s also the longest and it can take as long as 3 years to decompose! See more at Backyard Feast 
Quick CompostingIf, like me, you don’t have three years to wait around you can combine the first two methods together, turning twice a week and making sure that the heap remains warm. 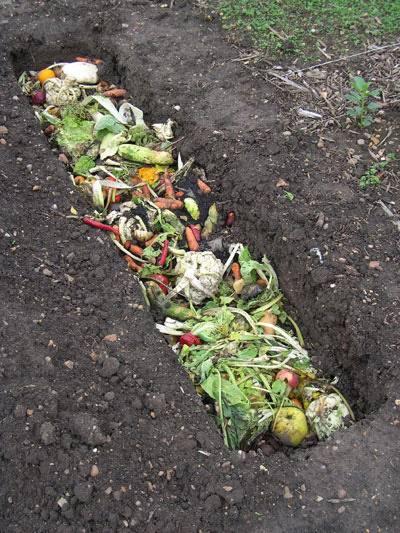
Trench CompostingTrenching, as discussed in our DIY garden beds post, trenching is a way of composting by digging a trench roughly 3-feet deep and filling it with compostable scraps, covering them with alternate layers of soil. Once completed leave them for 2-3months to break down and then plant your vegetables directly into the bed. See more at Good Life Garden 
Worm CompostingWorm Composting, and vermicomposting yield nutrient-rich castings, and probably the most fertile soil of the above methods, the downside is that it’s not as scalable as the above methods, but perfect for small gardens and apartment dwellers. Red wriggler earthworms are used to break down kitchen scraps into these castings and nutrient-rich worm tea, which can be used as an organic fertilizer. The downside is that the worms don’t have a large appetite so you can’t feed them a lot of food at once, you should also avoid all types of citrus, meat, or onions when feeding them. The plus side is that it’s also one of the least odorous methods of composting and why it’s become popular with many apartment dwellers using it to clear off kitchen scraps. The post Roundup: 5 DIY Composting Techniques For Creating Your Own Rich, Organic Fertilizer appeared first on Curbly. Via https://www.curbly.com/15058-roundup-5-diy-composting-techniques-for-creating-your-own-rich-organic-fertilizer |