Buy Now →

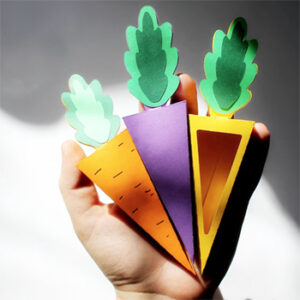
This post contains affiliate links. Gift-giving is one of the best ways to express our love and appreciation to the people we care about. Whether it’s for a special occasion or just a way to brighten someone’s day, gifts have the power to bring joy to both the giver and the receiver. However, finding the perfect gift is just the first step. Presenting it in an elegant and thoughtful way can elevate the entire experience. That’s where easy printable gift boxes come in. 
Easy printable gift boxes are a great way to add a personal touch to your gift-giving. They’re simple to make, customizable, and can be used for a variety of occasions. All you need is a printer, some cardstock paper, scissors, and glue. With these basic materials, you can create beautiful gift boxes that will make your gift stand out from the rest. There are many different templates available online for printable gift boxes. Some are simple and straightforward, while others are more complex and intricate. You can choose a template that matches the theme or style of your gift, or you can use one that reflects your own personal taste. One of the great things about printable gift boxes is that they can be customized in so many different ways. You can use different types of paper to create a variety of textures and colors. You can also add embellishments like ribbons, stickers, or even small ornaments to make the gift box even more special. Printable gift boxes are also a great way to reduce waste and save money. Instead of buying pre-made gift boxes that may not be exactly what you’re looking for, you can create your own custom boxes that perfectly match your gift and your style. Plus, by using paper instead of plastic or other materials, you’re making an eco-friendly choice that’s better for the planet. Table of contentsBox making supplies
Buy Now →
 Buy Now →
 Buy Now →
 Buy Now →
Download the free printable box templatesDownloading and printing DIY gift boxes is a convenient and easy way to create beautiful and personalized gift packaging. With just a few clicks, you can find and download a printable gift box template for a gift box that suits your needs and preferences. Once downloaded, all you need is a printer and some cardstock paper to bring your gift box to life. You can print as many copies as you need, making it a cost-effective option for those who want to create multiple gift boxes. Plus, with the ability to customize the colors, designs, and sizes of your gift box, you can create a truly unique and special gift presentation that will delight. 
Download one of our blank templates
Download one of our Holiday templatesHow to assemble the boxOnce you’ve chosen your gift box template, it’s time to print it out and get to work. Follow the instructions carefully, cutting along the dotted lines and folding the paper where indicated. You may need to use some glue (glue stick or glue gun) or tape to hold the edges together, but most printable gift boxes are designed to be folded and assembled without any additional tools or materials.
Find more templates on EtsyYou can also find loads of fun, printable templates from Etsy sellers. They not free, but pretty darn close and for just a few dollars, you can instantly download exactly what you need. Most of the paper box templates are customizable, using everything from Photoshop or Illustrator, to Canva and Cricut. They have loads of different sizes and shapes for every need, from product packaging to cute gift boxes for party favors or holidays, or small treat boxes for Easter or Valentine’s Day. 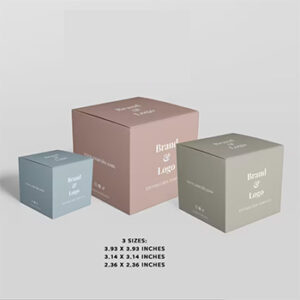 Buy Now →
 Buy Now →
 Buy Now →
 Buy Now →
Looking for more box making inspiration?
In conclusion, easy printable gift boxes are a simple and creative way to add a personal touch to your gift-giving. They’re customizable, eco-friendly, and cost-effective. So next time you’re looking for a way to present your gift in a special and thoughtful way, consider making a printable gift box. With just a few simple materials and a little bit of creativity, you can create a beautiful and unique gift box that will make your gift even more memorable. 
The post Make It: Easy Printable Gift Boxes appeared first on Curbly. Via https://www.curbly.com/make-it-easy-printable-gift-boxes
0 Comments
This post contains affiliate links. 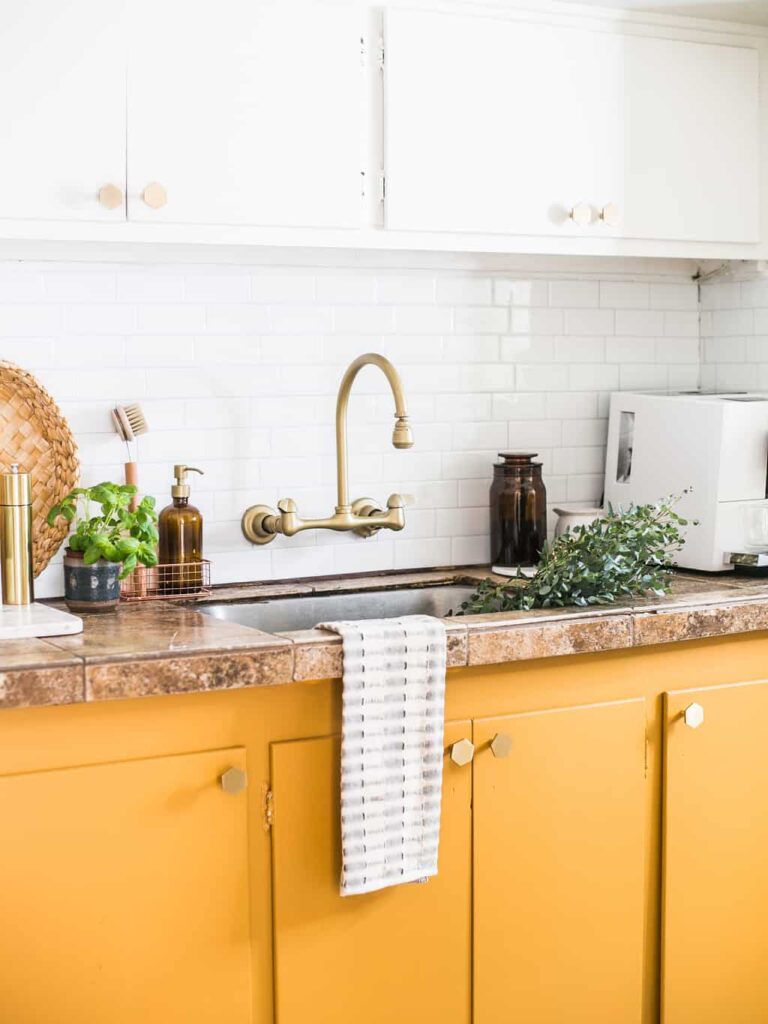
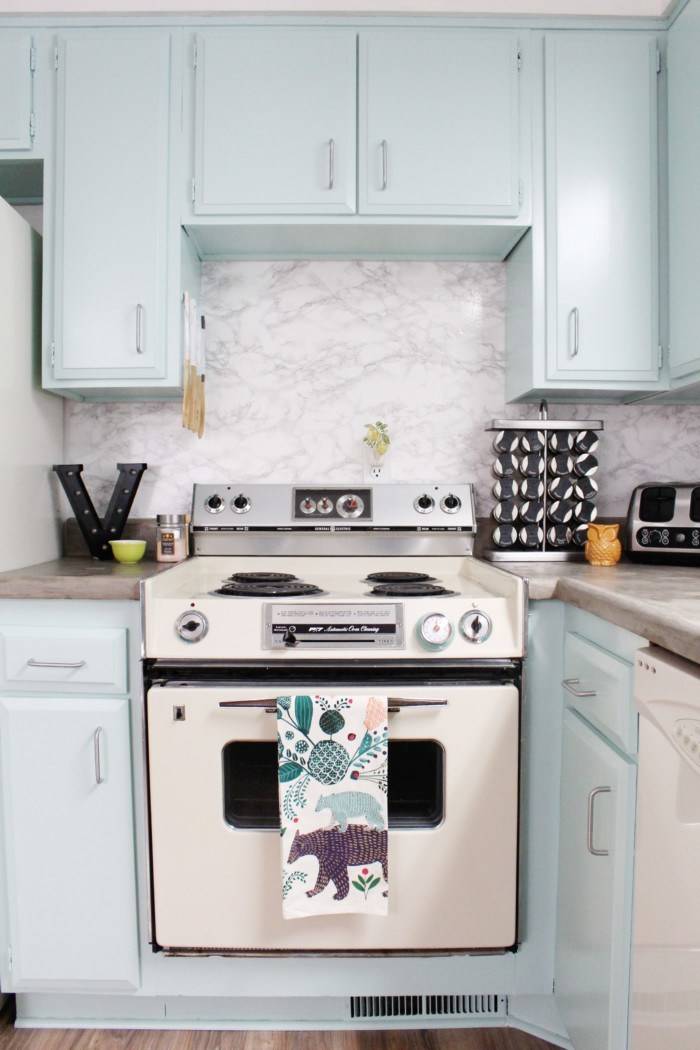
Hunting for a rental apartment is just about the worst thing about modern urban life. Not only do you have to contend with application fees and sketchy brokers, compete with other prospective tenants, and traipse through one messy, half-packed living room after another; but once you finally find a place that you can afford and that doesn’t have literal holes in the walls—you have to move in and actually LIVE WITH all the ugly, outdated apartment features that you tried desperately to ignore as you signed the lease and handed over your entire month’s income. Unless, of course, you are a DIYer. The only thing we DIYers have to live with is our penchant for hoarding supplies, politely known as “being prepared.” So roll up your sleeves, because today we are going to tackle one often-ignored rental eyesore: the kitchen backsplash. Keep reading to see how these temporary and removable backsplash ideas will make you love your apartment kitchen, without sacrificing your security deposit. Table of contents
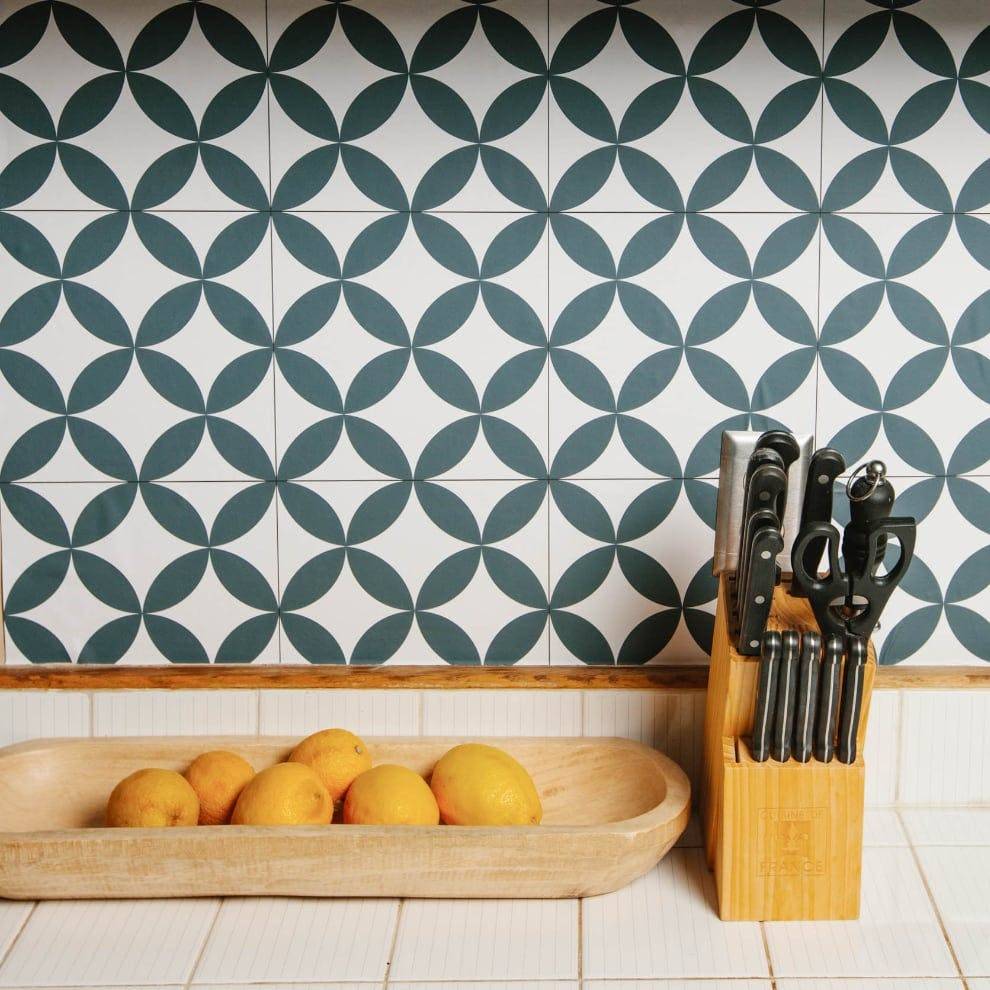
Peel-and-Stick Tile Backsplash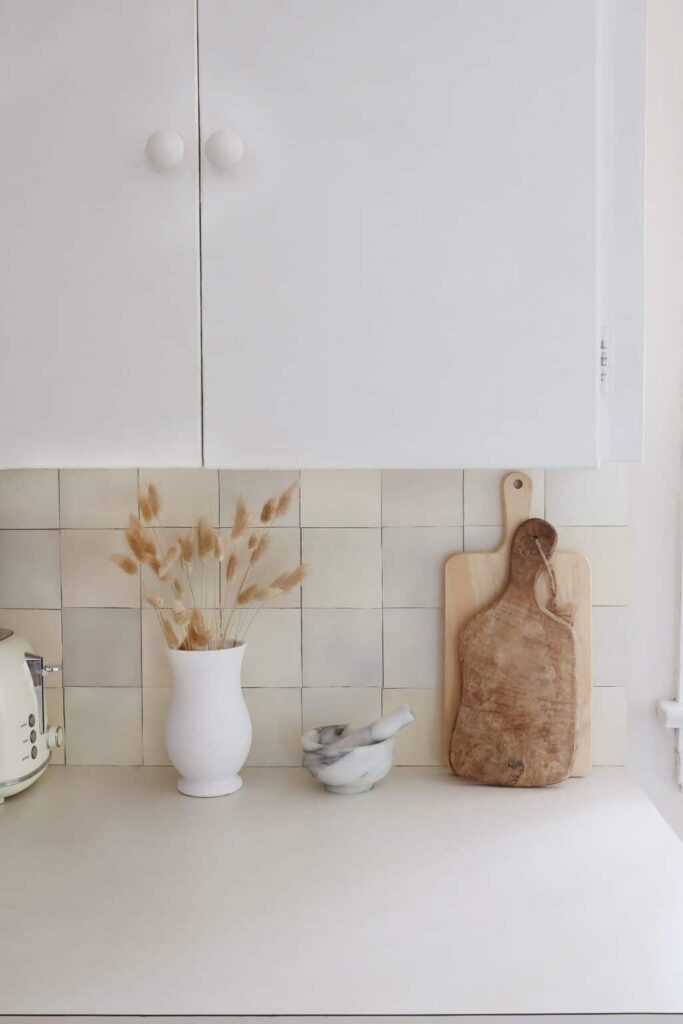

Peel-and-stick tile is definitely the easiest way to DIY your kitchen backsplash. If you can wrap a present with somewhat straight lines (admittedly a challenge at times), you can install peel-and-stick tile. It comes in an almost overwhelming array of styles. And, most importantly for our purposes, unlike real tile, the removable tile stickers can be removed at the end of your lease, when you’re on to your next heinous rental apartment. Inexpensive and renter-friendly! Check out some more peel-and-stick tile DIY backsplash ideas: 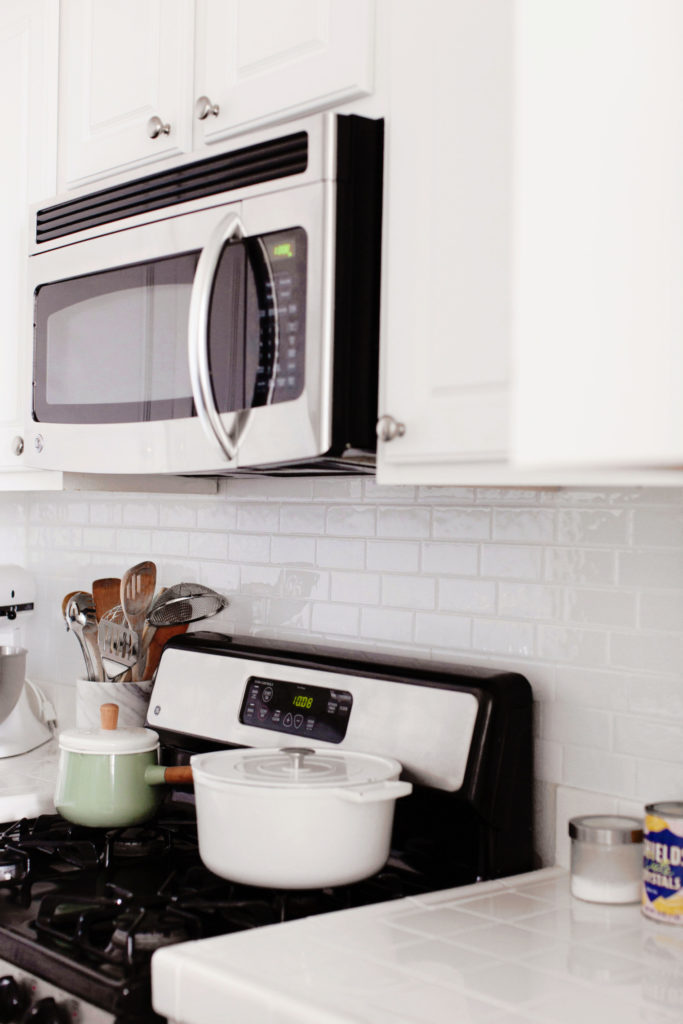
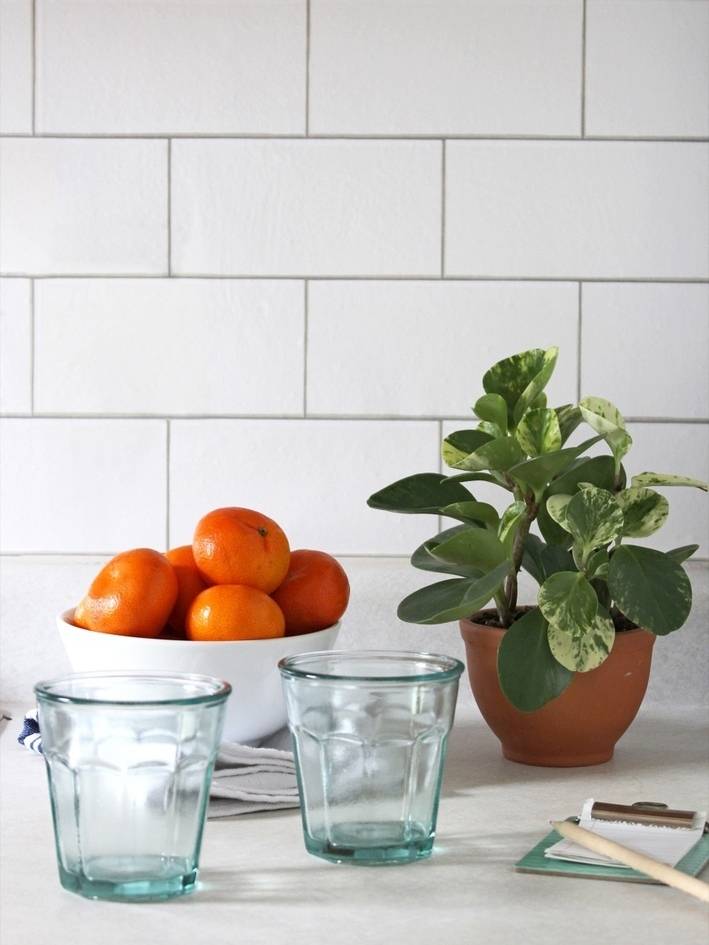
Melodrama’s DIY backsplash makeover with peel-and-stick tile is another example of how you just can’t go wrong with the classic, white subway tile look. 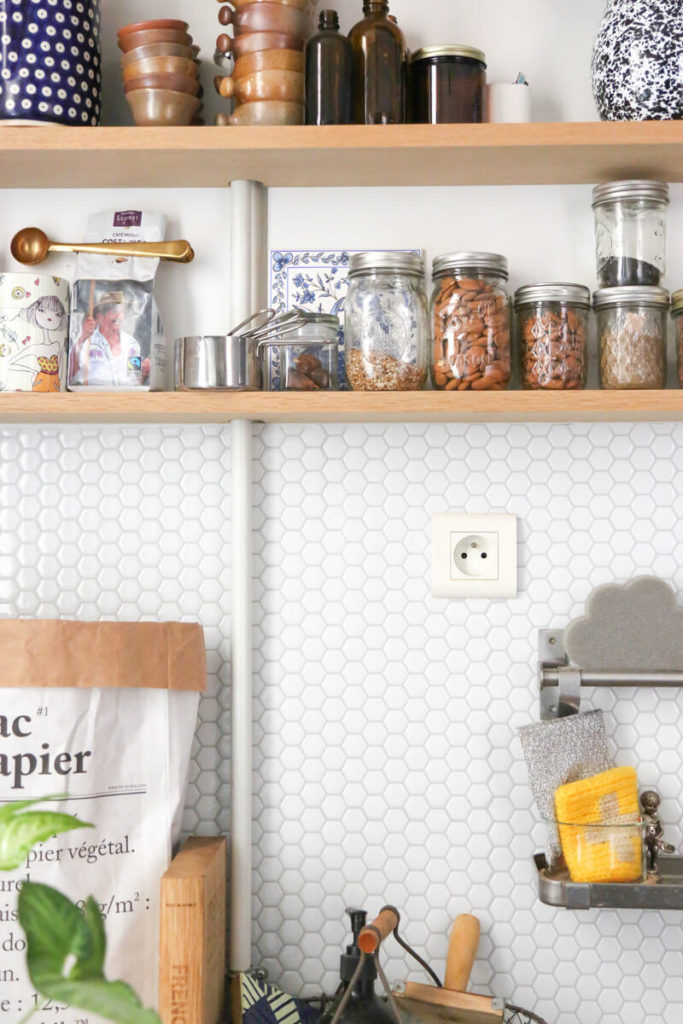
And my personal favorite of the bunch: the bloggers behind Atelier de Curiosite made over their Parisian kitchen using white hexagon peel-and-stick tile to make a beautiful backsplash. Can a rental kitchen get any dreamier?? Look out: there are lots of products on the market called “peel-and-stick tile.” Make sure you choose an option that’s best for your particular circumstances. Not all peel-and-sticks are removable. Peel-and-Stick Tile Sources from Amazon Buy Now →
 Buy Now →
 Buy Now →
 Buy Now →
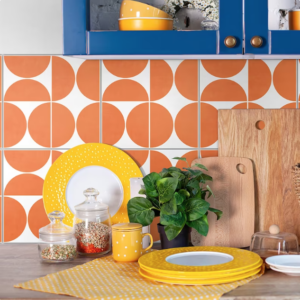
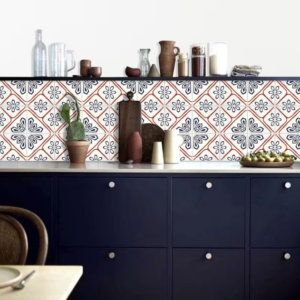
Fake a Backsplash with Temporary Wallpaper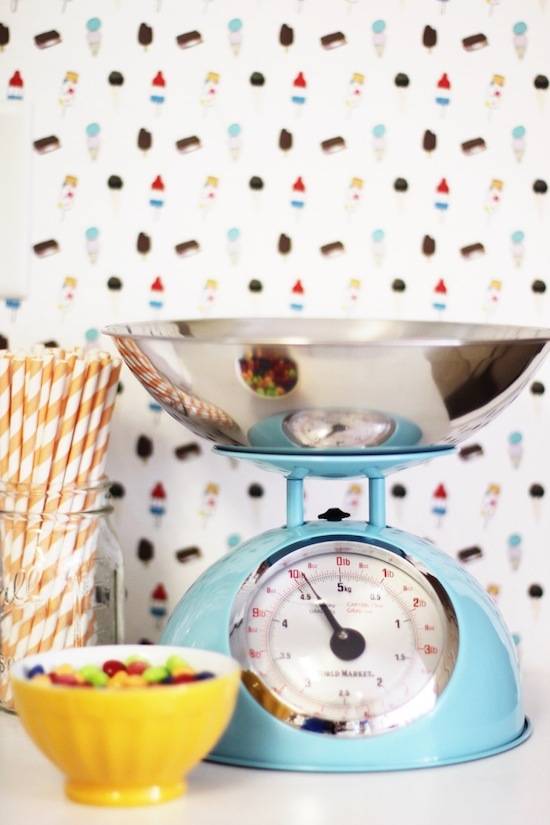
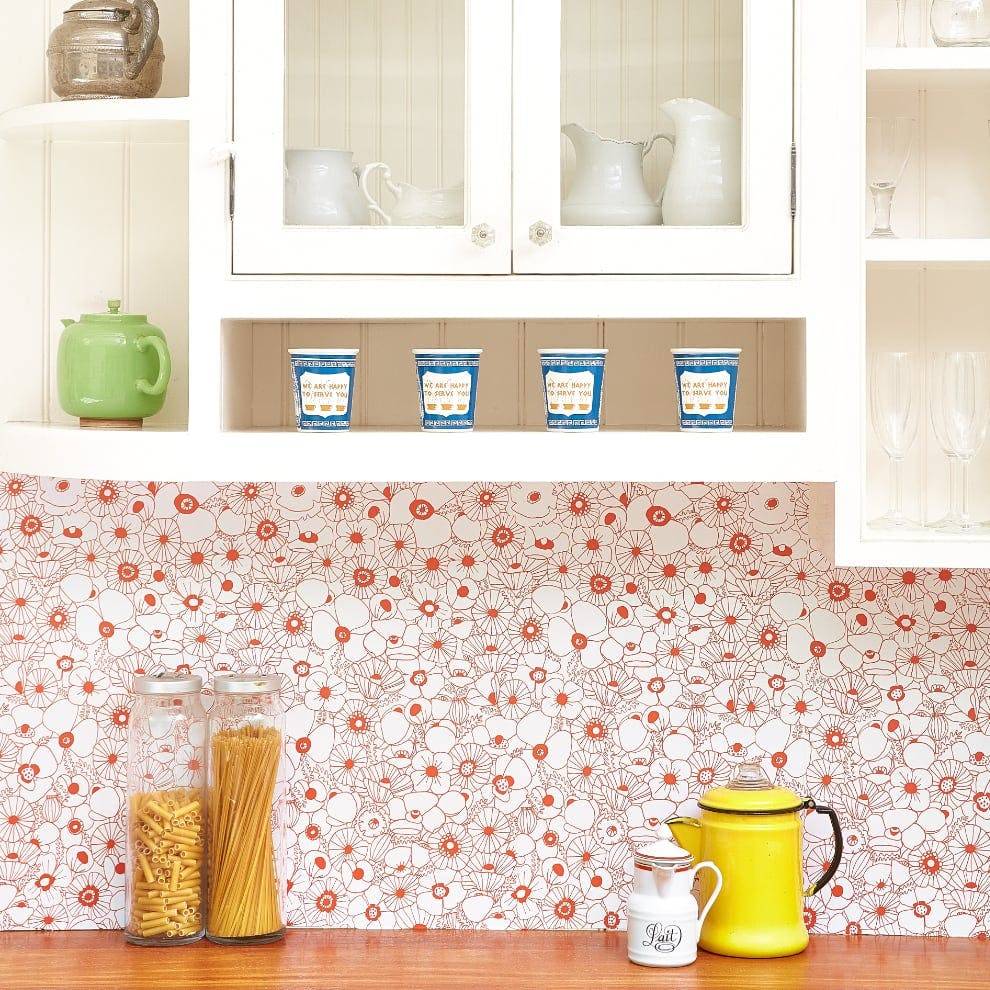
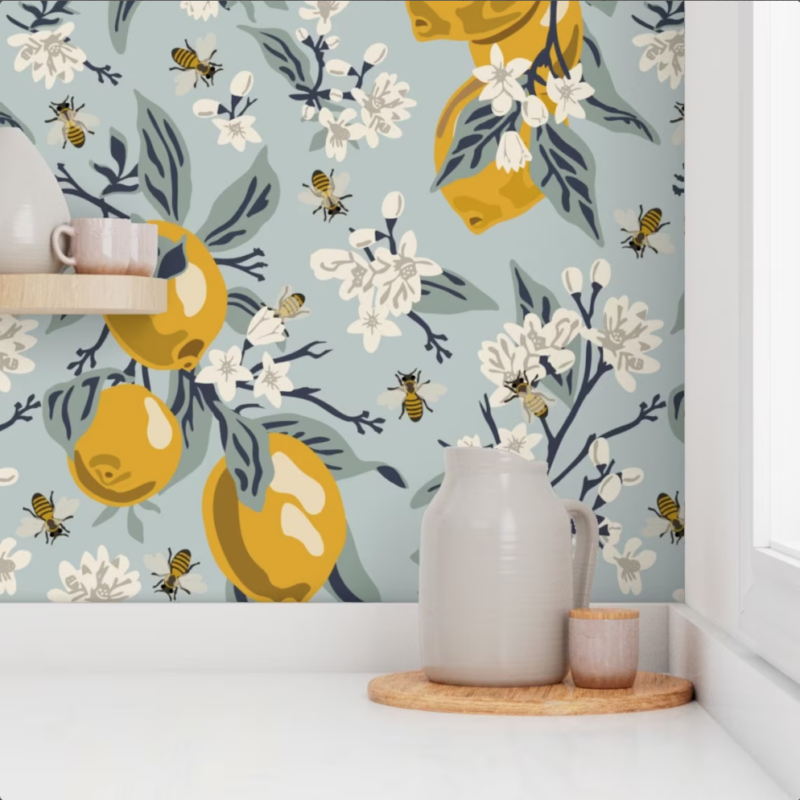
We live in a truly magical age. An age where things can be sticky, and not sticky, as we wish. That’s why this other peel-and-stick trick, removable wallpaper, is another great DIY renter-friendly backsplash idea. You can simply stick it over your hideous backsplash for a year or two, and pull it up when it’s time to go! It’s an ideal solution and requires no special tools. Chasing Paper has a truly endless selection of removable wallpaper prints to choose from, and inspiring images to get your ideas rolling and make your backsplash a focal point. Apologies in advance for sending you down that beautiful rabbit hole. 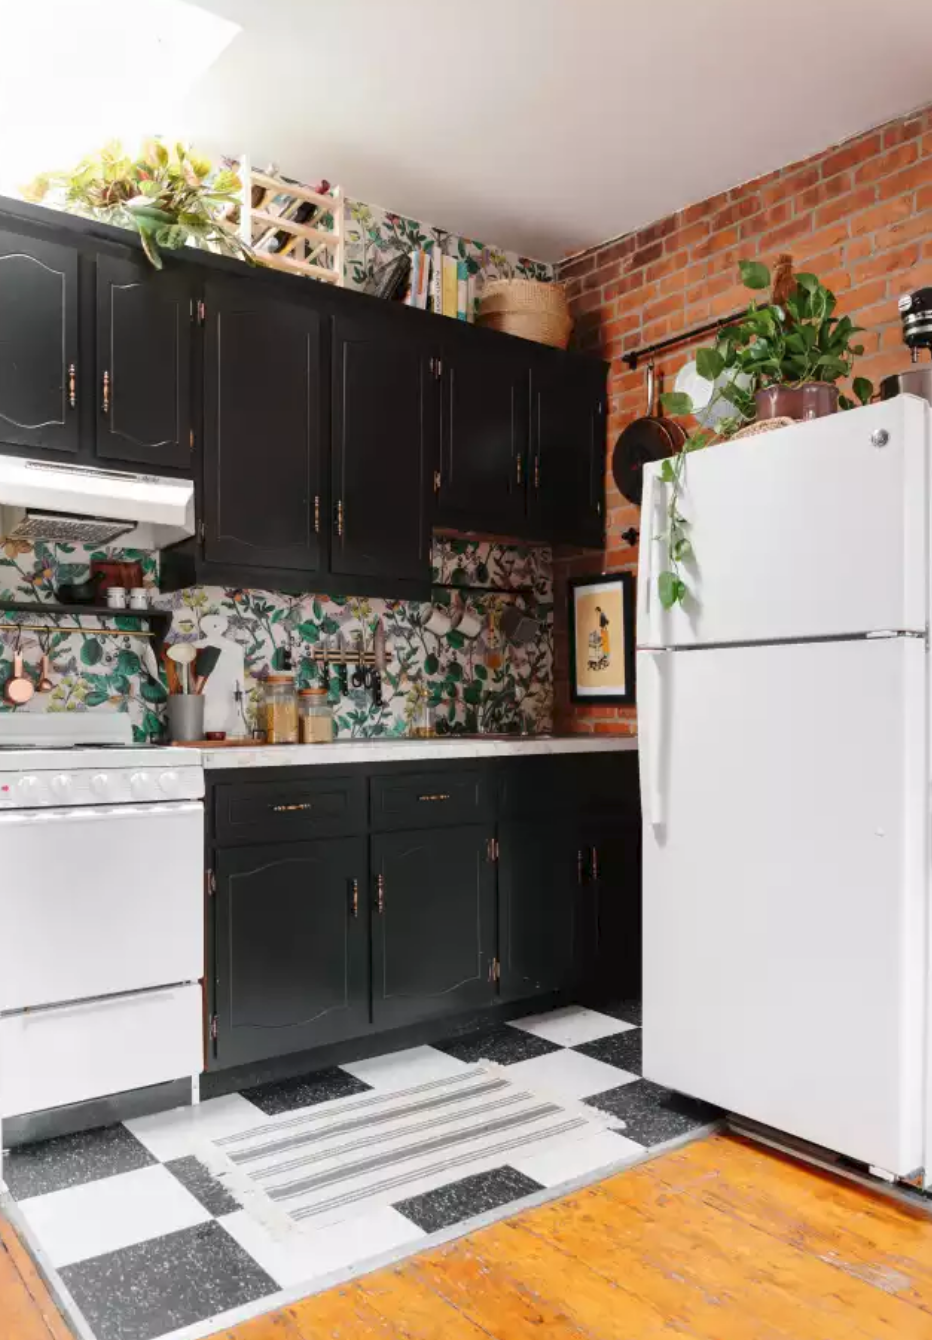
Botanical removable wallpaper makes a bold and beautiful statement in Apartment Therapy writer Anna Spaller’s rental kitchen. 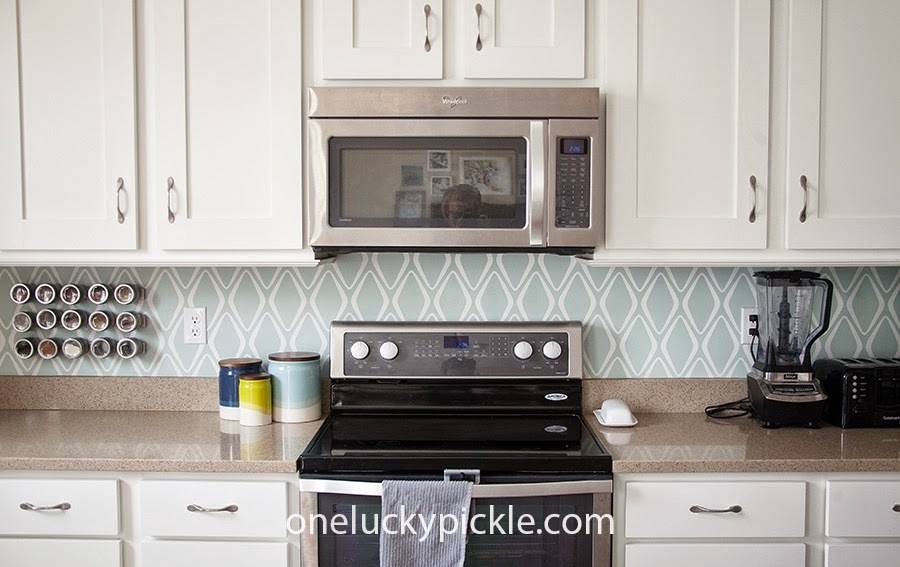
This mid-mod removable backsplash only cost $30 thanks to peel-and-stick wallpaper. 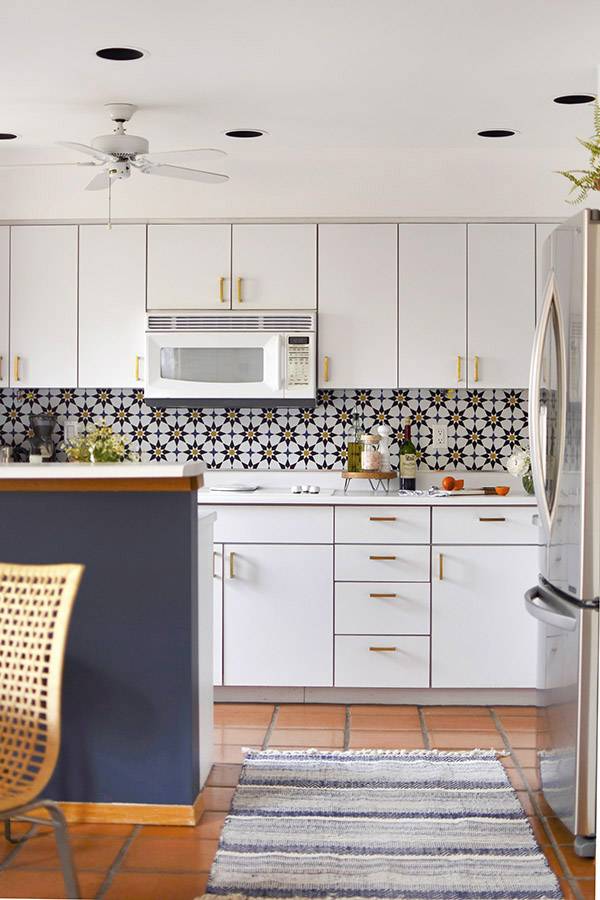
Our own M.E. used removable vinyl wallpaper to update her kitchen backsplash! 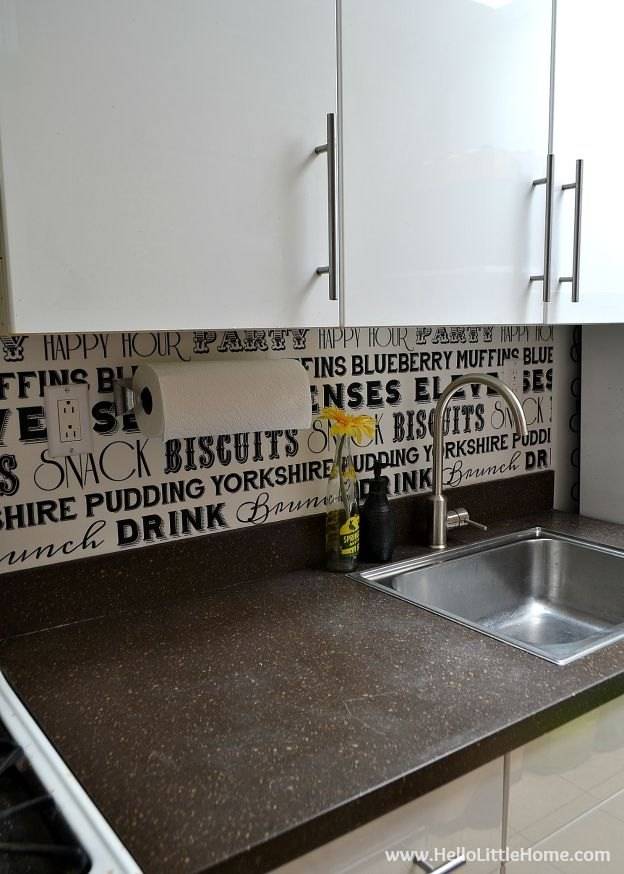
This inventive blogger shows how she was able to make her own custom temporary wallpaper using contact paper. Seriously the smartest use of contact paper I’ve ever seen.
Love the look of marble, but not the price tag? Contact paper to the rescue! Removable wallpaper sources from Etsy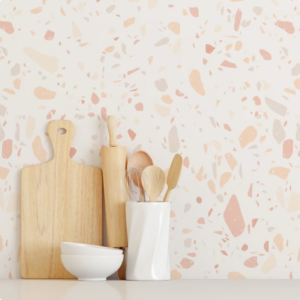 Buy Now →
 Buy Now →
 Buy Now →
 Buy Now →
gaia removable vinyl wallpaper Buy Now →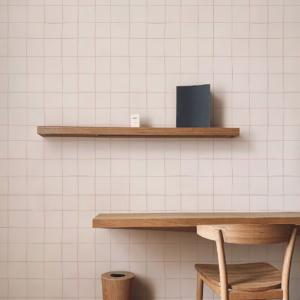 Buy Now →
Change the Look of your Backsplash with Paint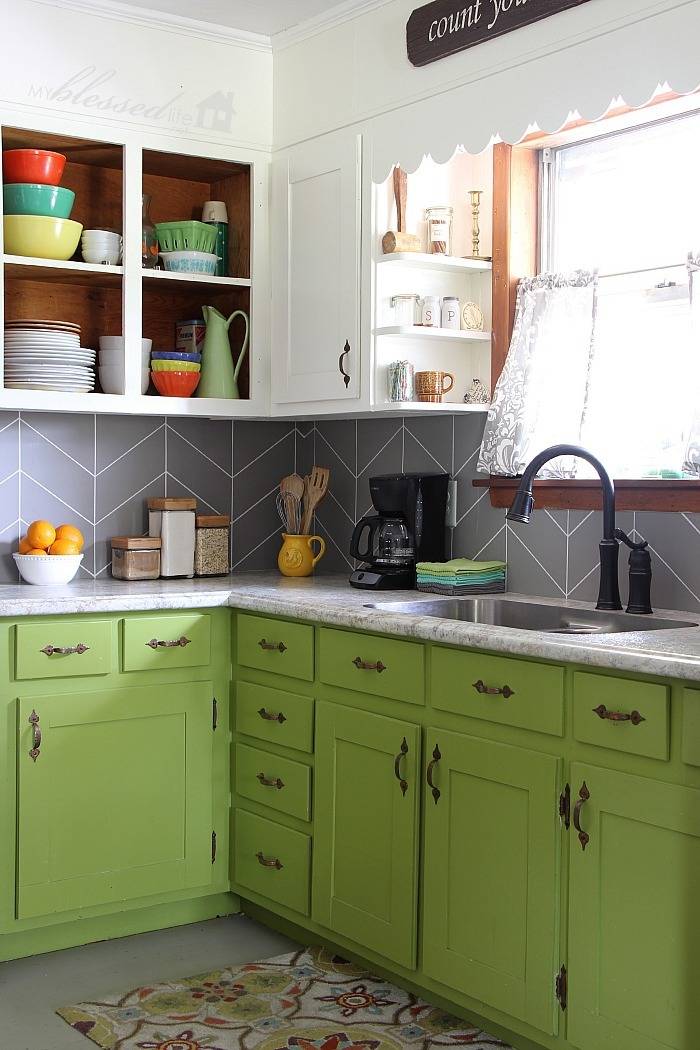
Including paint in this roundup might be cheating a bit, since not all landlords will allow their tenants to paint. But for you lucky renters who are allowed to paint, you will just die over all the ways you can makeover your kitchen backsplash using paint (like the DIY herringbone tile backsplash above!).
And for those of you who can’t paint in your apartment, don’t worry, I’ve got a workaround for you later on! 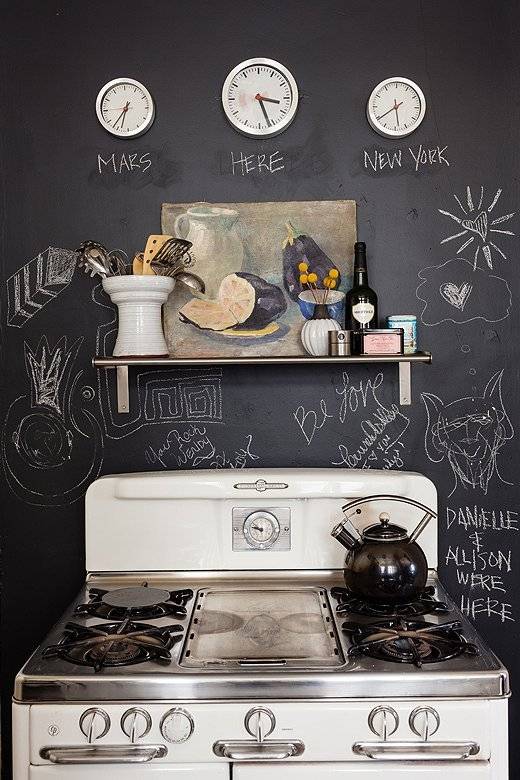
I know the chalkboard look has been fading in the design scene, but I will never ever tire of a well-executed chalkboard kitchen backsplash. And it’s such an easy DIY! As in the example above… 
…or designer C.S. Valentin’s charming version. 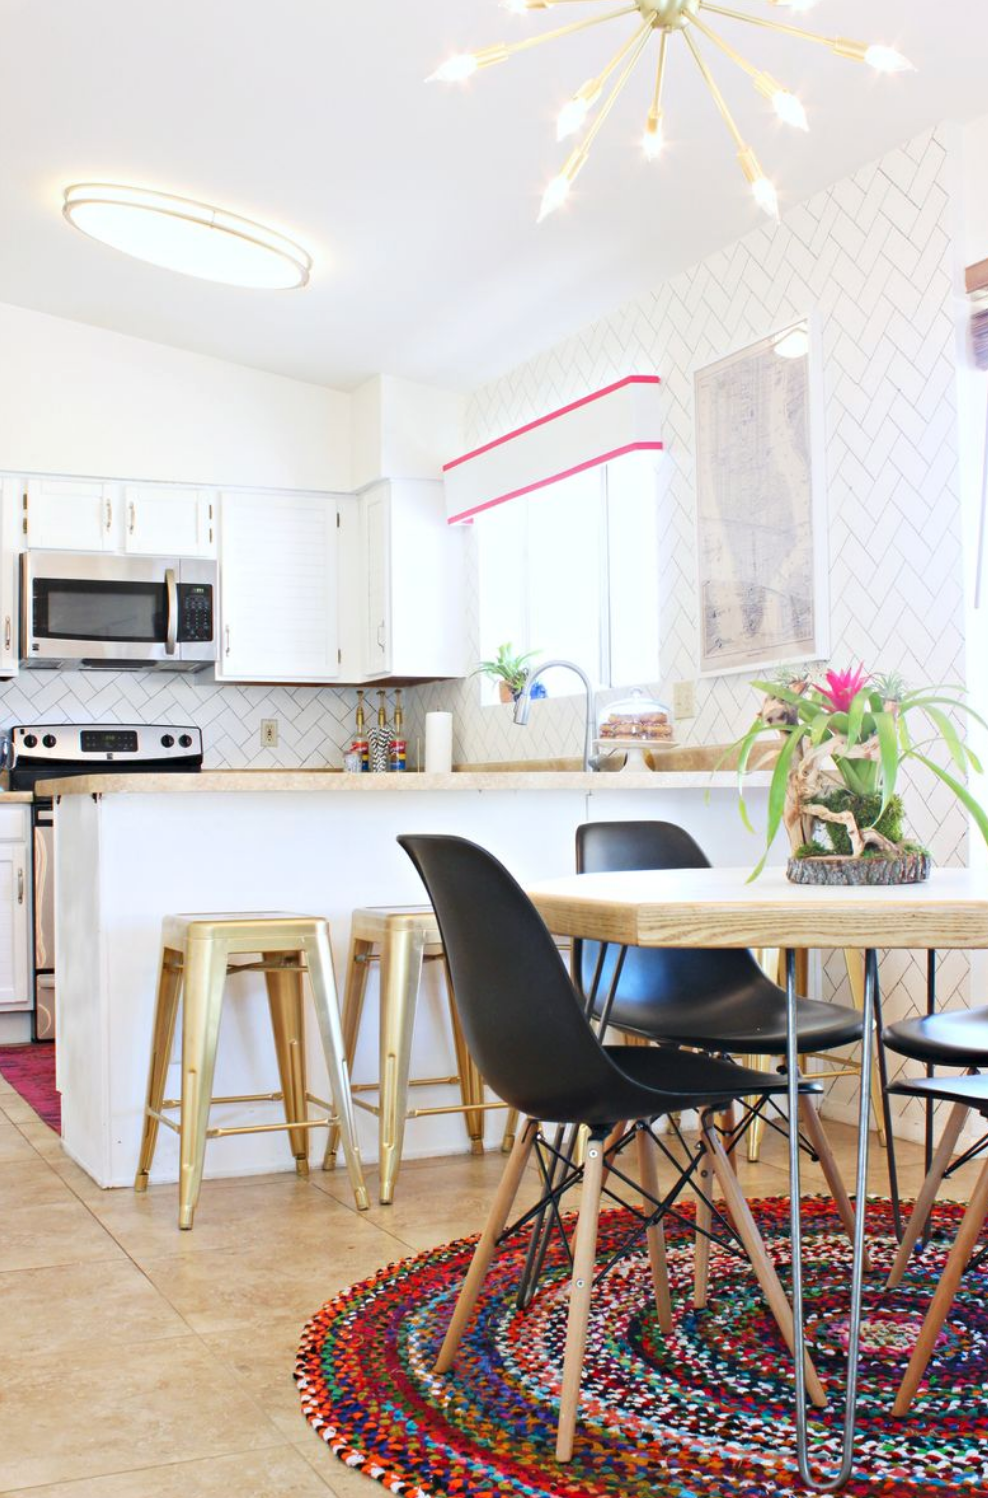
Here’s a DIY renter-friendly backsplash idea which doesn’t even require you to break out all the brushes and rollers. A Beautiful Mess created this DIY herringbone tile look with just a paint pen and a ruler (and, a lot of patience). 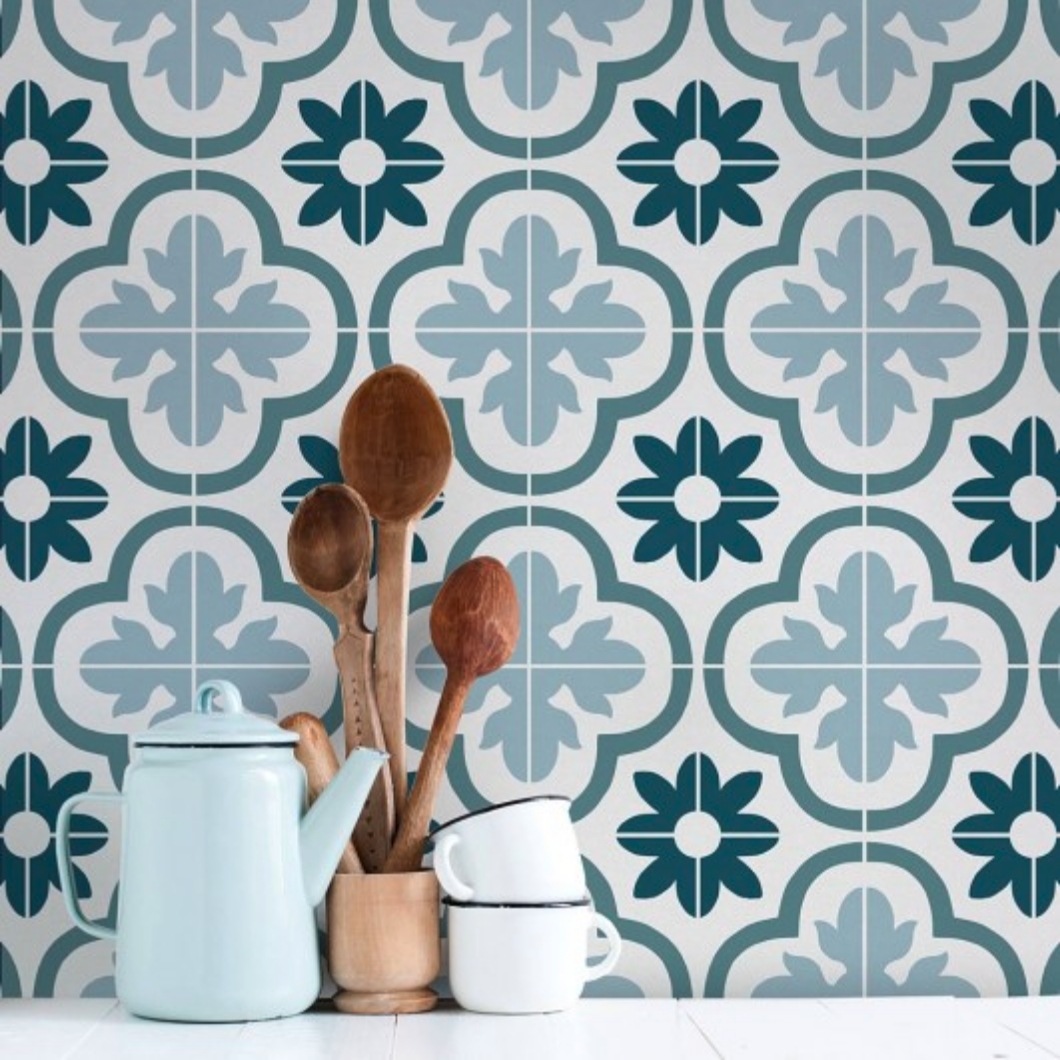
Try using cement tile stencils in a muted palette to paint your DIY backsplash. 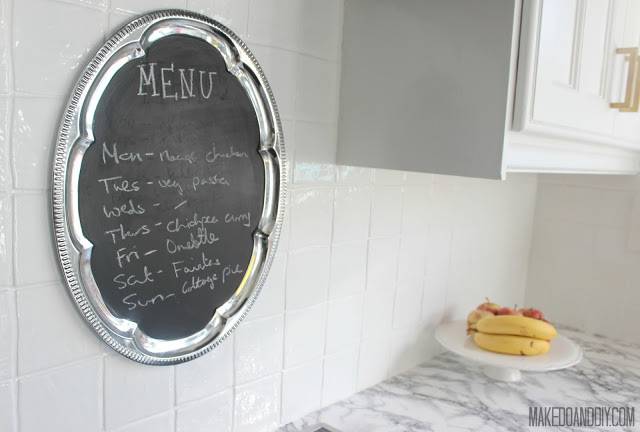
And did you know you can actually paint over existing tile? Make a Removable Backsplash by Installing a Panel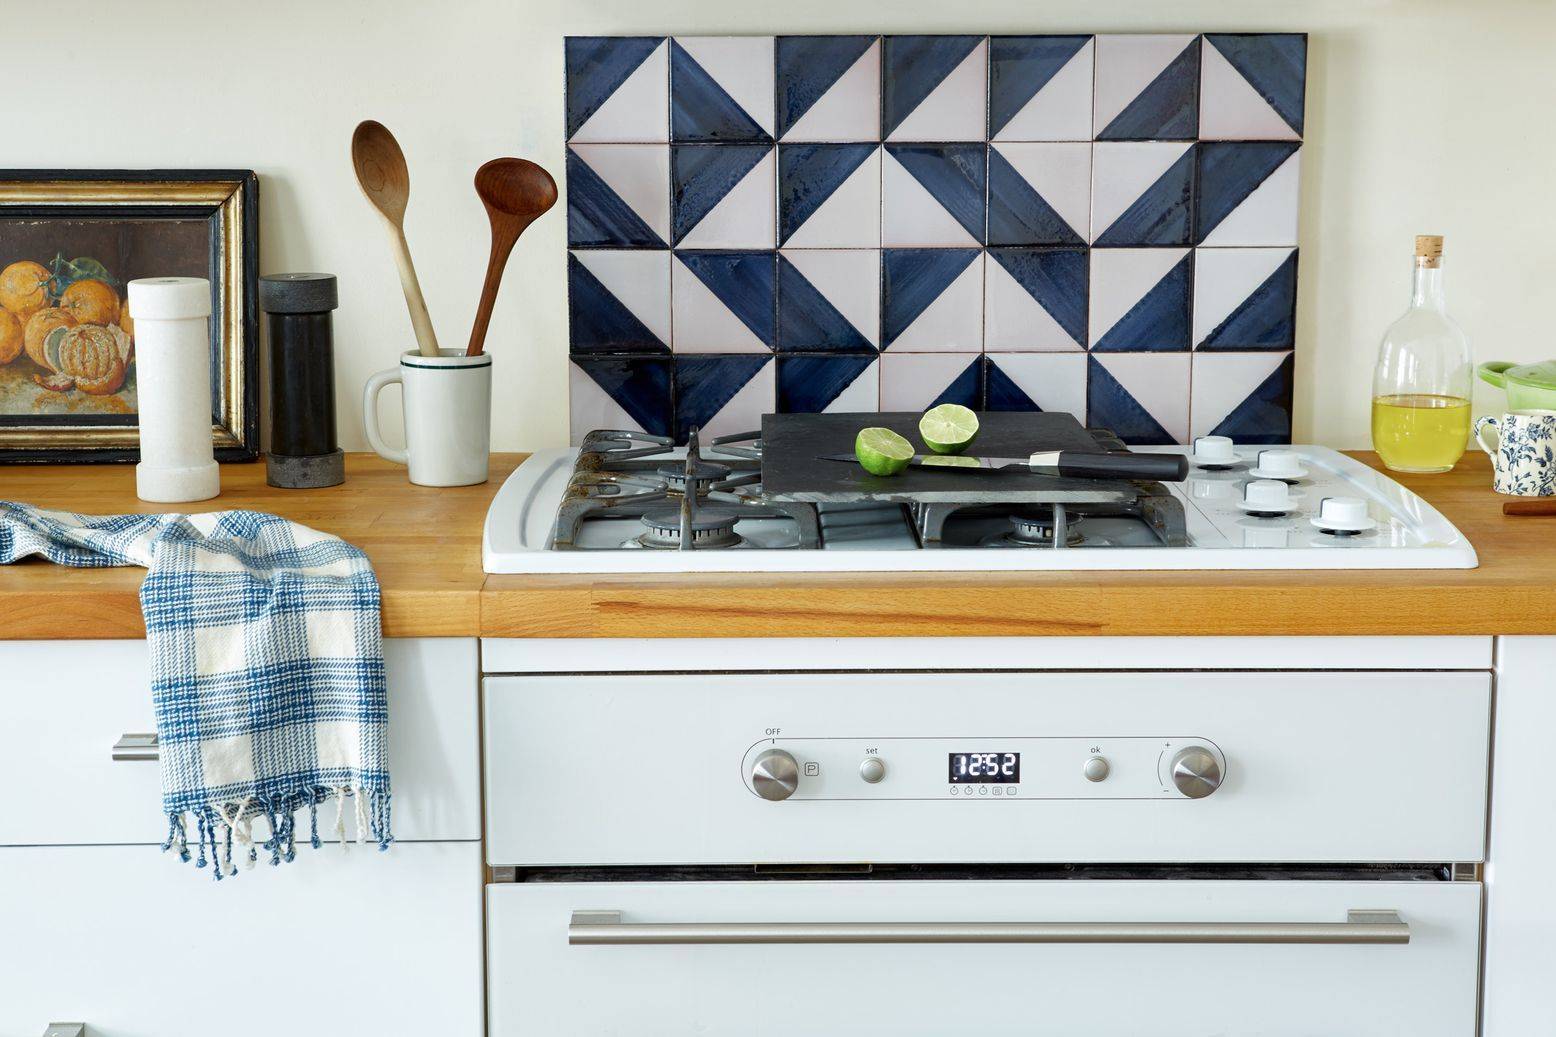
Renters who fall into the woefully tragic category of Being Unable to Paint, rejoice! You can still make a custom DIY painted backsplash using this workaround: paint — or even tile — a removable panel instead. Food 52’s Alex Kalita created her renter-friendly backsplash above by tiling a small plywood board. She then mounted the board to the wall with a French cleat. All very accessible, and very temporary. This rental hack of creating a backsplash on a temporary board or panel can be customized in so many ways. Take a look at some of these removable backsplash panels: 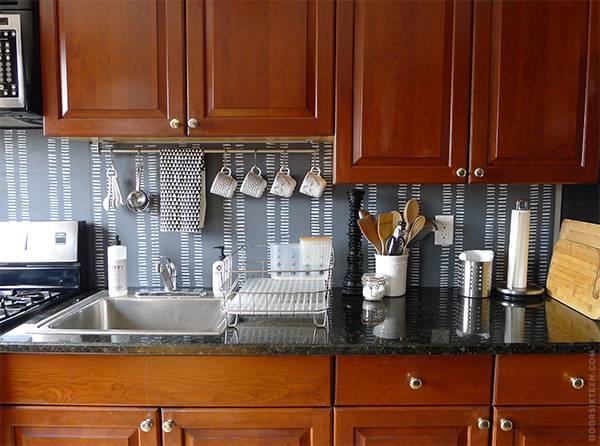

Anna Dorfman puts this technique to creative use with her graphic painted backsplash in her rental kitchen on Door Sixteen. 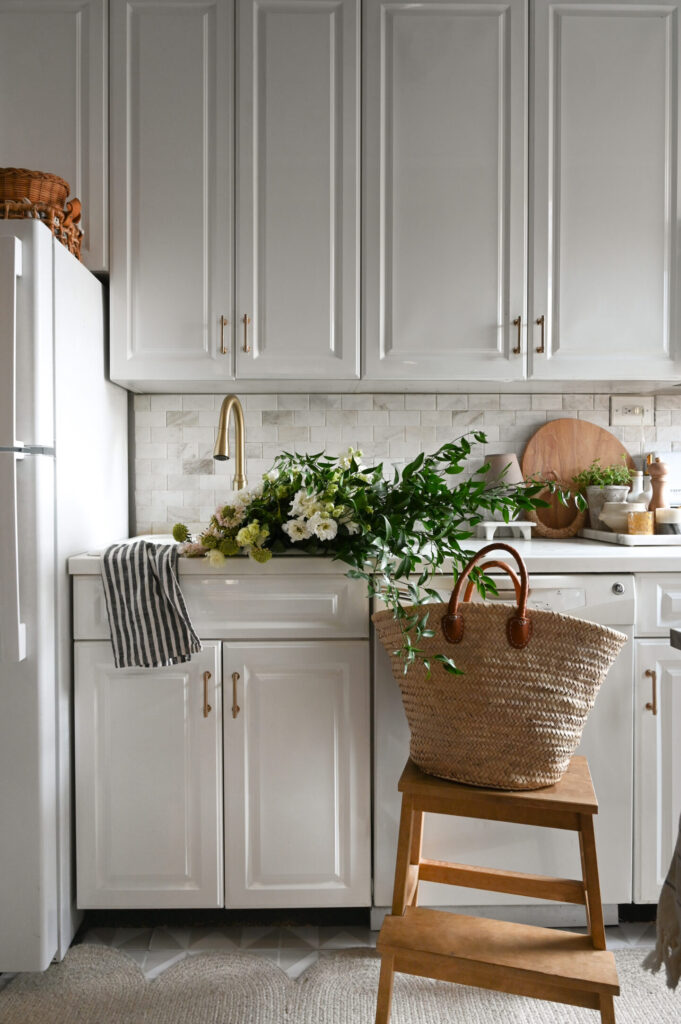
In the image above, Marianne applied removable wallpaper to the wall behind the tile installation to avoid damaging the drywall in her rental. It makes for a very attractive option, but does require a little extra work and an investment in real, ceramic tiles. 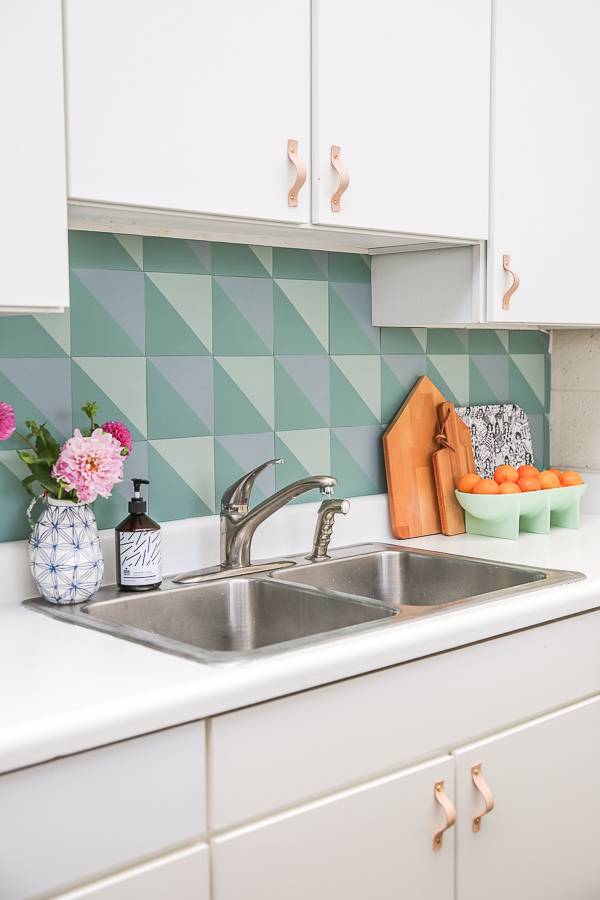
This unique and colorful backsplash is made of painted peel-and-stick tile. To make the project removable and renter-friendly, you can stick the painted tiles onto a panel cut to size, instead. And, use removable Velcro strips to keep the panels in place! 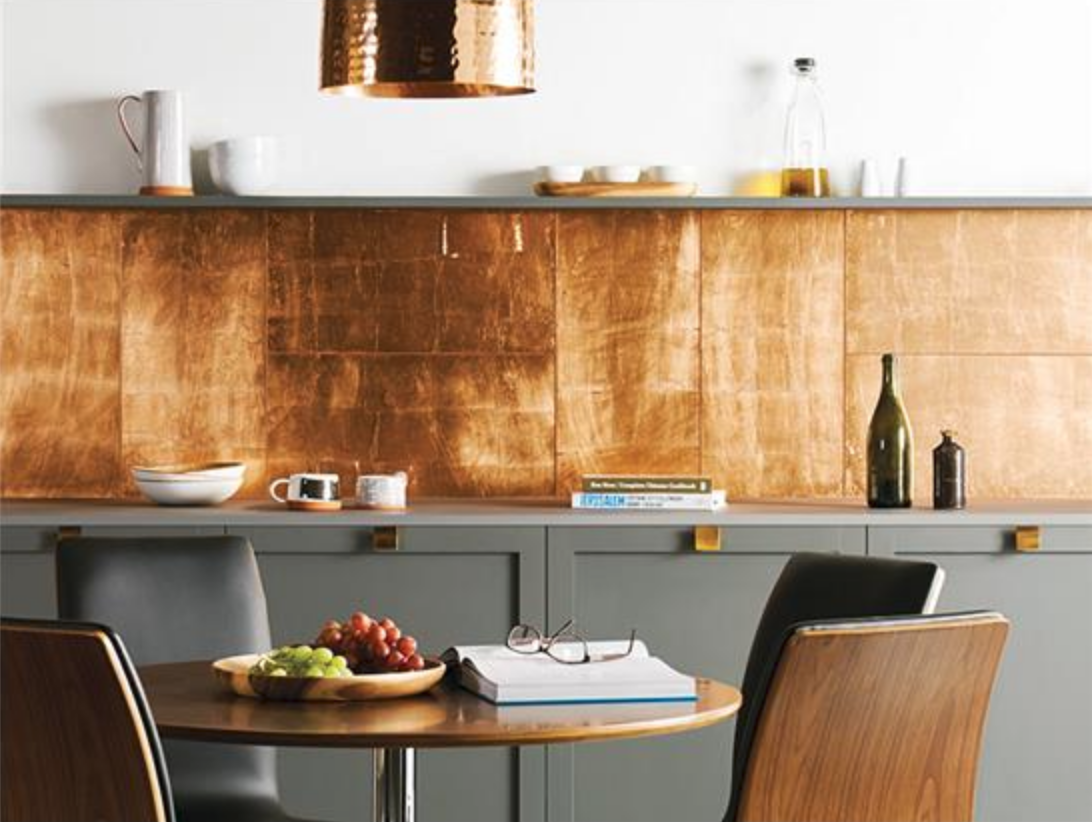
I am beyond obsessed with all things copper, which led me to discover these amazing copper sheet rolls on Amazon. I used them to create a magnetic copper inspiration board, and have been itching to recreate the project on a larger scale. Can you imagine a brilliant, shiny, patina-rich copper backsplash in your rental kitchen? It would be totally renter-friendly if you applied the copper sheet rolls onto a board attached to the wall. 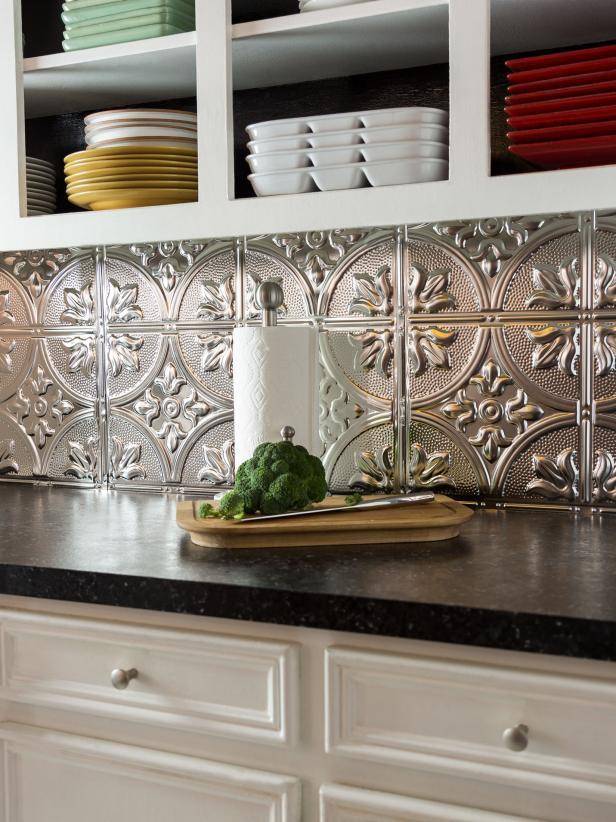
You can adapt the same idea using tin tiles from the hardware store, as the DIY Network did here. 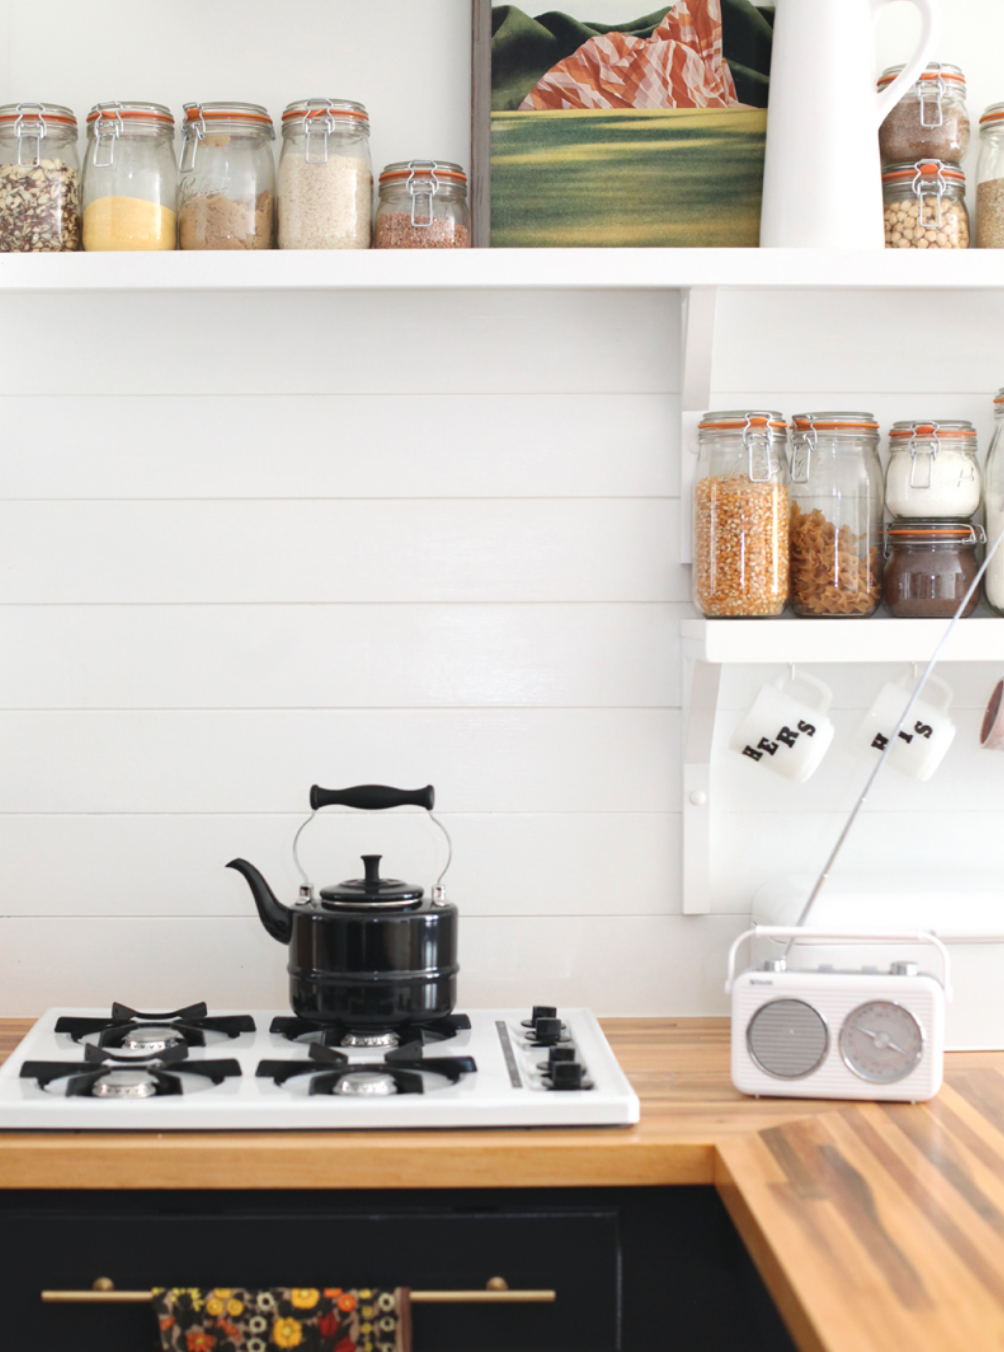
Shiplap is having a major moment, and the panel trick can make this stylish look possible in a rental too. Just use the tutorial from A Beautiful Mess, but combine it with Door Sixteen’s panel backsplash. 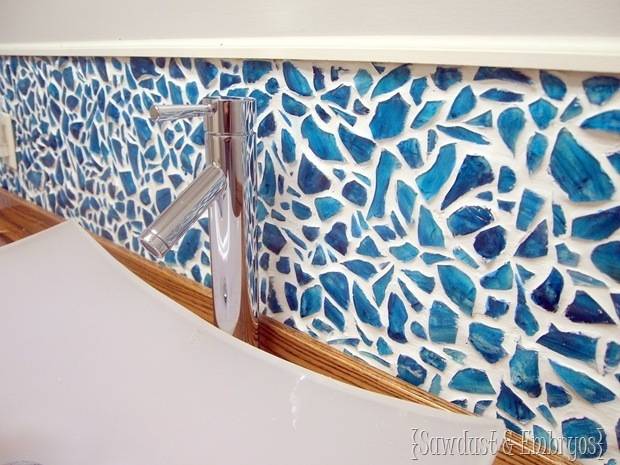
Or, go totally wild and create a custom mosaic backsplash! If you make the mosaic on a single, smaller board, such as for just behind the sink or stove, you can even take the project with you for your next rental kitchen. 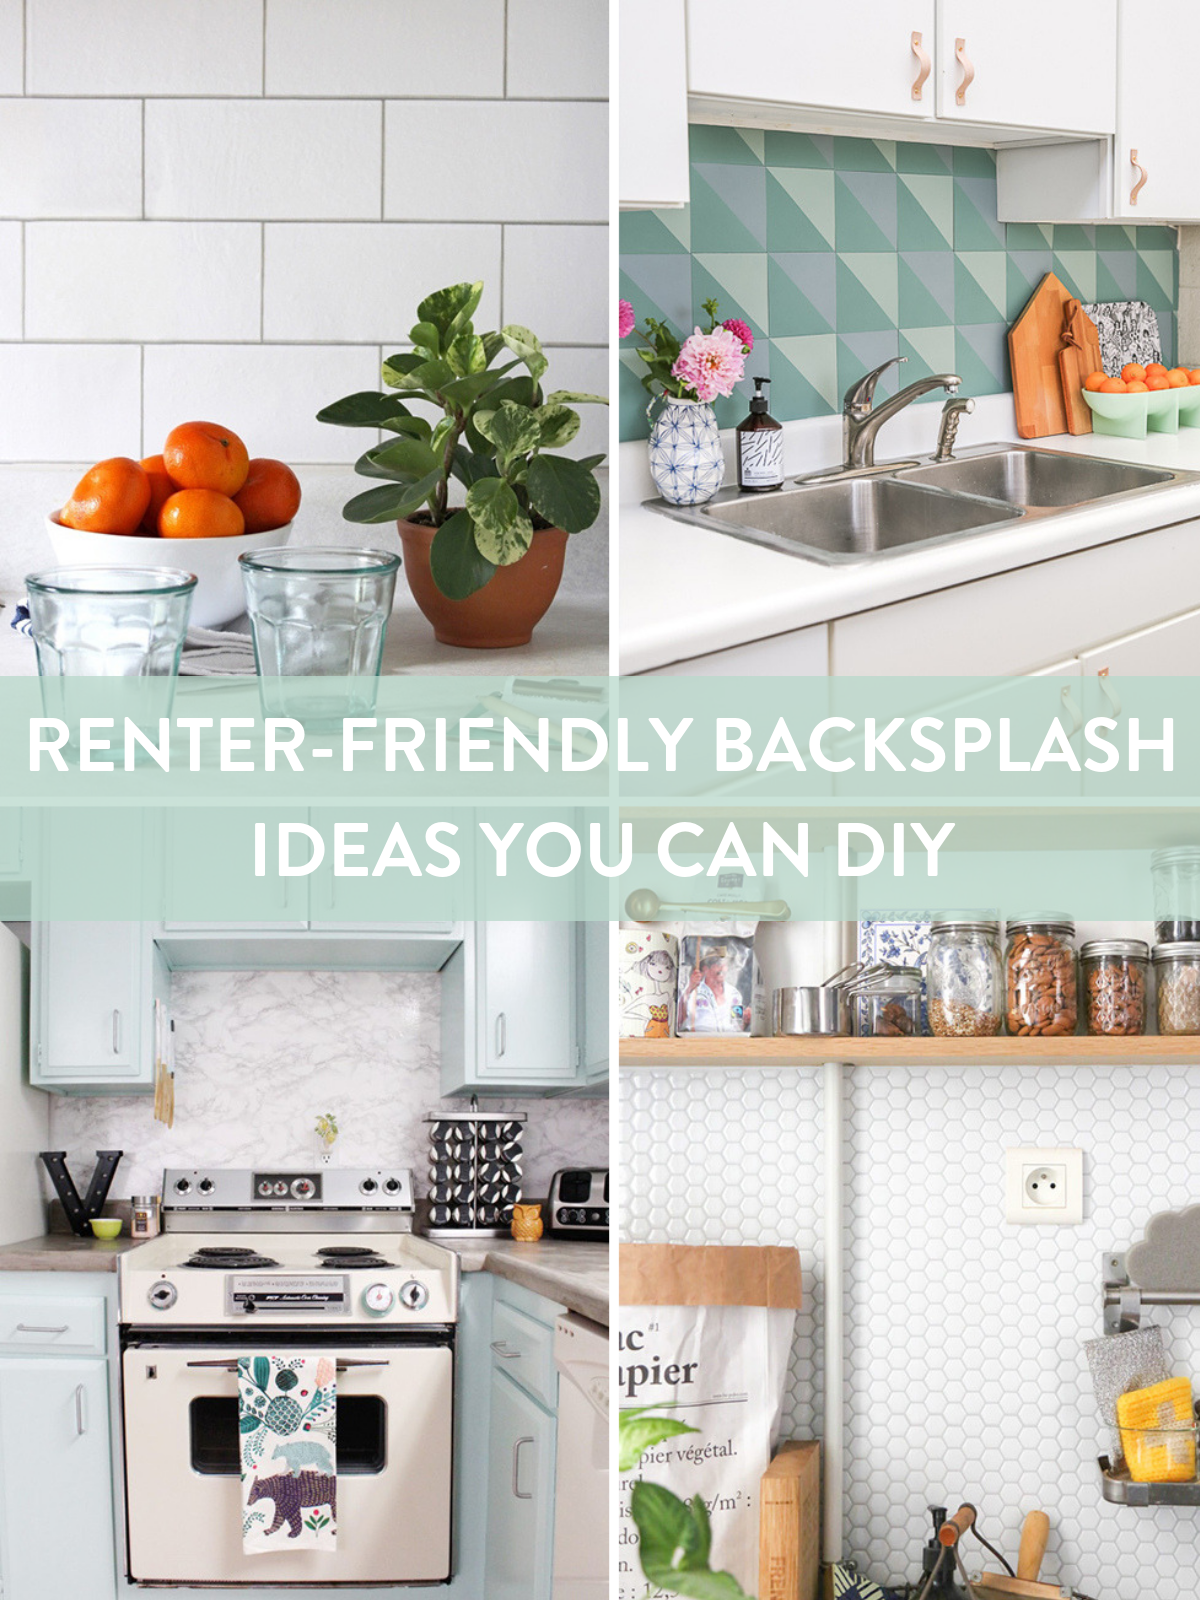
Alright, DIYers, I want to hear about your own rental kitchens. Do you have an eyesore apartment backsplash that’s in need of some love? Would you try one of these temporary DIY backsplash ideas? We’d love to hear your thoughts and stories in the comments! Looking for more DIY Kitchen Tutorials and Inspiration?
The post Renter-Friendly Backsplash Ideas that Look like a Million Bucks appeared first on Curbly. Via https://www.curbly.com/removable-backsplash-ideas 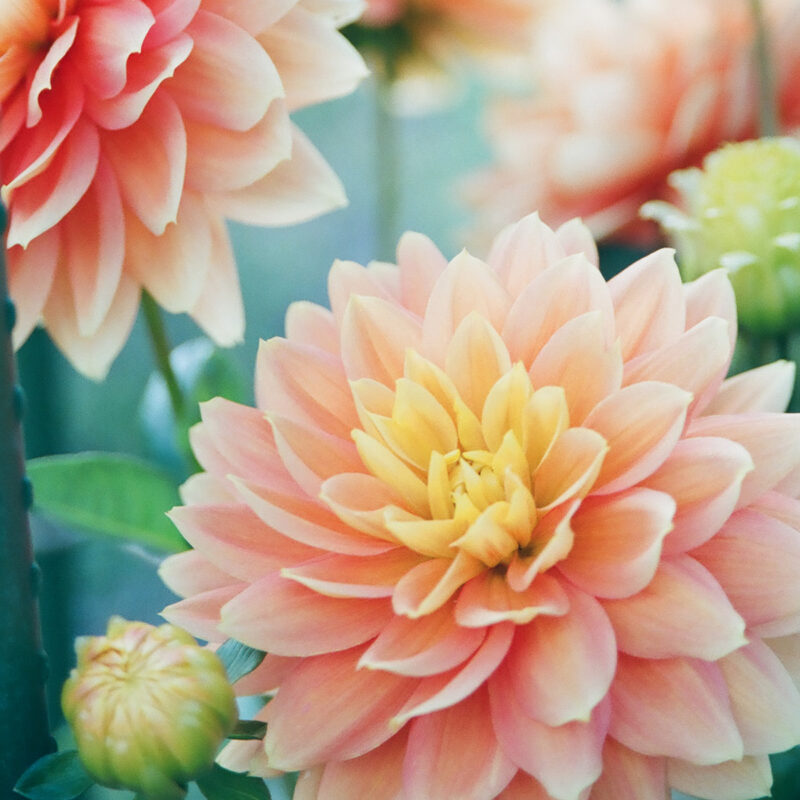
If you missed the planting season for spring bulbs last fall, don’t worry! Right now is the prime time for planting bulbs that bloom in the heat of summer. Summer flower bulbs are the often overlooked counterpart to popular spring blooms like daffodils and tulips. Still, they can extend your garden’s vibrant hues and textures once spring has passed and all the way into fall. This blog post covers everything you need to know about choosing the best bulbs for your garden, preparing the soil, planting bulbs, and caring for them. By following these tips, you can create a stunning summer flower garden that will surely be your neighborhood’s envy this summer. 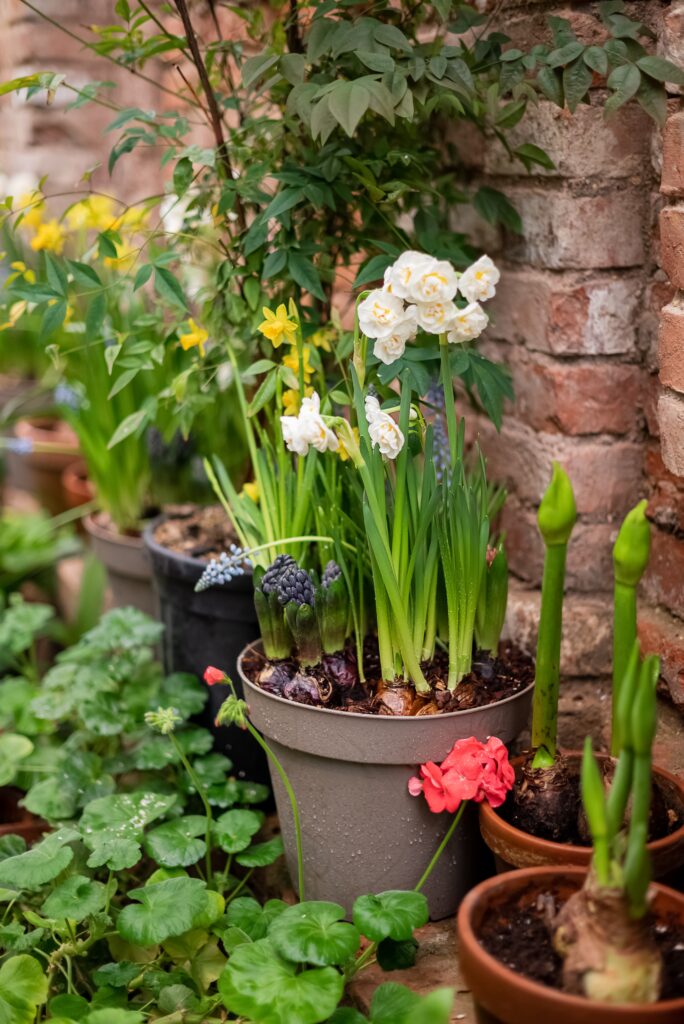
Table of contentsHow to choose the right summer bulbsSummer bulbs come in a wide variety of different types and colors. From large, showy dahlias to sweet, fragrant lilies, there are dozens of beautiful blooms for your garden. Not sure which ones would thrive best where you live? We’ve compiled a handy guide of some of the most popular summer flowering bulbs to plant, along with what hardiness zones (if you live in the U.S., find out what zone you live in here) they do well in, so you can delight in a beautiful flower garden this summer. All of the bulbs in this list can be either perennials or annuals. Any bulbs grown outside of the hardiness zone are annuals, anything grown in the recommended zone are perennials. 1. Gladiola (Gladiolus)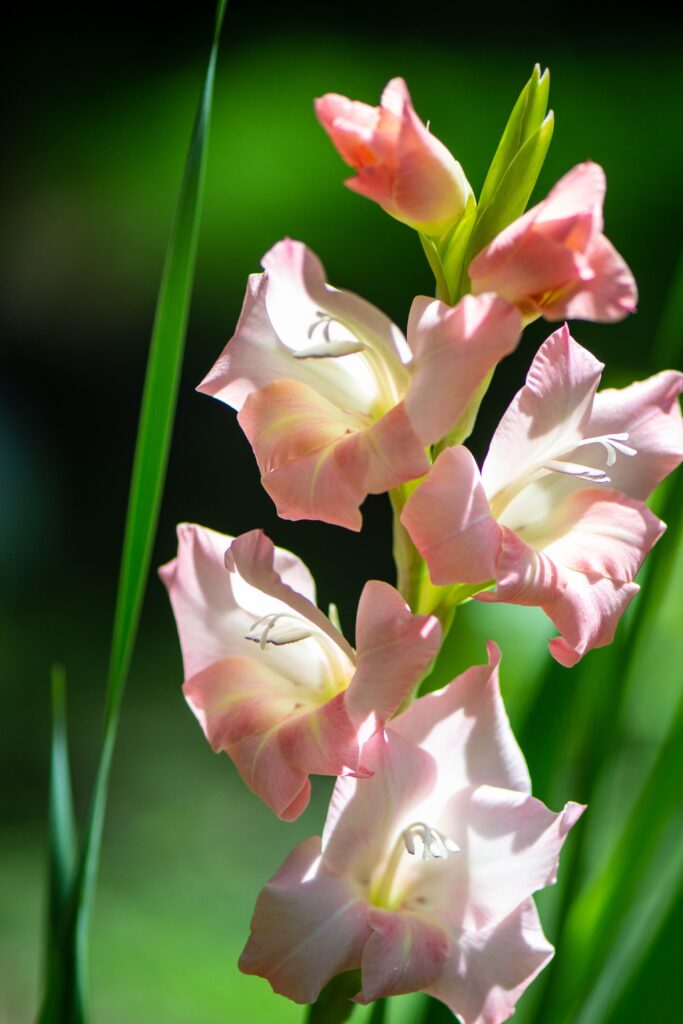
Gladiolas are tall, elegant spikes of brightly colored flowers that range in shades of pink, red, yellow, orange, purple, and white. Gladiolas are a favorite due to their stunning beauty and versatility in the garden.
2. Dahlia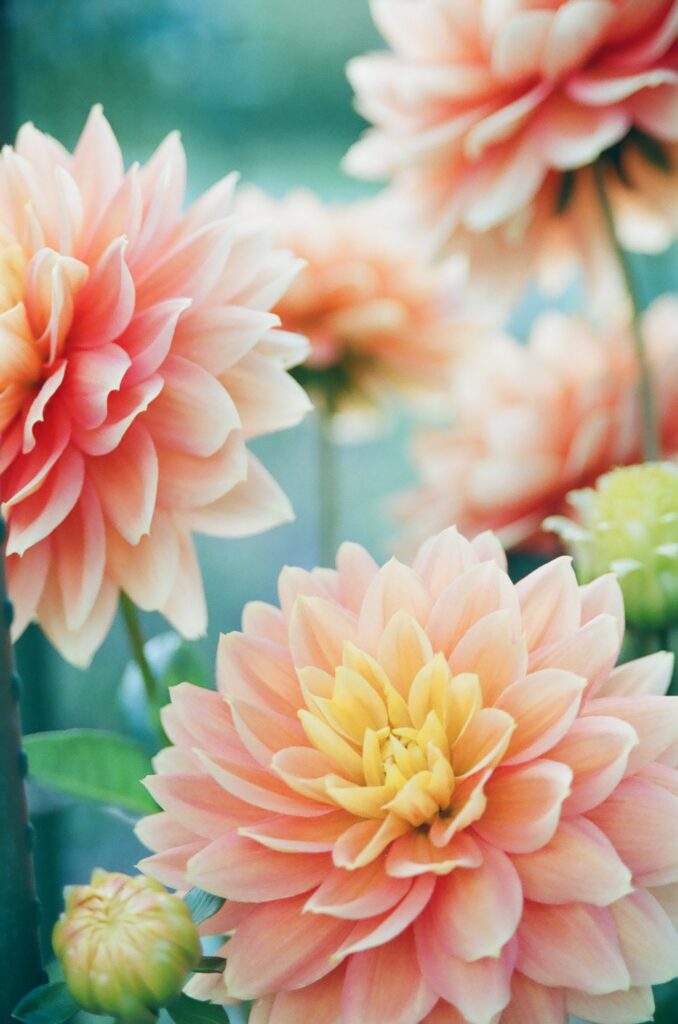
Dahlias are large, showy blooms ranging from small pom-poms to dinner plate-sized flowers. Dahlias come in various colors and patterns, from solid red, pink, orange, and yellow hues to bi-colored, tri-colored, and even striped blooms.
3. Freesia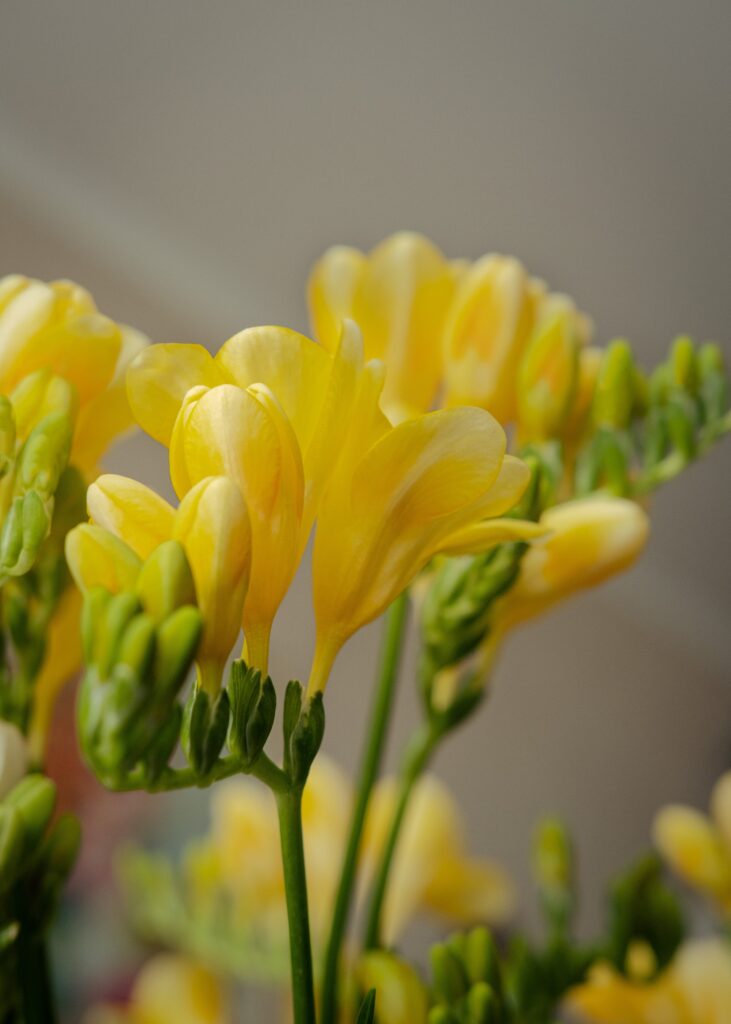
Freesias come in various colors, including white, yellow, pink, red, and purple. Freesias are often used as cut flowers and are popular in floral arrangements and bouquets due to their sweet scent and long vase life. They typically bloom in the spring and summer months.
4. Lily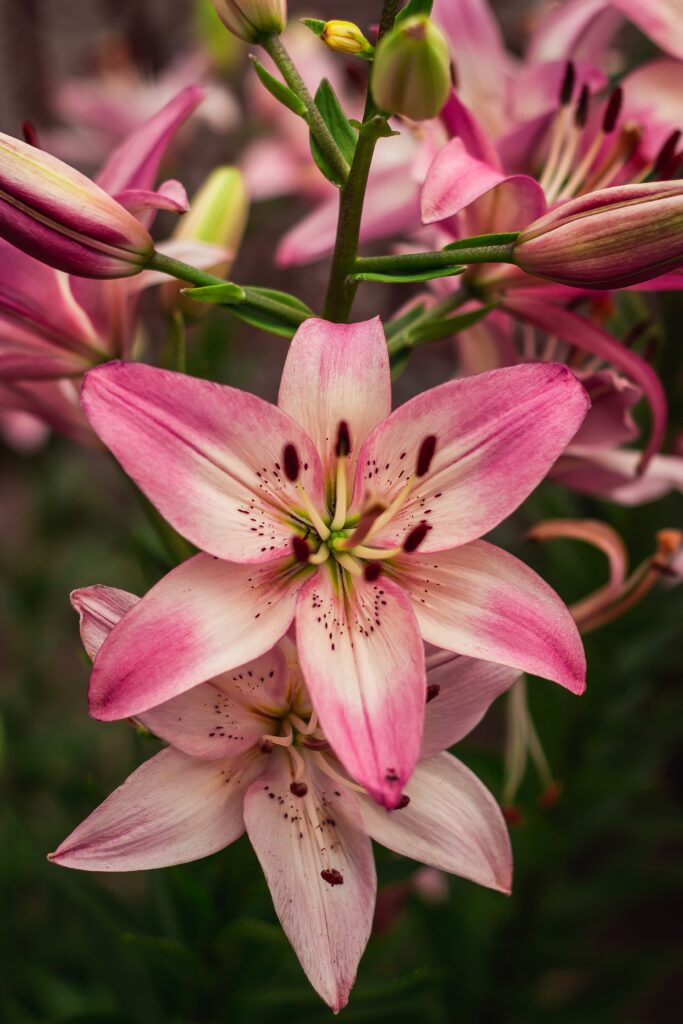
Lilies are known for their showy, trumpet-shaped flowers that come in a wide range of colors, including white, yellow, pink, red, orange, and purple. They are commonly used in gardens, as cut flowers, and in floral arrangements due to their stunning appearance and pleasant fragrance.
5. Liatris (Blazing Star or Gayfeather)
Liatris plants are known for their tall, slender spikes of fluffy, purple, or white flowers. They have long, narrow leaves that grow from a basal rosette and are attractive to bees and butterflies.
6. Calla Lily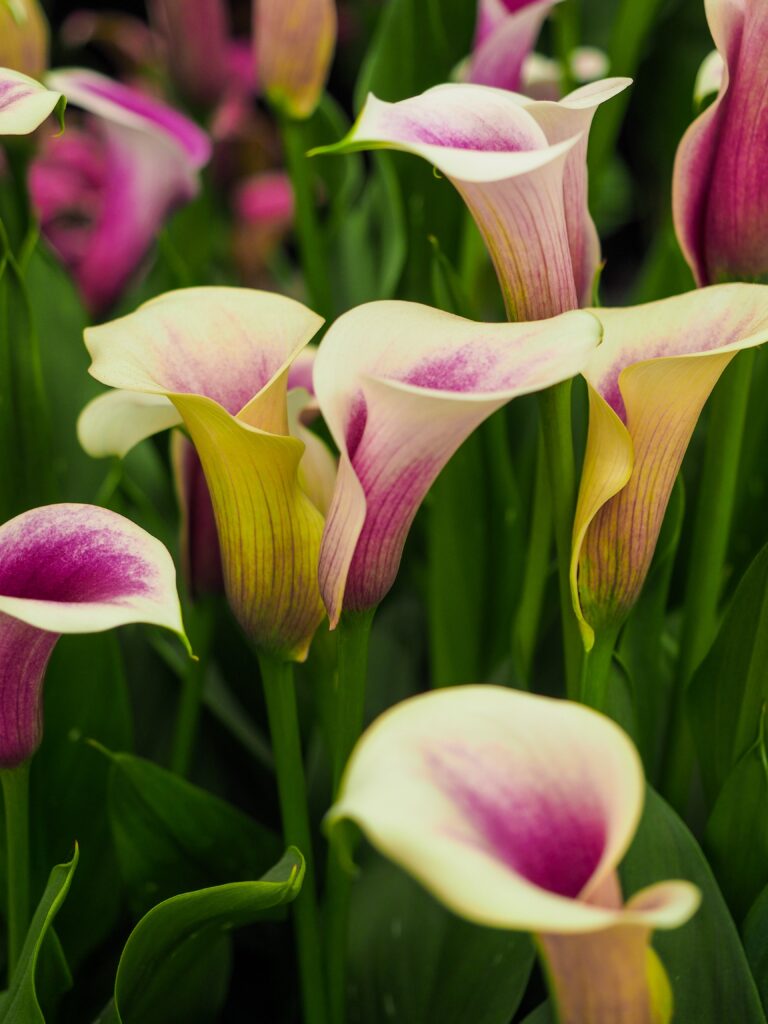
Calla lilies are known for their striking funnel-shaped flowers and glossy green leaves. The flowers come in various colors, including white, yellow, pink, orange, and red, making them the perfect addition to bouquets and floral arrangements.
7. Canna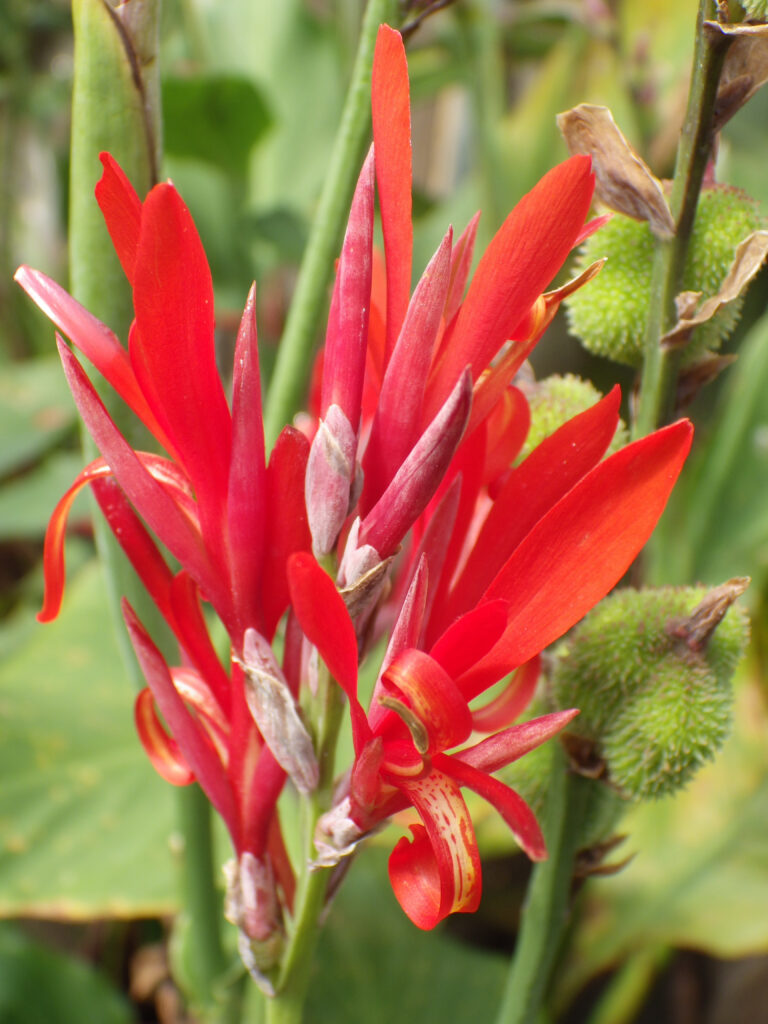
Canna plants produce large, vibrant blooms ranging in color from red, orange, and yellow to pink and white. The flowers are typically clustered together on tall stalks that can reach up to six feet in height. Canna plants are known for their bold foliage, which can come in various colors and patterns, including green, bronze, and variegated.
8. Begonia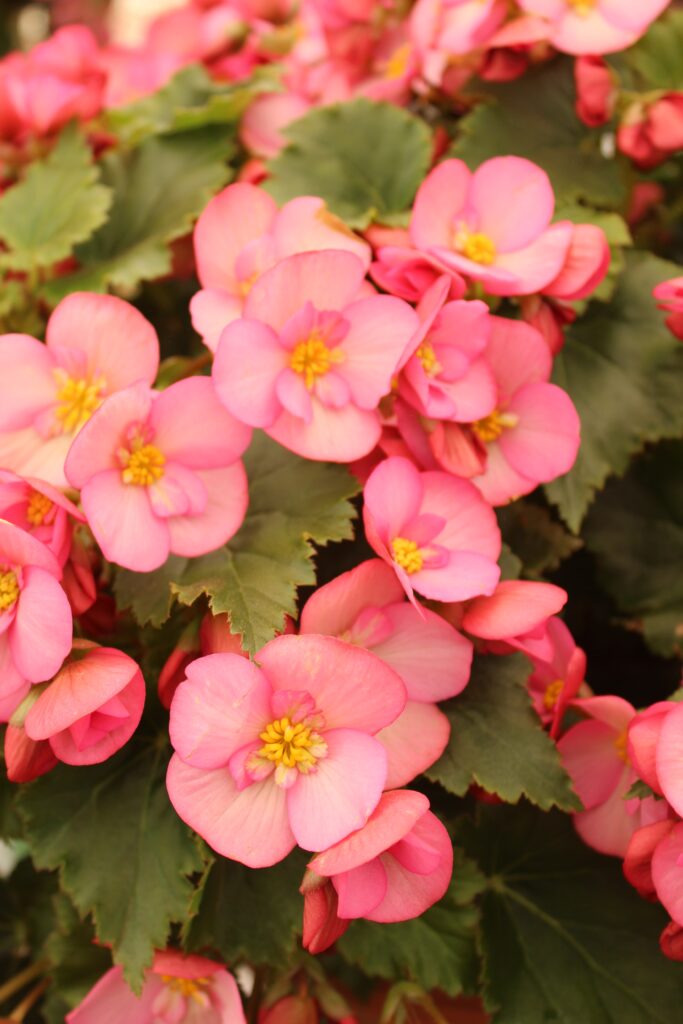
Begonia plants produce beautiful, colorful blooms ranging in color from pink, red, and orange to white and yellow. Begonias are also known for their attractive foliage, which can come in various shapes, sizes, and colors, including green, red, and silver.
9. Caladium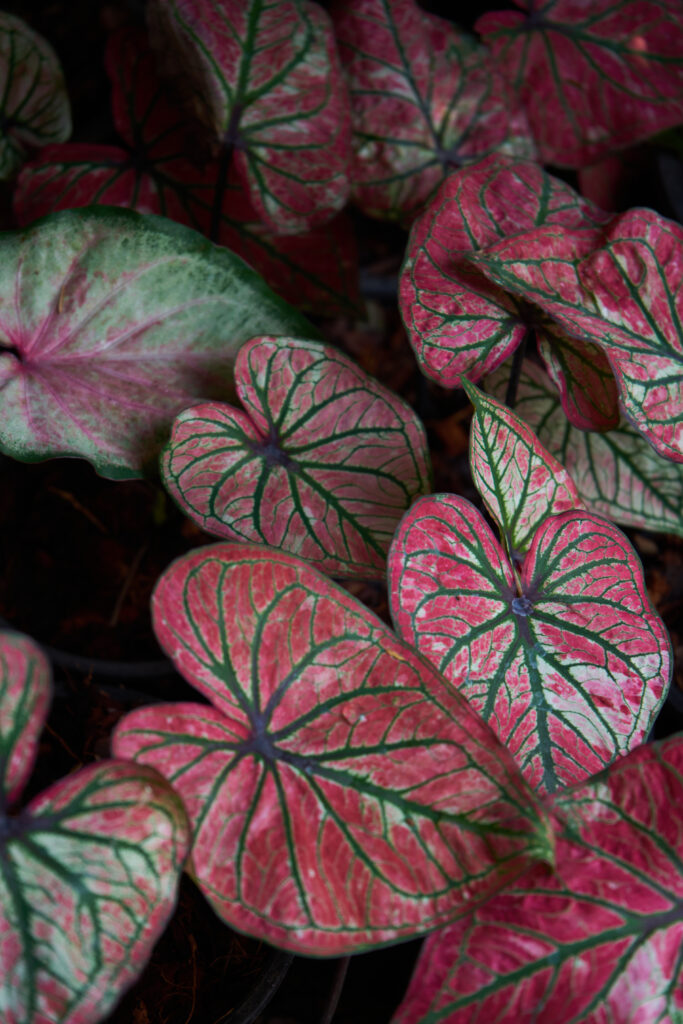
Caladium plants are prized for their stunning foliage, which can come in a variety of colors, including green, pink, red, and white. Caladiums are also known for their distinctive heart-shaped leaves that can have intricate patterns or veins running through them.
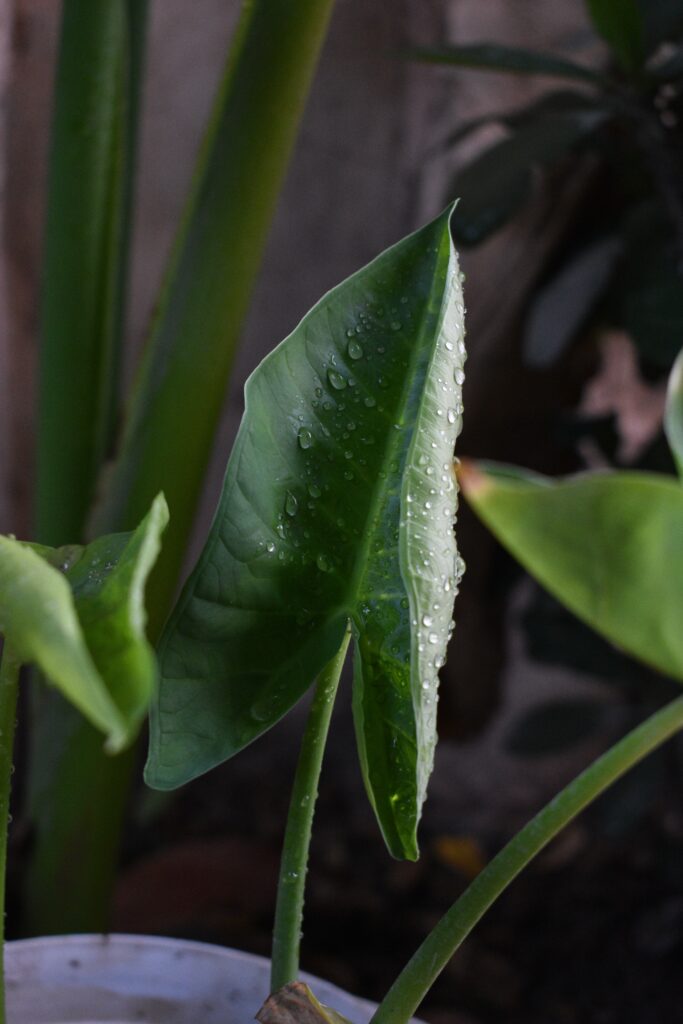
10. Colocasia (Elephant Ear)Colocasia plants, or Elephant Ear is the common name, produce large, heart-shaped leaves that can range in color from green to dark purple. Colocasia are known for their bold foliage and can add a dramatic statement to any garden or landscape.
How to prepare the soil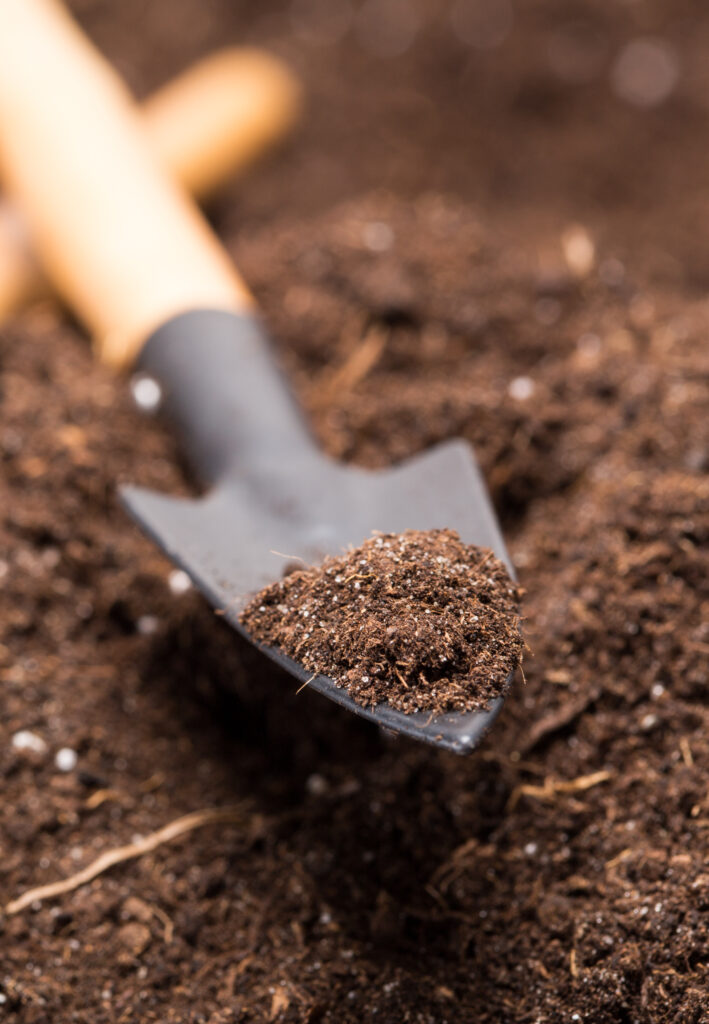
Whether planting bulbs in the ground or flowerpots, taking the necessary steps to prepare the soil is crucial to ensuring your flower garden flourishes this summer. Good drainage is critical for success. Start with soil that has dried out and has warmed to at least 55 degrees Fahrenheit. Soil should be well-draining and fertile, as summer-blooming bulbs prefer well-drained soil that is loose, crumbly, and rich in nutrients. To prepare the soil:
How to plant summer bulbs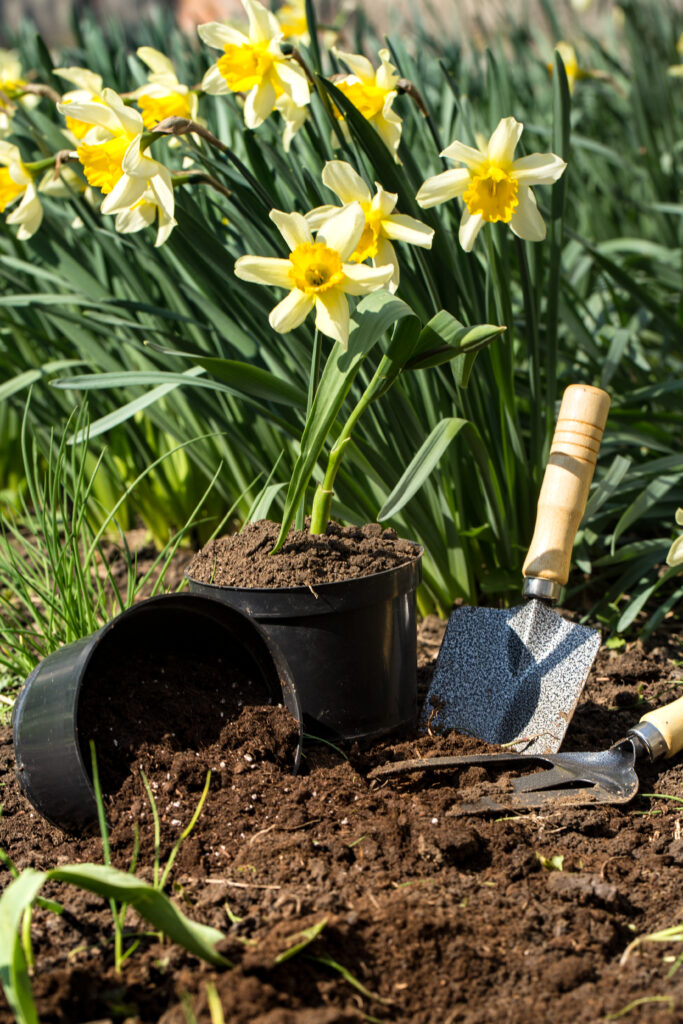
Now that you’ve taken the time to prepare the soil for your bulbs, it’s time for the fun part: planting! First things first, make sure you have chosen the right bulb type for your growing conditions, taking into account factors like sun exposure, soil type, and water requirements. *Keep in mind that you’ll want to wait until the danger of frost has passed before planting the bulbs. To plant the bulbs:
How to care for summer bulbs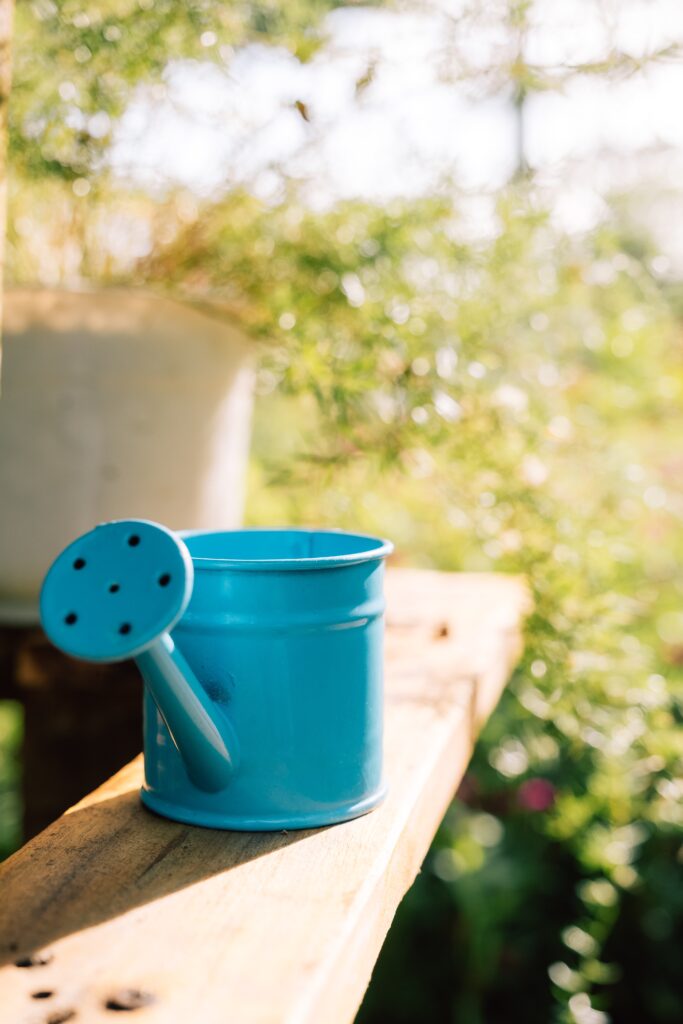
Caring for summer bulbs is essential for maintaining their health and beauty throughout the growing season. To ensure optimal growth, provide your bulbs with adequate water and nutrients. To care for the bulbs:
With proper care and attention, your summer bulbs will thrive this summer and provide a colorful and vibrant addition to your garden all season long. Looking for more garden ideas?
The post How to Plant Summer Bulbs appeared first on Curbly. Via https://www.curbly.com/how-to-plant-summer-bulbs 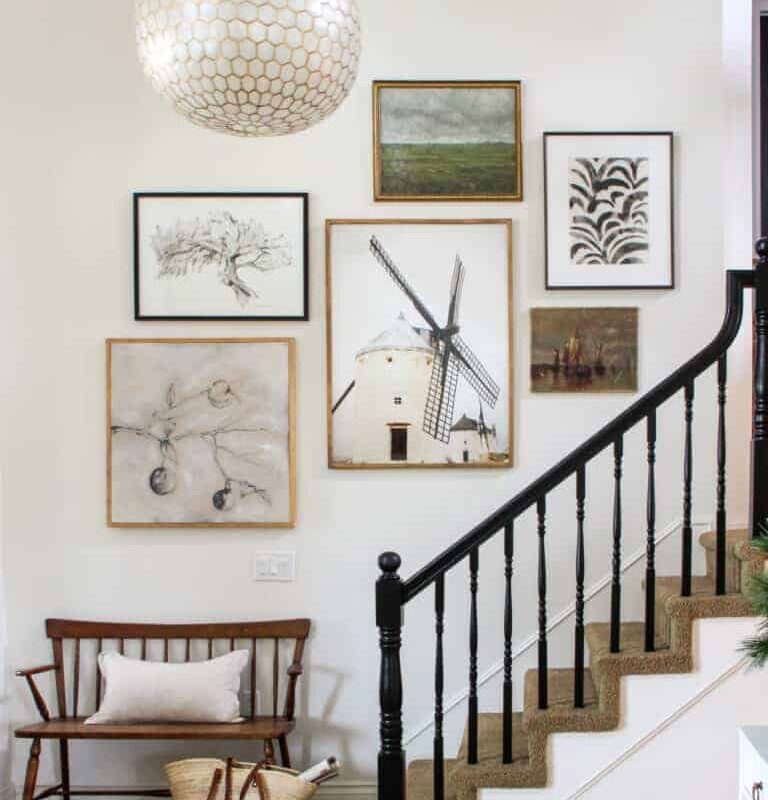
This post contains affiliate links. 
Wondering how high to hang pictures in your home? Should they be at eye level? Does that mean my eye level or the eye level of the average person? What if I have very high ceilings? What about those gallery walls everyone is posting Pinterest pictures of? It’s a lot to think about, right? Sometimes it seems as if there are as many answers to this question as there are different kinds of houses. This quick cheat sheet is designed to help you make this decision based on your own interior, and find the perfect height to hang pictures in your home. Table of contents
Should I hang this picture at eye level?At first glance, eye level may seem like a good idea. However, “eye level” means something different for each individual. Especially if you’re very tall or (in my case) very short, hanging at your eye level can be problematic. Instead of hanging pictures at your subjective eye level, follow the hanging guidelines in this article evenly throughout your interior. That way your paintings will look good, no matter whose eyes are beholding. How high to hang pictures in a hallway or entrywayAs a rule of thumb, it’s best to hang your picture at least 60 inches from the ground in places where they will be viewed from a standing position, such as in a hallway. For smaller pictures, you can hang them a little higher, about 65 inches. This height is the most comfortable for people of all sizes. If you’re putting in a gallery wall that will be viewed from a standing position, the bottom edge of it should be at least 60 inches from the floor. The gallery wall can go up as high as you want but make sure you leave a gap of at least one foot between the highest point of the gallery wall and the ceiling. 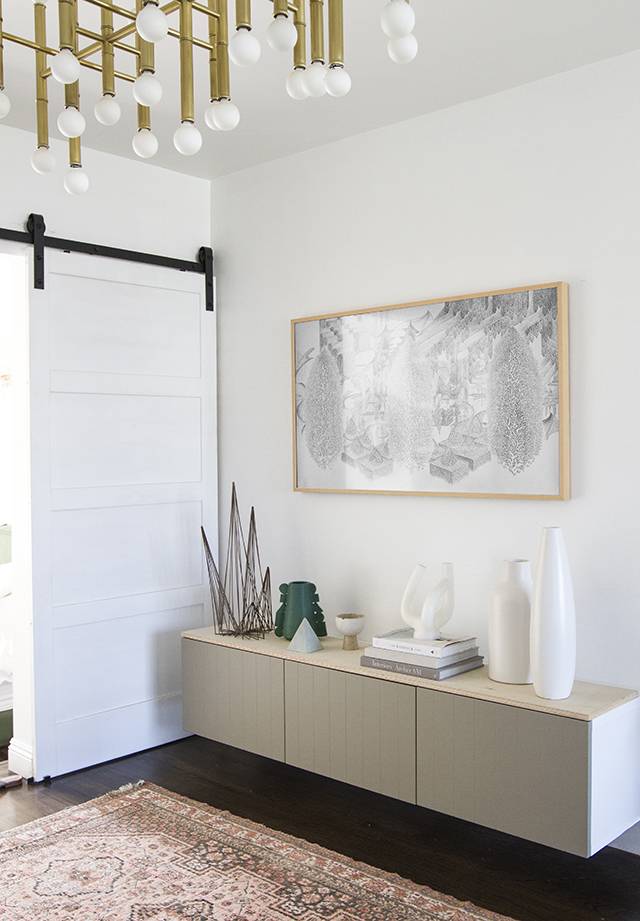
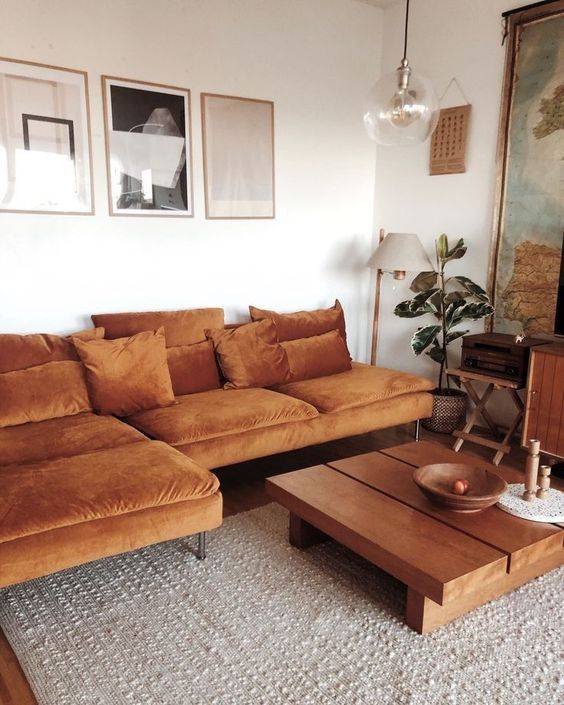
How high to hang pictures above a sofaWhether it’s one large work of art or a grouping of several, there are a couple of rules to hanging pictures over a sofas or couches. The first is that you should hang any pictures at least 8 inches from the back of the sofa. The second is that width of the work, or works of art, should take up about 2/3 the width of the sofa. If you have a small interior, use a mix of small and medium sized pictures to fill up that space. If you have a lot of wall space to fill or a large sofa, go for bigger pictures. These rules also work if you are hanging pictures above a console or hallway table. 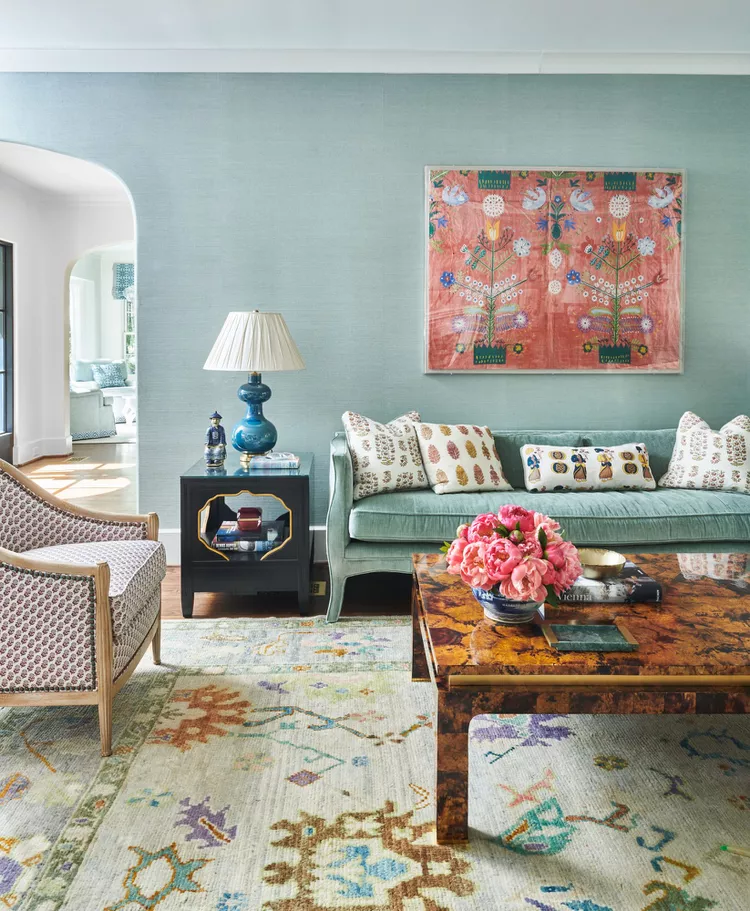

How to hang pictures along staircasesStaircases are good places to put gallery walls. Groupings of smaller pictures should go along the staircase diagonally, at least 60 inches from the bottom of each stair. Because of the height differences between stairs, this is not the place for large pictures. Leave those for spaces with even elevation. Also, just as in other spaces, you don’t want to hang all the way up to the ceiling. Leave a gap of at least one foot from the top of the picture and the ceiling. It’s okay if it’s not perfectly measured out. You have some wiggle room here to arrange the pictures in the way that looks best. 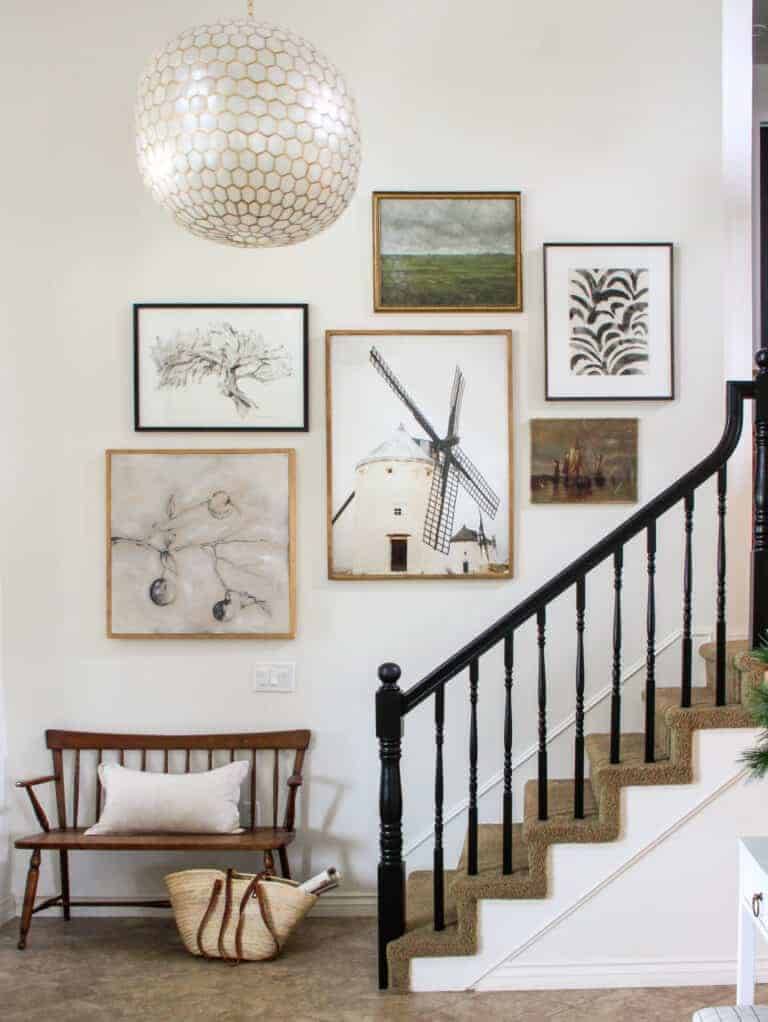
And don’t be afraid to break the rules! This staircase gallery is a perfect example. 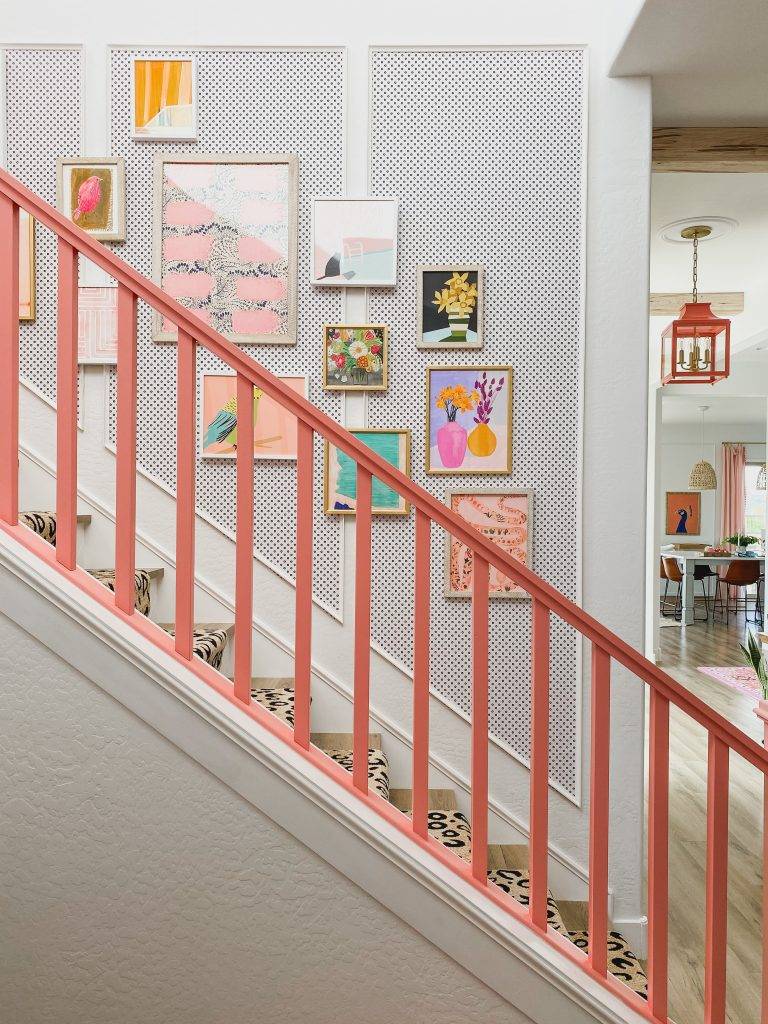
How to hang artwork in rooms with high ceilingsUnless you live at Downton Abbey, your pictures should not be hung floor to ceiling or “salon style.” This preferred picture hanging style of the old European aristocracy just doesn’t look good in modern interiors. Even the oldest museums don’t hang artwork this way anymore! If you don’t want your high-ceilinged living room to look like Hogwarts, leave the top third to a half of your wall space free. How much space you leave depends on how high your ceilings are. If you have a two story high great room or entry foyer, keep pictures in the bottom half. If your have high ceilings don’t reach two stories, hang in the bottom two thirds. Also, when you have a lot of wall space, it’s better to hang up one large picture instead of many small ones. 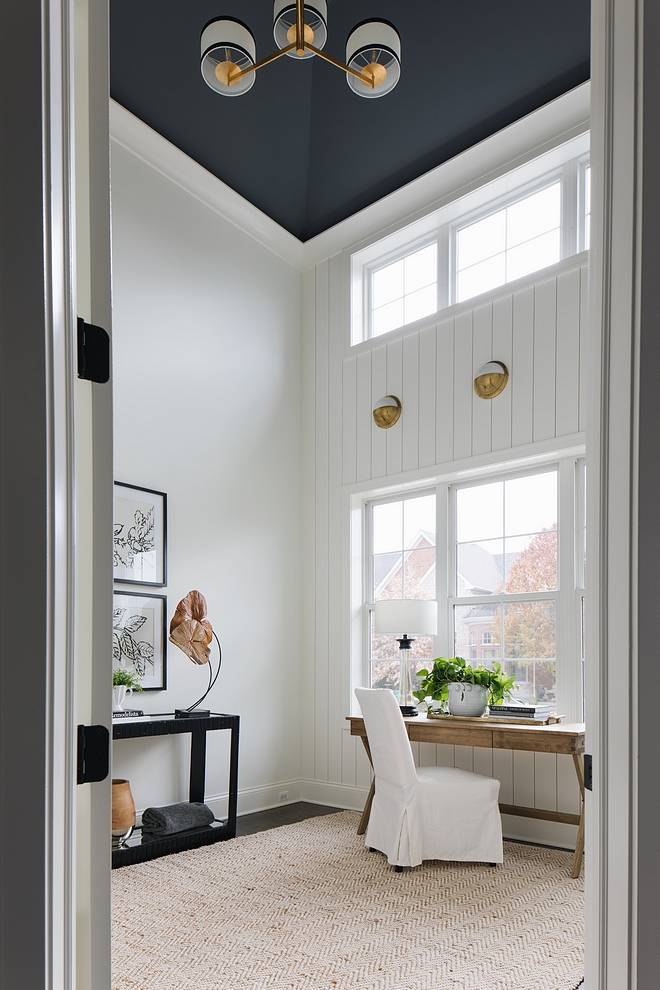
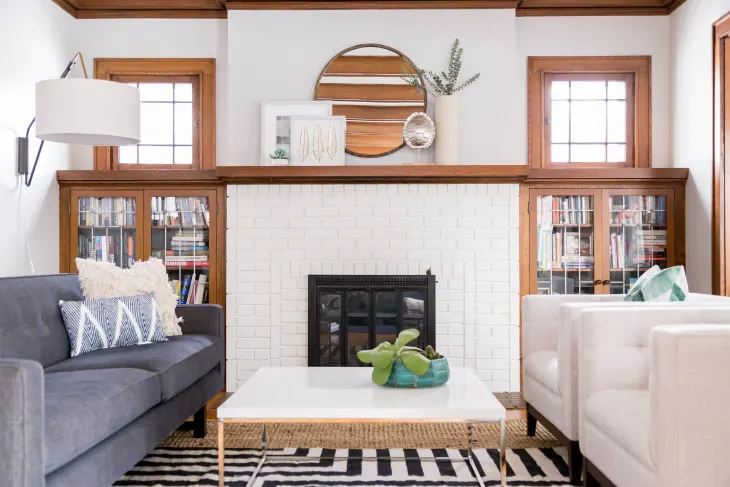
The right height for wall art above a fireplaceThe best thing to hang above a fireplace is a mirror. Why? Because the heat and dryness of the fire will slowly damage any work of art you put above it. But hanging a work of art is fine if you don’t light the fire that often or if the fire isn’t real (and therefore, doesn’t get too hot). That said, the rules for hanging mirrors in your home are the same as for hanging pictures. Hang the mirror at least eight inches from the mantelpiece. The mirror (and it should be only one large mirror) should measure about 2/3 of the width of the mantelpiece. 
Picture hanging hardware and suppliesWe all know the basics of what you need to hang a pictures, a nail and a hammer, but there are a handful of tools that will make the job so much easier and ensure that your artwork is safely in place. Hooks / hangers: Make sure that the hook is the appropriate size for the artwork. The heavier the artwork, the larger the hook and nail should be. If you have an especially heavy piece, consider distributing the weight across more than one hook and/or ensuring the hook is attached to a stud in the wall using a screw, instead of just a nail. Museum putty: You will find museum putty dotting the wall-facing bottom corners of the frames of all the artwork in my house. I especially recommend using it on pieces that hang closer to the doorways that naturally get jolted more. It safely keeps all of your pieces of art nicely in place. Level: Yes, you can eyeball it, but if you’re building a gallery wall or just want to save yourself a little grief, use a level. Tape Measure: Measure twice and you won’t regret it! Or have to fill a bunch of holes with putty before you’ve finished your project.  Buy Now →
 Buy Now →
 Buy Now →
SafetyJust a quick reminder, that if you live in an area prone to earthquakes, consider having artwork framed with acrylic instead of glass. Not only is it safer, but it’s also much lighter and is available with UV protection so your beloved artwork doesn’t fade away in the sun. Art is a crucial ingredient to making your house feel like a home. Using the tricks in this cheat sheet, you will be able to hang your favorite pictures in a balanced way that compliments the rest of your interior. These simple tricks also work in any room. So whether you’re hanging pictures of the kids in the den or framing up some seashells in your coastal bathroom, your pictures will always look perfect! And once you know the rules, you can break the rules! We’ve talked about art in the home, now let’s discuss lighting! Here are a few tricks on how to achieve a Scandinavian feel using lights.
The post How High Should I Hang A Picture: The Ultimate Cheat Sheet appeared first on Curbly. Via https://www.curbly.com/how-high-to-hang-pictures 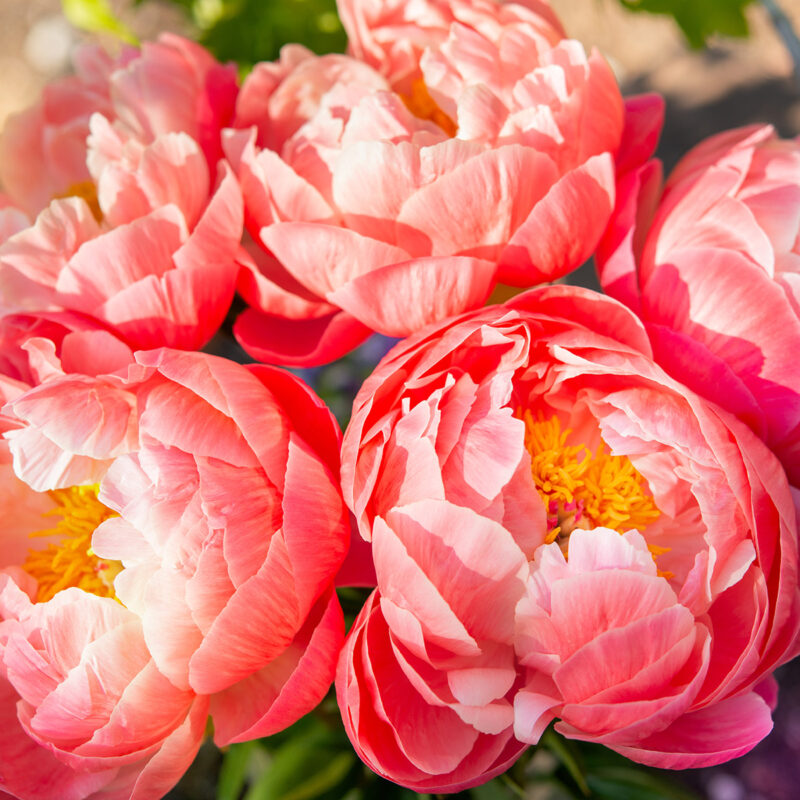
For me and just about every gardener I know, low maintenance garden plants are first and foremost perennials. Plant them once and reap their benefits for years to come. (Equally important for me are plants that are deer/pest resistant. Check this post out to see what I mean.) Therefore, when I began putting together this roundup, perennials were the focus. Other than the perennial requirement, I decided to break the list into two parts: the best low maintenance garden plants for sunny locations and the best low maintenance garden plants for shady locations. If I’ve personally had experience with the plant and its deer resistance, I’ve added a notation to identify it as such. Also, for further information, please “click” on the plant’s name in bold, which will take you to an outside link. Low maintenance garden plants for sunny locations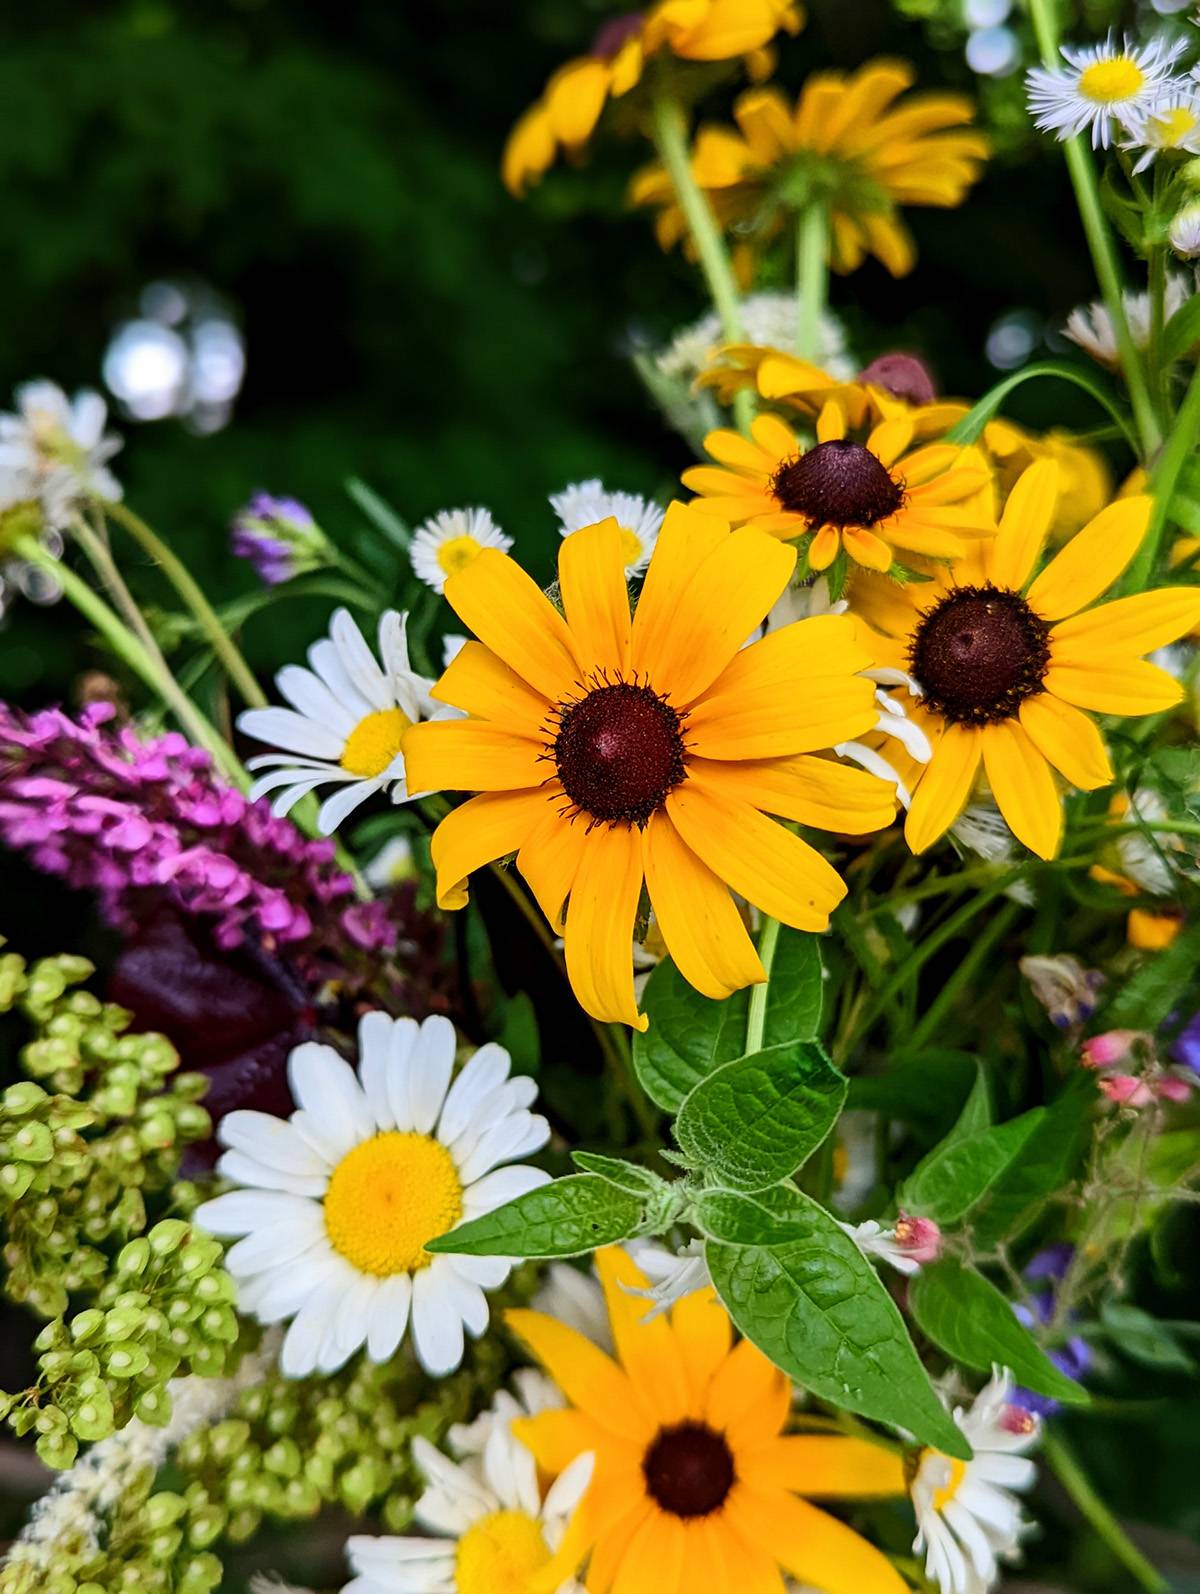
Black-Eyed Susan. Around these parts, Black-Eyed Susan is grown in ditches by the DOT. Rugged, impervious to drought, theses daisy-like flowers just might be one of the toughest flowering plants in the country. 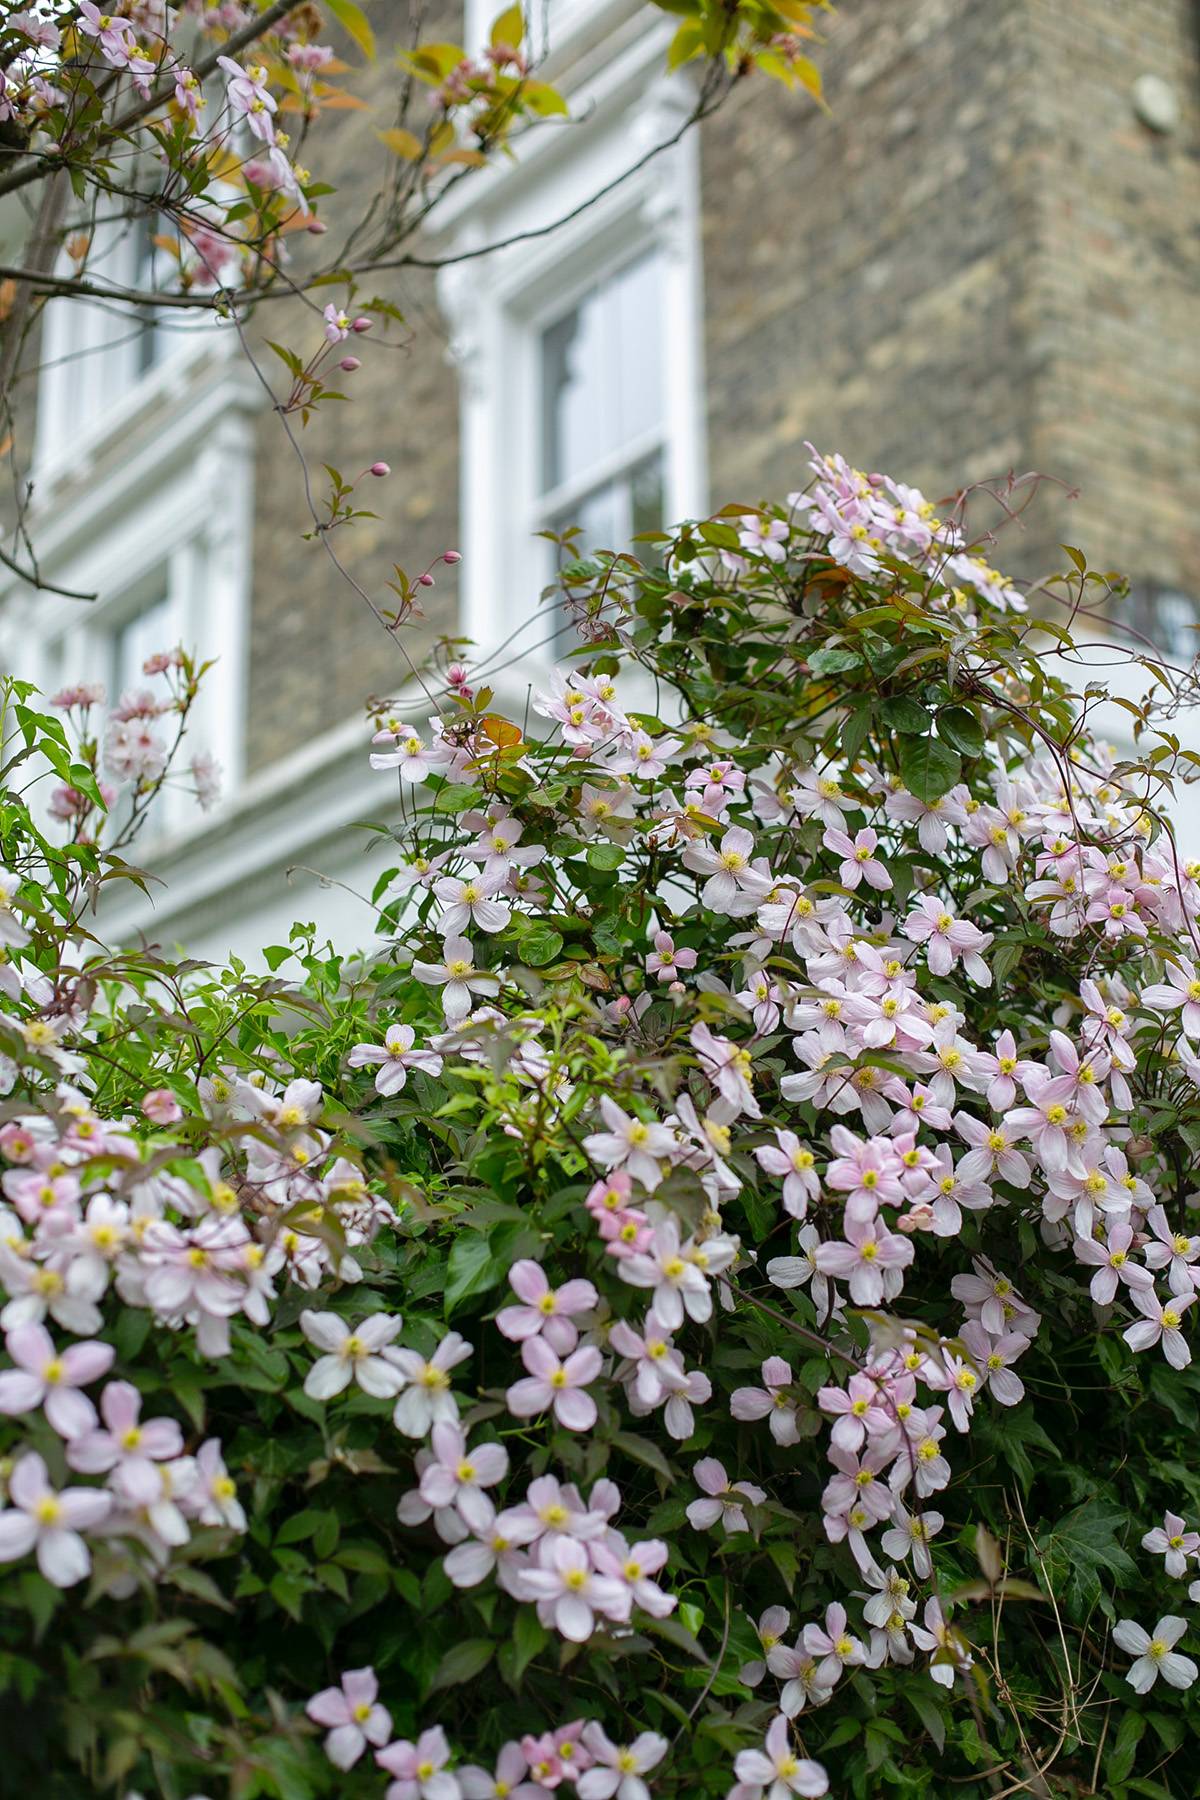
Clematis. For a showy climber, it doesn’t get much lovelier than clematis, but keep in mind, some varieties should NOT be cut back hard. (I did that once and all but killed a gorgeous plant.) 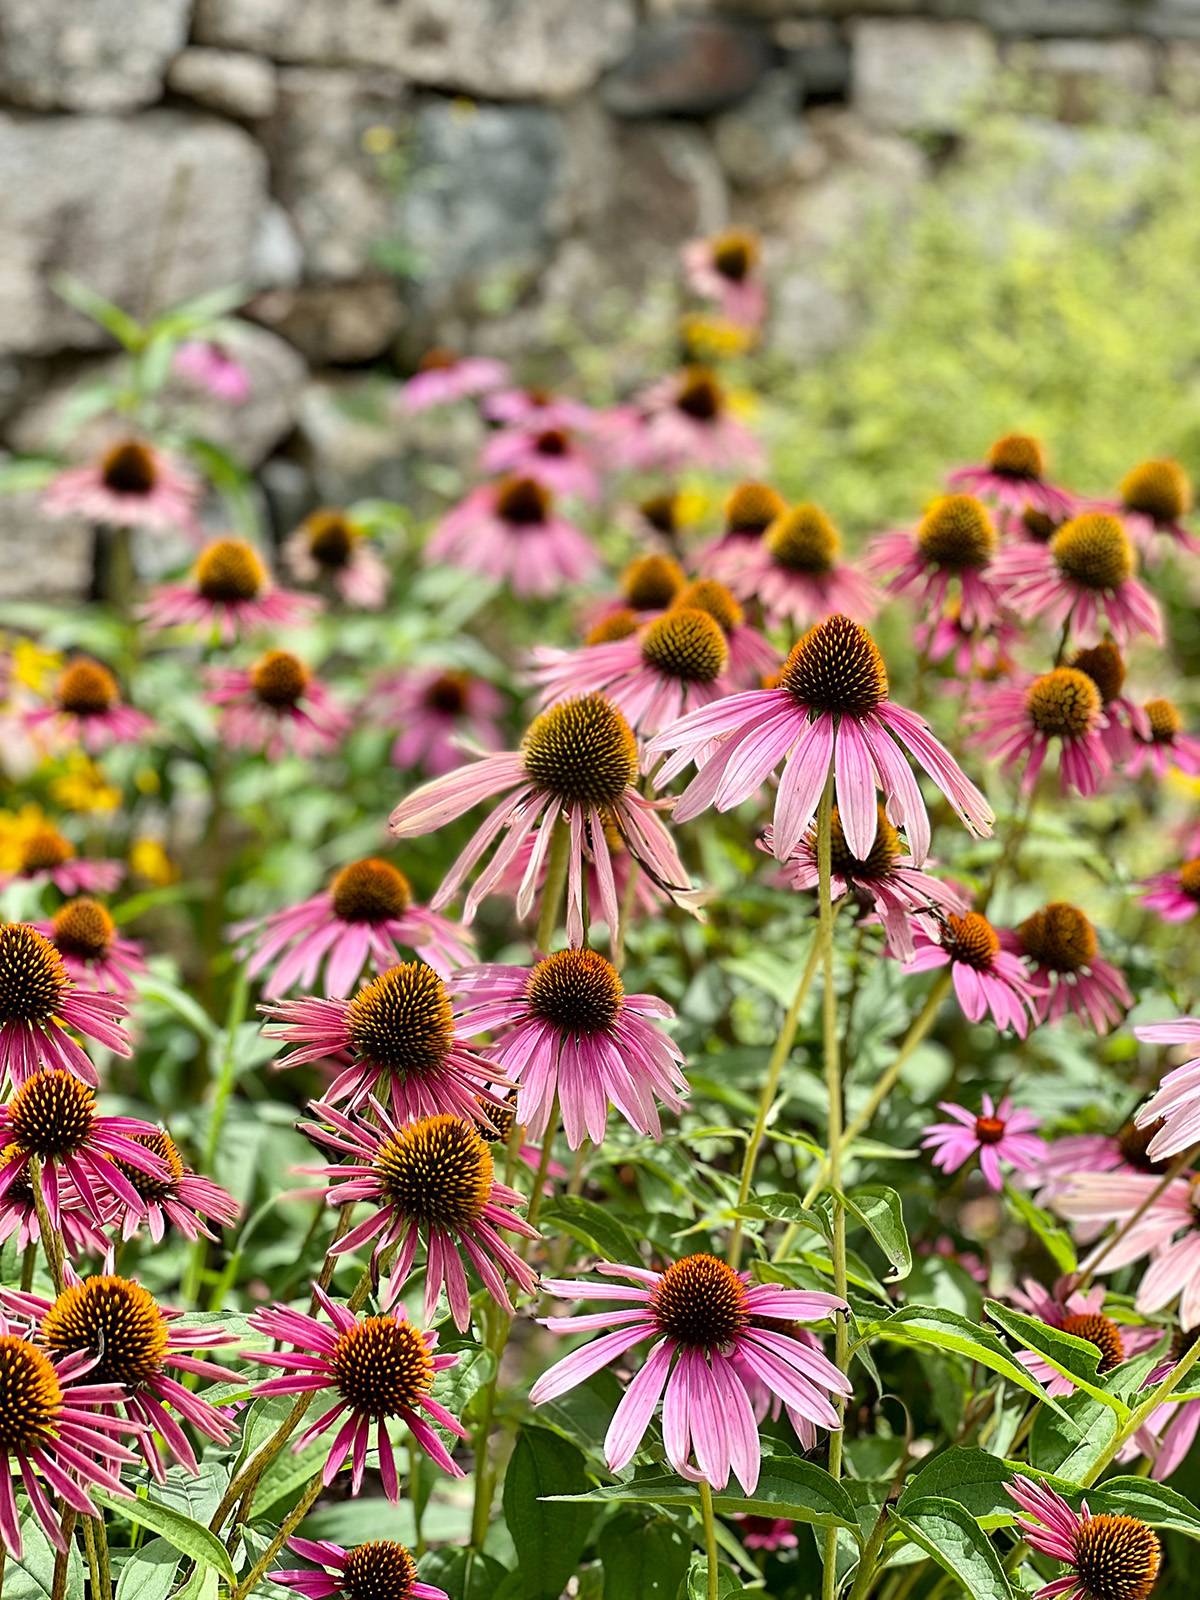
Coneflower. Coneflower, also known as “echinacea” are members of the daisy family and about as durable as Black-eyed Susans. They’re native to just about everywhere in the United States. The coneflower is long-blooming and attracts both bees and butterflies. 
Coreopsis. These darlings don’t care how hot or dry it is outside, they’ll grow just about anywhere. They also come in some luscious tropical colors too and provide late summer blooms for your garden. Coreopsis flowers are commonly called pot of gold or tickseed and require full sun. 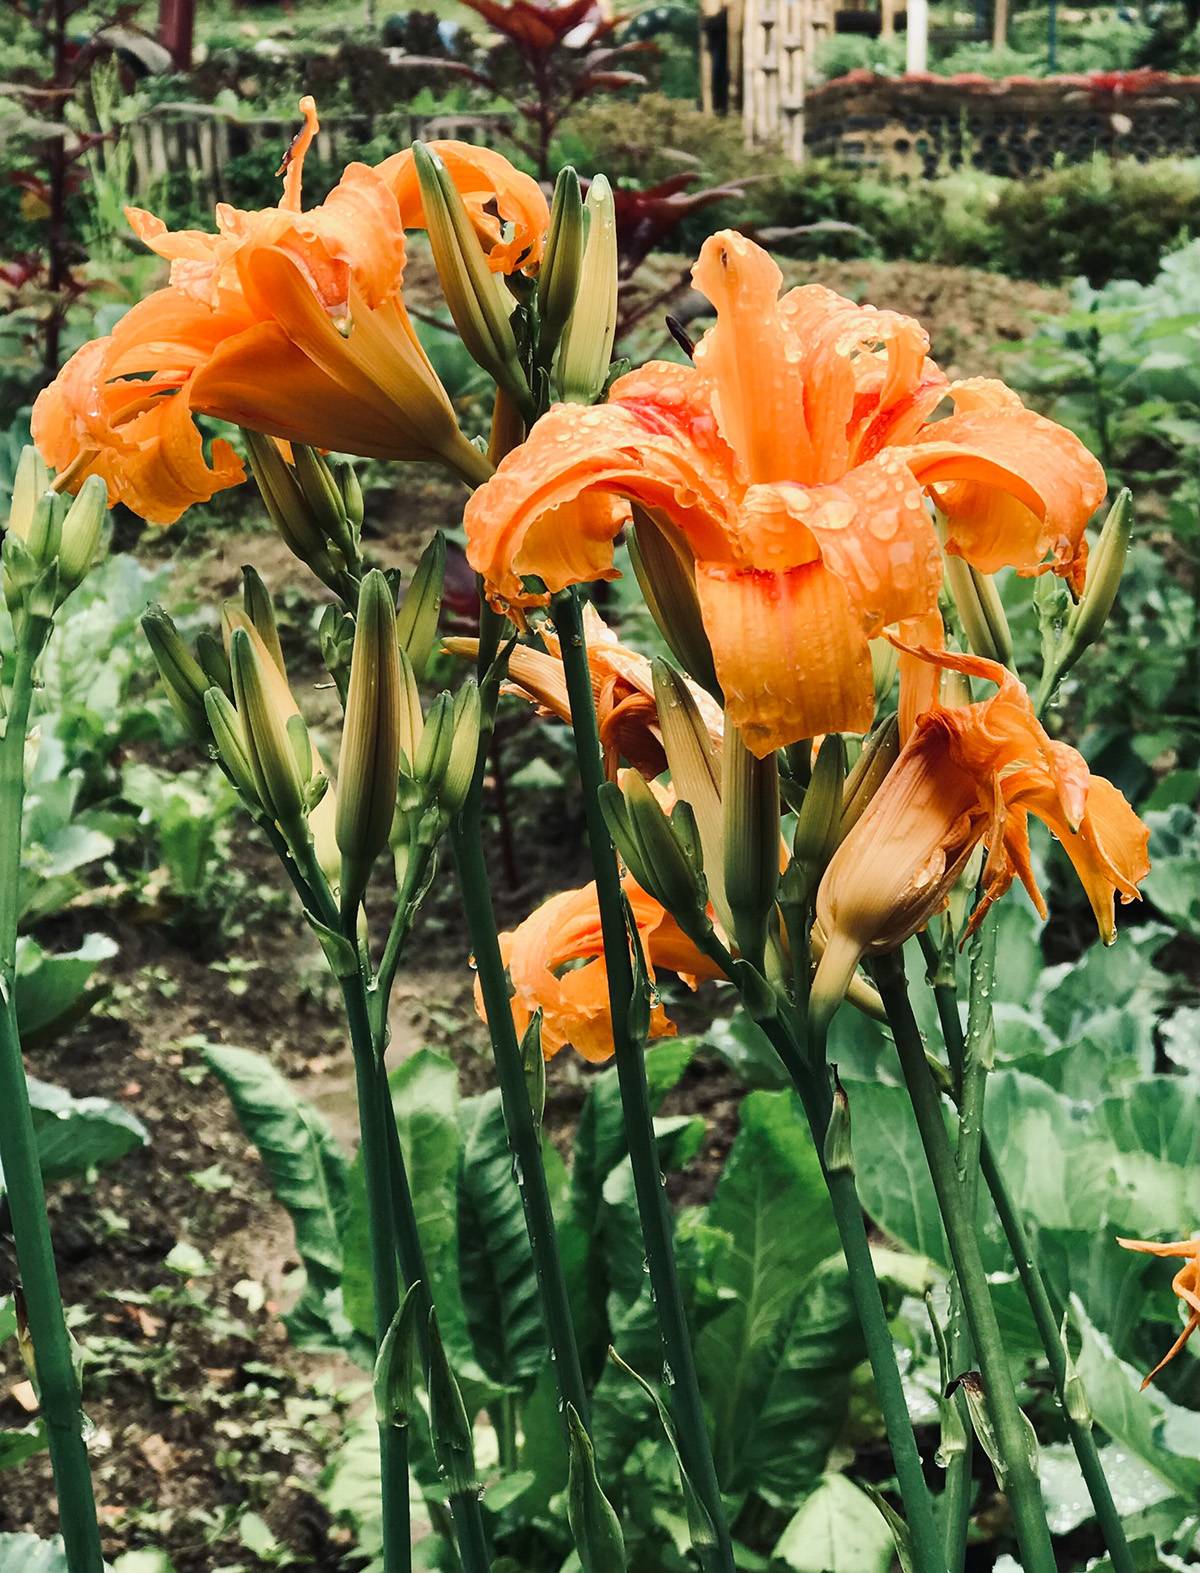
Daylilies. Daylilies multiply like weeds as well, but they’re easily divided. You can divide them anytime after they’ve bloomed with no issue. They tolerate a fair amount of abuse—including drought conditions. Only thing is, deer LOVE them. Especially their flowers. Plant in full-sun, moist but well-drained soil. 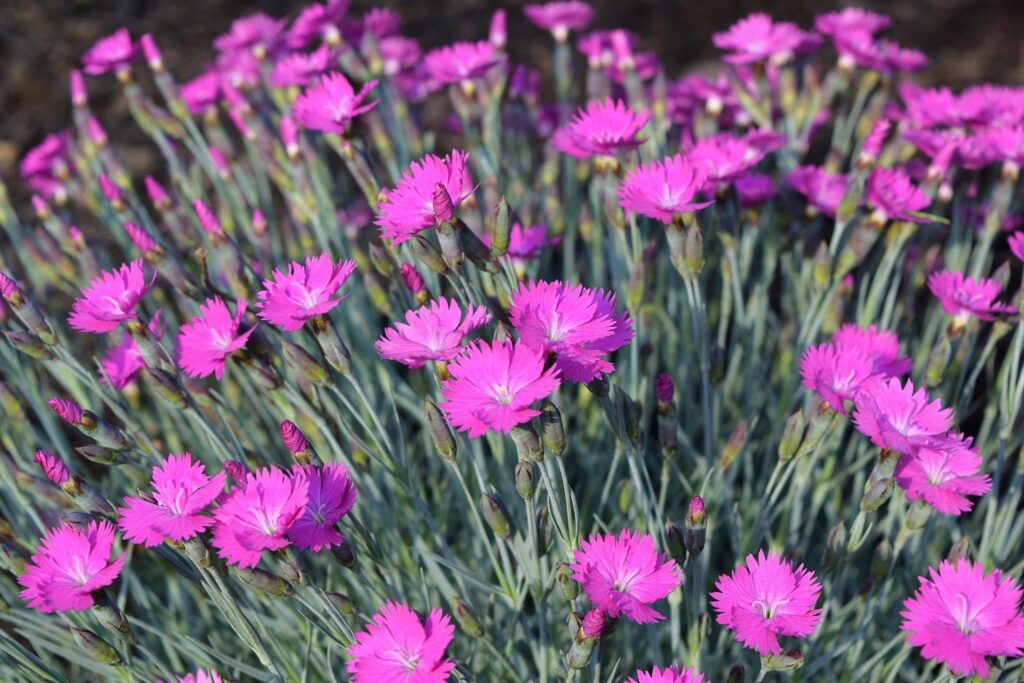
Dianthus. These beautiful little blossoms also called “pinks” have a spicy scent that I adore. Super easy to grow and drought-tolerant, they only get to be about 6” and 18” tall. Deer, as well as bunnies, love them too. 
Hens-and-Chicks. I find these plants fascinating, as they come across as misplaced desert dwellers that just happen to thrive in my zone. Actually, the more challenging the soil the better they grow. 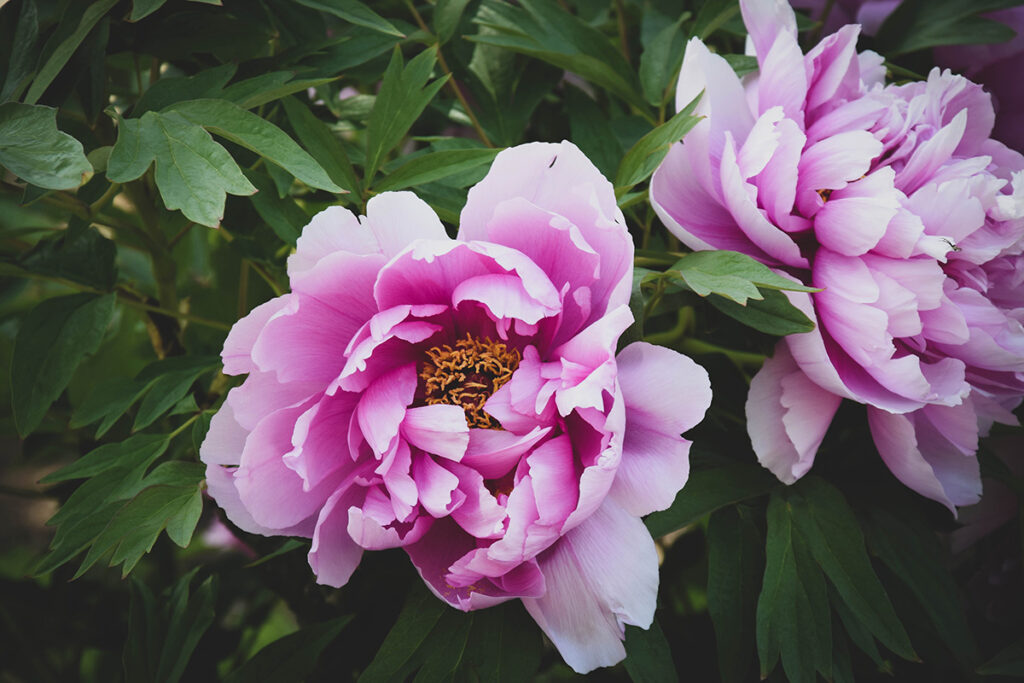
Peonies. I have dozens of peonies in my yard, and I can attest to their deer and rabbit resistance. (Whoop! Whoop!) They multiply well and they tolerate drought conditions too. Downsides include the need for cages as their blossoms are heavy and will cause the stalks to bend. (Mine are planted next to my garden shed, which provides suitable support, so I don’t have to use cages.) Also, peonies attract ants as the blossoms start to open. After they’ve done their job, the ants disappear, so it’s no biggie, but some people don’t plant them too close to the house for this reason. Note: to keep peonies looking healthy and vibrant past the blooming season, clip the spent blossoms off the plants. 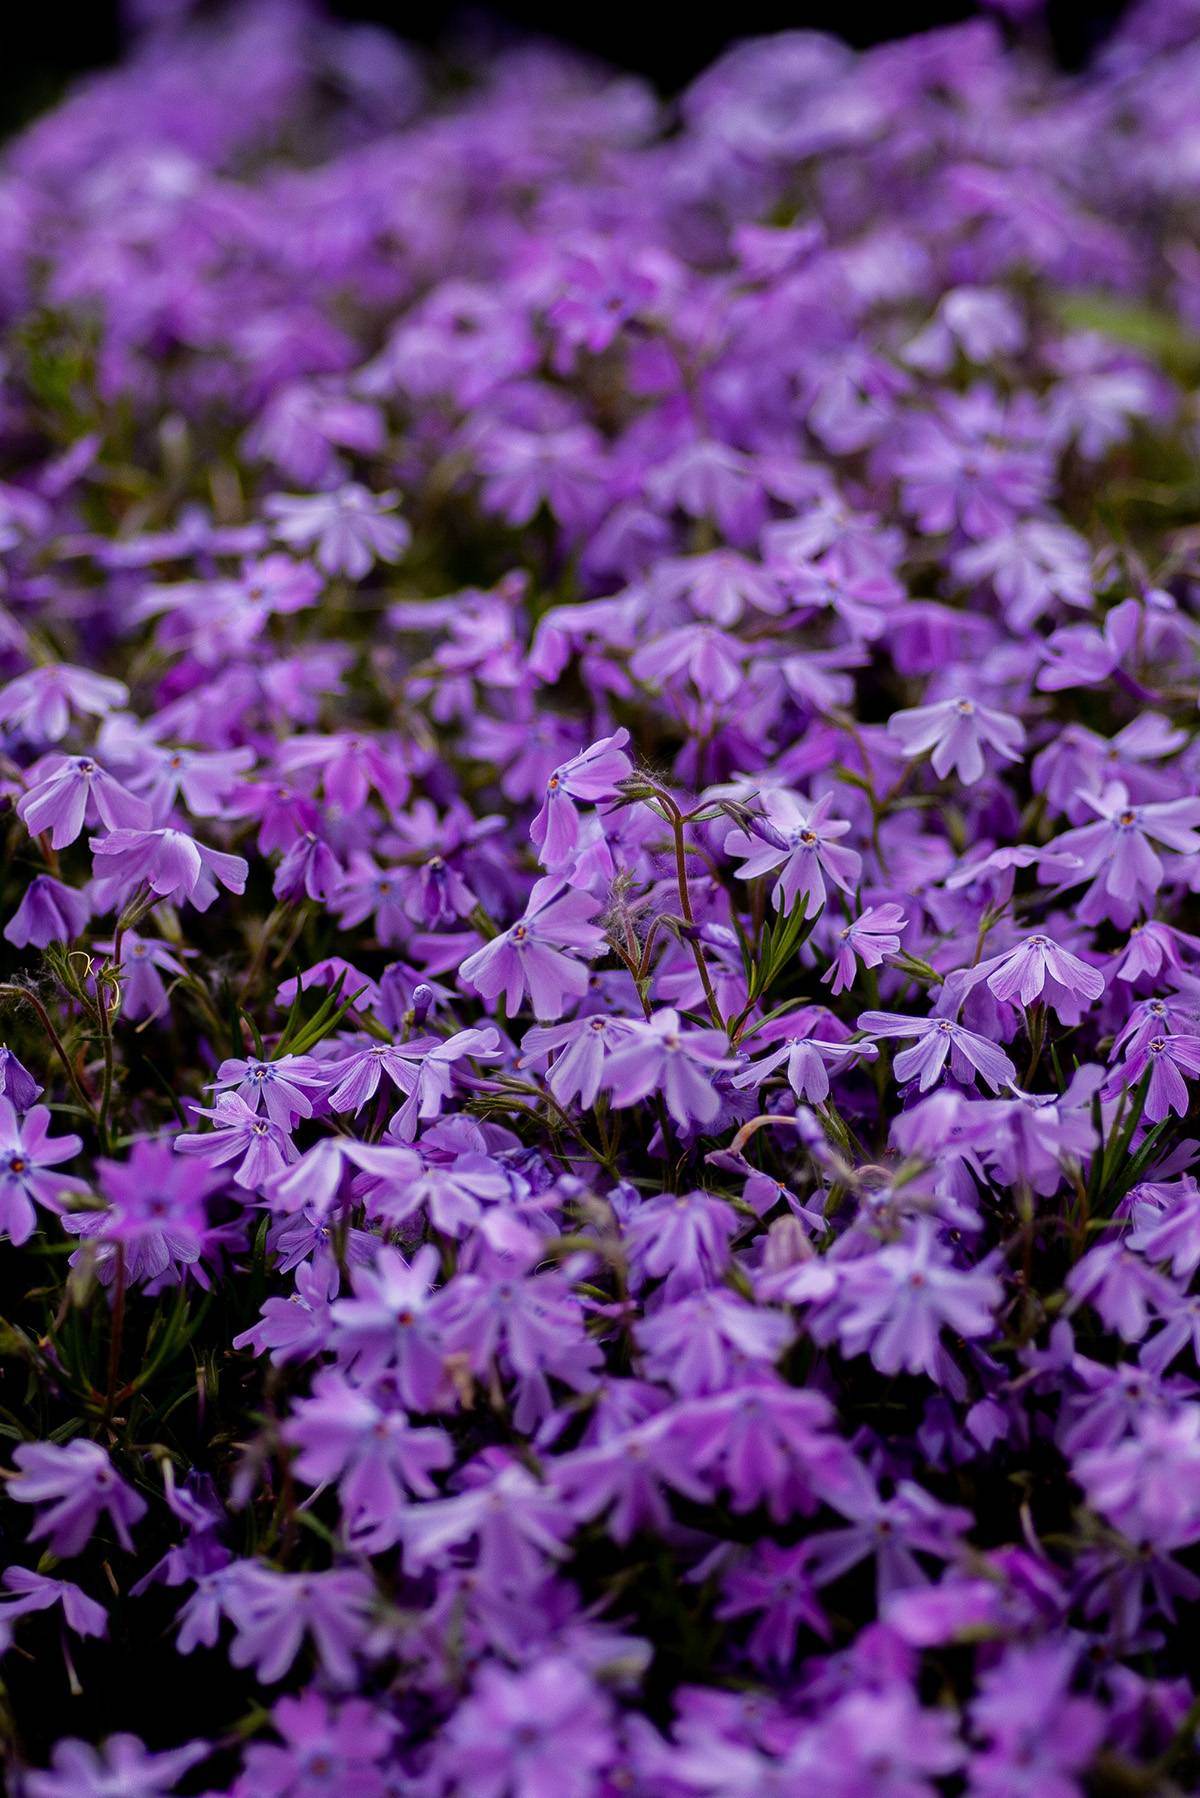
Phlox. Common to North America, phlox is another plant that will grow just about anywhere if the right variety is chosen. Check with your garden center to find out which is right for your area. Showy and fragrant, it attracts hummingbirds and butterflies and is available in several different colors. Sun requirement vary, based on variety. 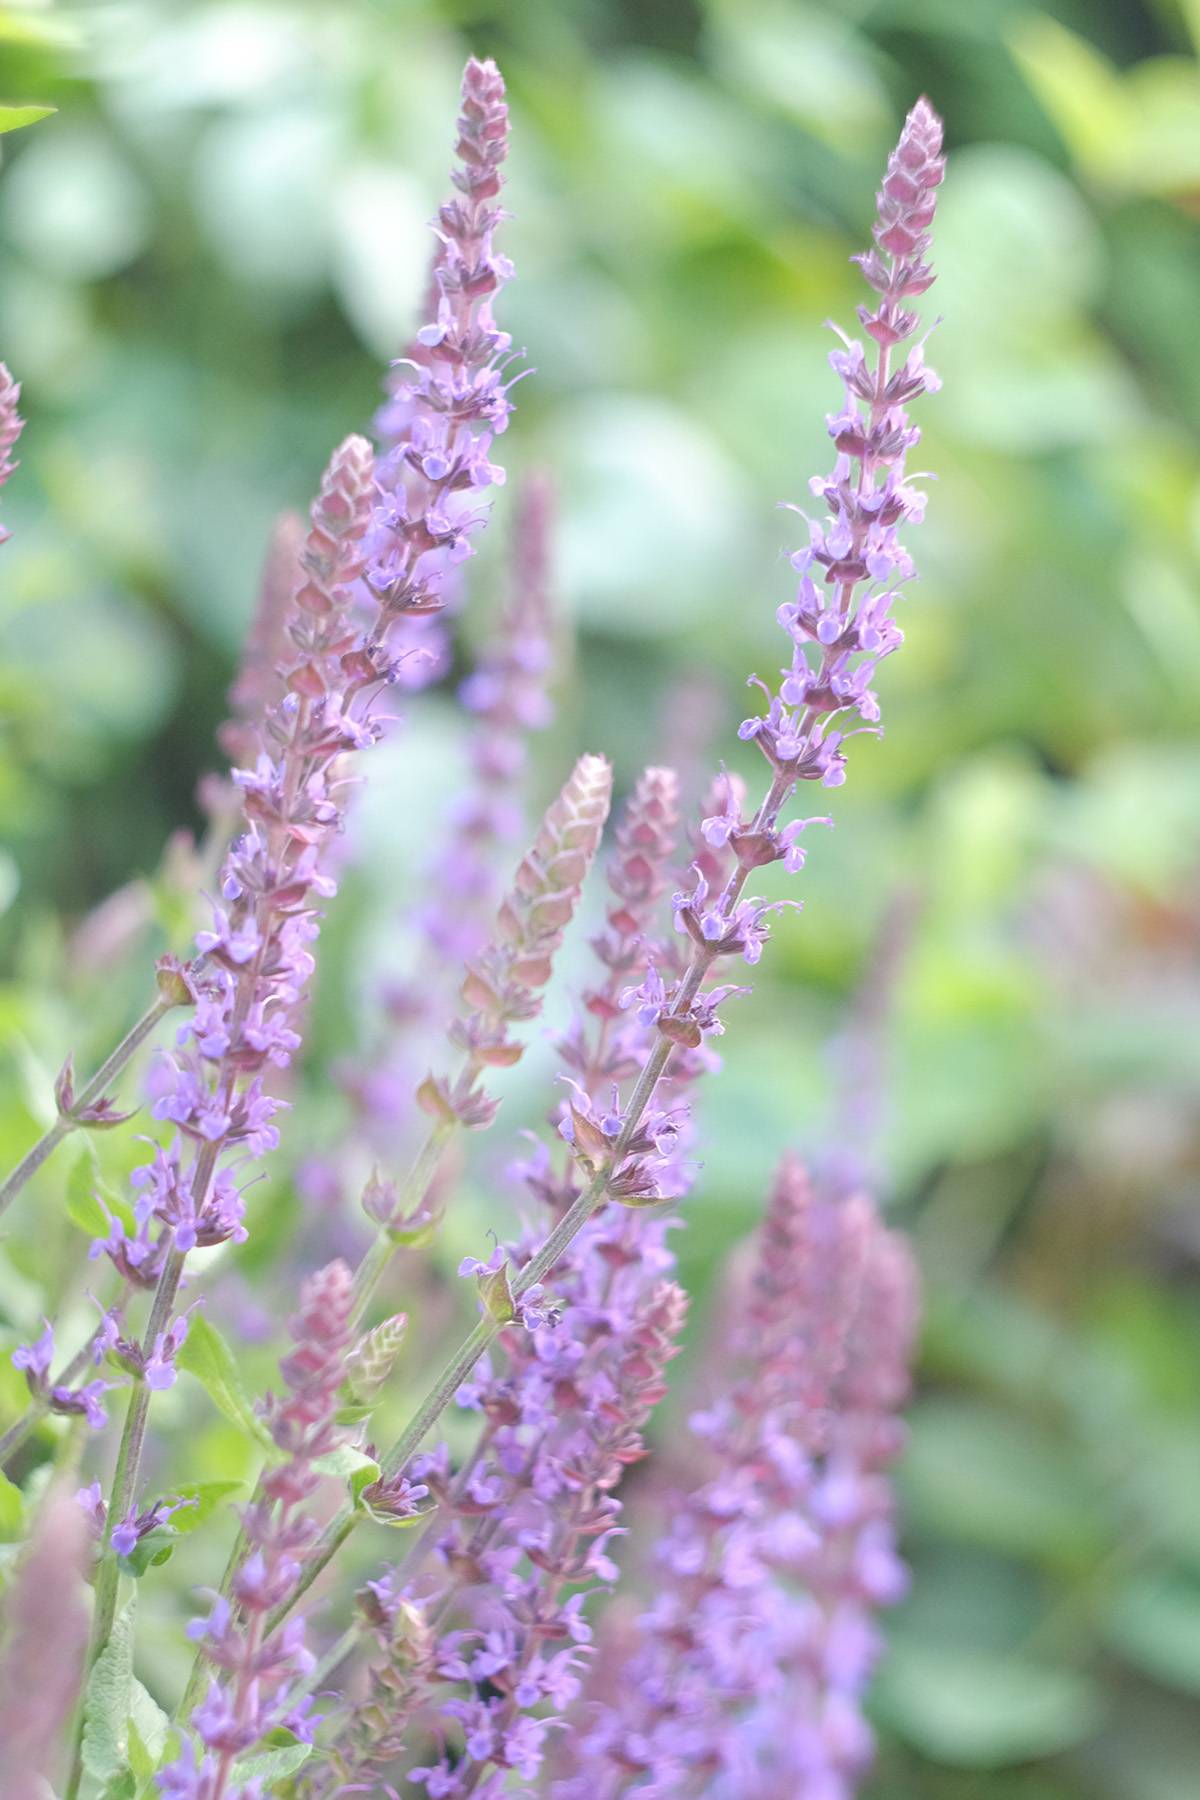
Salvia. This one needs to come with a warning label. First, it’s a psychoactive plant. Second, I’ve heard you can’t buy it in all states because it IS a psychoactive plant. But this is the deal, it’s super hardy, grows like a weed (pun not intended), and blooms all summer long. Another downside or perhaps upside, depending on how you look at it, it multiplies like nuts and can easily take over a garden space in no time. 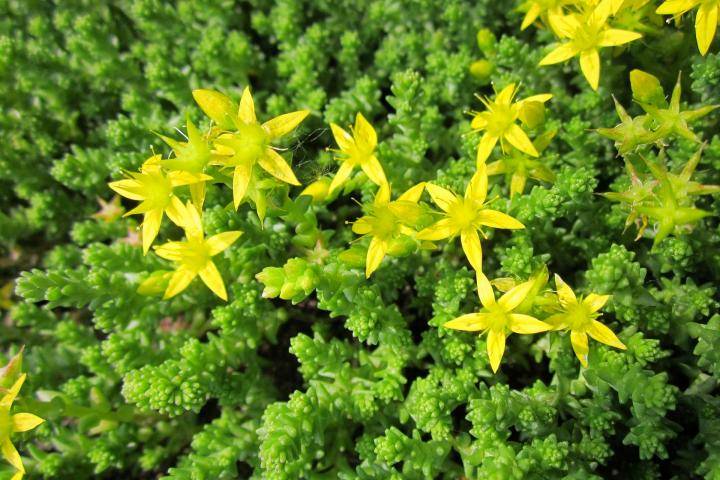
Sedum. Sedum is kind of like Hens-and-Chicks. It doesn’t seem to belong up here in my zone. Besides looking like they should be growing in a warmer climate, they look like a vegetable (to me), until they bloom, that is. Sedum also attracts bees like nobody’s business. Full sun to part-sun exposure is best. 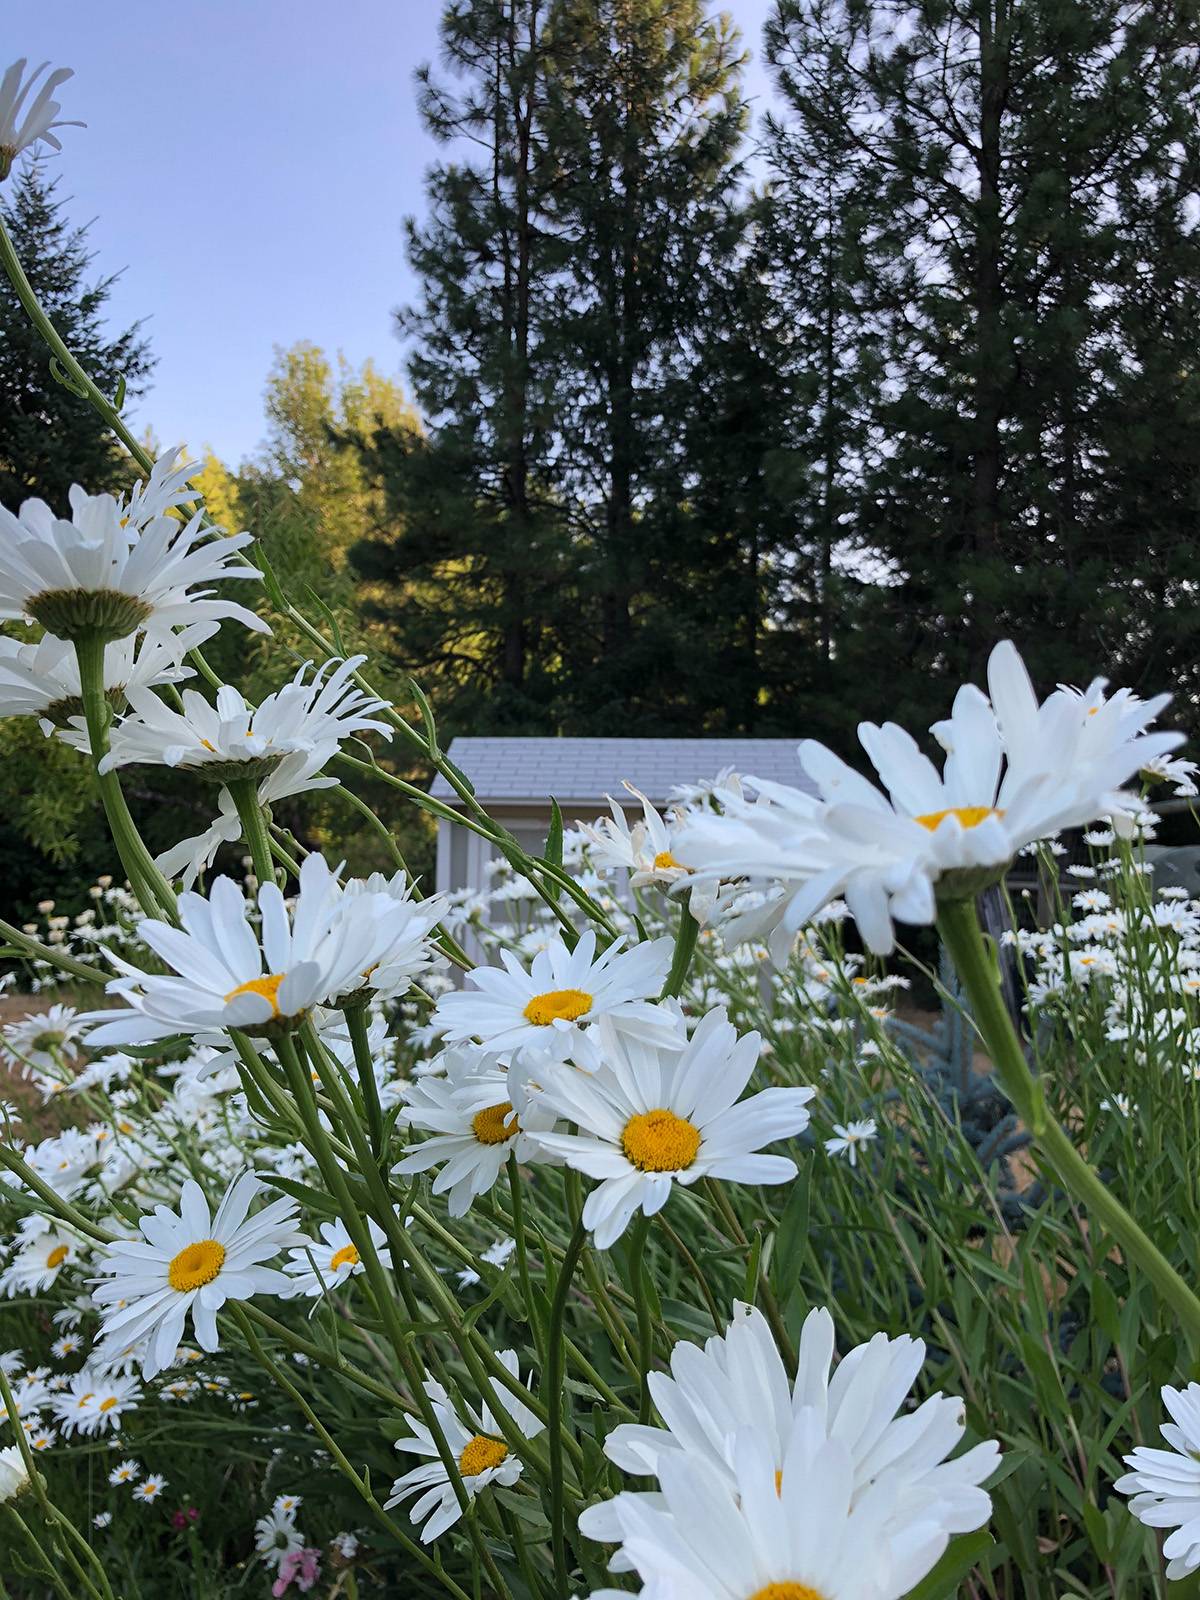
Shasta daisies. Where I live, Shasta Daisies are akin to weeds. Seriously, plant one in your garden and suddenly they are everywhere—and in places where they aren’t supposed to be. But that’s the definition of a weed, isn’t it? A flower that’s not in the right place? Drought tolerant and as rugged as rocks, daisies are one of my favorite flowers, and they are perfect for cutting. 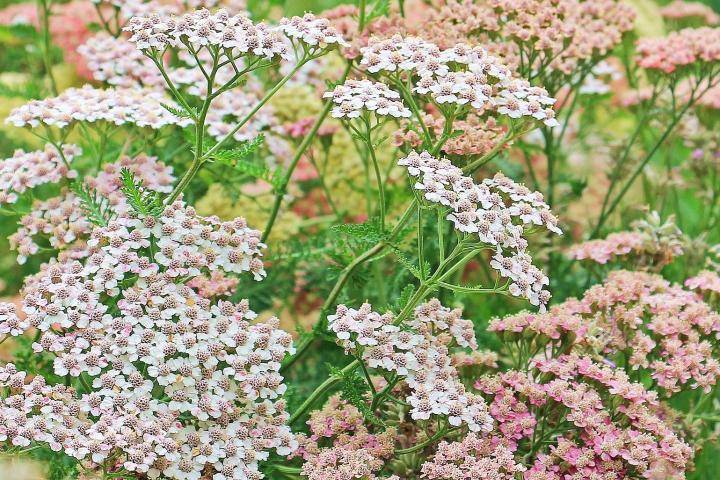
Yarrow. Don’t let the delicate flowers fool you, Yarrow is another indestructible plant. Again, it multiplies easily, attracts butterflies, tolerates dry conditions and is perfect for cutting. Oh, and it comes in pink, red and yellow! Low maintenance garden plants for part-sun or shade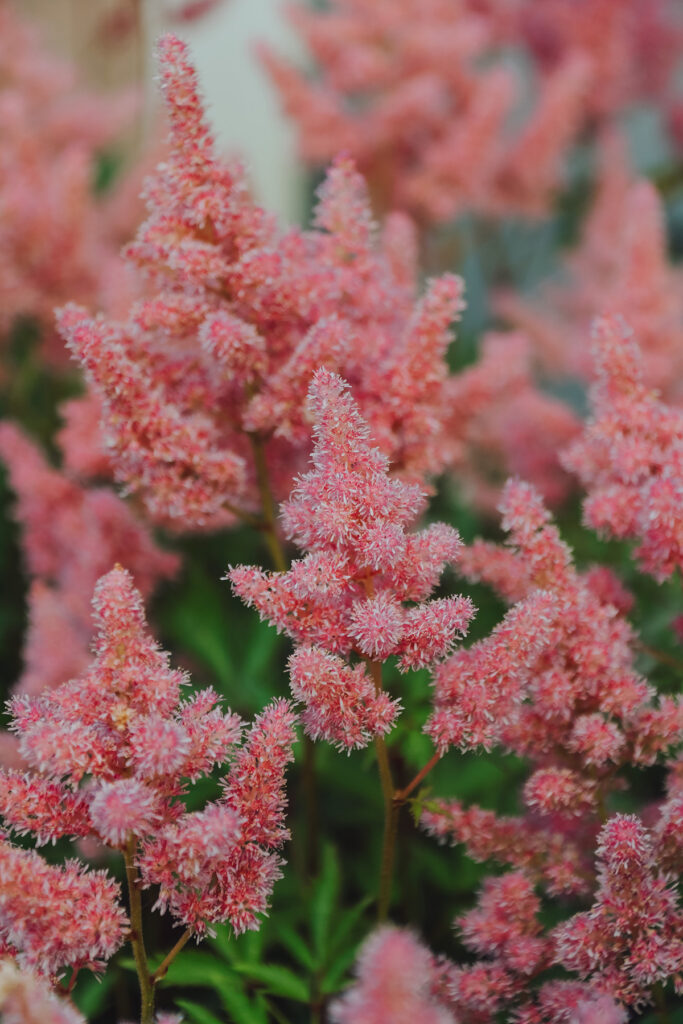
Astilbe. Think of astilbe as ferns that flower. Although they look delicate, they’re super easy to grow and provide lovely pops of color in shady places. 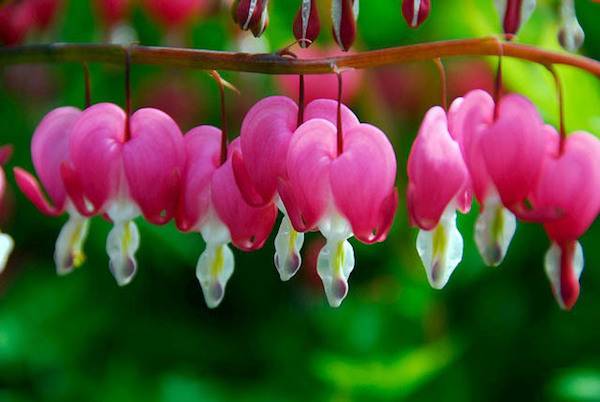
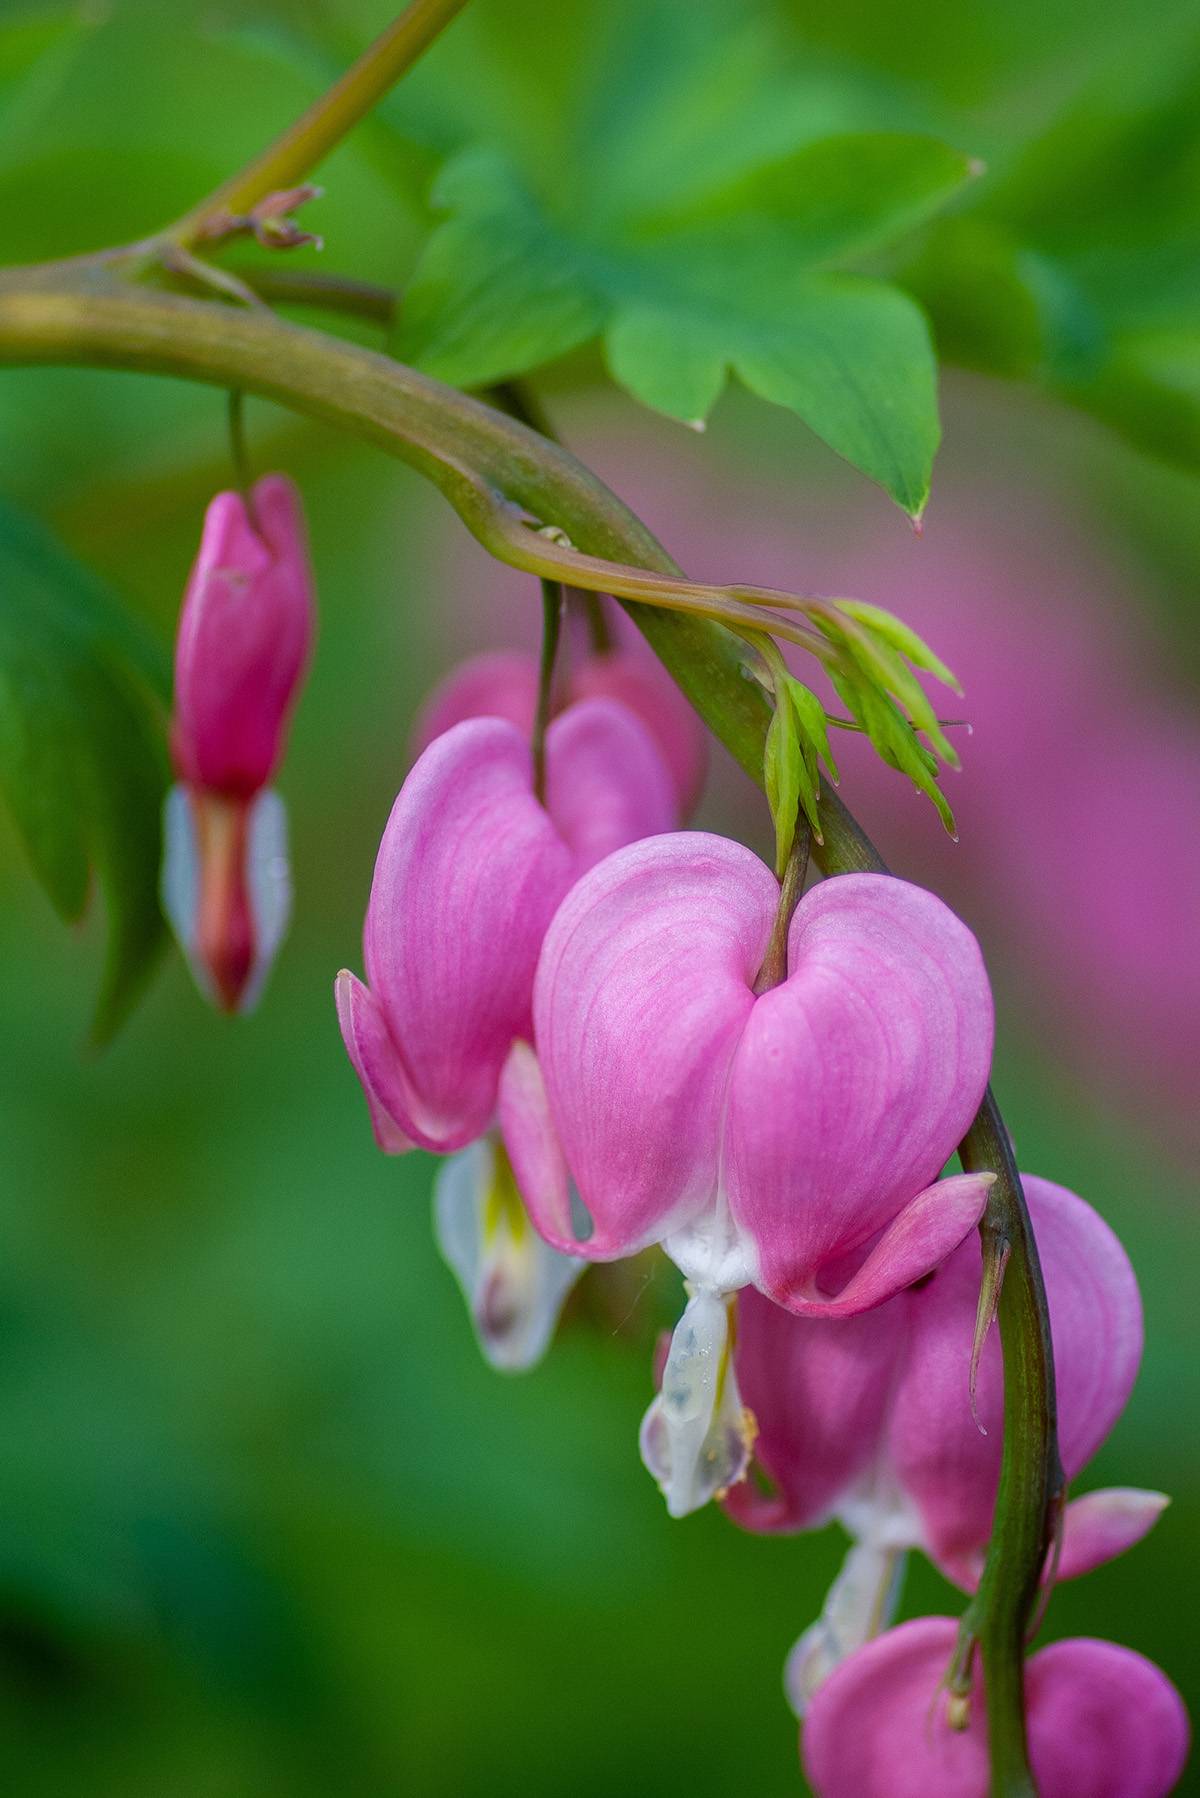
Bleeding Heart. I ADORE bleeding hearts. They’re so unusual, so colorful, so perfect, they look like they might be native to Pandora. Lucky for us they are native to earth and are a delight to grow. 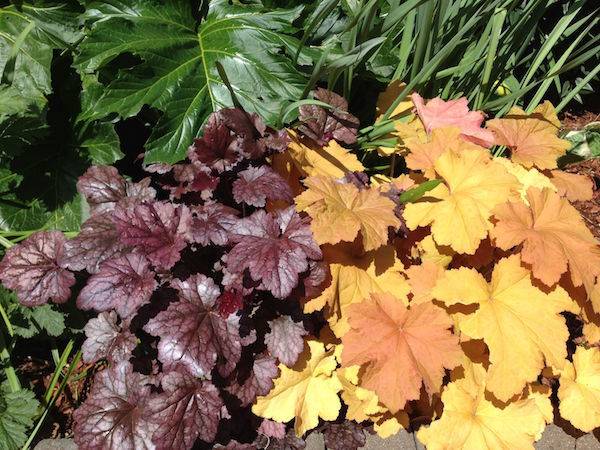
Coral Bells. Coral Bells give it all they got with colorful foliage that delights the entire growing season long, but they also offer delicate flowers in late spring or early summer that some might consider inconsequential. Coral bells don’t mind abuse, but they do mind when the deer much them down to nothing. 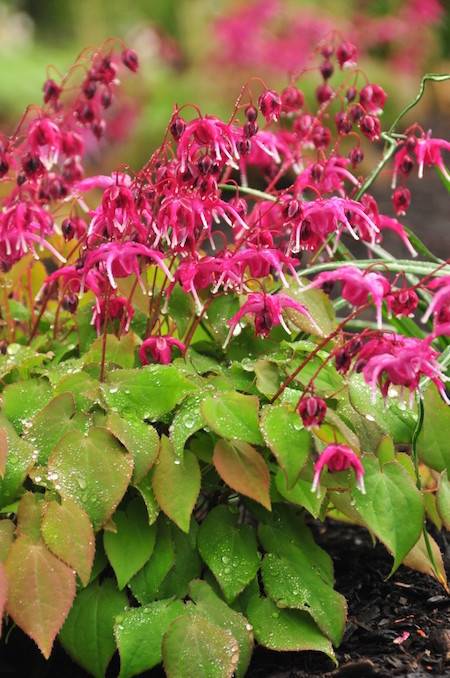
Epimedium. Don’t think you can grow ANYTHING in the shady areas of your garden? Think Epimedium. They can also tolerate sunny spots too. How’s that for hardy? 
Ferns. Can we have a shout out for my favorite fern, the Fiddlehead? I mean, the name alone makes me love it. These things grow like crazy in shady areas around where I live. Even in the middle of the forests. Visit your local garden center to pick varieties adaptable to your situation. 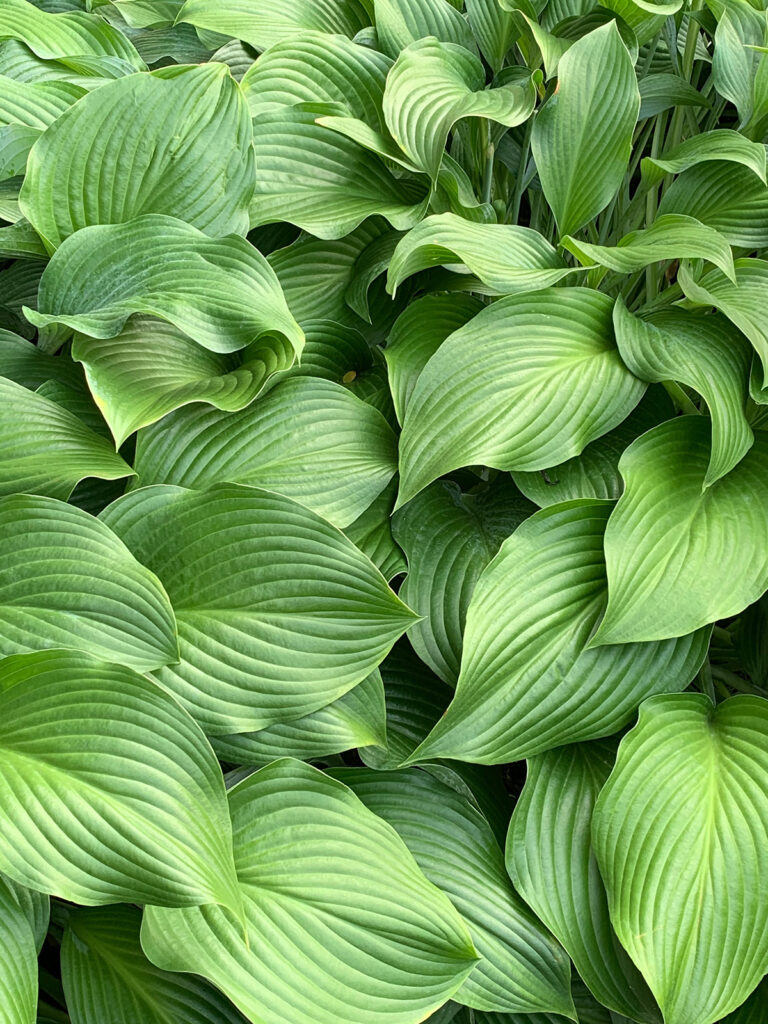
Hosta. (Oh, hosta, how you delight and aggravate.) Delight because they are super easy to grow, they multiply like crazy, they’re a snap to divide, they come in endless varieties (tiny to huge, variegated to not), they produce interesting spiky flowers in late summer, AND they’ll grow right next to a building in the deepest of shade. So why are hosta aggravating too? Because they are like chocolate to deer. Although, the Irish Spring trick works to keep them at bay. It also seems to depend on where the hosta is planted too. Those plants very close to the house are safe, those that are just a few feet away will get munched down to the dirt in one deer-pass. 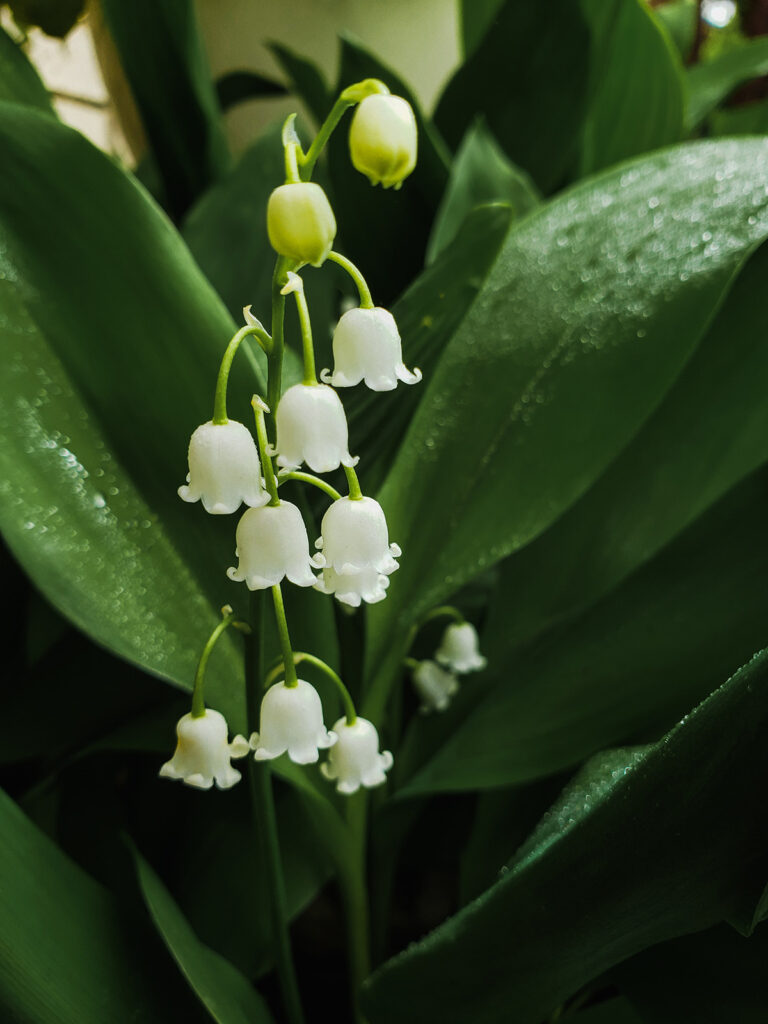
Lily of the Valley. Although the blossoms of these hardy darlings give off a heavenly scent, keep in mind they are toxic. (Which means the deer don’t eat them and neither do the bunnies.) It’s best to have some sort of barrier around these buggers because that can easily take over a garden. 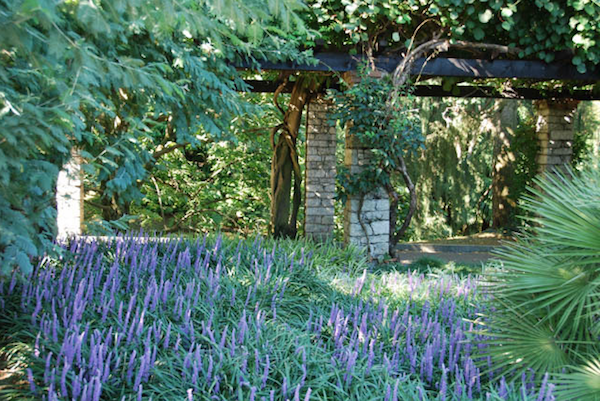
Lily Turf. If it sounds like a ground cover, it is. It has the features of ornamental grass with the benefits of showy purplish flowers in the late summer. 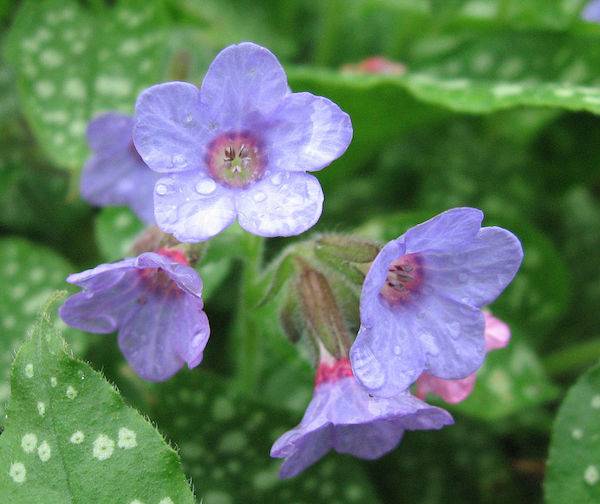
Lungwort. An unfortunately-named plant with beautiful blossoms, lungwort can be grown in shady to sunny areas. 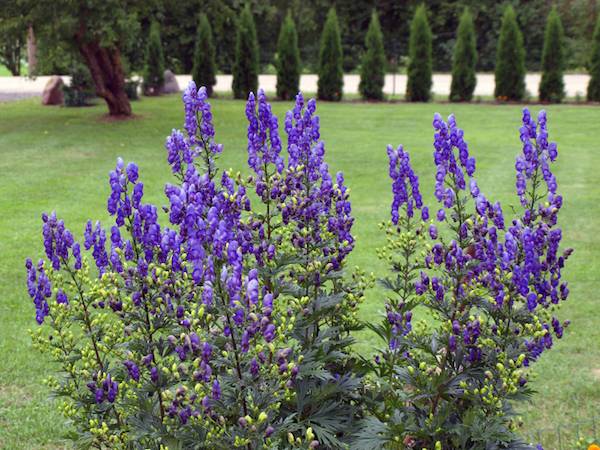
Monkshood. A wildflower, Monkshood is also known as wolfsbane, which means it repels werewolves! Considered a wildflower, Monkshood can grow from 2 to 4 feet tall and produces lovely purplish-blue flowers. (Blue flowers in the garden…swoon.) (Note: Monkshood, or Acontinum napellus, is a poisonous plant, so you should handle it with care. It’s toxic if any part of the plant is swallowed, but is generally not dangerous to handle in the garden, according to Poison.org) 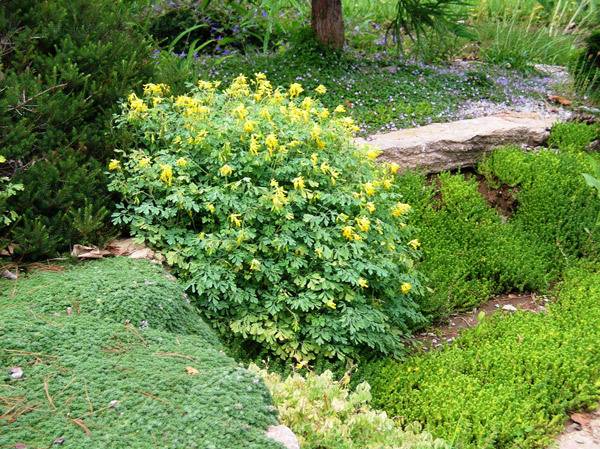
Yellow Corydalis. Another plant that can take a lot of abuse, Yellow Corydalis is adaptable to just about any condition and zone. But be warned, it is aggressive. 
Native PlantsAny roundup of low-maintenance garden plants wouldn’t be complete without mentioning native plants. According to The United States National Arboretum, a native plant is defined as “one that occurs naturally in a particular region, ecosystem, or habitat without direct or indirect human intervention.” Because they are native to the landscape, they are easier to grow which is secondary, really, to their importance to the environment. You can find natives at reputable garden centers near you. And for more information about natives, visit the National Wildlife Federation. 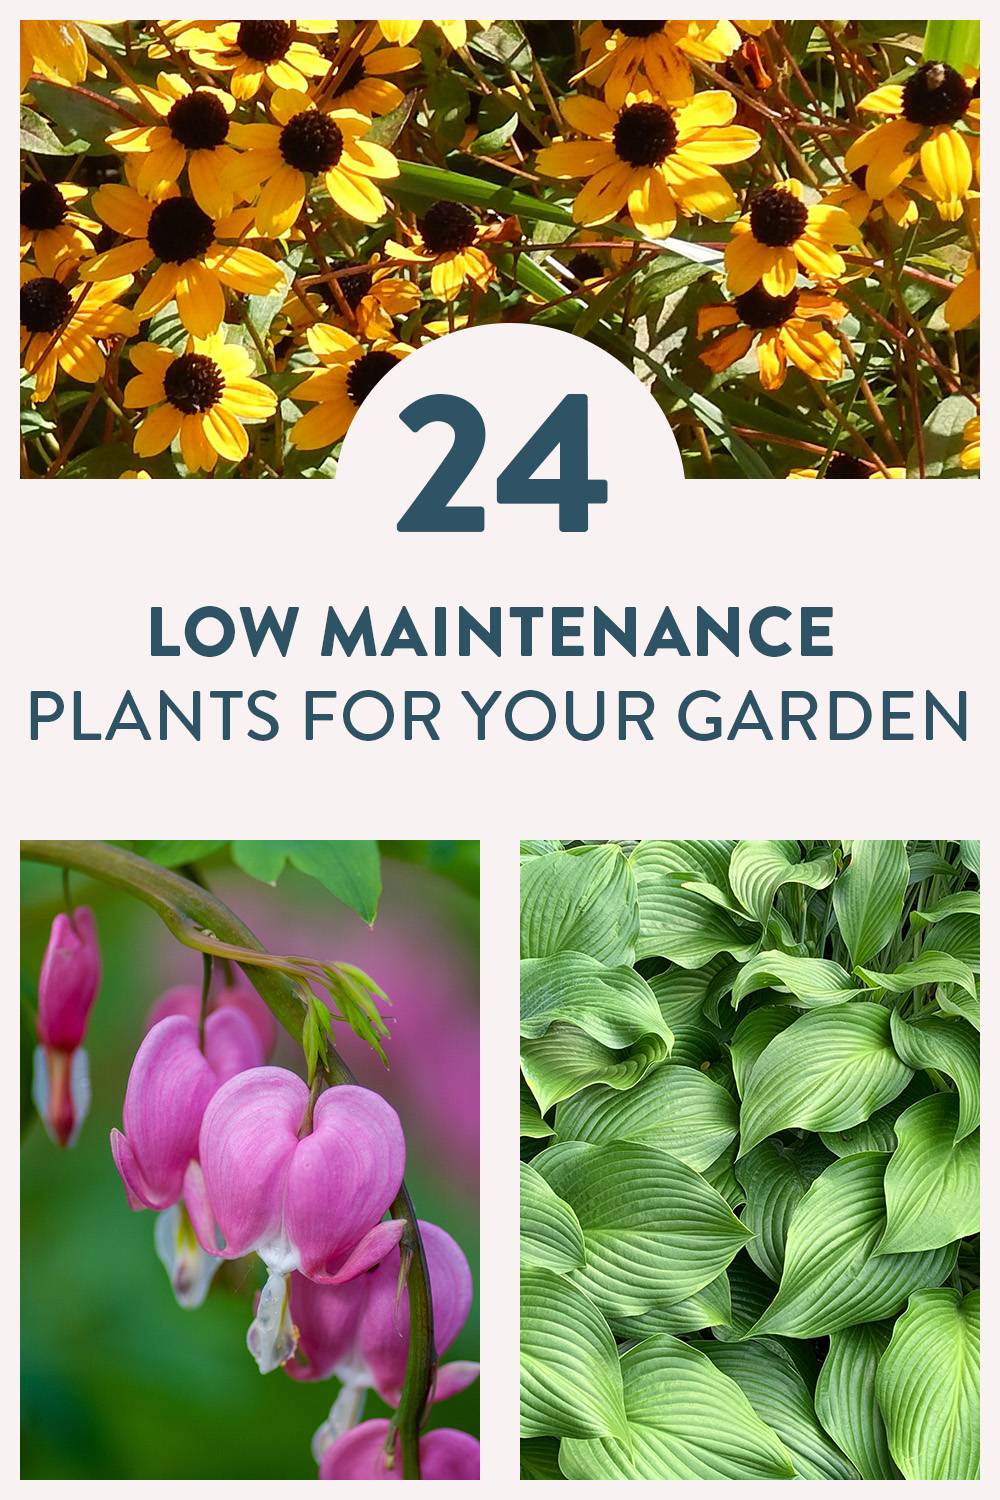
Looking for more gardening inspiration?
The post 24 of the Best Low Maintenance Plants for Your Garden appeared first on Curbly. Via https://www.curbly.com/17957-round-up-24-of-the-best-low-maintenance-plants-for-your-garden 
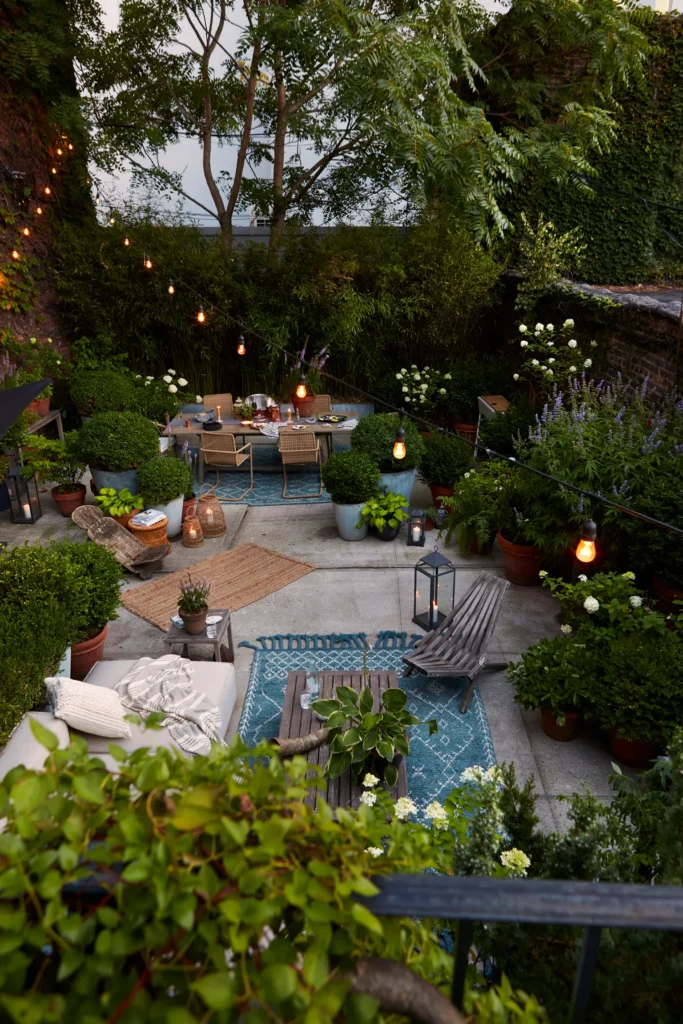
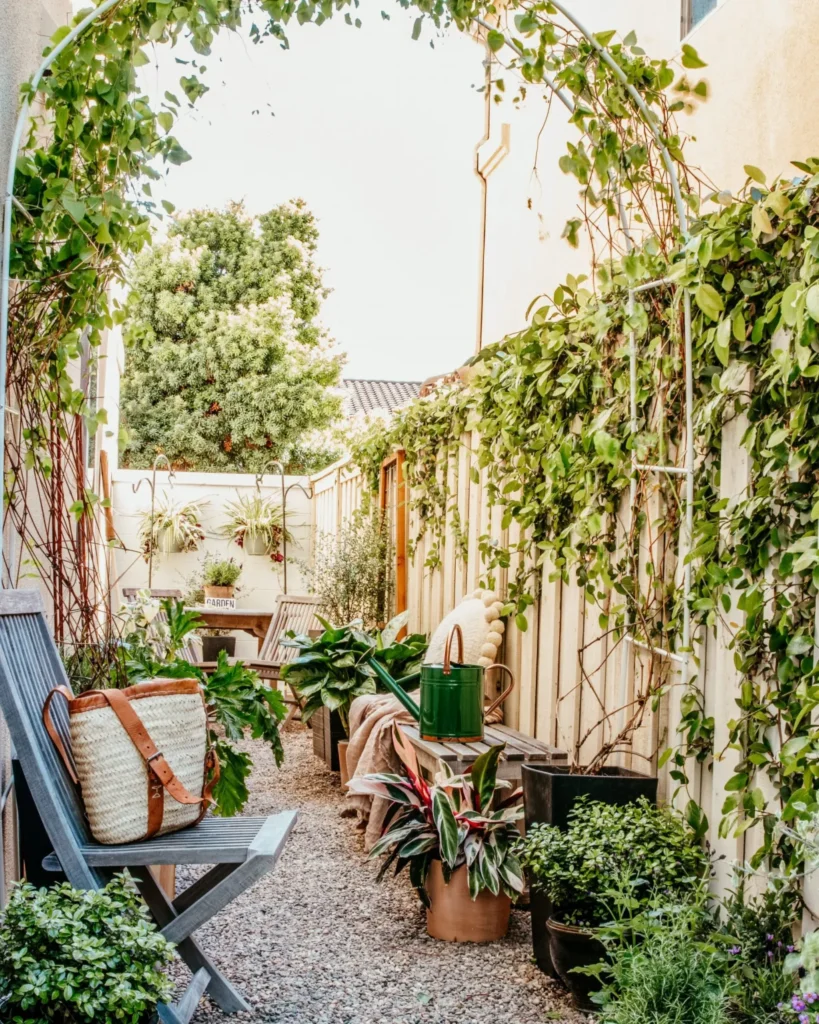
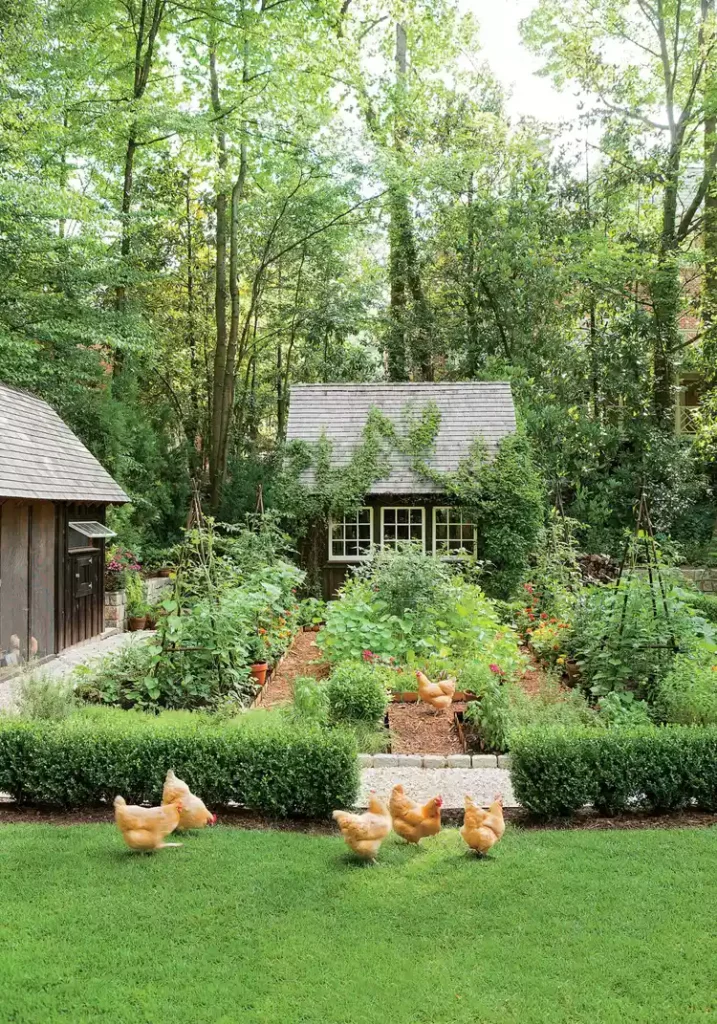
As the weather warms up, thoughts of a beautiful spring garden can take hold. Whether you are new to gardening or a seasoned pro, this guide to planning a stunning spring garden will provide you with plenty of ideas, considerations, and inspiration. From selecting the right plants to designing your layout, this blog post will help you create a vibrant spring garden that you can enjoy all season long. So let’s get started by discussing the basics of creating a stunning spring garden! 
Table of contentsDefine your gardening goalsSpring is the perfect time for a “spring cleaning” of your garden and a great time to plan any changes or updates. To help you pace yourself and tackle each task as it comes up, create a checklist of all the tasks you want to complete before the season begins. The checklist should include any spring bulbs you need to plant, checking for any empty spots in your garden where you might want to add a few new plants, and any maintenance chores that need to be done. Taking care of these tasks early will give you more time to relax and enjoy your landscape throughout the summer. Additionally, take note of any existing spring plants that are beginning to flower — this is a great indication of what you might want to add to your garden in future seasons. Planning your garden goals now will ensure that your garden looks stunning this spring! Choose the right plantsWhen planning your spring garden, you want to make sure you choose the right plants for the season. If you pick plants that aren’t well-suited for the springtime, you won’t get the best results. There are a few things to consider when selecting your plants, including the region where you live, the amount of light your garden will receive, and the growing season. The best plants to start in spring depend on where you live and the climate conditions. Generally speaking, vegetables and flowers that thrive in cooler temperatures are best for starting in the spring. Some popular spring vegetables include lettuce, spinach, carrots, radishes, and beets. Flowers such as pansies, snapdragons, and petunias are also great choices. In addition to vegetables and flowers, you’ll also want to think about selecting spring plants that are low-maintenance. Plants like roses and azaleas require more care than something like lavender or daisies. Choose plants that you can easily care for throughout the growing season. Spring garden maintenance is also important when selecting your plants. To ensure the health of your garden, make sure to water regularly and provide ample sun or shade depending on the needs of each plant. Be sure to fertilize periodically, remove weeds, and protect your plants from pests. With some careful planning and a bit of research, you can create a beautiful spring garden full of lush flowers and delicious vegetables! Spring garden maintenanceSurveying the yard and assessing the trees, mid-level, and ground plane of your garden is key to beginning your spring garden maintenance. You will want to check for any damage sustained over the winter months, and decide if any pruning or trimming needs to be done. You can also choose to add new spring plants to your garden in order to make it more vibrant. Before getting started, it’s important to have the right tools for the job. Tune up tools such as bypass pruners and wooden handles and make sure you have enough supplies to get the job done. Once you’ve checked your tools, you’ll want to give your lawn some attention. Refresh the lawn by sending the mower and leaf blower for servicing, clearing the lawn of winter debris, and looking for areas that need reseeding before mowing. Prune shrubs by removing dead, damaged, and diseased branches, thinning and trimming summer-blooming shrubs, and pruning cold-damaged wood after plants resume spring growth. If you don’t have a garden bed established yet, then you can prepare one by creating a new planting bed. Once your spring garden maintenance is complete, all that’s left is to enjoy your hard work! Sit back, relax, and watch the beauty of nature come alive. Consider the layout of your gardenWhen you plan your spring garden, consider the long-term goals for your yard. Not only do you need to decide what you want to plant this season, but also the overall look and feel of your garden for future years. Make sure that the plants you choose are suitable for the amount of water and sunlight available in your area, as well as able to withstand your local climate. Adding pops of color is a great way to bring your garden to life! Incorporate flowering spring plants such as pansies, daffodils, and tulips, or bright colored foliage such as purple fountain grass and coleus. If your yard has shadier areas, look for plants that thrive in less sun like ferns and hostas. Consider other features such as pathways, benches, bird baths, or sculptures to complete your design. Finally, don’t forget to include some native plants to attract beneficial wildlife like butterflies, bees, and birds. By considering the layout of your garden and adding colorful accents, you will be able to create an inviting and thriving oasis. With some thoughtful planning, you can turn your garden into a stunning space for the entire family to enjoy! Get inspired by other gardensOne of the most fun parts of planning a spring garden is getting inspiration from other gardens. From traditional cottage-style plantings to lush and luxurious botanical gardens, there are plenty of ideas to draw from. Look for commonalities in garden designs that appeal to you and think about ways to incorporate them into your own garden. Look for ideas on different ways to feature spring plants, like beautiful flowering shrubs, showy trees, and seasonal annuals. Consider color schemes, form and texture, and unique accents like structures and water features. By taking some cues from these stunning examples, you can create a spring garden that reflects your personal style and is perfectly tailored to your needs. 

Have fun planning your spring garden!Gardening is a wonderful way to express your creativity and make your home look beautiful. With the right combination of spring plants, you can create a stunning spring garden that adds color and life to your outdoor space. Whether you’re planting an herb garden or creating a vibrant flower bed, planning your spring garden can be an exciting and rewarding experience. Be sure to take the time to plan out your garden in detail, so that you can enjoy a lush and blooming paradise for the warmer months. And don’t forget to keep your plants well watered, fertilized, and pruned – your spring garden will thank you for it! Looking for more garden inspiration and ideas?
The post Sprouting Ideas: Your Guide to Planning a Stunning Spring Garden appeared first on Curbly. Via https://www.curbly.com/sprouting-ideas-your-guide-to-planning-a-stunning-spring-garden 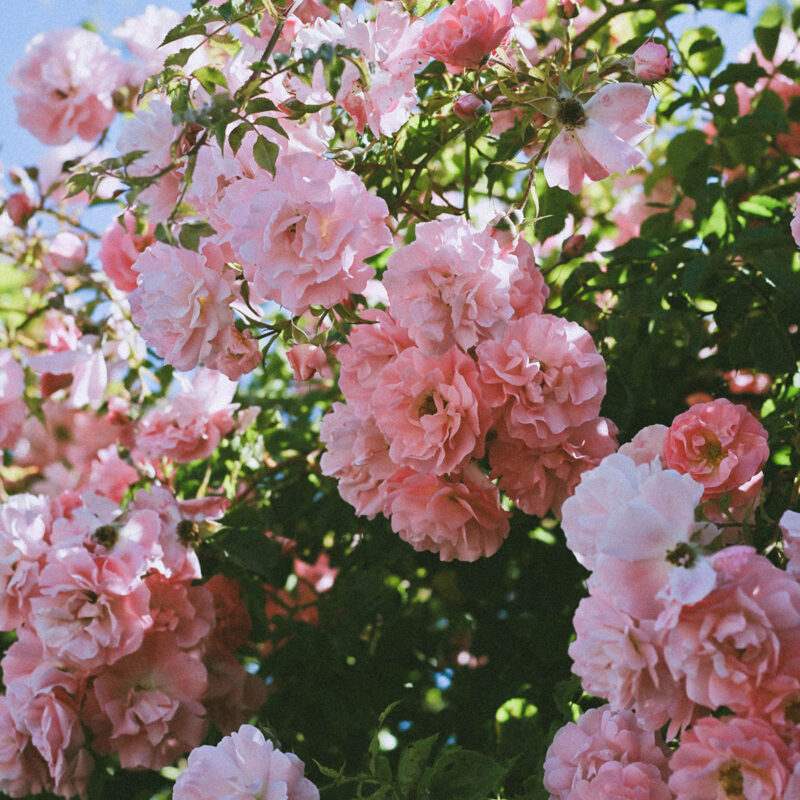
Landscaping can be pricey, but there are ways to lessen the expense if you put in a bit of extra effort and some ingenuity. Whether you’re a homeowner trying not to break the bank or a renter trying not to invest too much in a temporary space, there’s a budget-friendly landscape option for you! Below you’ll find some of our favorite tips, but one of the most important things you can do when you’re on a budget is to start with a landscaping plan. Having a clear idea for your yard will let you:
With a little planning and a handful of these tips, you’ll be able to keep your yard looking sharp without hiring a landscape professional. Here are our favorite budget landscaping ideas. Budget Landscaping Tips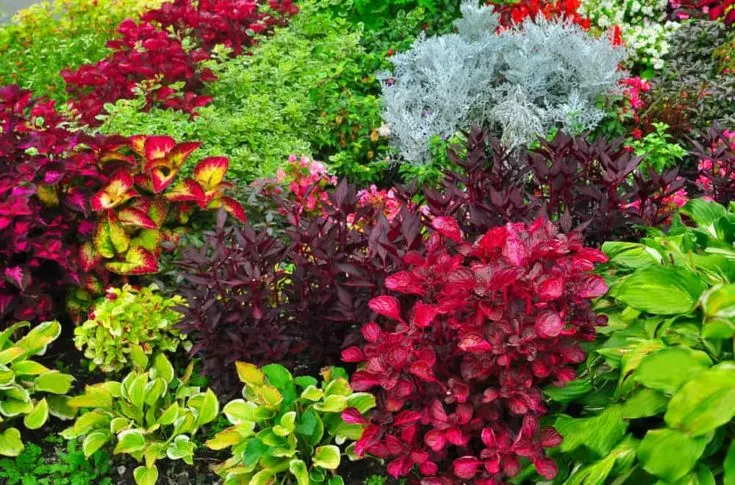
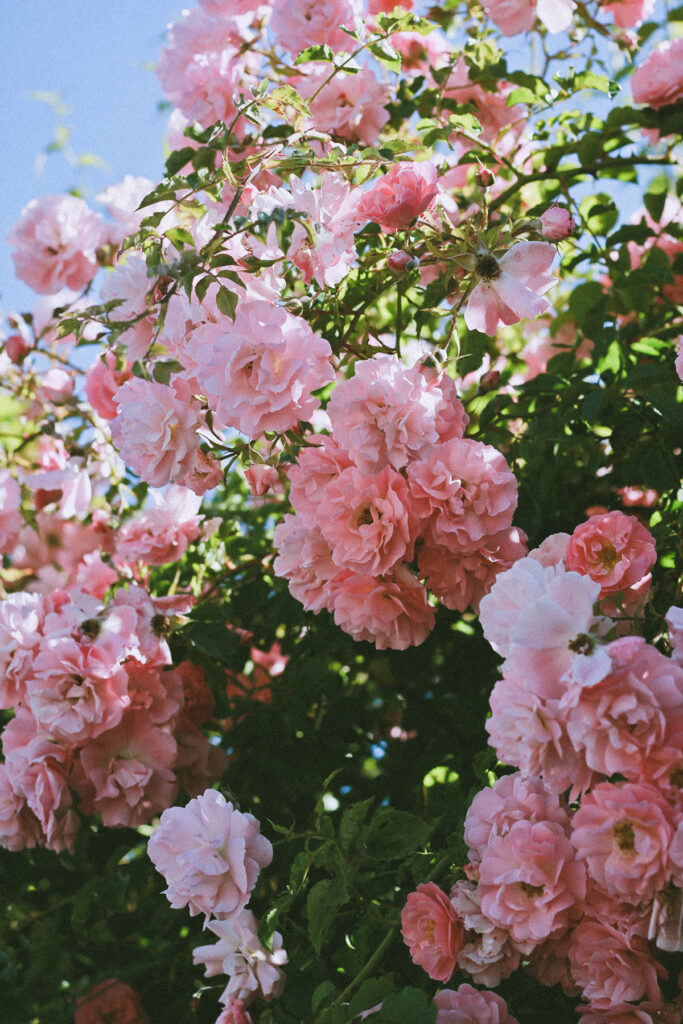
1. Choose plants with bright colored blooms for big impact.Flowering plants with big, bright blooms help fill space and draw the eye in. Look for colors that complement or offset the shades of your home’s siding or stucco. 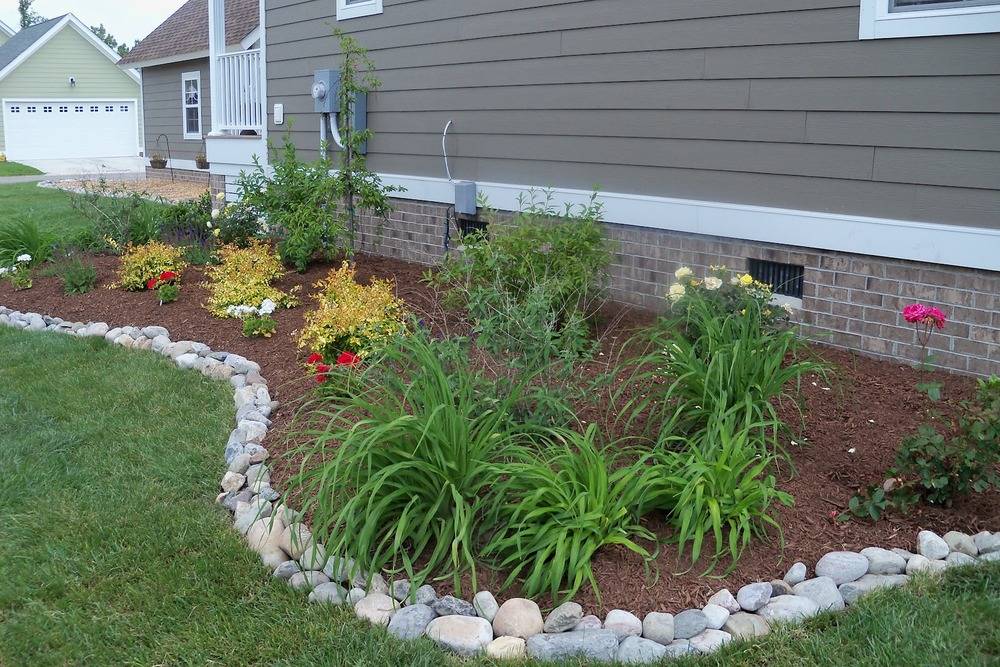
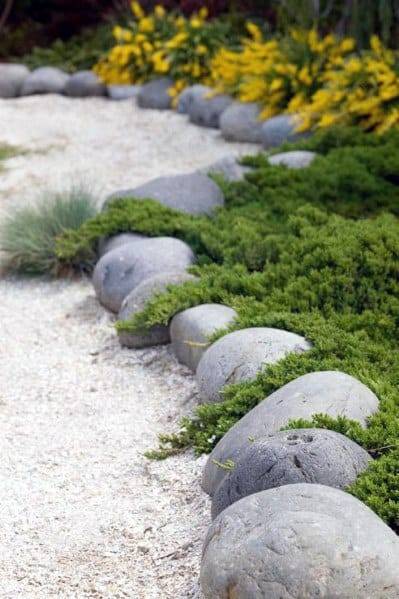
2. Collect rocks and use them to edge the gardenRather than buying brick or other garden border materials, find stones for free and use them to create an attractive divider between the garden and the lawn or line a pathway. You can also repurpose the stone, brick, or gravel you already have in your yard in new and interesting ways. 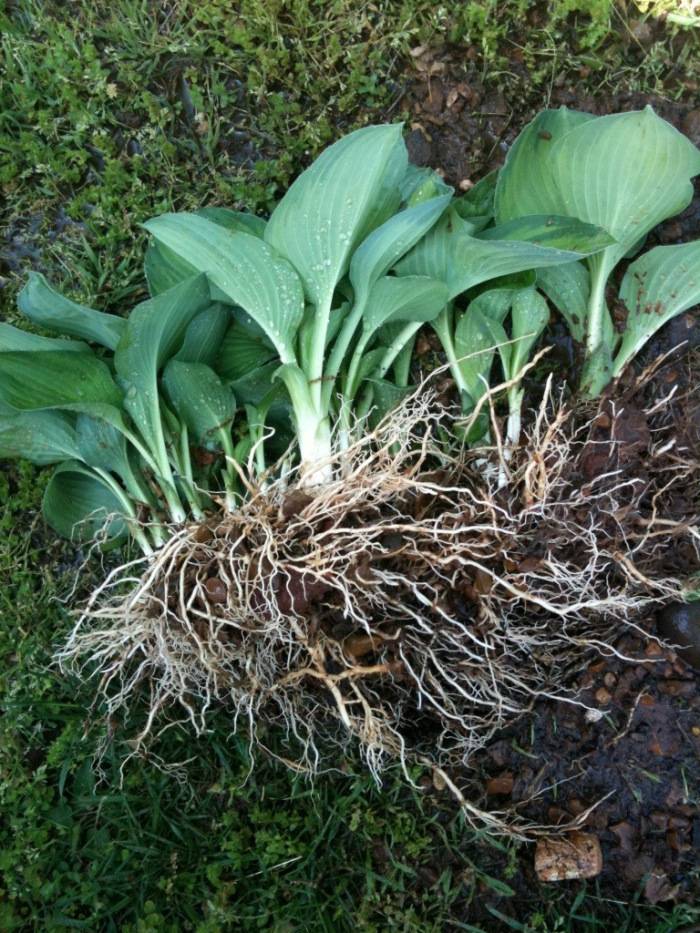
3. Instead of buying 5 plants, buy one and divide it.Divide plants, like hostas, lilies or other bulbs, and spread them throughout your yard. You’ll save money by turning one plant into several. Dividing plants is pretty easy and the perfect project for beginners; just dig up the entire plant, making sure to keep the root-ball intact. Then carefully split up the roots and stems until you have separated the plant into several chunks. Each group can be re-planted, and should continue to grow if watered and maintained appropriately. Read more here. 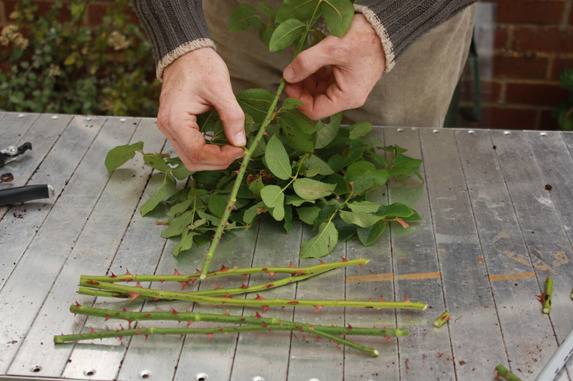
4. Ask a neighbor for rose-bush cuttingsSkip the garden center and ask your neighbor if you can take a few cuttings from their rose bushes. Then use this tutorial from Amateur Gardening to learn how to easily propagate roses. 5. Turn kitchen refuse into compost to improve garden soil qualityLearn to compost! Put garden and kitchen waste to good use and help add important nutrients back into the topsoil. Learn more about composting here. 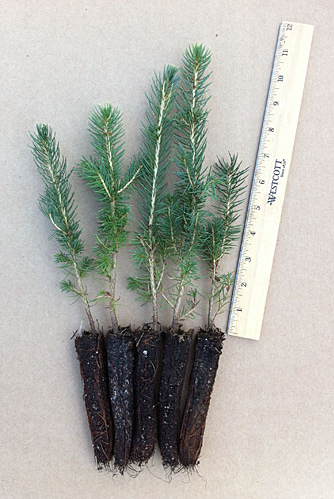
6. Buy evergreen seedlings instead of larger potted trees.Seedlings will take a bit longer to grow and require patience and planning ahead, but they’re much less expensive. This is also an affordable way to go when planting privacy shrubs. 
7. Upcycle old materials.Use this tutorial from Foxy Folksy to find out how to make a raised garden bed out of a couple of old wooden pallets. We’ve seen loads of great cheap landscaping ideas using all sorts of up-cycled items in the garden:
8. Trade resources with friends and neighborsTool sharing is a gray way to save money. Rent a wood chippers or soil aerator, and split the costs with friends. You can also split seed packs, plant packs, and more. 9. Buy pots and planters used or on sale.Yard sales, flea markets, NextDoor, and Craigslist are all great resources for finding really affordable pots and plant containers. 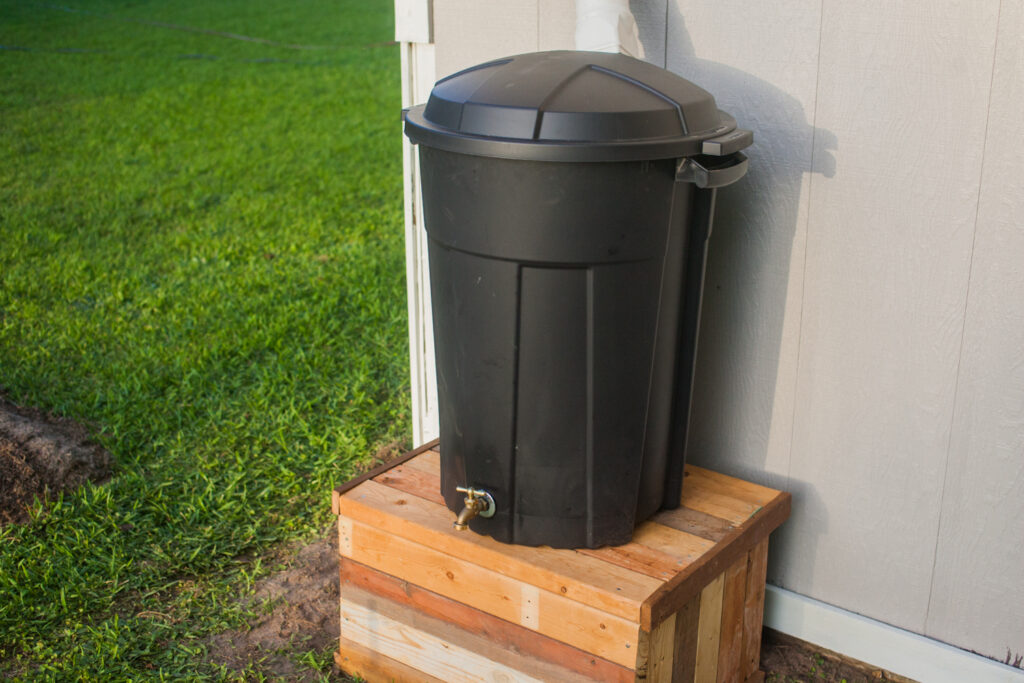
10. Construct a rain barrel to collect rain to water your garden and lawn.This will lower your water bills (and help the environment too!). Get the rain barrel tutorial from Man Made DIY. Use a downspout adapter to direct water flow. 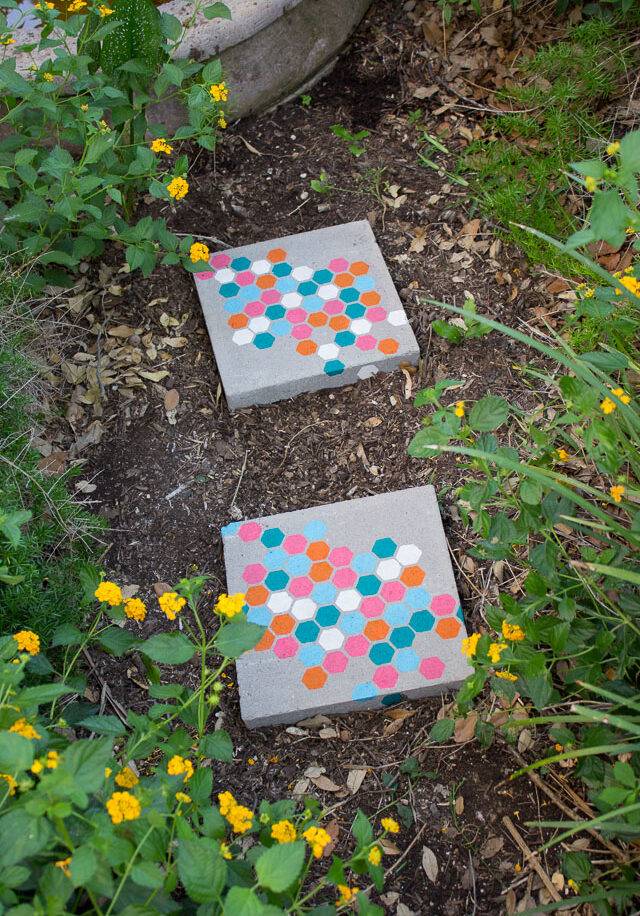
11. Add some color by painting rocks, bricks, or landscaping pavers.You know how sometimes you just get tired of looking at boring, plain, red bricks? Well, guess what? Other people do to! Which is why those materials can often be found for cheap, or free. But with a fresh coat of paint, you can turn them into something special. Try painting river rocks white for a clean, modern-looking ground cover option. Or add pops of bright color to an old brick wall. 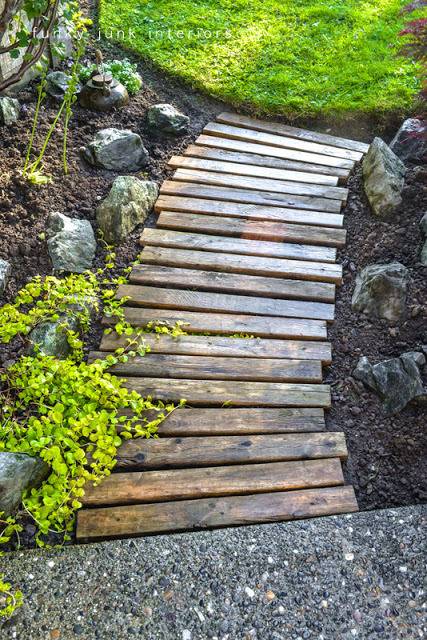
12. Use pallets for cheap stepping stonesWood shipping pallets can be found for free almost anytime (or bought for cheap). Look for them by the side of the road, or at warehouse loading docks (make sure to ask before you take them; usually people will be happy to let you have them). These wood structures are built to be used outside, and can easily be turned into simple pathways (as above) or other outdoor landscaping features. 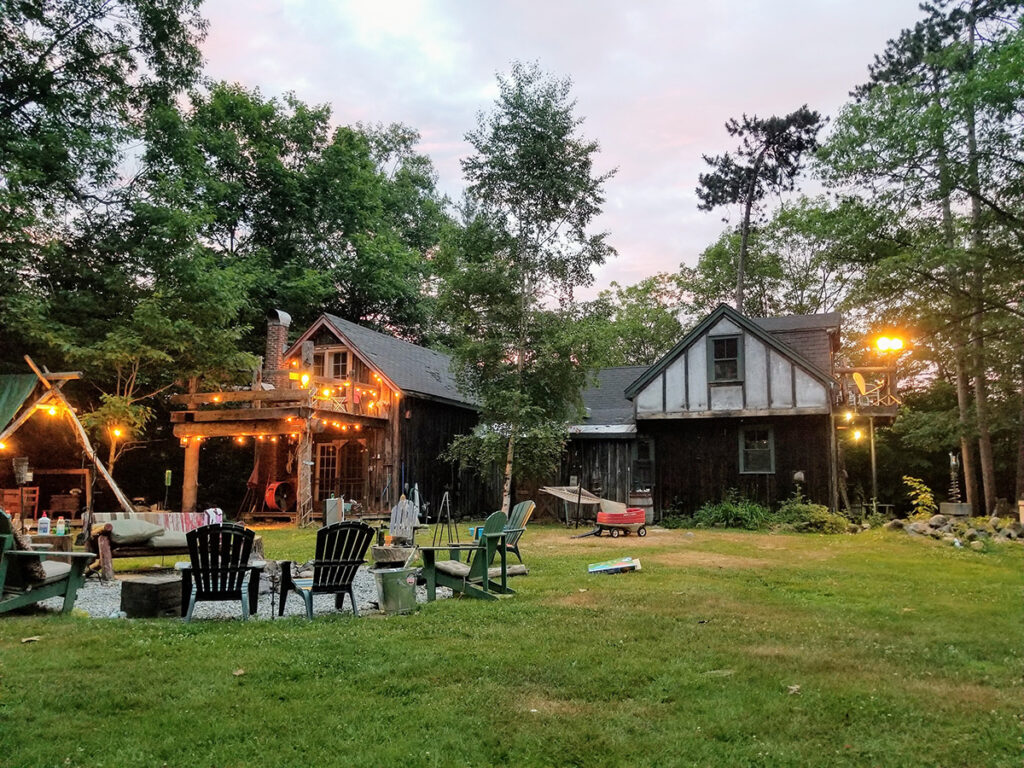
13. Add lighting elementsSimple, carefully-placed lighting can make even the most ordinary yard look amazing. And the best thing? Lights have gotten really affordable over the last few years, thanks in part to the advancement of LED technology. In many cases, you may not even need additional electrical wiring, because LEDs use such little electricity that they can be solar powered. Try a rope light along the edge of a garden, or spot lights to feature large plants or trees. Adding lighting is a small project that adds a lot to any outdoor space. 
14. Start the process early and grow plants from seedSeeds are very budget-friendly compared to plants at the nursery. Plan ahead and sprout all of your favorite garden vegetables and flowers from seed. While the process is time-consuming, it’s an easy way to grow a lot with just a little! 15. Go with perennials instead of annualsPerennials last much longer than annuals, hence the names. Even so, I always get the two confused. Annuals only last one season and need to be replaced year after year. While the perennials may cost a bit more, but they’ll be with you for the long term. 16. Get the mulch pile instead of the fancy blow-in mulchMany cities (lookin’ at you Portland, OR!) offer free much to residents. Mulch is a great way to keep weeds under control and your yard looking sharp. The only catch is the city usually leaves it in a big pile in your driveway and it’s up to you to spread it around your yard. This service can save you hundreds, even thousands, on much services. So get that wheelbarrow out and reach out to your city tree services department for the details. In conclusion, landscaping can be an expensive venture, but it doesn’t have to be. By using some of the tips mentioned in this post, you can transform your outdoor space on a budget. Whether you opt for low-maintenance plants, repurpose materials, or tackle some DIY projects, you can achieve a beautiful and functional outdoor oasis without breaking the bank. With a little creativity and effort, you can make your landscaping dreams a reality. So don’t let a tight budget hold you back from creating a space you love to spend time in. Get started today and enjoy the fruits of your labor all year round. 
Looking for more yard and garden inspiration?
The post 15 Tips For Landscaping On A Budget appeared first on Curbly. Via https://www.curbly.com/tips-for-landscaping-on-a-budget 
There are many uses for olive oil beyond what you might normally think of in the kitchen. It’s an incredibly versatile ingredient that you can put to good use in a lot of interesting situations. It’s great for everything from your skin and face to polishing furniture and fixing that squeaky door! 
Nutritionists will continue to tout olive oil for its high content of healthful, monounsaturated fats, like oleic acid, and polyphenols. The fruit oil practically propelled the entire Western world in antiquity and is mentioned in nearly every sacred text this side of the Tigris and Euphrates. Health benefits of olive oilAs a cooking fat, it’s high up on the heart-smart list…which works out, ‘cause it tastes darn good. Did you know that olive oil is not just a tasty addition to your meals, but it also comes with a range of health benefits? Olive oil is loaded with healthy monounsaturated fats, which are great for your heart and can help lower bad cholesterol levels. It’s also rich in antioxidants, which can help reduce inflammation in your body and protect your cells from damage. Additionally, studies have shown that olive oil consumption may have a positive impact on cognitive function, as well as reducing the risk of certain types of cancer. So, the next time you’re cooking up a storm in the kitchen, consider reaching for some extra-virgin olive oil for both its delicious flavor and its many health benefits. As a tip, Consumer Reports has rated Goya brand extra virgin olive oil (from Spain) as the best general-purpose olive oil, and as their best buy. I whole-healthy-heartedly concur. 
There are plenty of other olive oil uses around your home, outside of the sauté pan and the salad dressing. There’s no need to waste your expensive Greek or Spanish Extra Virgin for these tasks, just grab a bottle of inexpensive, domestic olive oil for around-the-house use. You can cut down on excess oil by investing in a refillable spray can, such as the Misto. Top 25 uses for olive oilHere you’ll find 25 of our favorite ways to use olive oil, along with a handy cheatsheet to download and print. 1. Shaving cream. Olive oil can provide a safe and natural lubricant for a close shave. Rub in an extra teaspoon after washing your body or face once finished. 2. Wood Furniture Polish. Wipe with a teaspoon of olive oil and a soft rag. Add a bit of vinegar of citrus juice to bulk up the cleaning power, and add a fresh scent. 
3. Fingernails. Use a bit of olive oil to moisturize cuticles, or mix oil and water and soak your hands before a manicure. 4. Easy cleanup of measuring cups and spoons. Rub or spray olive oil on your measuring tools for easy clean-up of sticky substances like honey, grain mustards, sugar syrups, molasses, and nut butter. 5. Control hair frizz. Comb a bit of olive oil through dry hair to tame the frizz and flyaways on humid days or in the winter. Pop a shower cap on if you want to use it as a deep hair and scalp conditioner and avoid getting it on your upholstered furniture. 6. Free a stuck zipper. Use a cotton swab to apply olive oil to the teeth of a zipper, then gently ease the tab down to unstick a stuck zipper. 7. Care for your kitty. Add a teaspoon of olive oil to your cat’s food to help prevent hairballs, and provide a shiny coat. 
8. DIY Lip balm. Mix olive oil and melted beeswax in a 1:1 ratio, with essential oil for fragrance, and say goodbye to dry and chapped lips. 9. Stop Snoring. Take a sip of olive oil before heading to bed. It might lubricate your throat muscles, and stop yourself, or your partner, from snoring. 10. Shine stainless steel and brass. Rub a bit of olive oil on a clean rag to prevent streaks, corrosion, and tarnish. 11. Exfoliate your face and hands. Rub your skin with olive oil, then scrub with sugar or coarse salt, and rinse. 12. As you bathe. Add a few tablespoons of olive oil to your running bath water. You’ll be amazed when you towel off. 13. Remove makeup. Dab a bit under your eyes, on your cheeks and forehead, then wipe with a damp cloth. 14. Cure an earache. Very carefully, use a cotton swab to apply olive oil to the outside ear cavity to help with earaches and remove excess ear wax. 15. Remove paint from your skin. Rub on olive oil onto messy hand and arms (or faces) and allow the oil to soak into the skin for five minutes, then rinse with soap and water. 16. Treat lice. Apply olive oil to your youngster’s hair, and leave on for at least 40 minutes. Shampoo twice, then apply a preventative. 17. Stop a throat tickle. Take a sip of olive oil to stop the itchy flicker that is making you cough. 
18. Fix a squeaky door. Use a rag or cotton swab to apply olive oil to the top of a problematic or rusted hinge in your home or automobile. 19. Shoe polish. Rub down your shoes with just a spray of olive oil to maintain their shine. 20. Massage oil. It works… 21. Soften your skin. Rub olive oil daily on notoriously dry areas, such as your feet or elbows, especially after a shower, shaving, or waxing. Bonus, olive oil contains vitamin E. 22. Easy clean up of garden tools. Spritz some olive oil on your tools to cut down on dirt buildup. 23. Condition leather. Rub olive oil into worn leather, such as a baseball gloves, furniture or leather shoes, and let set for 30 minutes, then wipe away any excess. 24. As a hair tonic. Comb some olive oil through your hair for the vintage look of pomade without the build-up, or add a bit to wet hair for a grungy, but clean, look. 25. Cure diaper rash. Gently wipe on thin layer of olive oil to your baby’s bottom to help with the irritation of diaper rash. 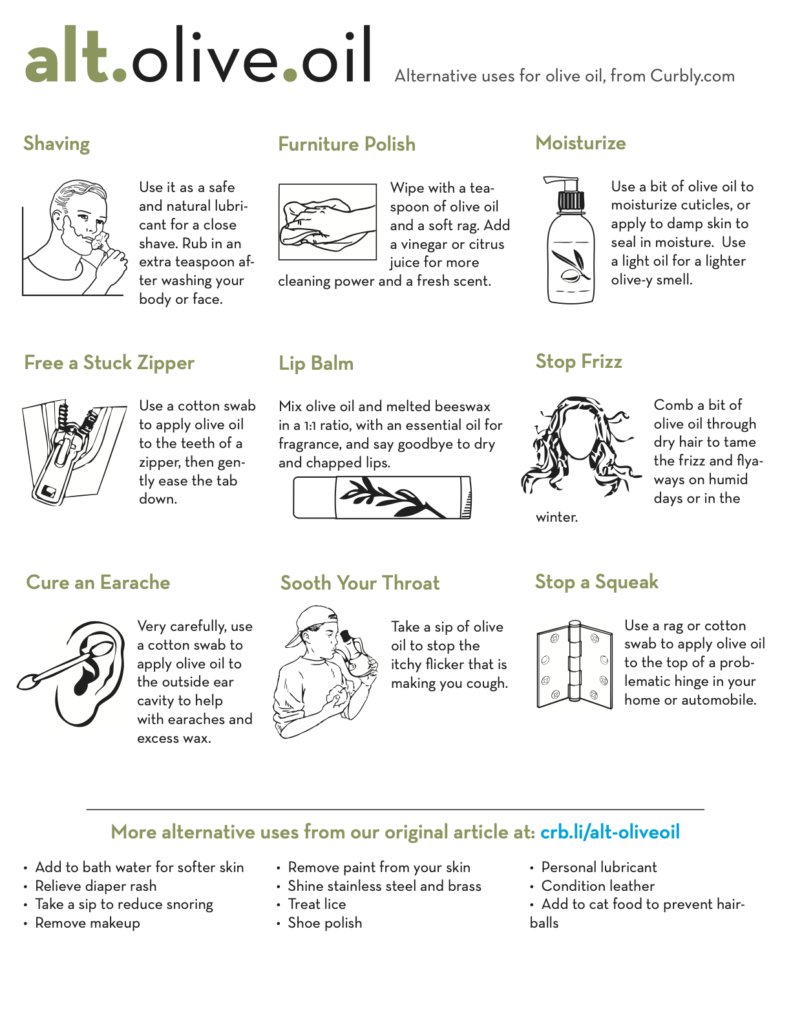
There you have it, folks! As you can see, there are countless uses for olive oil beyond just cooking. From polishing your furniture to nourishing your hair and skin, this versatile oil has got you covered. And not only is it great for your home and beauty routine, but it’s also packed with health benefits, making it a must-have in any kitchen. So, the next time you’re looking for a natural, multi-purpose ingredient, reach for a bottle of olive oil and let its magic do the rest. Happy exploring! Curious about alternative uses for vinegar? Check out this useful cheat sheet! The post 25 Brilliant Ways to Use Olive Oil Around the House (Plus a Free Download) appeared first on Curbly. Via https://www.curbly.com/olive-oil-uses |