Have you ever wondered why traditions are so prevalent and feel so important around the holidays? As it turns out, traditions reinforce important belief structures. They comfort us with a sense of belonging, and help us express gratitude! Traditions cement existing bonds, and create new ones. If those aren’t reason enough for you to hop on board the Tradition Train, consider it this way: traditions usually involve food, and are usually just plain fun. Christmas traditions vary in their details but the reasons behind them are remarkably similar. Read on for fifteen real-life stories on the importance of tradition, from my community to yours. On maximizing the holiday season:
On sweet fathers:
On giving back together:
On movies:
On tree decorating:

On Christmas Eve:
On accidental traditions:
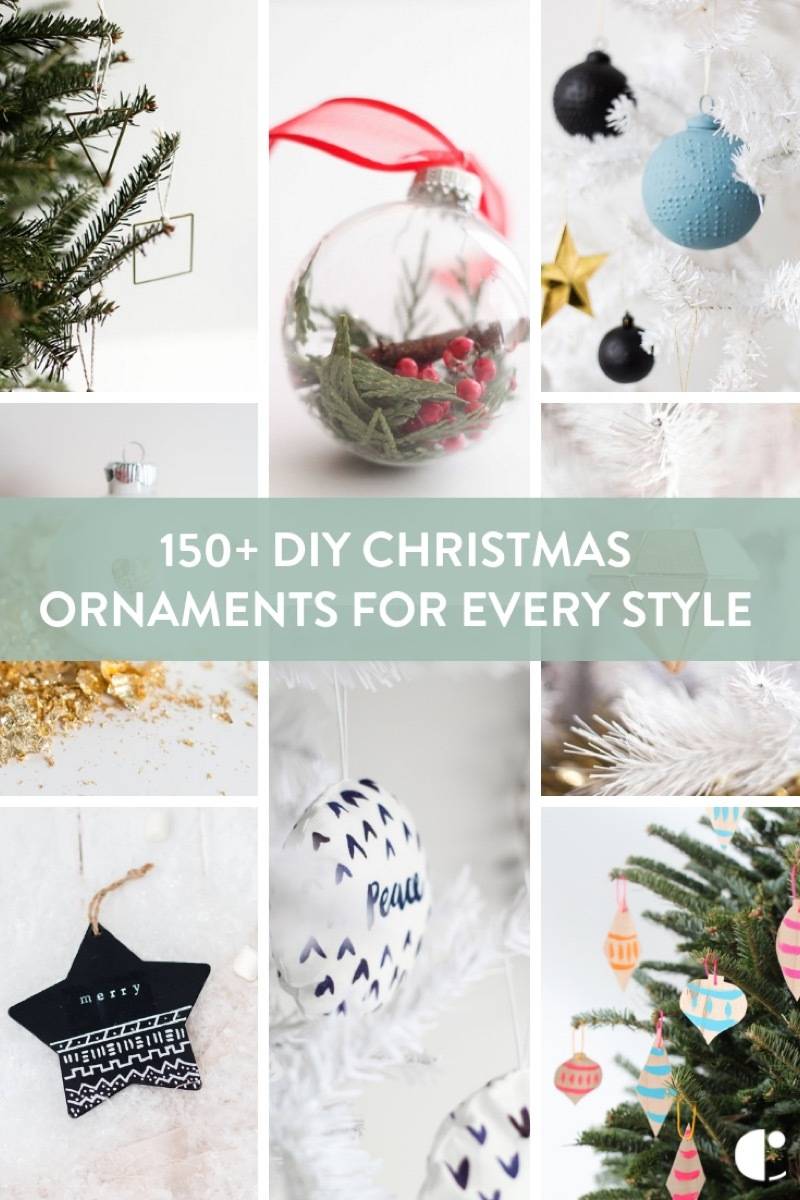
Let this be an encouragement to embrace your existing traditions and consider establishing new ones! We all want to celebrate our story and recognize that we belong to each other. Traditions are key to doing just that! Happy holidays, everybody. Making your own Christmas ornaments every year is a great opportunity to create tradition. Check out this list of over 150 DIY ideas for some inspiration!
The post What’s in a Tradition? 15 Stories of Holiday Habits appeared first on Curbly. Via https://www.curbly.com/holiday-traditions
0 Comments
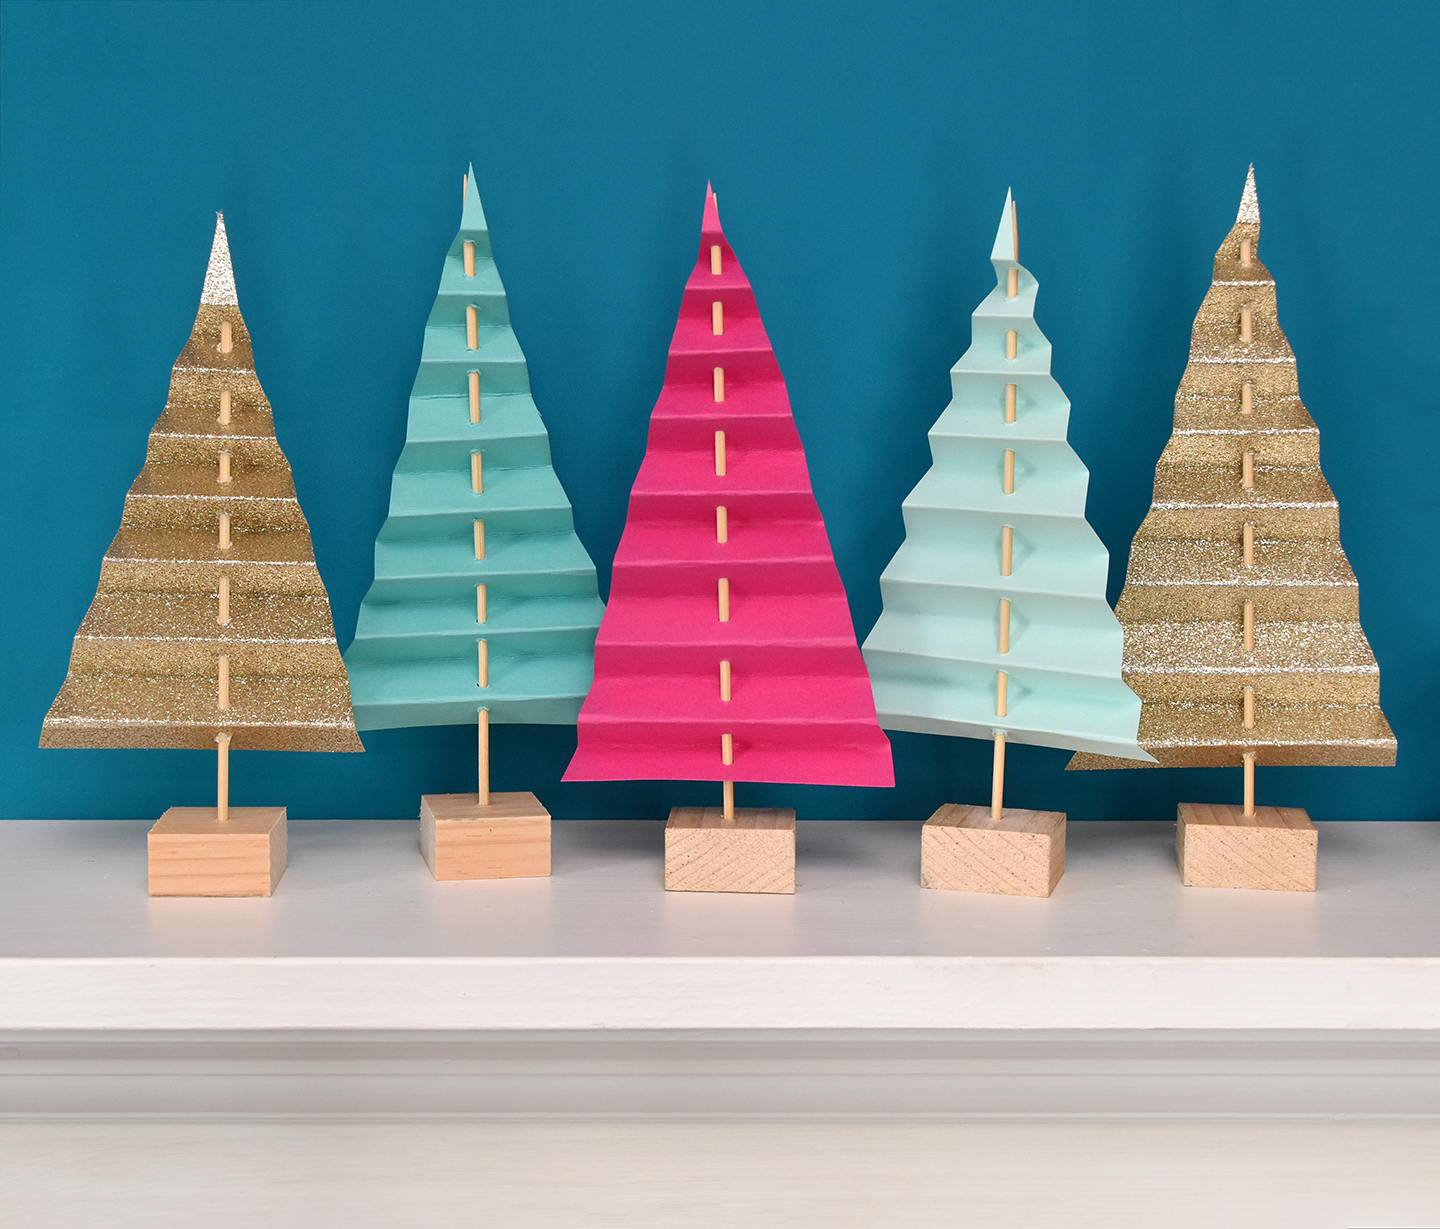
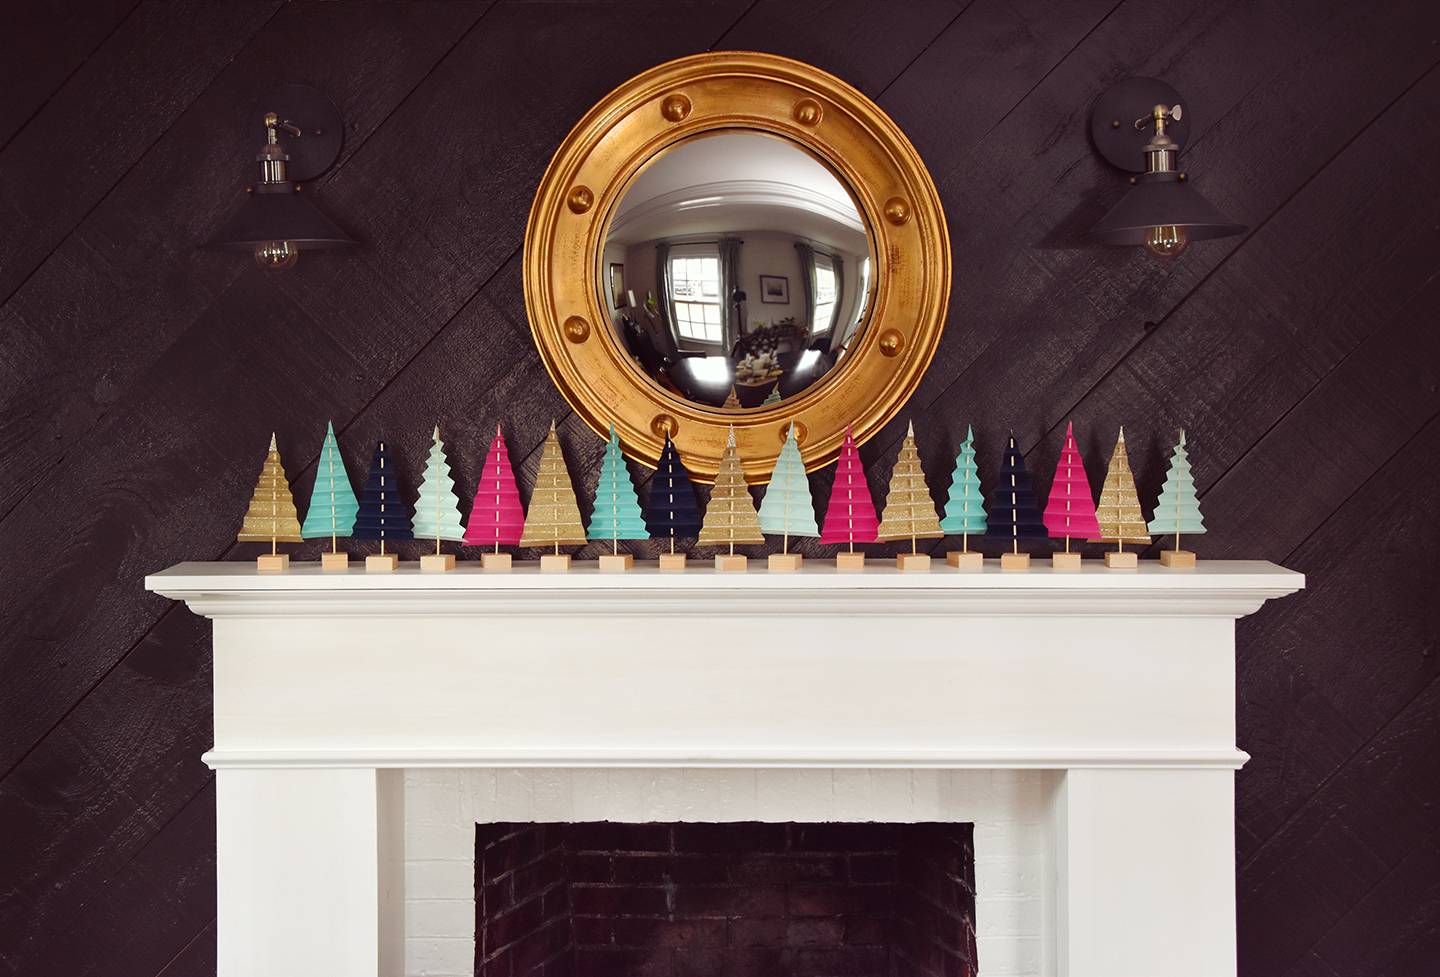
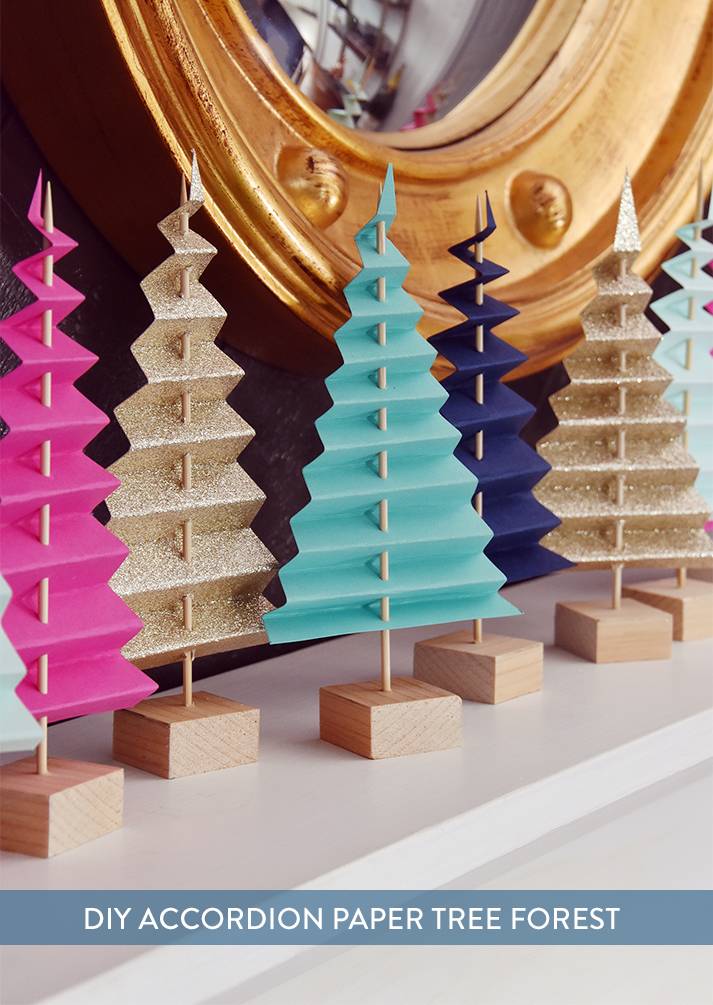
Ever since I built a mantel a couple of years ago, I’m always on the hunt for fun new ways to decorate it. So as I browsed the paper aisle at my local craft store, it hit me – a folded paper tree forest! I’m a big fan of non-traditional colors, so I bought a few of my favorites and got to work. Click through to check out the full tutorial.
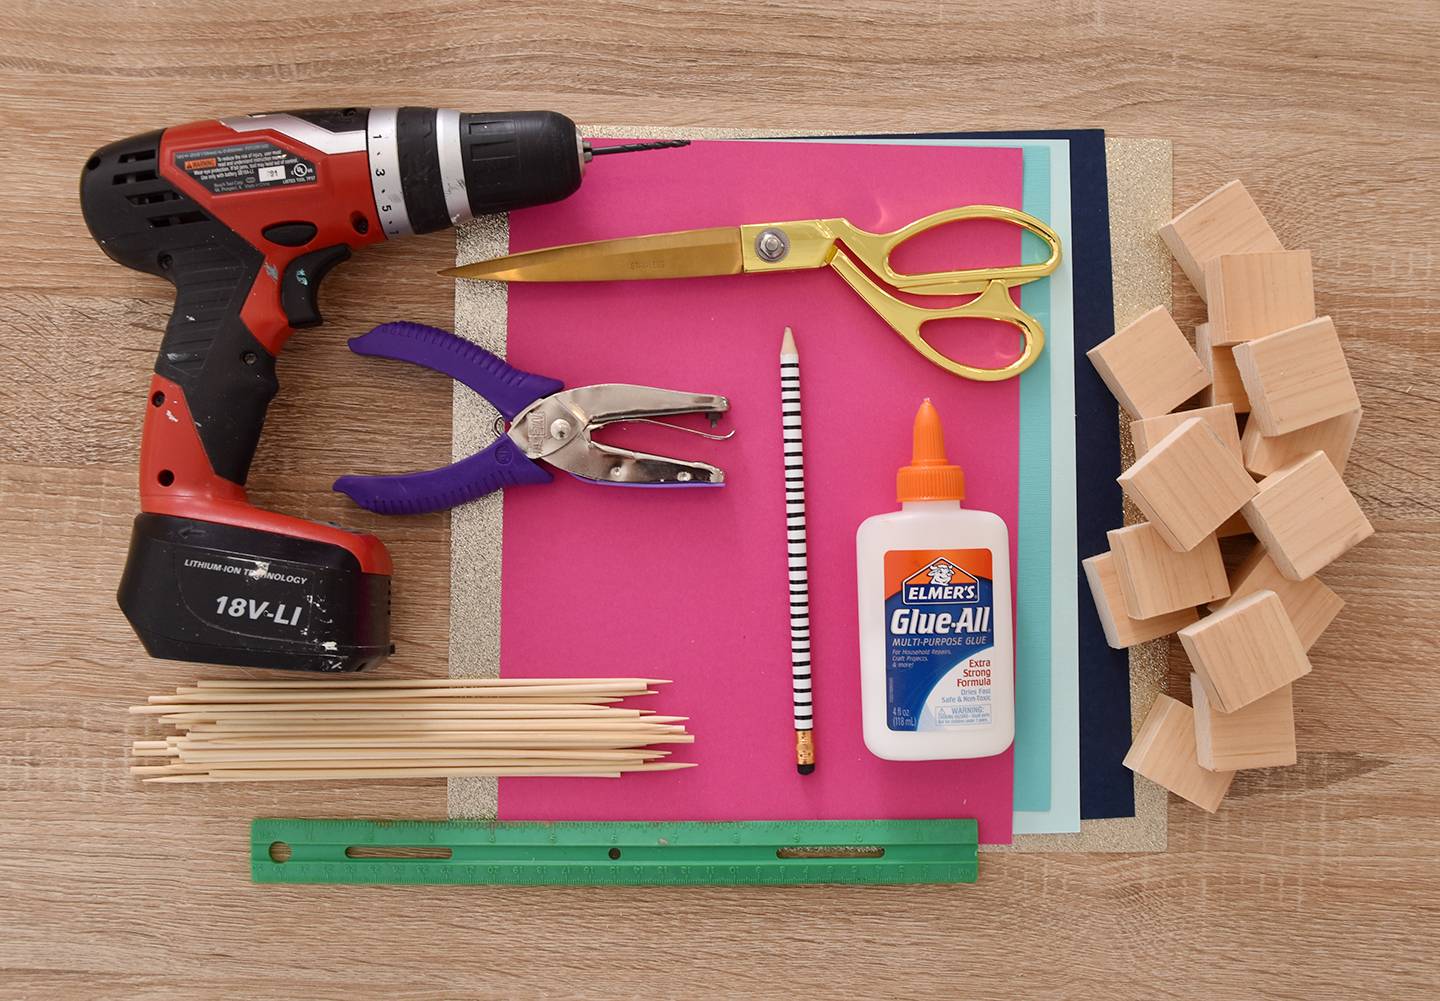
Materials
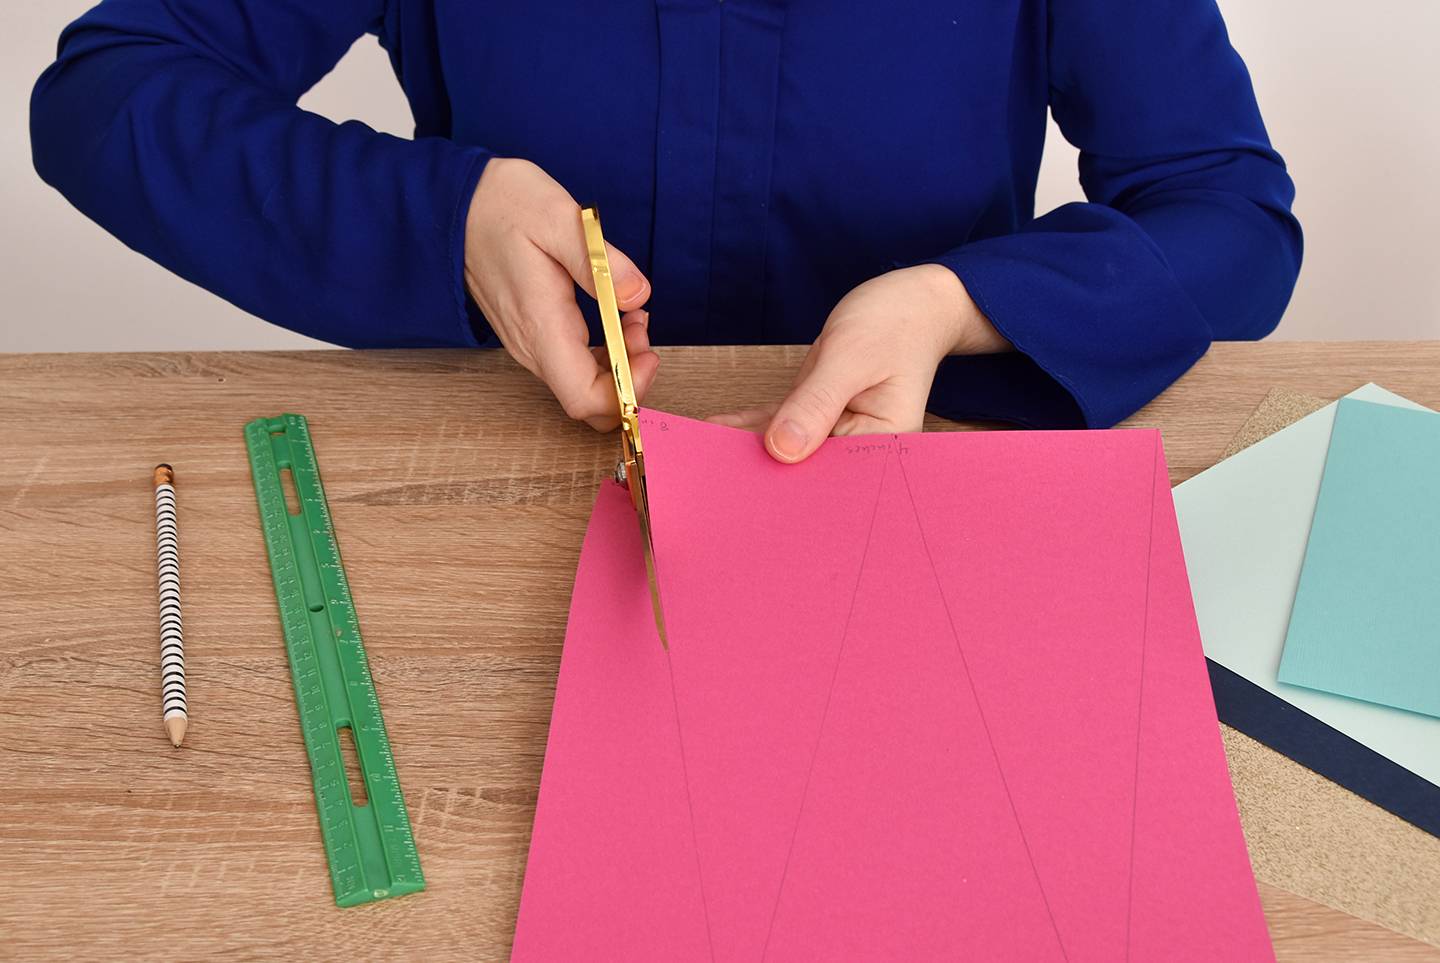
StepBegin by drawing tall triangles on the back of a piece of cardstock. They should be about 4 inches wide at the bottom, so if you have an 8 1/2 x 11 inch piece of cardstock, then you should make a mark at the 4 inch point along the bottom edge, and at the 8 inch point. Along the top edge, make a mark at the 2 inch point and the 6 inch point. Connect the dots from top to bottom and then cut out the triangles.
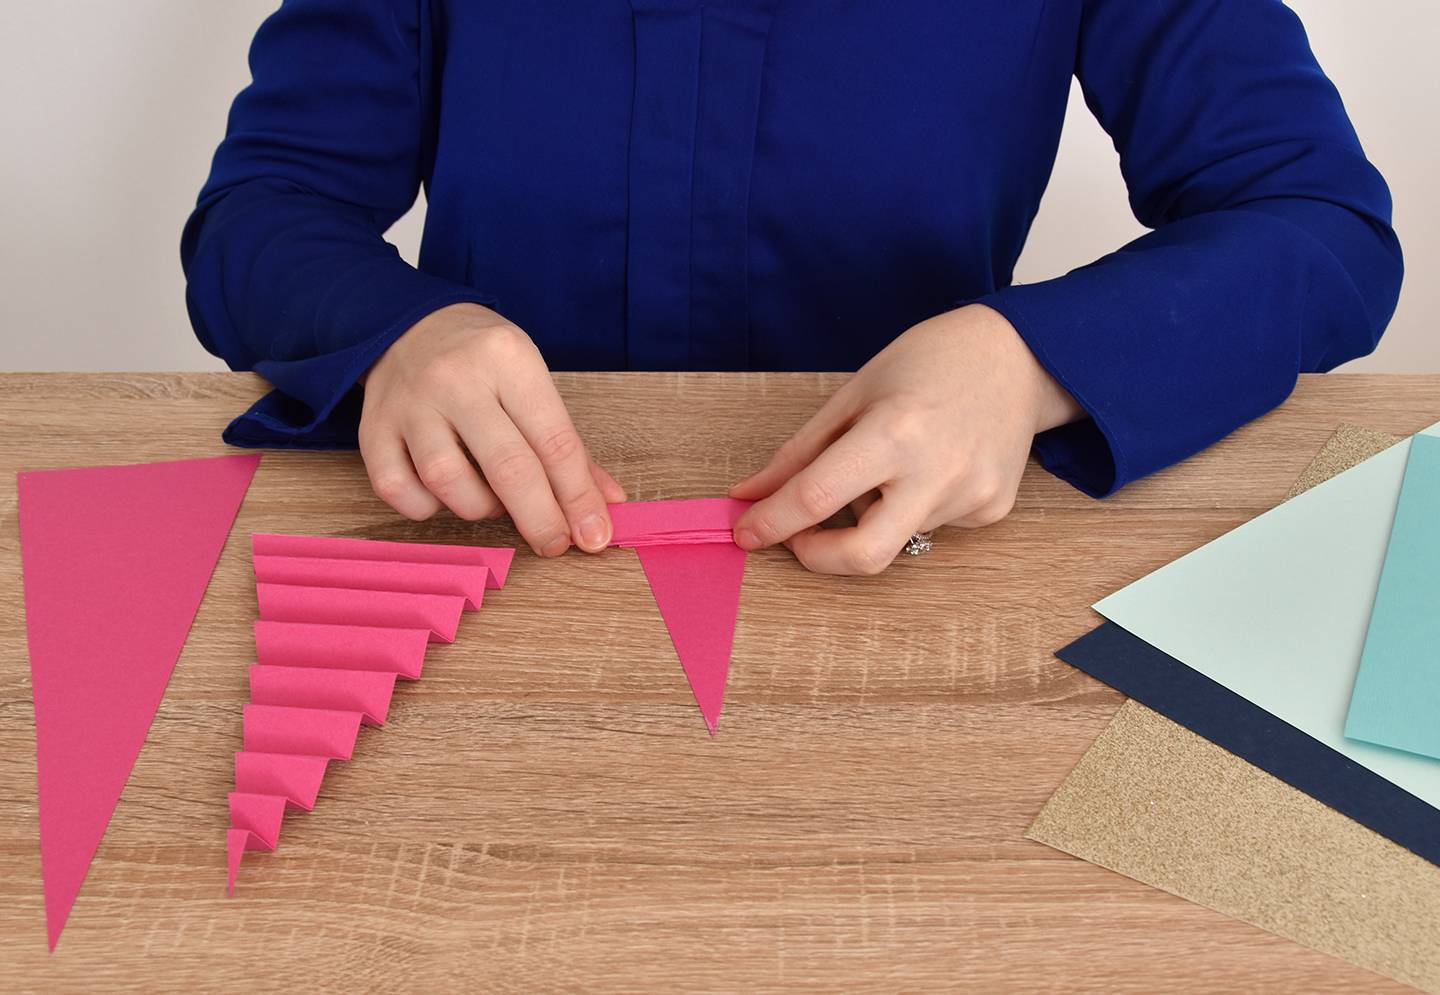
StepEach piece of 8 1/2 x 11 inch paper should make 3 triangles. Fold them each accordion style as shown above, making sure that each fold is about 1/2 an inch wide. Repeat this process on all of your triangles.

StepNext, punch a hole through the middle of the first couple of layers as shown above.
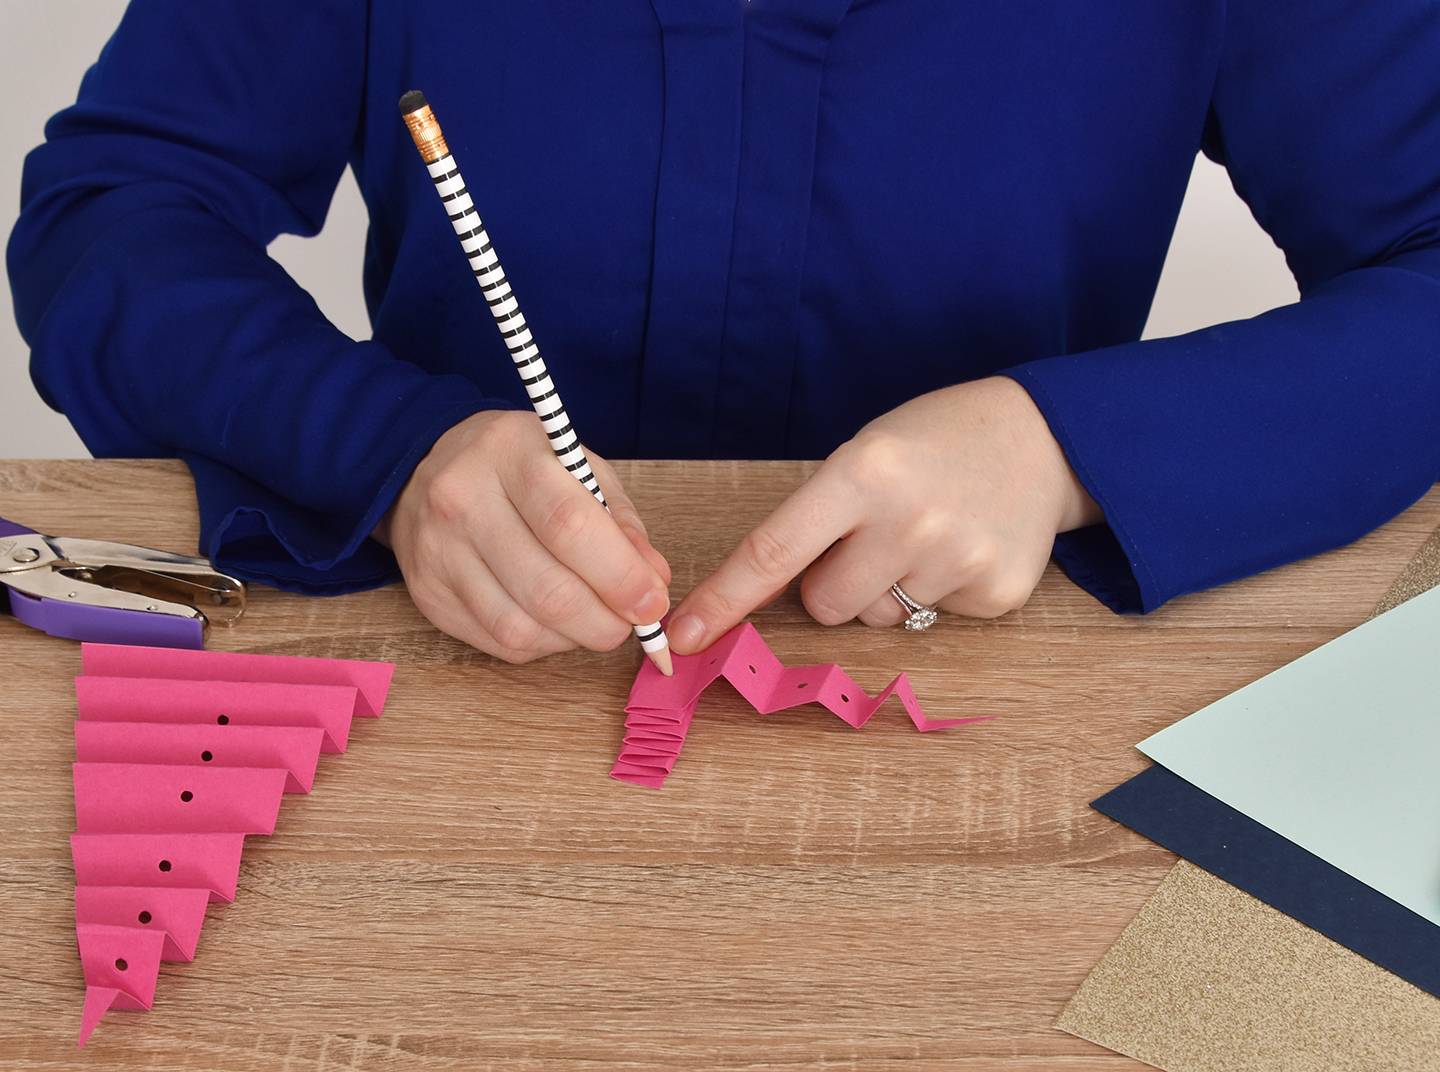
StepMake a mark inside the lowest hole and then punch through that spot to make sure that all of the holes are centered. Repeat this until you have made holes through the entire tree.
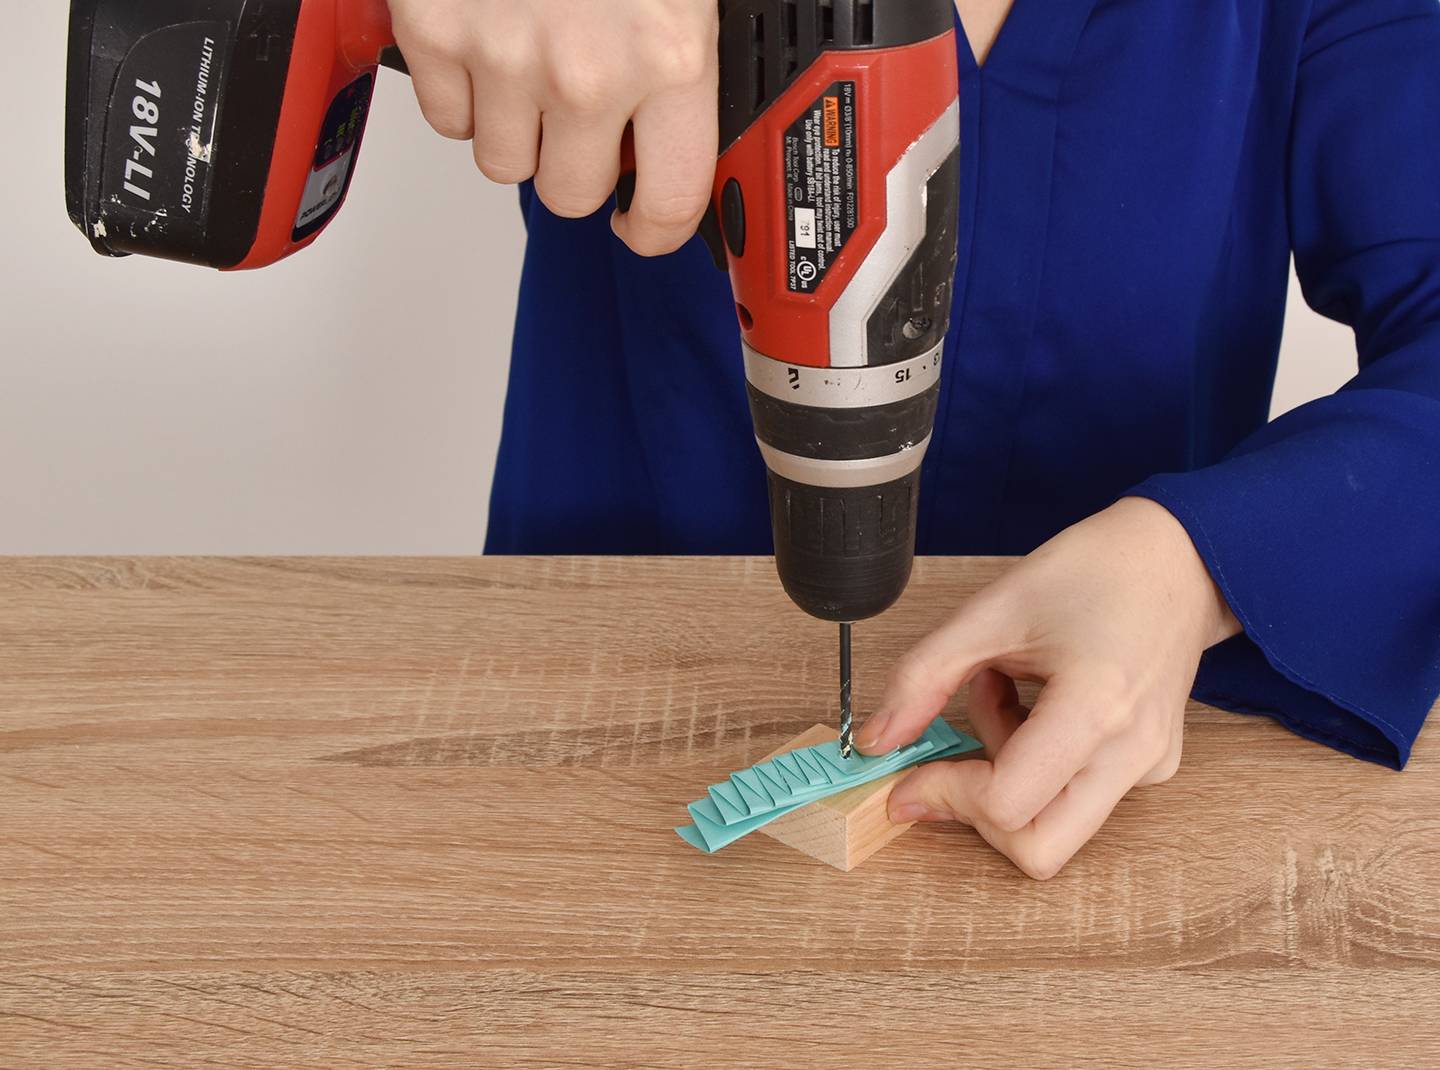
Alternate method: If you’re impatient like me, you may want to use your drill to make the holes instead. They do come out slightly ragged this way, however, whereas the hole punch method cuts very crisp holes. But it also takes much longer. You decide.

StepDrill a hole through the center of a piece of wood, stopping about half way through.
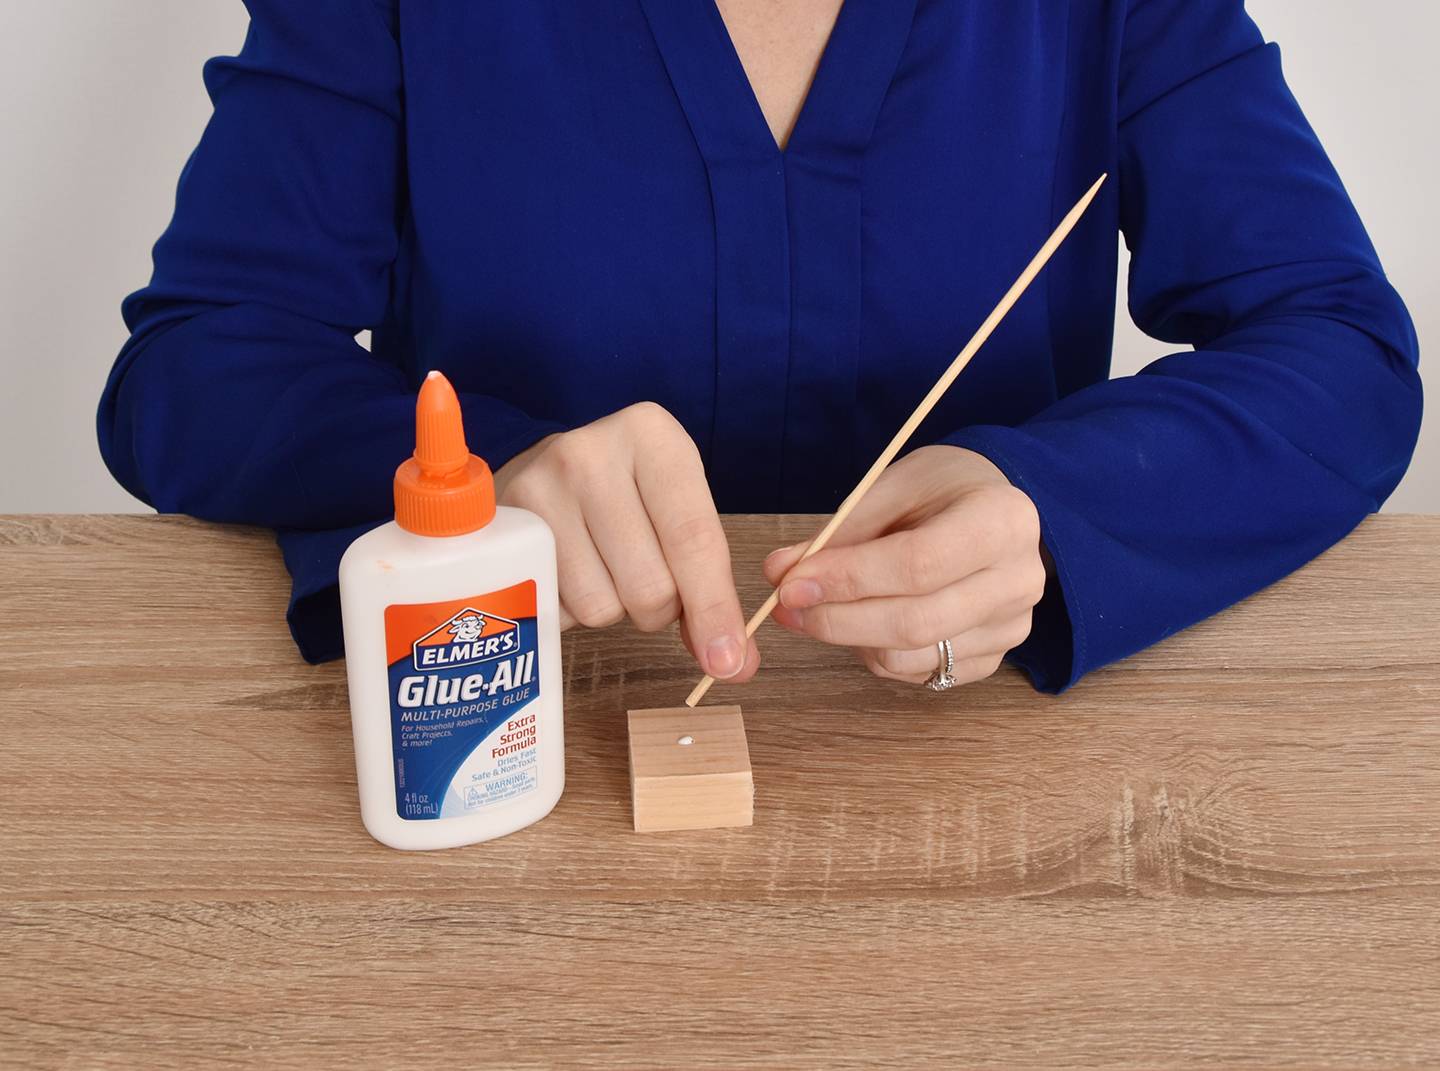
StepPut a tiny dot of glue in the hole and insert the skewer so that the pointy side is on the top.
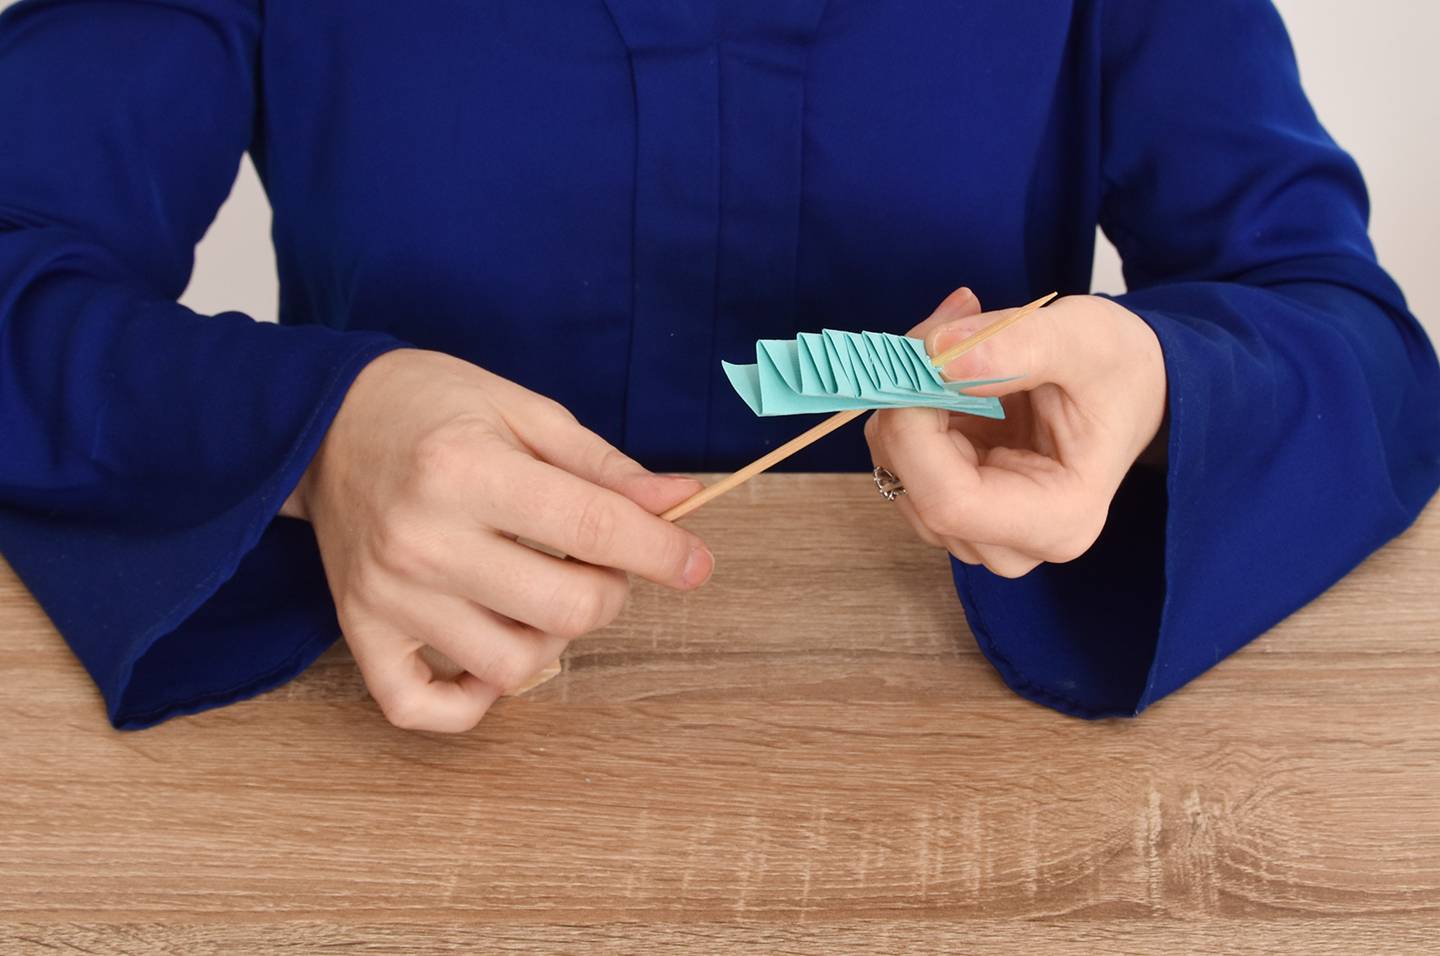
StepFold a paper tree back up and slip the skewer through the holes. Spread out the accordion folds so that everything looks even. Set it aside and repeat the process as many times as you like, depending on how big you want your forest to be.
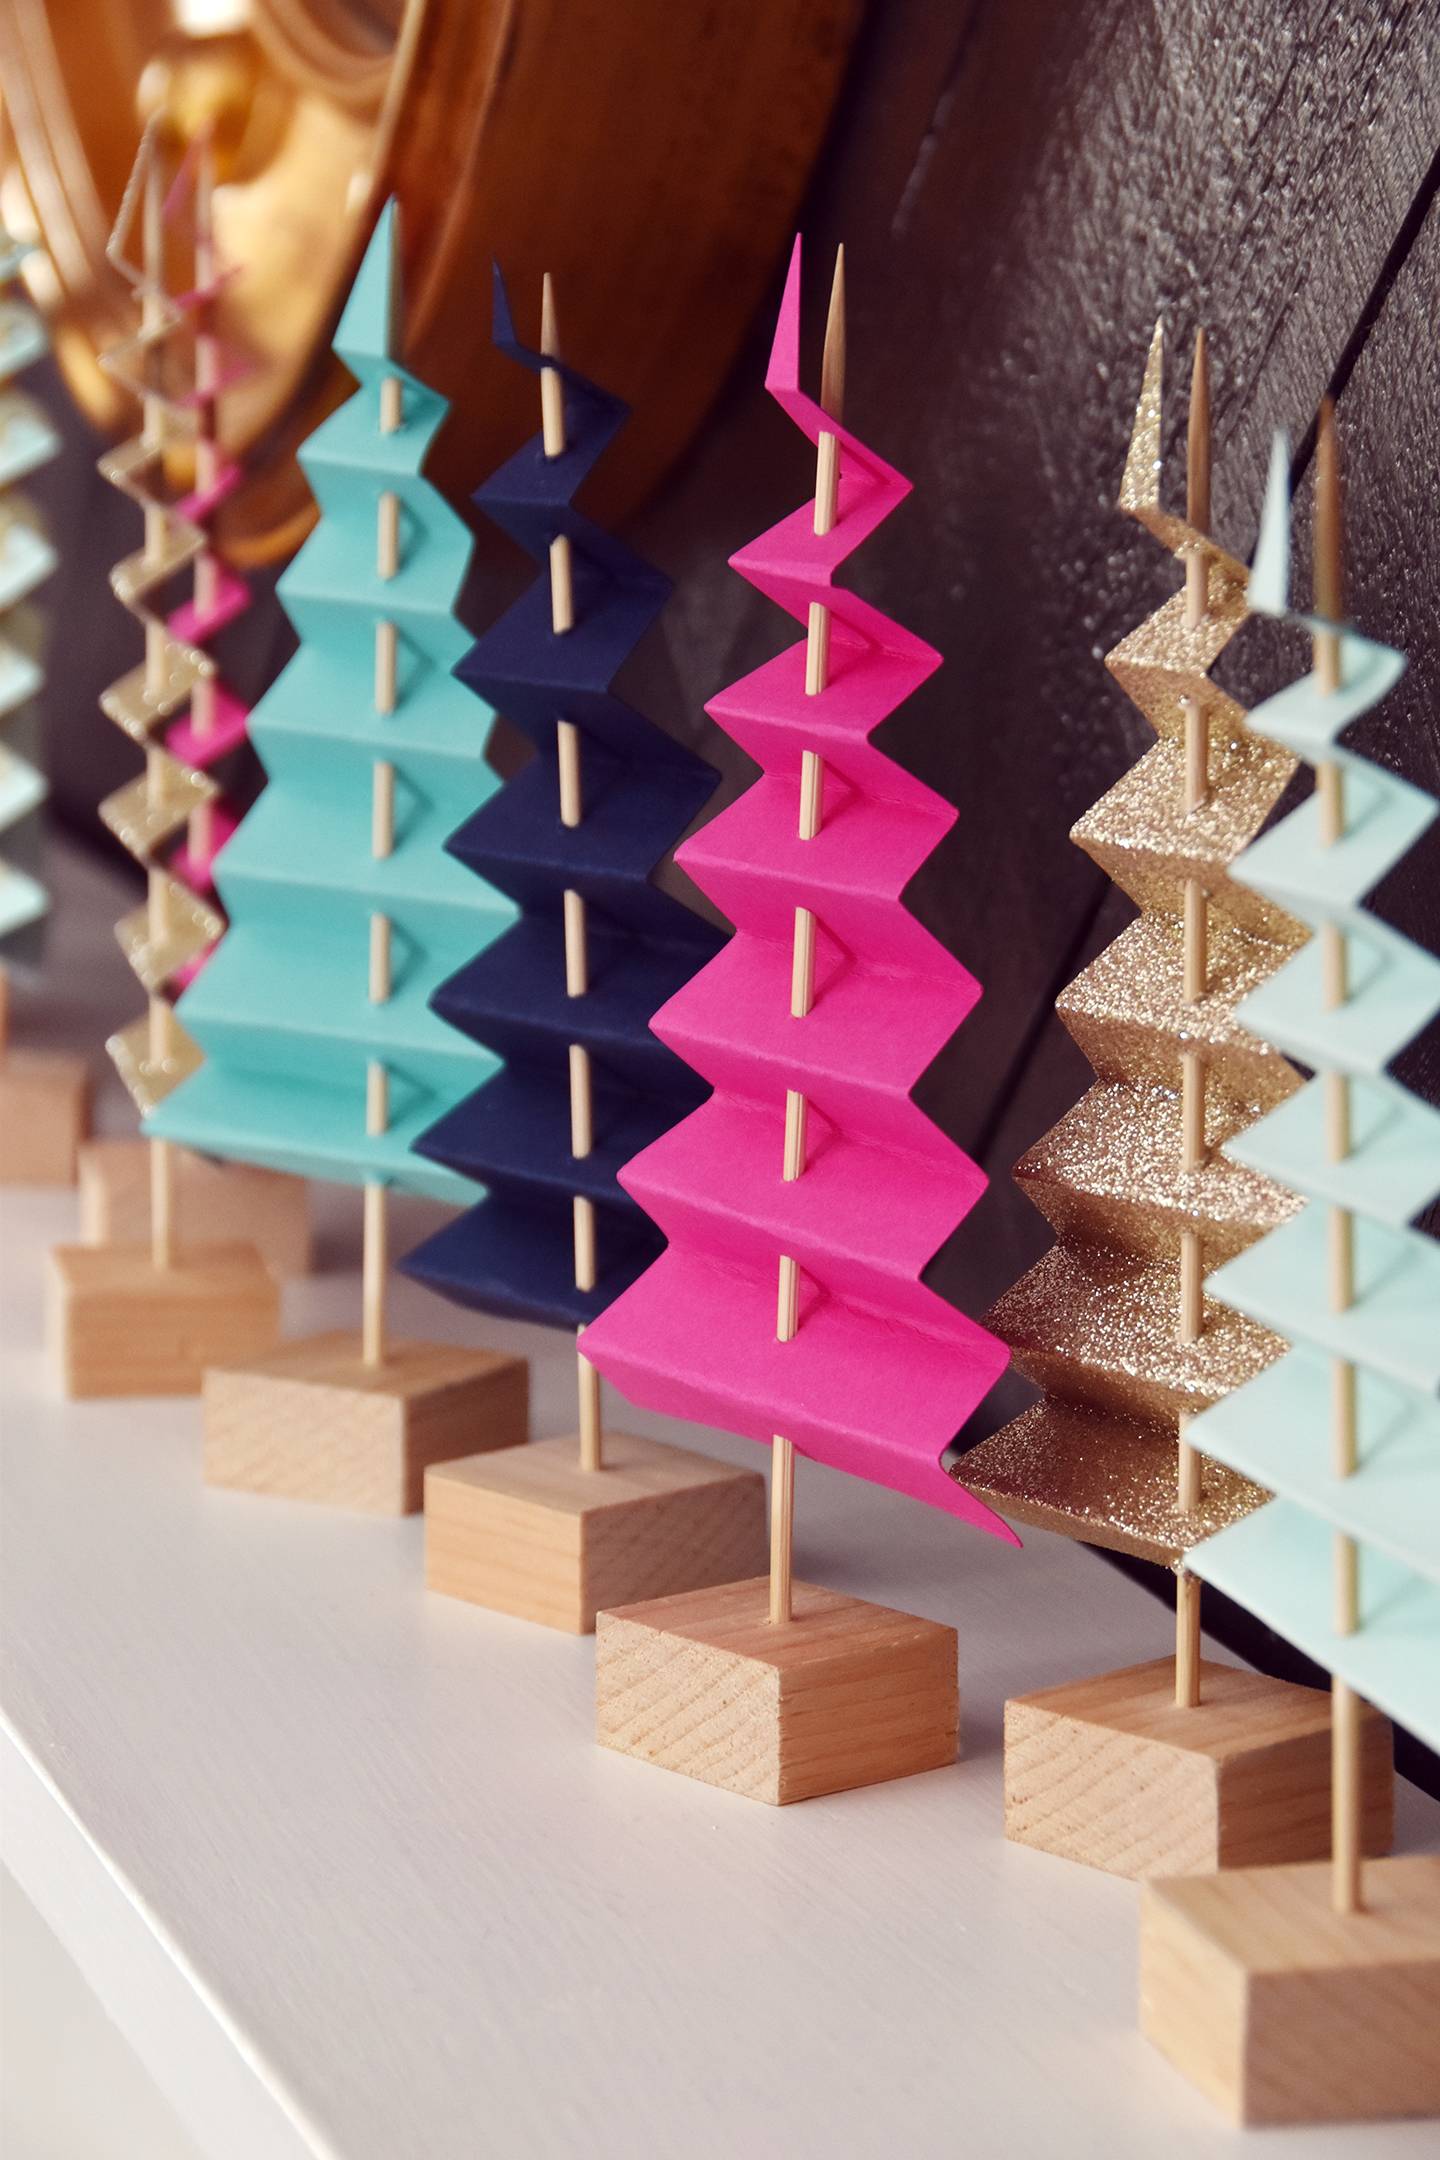
The end result is super unique and festive, thanks to the glitter paper and bold colors. I love non-traditional colors, but if you’re more of a traditionalist, you might want to experiment with greens and reds.
Or if you like more of a neutral look, you might consider all white and beige papers with different textures. You could use them throughout the winter if you opt for less of a holiday color scheme.
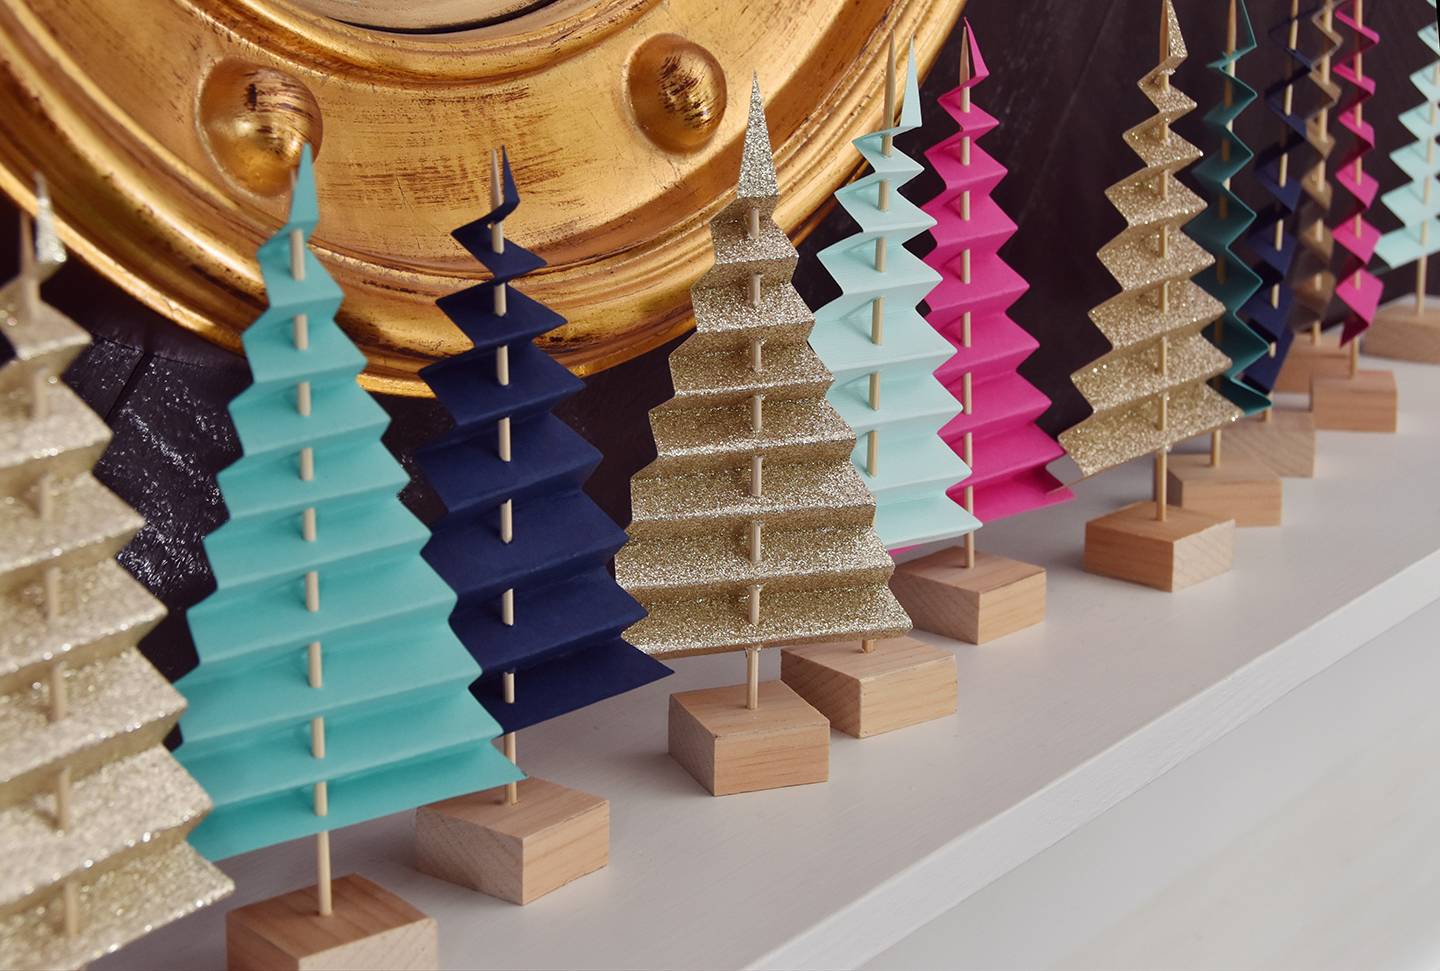
They look quite impressive lined up all together, but you could also scatter them around the house where ever you need a bit of extra holiday cheer. Happy crafting friends!
The post Easy Mantel Idea: Colorful Paper Tree Forest appeared first on Curbly. Via https://www.curbly.com/easy-mantel-idea-colorful-paper-tree-forest 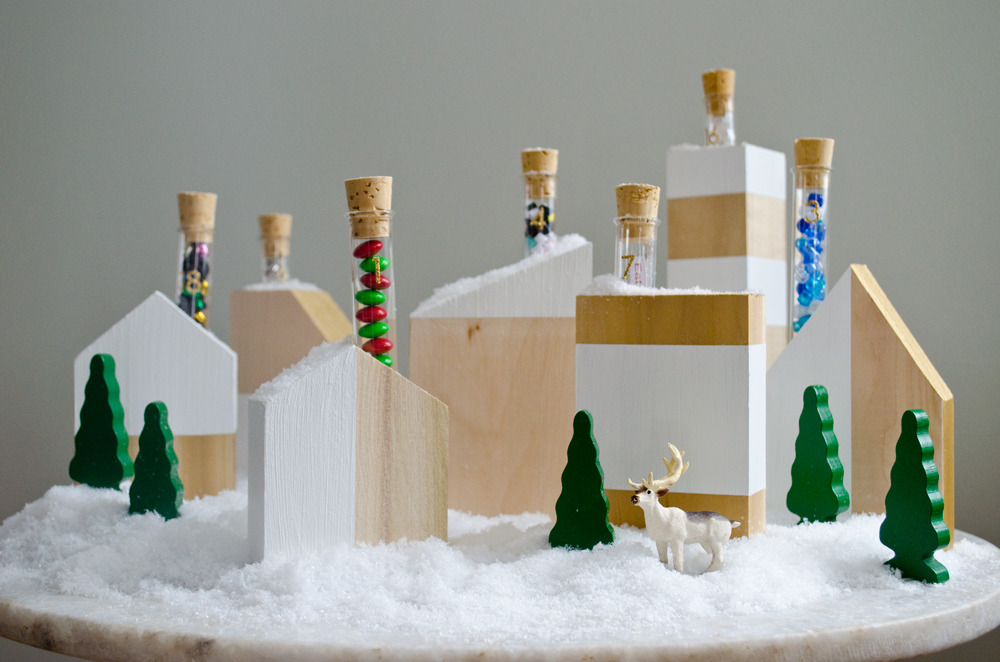
It’s advent calendar time! As I write this post, the Midwest is being walloped by a snow storm. Nothing inspires holiday decorating like many inches of snow, and to stave off decking all the halls, I created a little diy advent calendar village for our children. Read on for the full tutorial. Using blocks of wood and test tubes, I assembled a village full of tiny treasures to help our family celebrate the season. The great thing about using test tubes is that it ensures each day’s surprise is small. 
Creating your own diy advent calendar village is simple. We originally created 24 houses for this project, but the result was overwhelming, so we scaled back to a set of seven houses (to represent each week leading up to Christmas). 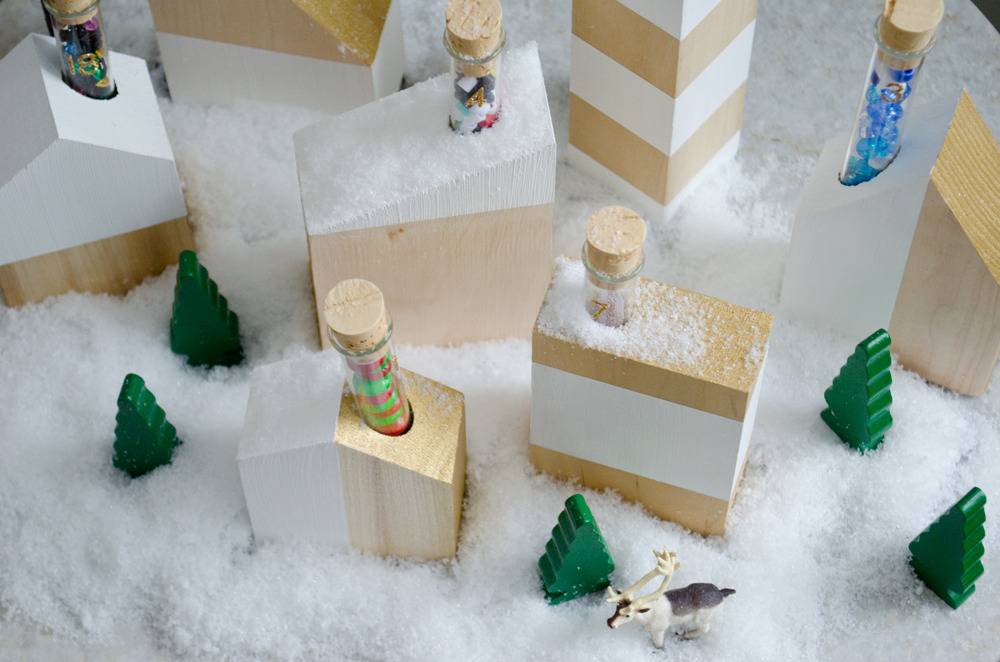
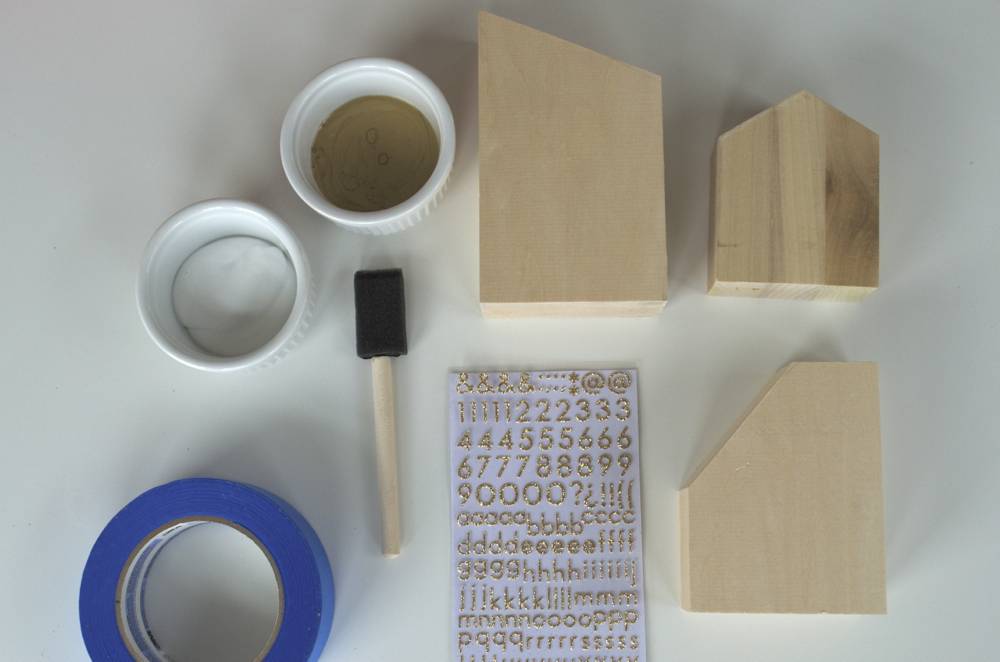
Materials
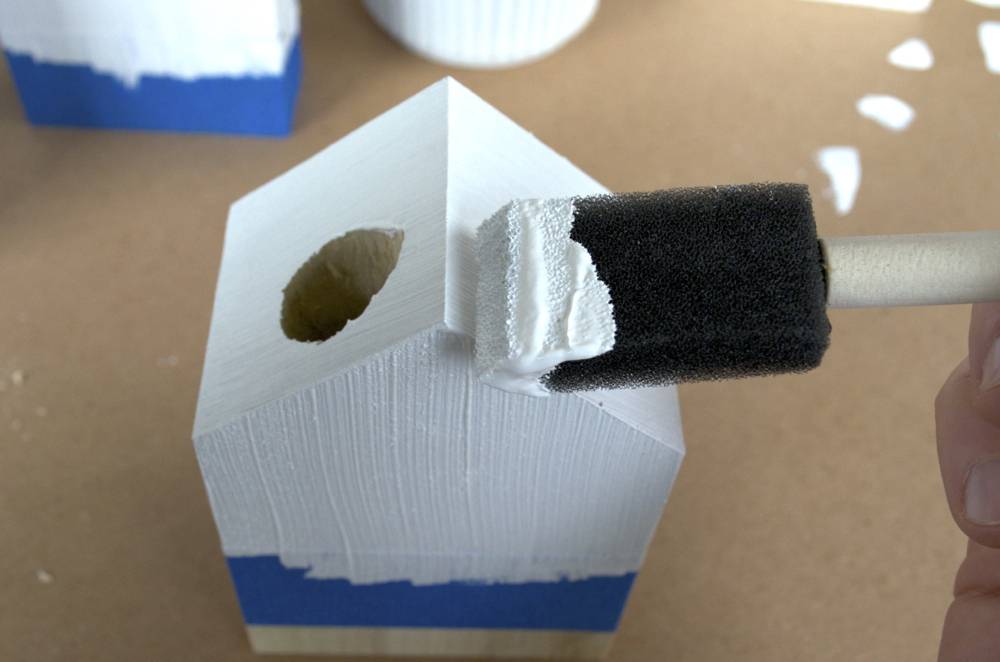
Make Your DIY Advent Calendar:

I used a variety of small treats to fill my tubes, and I’ll share some of my favorites with you because it was a challenge to find goodies small enough to fit inside a standard test tube. 
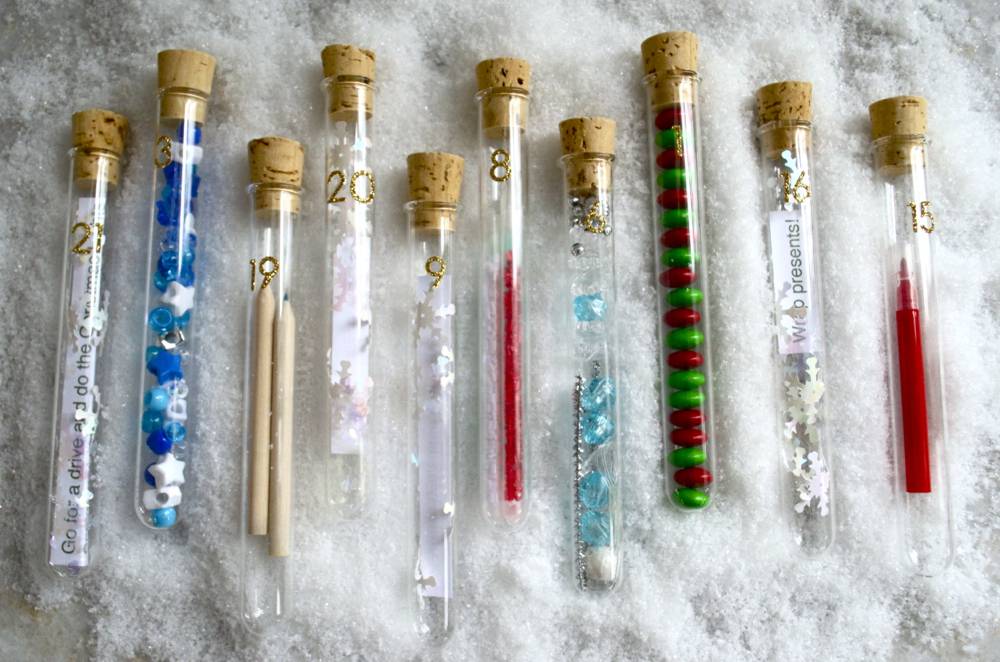
What to put in your DIY advent calendar?
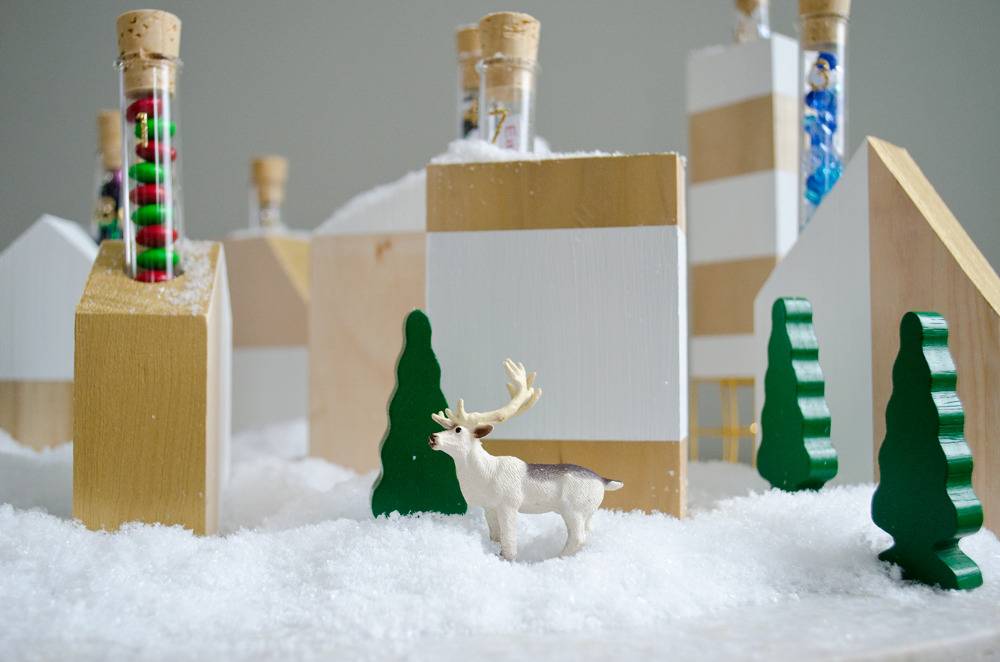
The final result is a sweet village to help us count down the days until Christmas. 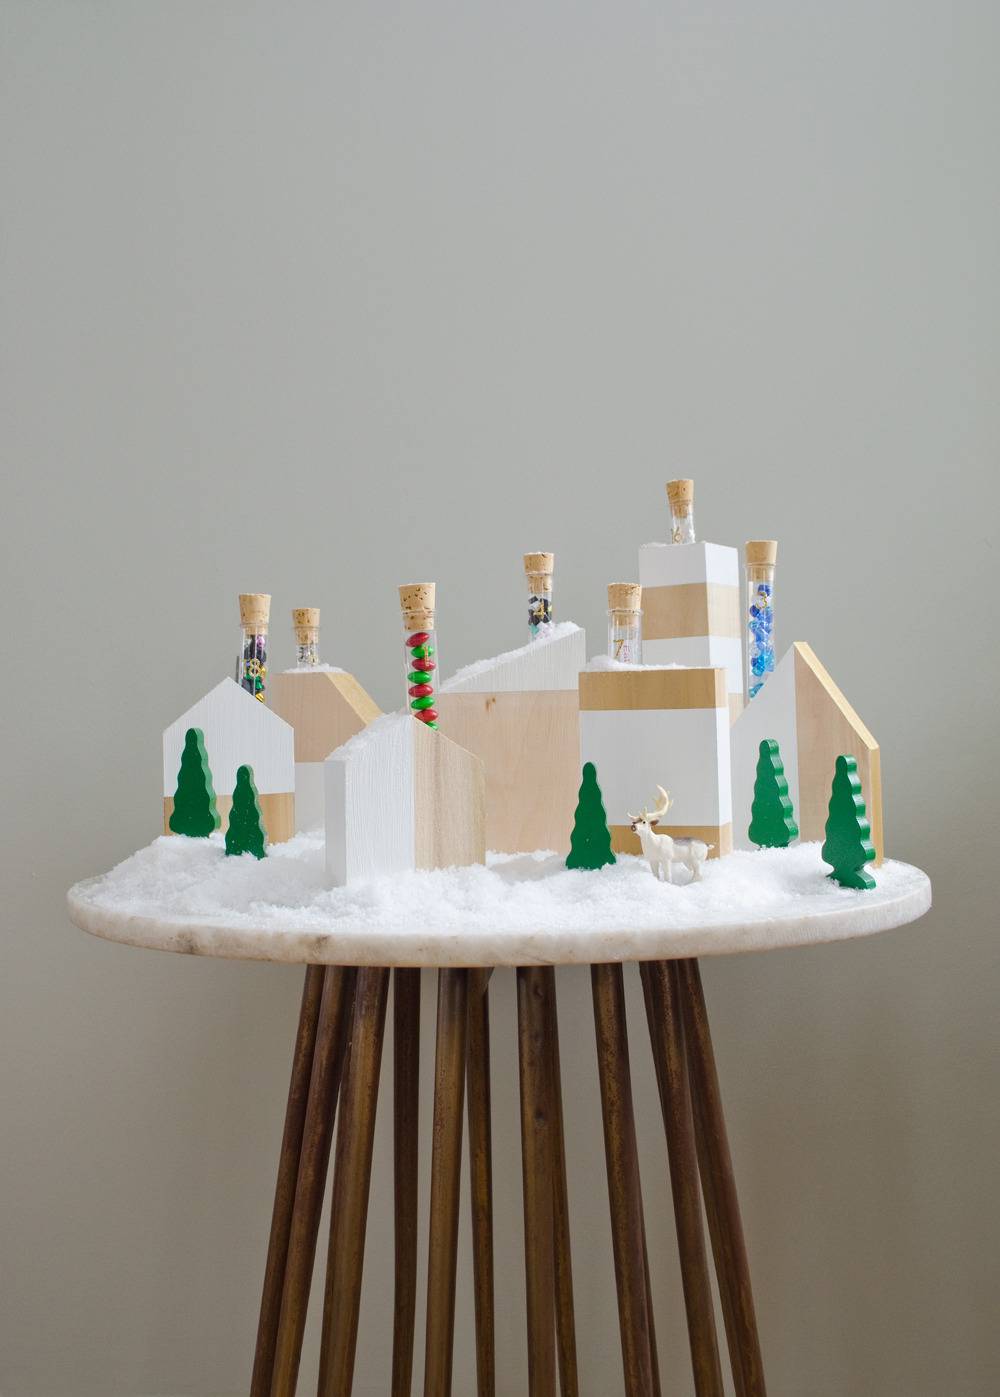
If you like this how-to, do us a favor and share it on Pinterest: 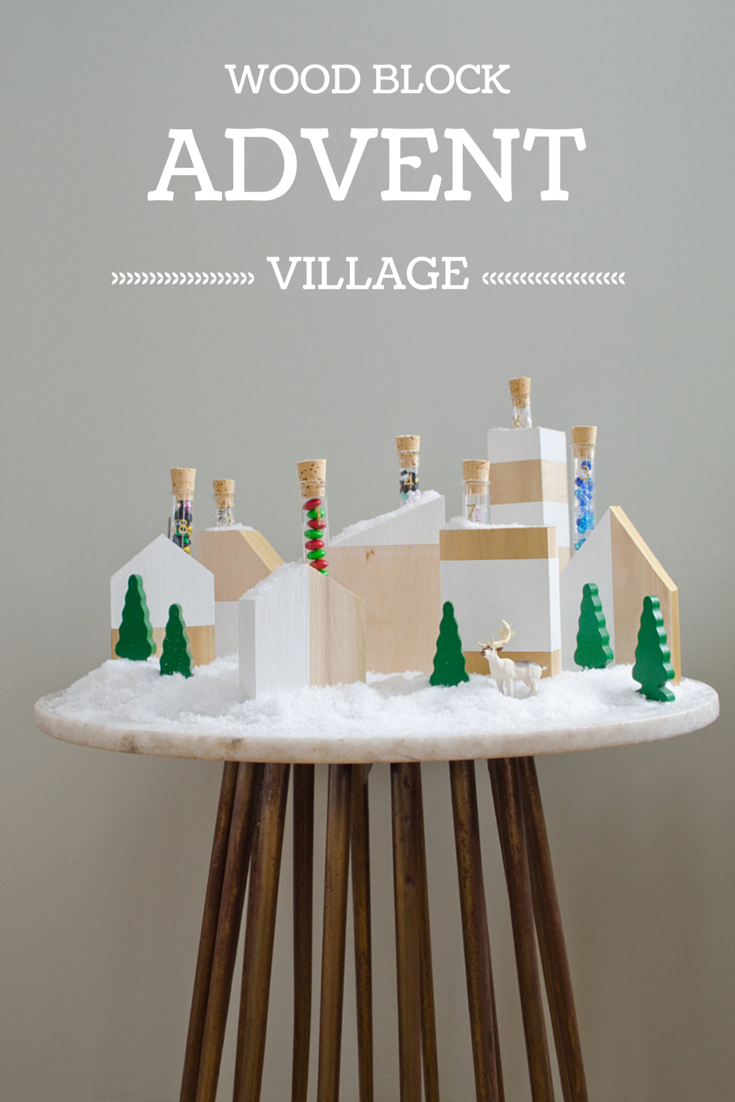
The post How to Make a Sweet Modern Advent Calendar Village appeared first on Curbly. Via https://www.curbly.com/diy-advent-calendar-with-test-tubes
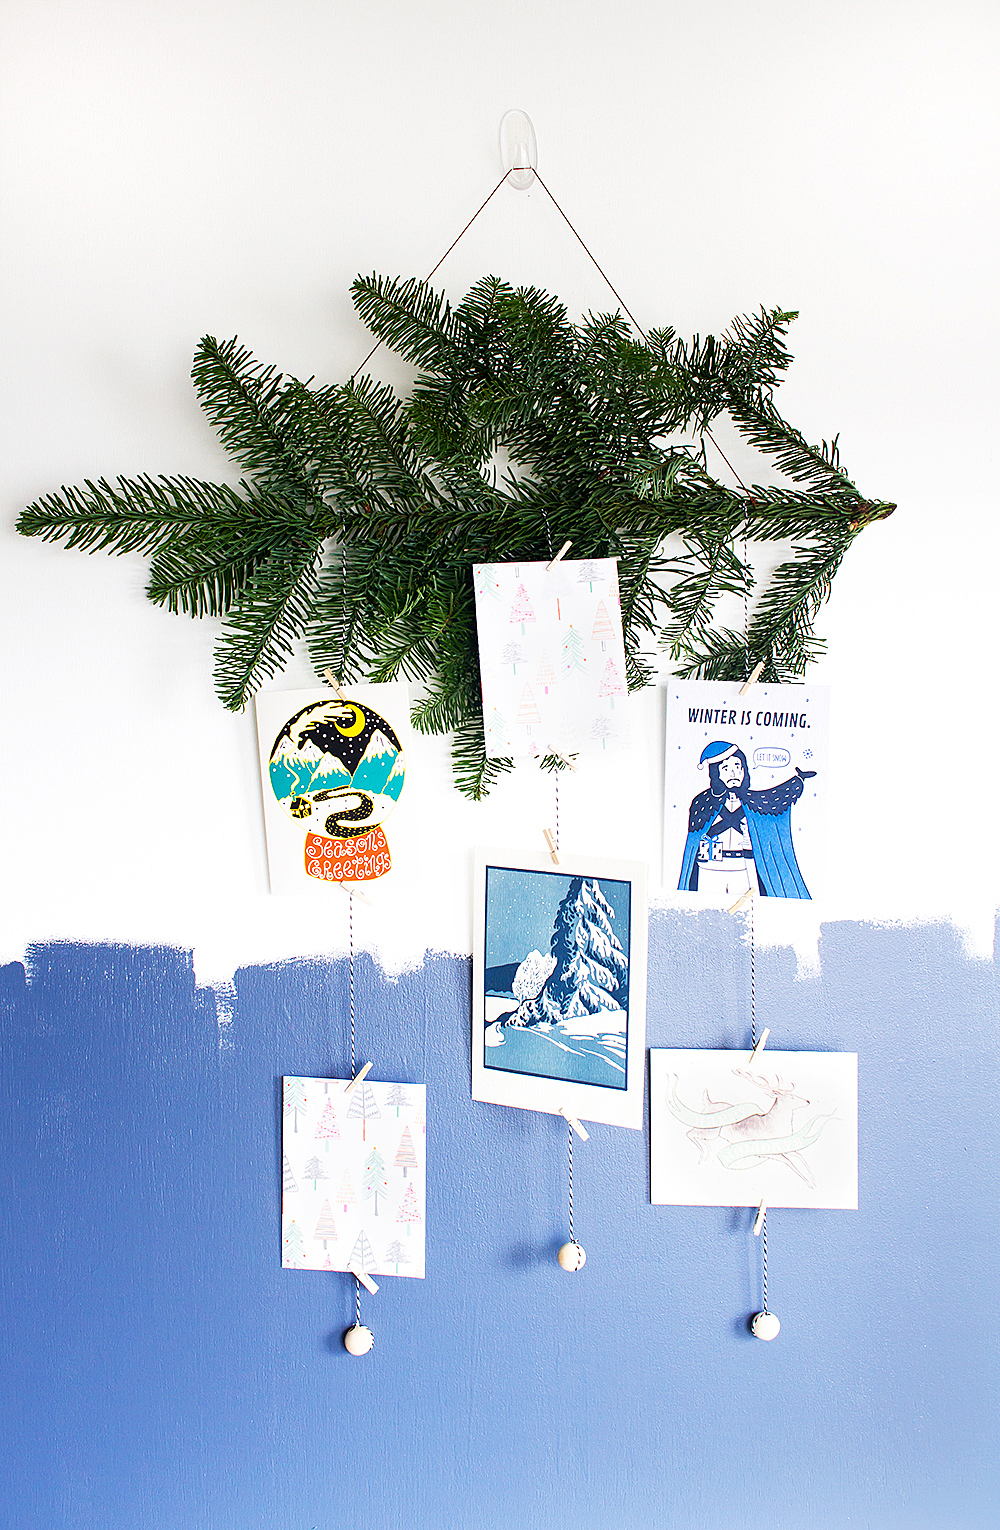
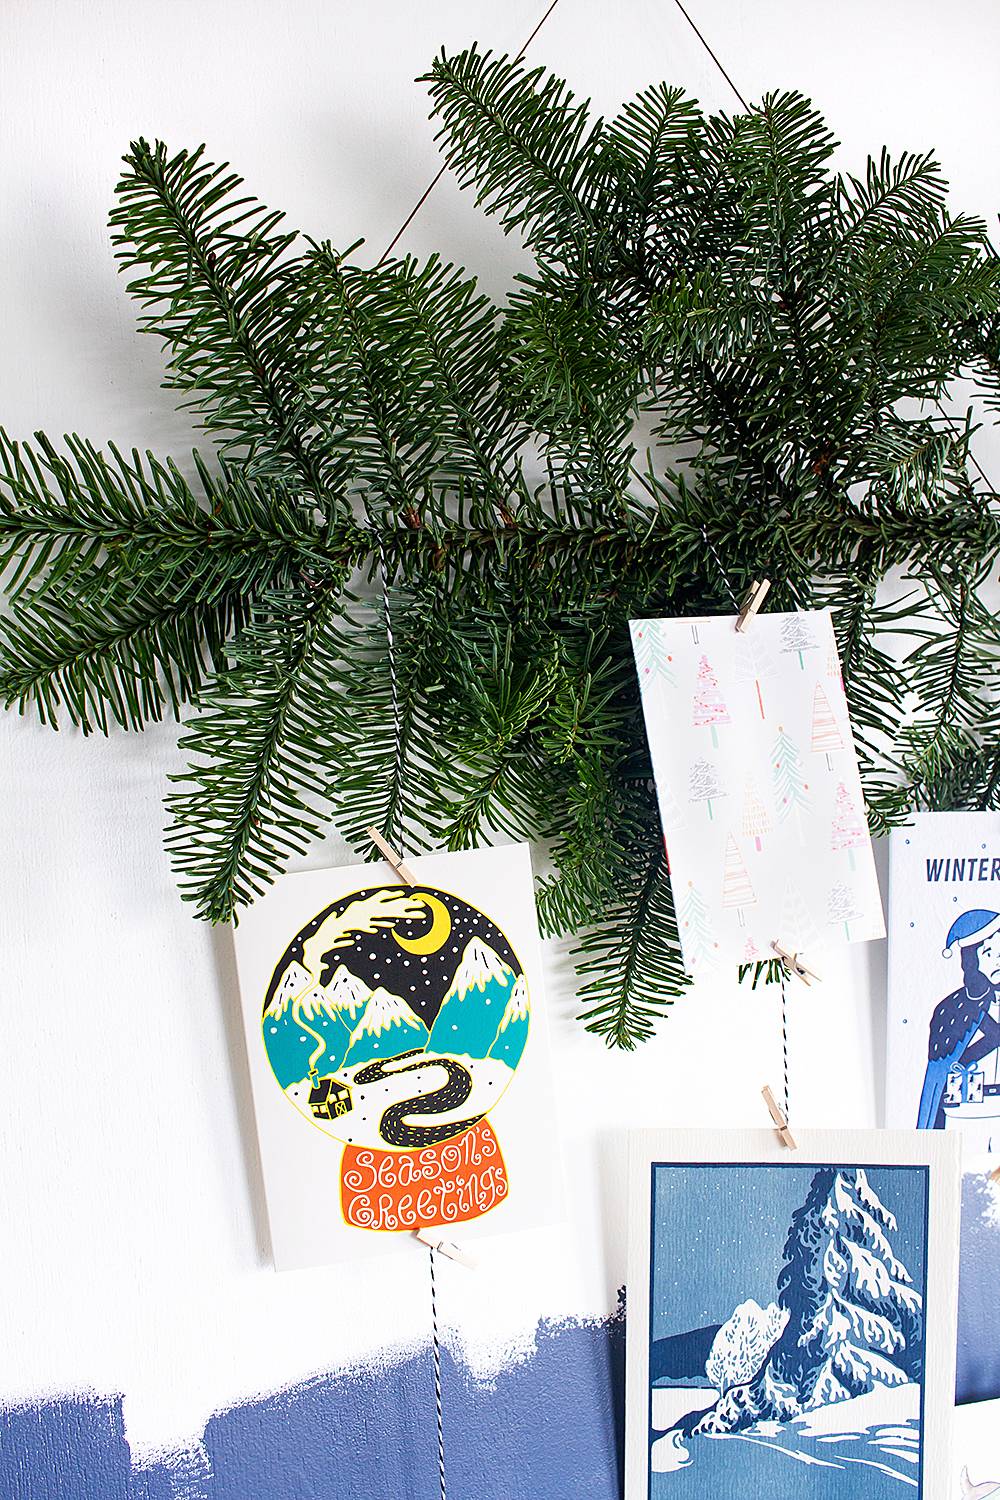
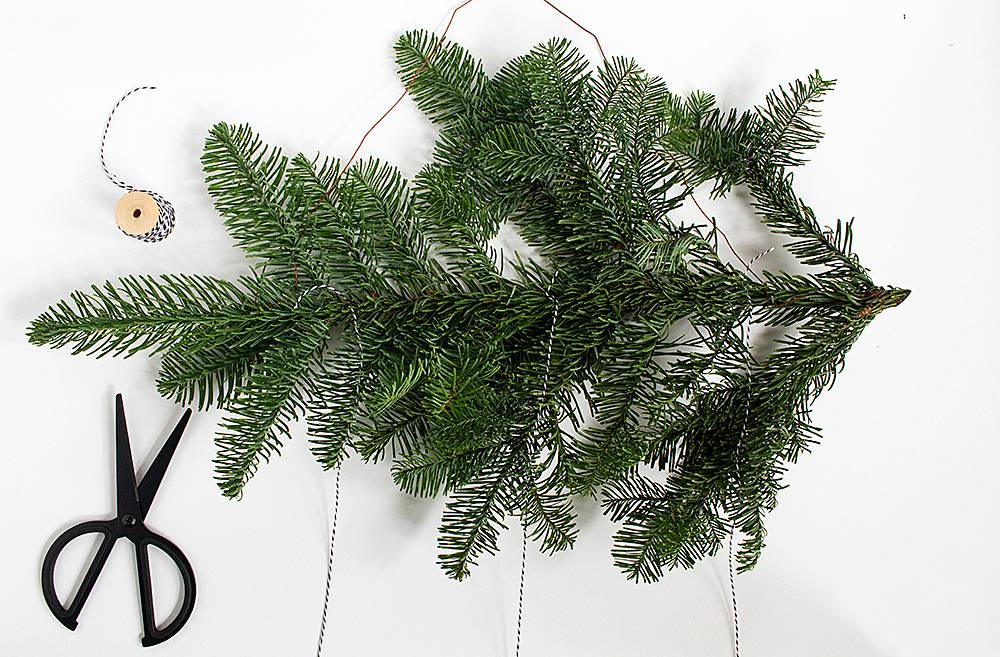
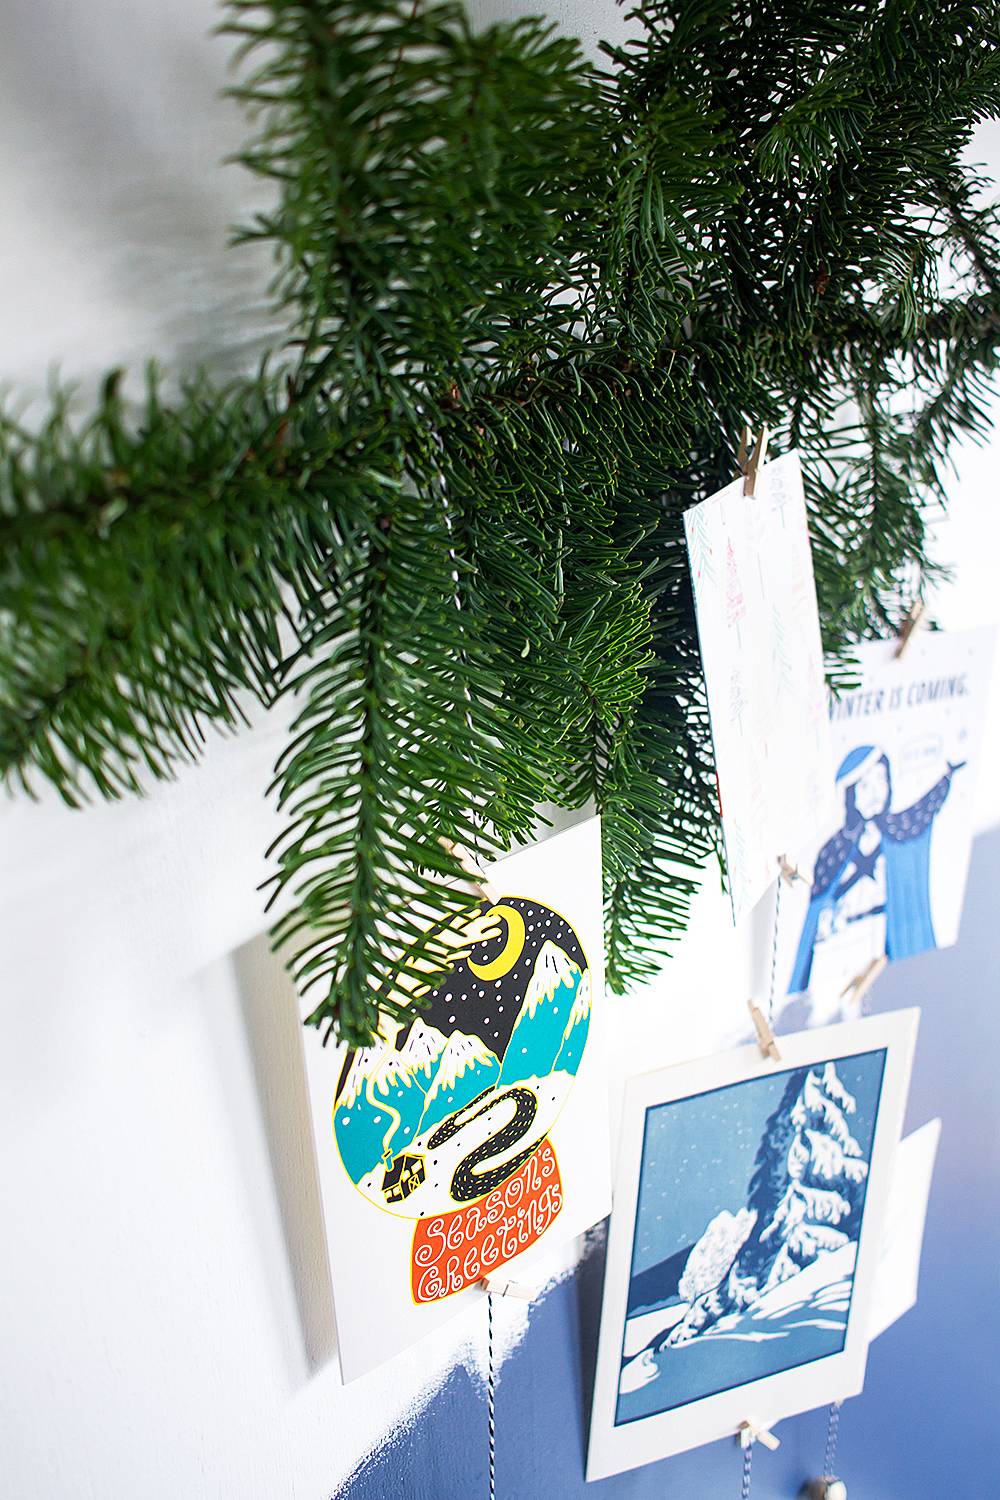
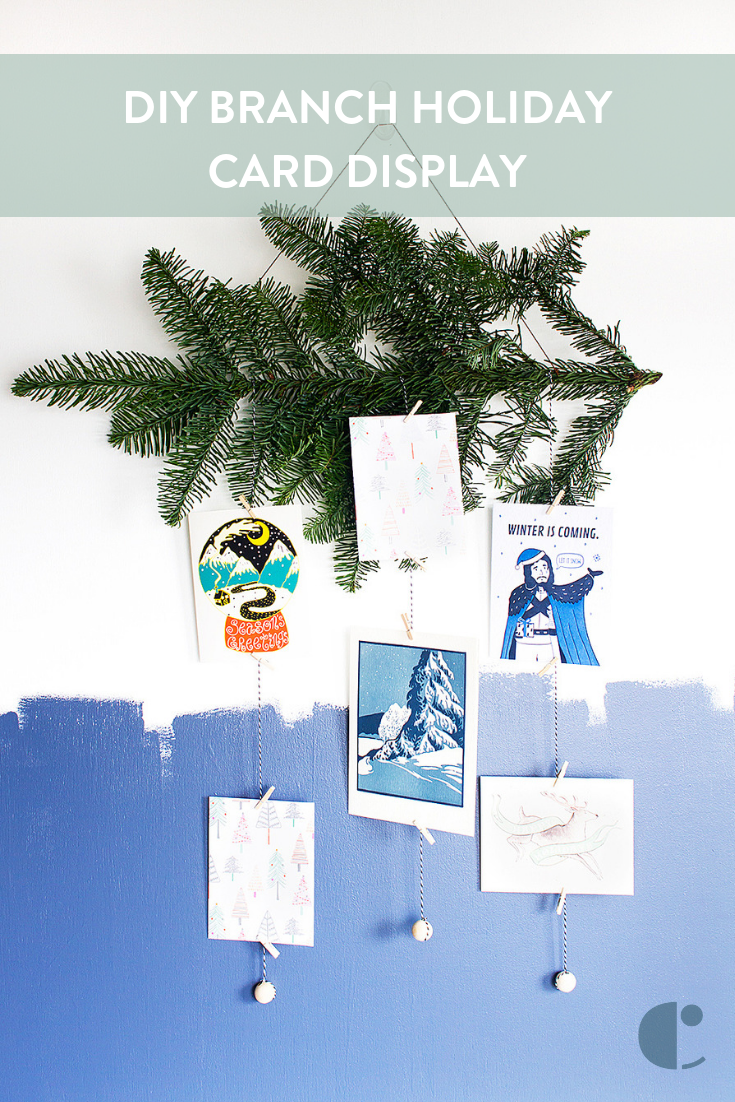
Every winter, it’s the same story. I get a handful of thoughtfully selected, lovingly written cards for the holidays…and, I have nowhere to put them. Tacked on the fridge with the grocery lists and unpaid parking tickets? Jammed on a shelf between the dusty knick-knacks and piles of unopened mail? Ok, my house isn’t THAT disorganized (most of the time), but I’m sure you feel the pain of receiving beautiful mail and having nowhere to display it. This year, I decided to take matters into my craft-loving hands and make a simple, pretty DIY branch holiday card display. It only requires a few basic supplies to make, can be made as small or as large as you want, and will make your home smell like a pine tree, which is obviously the best reason to make your own. Keep reading to see how to make a DIY branch holiday card display!
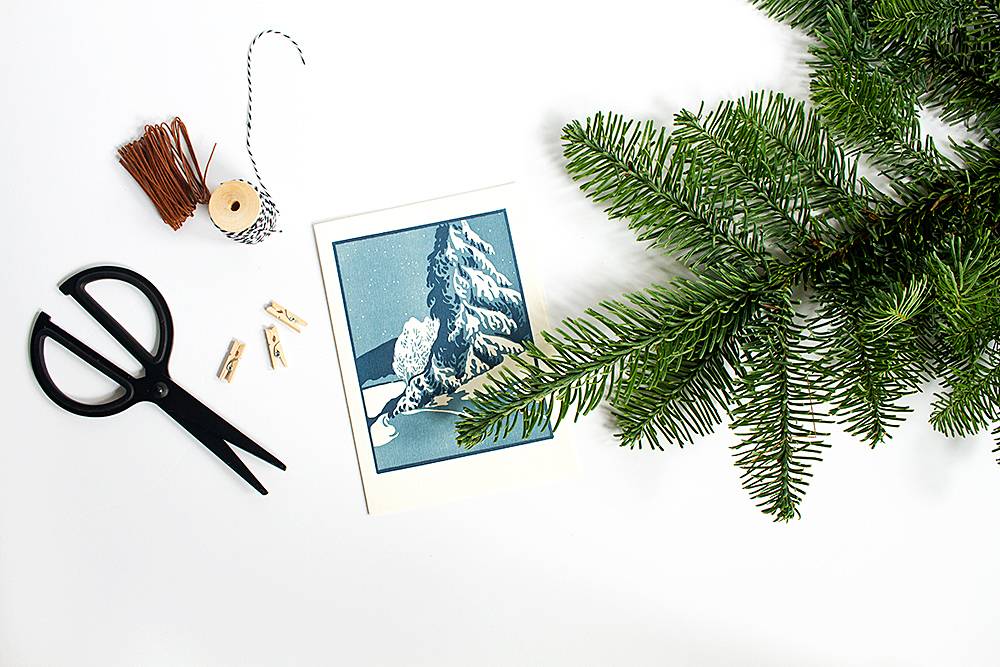
Materials
Step
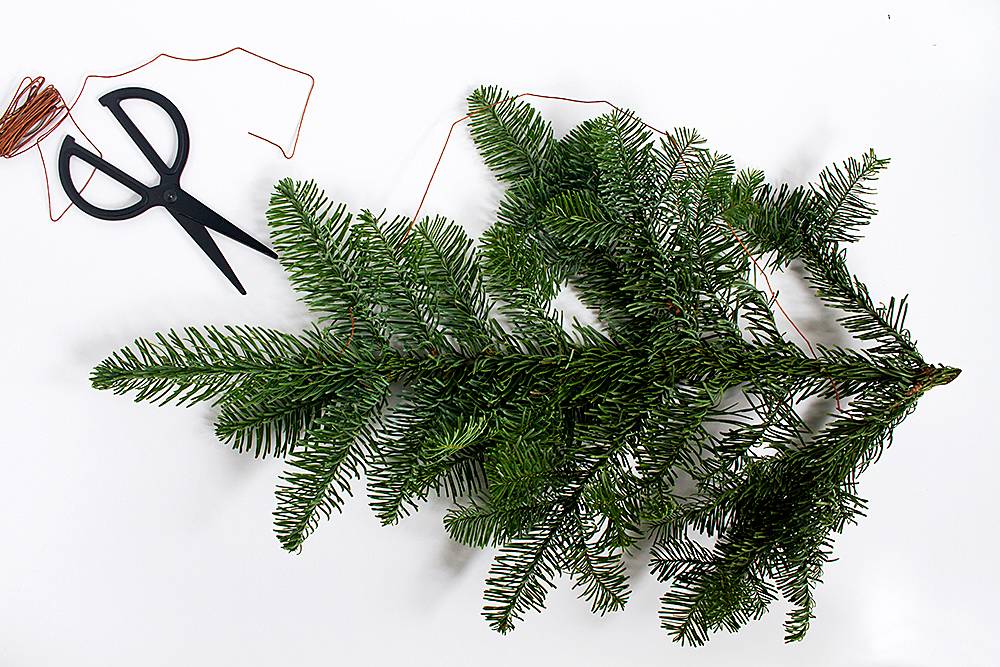
Cut a piece of cord to hang your branch, and tie the cord to the branch at two points. Step
Attach string to the branch to hang the cards.
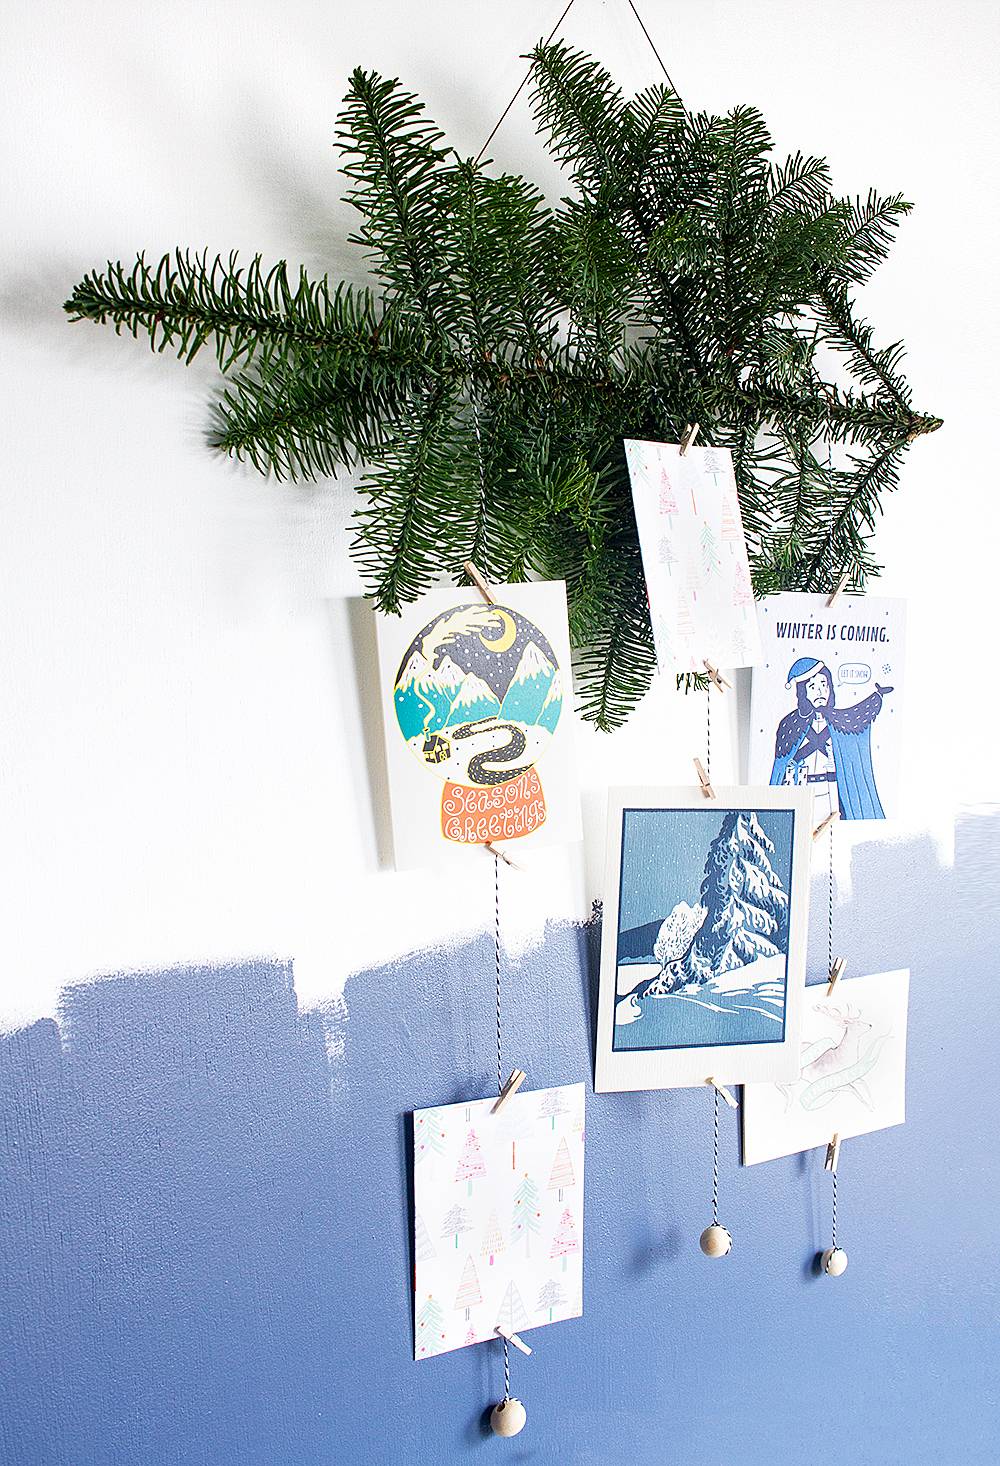
If you receive lots of cards for the holidays, simply scale this project up with a larger branch and more string!
Step
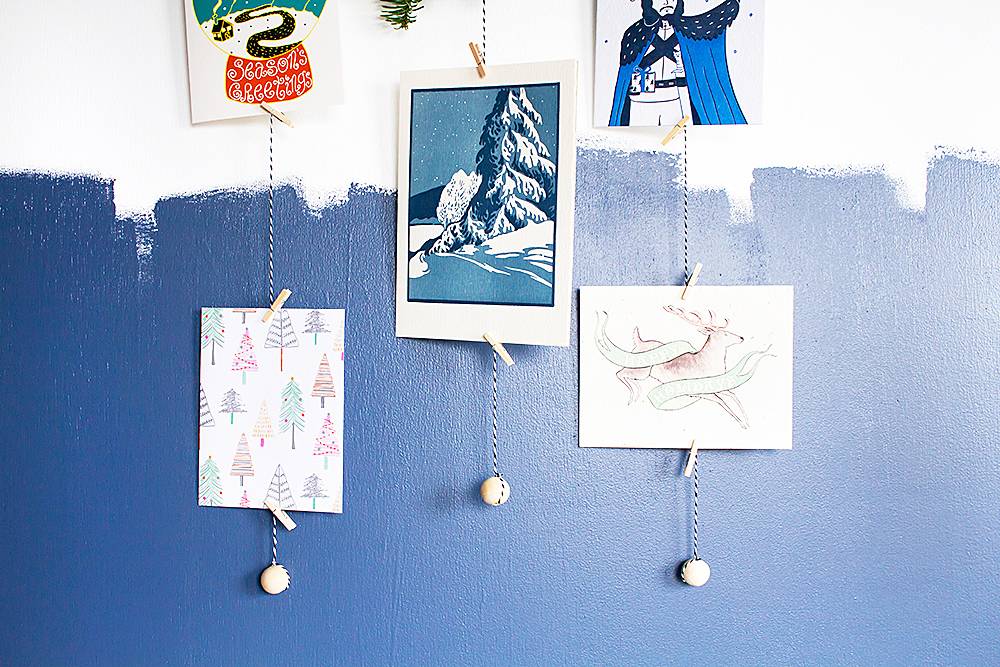
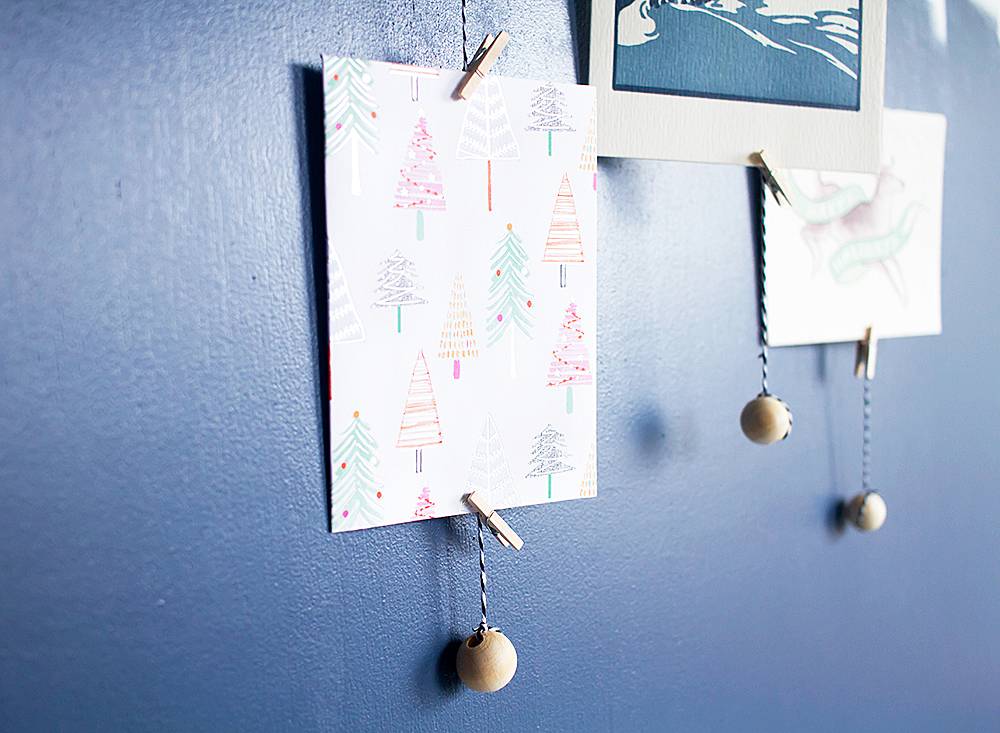
Trim all the string ends, then hang the branch (Command hooks are great for temporary projects like this!). Attach the cards to the string with mini clothespins. Finally, tie beads to the ends of the strings so they hang straight. And that’s it! Now you can see and enjoy all that lovely holiday mail for the season. 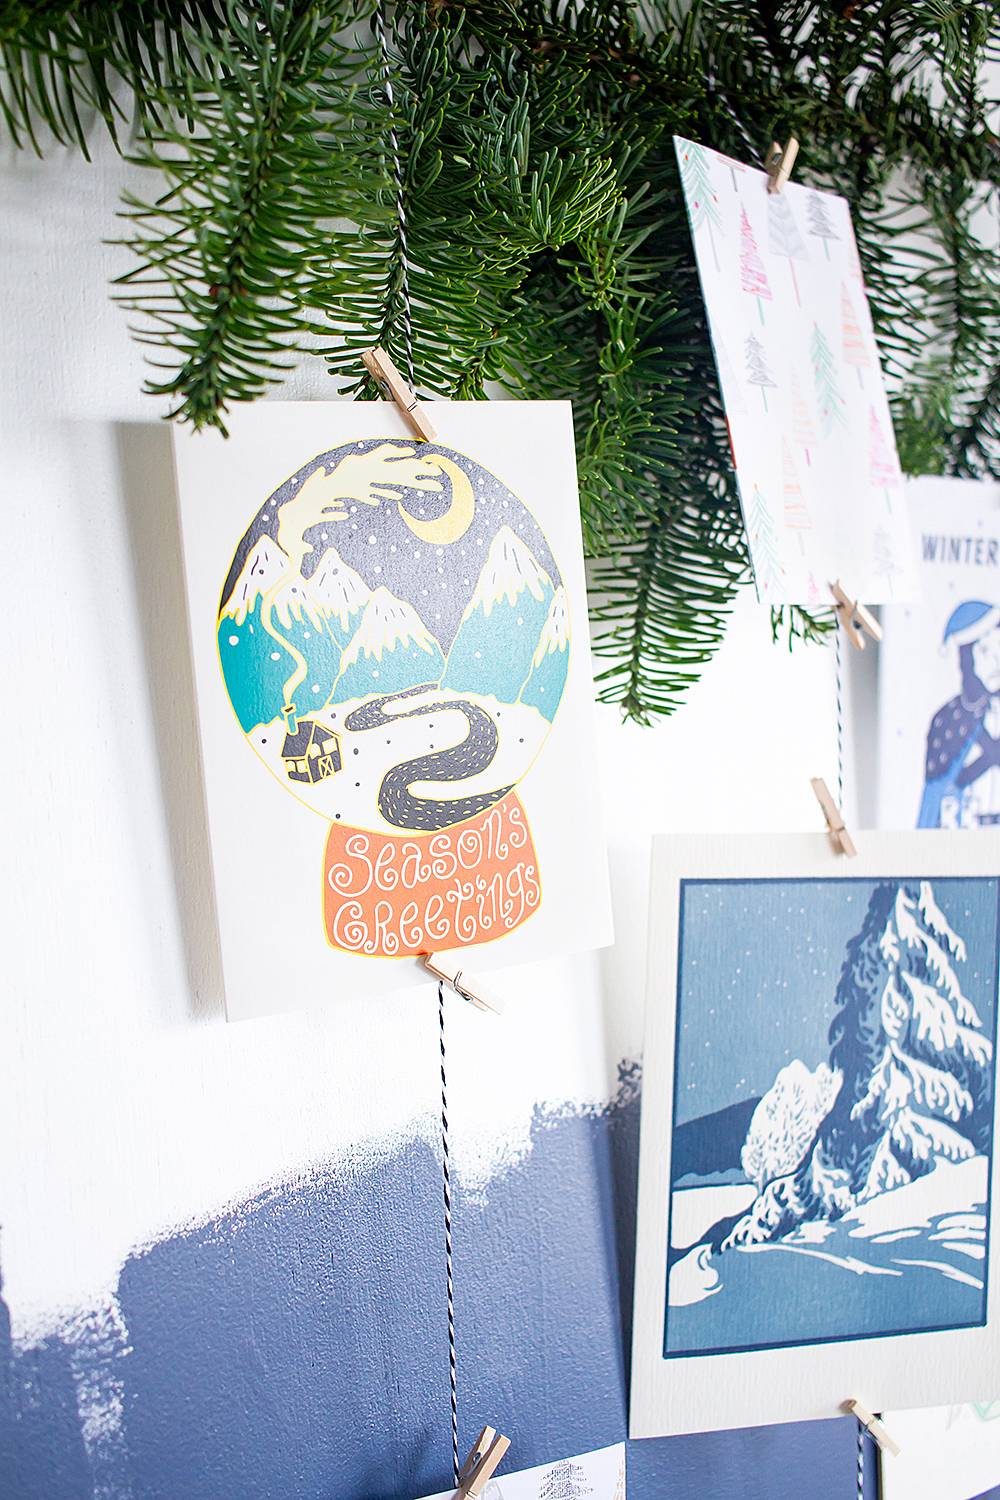
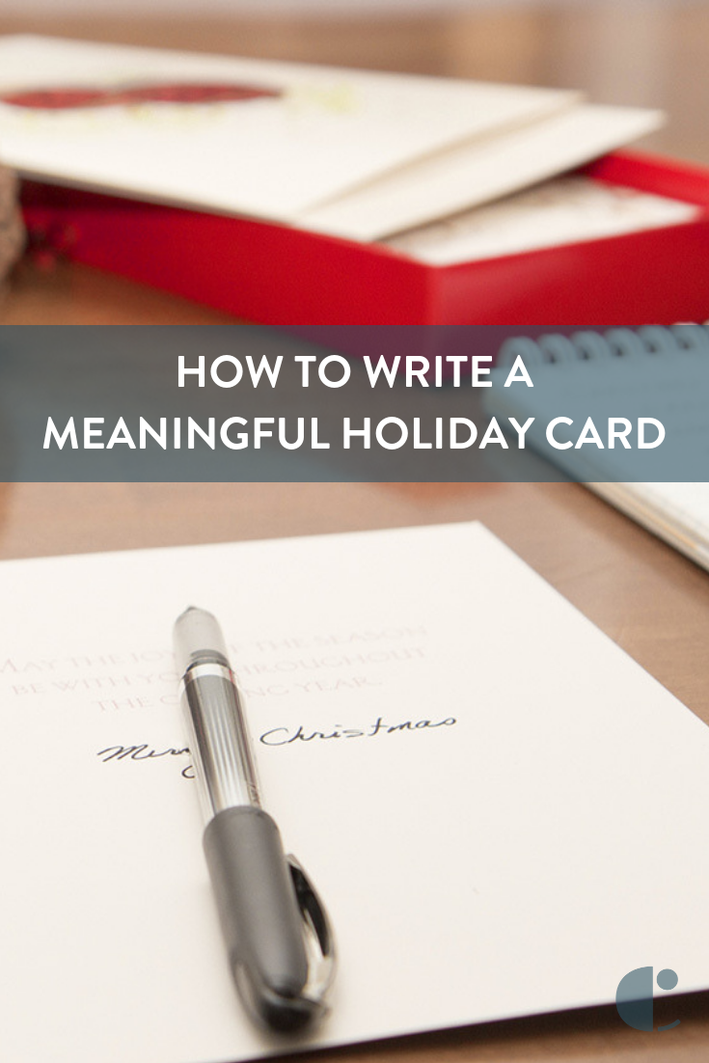
Where would you hang your branch holiday card display? Do you have other ideas for showing off your holiday cards? Let us know in the comments! Looking for more thoughtful holiday ideas? Check out how to write a meaningful holiday card for your loved ones!
The post Show off your Holiday Cards in Style with this DIY Branch Holiday Card Display appeared first on Curbly. Via https://www.curbly.com/diy-branch-holiday-card-display 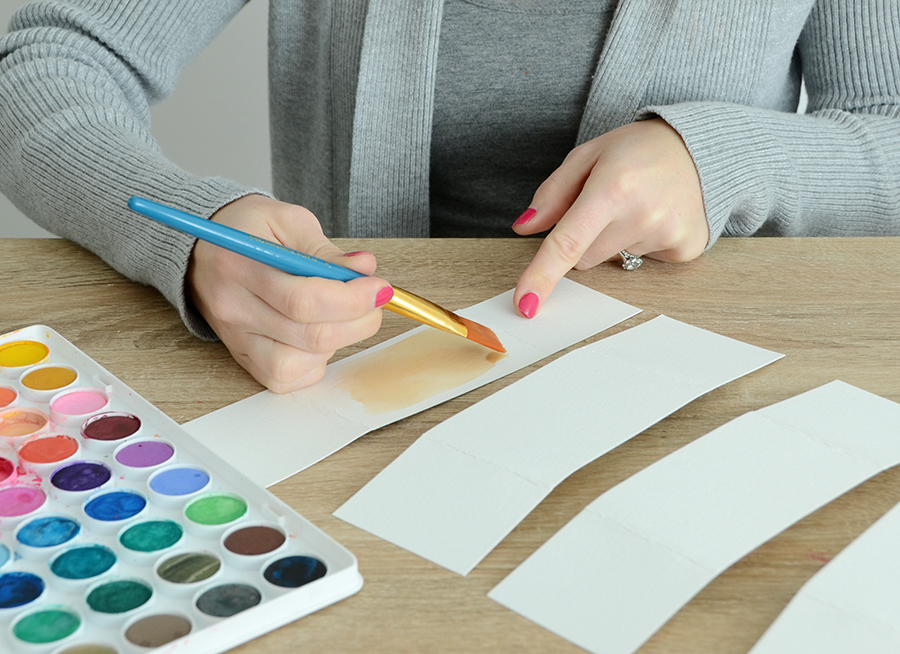
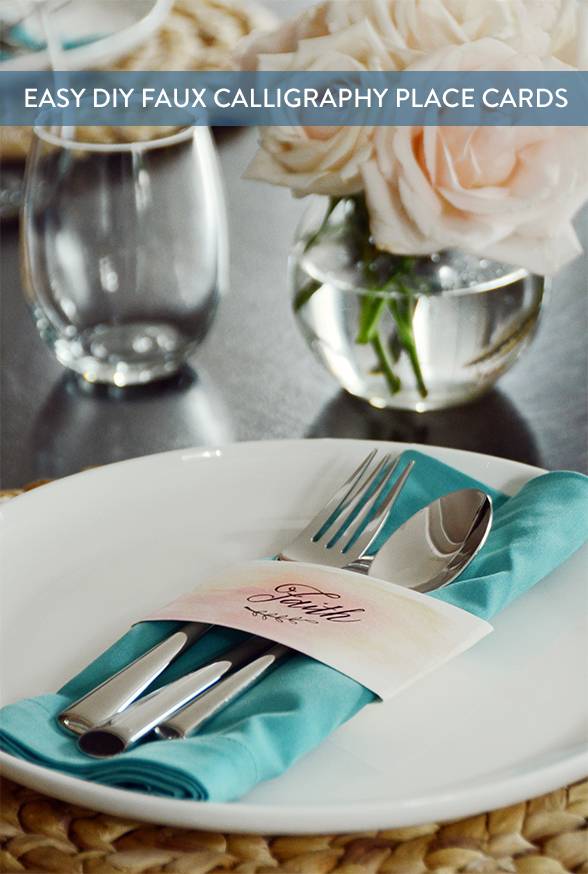
So you love the look of calligraphy, but you don’t have the time to learn how to do it? Or the patience, or the steady hand? Well there’s an easy way to fake it ’til you make it… today I’m going to show you how to make your own faux calligraphy place cards for Thanksgiving, Christmas or your next dinner party.
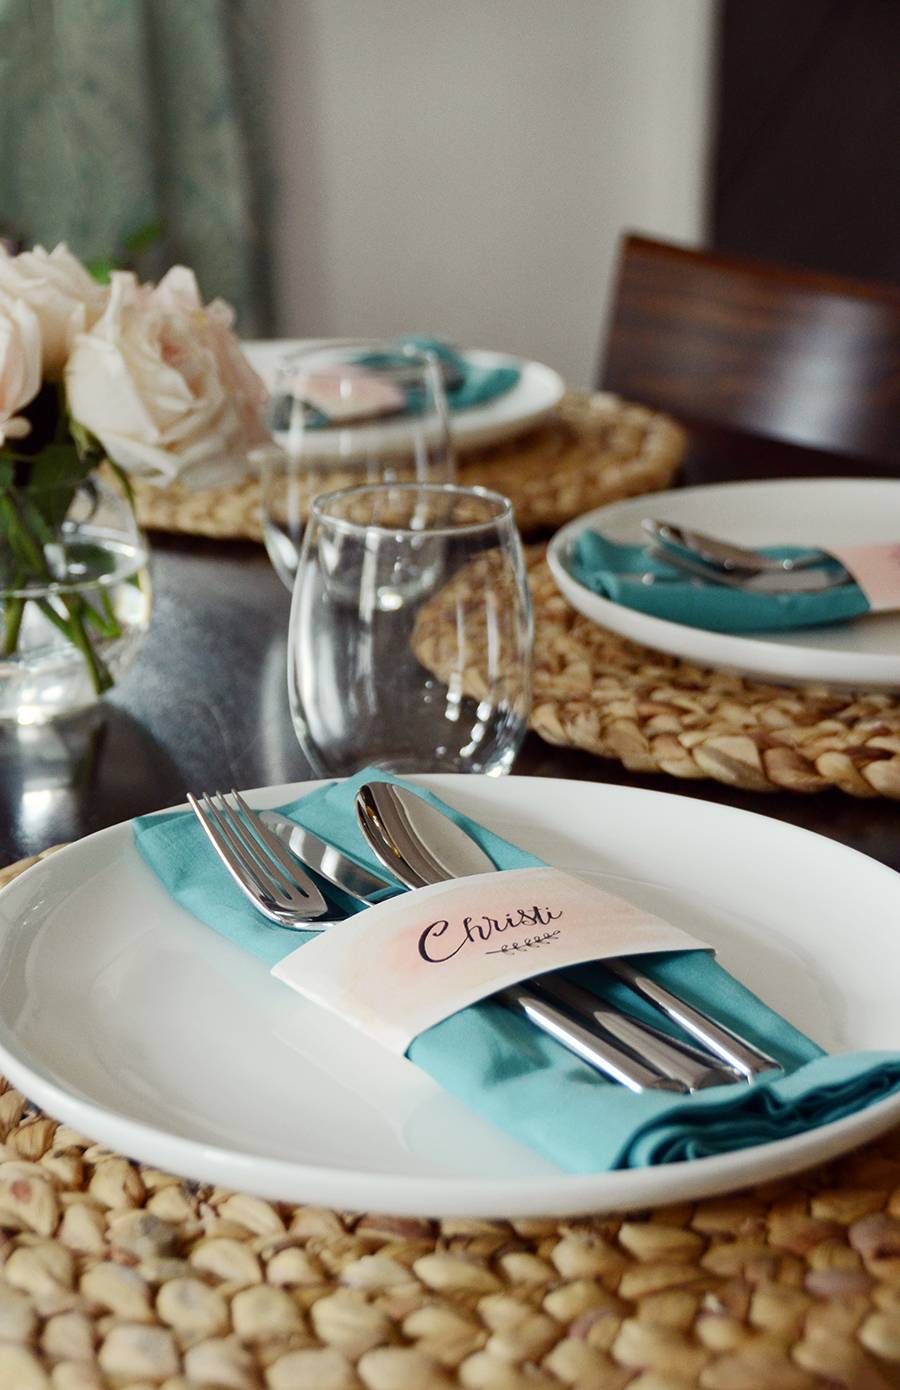
The end result is totally elegant and surprisingly easy to achieve. So let’s get started!
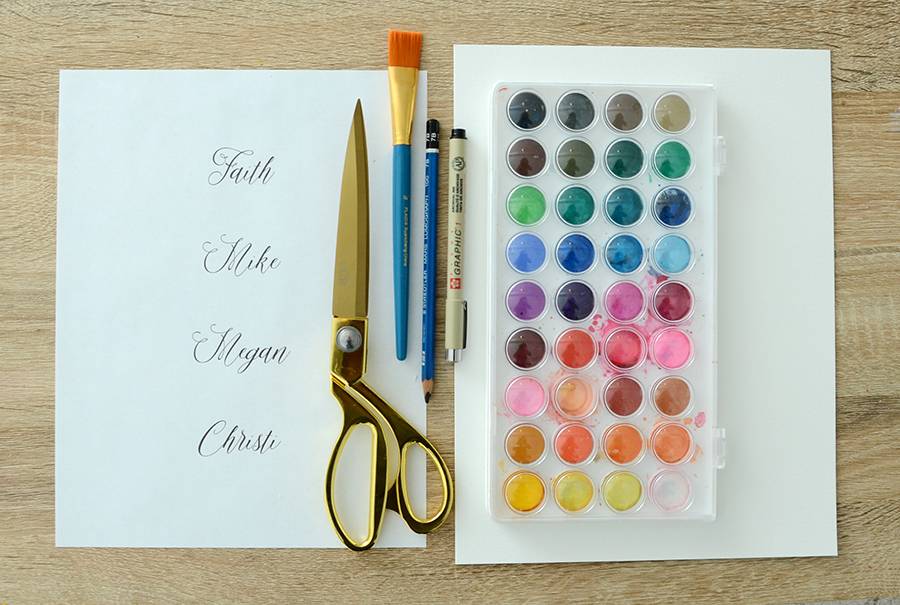
Materials
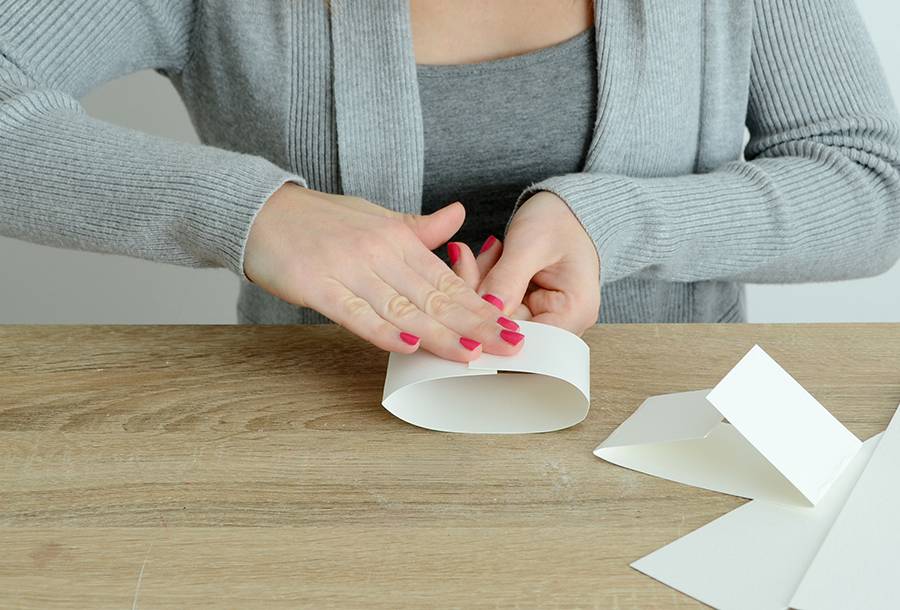
Begin by cutting your watercolor into strips that are approximately 3 x 10 inches. Fold them as shown above, so that the back flaps overlap by about 1/2 an inch.
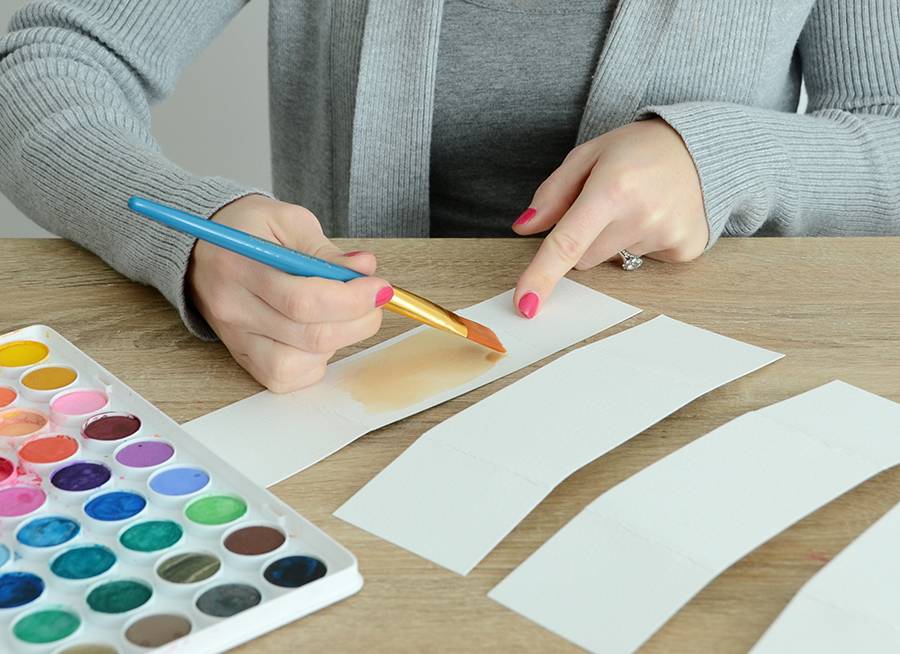
Unfold them and begin painting the middle section of each strip. Choose any color scheme you like, and feel free to paint the side sections for a more natural look. Let them dry thoroughly.
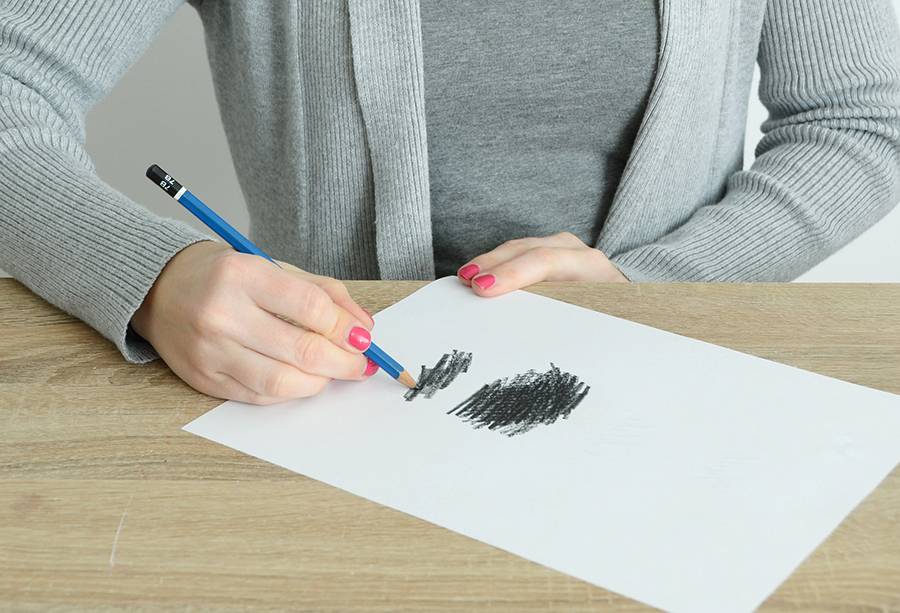
Next, use a soft pencil (the softer the pencil, the darker it is) to color over the names on the back side of the printout. I used a 7B, but you could use anything in the 4B to 8B range.

Cut out each name and place it over the center of the place card with the pencil-covered side down. Hold it in place with your non-dominant hand, and use the pencil to trace the name. When you lift it up, you will see that the pencil has transferred down onto your painted surface!
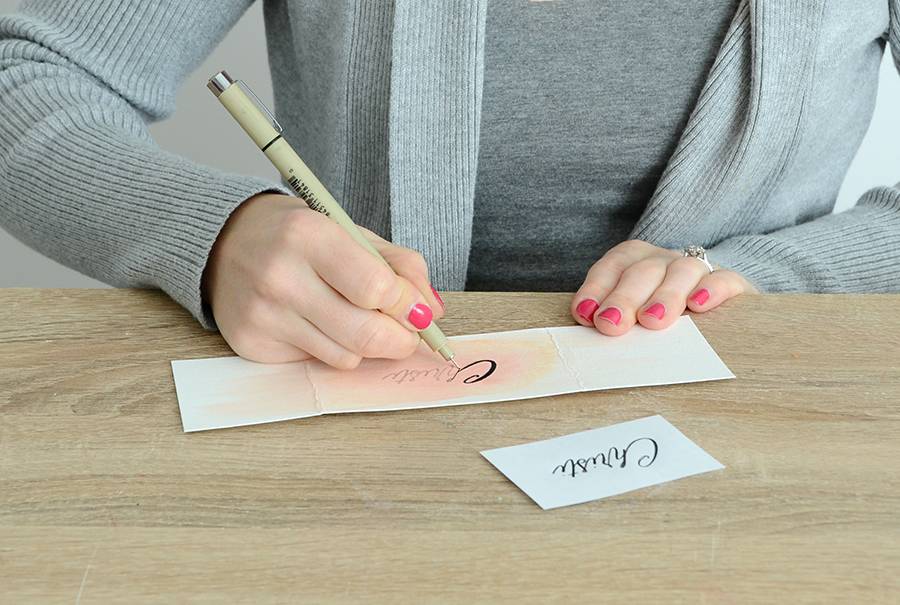
Use a fine pen to trace over the pencil lines. Add thickness to the lines as necessary, using the printed font as a guideline. You can leave it as is, or add a flourish underneath like I did. To make the branch motif that I used, start by drawing a curved line underneath the name. Then draw small ovals down one side, and back up the other. Add a bit of thickness to one end of the stem.
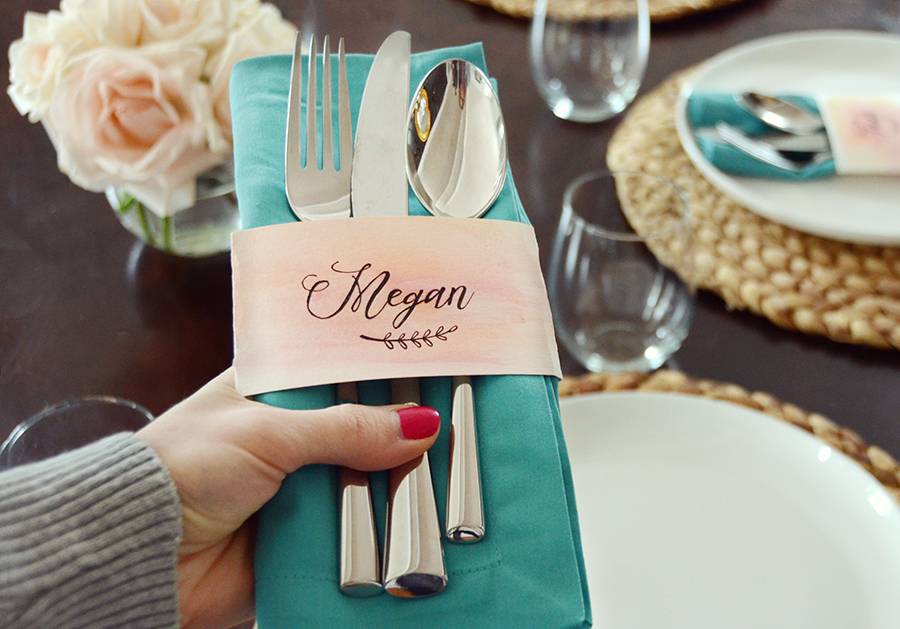
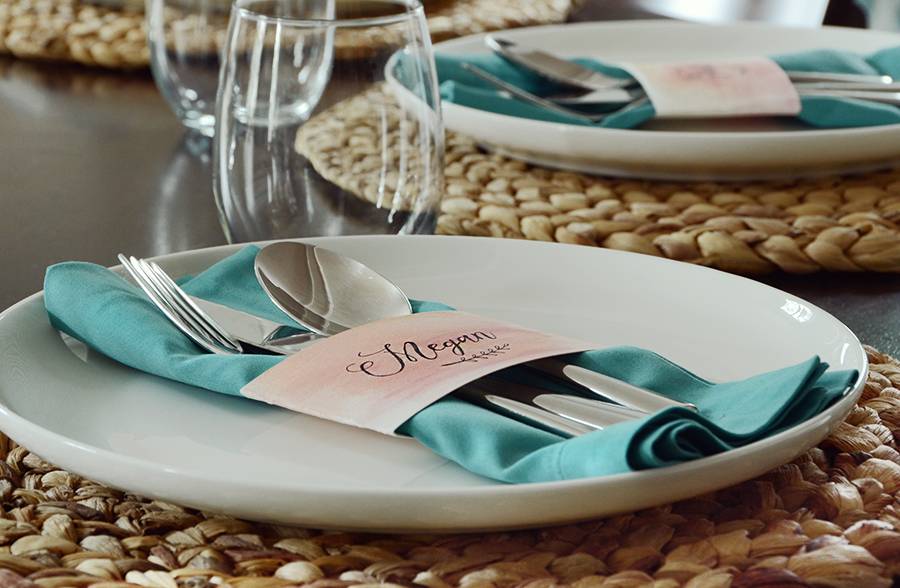
Wrap it around a napkin, tape the back and place the silverware in between. The end result is elegant with a bit of a playful vibe. Your guests are sure to rave about them!

You can easily customize these by choosing different paint or ink colors, different fonts and perhaps ever different paper colors.

If you’re short on napkin rings for your next gathering, these take their place – problem solved!
And who knows, maybe this will inspire you to get into calligraphy… it’s a fun way to up your creativity without having to buy a ton of materials. Happy lettering everyone!
The post DIY Place Cards With Faux Calligraphy appeared first on Curbly. Via https://www.curbly.com/diy-place-cards-with-faux-calligraphy How to Throw an Office Holiday Party Your Co-Workers Will Be Talking About into the New Year11/9/2022 
Are you in charge of throwing the office Christmas party? What a great opportunity! After all, if it goes well, you can expect plenty of appreciation and accolades. Make sure you don’t skimp on the planning, though. If the event is boring and awkward, the party will be remembered for all the wrong reasons. Looking for work Christmas party ideas? Read on for tips and ideas sure to make your office party fun, delicious, and full of holiday spirit.
Why Have an Office Holiday Party Anyway?The answer seems obvious: “To have a good time!” But there’s more to it than that. An office Christmas party is a great way to show appreciation. You and your co-workers have put in a lot of hard work over the year, and a thoughtful party acknowledges that work and all the professional development that went along with it. Another big reason to celebrate? Getting together builds personal ties. The constraints of deadlines and meetings don’t always encourage the kind of teamwork that is so important to the success of your company. Socializing as a group goes a long way! 
How to Throw an Office Holiday Party: First StepsThe first step is identifying your budget and the guest list. These two factors will drive the rest of your decisions. Will only employees be coming or will they bring plus ones or even their entire family? Once you know who is going to attend, consider their idea of a good time. The engineers I used to work with would have hated a karaoke party but other departments would be thrilled with the idea. What spells “fun” for your office? The answer to this question will help you know how to allocate your budget and set you down the path toward a great company party. Clueless about what your co-workers enjoy after hours? Send out an email and ask them to pick from a few affordable work Christmas party ideas, and go with the most popular one. Picking a Venue for a Work Holiday PartyA restaurant is a no-fail option, but also consider reserving space at an art gallery, botanical garden, museum, local historical site, or community center. If you live somewhere with temperate weather look to enjoy the outdoors and book a park pavilion. Establishments such as a bowling alley, paint-your-own pottery place, arcade, ice skating rink, the zoo, dance studio, or comedy show offer built-in entertainment. The search for a party venue may be no farther than your desk. The office can be a great space for the company holiday event, especially if the party budget is tight. The success of this depends on your particular office, though. Some employees would appreciate having time off during the work day to celebrate while others would prefer a night out. A company holiday event held at the office is a great chance to play some Christmas party games or group ice breakers. Consider a photo booth, cookie decorating station, or meme contest for potential work Christmas party ideas. If the party is held at the office be sure to make the atmosphere different from the normal workday with music and decor. 
What Refreshments to Serve at a Company Holiday GatheringFood and drink are key to a successful work Christmas party, but this doesn’t mean it has to be expensive or elaborate. There are many different ways to eat, drink, and be merry – just give some thought to your guests and what they would most enjoy. A catered meal, a rented food truck, a dessert bar, dinner cruise, and potluck are all great choices for different reasons. Fondue or shabu shabu are fun and social ways to enjoy a meal. Think outside of the dinner box and consider a brunch party or appetizers and happy hour party. If you are holding your holiday gathering at the office, make sure you check with the Human Resources department or office manager on whether or not you can serve alcohol at your event. What to Wear to a Work Christmas PartyThe dress code will take its cue from the venue. Party outfits should be appropriate but festive. A cute dress or button up shirt will fit well in most places. Daytime events are more casual but can still incorporate holiday colors or jewelry. Comfort is always important. It is much easier to have a good time if you do not have to fuss with your clothes all night. 
How to Decorate the Office for ChristmasDecorating for the company party is more than scattering pretty objects around. The purpose is to build atmosphere and set the expectation of a festive time. Twinkle lights and candles make for great mood lighting. Good decor not only looks wonderful, it smells great, too! Include live greenery like evergreen boughs, eucalyptus branches, and poinsettia. Citrus fruits and live wreaths make for lovely tablescape decor. They can also be taken home afterwards as party favors. Keep in mind the diversity of your co-workers’ beliefs. Christmas could feel universally accepted as it is embraced by many who are non-religious, but it is not celebrated by everyone. Do not decorate with religious symbols- especially those of which you are not familiar. What you may see as a decoration, someone else may regard as sacred. Stick to festive items like garland and snowflakes and leave kinara, menorahs, and manger scenes out. Holiday Office Party InvitationsParty invitations can run the gamut from a simple group e-mail to letterpress invites delivered by post. Online invitation services or social media event pages are simple and effective options. Also, there are many sites that offer downloadable invitation templates that you can use to print or e-mail. Whatever you choose, make sure that the holiday office party invitations communicate the dress code and clearly state whether employees are invited to bring a guest. 
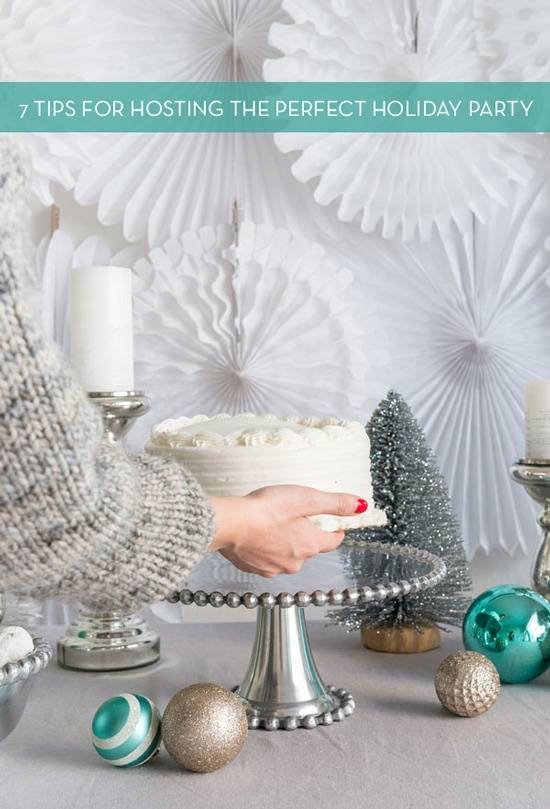
With a little effort and creativity, your office holiday party will be loads of fun! Your co-workers will leave smiling, feeling appreciated, and already looking forward to next year’s bash. Want more work Christmas party ideas? Check this article on 7 tips for hosting the perfect holiday get-together.
The post How to Throw an Office Holiday Party Your Co-Workers Will Be Talking About into the New Year appeared first on Curbly. Via https://www.curbly.com/work-christmas-party-ideas 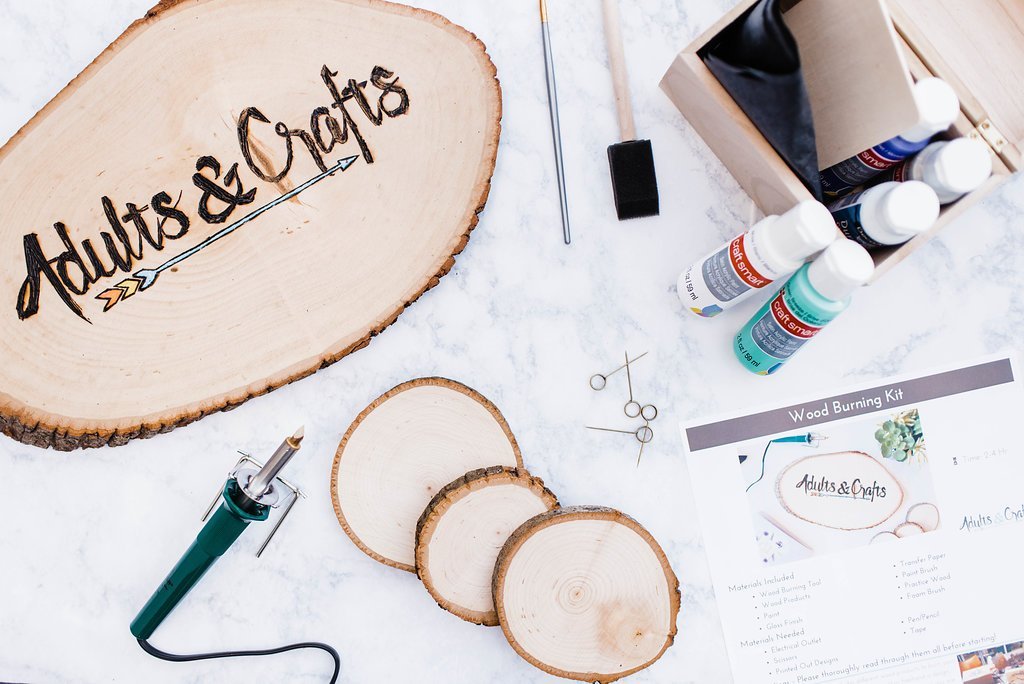
If you’re like me, you probably have a few artists, DIYers or crafters on your Christmas list this year. You might also be running out of ideas for gifts to give these creative individuals, especially if they’ve been on your nice list for awhile. In an effort to make your gift shopping a little easier this holiday season, here are some ideas of gifts for artists.
What are the best gifts to give for someone who loves art?Most artists have the basic materials needed for their particular art form, so the key is to either find something unique that will help them take their art a step further, or to buy them something that will help them expand their art knowledge into different mediums and techniques. Here are some of my favorite ideas: 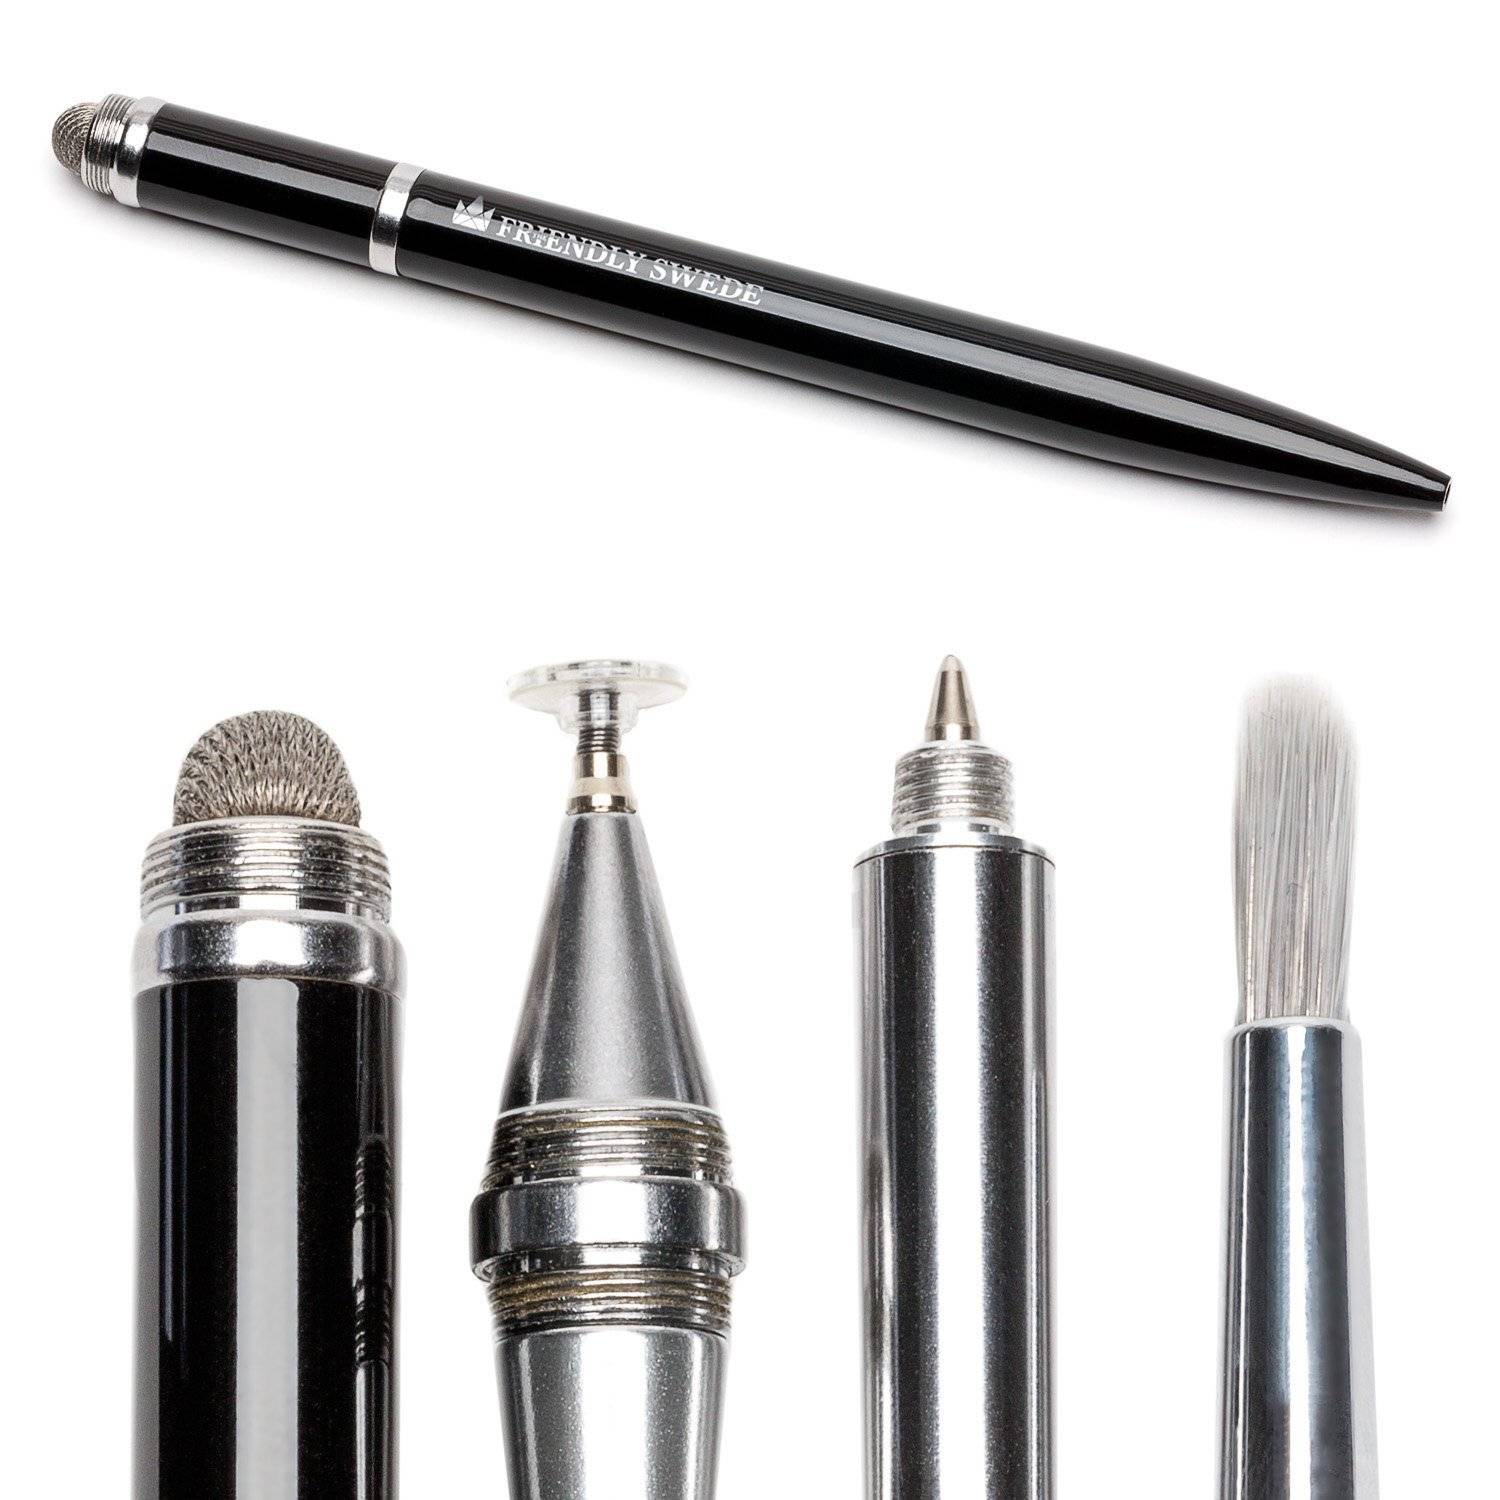
1. Stylus Pen For Digital PaintingDigital art on tablets and phones is becoming super popular… get the art lover on your list a stylus pen so they can create art on-the-go too. This would be a great gift idea for teenage artists who are, let’s face it, the most tech savvy age group out there. This one from Amazon comes with four different tips. $23
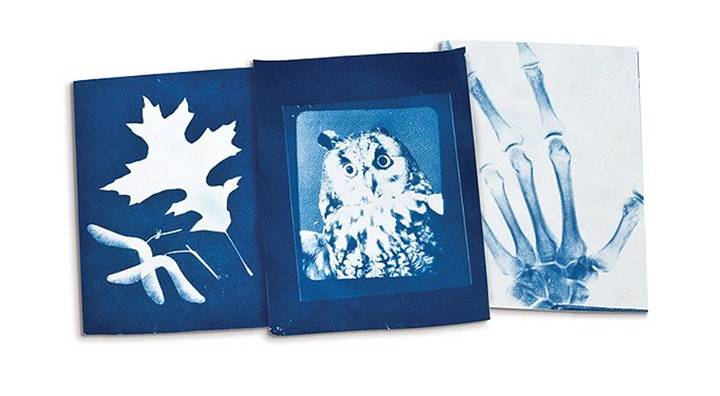
2. Solar Photography KitPhotographers and nature-lovers alike will enjoy this unique kit that teaches you how to create prints using sunlight and found objects. Just place the special light-reactive material outside with an object on top and get ready to be amazed! Get it at Uncommon Goods. $15
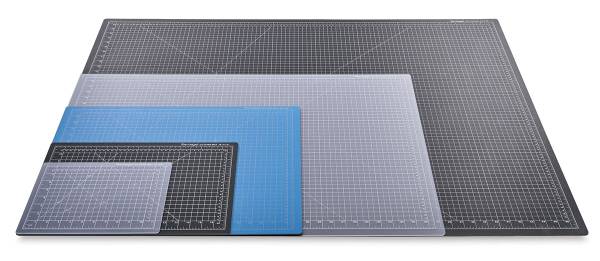
3. Self-Healing MatsCrafters and artists will find a self-healing cutting mat to be an invaluable item to have in their studio. They are great for cutting photo mats, paper, fabric, etc. I use mine all the time… it will protect your table or work surface, and it’s also the perfect material to use a rotary cutter on (see next item on the list). Blick has a variety of self-healing mats to choose from in different sizes from $7 to $69.

4. Rotary CutterA rotary cutter is a great item to go along with the self-healing mat. You can cut paper, fabric and a number of other things with them, and they give you more control than a traditional pair of scissors or a utility knife. I can’t tell you how much faster it is to cut fabric with a rotary cutter… and it eliminates those little jagged edges too. Get this one from Gingher on Amazon. $40
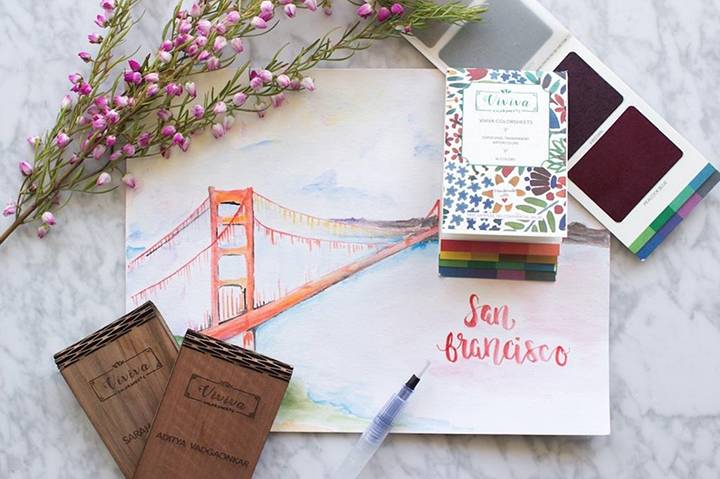
5. Viviva Colorsheets
For the artist in your life that loves to paint en-plein-air, consider one of these unique portable colorsheet booklets from Viviva. Vibrant watercolors are housed in small pocket-sized booklets that can be brought anywhere. It would be fun to pop one of these in your purse in case you’re inspired on-the-go. Buy them here. $20
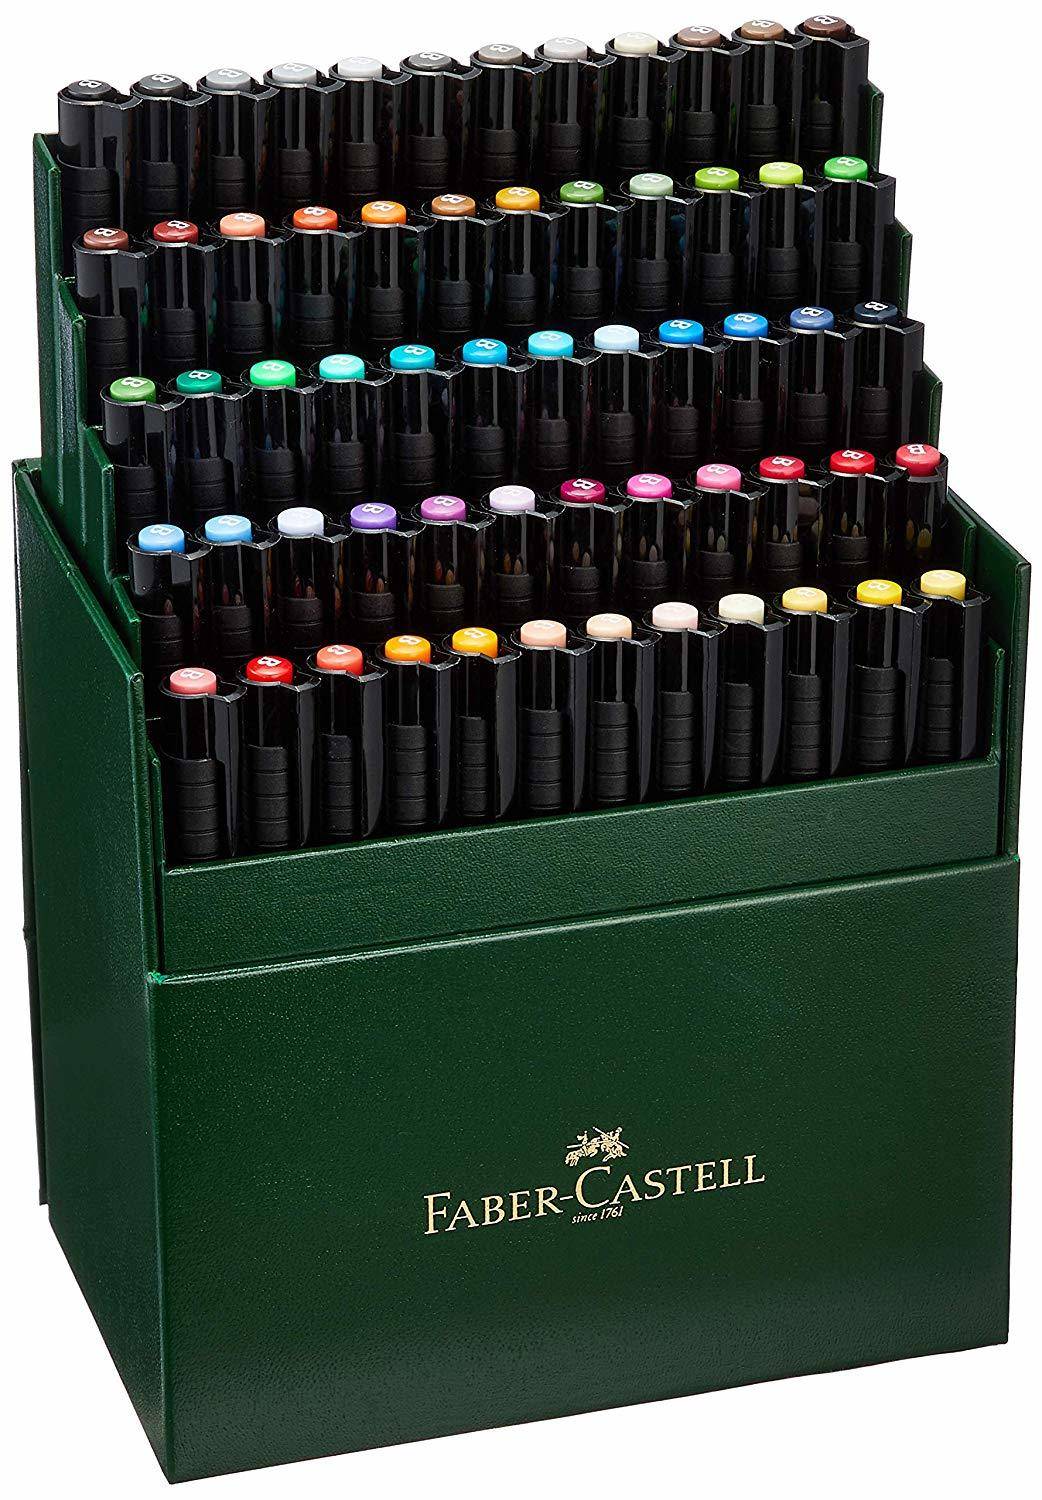
6. High Quality Marker SetA high quality set of brush pens or markers is one of my favorite gifts for artists. It’s the sort of thing that you might not splurge on for yourself, but I guarantee the recipient’s eyes will light up at the sight of all those beautiful colors. I just bought a few of these Faber-Castell PITT brush pens and they write like a dream. Buy this 60-piece set here. $94

7. 3D Printer PenA 3D printer pen is a super unique gift for artists of all ages. It can be used to create beautiful art and sculpture, but it’s also handy for making functional items too. I have the 3Doodler Create+ pictured above and it’s fantastic. And it’s really quite easy to control once you get the hang of it. Get the 3Doodler here. $80
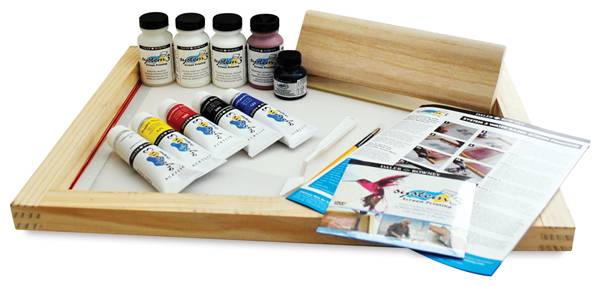
8. Screen Printing SetThis would be a great gift for young artists who are interested in trying a different medium. You can print posters, cards and even clothing using this beginner kit from Blick. I’ve always wanted one of these, and I don’t think I’m the only one! Get it here. $82
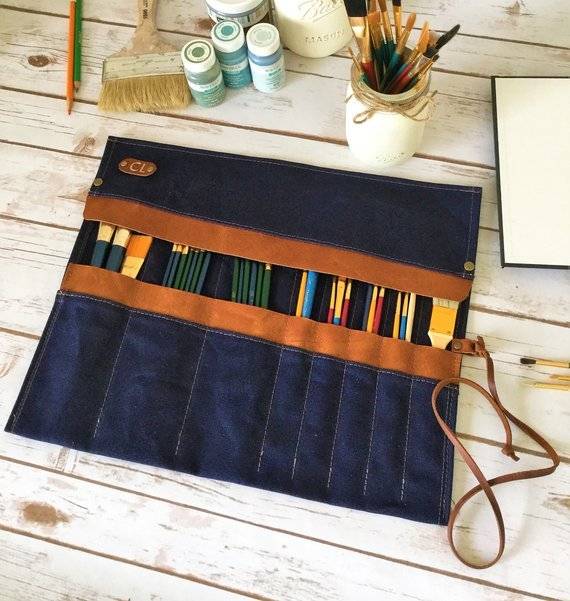
9. Handmade Waxed Canvas Brush RollMost artists I know are willing to spend money on art supplies themselves, but not on storage or organizational items. This beautiful handmade waxed canvas brush roll will keep all of their paintbrushes and pencils organized and protected, and also provide an easy way to transport them to and from the studio. As an added bonus, it will stand up if you roll it inside out. Get it on Etsy. $42
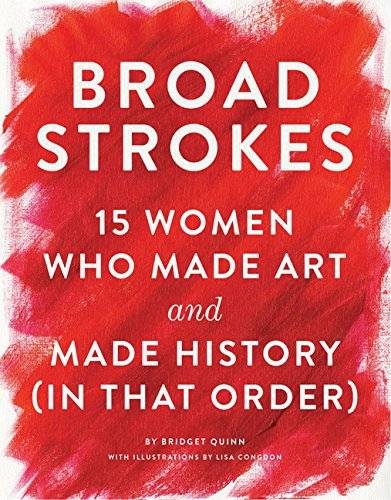
10. Broad StrokesThis is a great book for the artist in your life who appreciates strong female artists who have made history using their creativity. Artemisia Gentileschi, Lee Krasner, Kara Walker and more top the list. It’s a great read, but also makes a wonderful coffee table book thanks to its bold red cover. Get it here. $10
11. Art Museum MembershipIf you know an artist who loves to visit their local art museum, give them the gift of a membership so they can visit more often. Perks sometimes include discounts on parking, special events and early access to exhibitions. Museum memberships also often provide opportunities to get more involved with the art community as an added bonus. Prices vary for this one… locate museums by state here.

12. Craft Subscription BoxThis is one of the best gifts for artists that I’ve found. Each month, all the supplies for a new craft project are sent to the recipient… talk about a creative present! Adults & Crafts has monthly subscription boxes with some really interesting looking projects. You can do a three, six or twelve month subscription (and the more months you subscribe for, the less it costs each month). Check it out here. $30+ Do you have any gifts for artists that you’ve given in the past? Or something you’re thinking about giving this year? Be sure to share them in the comments section below! 
The post Gift Guide For The Creative Type: 12 Fantastic Gifts For Artists appeared first on Curbly. Via https://www.curbly.com/gifts-for-artists
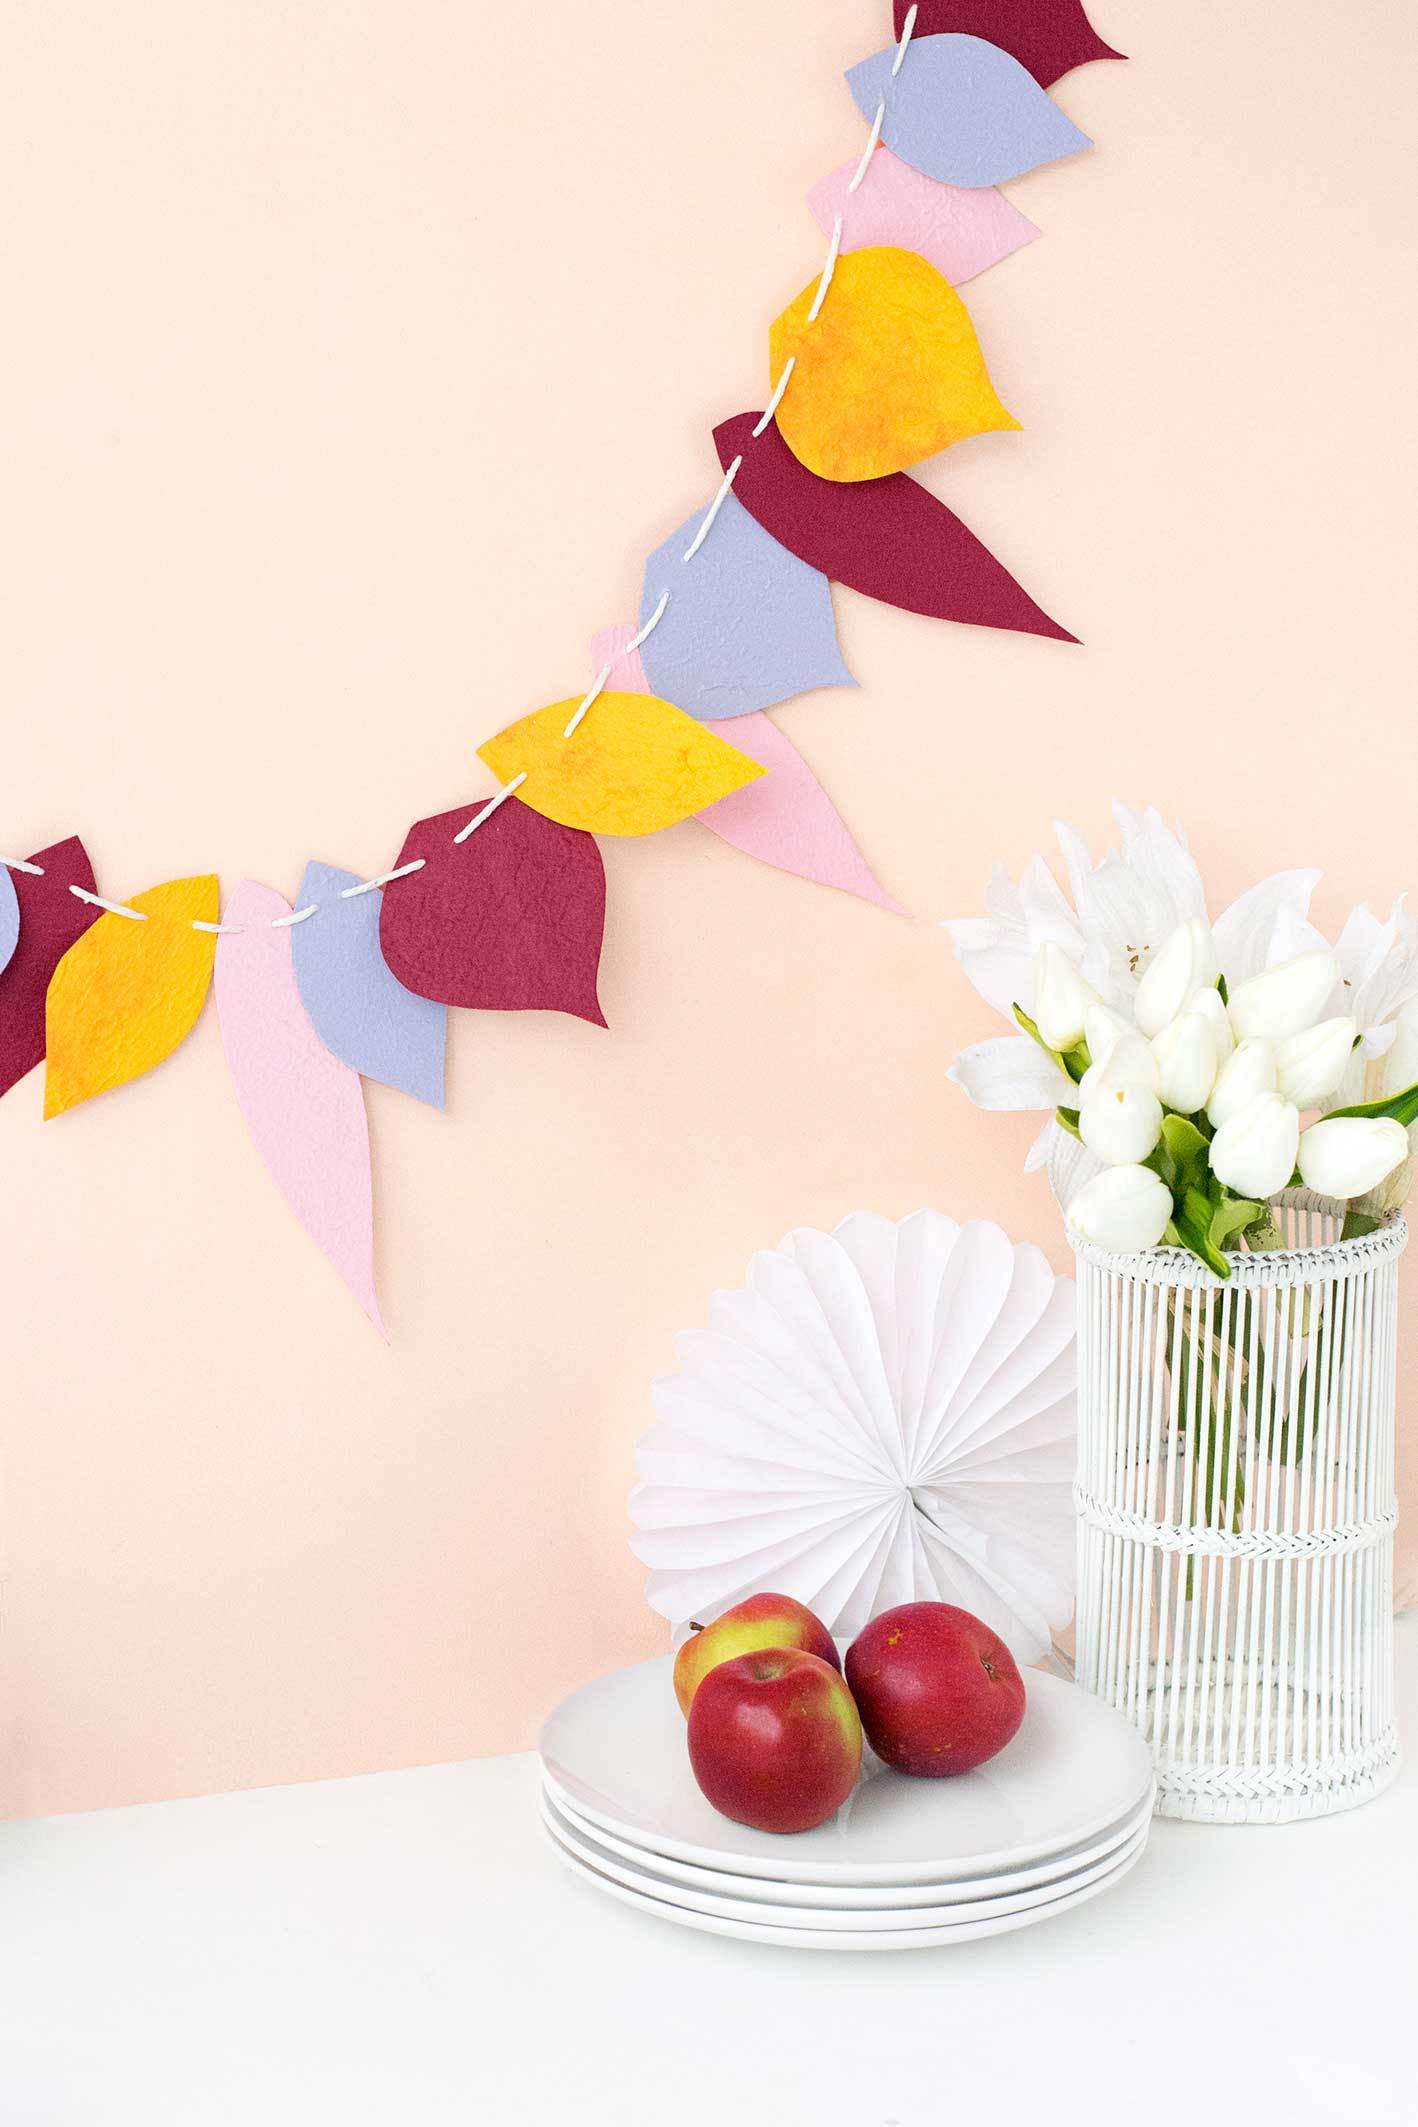
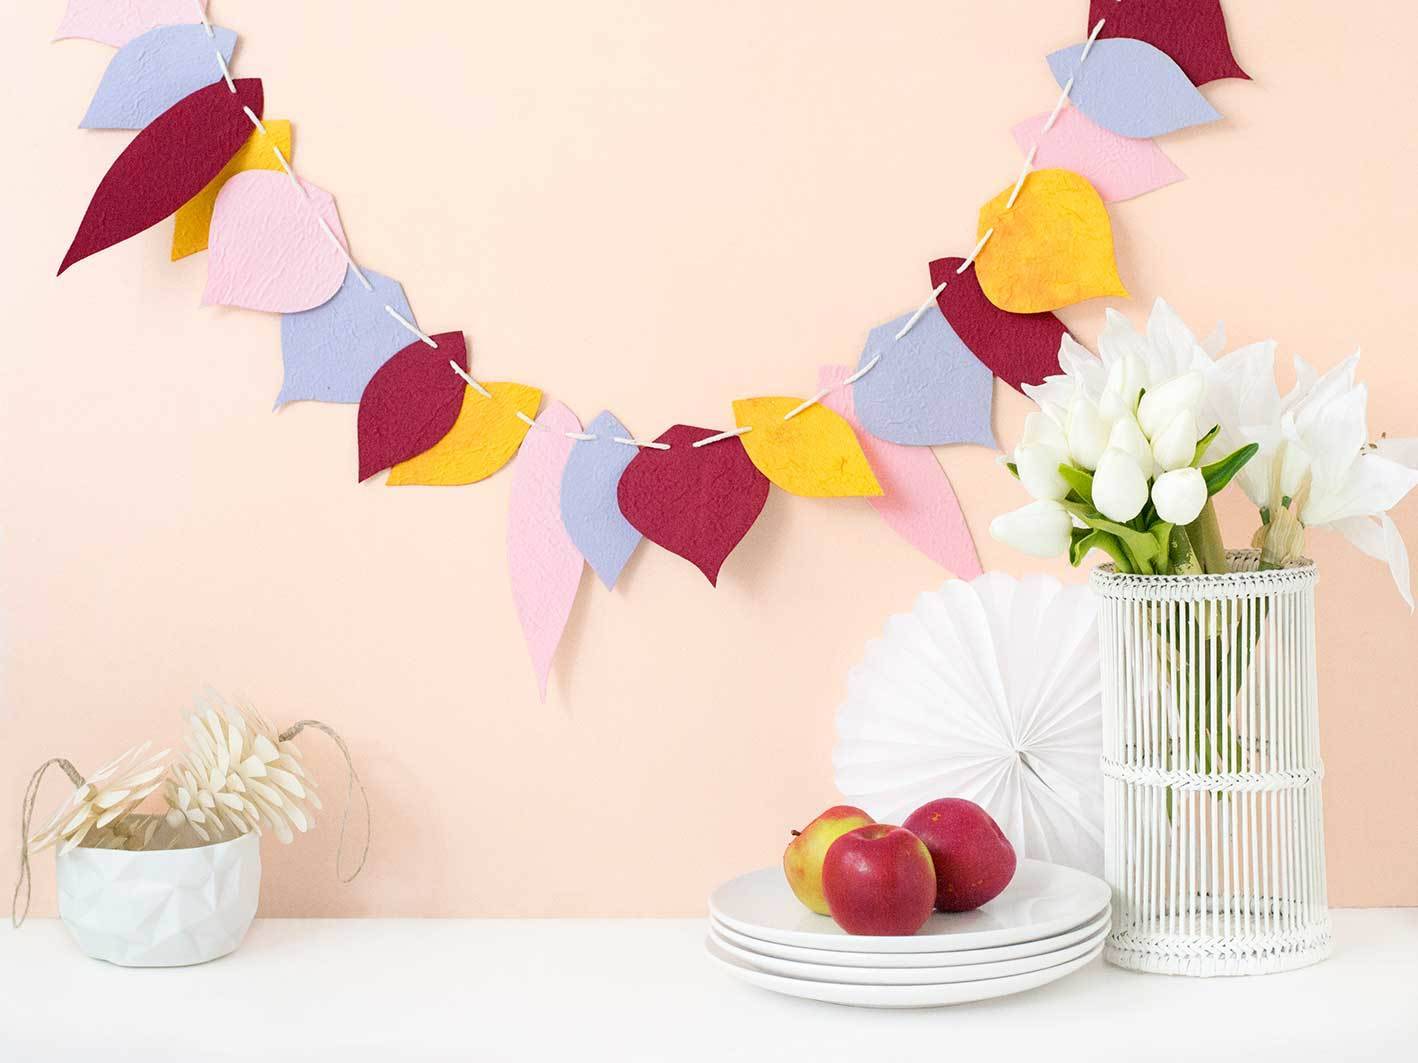
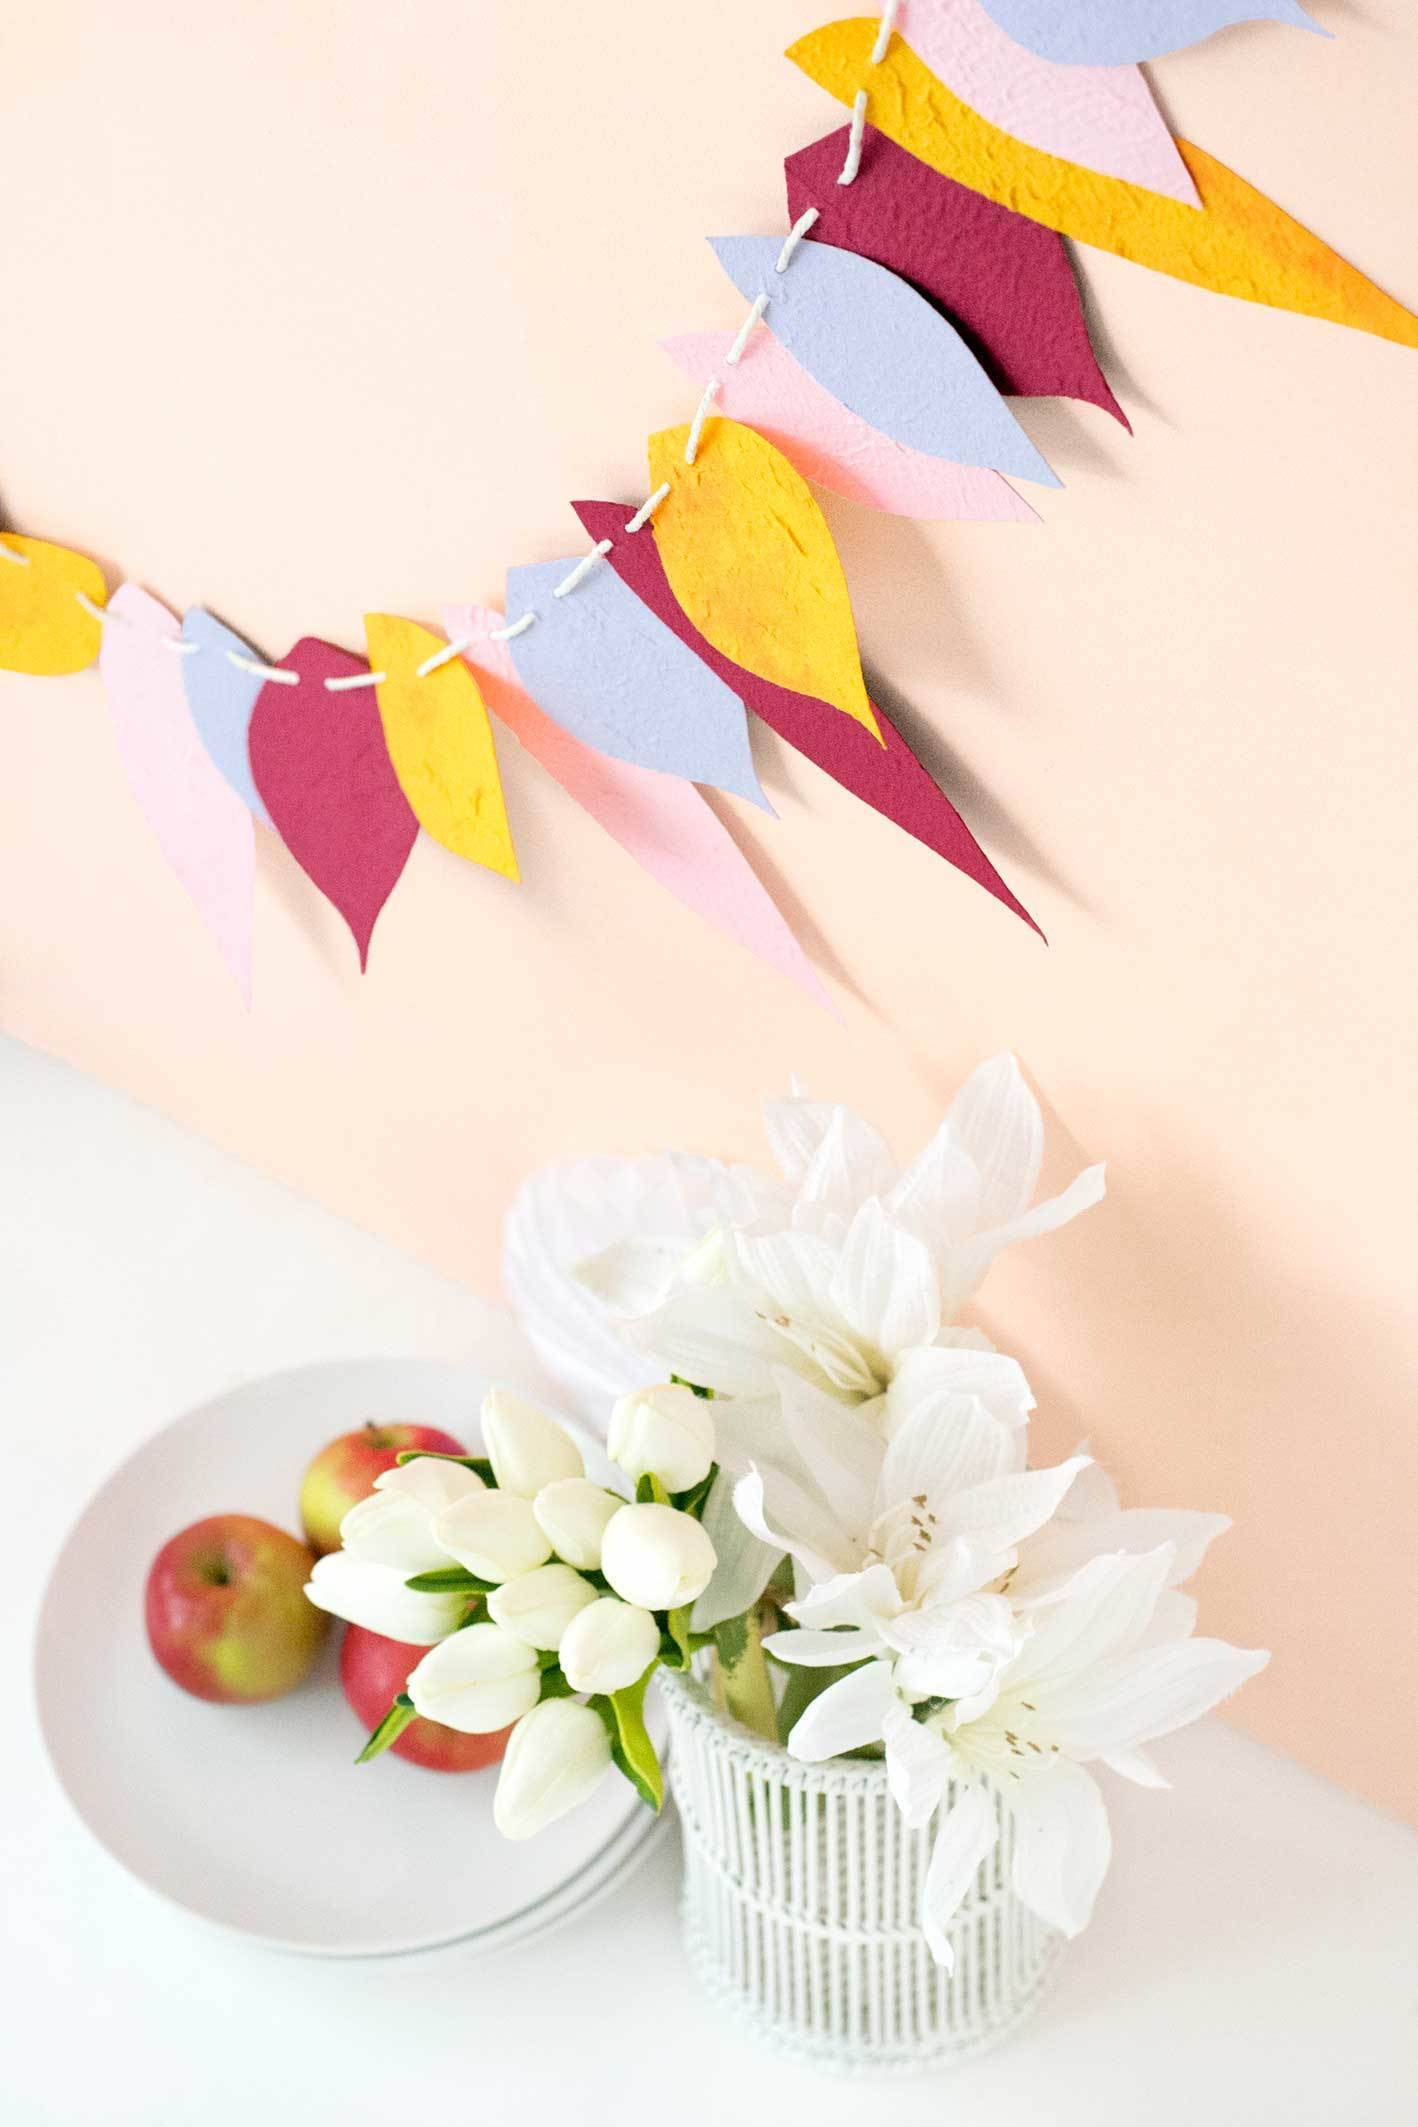
Autumn brings to mind some of the best memories for me, like the crunch of leaves underfoot, the crisp, fresh air and the trees ablaze in brilliant shades of red and yellow. It’s only natural to want to bring some of those elements indoors, and one easy way to do this is by making a fall leaf garland to show off those fantastic fall colors.
This is a nice, quick project for an afternoon indoors, so grab a hot chocolate and a pair of scissors and let’s get crafting!
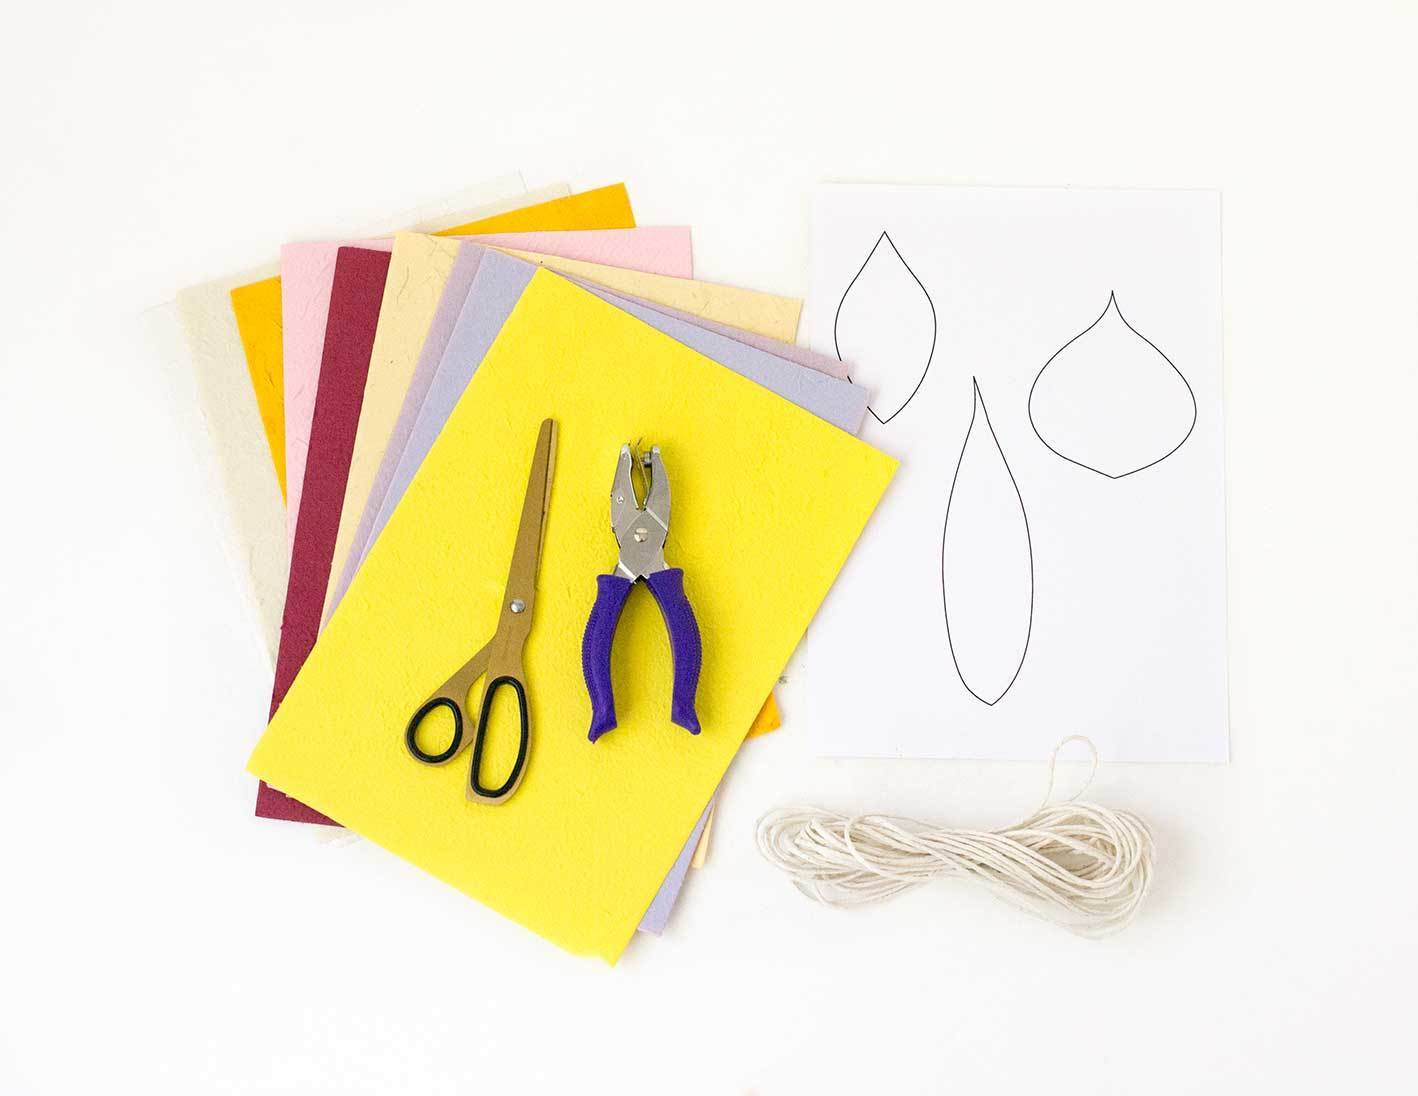
Materials
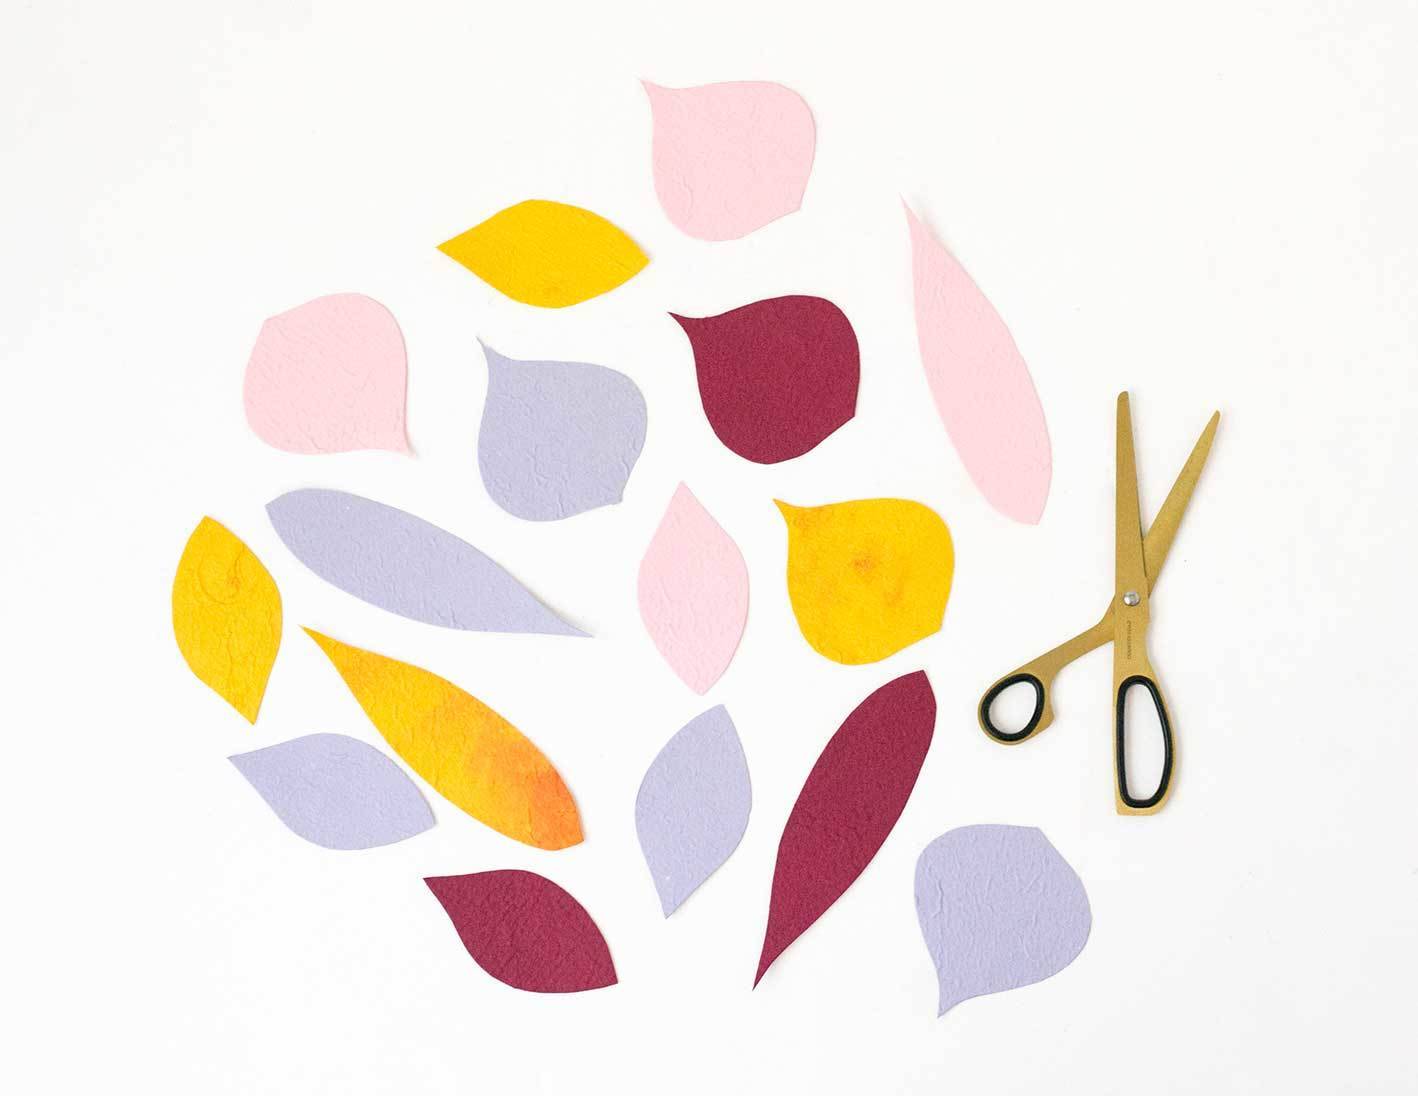
StepDownload the fall leaf template, print it out onto white card and cut out the leaf shapes.
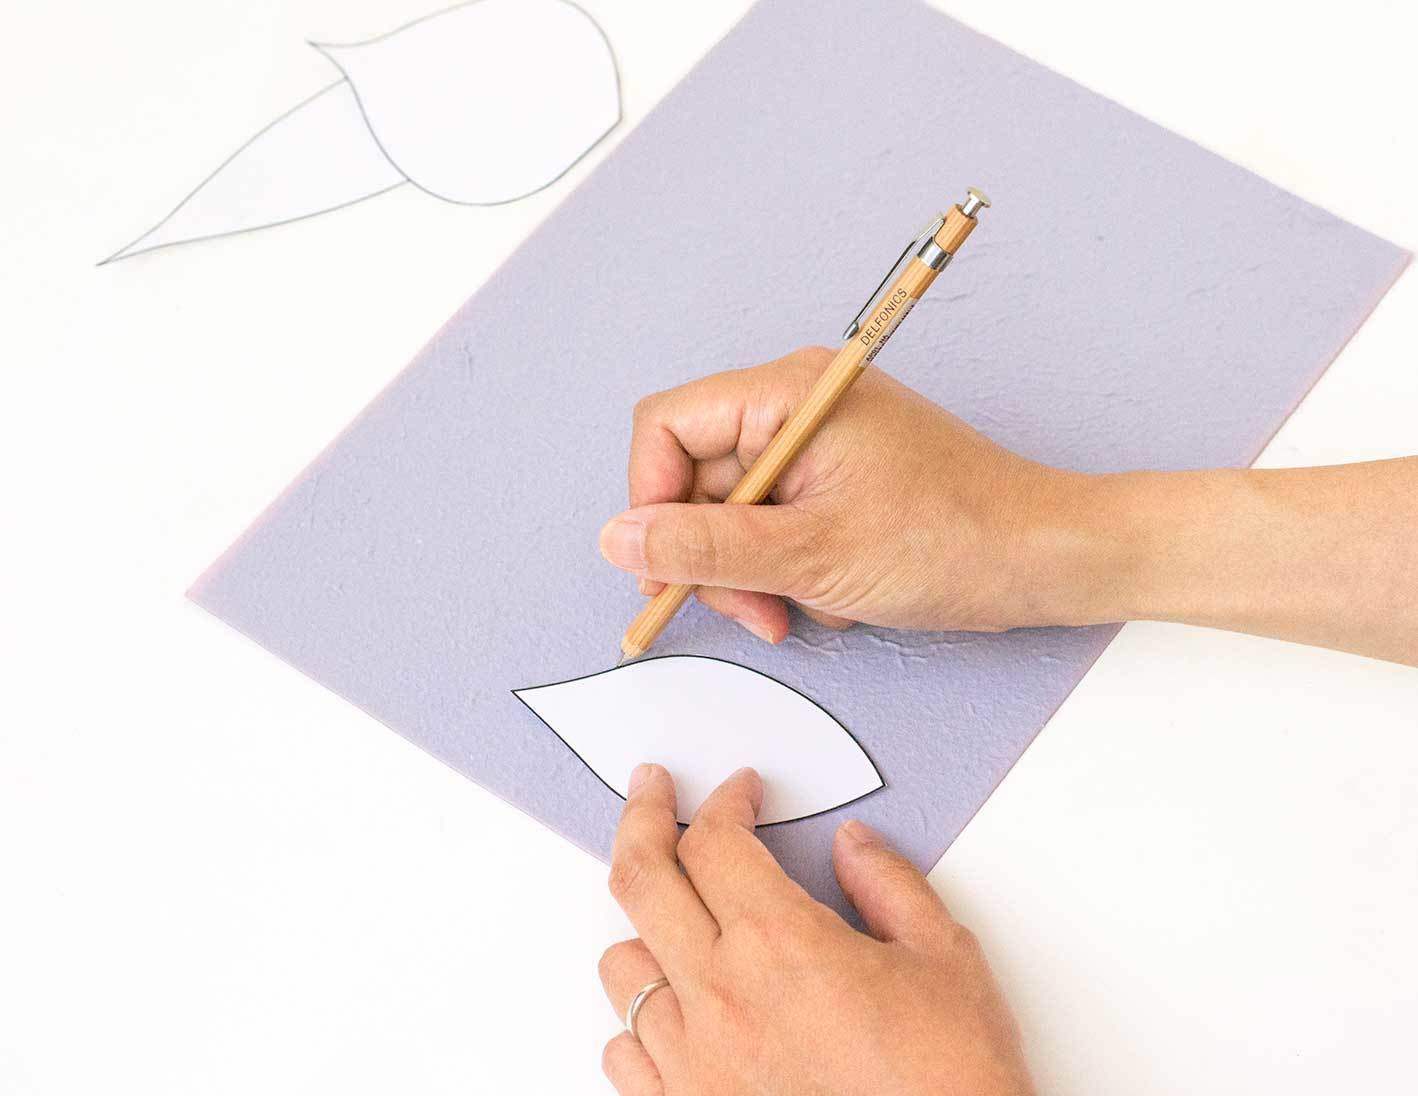
Trace around the leaf template shapes onto the back of your colored paper. Trace as many leaves as you’ll need to fill the length of your fall leaf garland.
StepCut out the leaves you traced with a pair of scissors.
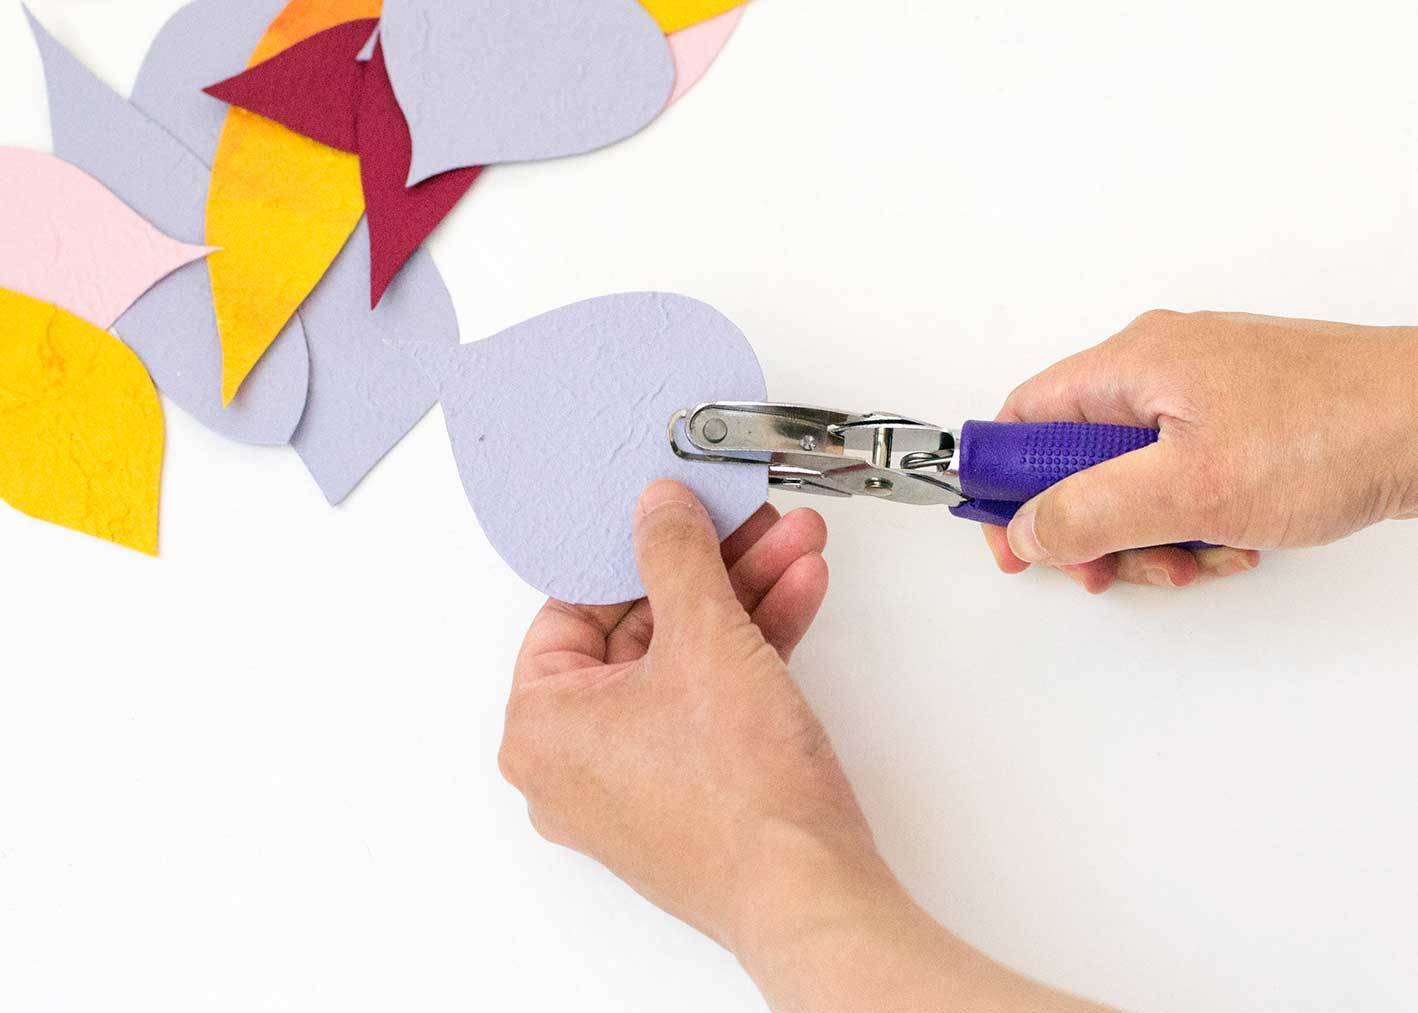
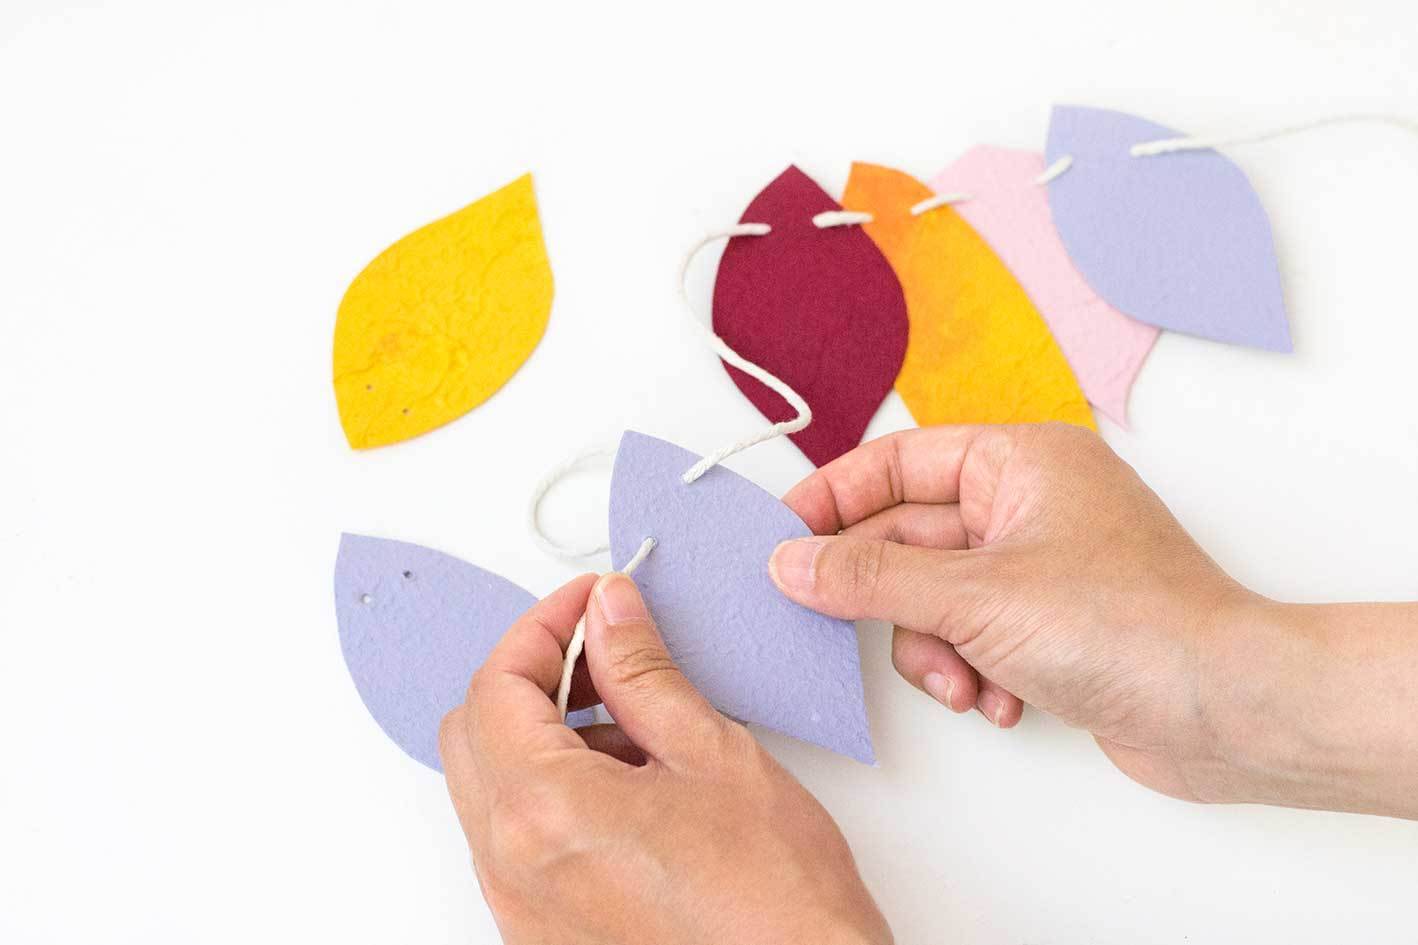
StepPunch two holes in each leaf with a small hole punch. You’ll use these holes to attach the leaves to your garland.
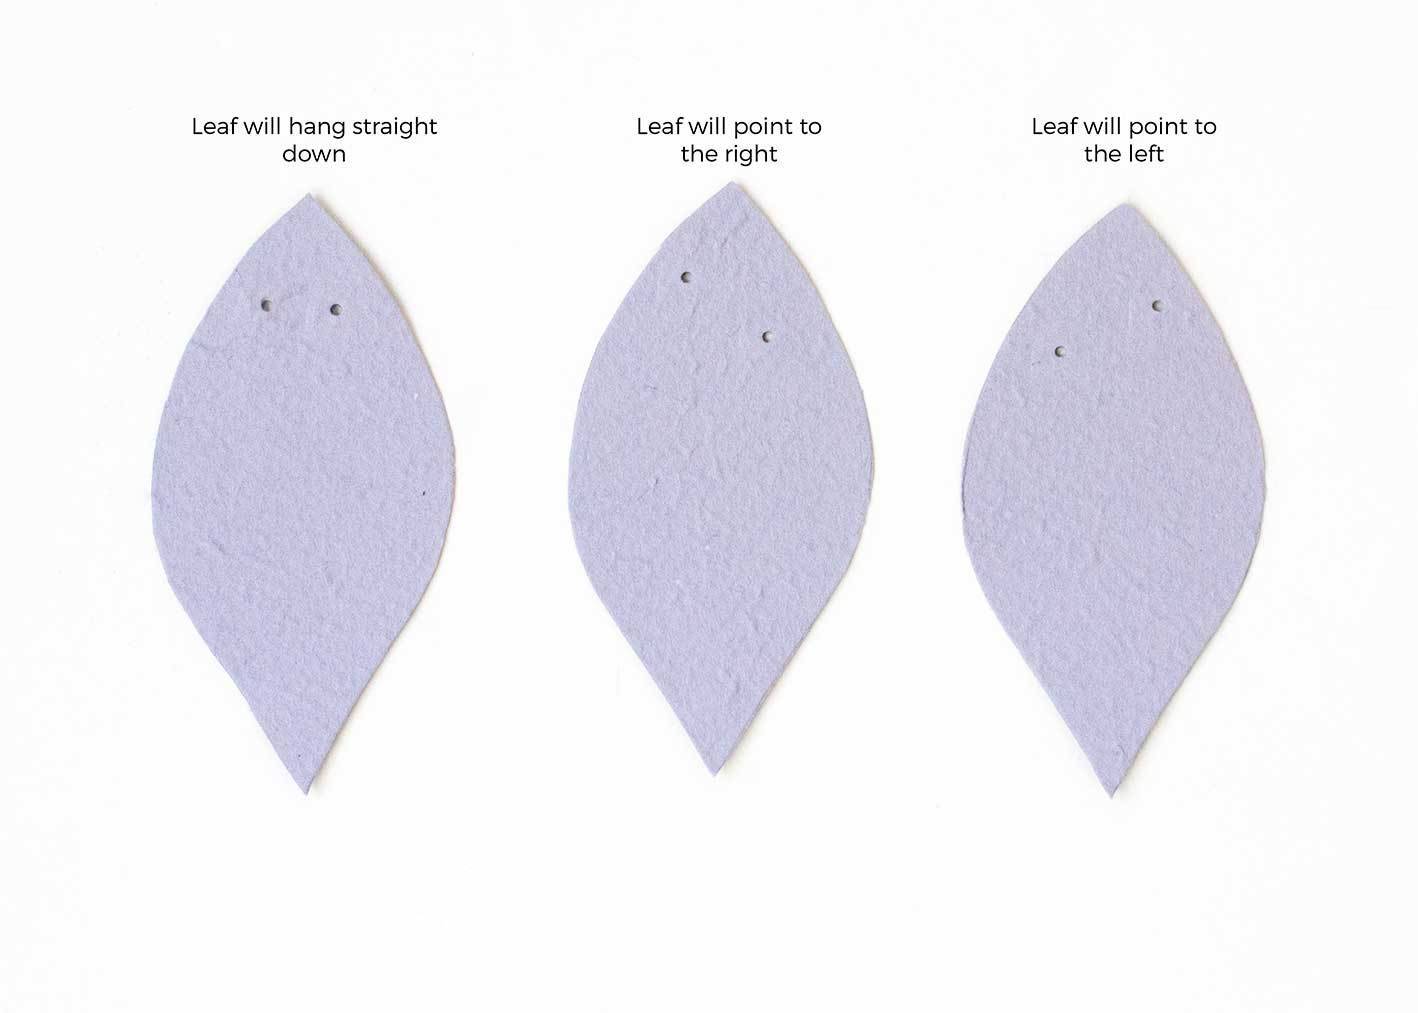
Angle your holes in various ways to make your leaves hang in different directions:
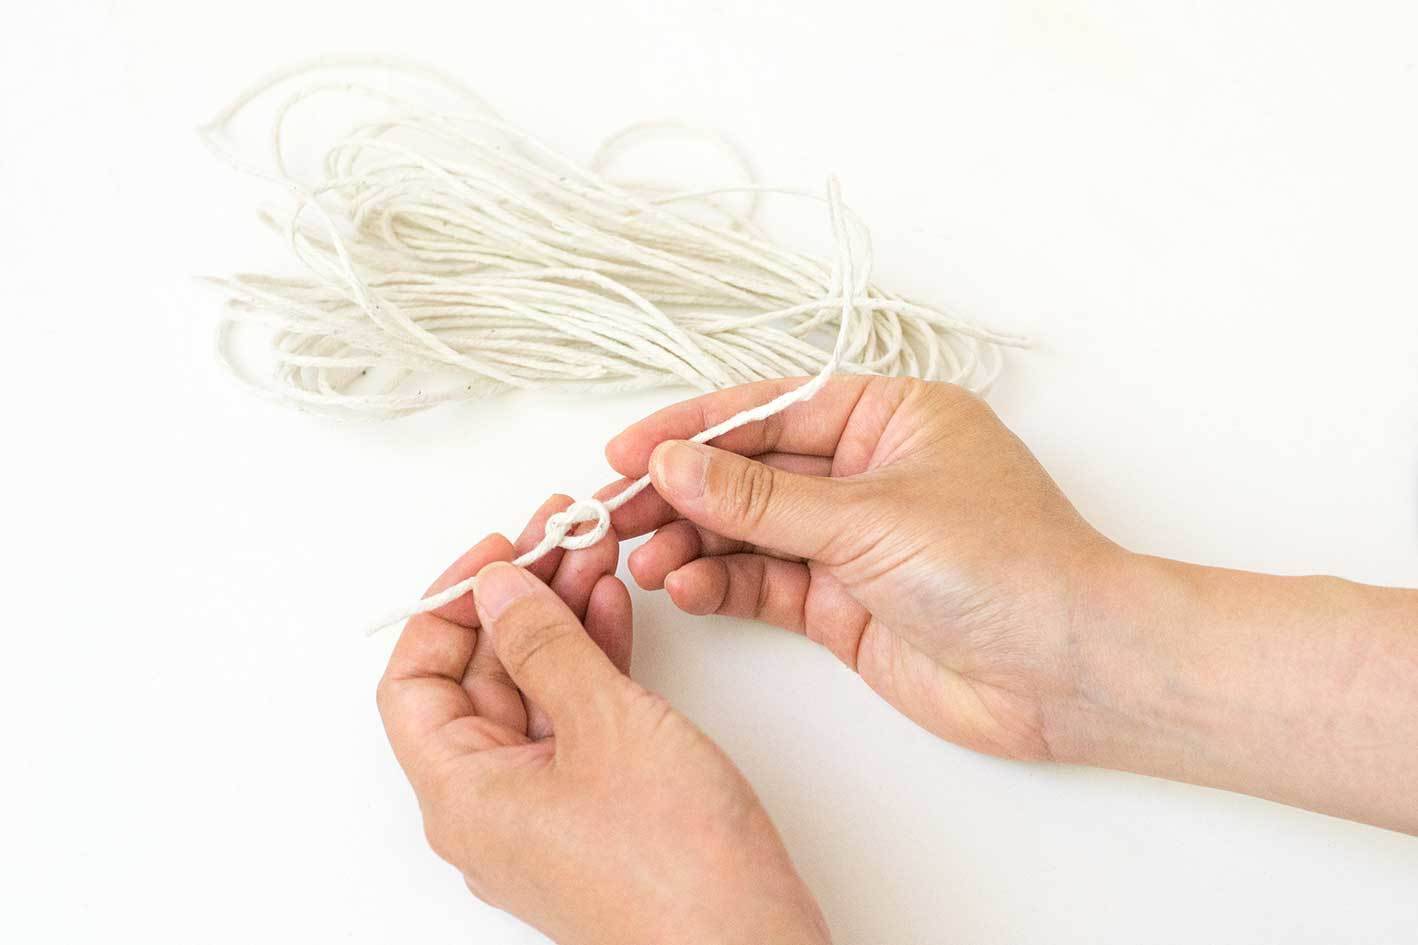
StepCut a long length of twine and tie a knot in one end.
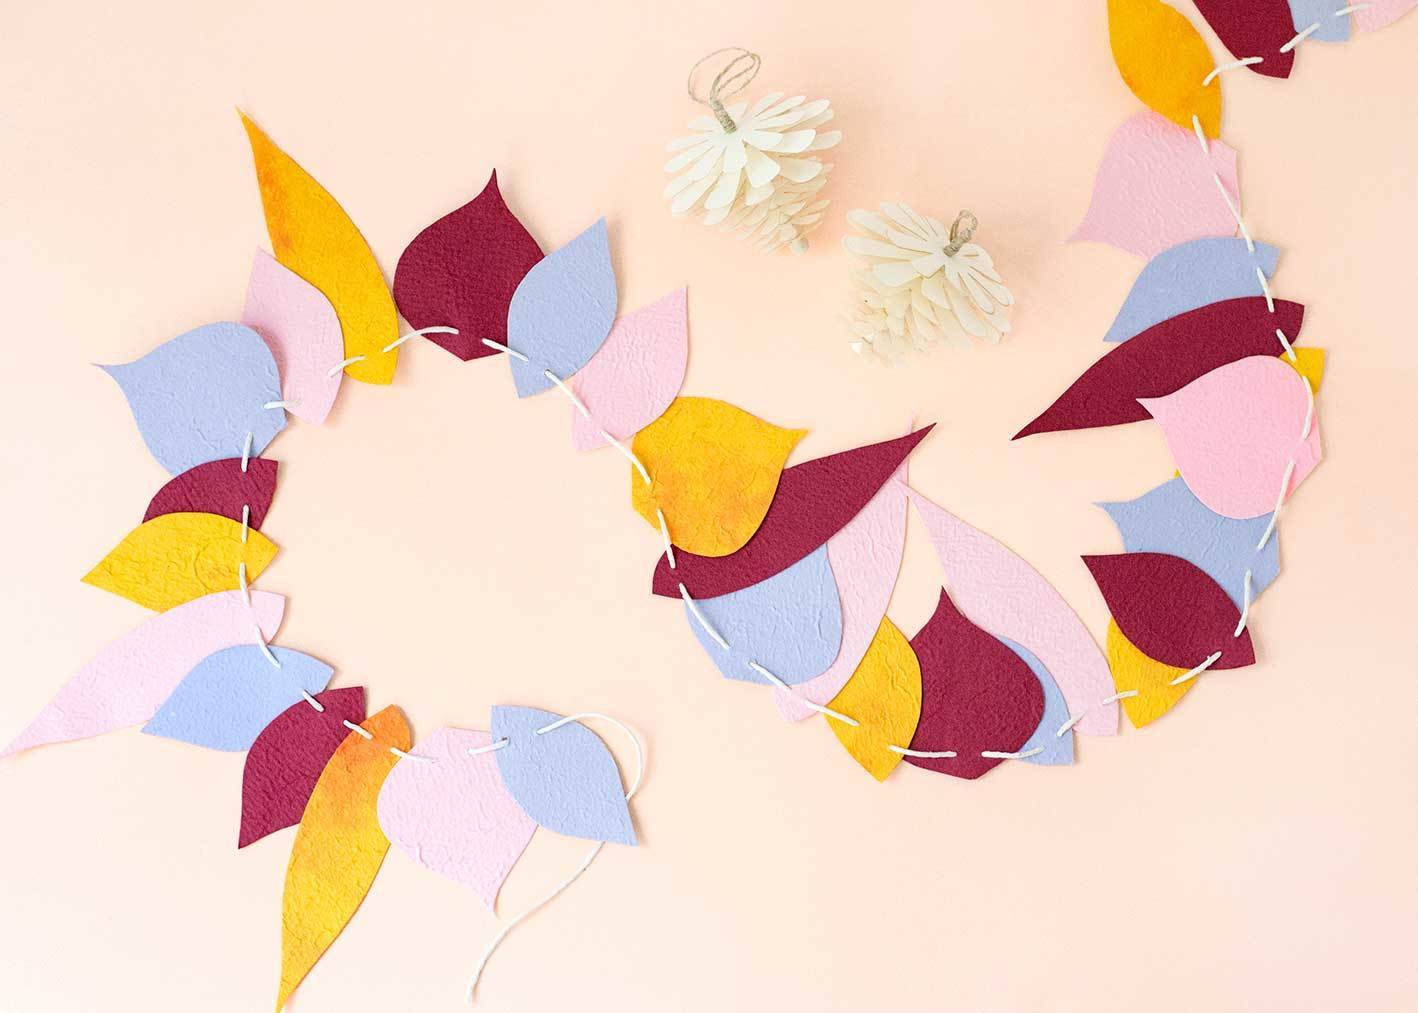
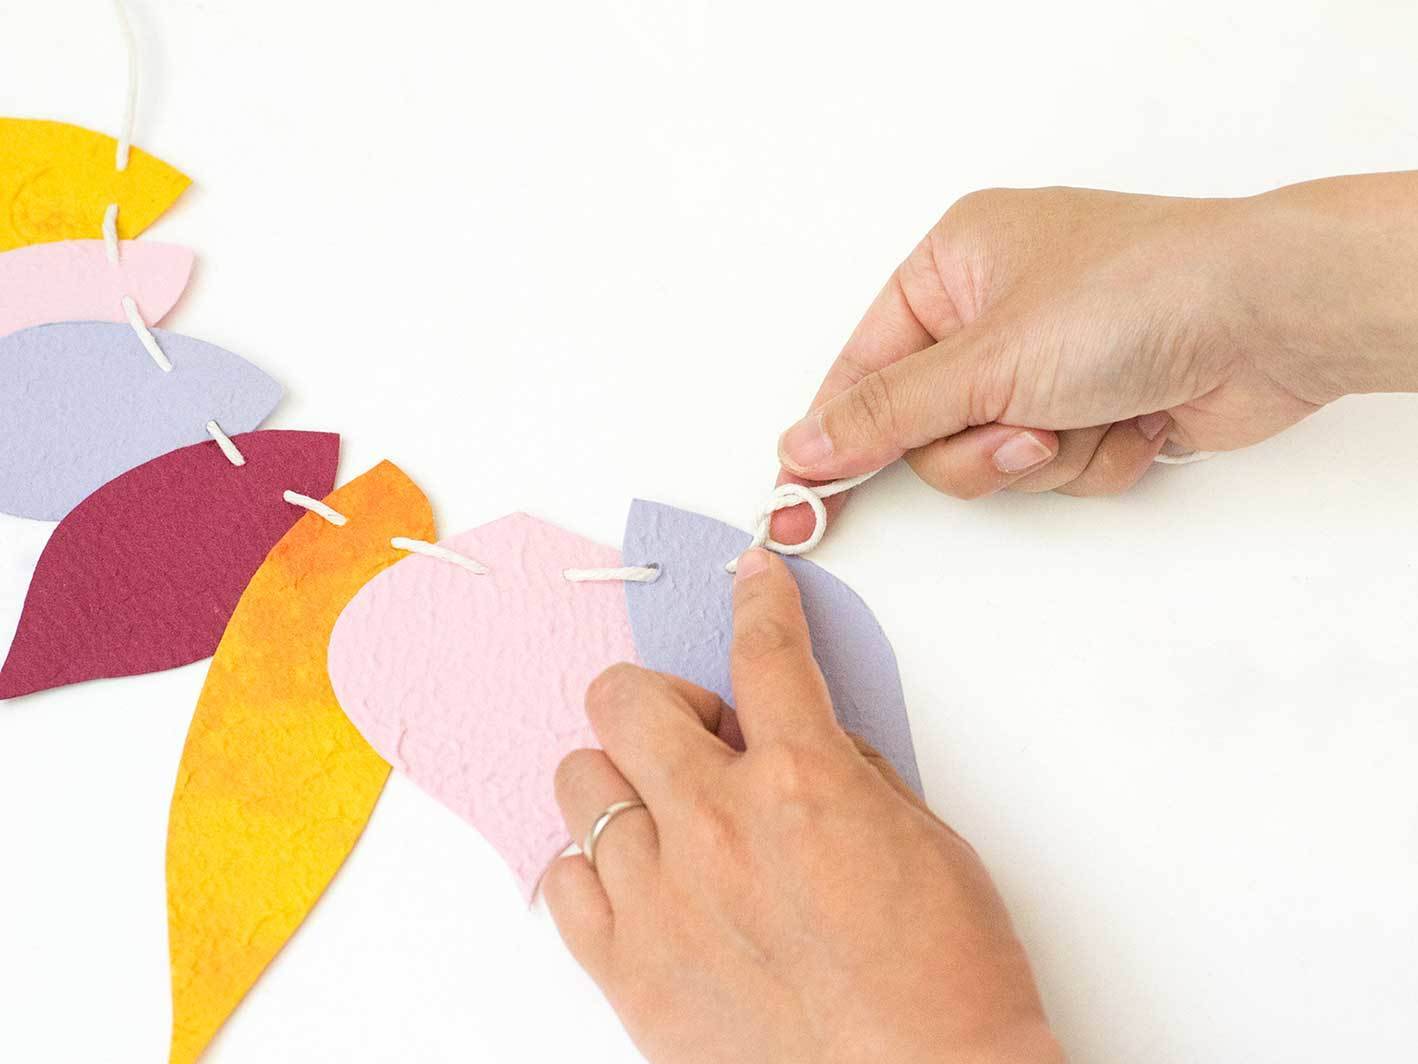
StepGet the opposite (unknotted) end of the twine and start threading your leaves onto it. Alternate between leaves of different colors, shapes and directions.
StepOnce all your leaves have been threaded on, tie a knot at the end to secure them in place.
It’s easy to tweak this fall leaf garland to suit your fall decorating – just use alternative colors and maybe other types of leaves for a completely different look!
The post Make This: Colorful Leaf Garland for Fall and Thanksgiving appeared first on Curbly. Via https://www.curbly.com/fall-leaf-garland |