|
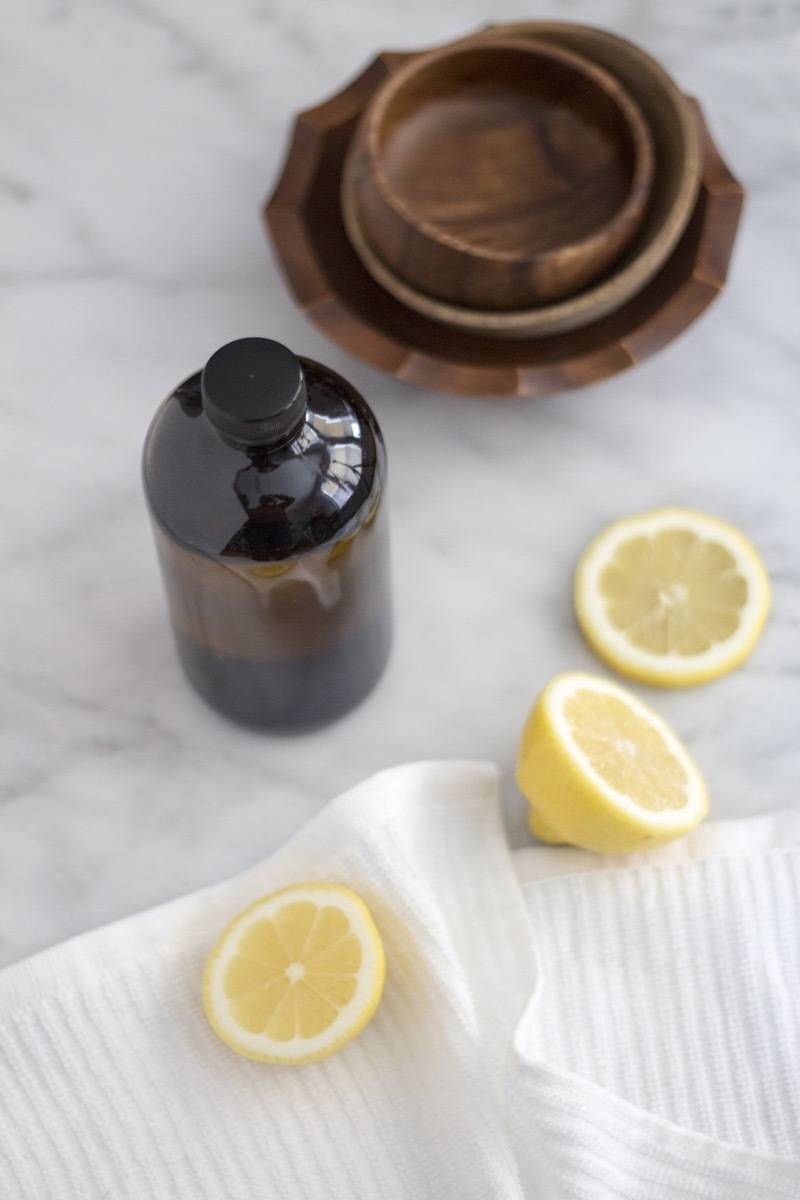
More and more I find myself opting for greener products in my home. Call me a hippie (you’re a hippie!), but I just don’t want all that toxic chemical junk around me. I’ve successfully transitioned all my cleaning products to eco-friendly versions, and I’m now dipping my toes in the realm of homemade cleaners. If you’ve made your own cleansing sprays before, you know the main ingredient is almost always vinegar. I love the cleaning power of vinegar, but hate the smell. Doesn’t it just remind you of decorating Easter eggs? This recipe for all-natural wood cleaner doesn’t have that overpowering vinegar aroma. Instead, is has a light lemon scent. And I have to say, it’s a crazy-pleasant smell. Like I kind of want to wear it as a perfume. Materials
This cleaner is easy to make. Simply combine all ingredients in a large bottle, and shake it up! I opted not to use a spray bottle, and instead I’m keeping mine in a simple amber one. The reason is that I’ve found when I make all-natural cleaners, the sprayer tends to clog up and break. If anyone has any tips to prevent this from happening, let me know in the comments please! To use this all-natural wood cleaner, distribute a little bit of the solution on a soft cloth, and wipe wood surfaces clean.
This wood cleaning solution is more about getting rid of dirt, and less about polishing. This makes it great for cleaning floors, dishes, or wood surfaces you eat off of or prepare food on. If you’re looking to make a cleaner with a little more polishing power, add a tablespoon of olive oil to this mixture. In case you’re curious what each ingredient is for, here’s the breakdown: The water is essentially the carrier. The vinegar is the cleansing agent. The vegetable glycerin helps the solution dry faster, and the lemon oil is there to smell amazing. 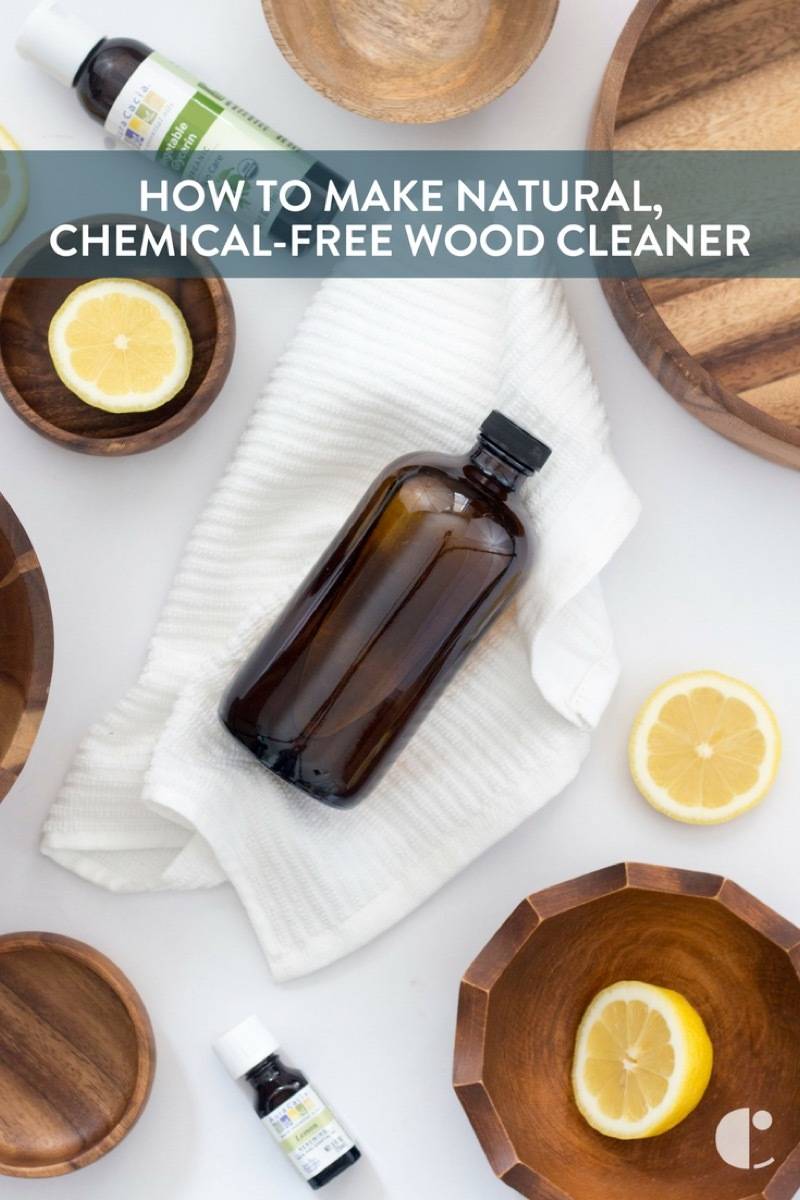
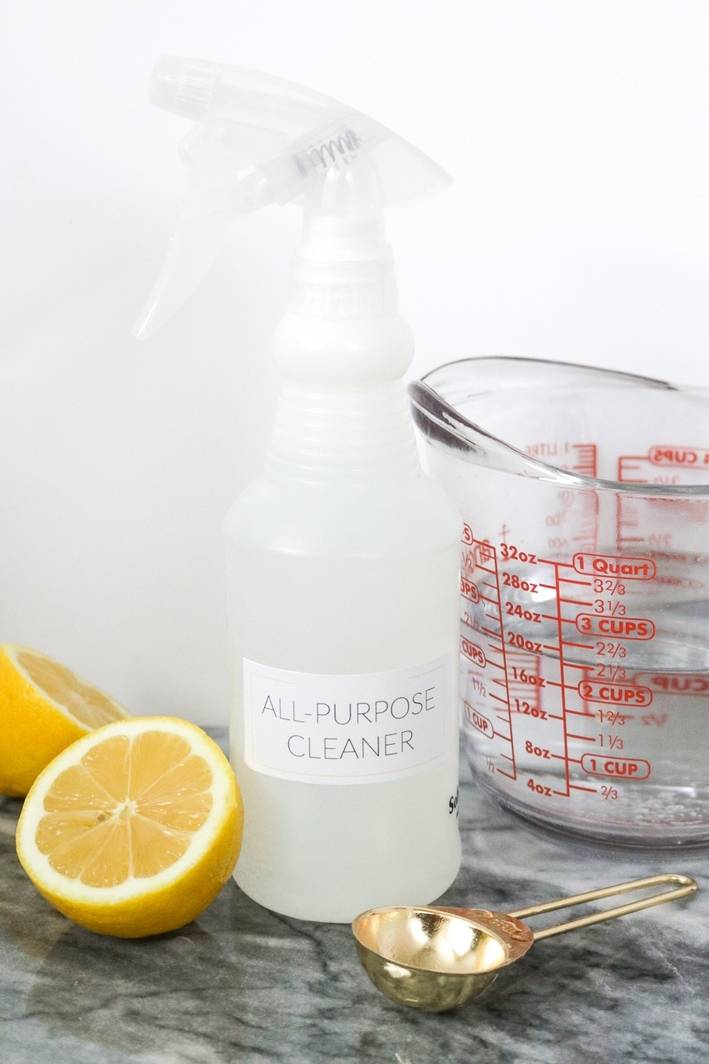
Happy cleaning! Looking for more all-natural ways to clean your home? Try this all-purpose spray!
The post How To: Make Natural, Chemical-Free Wood Cleaner appeared first on Curbly. Via https://www.curbly.com/natural-wood-cleaner
0 Comments
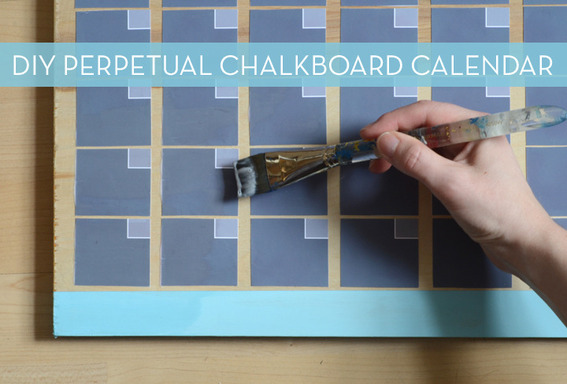
Organization is not my strong suit. Of course, I enjoy being organized, but somehow I never quite get there. So, I thought a new calendar might help to keep my schedule in order. I wanted to make one that I could reuse each month to keep track of my projects and appointments, so I decided to make a perpetual chalkboard version. And then? I stumbled upon the miracle of clear chalkboard paint… and the rest is, well, my own DIY perpetual calendar. This stuff is like magic, people… you can paint it on virtually anything, and suddenly you’ll have chalkboards all over the house. Or…maybe that’s just me. But it’s a really great product. I bought mine on Amazon.com… it’s called Clear Chalkboard Coating by Americana. So anyways, enough gushing, and on to the tutorial. 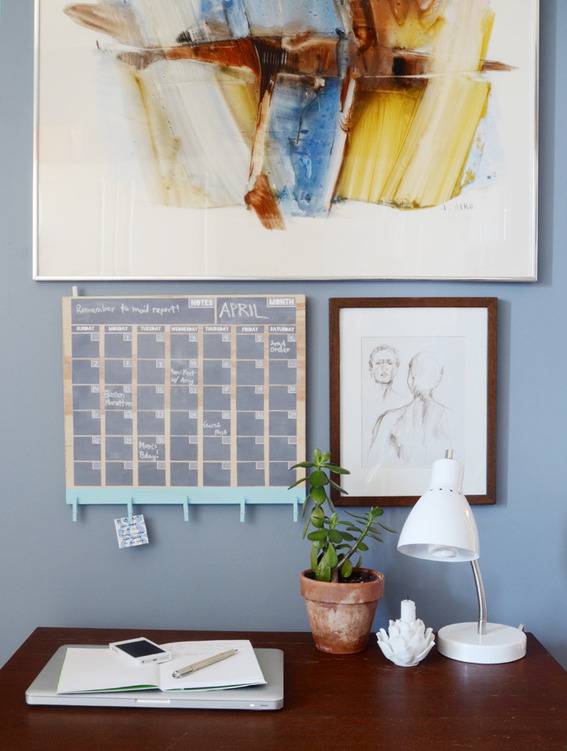
This perpetual calendar is handy because you can reuse it over and over again, and it has the added bonus of mini clothespins along the bottom to clip notes, invitations, etc. It’s not a difficult project, and it won’t take more than an hour or two to complete (with some drying time). 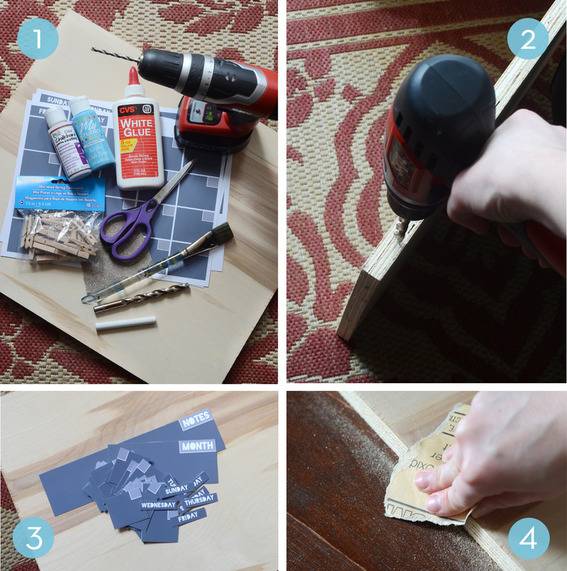
1. First, gather your materials. You will need:
2. If you have a hand drill at your disposal, drill a hole along the top edge of the longer 17″ edge of the wood. This will be your chalk holder. If you don’t have one, you’ll can just find another place for your chalk! 3. Now print your calendar squares and cut them out. 4. Next, sand your wood until it has a nice, smooth finish. 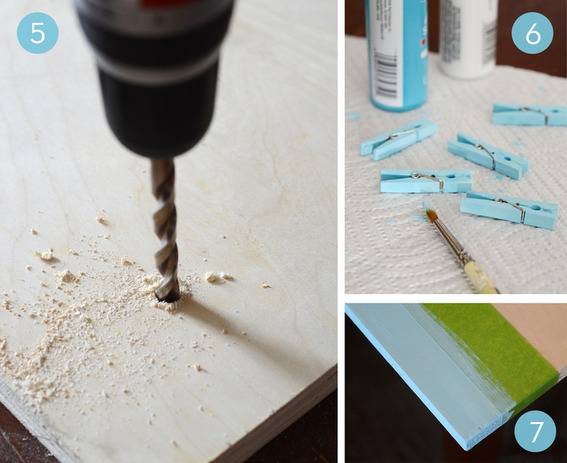
5. Drill two holes on the back of the wood for hanging – place one 2″ from the top and left edges, and the other 2″ from the top and right edges. Skip this step if you don’t have a drill. 6. Paint five mini clothespins blue (or whatever color you have chosen). Leave them aside to dry for a half hour, and then do a second coat. 7. Place painter’s tape along the bottom 17″ edge, leaving a 1″ wide strip uncovered. Paint that area the same color as your clothespins. Carefully remove the tape after a half hour. 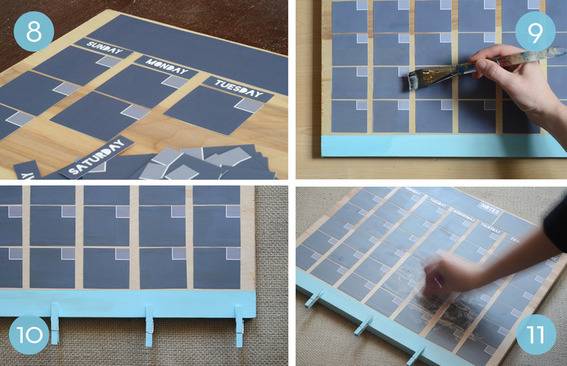
8. Lay out all of your calendar pieces, starting with the “notes” piece in the top left, and the “month” piece in the top right. Below those, evenly space the days of the week. Then place all 42 remaining squares below the days of the week and above your strip of color. They should be laid out in a grid with 7 along the top axis and 6 down the side axis. (Yes you need 6 weeks worth, trust me). Once everything is laid out, glue each piece to the board. I find that using a paintbrush is the easiest way to do it, so you can “paint” the glue right to the edge of each square. The pieces may curl up around the outside a bit while they dry, just pat them back down again. 9. Once the glue has dried (it takes about an hour), use a wide paintbrush to liberally apply the clear chalkboard coating according to the directions on the bottle (two coats, one vertically and one horizontally). Let these dry in between too. 10. Glue your clothespins to the bottom edge. 11. Let your calendar dry overnight. Last, condition the chalkboard. This is a fancy way of telling you to lay a piece of chalk down on its side and rub it across the whole surface. Then wipe clean with a dry paper towel. 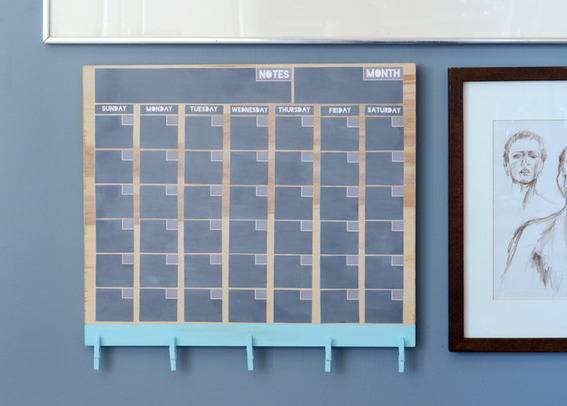
And that’s it! Now it’s time to hang your fancy new calendar. Measure the distance between the holes on the back of the board and hang screws on your wall according to those measurements. If you don’t have a drill, simply insert nails into the back of the board instead and string picture wire between them. Insert a third nail into the wall and hang it that way. 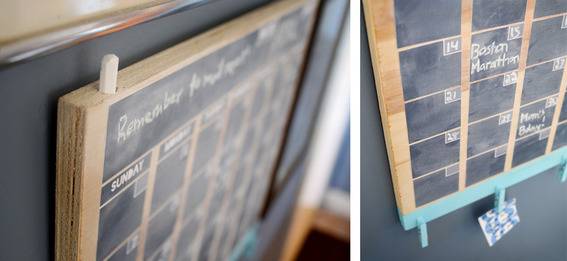
Hope this chalkboard helps you get organized this spring… it sure has helped me. Happy crafting! 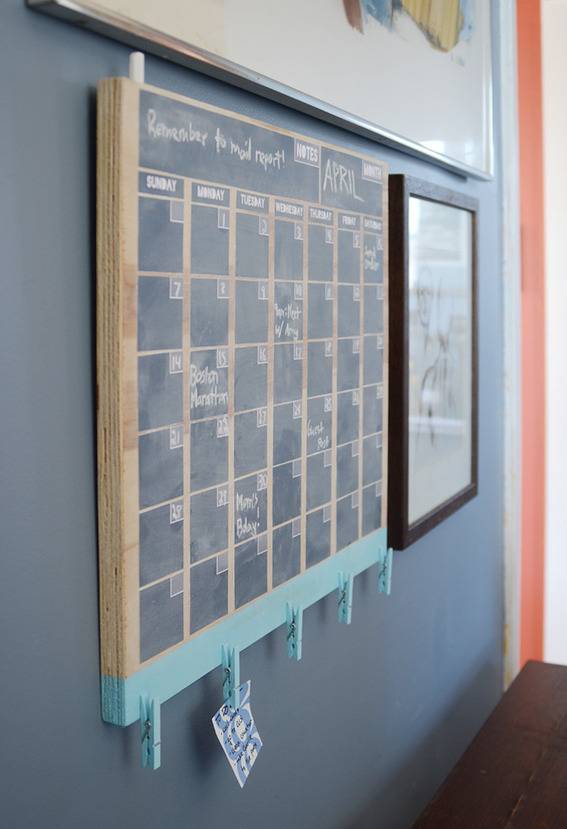
The post How to: Make an Easy Perpetual Chalkboard Calendar appeared first on Curbly. Via https://www.curbly.com/14868-how-to-make-an-easy-perpetual-chalkboard-calendar
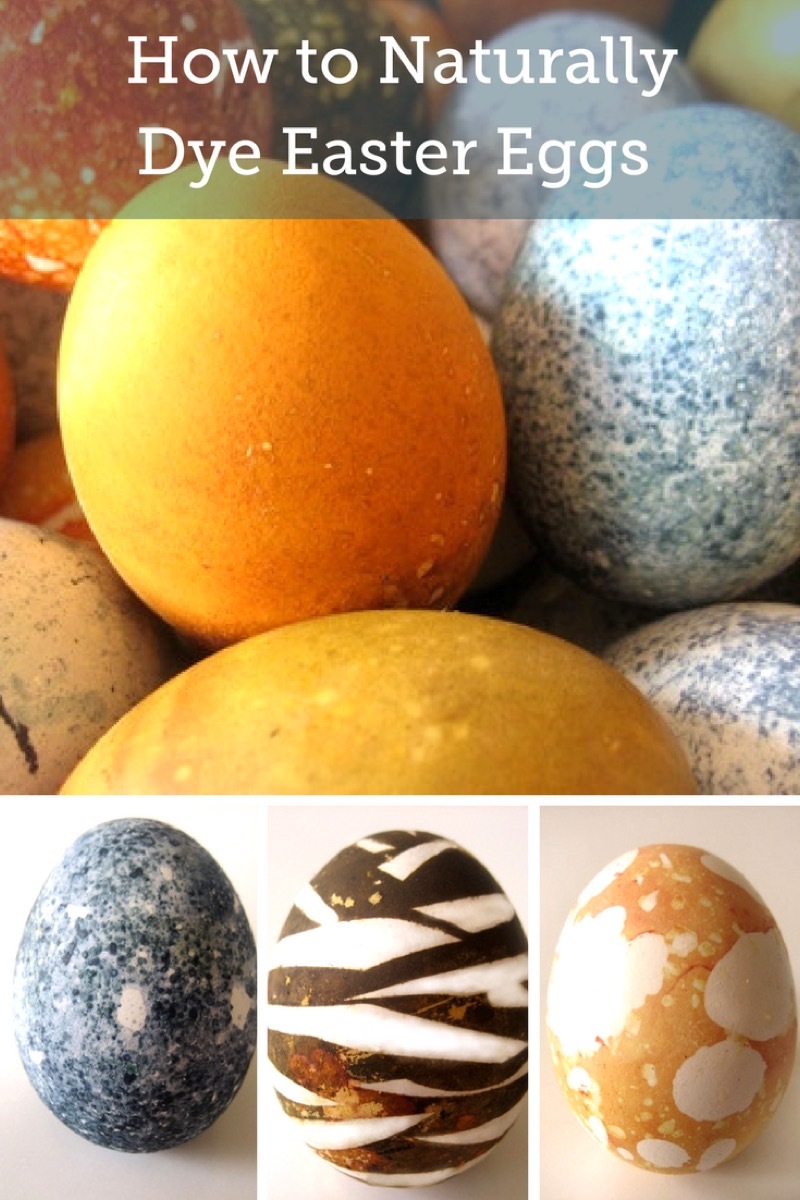
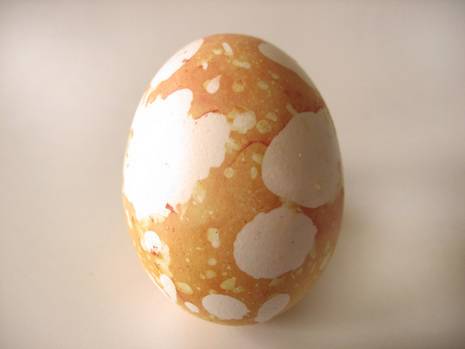
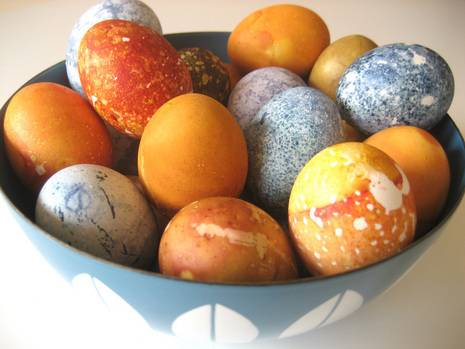
This Easter season, head to the produce aisle and dye your eggs with nature. Materials
StepChoose which colors you’d like to dye your eggs.
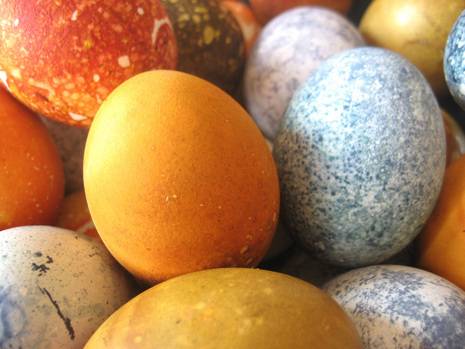
StepFor each color, fill a saucepan with at least three inches of water. Add in your vegetables or spices. It’ll take a lot…around two cups, packed. StepBring the water to a boil, and add two teaspoons of alum powder – UNLESS you’re using onion skins, as it creates a funky reaction. Boil for 30 minutes. StepRemove the pan from heat and allow it to cool slightly. You don’t want to add the eggs to boiling water, because the shells will likely crack. StepReturn to heat, and stir in two tablespoons of white vinegar. Add the eggs, and bring the mixture back to a full boil. Reduce the heat slightly, and cook for 10-12 minutes. Take the pan off the heat, and let the eggs cool in the dye. StepRemove the eggs from the dye. If you’re satisfied with the color, then allow them to dry. For deeper, richer colors, strain the liquid, and allow the egg to continue to soak for up to eight hours. (Any longer, and the vinegar will start to disintegrate the shell.) If you plan to eat the eggs, put them into the refrigerator.
Other IdeasTo add this marbleized effect, stir in a few teaspoons of vegetable oil into the cooled, strained dye. The oil will stick to the shell in certain places, preventing the dye from continuing to color the shell in certain spots.
Try dripping wax on the shell, or color them with crayons. Dye as above, and then stick them in a 200° oven for 8-10 minutes to melt the wax.
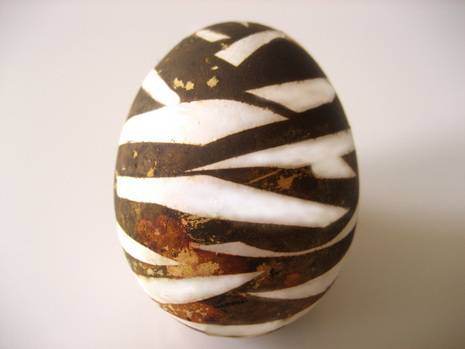
For a relief technique, cover the shell with stickers, tape, stencils, leafs, flowers, etc before dying them. On this egg, I added shards of electrical (PVC) tape.
Lastly, if you want your eggs to sparkle, polish them with a bit of vegetable oil. Happy Easter!
The post Curbly Video: How to Make Naturally Dyed Easter Eggs appeared first on Curbly. Via https://www.curbly.com/3840-curbly-video-how-to-make-naturally-dyed-easter-eggs Easter is less than a week away and if you’re looking for a simple-yet-stylish DIY project, take a peek at this adorable idea! These clay bunny bowls are an easy afternoon project that even little ones can help with. Plus, they’re cute enough to leave out all year long (they’d make great catch-alls for small items or jewelry)! Check out the tutorial and supply list on Alice & Lois! LINK: DIY Clay Bunny Bowls by Alice & Lois The post Handmade Easter: DIY Clay Bunny Bowls appeared first on Curbly. Via https://www.curbly.com/15969-handmade-easter-diy-clay-bunny-bowls
Spring has sprung and Easter egg season is here! Gone are the days of simply dropping tablets into water and vinegar and plastic-wrapping your eggs. Though there’s nothing wrong with the classic method, the sky is really the limit when it comes to egg decorating, and DIYing a dozen has never been easier or more beautiful. We’ve rounded up fifty of the best DIY egg-dyeing and decorating projects to inspire you!
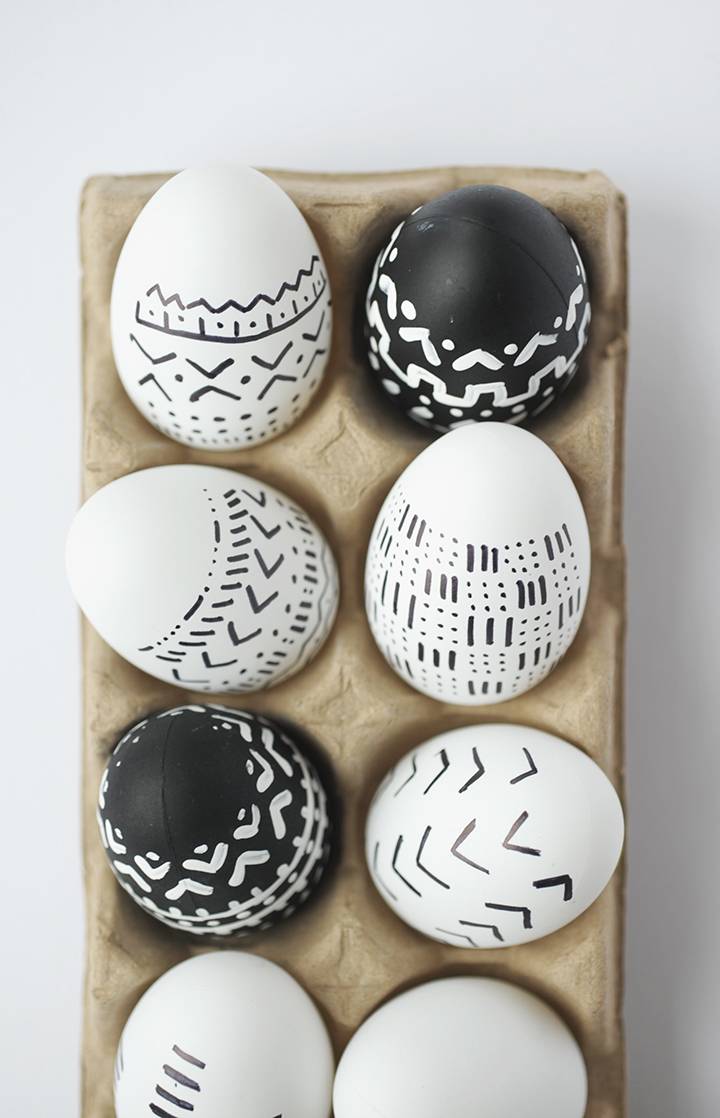
1. Mudcloth Eggs: These eggs are modern, minimal, and so stunning. 
2. Dyed Robin Eggs: Dyed with cabbage and flecked with edible gold dust, these eggs are safe to eat in addition to being gorgeous. 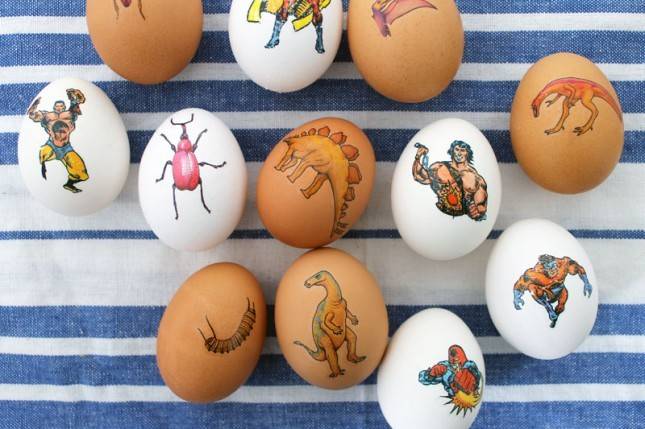
3. Tattooed Eggs: Ink those eggs! These easy egg tattoos go on in just thirty seconds, and look crisp as can be. 
4. Watercolor Floral Eggs: Food coloring + Paintbrush + Sharpie + (Artistry) = These gorgeous eggs that make me think of Rifle Paper Co. flowers! 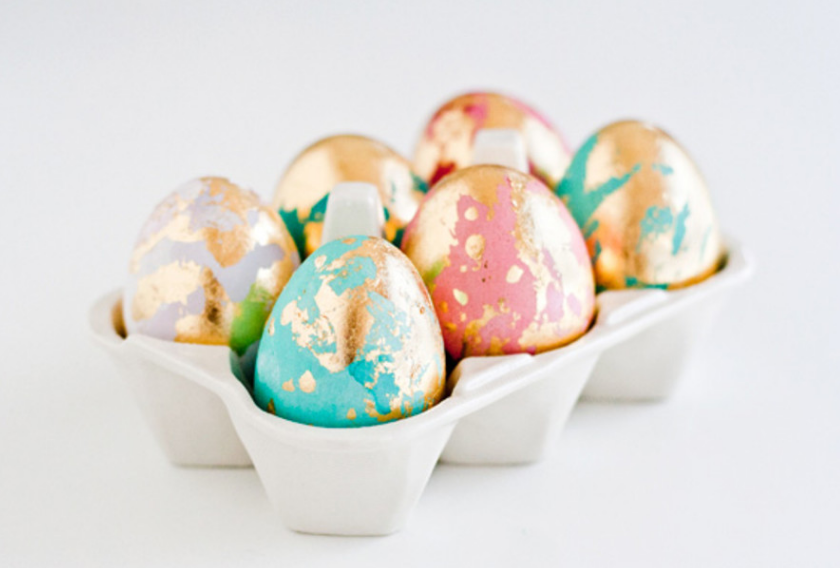
5. Gold Leaf Eggs: They’re delicate and timeless. 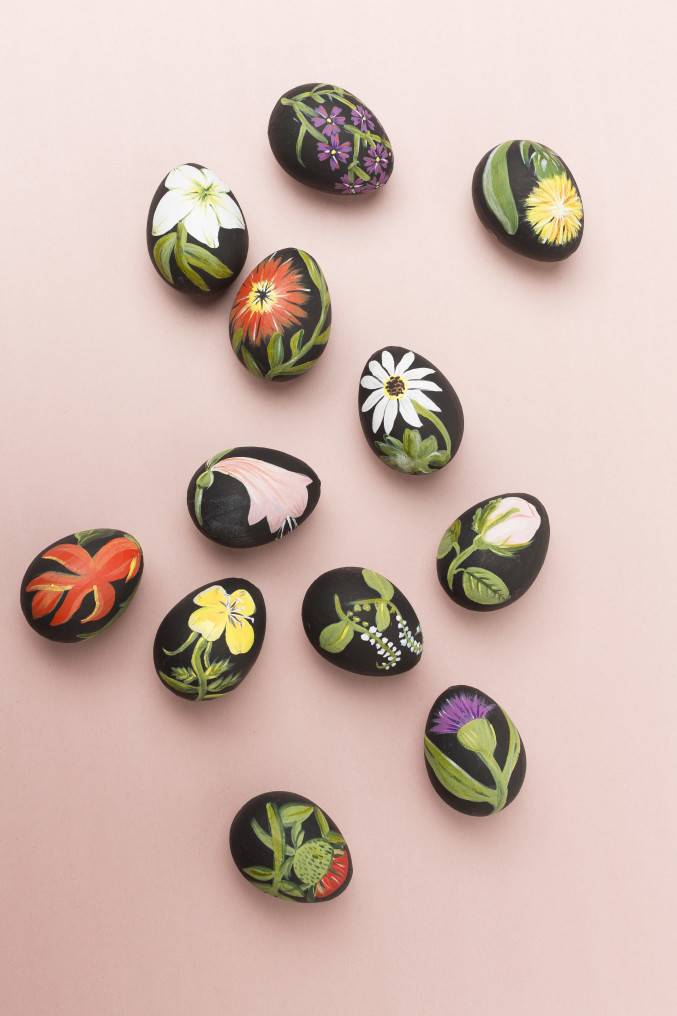
6. Botanical Eggs: Moody eggs so beautiful that I want to quit my day job and craft them for a living. 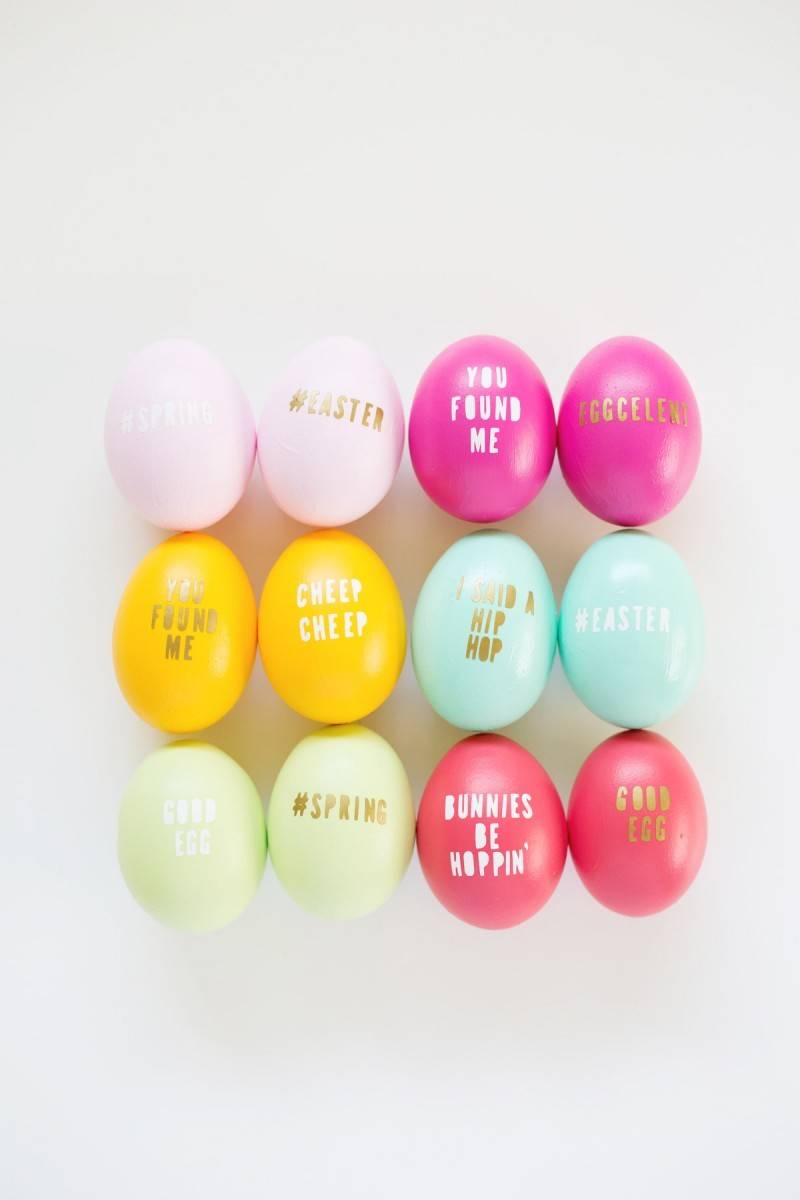
7. Typography Eggs: #springy #punny #eggs 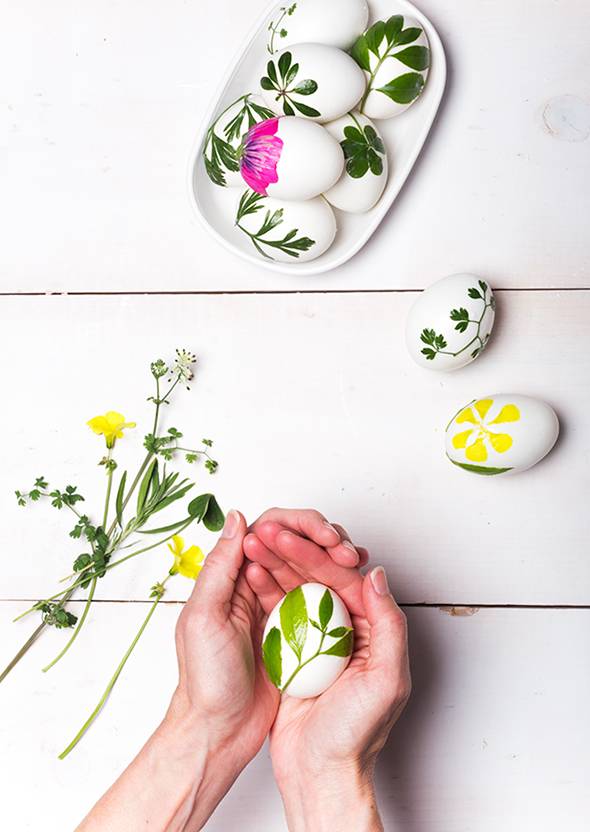
8. Foliage Eggs: You can put all the spring flowers on your eggs! 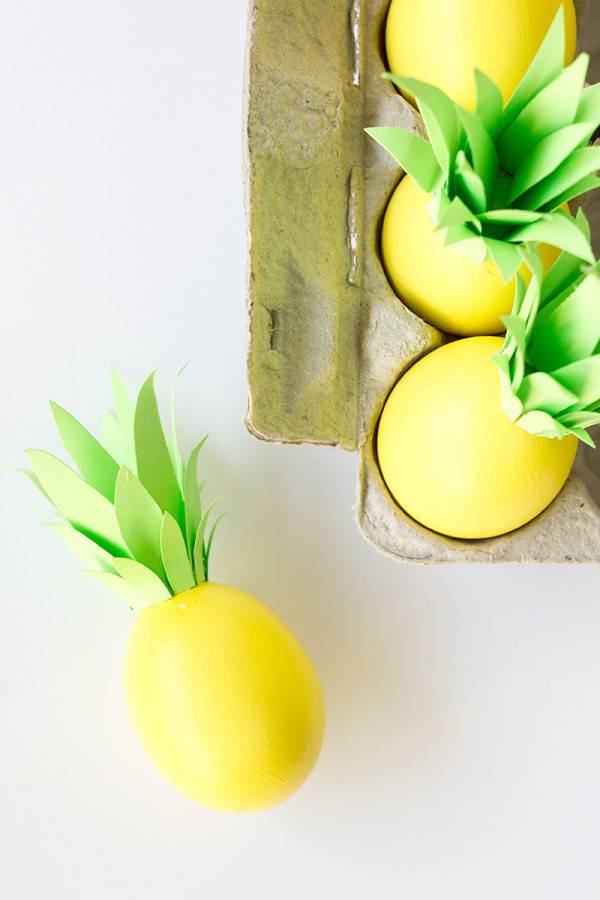
9. Pineapple Egg: Transform your egg into fruit! 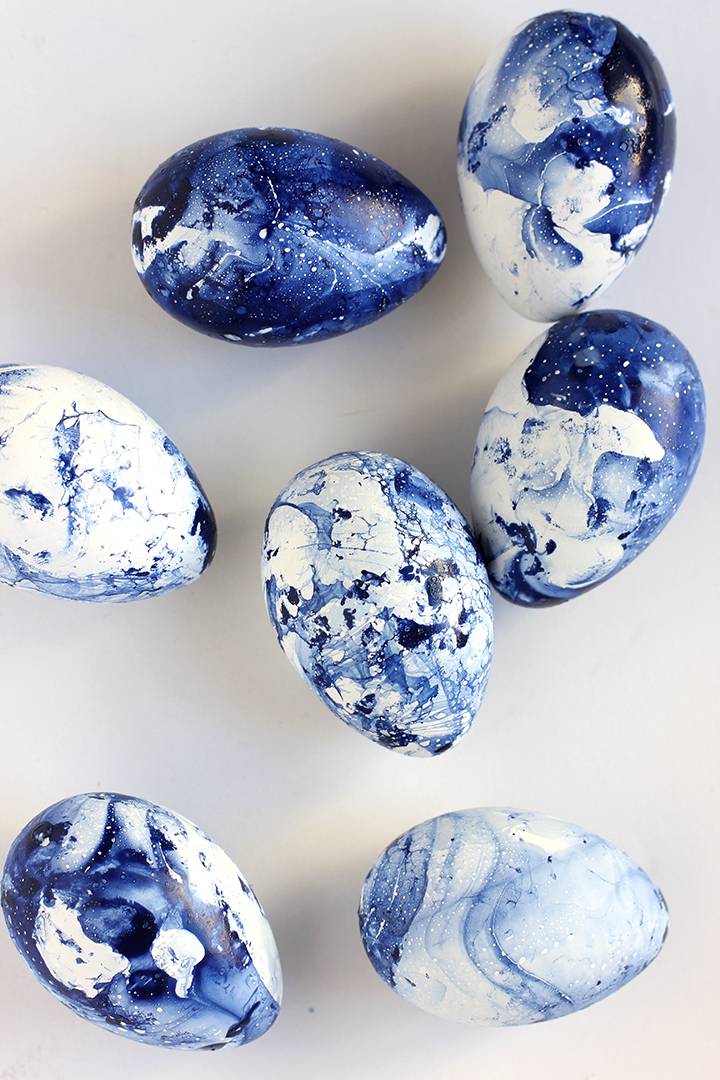
10. Indigo Eggs: These are my very favorite eggs on the list, and they’re easy to make! And guess what? You can marble with shaving cream too! 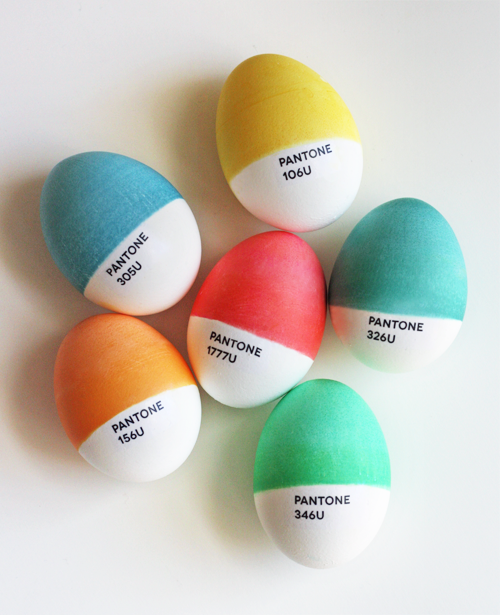
11. Pantone Eggs: Organize those eggs by color! 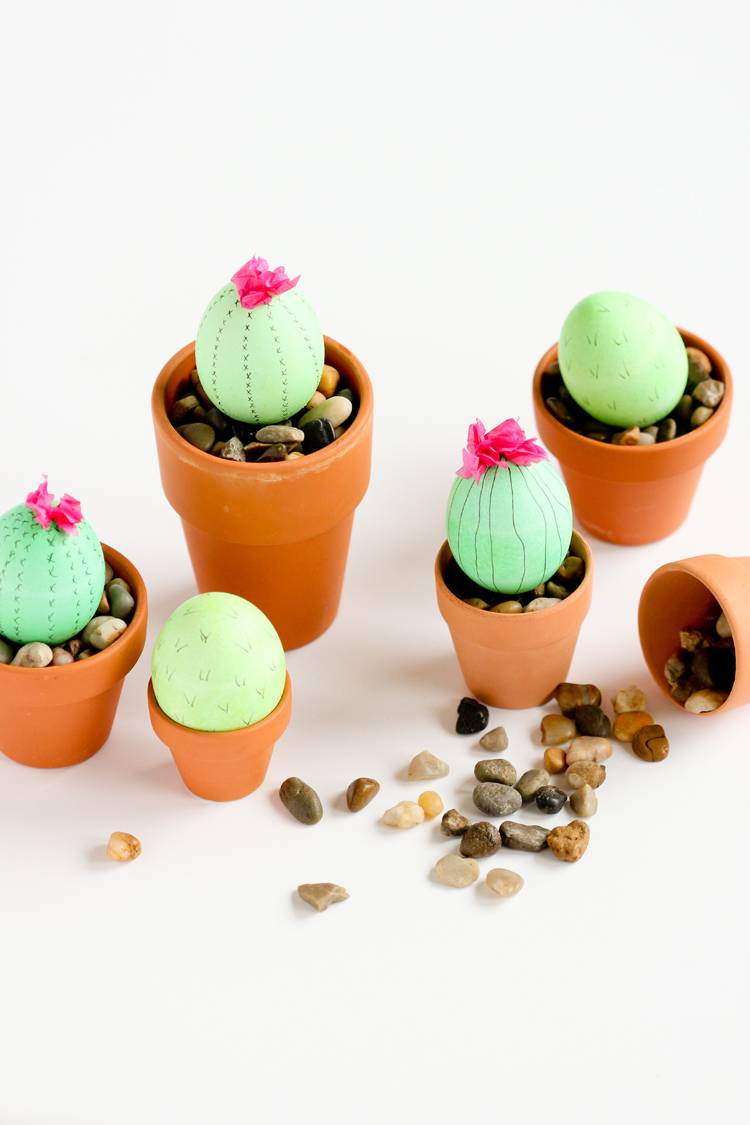
12. Southwestern Eggs: It doesn’t get much better than a blooming cactus. 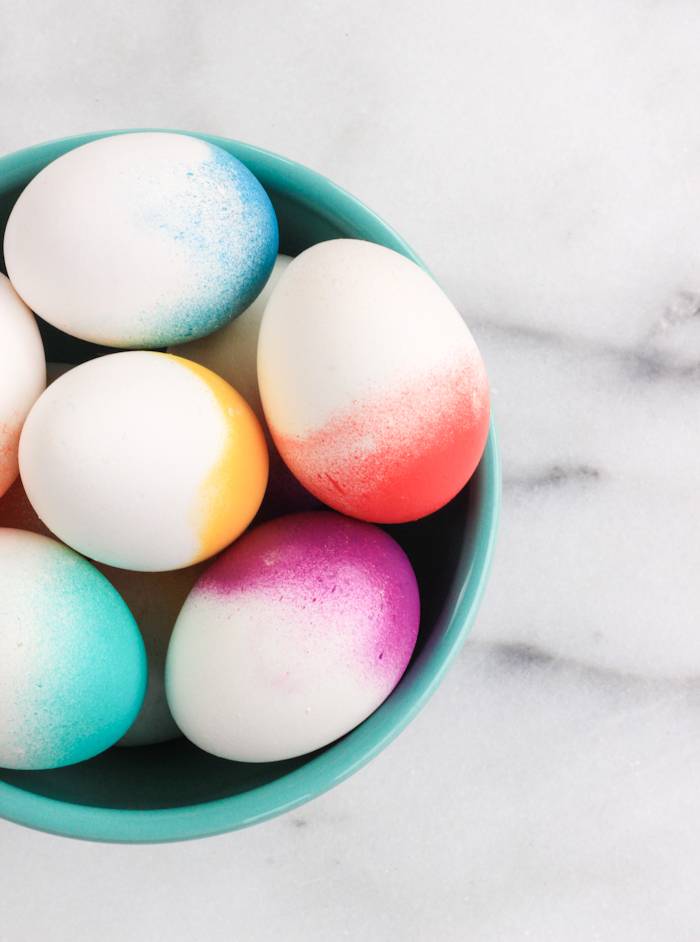
13. Ombre Eggs: Easter eggs with just the right amount of color and shading. 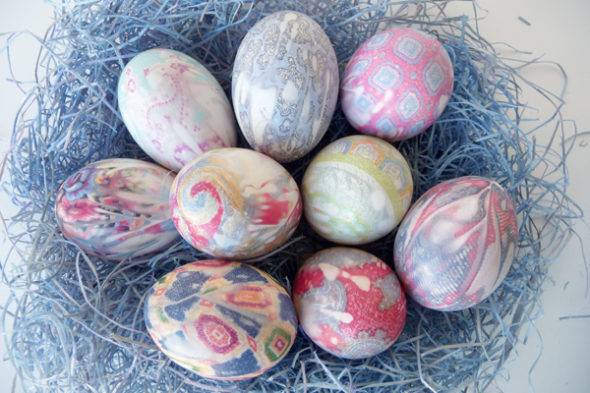
14. Silk Tie Eggs: I just learned that you can color an egg using a silk tie! Mind exploded! 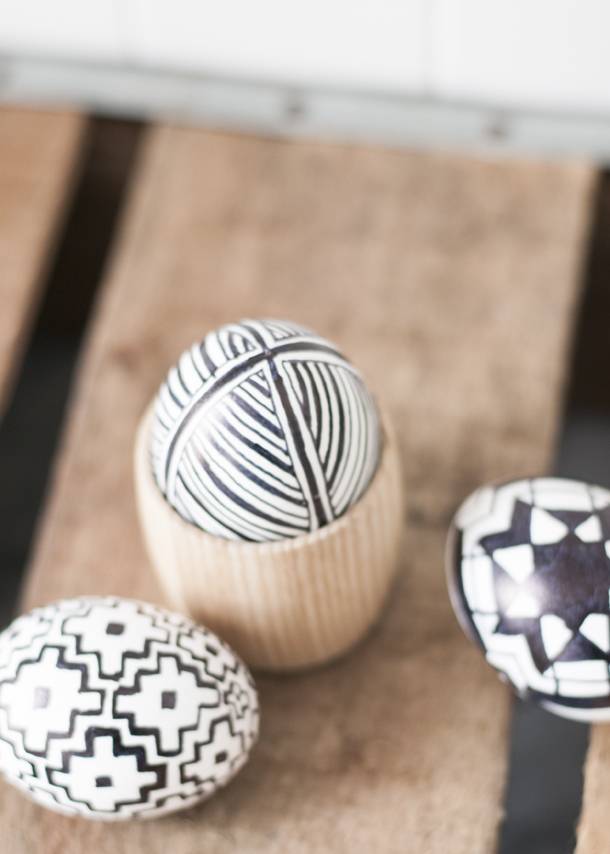
15. Black & White Eggs: Classic colors + classic design. 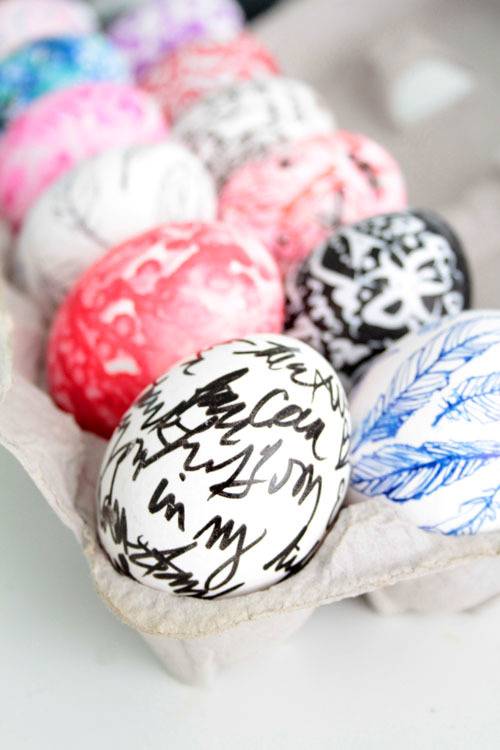
16. Eggs a Dozen Ways: Using a variety of everyday materials, you can create a special dozen. 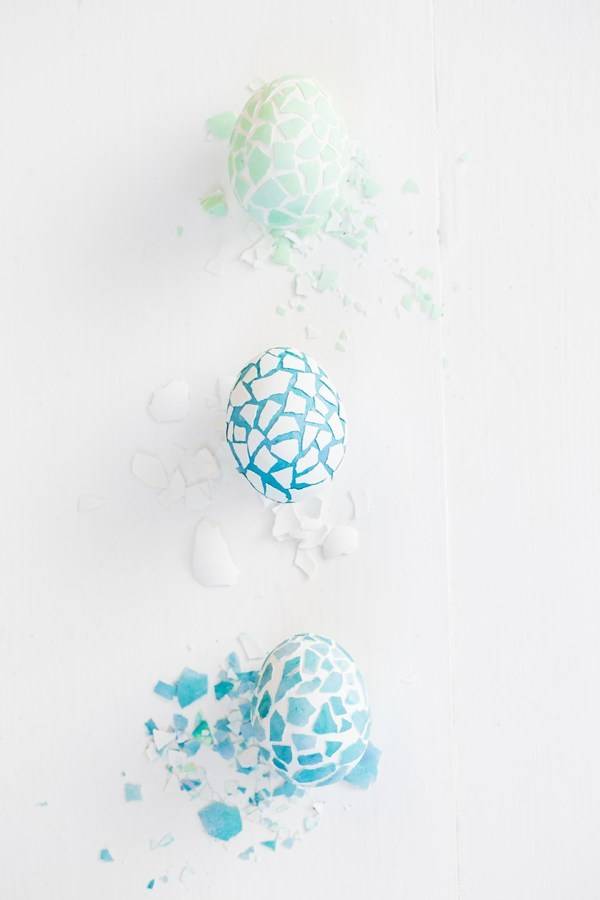
17. Mosaic Eggs: A beautiful resolution to the Humpty Dumpty situation. 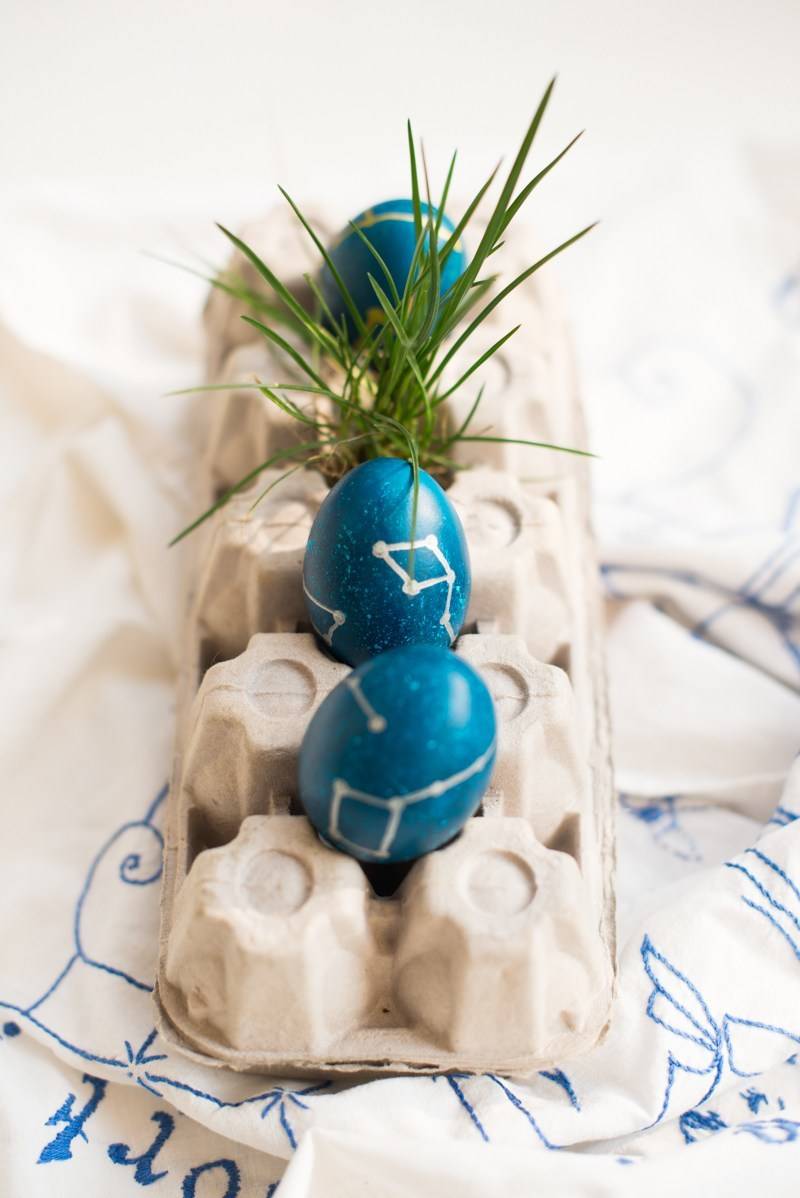
18. Star Sign Eggs: What’s your sign? Turn your Easter into a horological experience by hand-painting astrological signs onto those mini-orbs. 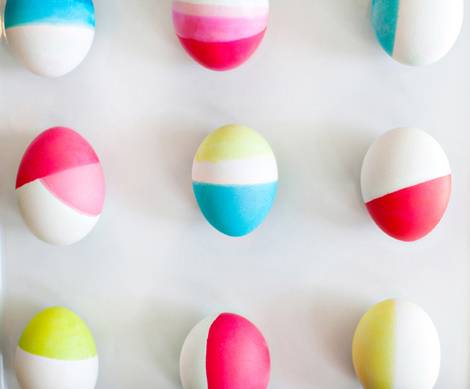
19. Dip Dyed Eggs: Half-egg, half-neon! All geometric fun. 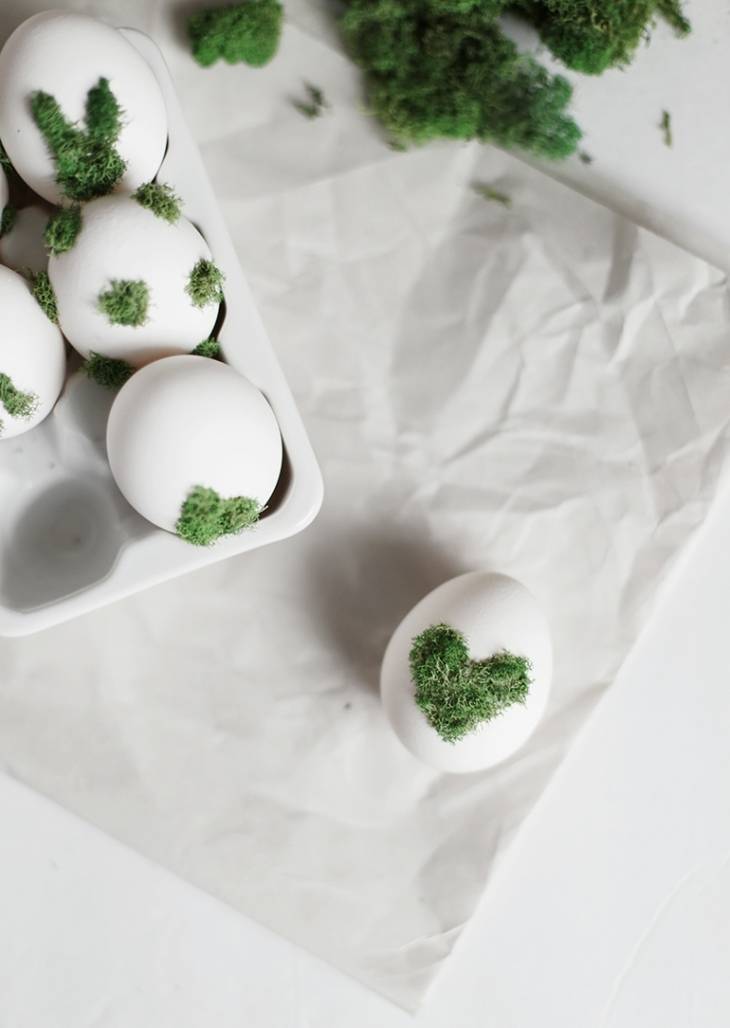
20. Moss Eggs: Delicate spring grass glued on an egg. These are cool, and, for some reason, also slightly weird to me. 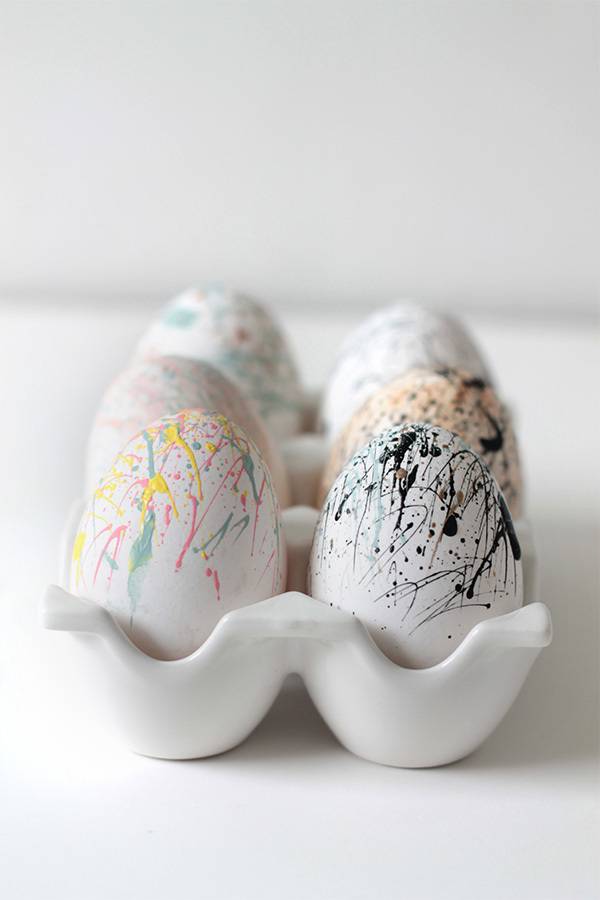
21. Paint Splatter Eggs: It doesn’t get much easier than splattering paint on an egg. Jackson Pollock would approve. 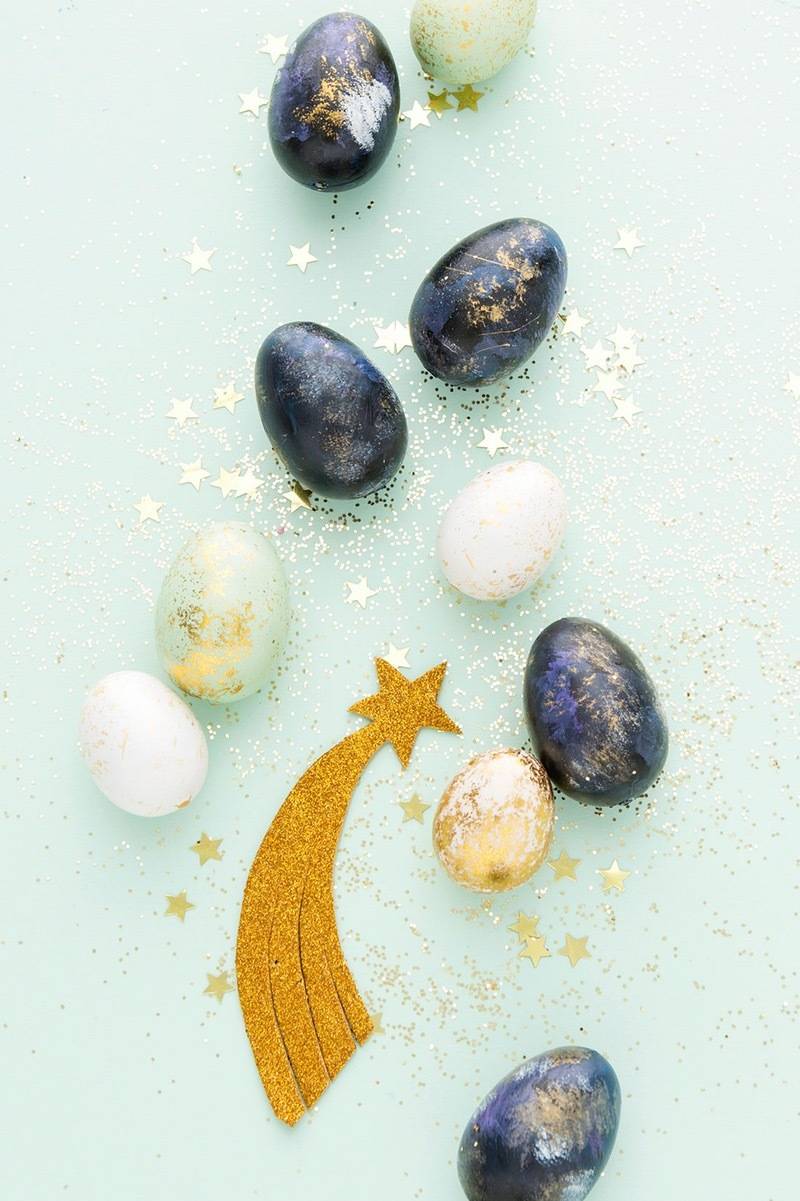
22. Galaxy Eggs: These eggs are out of this world. 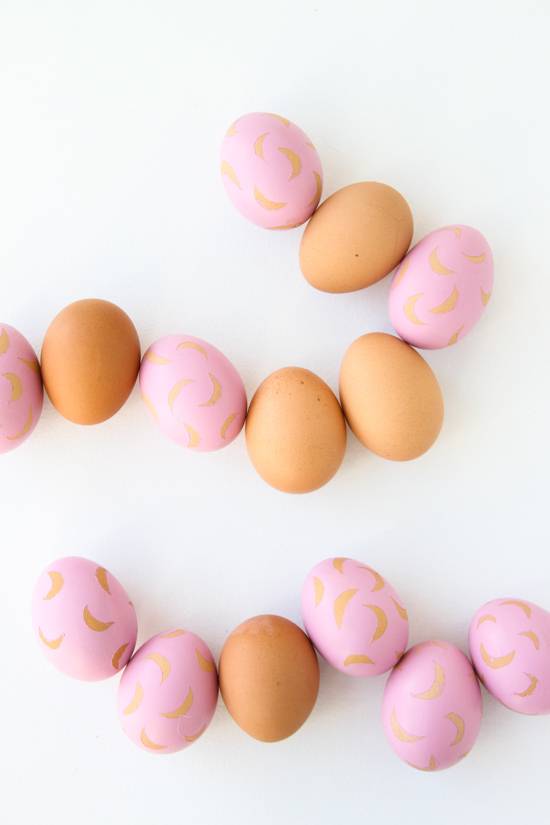
23. Pink Moon Eggs: Nick Drake-style Easter eggs for the emo among us. 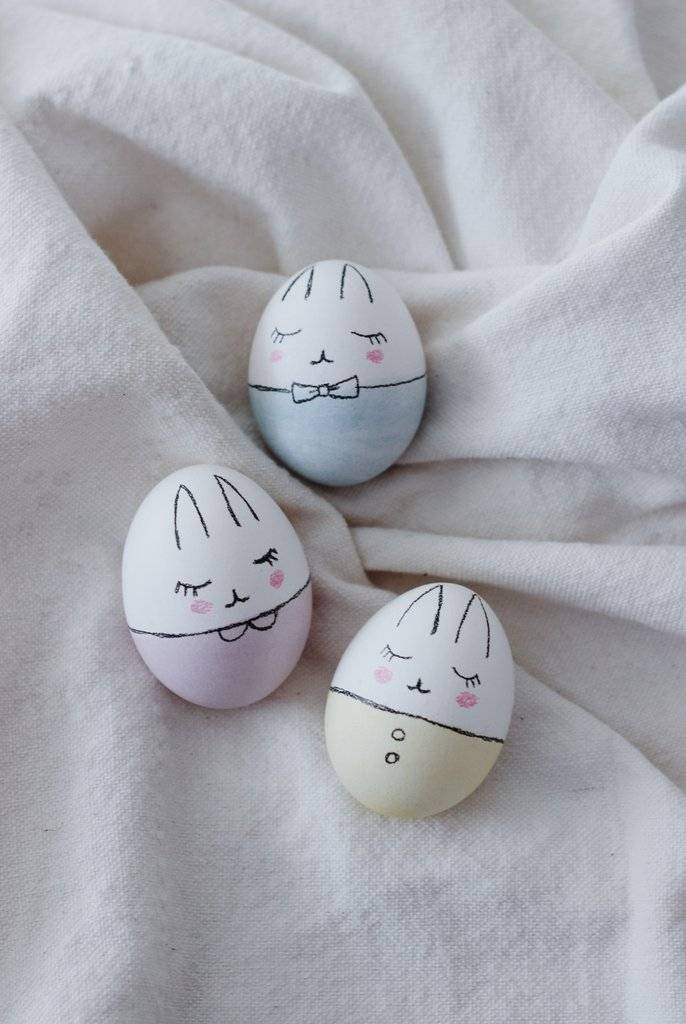
24. Easter Bunny Eggs: Sweet bunny eggs asleep in their cozy egg onesies. 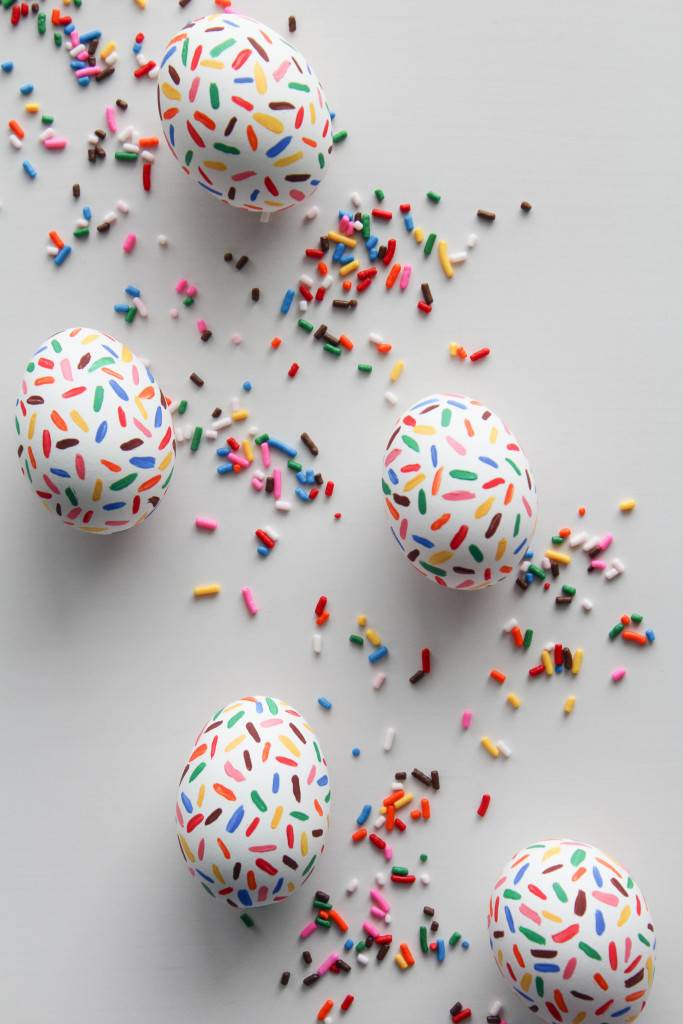
25. Sprinkle Eggs: These confetti eggs are ready to party! Super easy to make, they bring lots of colorful fun. 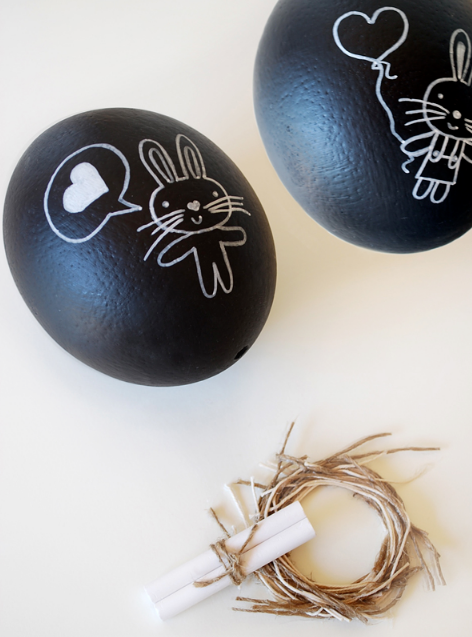
26. Chalkboard Eggs: Create a new design every day with this clever idea. Now you just need to learn to draw those cute bunnies! 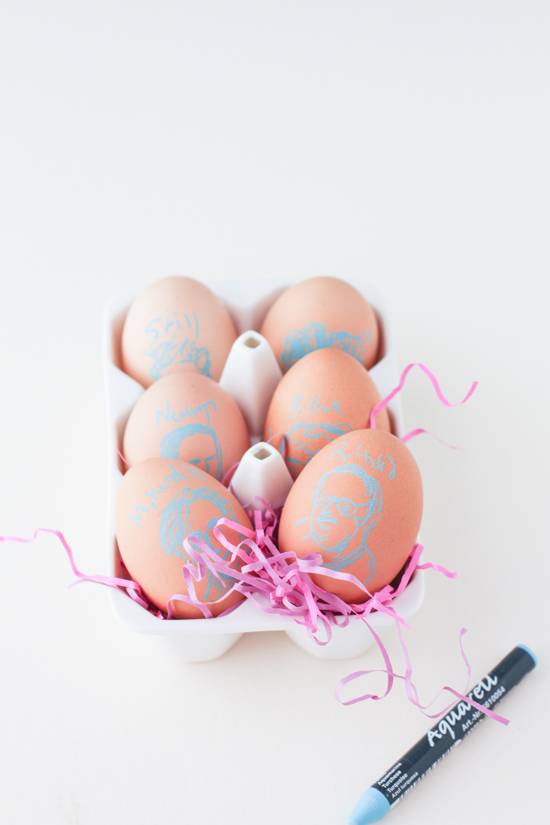
27. Artist Egg: Portrait of an artist as a young egg. 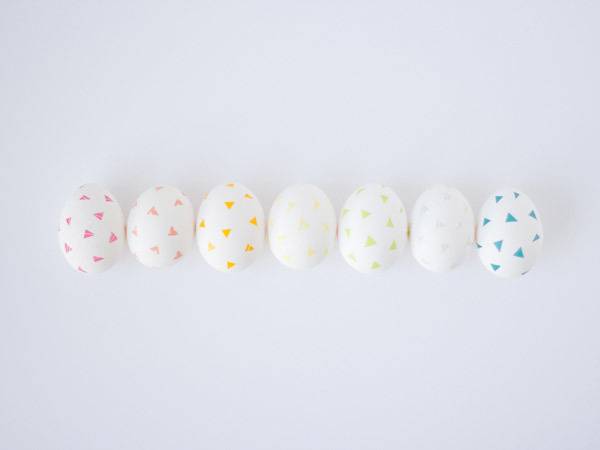
28. Washi Tape Eggs: Tiny taped shapes turn these plain white ovoids into funky fun. 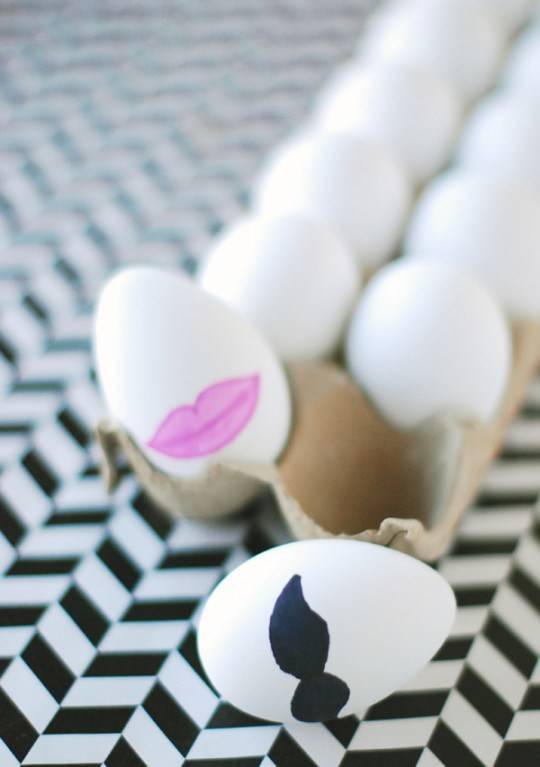
29. His & Her Eggs: Lips and a moustache are the only disguise these eggs wear. 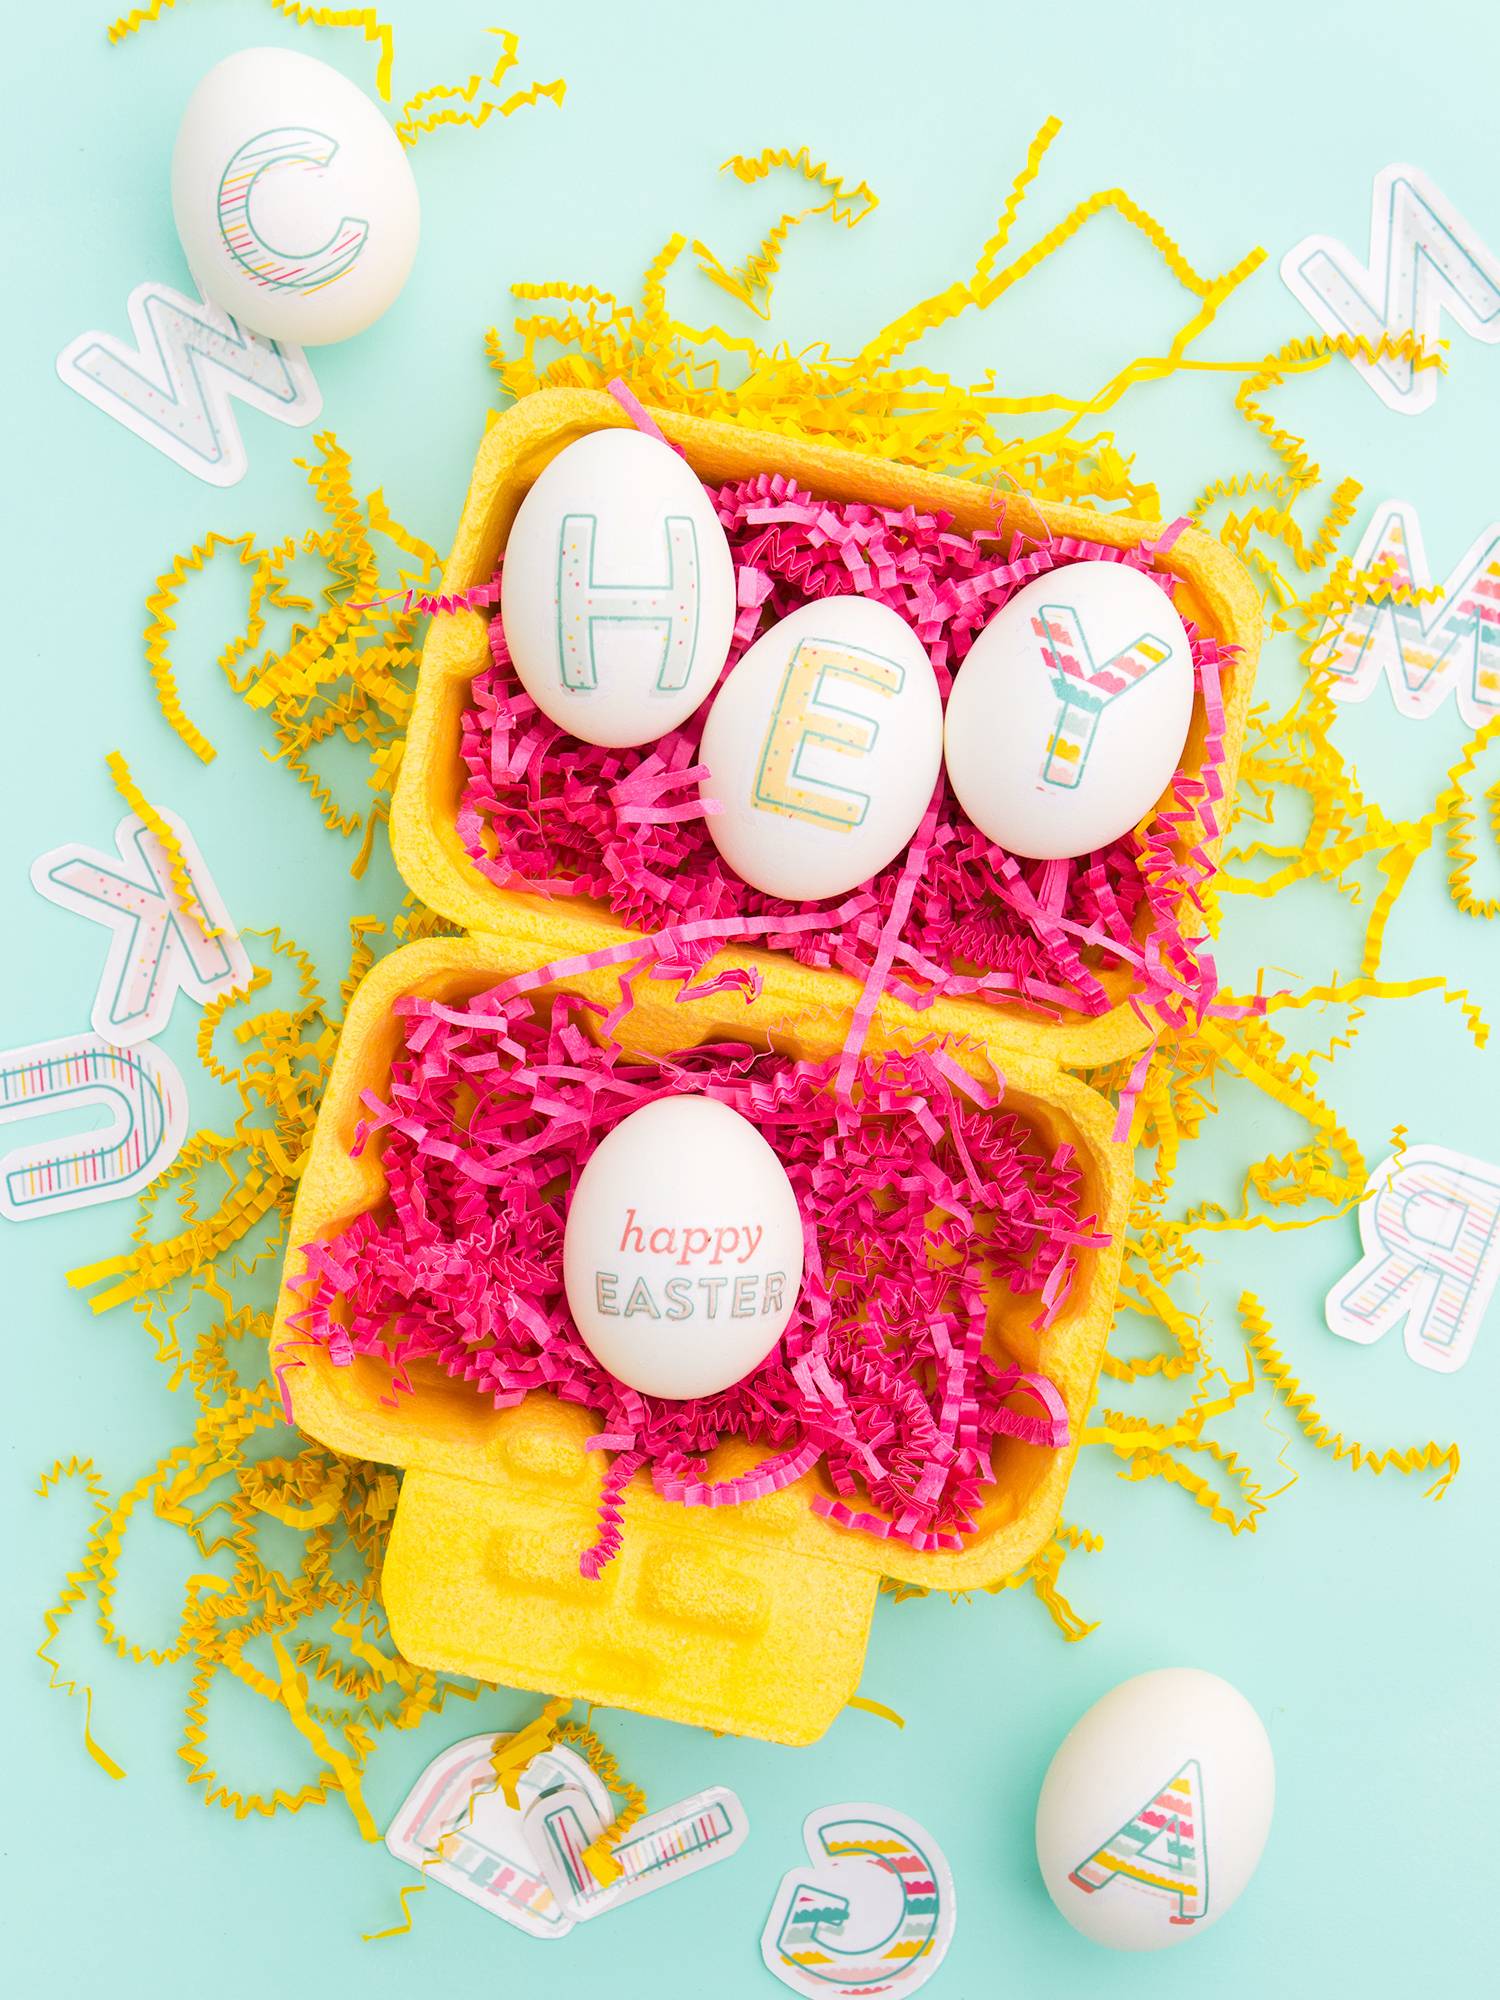
30. Monogrammed Eggs: Your initials or an Easter greeting on the incredible, edible egg. Happy typography for the win! 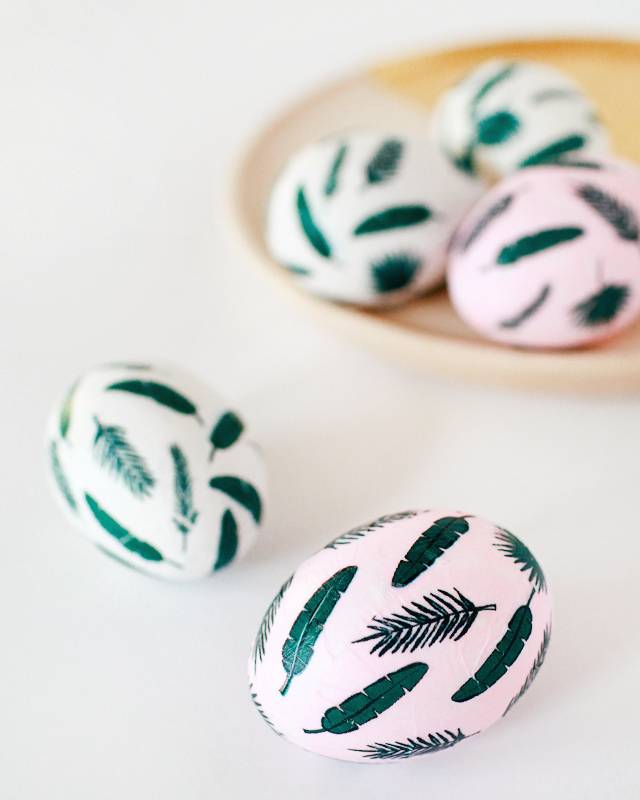
31. Tropical Leaf Eggs: A jungle of boho styling makes these botanical Easter Eggs extra special. 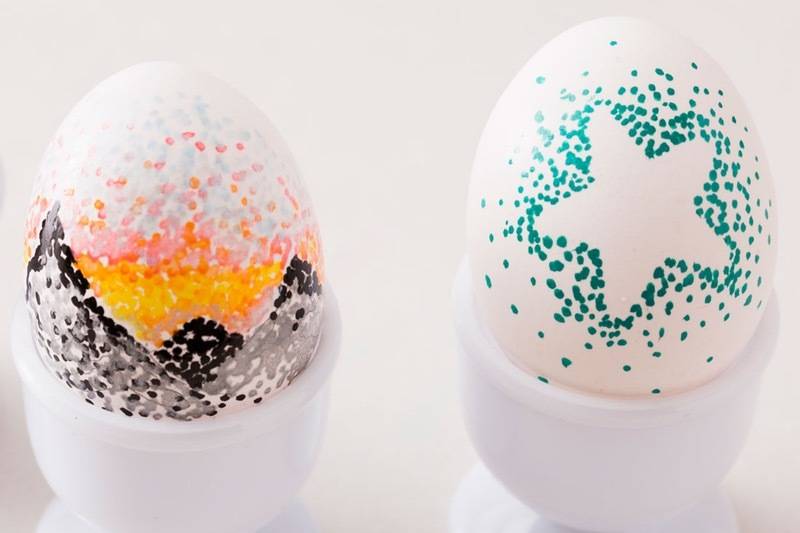
32. Pointillism Eggs: Dotty designs using any shape you choose. 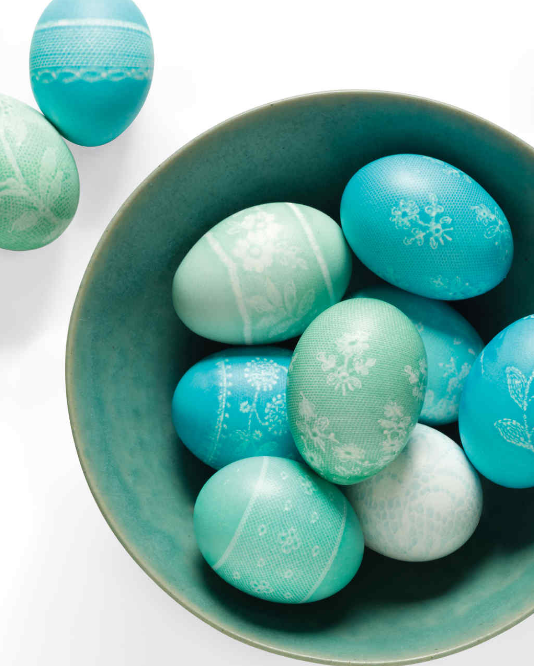
33. Lace-Dipped Eggs: Tightly wrap eggs in lace before they take the dip-dye plunge. 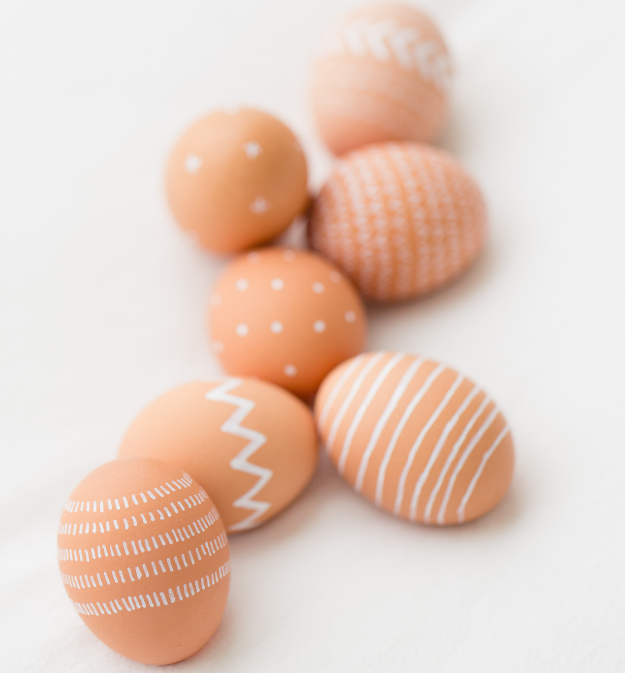
34. Penned Eggs: White pen + Brown egg = Delicate designs. 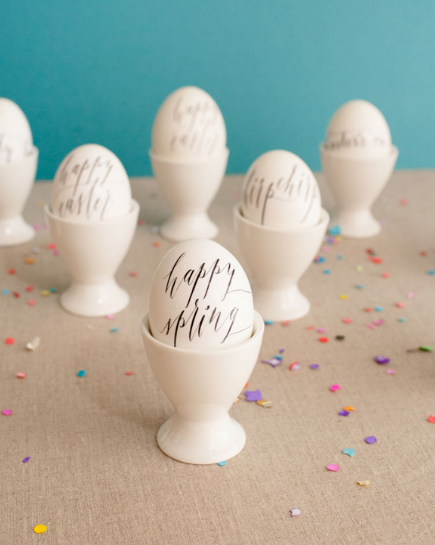
35. Calligraphied Eggs: Beautiful script for all your Easter wishes. 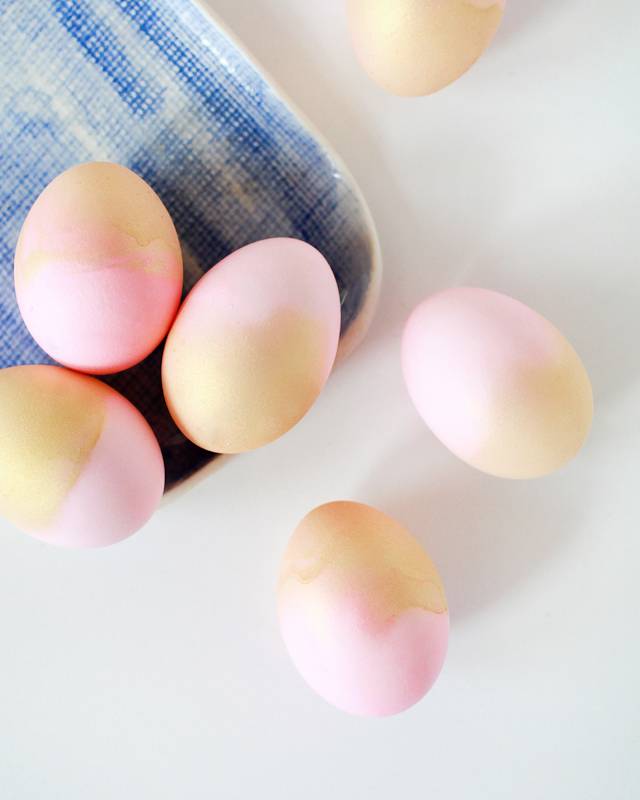
36. Pink and Gold Mist Eggs: A hint of pink, a dash of gold. 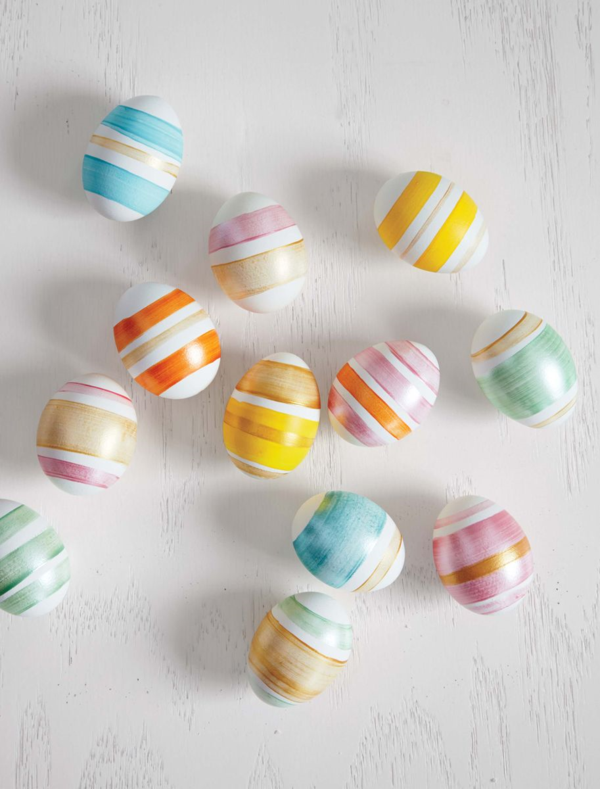
37. Striped Eggs. A super-slick way to stripe your eggs. 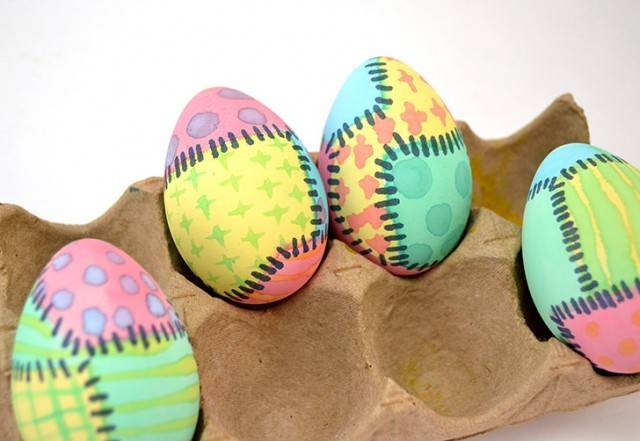
38. Quilted Eggs: Patches of dye and painted stitches create eggs that are practically cozy. 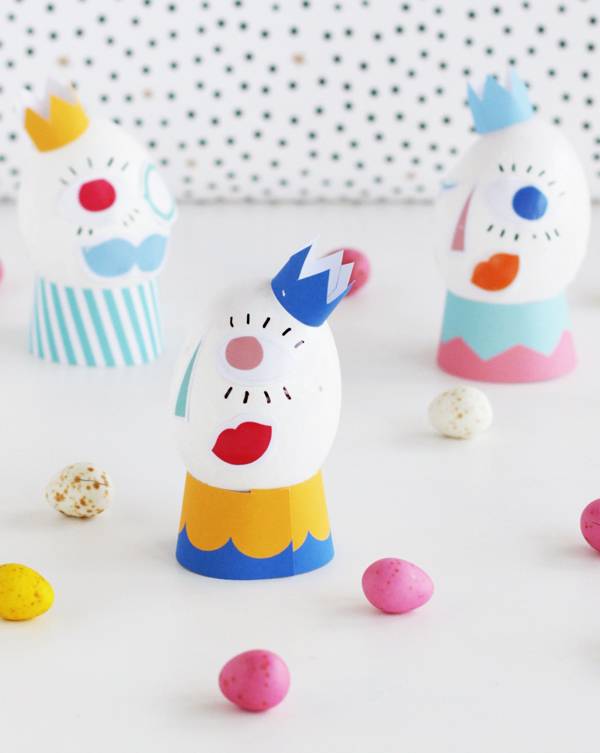
39. Silly Face Eggs: Quirky, colorful eggs with abstract expressions. 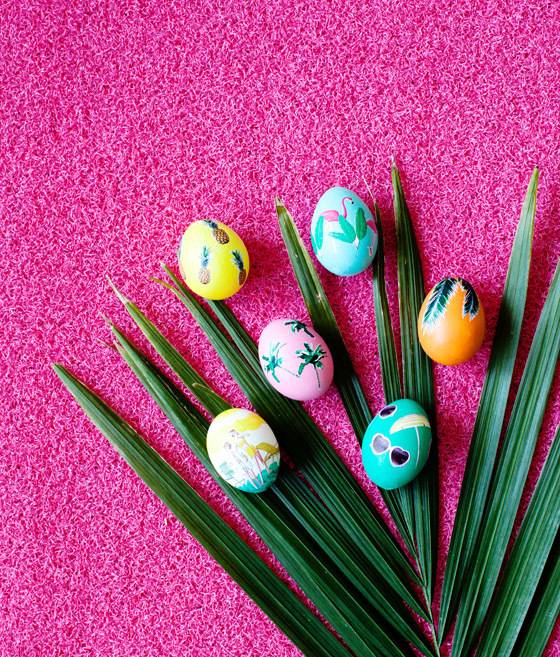
40. Decoupage Eggs: Use these tropical images to deck those eggs. 
41. Stenciled Eggs: Using tape and the shapes of your choosing, you can create patterns to your heart’s content. 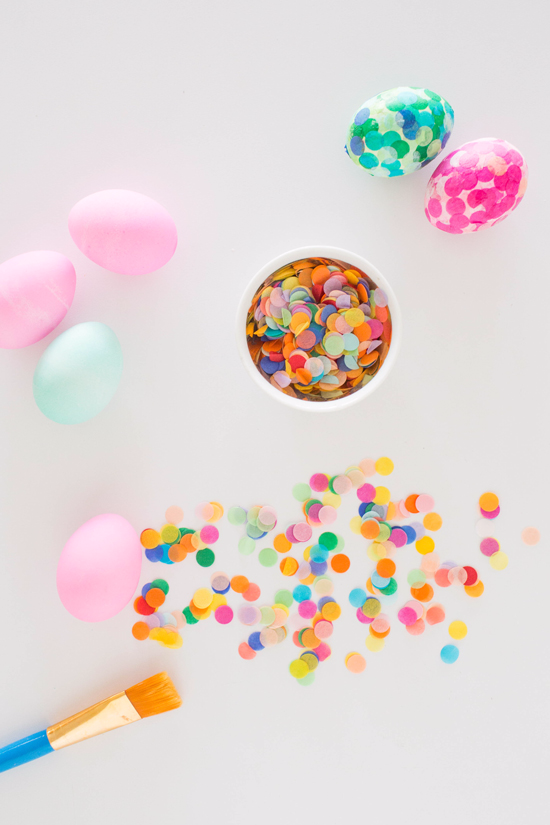
42. Confetti Eggs: Bring the party to your ovoids. 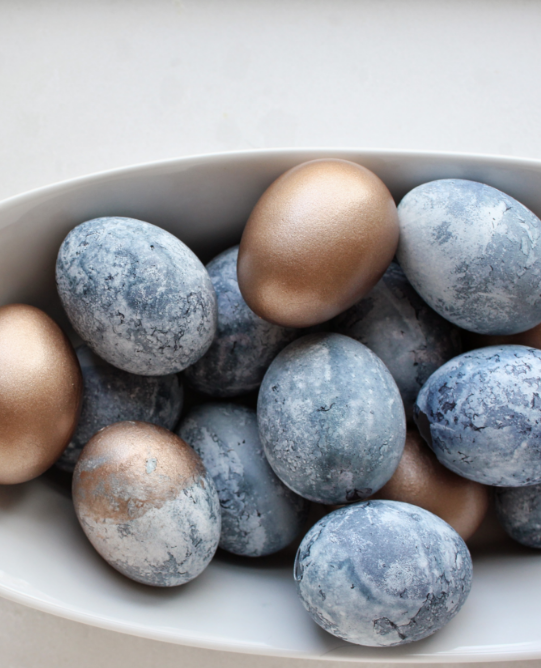
43. Marbled Gold Eggs: Using grape juice and paint you can create a marbled dozen. 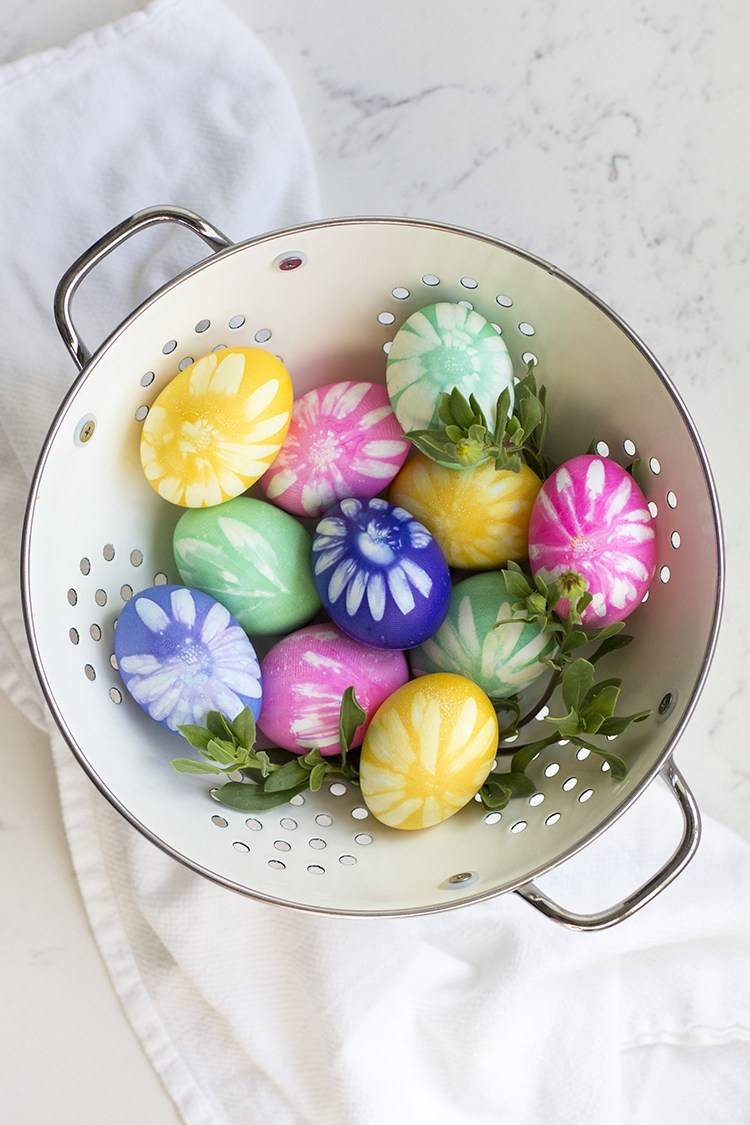
44. Nylon Floral Eggs: Beautiful designs using nature and netting. 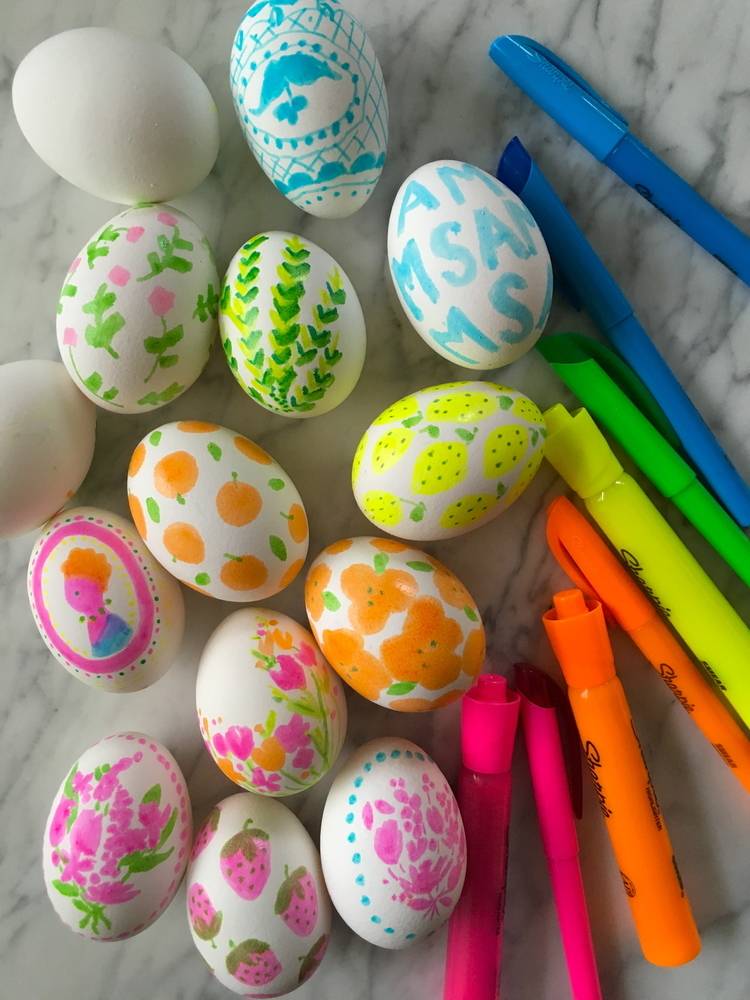
45. Highlighter Pen Eggs: Achieve a watercolor look with a set of highlighter markers. 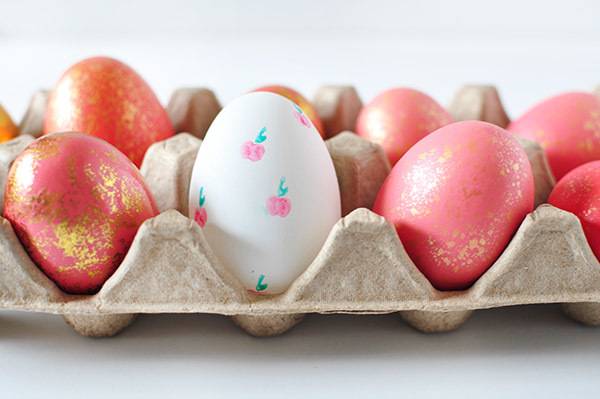
46. Fruit & Veggie Stamped Eggs: The tiniest produce on display. 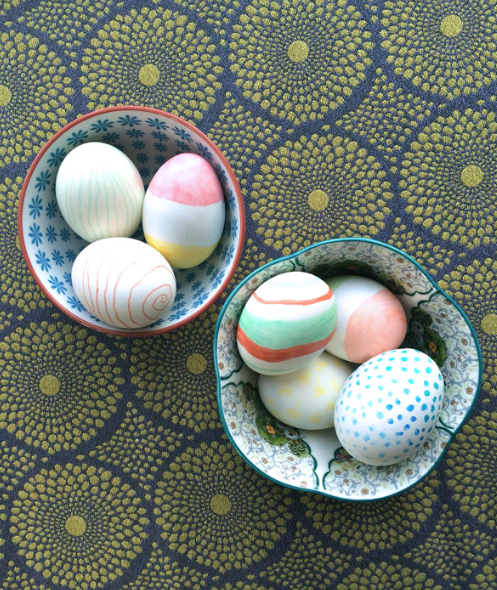
47. Marker Colored Eggs: Use markers to make a set of colorful spring eggs. 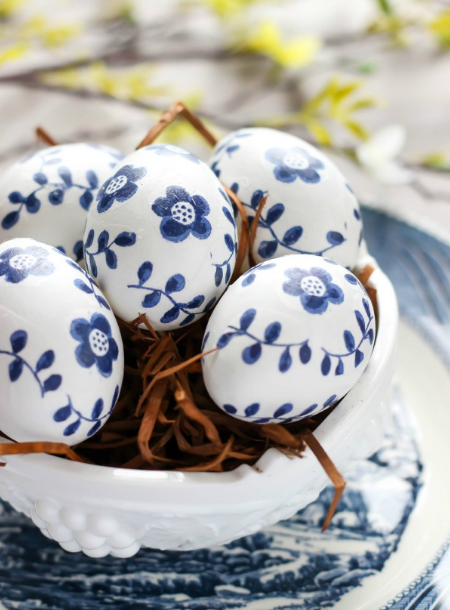
48. Paper Napkin Eggs: These paper napkin eggs remind me of classic Scandinavian design and they are a piece of cake to make. 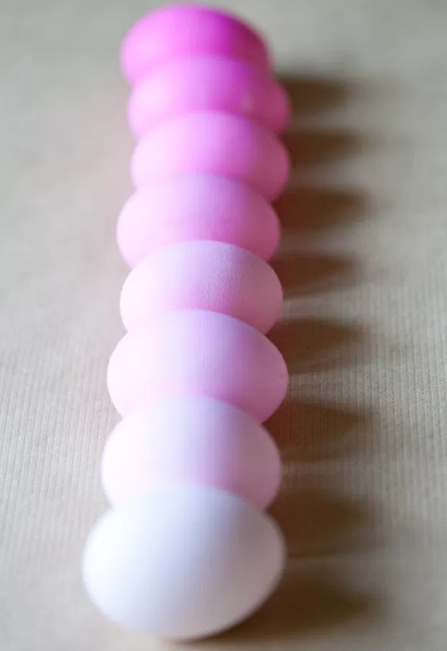
49. Gradient Eggs: Put your dozen in a row and gradually deepen the color. 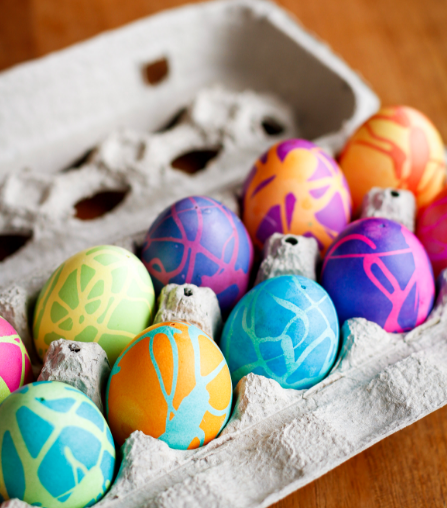
50. Rubber Cement Eggs: You can make cool shapes and swirls using a double-dye process and rubber cement. Whew! We made it! Fifty gorgeous, completely DIYable Easter eggs for you to decorate this spring. Now, hop to it! The post The 50 Best Ways to Dye and Decorate Easter Eggs appeared first on Curbly. Via https://www.curbly.com/best-ways-to-dye-and-decorate-easter-eggs 
Sure, all-white kitchens are neutral and easy, but they also tend to lack personality. Why not infuse your space with a bit of extra color to add some character? Here are 27 gorgeous kitchens that aren’t all white to get your creative juices flowing.
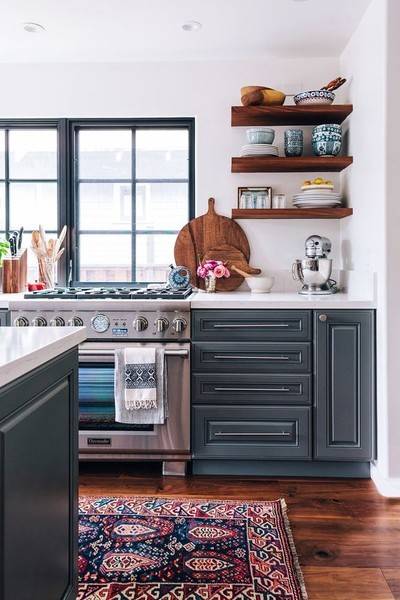
1. Blue-gray cabinets and a colorful rug add some serious personality to a kitchen with white walls and countertops. [Photo: Good House] 
2. Lots of natural wood gives this space a rustic vibe that it wouldn’t otherwise have if it were all white. [Photo: Domino] 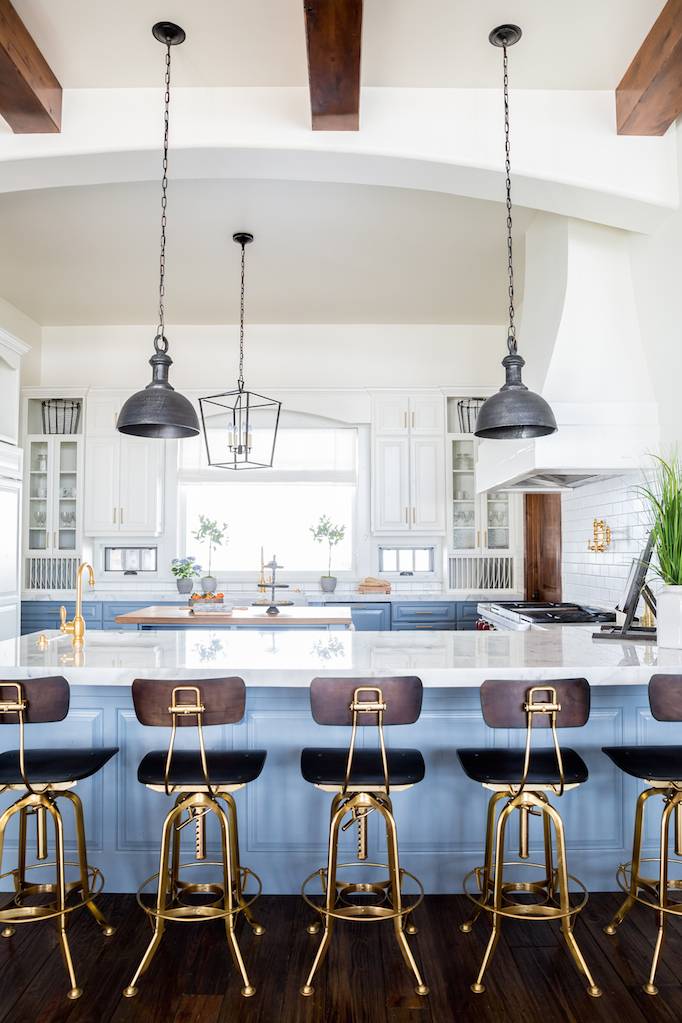
3. Pale blue lower cabinets add color and vibrancy to this lovely kitchen. [Photo: BeckiOwens.com] 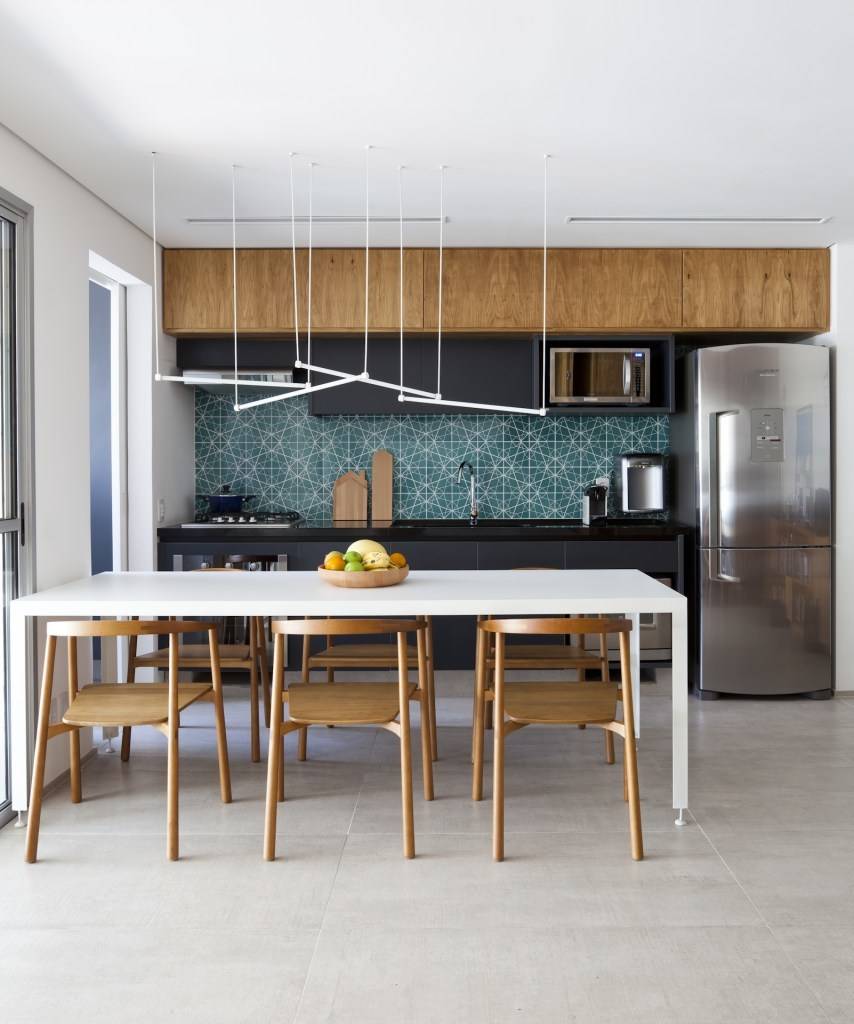
4. This kitchen’s backsplash is a complete and utter showstopper! [Photo: Nonagon] 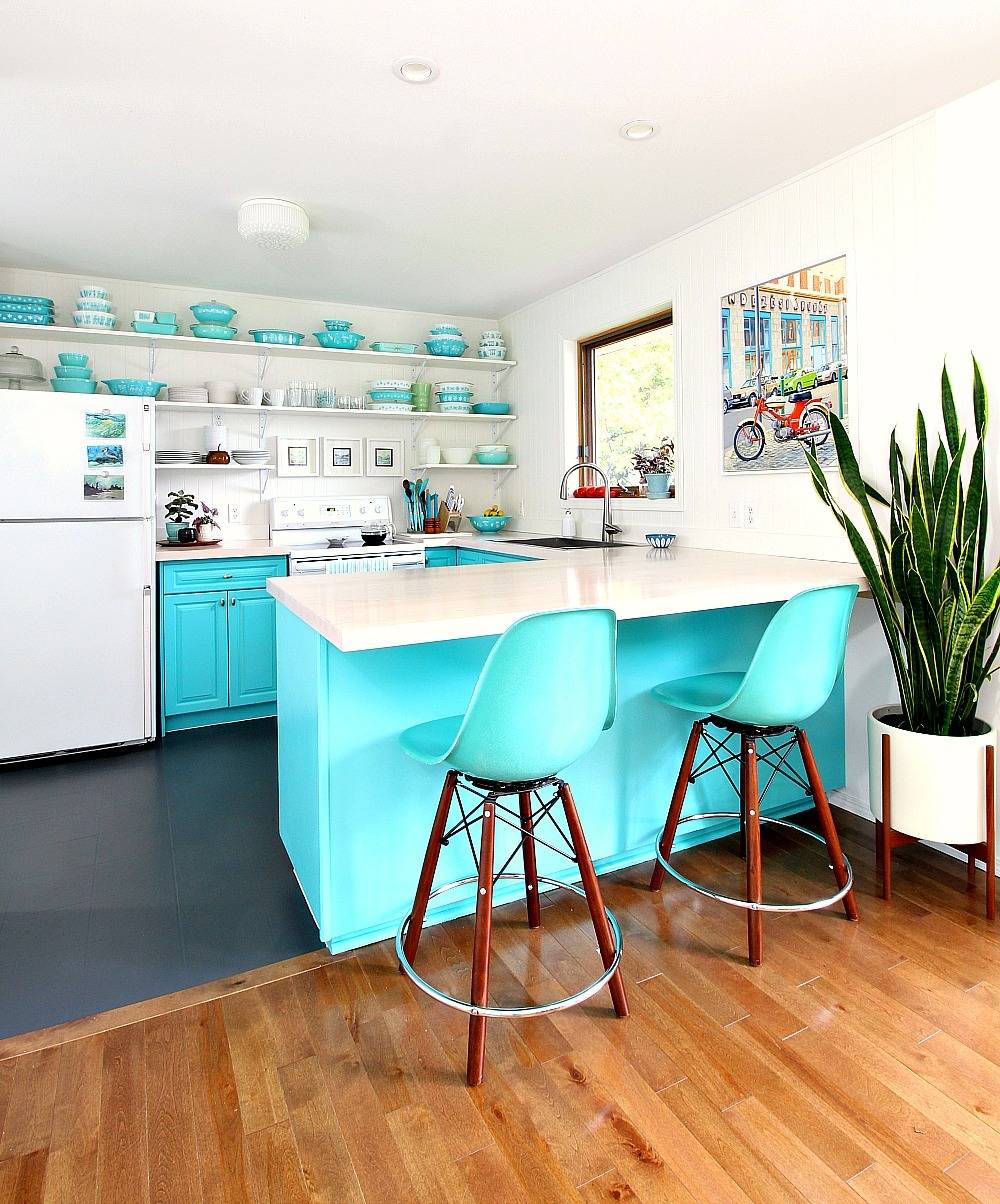
5. Electric blue cabinets, stools and dishes give this kitchen a memorable look. [Photo: Dans Le Lakehouse] 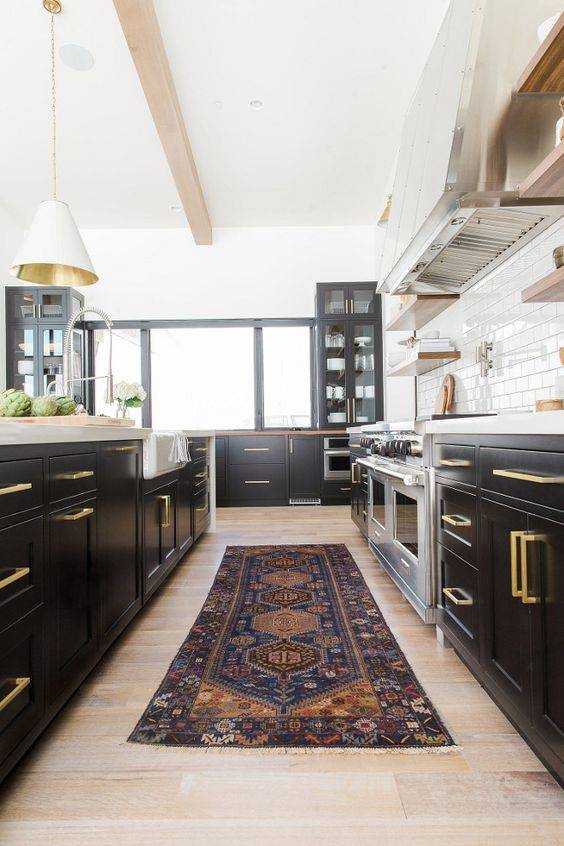
6. Black lower cabinets and a dramatic runner give this white-walled kitchen a glamorous look. [Photo: BHG] 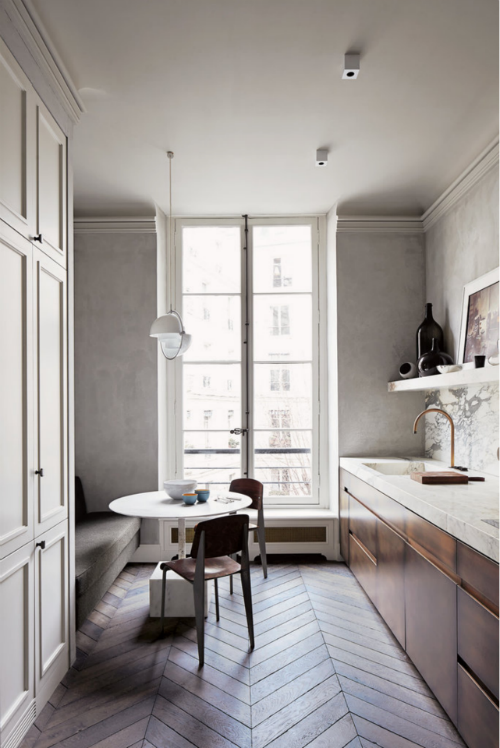
7. Grey walls and wooden cabinets and floors give this kitchen a thoroughly unique style. [Photo: Leuchtend Grau] 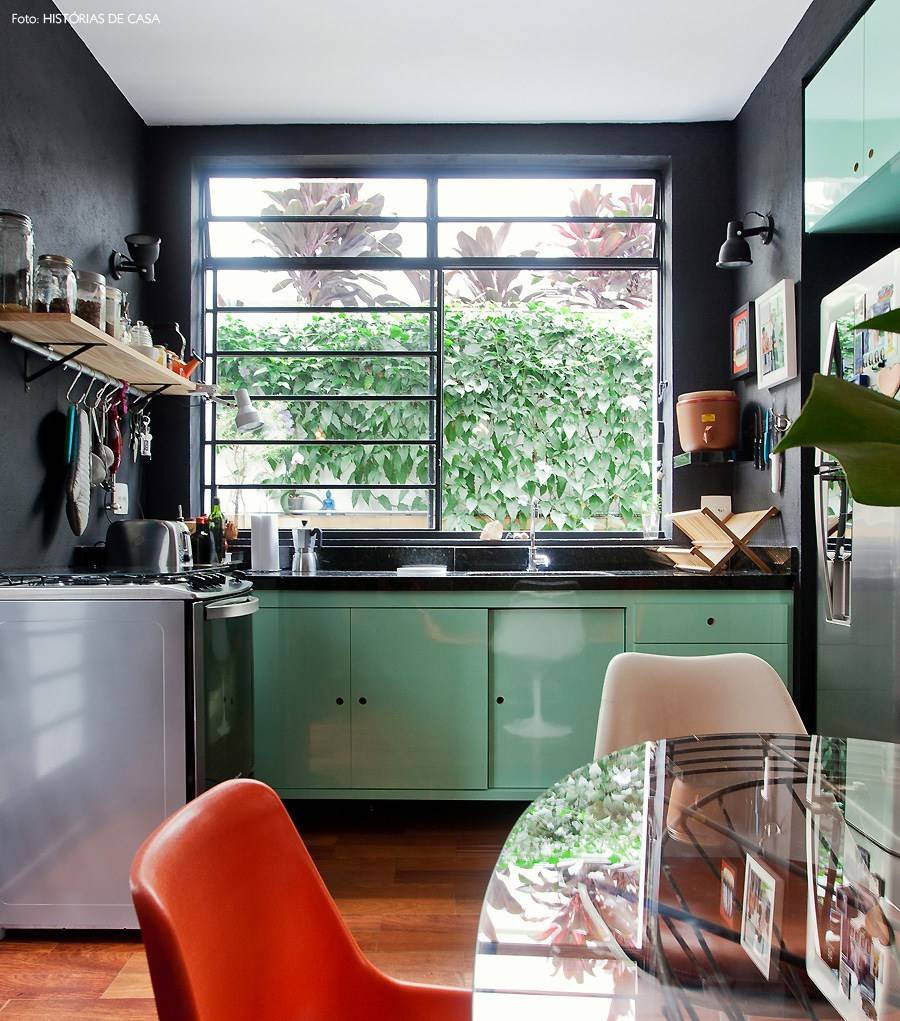
8. Take a cue from the view from your window as these homeowners have done, matching their cabinets with their greenery. [Photo: Historias De Casa] 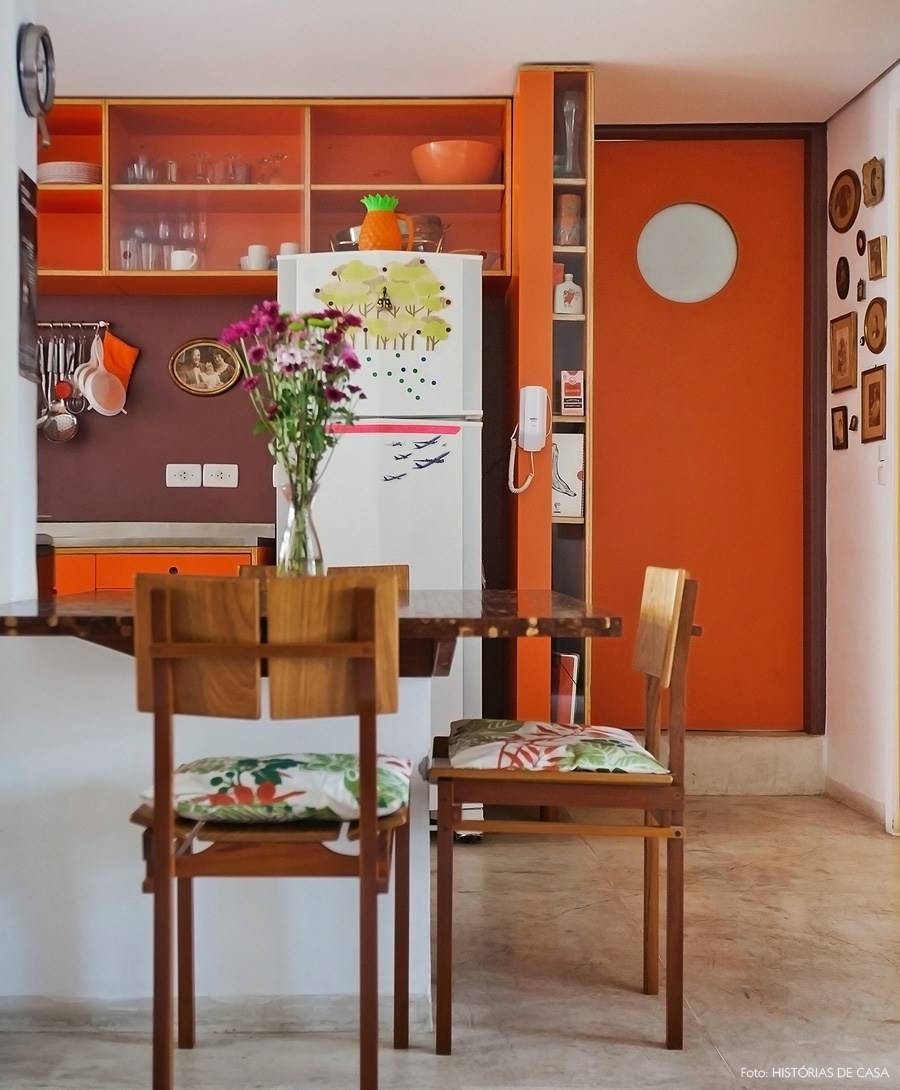
9. A rich orange color lends this kitchen a deliciously retro vibe. [Photo: Historias De Casa] 
10. Black cabinets give this kitchen an unexpectedly bold look. [Photo: The DIY Mommy] 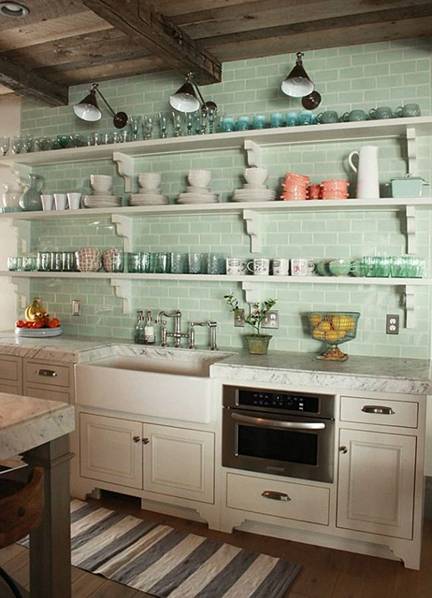
11. Celery green subway tile creates a lovely backdrop for glassware in this kitchen. [Photo: Onekindesign] 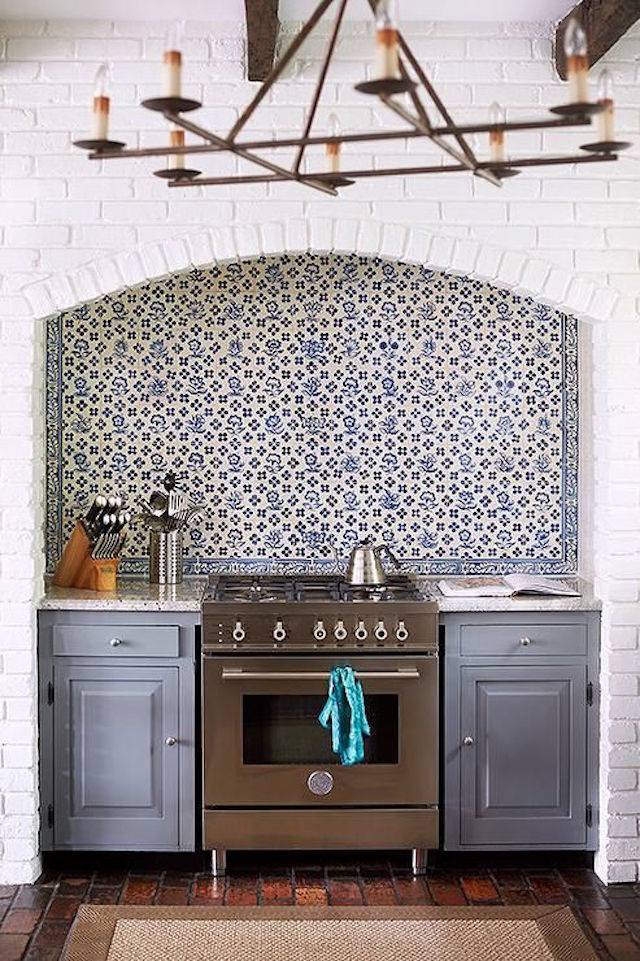
12. A bold backsplash and coordinating cabinets give this kitchen nook a unique look. [Photo: The Effortless Chic] 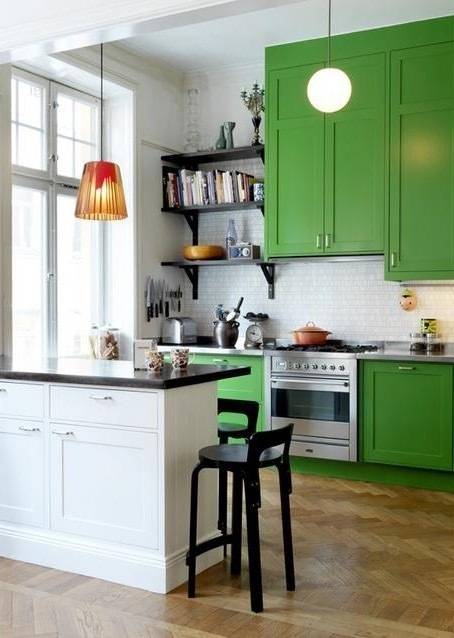
13. This mostly white kitchen gets a strong dose of color in the form of kelly green cabinets. [Photo: Apartment Therapy] 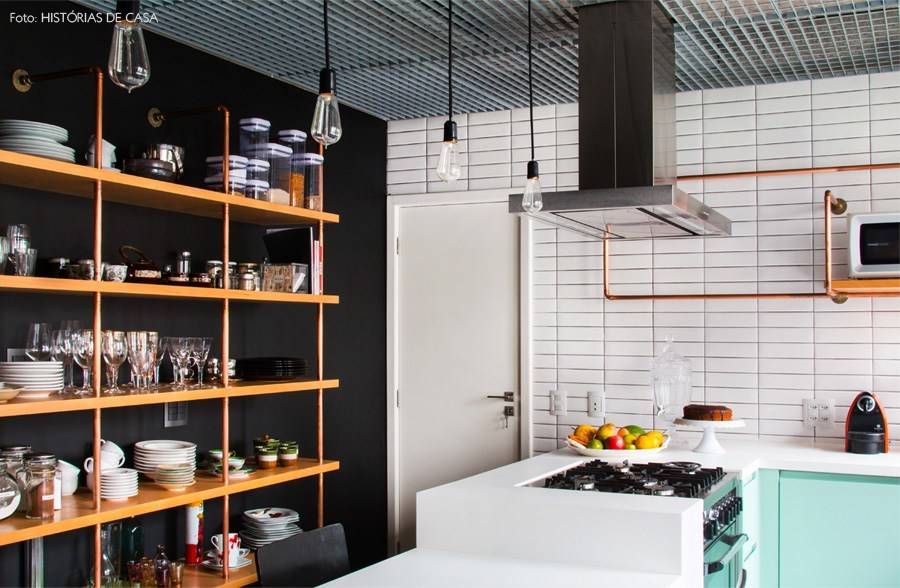
14. Mint green, copper and black are used here to freshen up a white backsplash. [Photo: Historias De Casa] 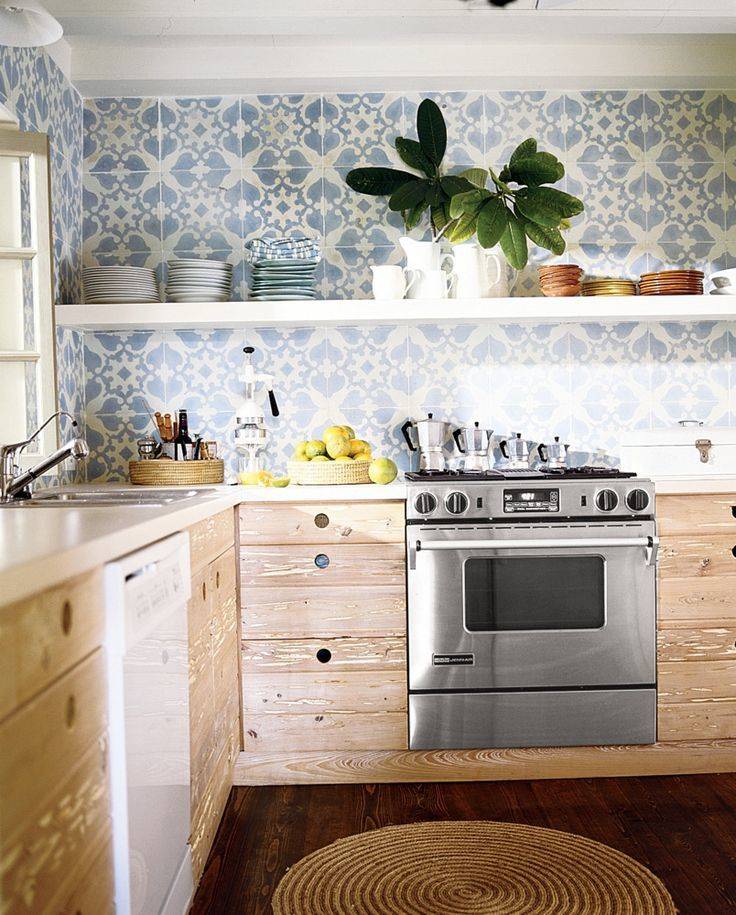
15. Light wooden cabinets and colorful wall tiles lend a super chic vibe to this kitchen. [Photo: Homedit] 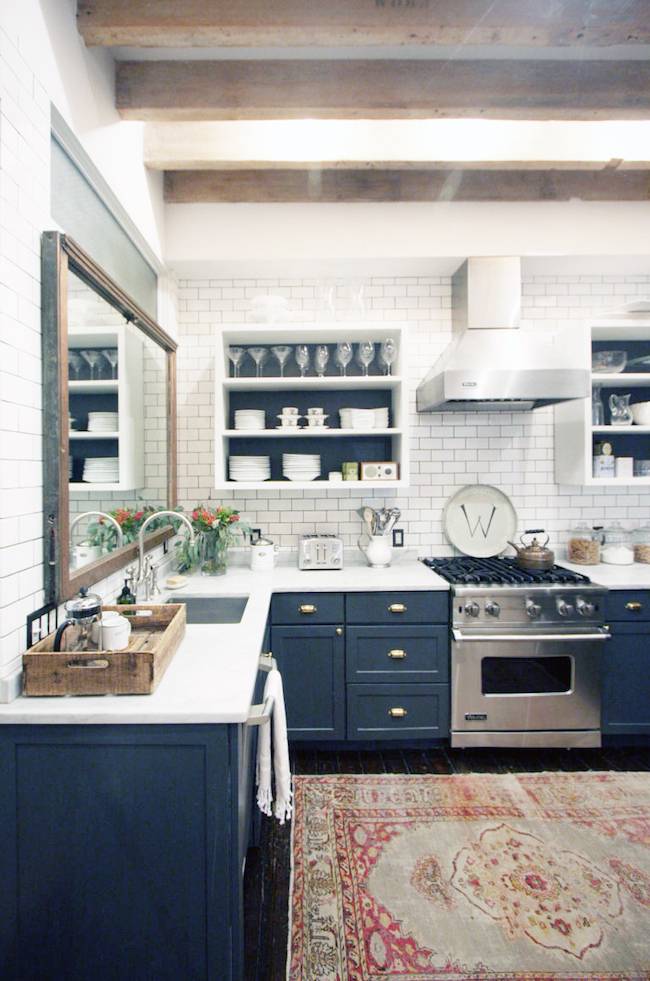
16. Here, white subway tile is balanced with dark blue lower cabinets and a beautiful red and beige rug. [Photo: Jacquelyn Clark] 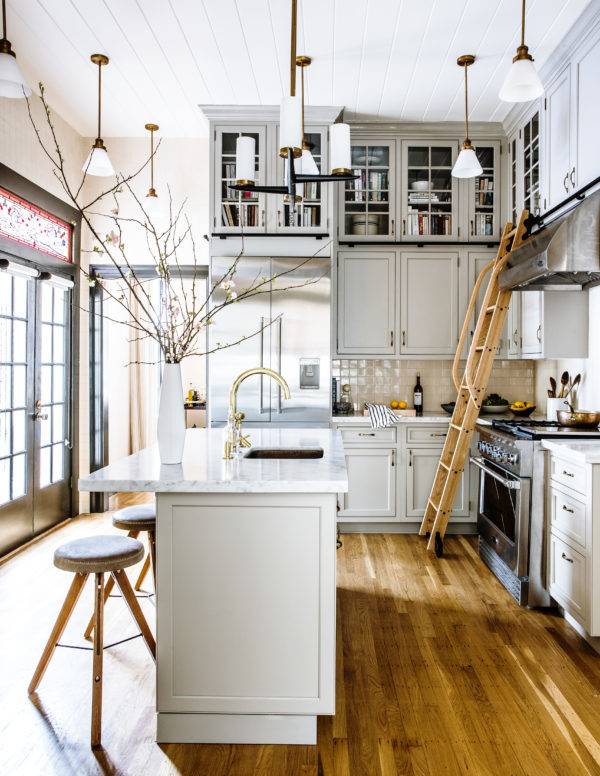
17. If you like the lighter look but don’t want to go all white, you might consider light grey with wooden accents like the kitchen above. [Photo: Decoholic] 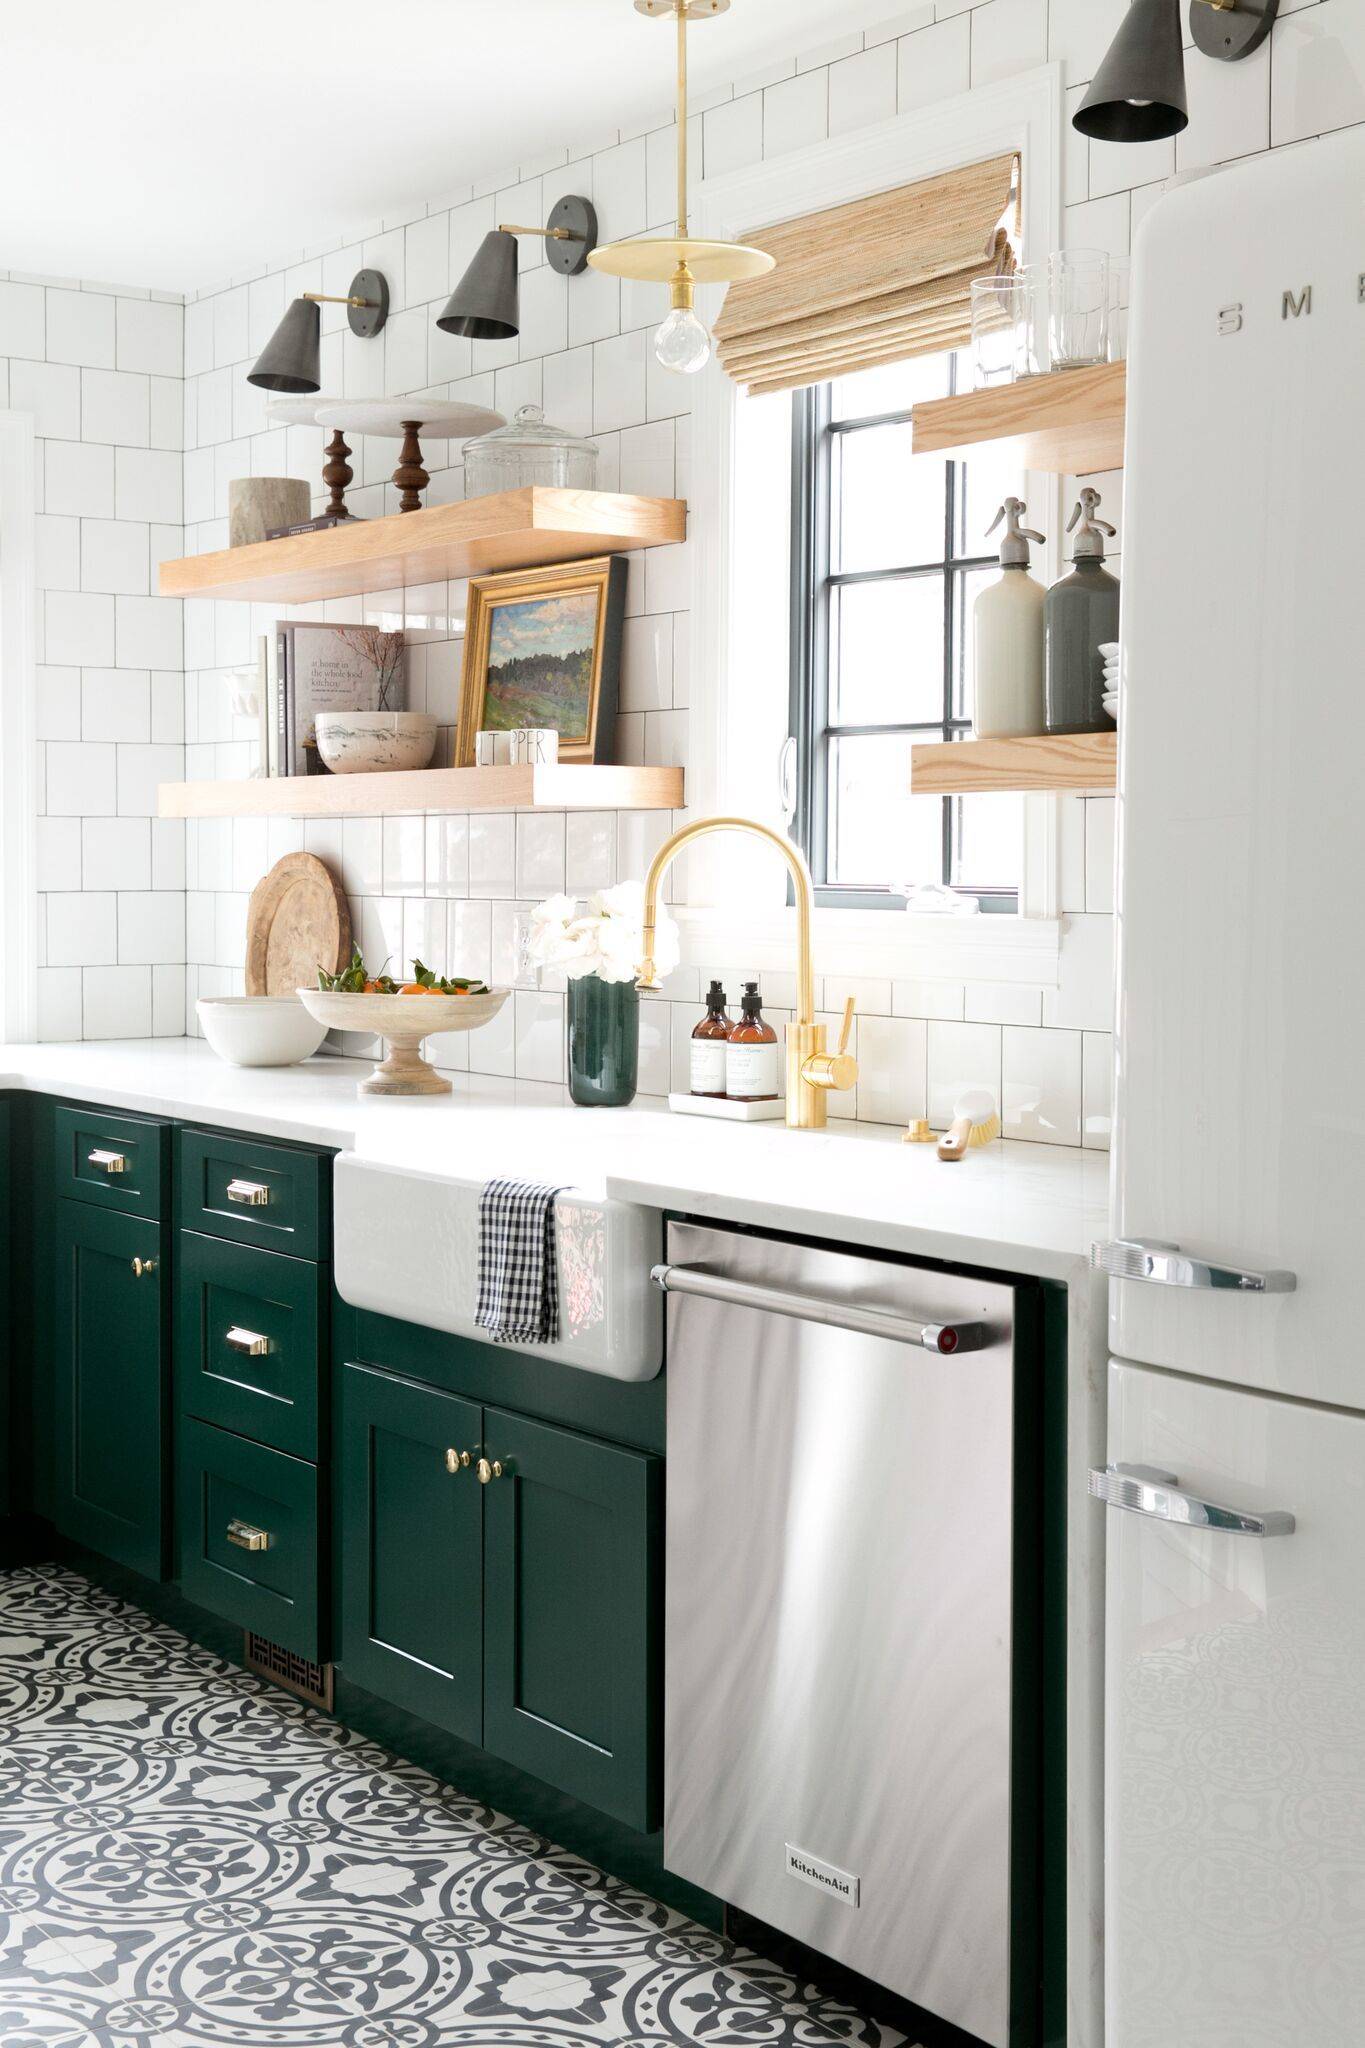
18. Bold tiling and dark green cabinets give weight and substance to this lovely Tudor style home. [Photo: Studio McGee] 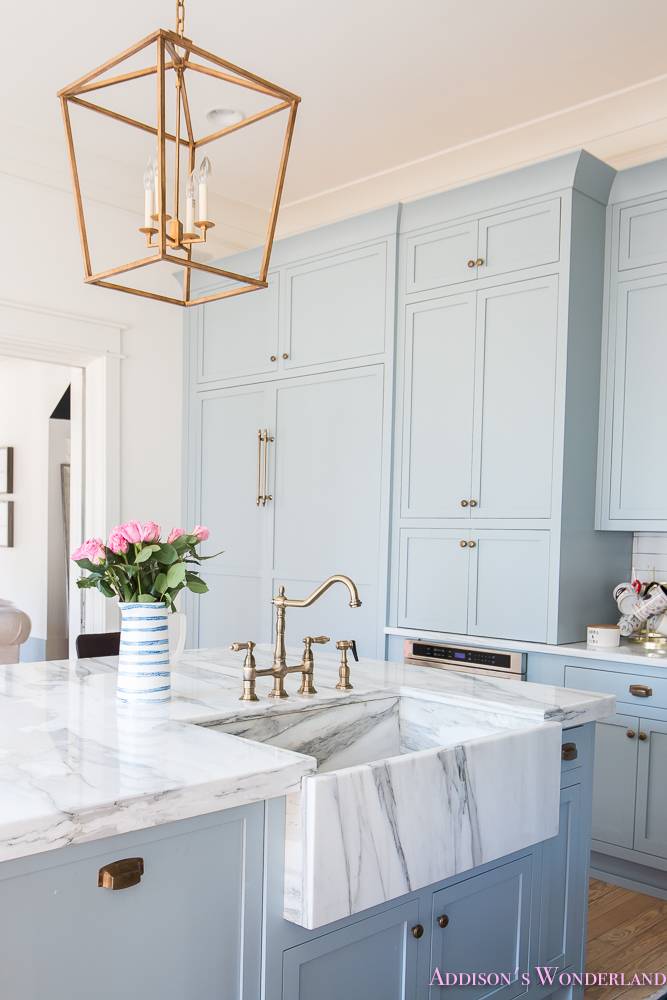
19. Pale blue cabinets offset the marble countertops perfectly in this tall, airy kitchen. [Photo: Addison’s Wonderland] 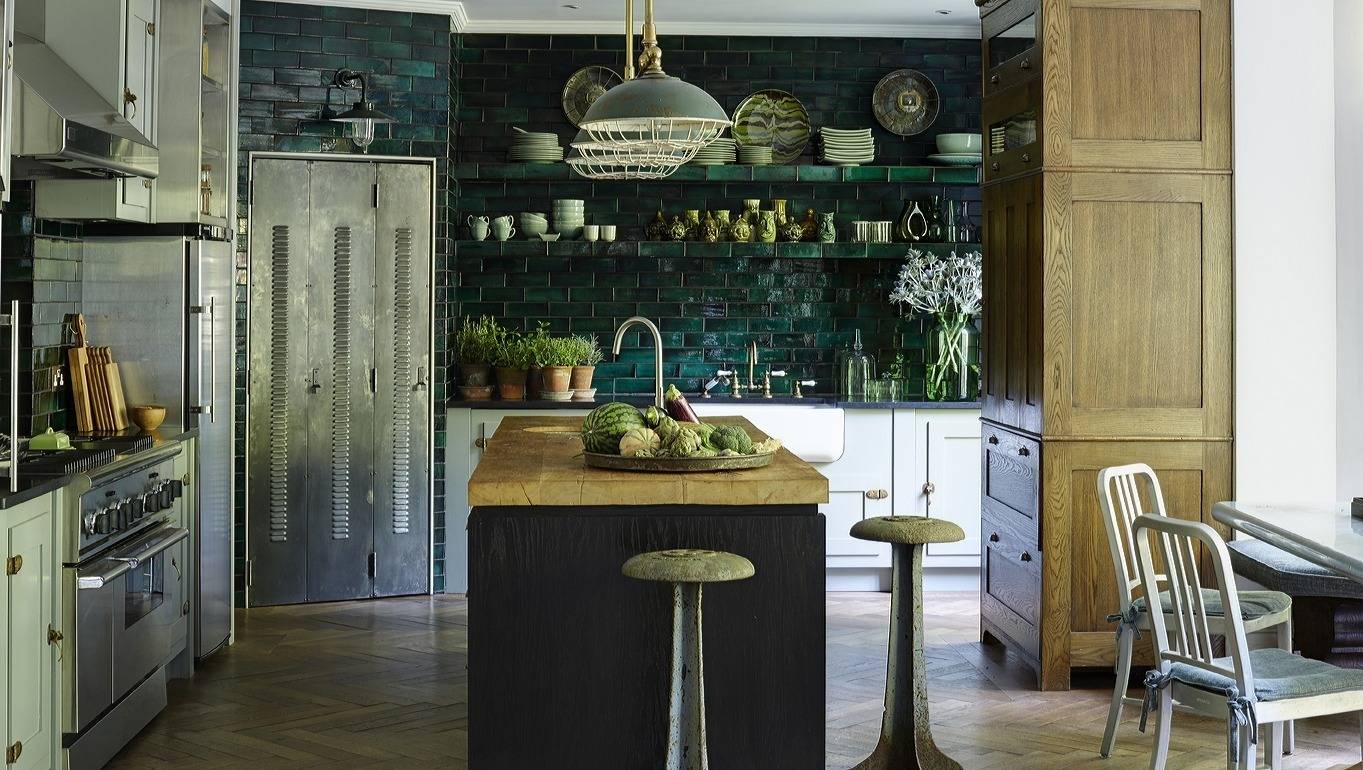
20. Dark green tiling and wooden elements make this kitchen feel like a nod to the great outdoors. [Photo: HZ Interiors] 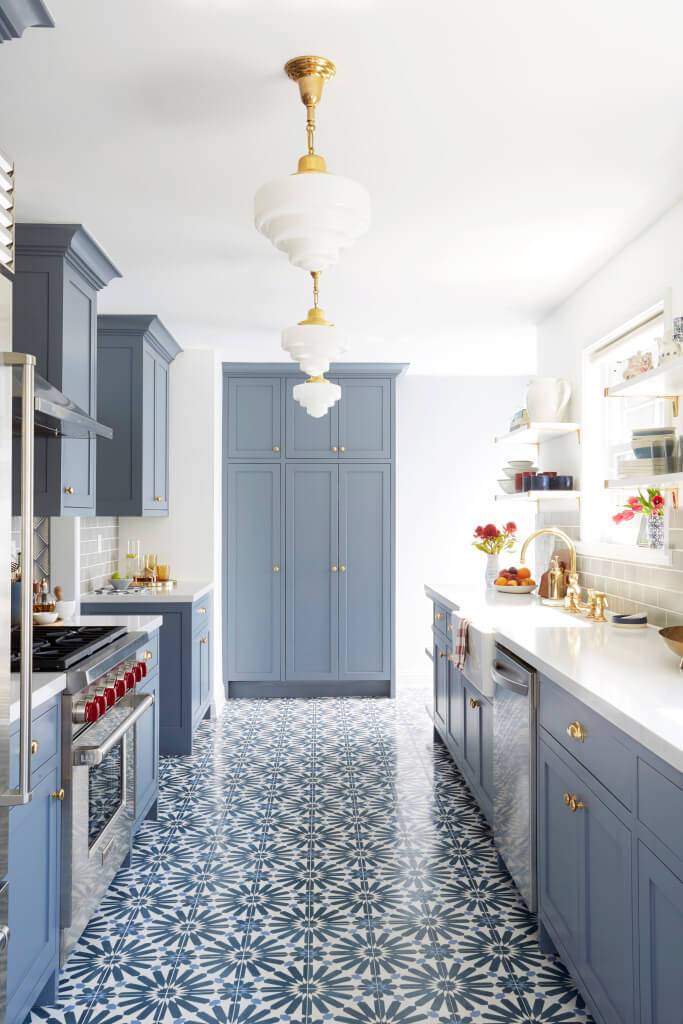
21. Patterned tile and blue cabinets for the win, yet again! [Photo: Style By Emily Henderson] 
22. Why not add a bold pop of yellow to an old set of cabinets? [Photo: A Beautiful Mess] 
23. A medium gray is just as neutral as white… but way less boring! [Photo: Greige Design] 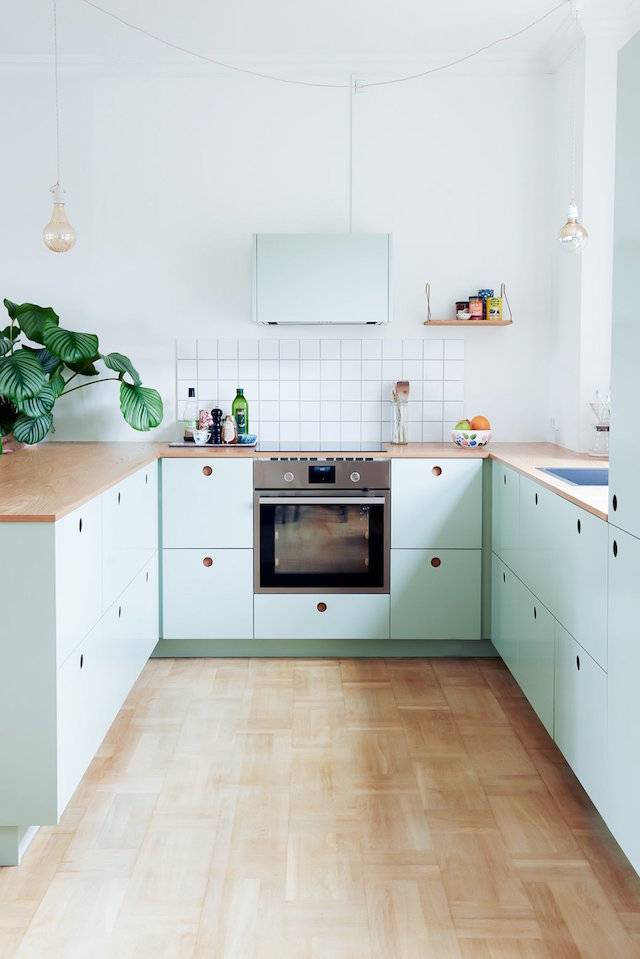
24. Minty fresh cabinets feel very inviting in this simply-designed kitchen. [Photo: My Scandinavian Home] 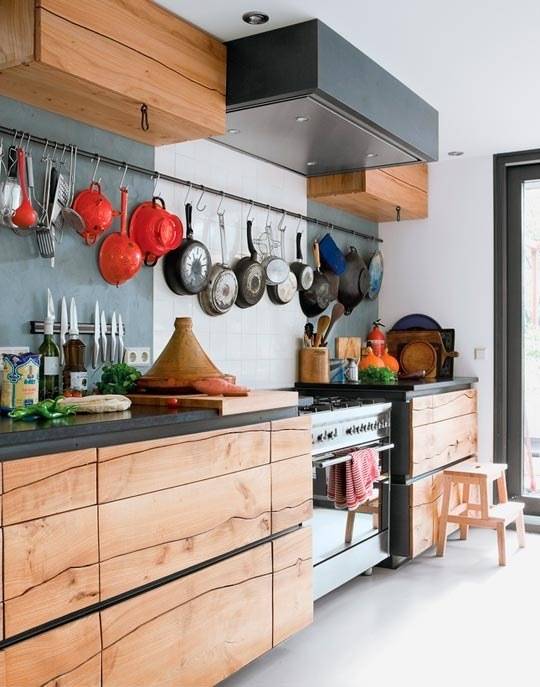
25. Natural elements lend a unique sensibility to this sun-filled space. [Photo: The Kitchn] 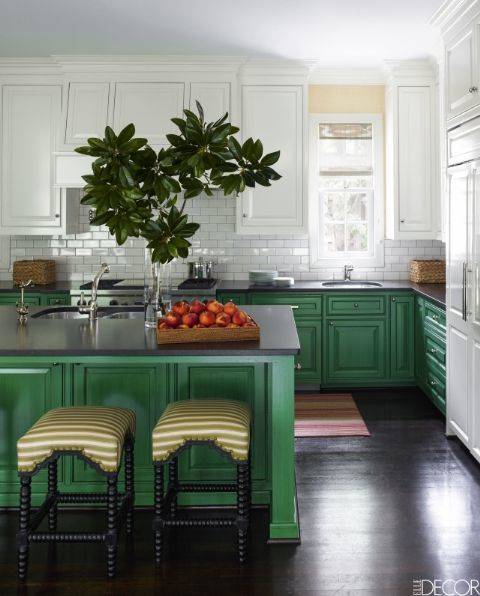
26. Distressed green lower cabinets add lots of pizzazz to this large kitchen. [Photo: Elle Decor] 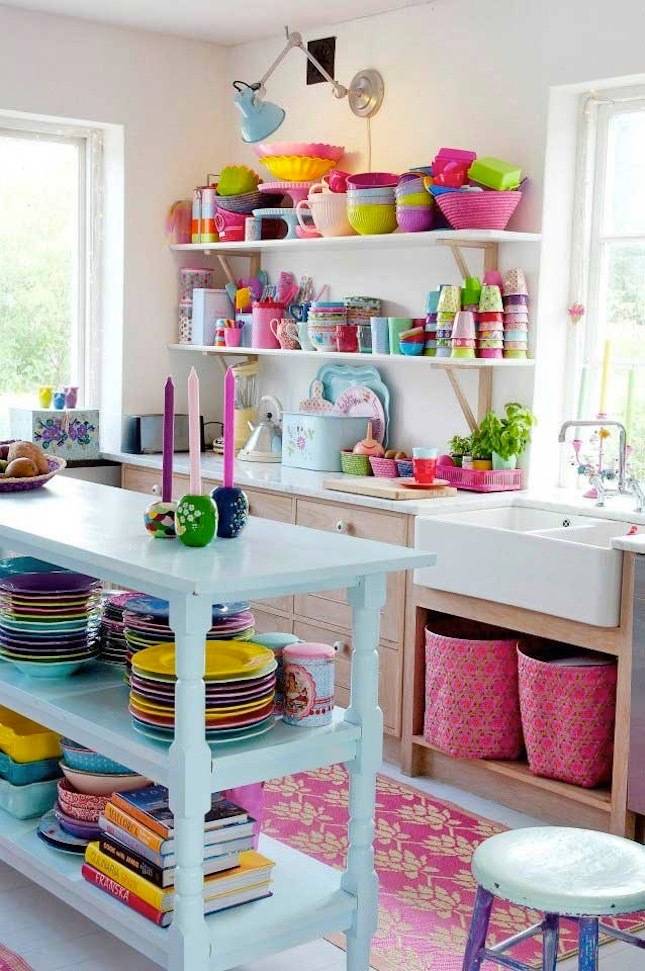
27. And if you’re feeling really daring… why not try using every color of the rainbow?! [Photo: Brit + Co.] 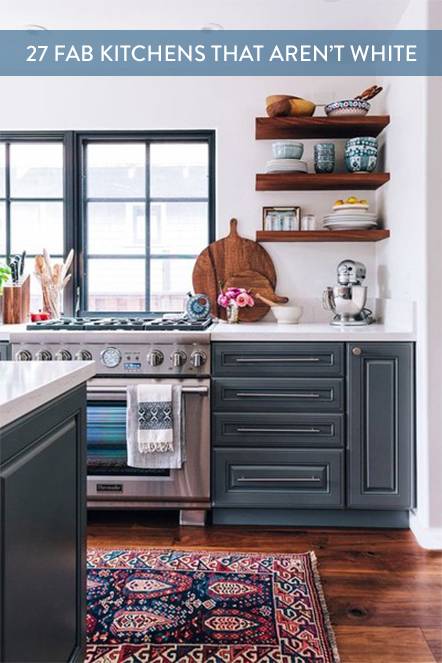
The post 27 Ways to Move Beyond the White Kitchen Trend appeared first on Curbly. Via https://www.curbly.com/27-ways-to-move-beyond-the-white-kitchen-trend
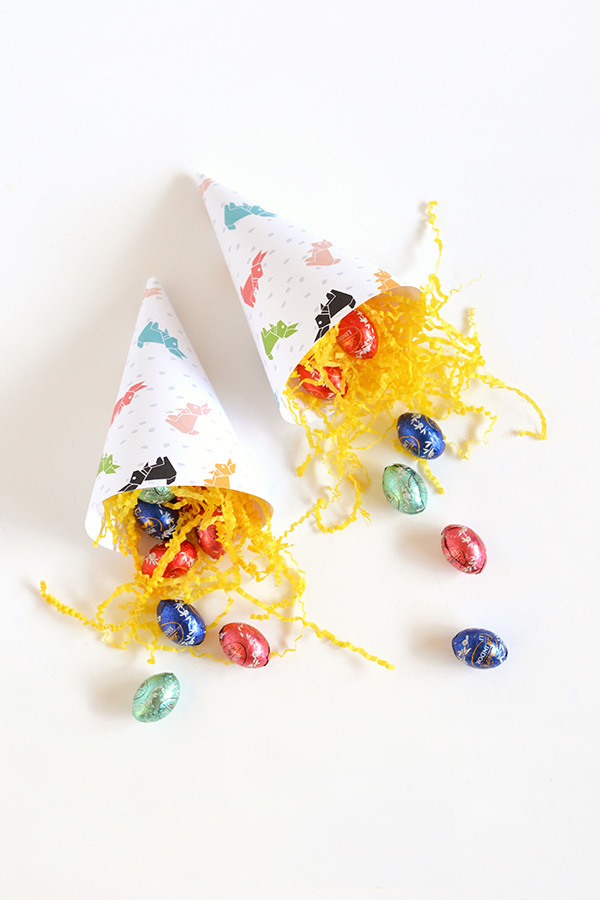
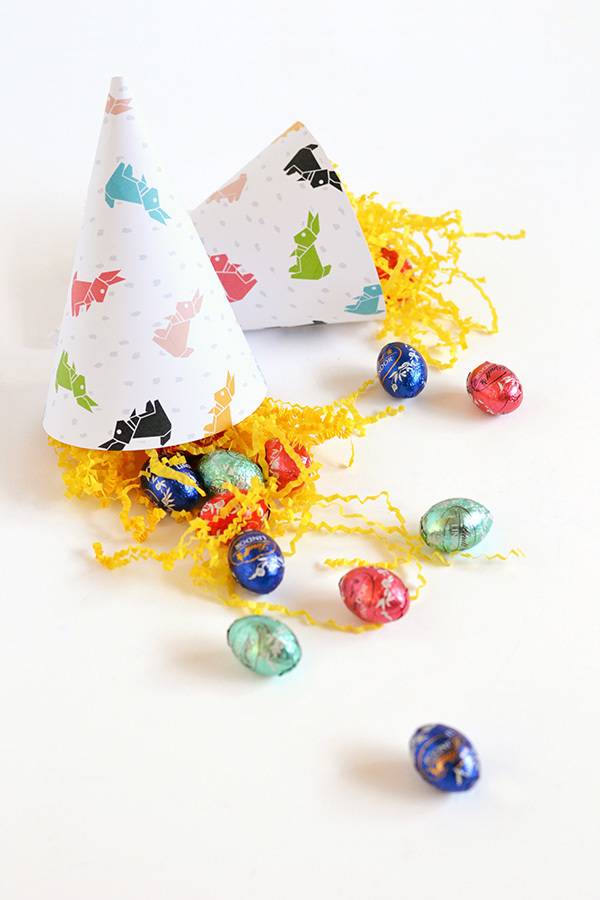
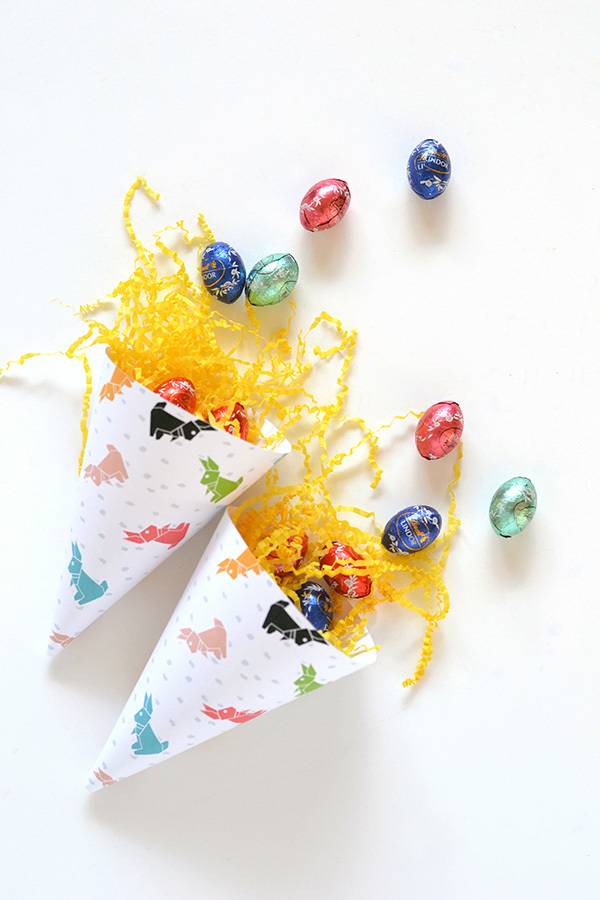
Maybe I’m generalising just a little bit, but I truly believe most people can’t resist a good Easter egg hunt. And if you’re taking part in one this year, whether you’ve got young kids or you’re just a big kid at heart, you’ll need something on hand to collect all that chocolate loot!
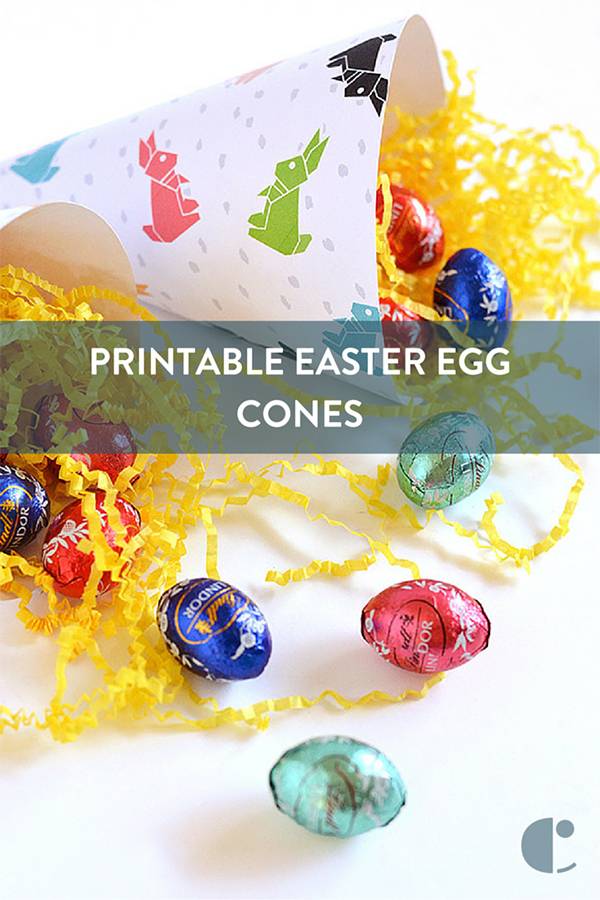
Well look no further, these printable easter cones are just the ticket – they’re perfectly themed and super easy to assemble. With only five minutes of crafting, you’ll be set for your treasure hunt and you can spend the rest of your valuable time on the search for those tasty treats! ?
Materials
Step
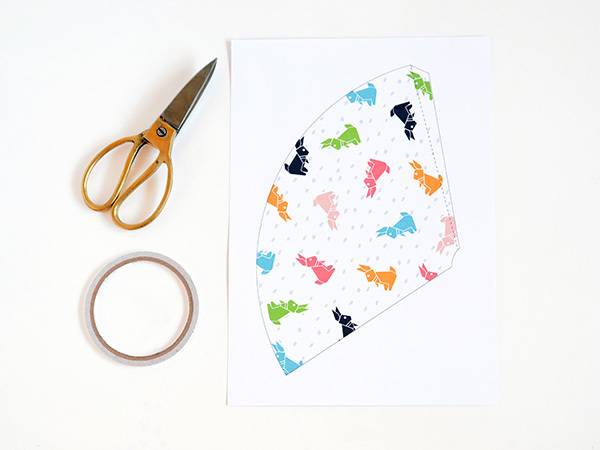
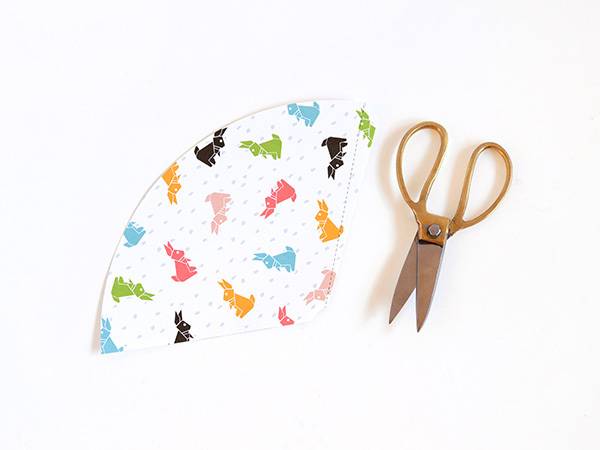
Print out the easter cone file onto good quality white letter-sized card and cut it out with a pair of scissors. Step
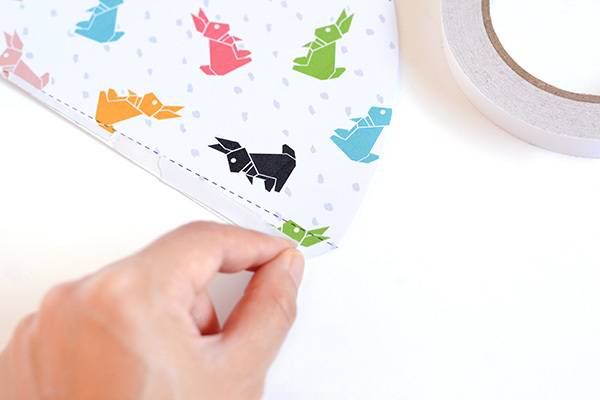
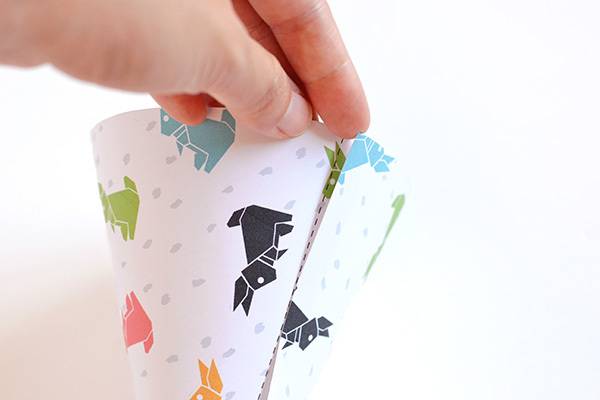
There’s a tab on the cone that’s sectioned off by a dashed line. Using the line as a guide, apply glue or double-sided tape to the tab. Step
Fold the cardboard over so that it forms a cone shape and affix the tab to the underside of the opposite edge.
Once the tab’s been stuck in place, the cones are ready to fill with oodles of chocolate!
Handy tip: If young kids are going to be using the cones on a treasure hunt, try gluing a length of ribbon to the wide end of the cone to form a handle – it’ll make it easier for little hands to carry as they search for their eggs!
The post Make it: Printable Easter Cones appeared first on Curbly. Via https://www.curbly.com/17826-make-it-printable-easter-cones |