|
I don’t know about you, but my laundry room is a black hole in which I spend as little time as possible. It’s dark, tiny, and dank… in other words, the complete opposite of all these awesome laundry room makeovers. If you’re in a similar boat and looking for some serious inspiration, check out these laundry room ideas.
Erin’s white-washed wood paneling is a Scandinavian-inspired laundry room retreat! And check out that DIY concrete countertop — nicely done! See more on HGTV.
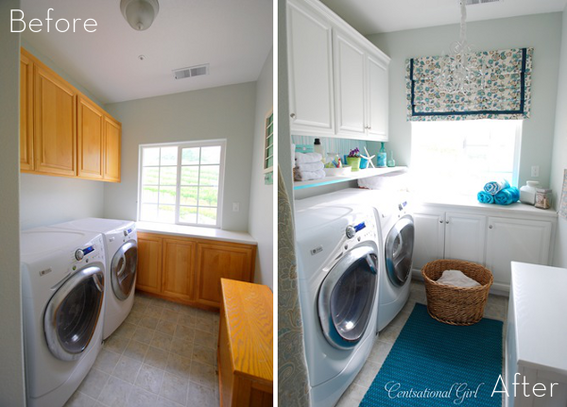
Some painted cabinets (learn how to paint your own right here!), shelving, and decorative flourishes make this laundry room pop! See more on Centsational Girl.
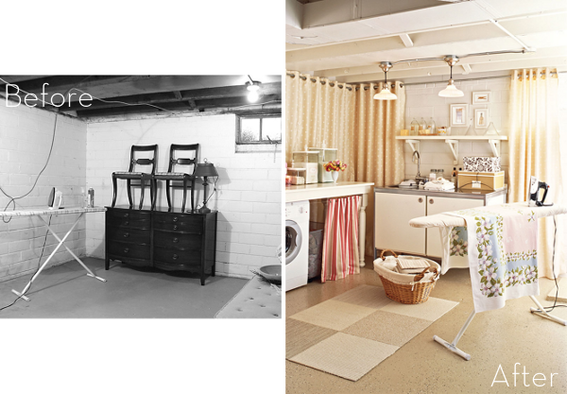
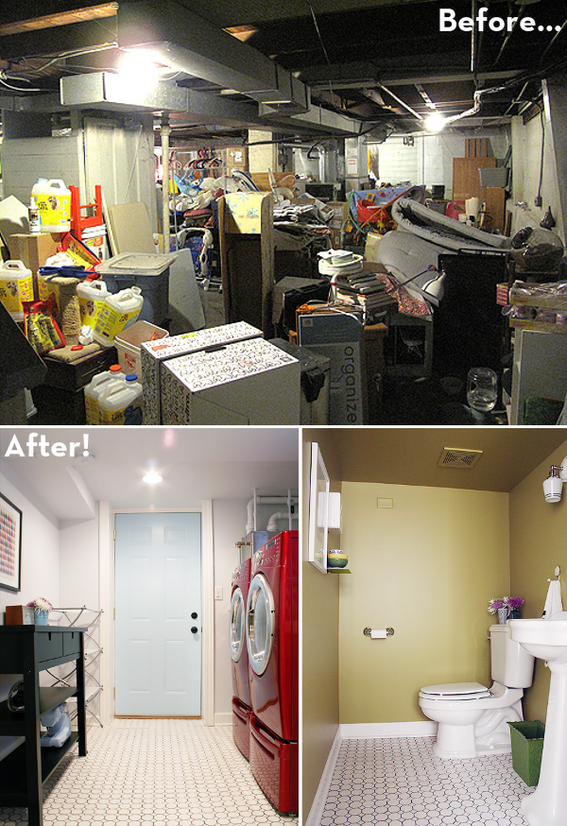
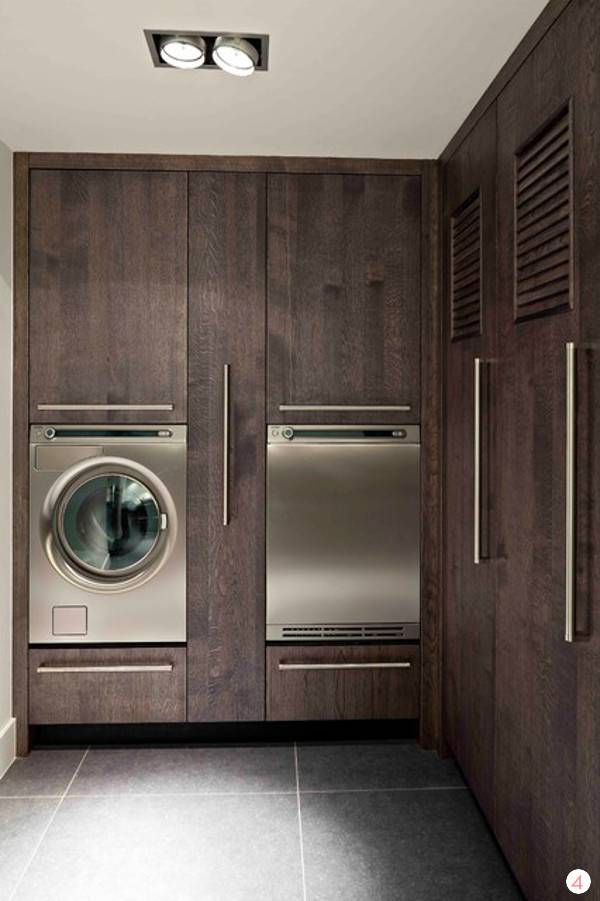
This basement laundry room gets a warm and inviting face lift — SO much better than its prison cell-like beginnings! One of our favorite laundry room ideas. See more on Country Home.
More Scandinavian-y goodness! Can you say “so fresh and so clean, clean”? See more here.
I didn’t realize how sad and boring the “before” was until I saw the “after”! Holy color explosion! I would fold laundry in this space any day. See more on BHG.
This laundry room started out looking like every laundry room that was ever built in the 90s. And now? Now it’s got style to the max! See more on Tatertots & Jello.
Then there was a laundry “area” somewhere in this scary basement… but now it’s got its own room, complete with colorful details and some seriously awesome tile. See more here. Eye Candy: 11 Incredible Laundry Room Ideas
Right now, our laundry room is in a dark, unfinished corner of our basement but we have plans to *someday* turn it into a room that doesn’t give us the creeps. Until then, I’ll just keep collecting inspiration! If you’re in a similar boat, take a peek at these gorgeous laundry room ideas. 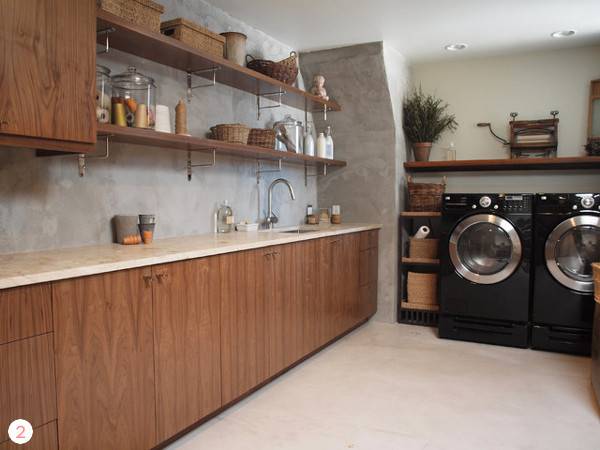
Woah! A washer and dryer in the kitchen? Controversial, or just genius? 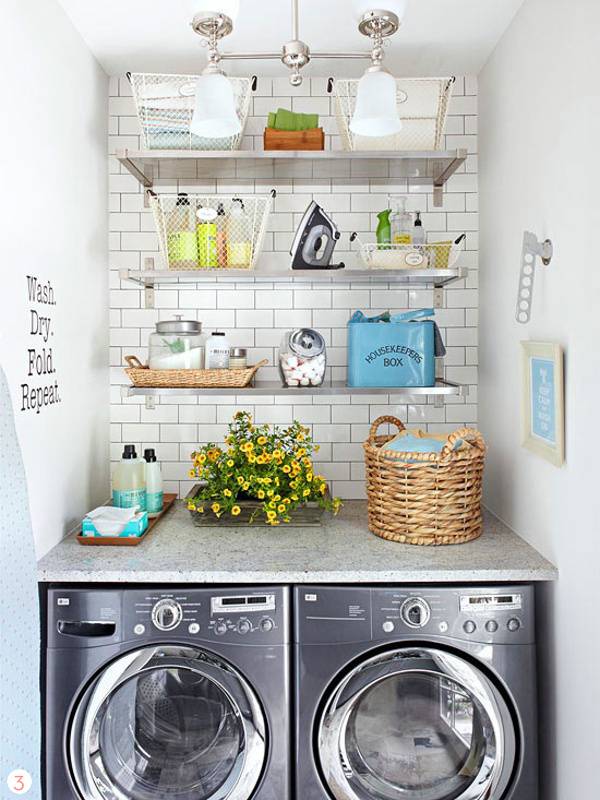
1. Kriste Michelini 2. Kathryn O’Donovan 3. Better Homes & Gardens 4. Leicht Westchester 
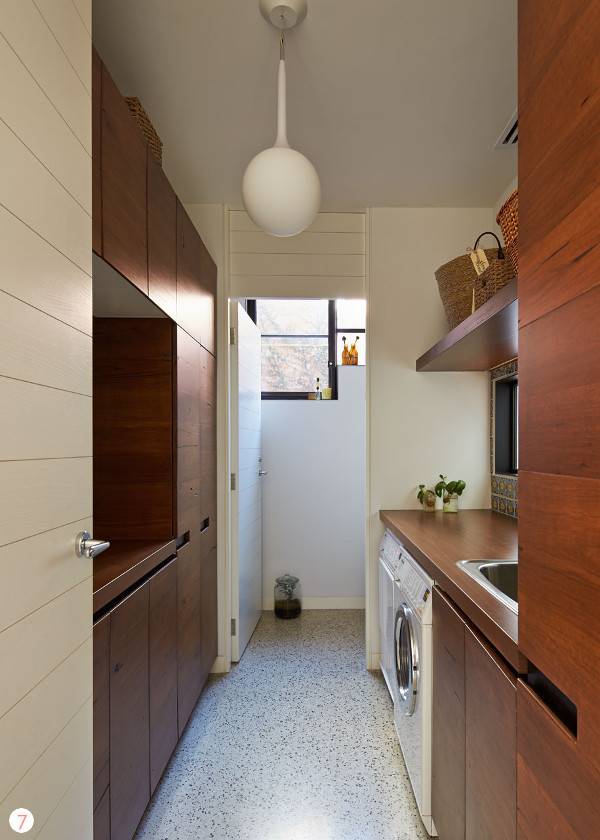
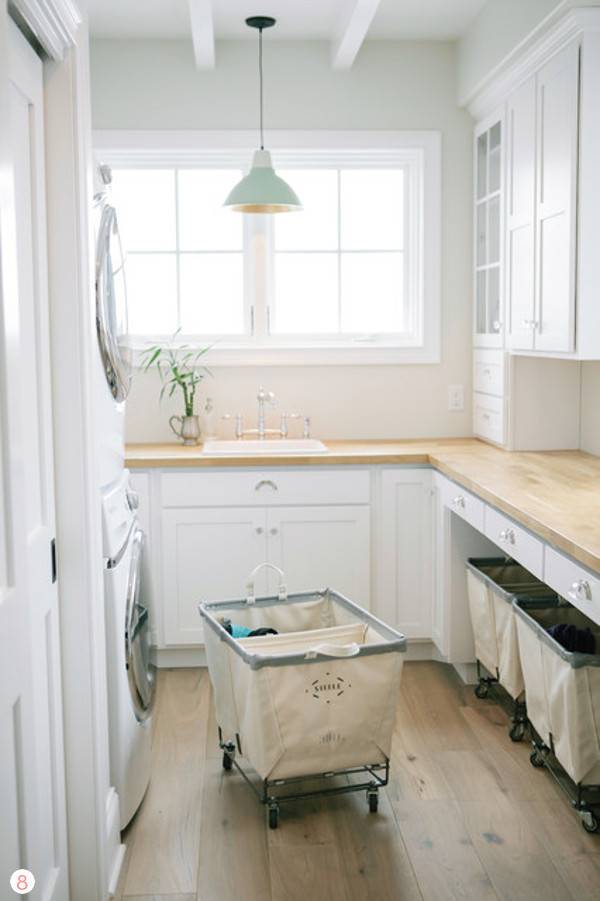
5. Hardenburg Designs 6. Better Homes & Gardens 7. HabitusLiving 8. Steel Canvas Basket Corp 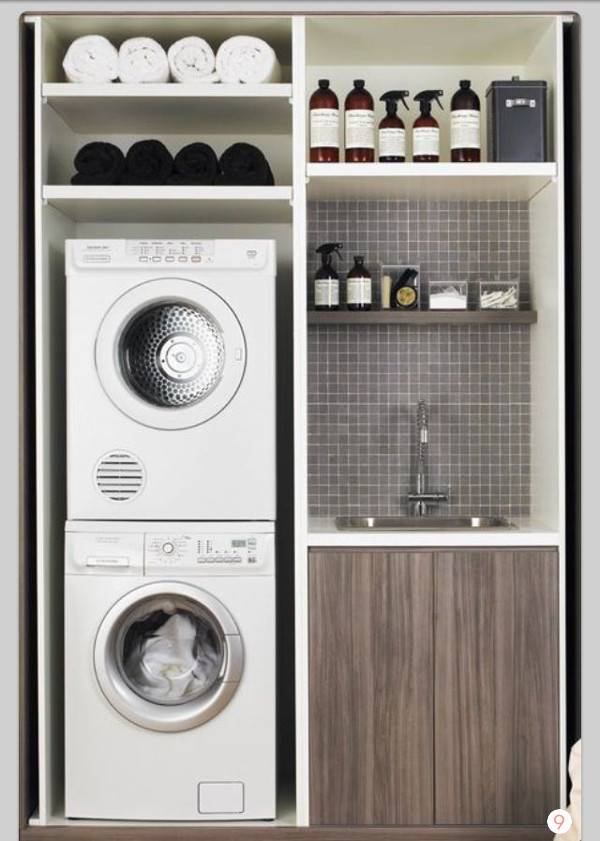
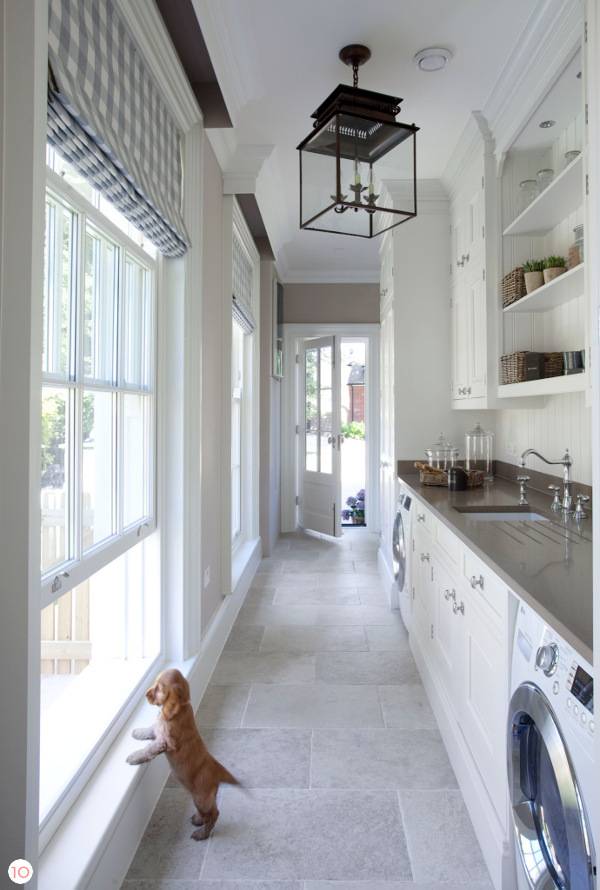
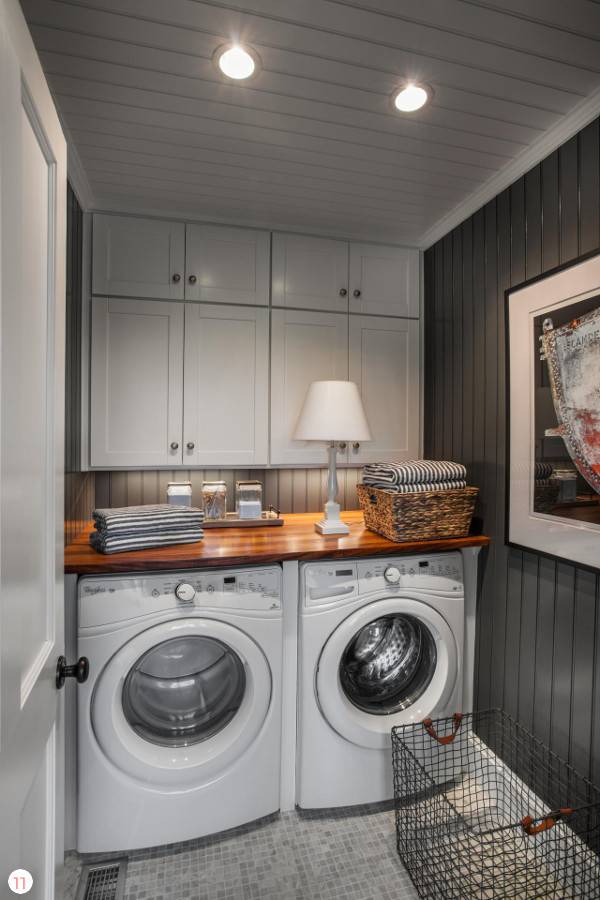
9. Designing Dining and Diapers 10. Hayburn 11. HGTV Let us know what must-have features your dream laundry room would have in the comments below! Before and After: An Incredible Laundry Room Makeover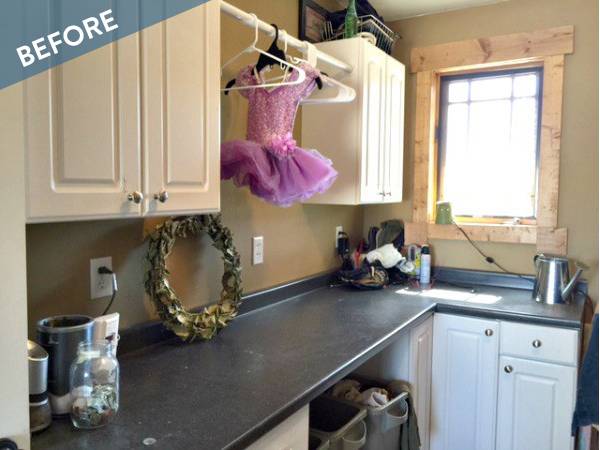
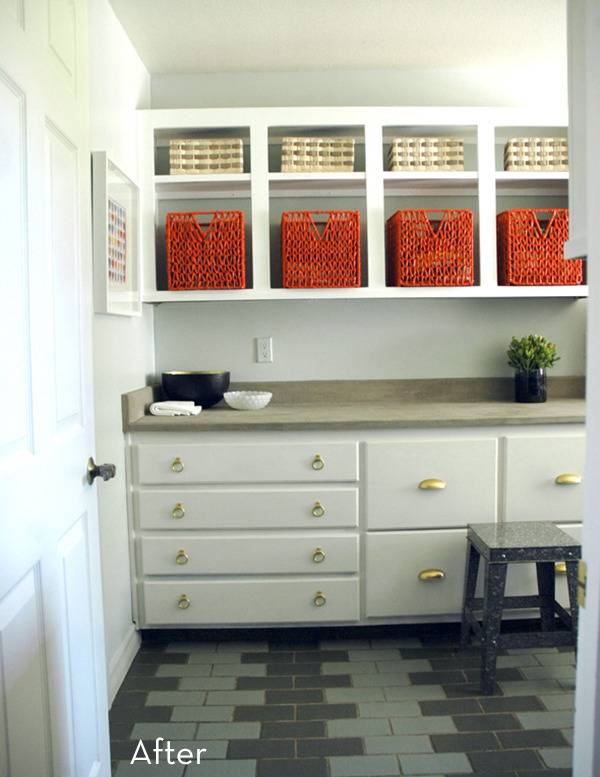
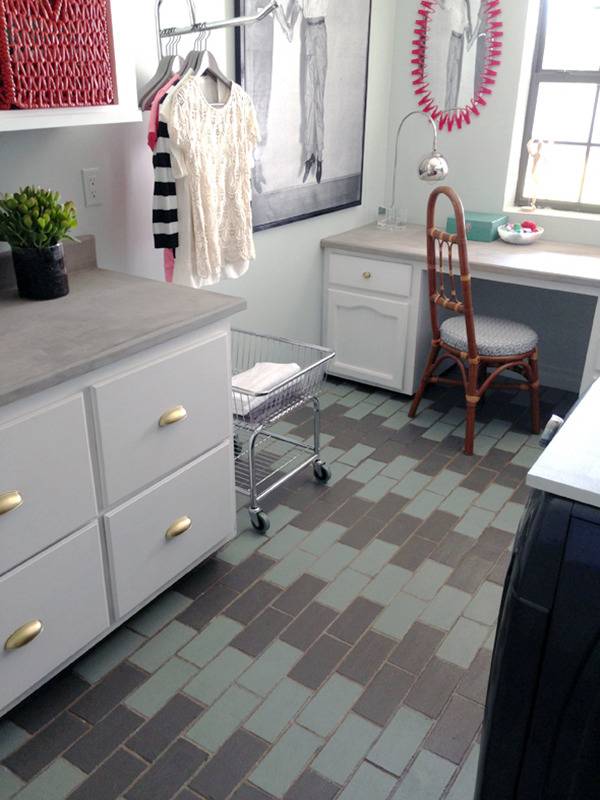
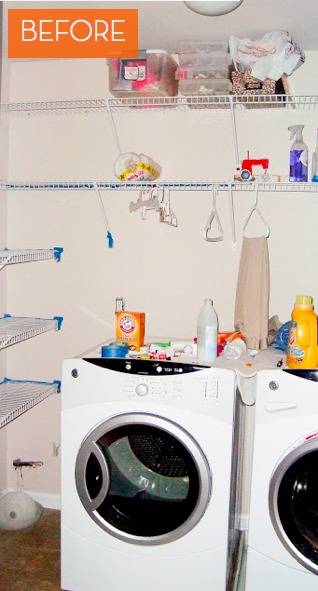
This laundry room looks like most do – functional and not so pretty. But just wait until you see the space after its makeover… it looks so nice, you’d actually look forward to doing a load of wash. Check out the incredible transformation. Hopefully it’ll spark your own ideas for a laundry room renovation! 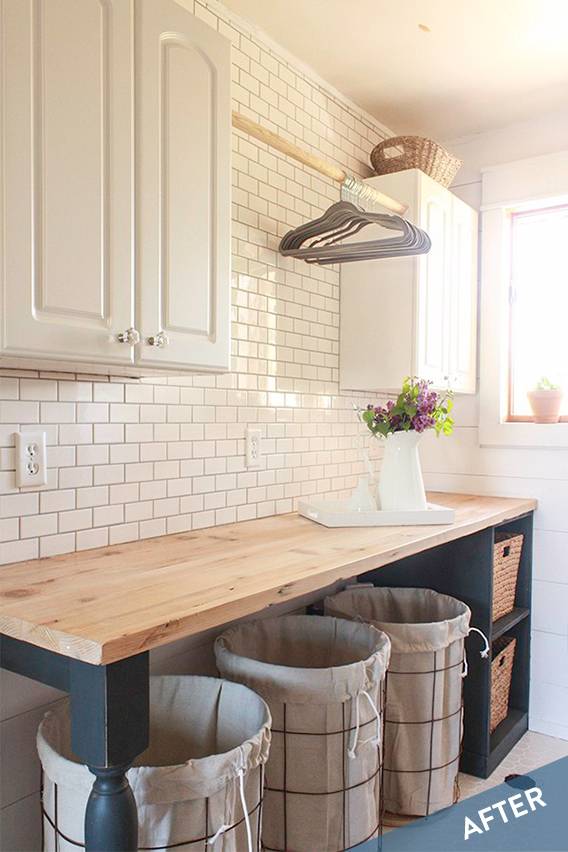
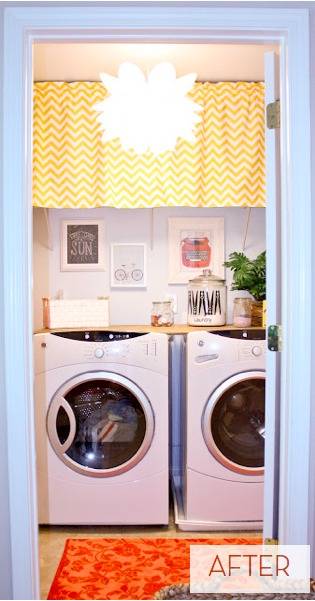
So much better, right?! The tiling and new work surface were the biggest changes, while the rest were mostly cosmetic. Make your way over to Twelve On Main to see more photos and to read about the whole laundry room renovation process. 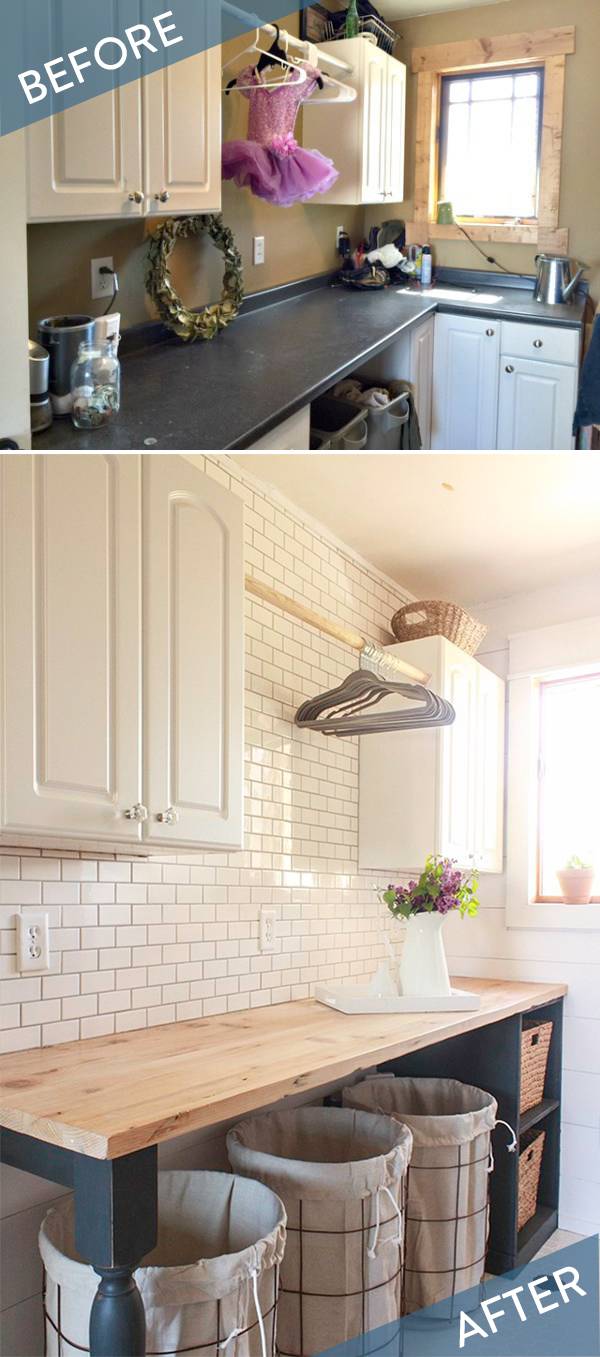
An Incredible DIY Laundry Room MakeoverI think my favorite thing about this laundry room makeover, besides the fact that it looks awesome, is that the homeowners did every single thing themselves — and on a budget! From painting the tile floors to making their own concrete countertops (remember this easy way?) to embellishing the space with a million other DIY decor projects, Jenny from Little Green Notebook truly made this space pop! Check out all the projects and everything that went into this incredible, budget-friendly makeover right here. A Fresh and Clean Scandinavian-Inspired Laundry Room Makeover
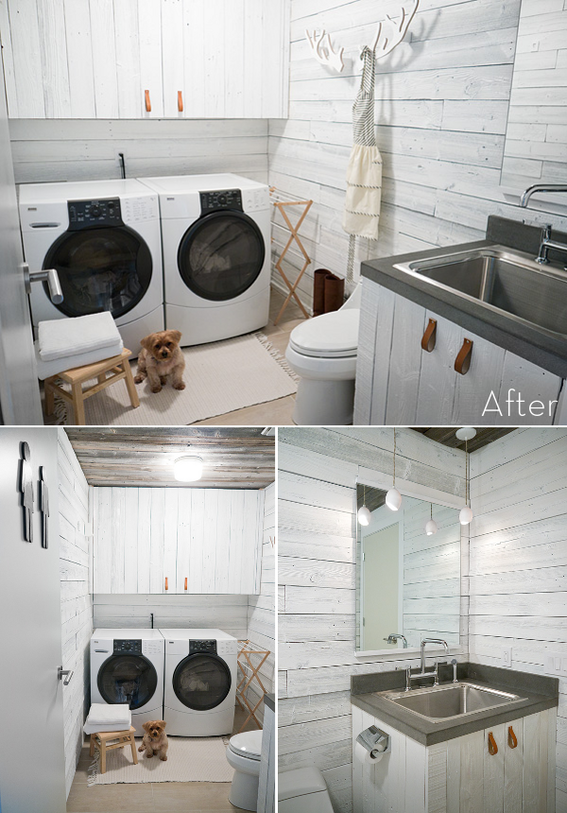
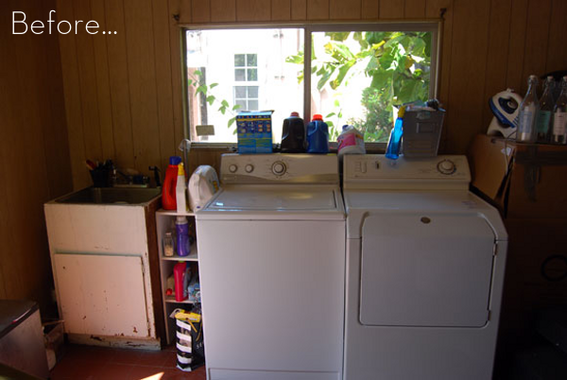
Going along with our basement and sleeping themes today (because you sleep in clothes/pajamas and washers and dryers are often in basements? I know, it’s a stretch…), I thought I’d share this lovely laundry room* makeover from Curbly fave Charles & Hudson!
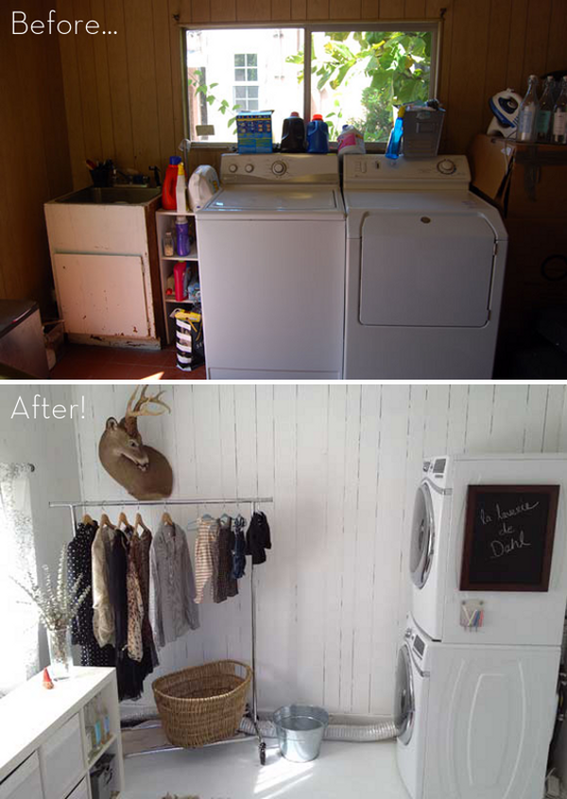
In preparation for the arrival of their new baby, Timothy Dahl, the founder and editor of Charles & Hudson (and all-around great guy), decided to tackle a laundry room makeover. The old space was functional in the most minimal way possible. Sure it had a washer and dryer (both incredibly old, not to mention huge energy/water hogs), but there was no space for sorting and folding. The scary utility sink was too grimy to actually use for hand-washing and the room had also become a messy, catch-all storage closet. Bad news for a growing family with growing laundry needs!
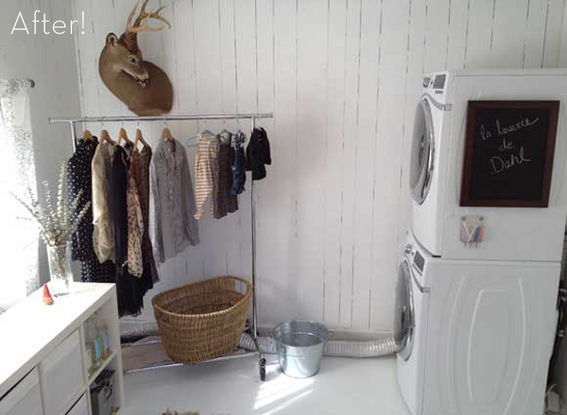
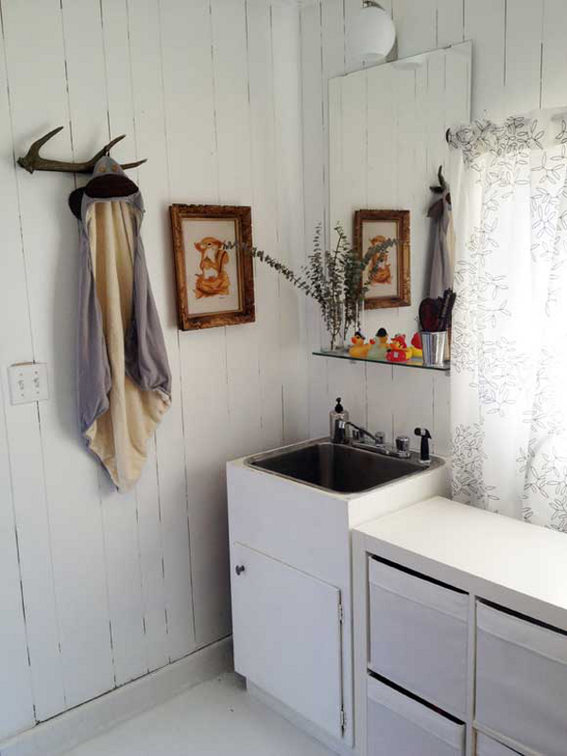
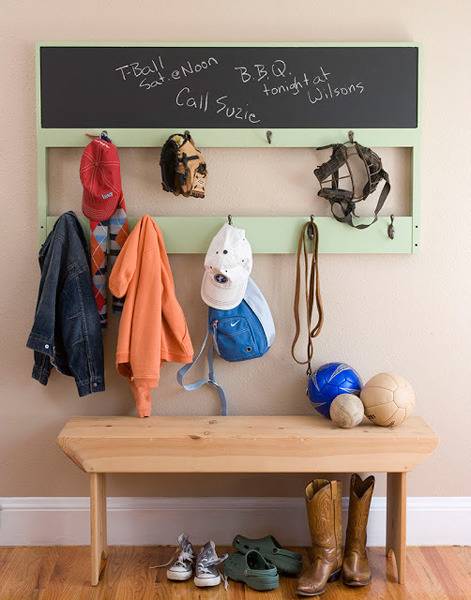
The new space is not only bright, clean, and full of Scandinavian-inspired goodness, it’s also way more functional. A new shelving system keeps supplies organized, the cleaned up sink is ready for even the most delicate of hand-wash-only items, and there’s plenty of space to sort, fold, and hang laundry! As for those new Energy Star rated appliances? The icing on the cake! Check out more of this makeover, including some great DIY projects (like the chalkboard and antler coat rack) and painting tips, over on Charles & Hudson! *This laundry room is NOT actually in a basement… I told you–it was a huge stretch! Lovely Laundry Room Makeover
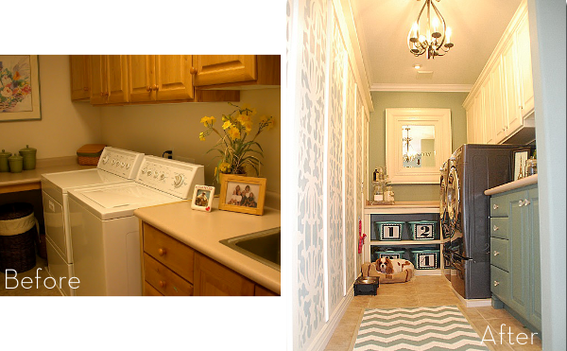
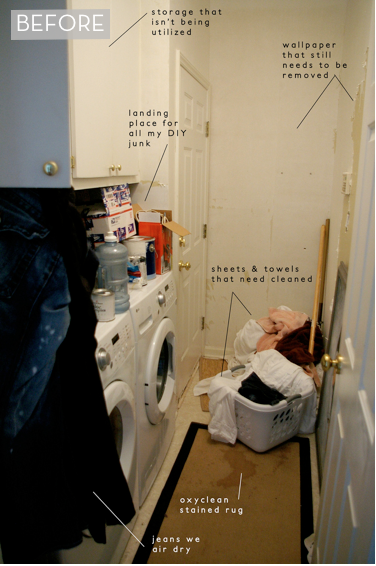
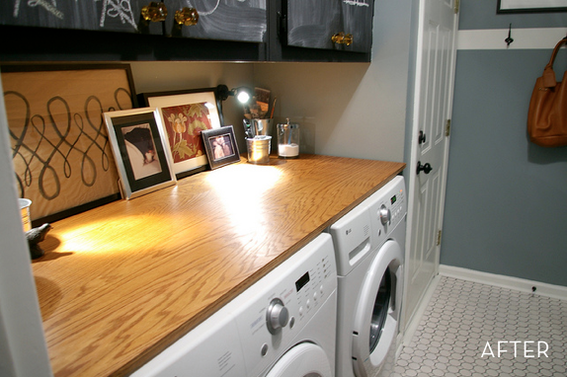
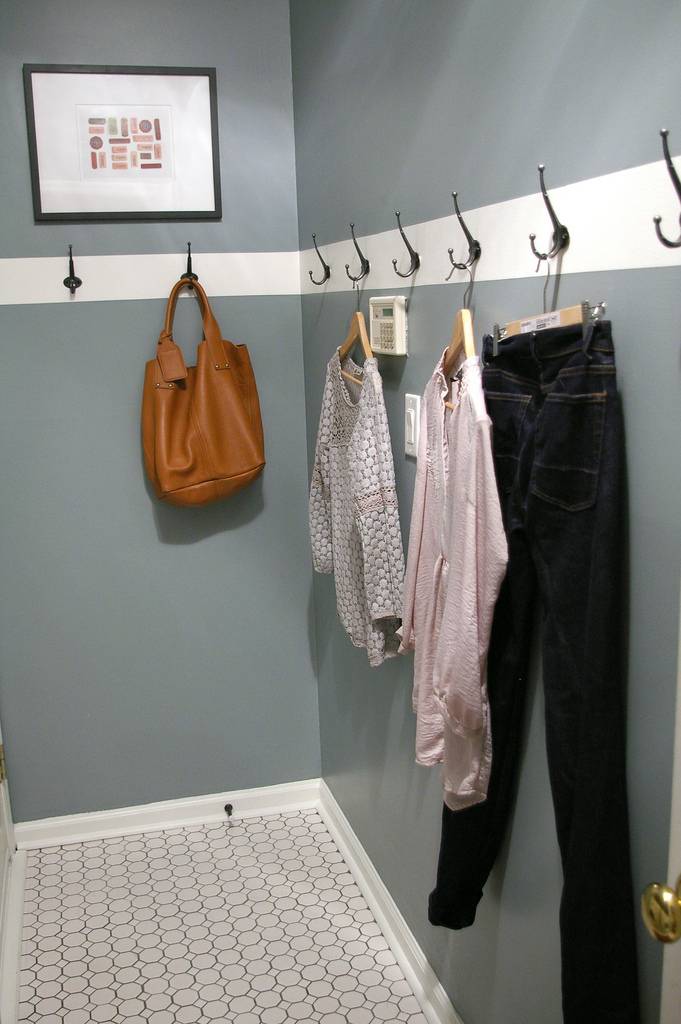
Bryn’s laundry room was lacking natural light, not to mention, the function she really needed. See how she gave her wash-and-wear room some “dry clean only” sophistication.
Bryn added some task lighting beneath her upper cabinets, and installed a wooden countertop for a work surface.
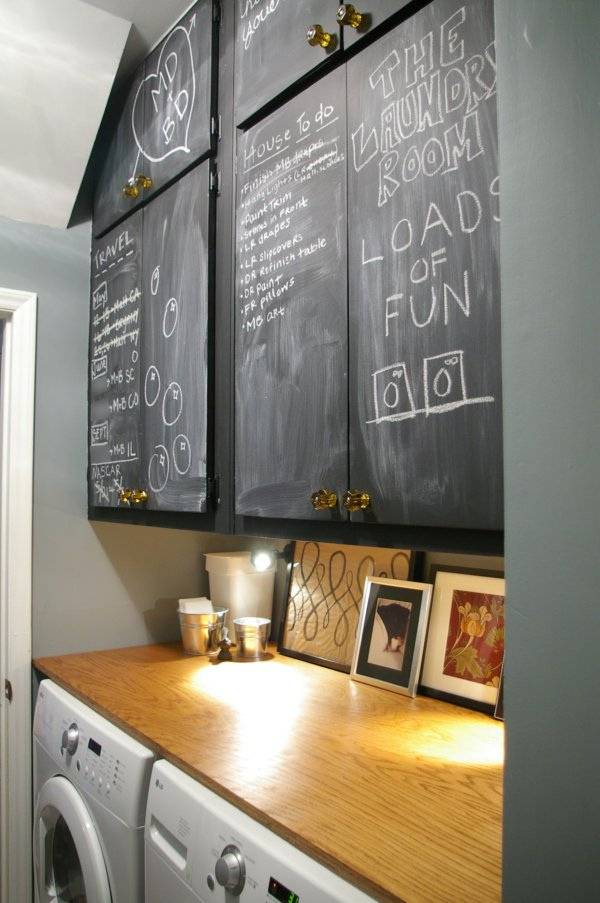
She painted her cabinets with chalkboard paint. I think a laundry room is a great place to add this kind of texture. Bryn also glammed up the space with some DIY art and pretty containers for her laundry soap.
Finally, she painted a stripe around the narrow room and installed hooks to hang air dry-only clothing. See more pictures of her laundry room transformation, plus a detailed source list on her blog, Bryn Alexandra. BIG Tiny Laundry Room MakeoverFor being tiny (about 94 inches wide), Chrissy’s laundry room is big on style. Of course, it wasn’t always that way. Above is how it looked before she made it over. Utilitarian: yes. Inviting: not so much. After sewing curtains to hide the wire shelving, a new coat of paint on the walls, light fixture, rug, bins and other doodads, Chrissy’s laundry room is now cute enough to put on display (aka: leaving the door open for all to see.) For more information about the makeover and the individual projects that went into it, head on over to Shanty 2 Chic. And to see more of Chrissy’s magic, visit her blog Hoot Designs. Hoot Designs – Laundry Room Makeover [Shanty 2 Chic] Dramatically Functional Laundry Room Makeover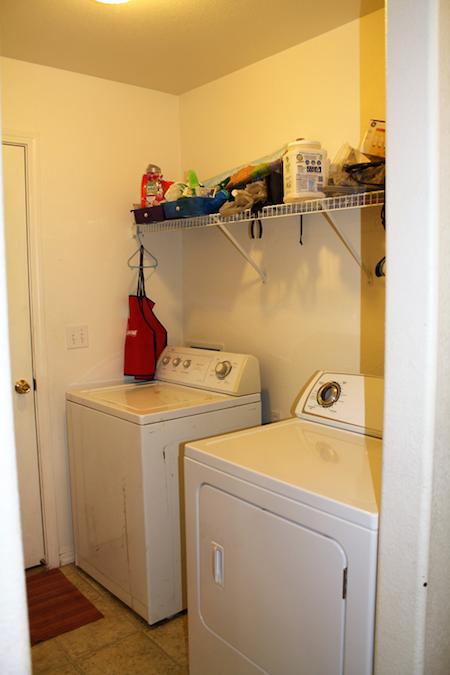
Recently Stacy made over her friend Taralyn’s laundry room, and the results are nothing less than dramatic. The room, or rather, passageway, as it is just off the garage and functions as an entry of sorts to the rest of the home, was well-defined as “builder grade.” After its makeover, the laundry room is now an eye-catching transition worthy of a lingering look. Check it out. 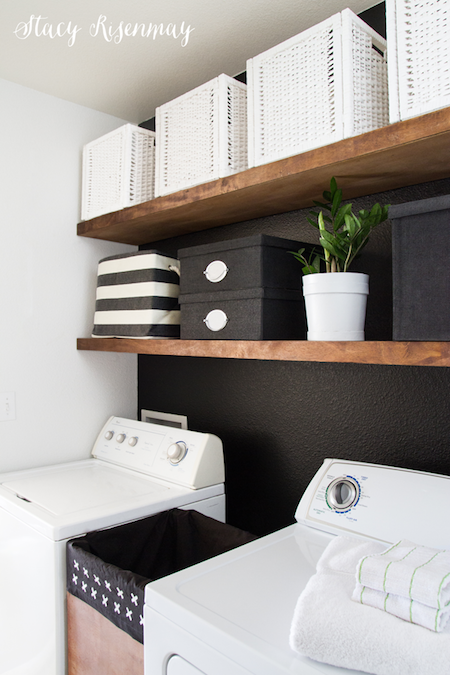
Stacy’s fearless use of black paint really bumps things up a notch. If working with such a dark color gives you a case of the sweats, Stacy has a FABULOUS tip on how to get super-crisp paint lines. To find out just what the tip is plus more pictures of the room both before and after, visit Stacy’s website, Not Just a Housewife. Laundry Room Makeover! [Not Just a Housewife] Unbelievable Laundry Room Makeover with Penny Tiles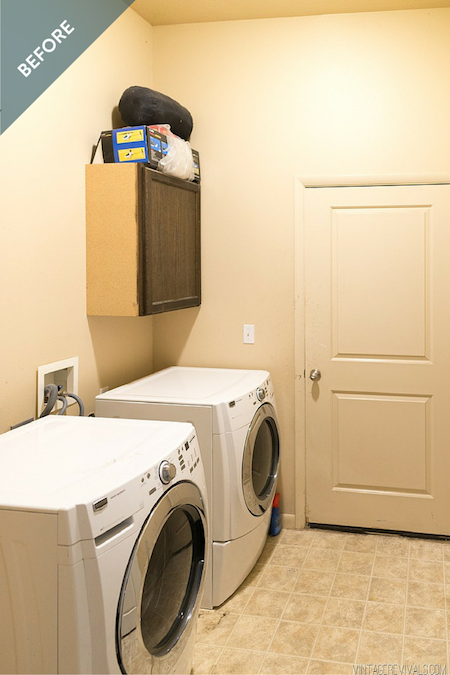 
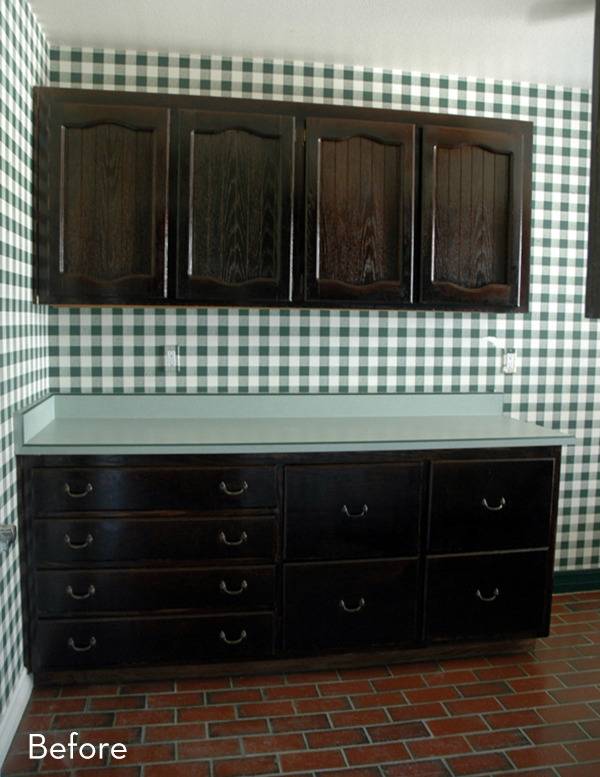
Mandi from Vintage Revivals, recently revealed her laundry room makeover and the results couldn’t be more spectacular. Unlike a typical laundry room that you hide behind closed doors, this one you’d want to show off. Maybe even host parties in there. New penny round tile on the floor and slim subway tile on the wall, plus loads and loads of new storage and counter space prove to be the winning combination. Take a look at the “after”: 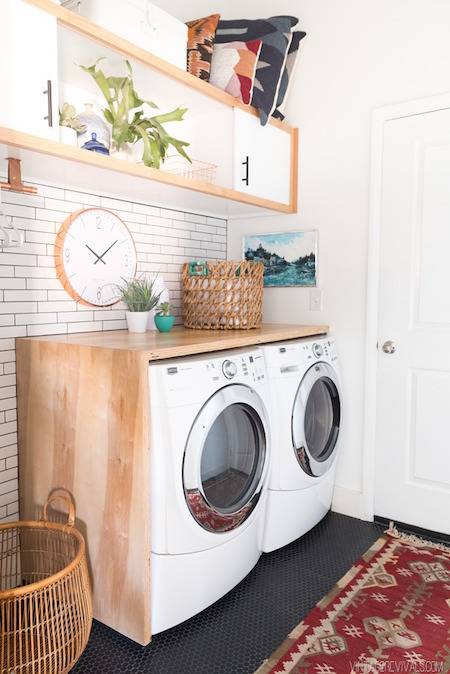
For the entire story including pictures of every nook and cranny of this glorious makeover, visit Vintage Revivals. 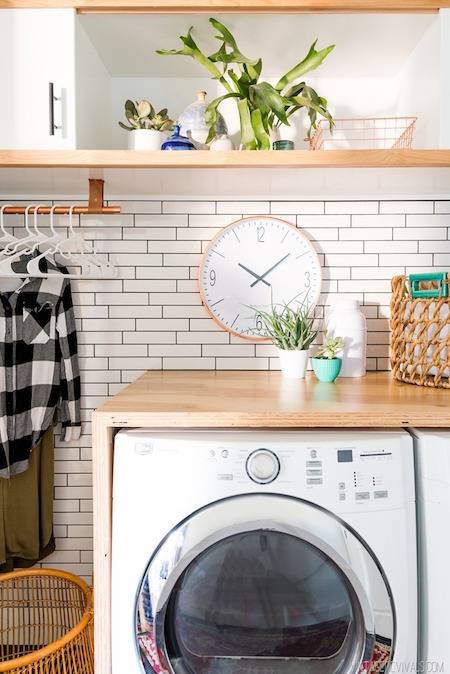
Laundry Room Makeover: Reveal [Vintage Revivals] A $125 Laundry Room Makeover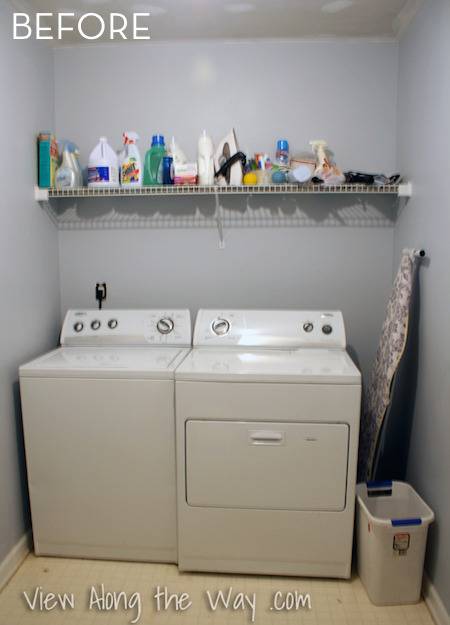
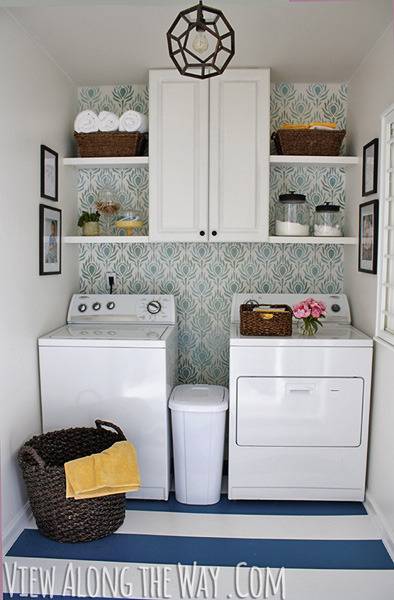
Kelly’s washer and dryer looked kinda sad in their old living quarters. Did she paint them with a bright color to cheer them up? Nope. She just changed everything around them to make them look like a million bucks–and it only cost $125! From top to bottom–including an amazing DIY pendant light to painting the vinyl flooring–nothing was overlooked by Kelly’s keen eye and talented hands. Take a look at what her laundry room looks like now: 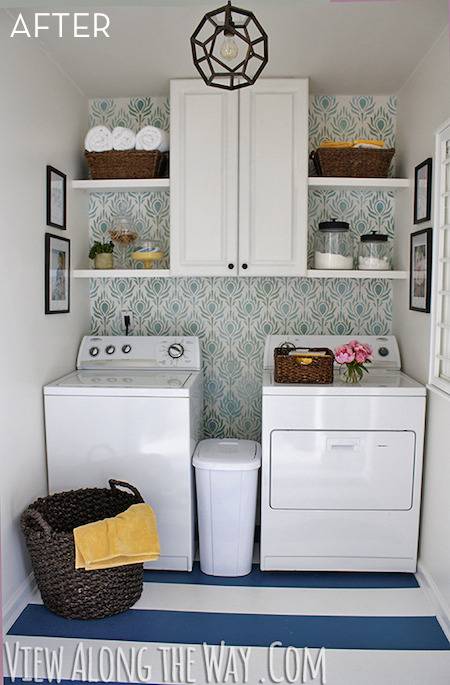
The drying rack to the right of the washer and dryer was snagged for $25 and the cabinet in the center of the laundry room was found at a garage sale for $20. 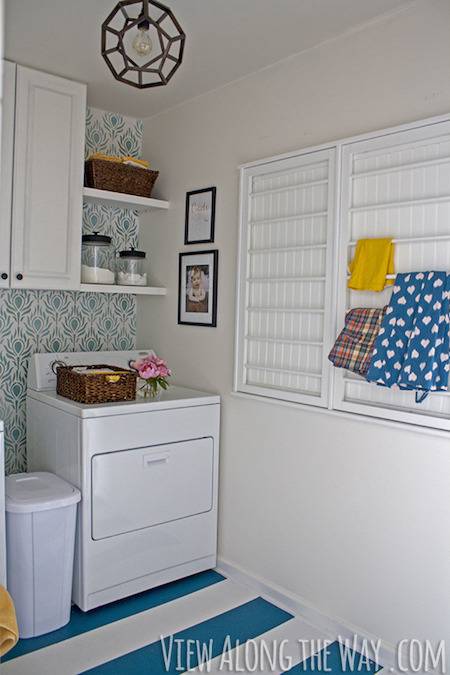
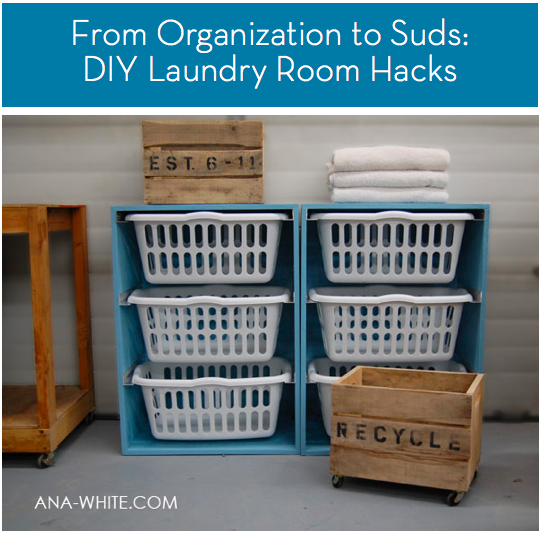
For more information, pictures, and links to individual tutorials regarding the makeover, head on over to View Along the Way. Laundry Room Reveal [View Along the Way] 8 DIY Laundry Room Hacks, Tips, & Ideas
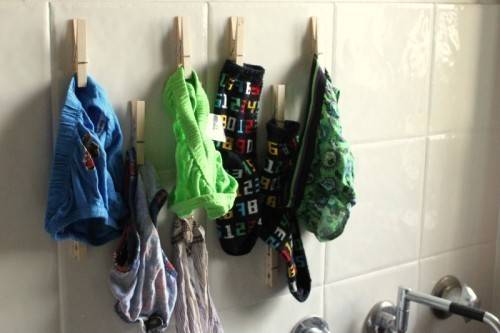
Getting the laundry room ship-shape for spring will be a SNAP with these very clever hacks. There’s something for everyone too. Woodworkers can go all out with Ana White’s Laundry Basket Dresser plan, pictured above. If you’d rather keep your tools in their chest, check out this super simple idea from Craft Blog. A ‘blob’ of hot glue was used to attach clothes pins to a tiled wall to hang dry those little items that get stuck in the dryer and come out damp. (Instead of glue, I’d opt to used 3M’s hook and loop picture hanging strips, especially on drywall.)
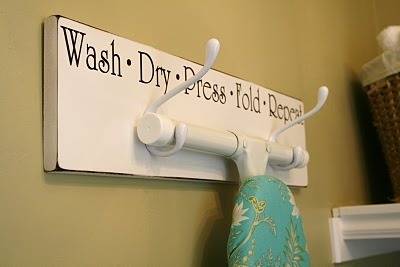
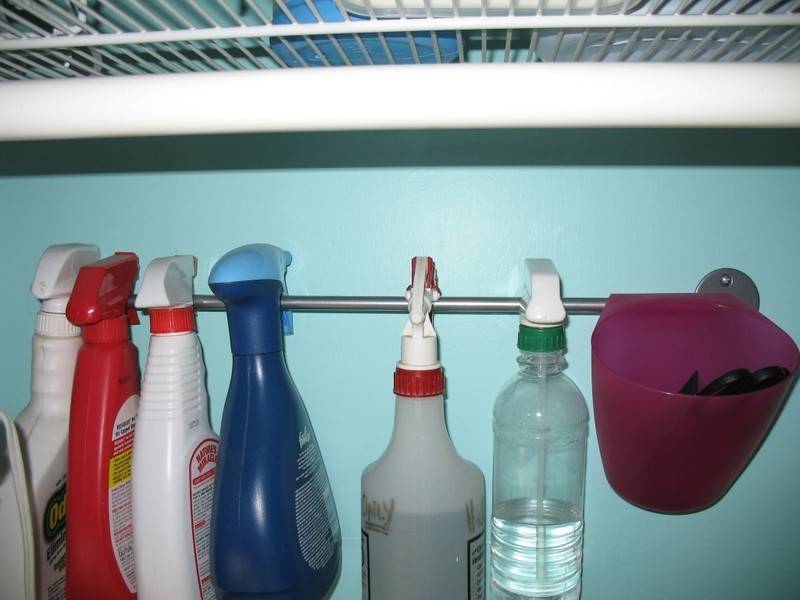
One of the best laundry room investments I ever made was a ironing board hanger. Although it works great, it isn’t as charming as the The House of Smiths’ laundry room idea. How about turning an IKEA BYGEL towel rod ($1.99) into a clever place to hang all those spray bottles that seem to collect in the laundry room? I like the little ‘catch-all’ on the right too.
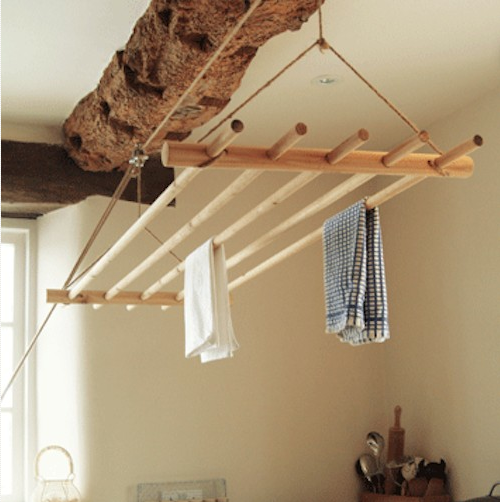
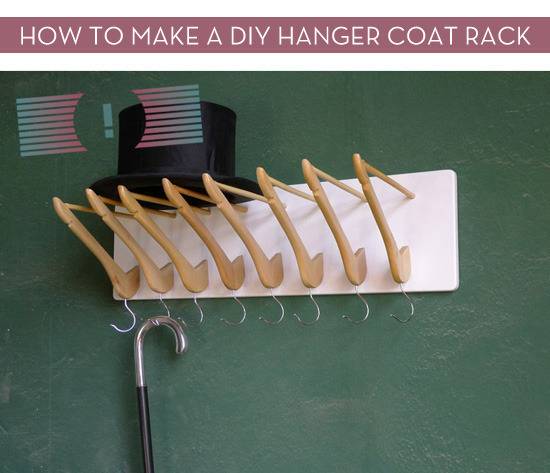
Although this next entry is a store-bought item, I thought it needed to be included in our round up as it’s TOTALLY DIYable. Some 1″ x 2″ (or so), pulleys, doweling and rope and we’re good to go. I particularly like how this rack is elevated, unlike the ubiquitous fold up/fold down kind.
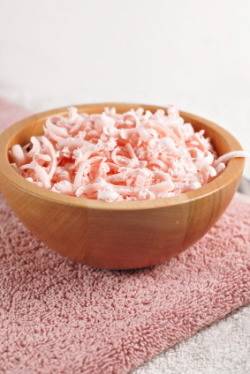
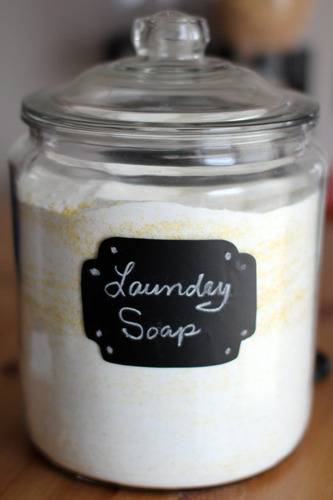
And now for the second half of our round up…suds and stuff! We’ll start at the beginning: pre-treating. Sandy takes us step by step through her recipe for laundry soap as well as her tip for storing it. In this case a glass canister with a labels made out of chalkboard contact paper. Brill.
Of course, we don’t want to forget the fabric softener. Hallee hooks us up for this one. Her recipe consists of hot water, baking soda and vinegar. Her concoction even works in one of those Downy ball thingies!
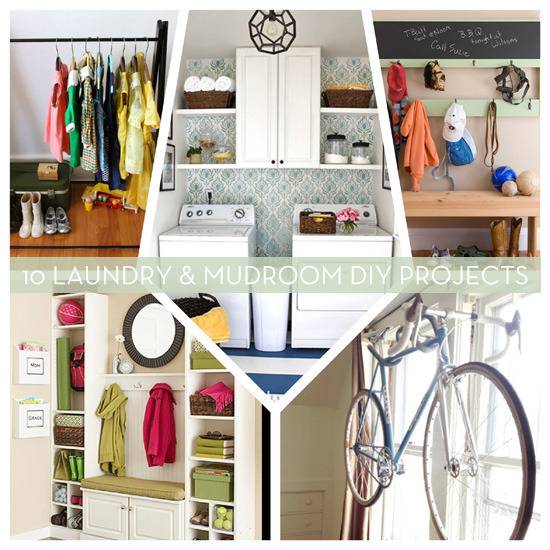
10 More DIY Laundry Room and Mudroom Organization Projects
Here’s a collection of DIY projects and laundry room ideas to aid you in organizing or decorating some of cleanest and messiest rooms in our homes: the laundry and mudroom. Some of them are simple afternoon projects, costing as little as $10 and using thrifted or upcycled materials, and others are entire plans for building your own mudroom from scratch. There is something for every level of DIYer.
1. The $100 laundry makeover via View Along The Way
2. DIY Laundry Basket Dresser via Infarrantly Creative
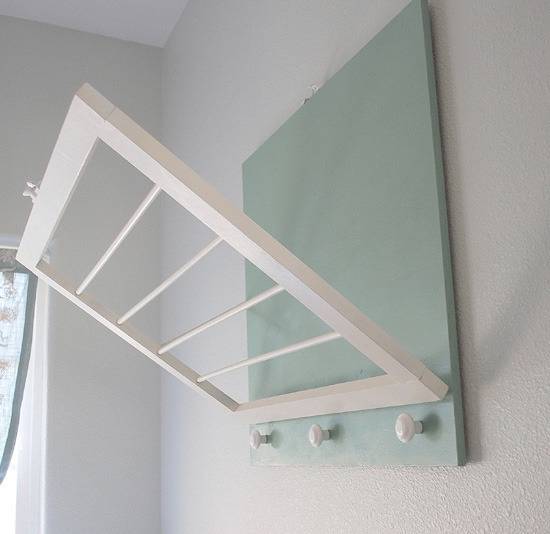
3. DIY Laundry Room Drying Rack via Centsational Girl
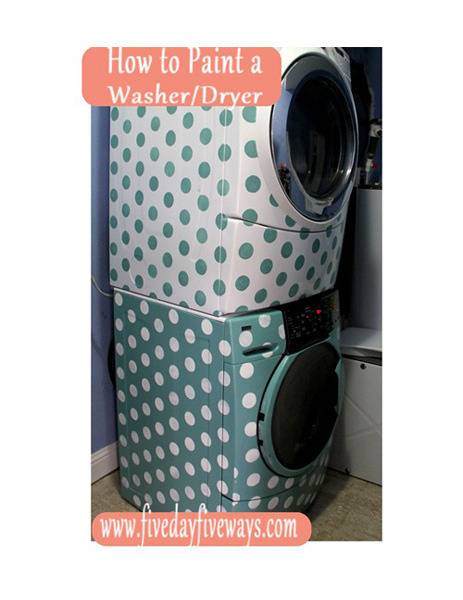
4. How to paint a clothes washer/dryer via Five Days… 5 Ways
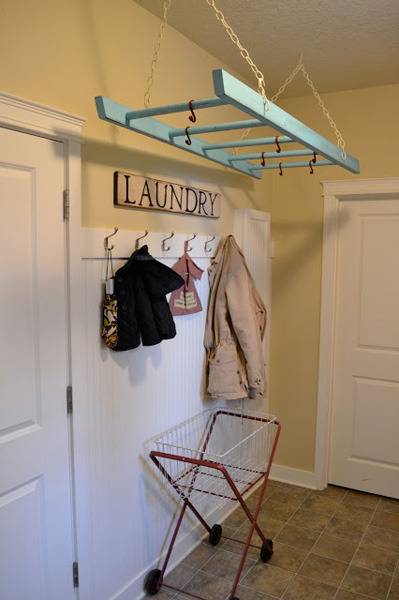
5. Ladder Laundry Rack via Little Lucy Lu
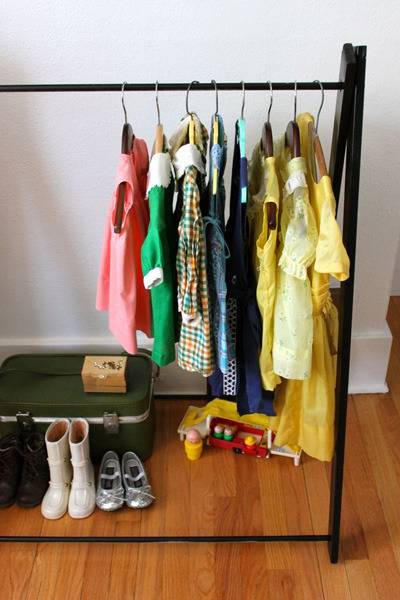
6. DIY Garment Rack for Littles via Smile & Wave
7. One headboard, 3 looks via Shannon Quimby
8. DIY Coat Hanger Rack via Curbly
9. DIY Wall Bike Hanger via Kyle The Wilson
10. Build the cutest Mudroom via Ana White Laundry Room Closet to Mudroom Makeover
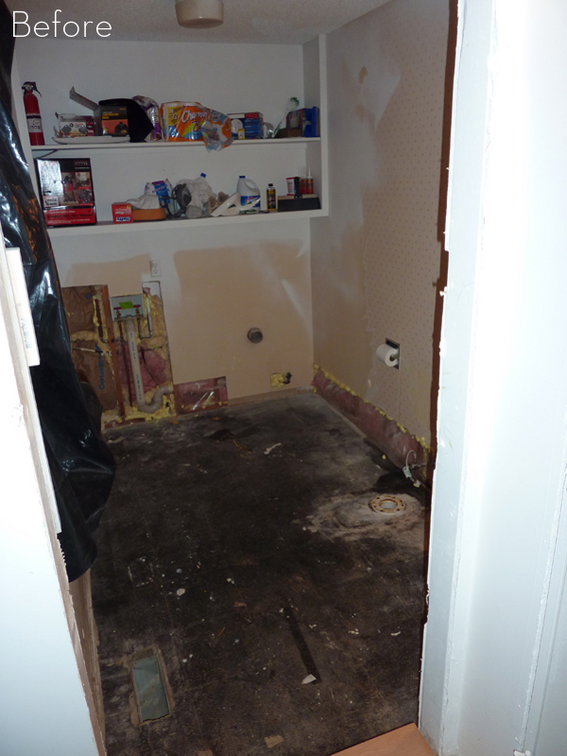
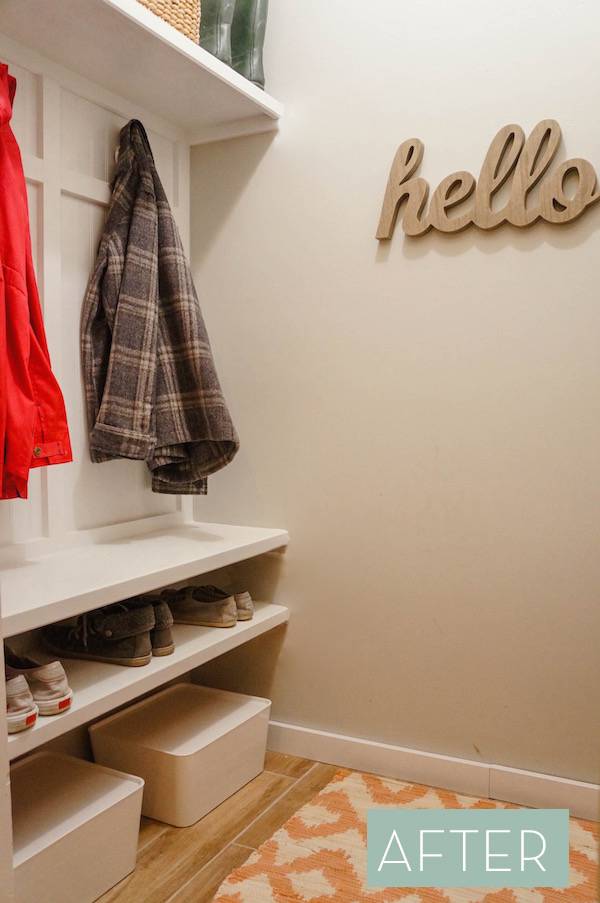
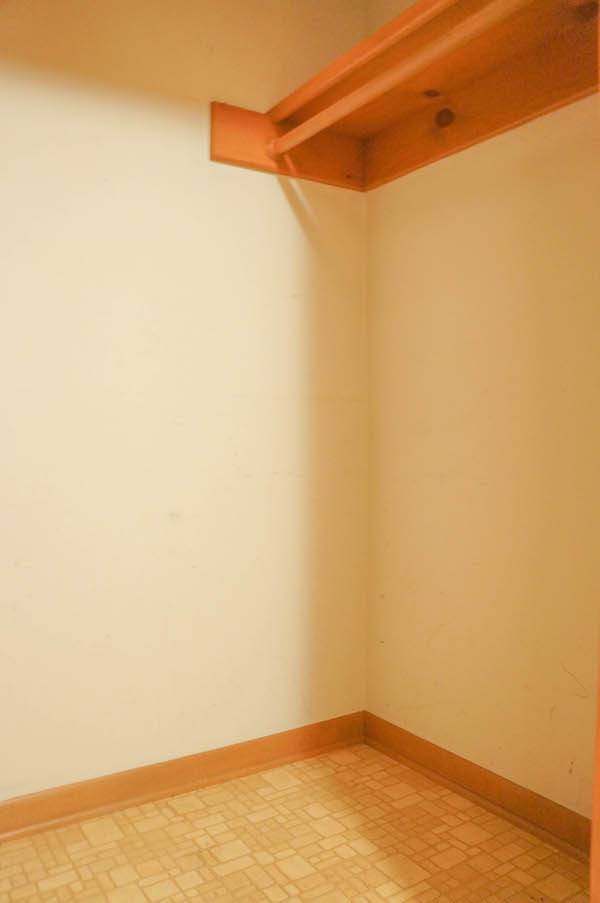
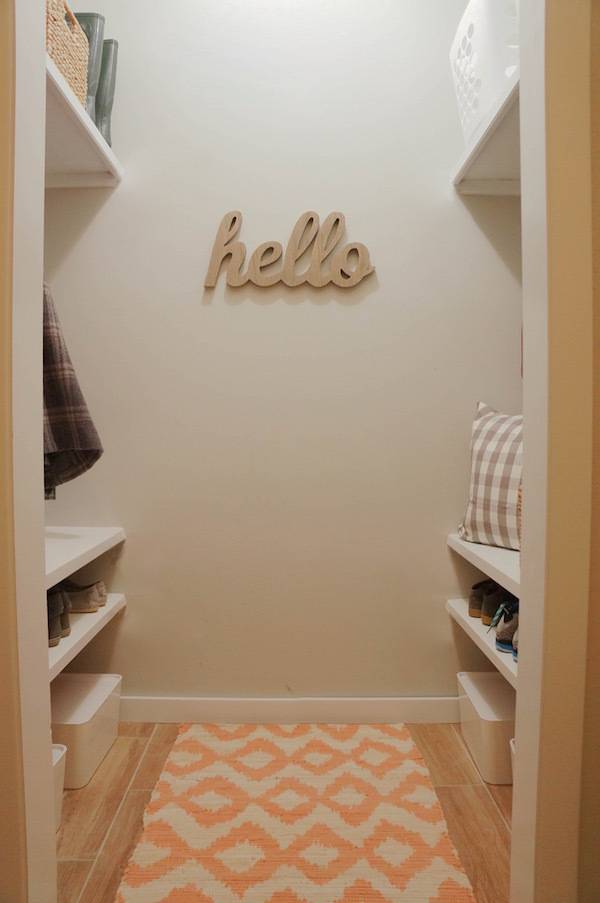
In this 1950s ranch style home you walk in from the garage straight into the laundry room. Inside the laundry room is a walk in coat/storage closet. The owner before had used it as a pantry/coat closet. Besides being outdated, this closet had a few identity problems. Problem #1: The space of the closet would make a great pantry except the kitchen is down the hall, through the living room, and on the complete other side of the house. Problem #2: All the doors opened into each other. If the closet door was open you couldn’t open the door to the garage and vice versa. If you changed the door to open inward, you would have to walk inside and shut the door to access one side of the closet. The solution? Take the door off and make the closet into a mudroom.
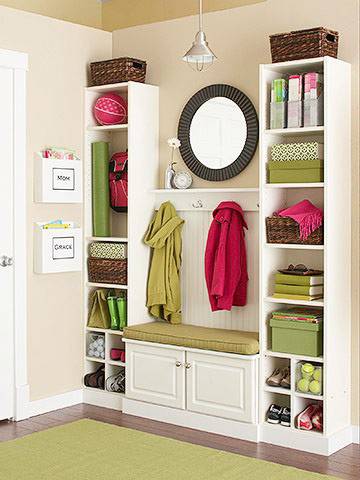
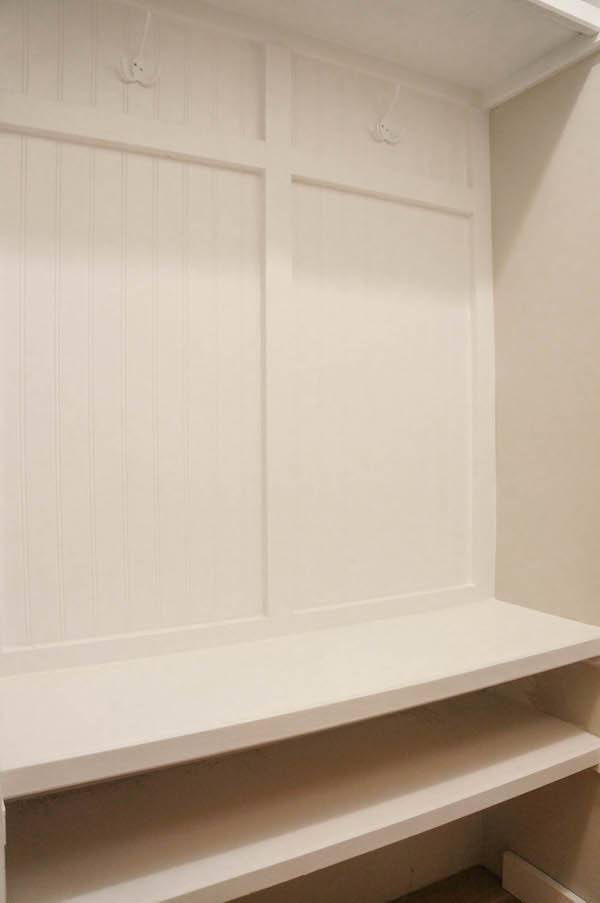
Taking the door off made the space flow uninterupted but it created the need for something functional and visually organized. The mudroom with built-in lockers was the easiest solution.
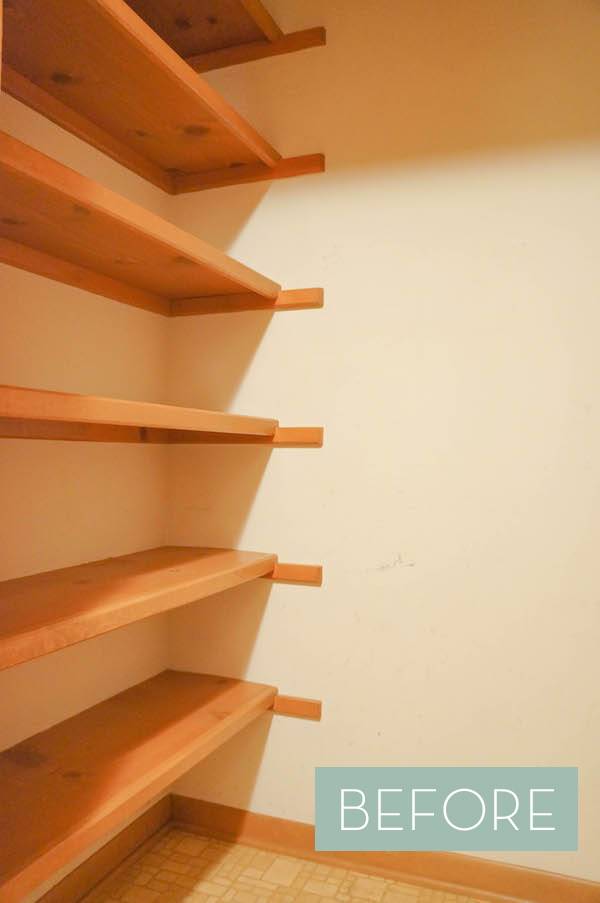
This was what the closet looked like on the other side. There was another coat closet located at the front door so we didn’t lose coat storage. Since the laundry room was located off the garage it was the main entry for the homeowner. The transformation to a mudroom would give the new homeowner a place for her family to drop their things on the way inside.
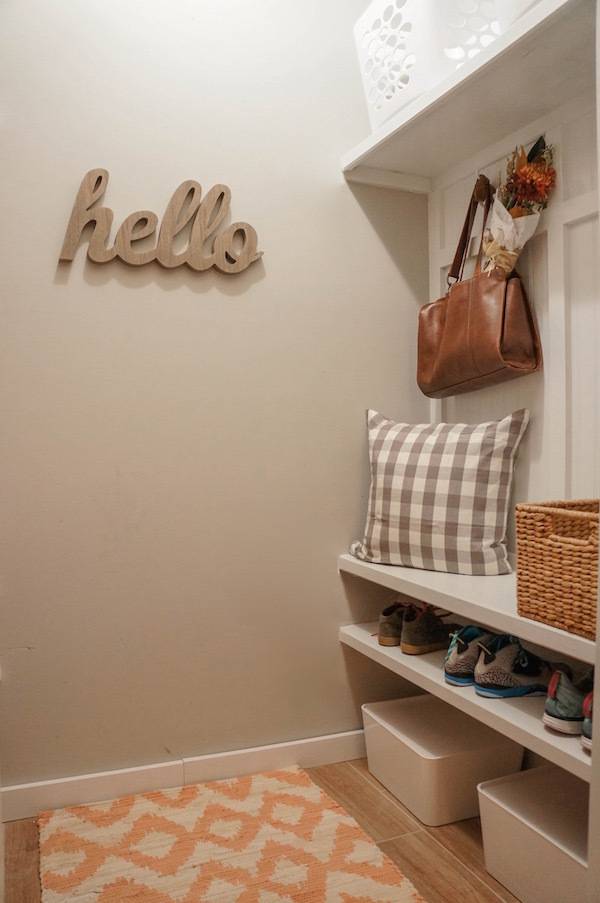
This was a “use what you have” transformation. The original shelves on the left side were taken down and reused on both sides. By hanging the first two shelves close together it created a nook for shoes. The space under the first shelf was made for bins and baskets to store hats and scarves. The top shelf is a place where she can store her folded laundry just in case she doesn’t have time to put it away immediately.
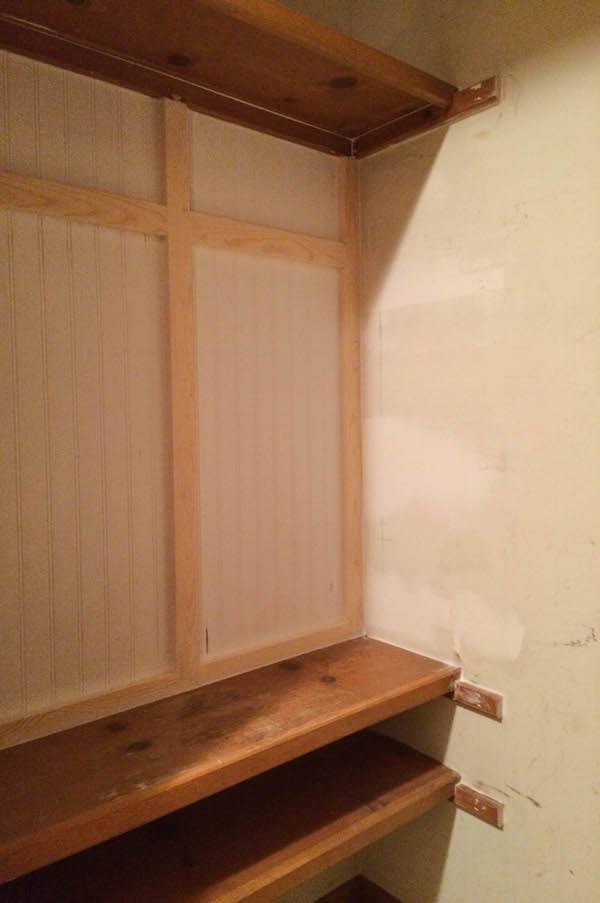
This makeover was easy to do and inexpensive by reusing what the closet already had to offer. Bead board and trim pieces were added to the wall to give the look of a custom built-in locker system.
The hooks were added after the dry wall was patched and the wood got a fresh coat of white paint.
The shelves are even sturdy enough to sit on while you take off your shoes.
Often homes are built in a way that make sense for one family but when the home changes hands it doesn’t translate to the new family’s needs. It is not crazy that your family uses the space much differently than the homeowner/renter before. If you have a space that seems “off”, re-work it a little to make it functional. A great place to start are closets like the one above. They are a great place to add some usable square footage in many different ways. The post The Best Laundry Room Ideas appeared first on Curbly. Via https://www.curbly.com/laundry-room-ideas
0 Comments

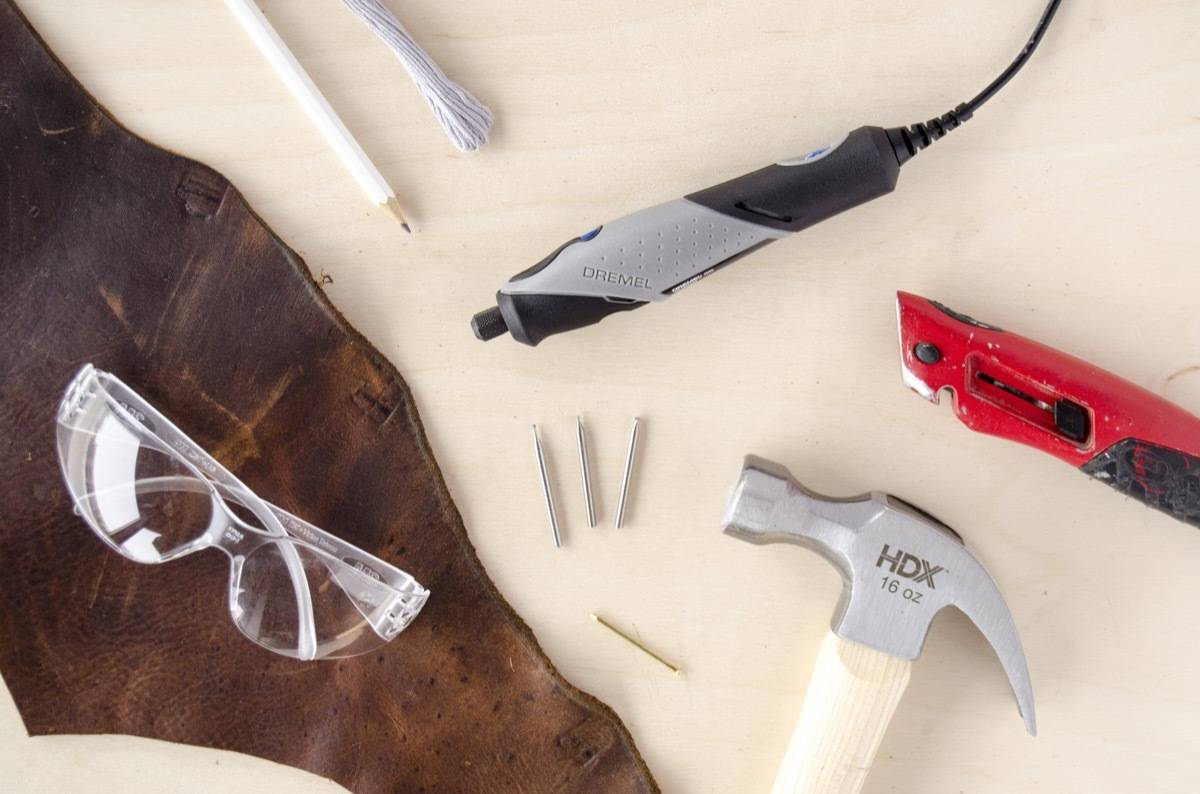
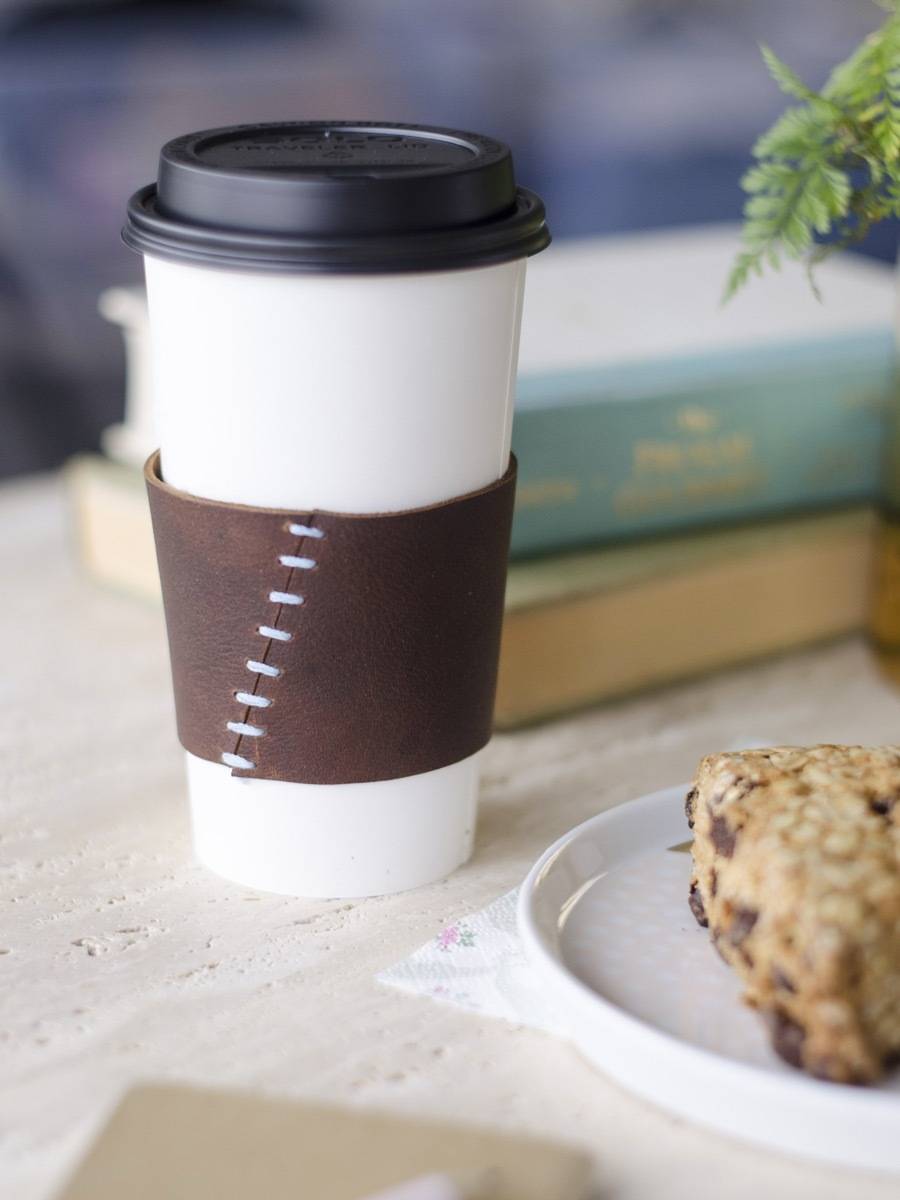
My wife and I will be buying a house somewhere in the near future. Whenever she asks me what kind of neighborhood I want to live in, I just say, “One within walking distance of a coffee shop.” That’s my only criteria, because that’s how much I love coffee. Right now we live in an apartment in a busier part of the city, so most of my coffee is to-go, and grabbed on foot. Which is where this DIY leather coffee sleeve come into play… For now, I don’t live in a house within walking distance of a coffee shop. I live in an apartment within walking distance of like 20 coffee shops. It’s a caffeine-lovers dream, really. I don’t know if you can call “grabbing coffee” a hobby, but if you could, I’d be the most skilled at that hobby. Even though I get a lot of coffee, I don’t always remember to grab a reusable cup prior to a coffee run. A coffee sleeve, though, is small enough to keep in my coat pocket. It helps cut down on a little bit of waste, plus it’s cute and let’s everyone know that I am definitely not drinking tea. Because I live in an apartment and not a house, there’s not a lot of heavy duty crafting happening at my place. Tools are loud, and the walls in my building are thin. I had never even considered doing any mechanical etching, sanding, etc. before I got my hands on the tool I used to etch this leather coffee sleeve. You guys – it’s so quiet. And it’s small, so it’s not intimidating at all. The Dremel® Stylo+? 10/10, would etch again. Keep reading to see how I made a reusable coffee cup sleeve to keep my hands cool and my drink hot. Materials
Step
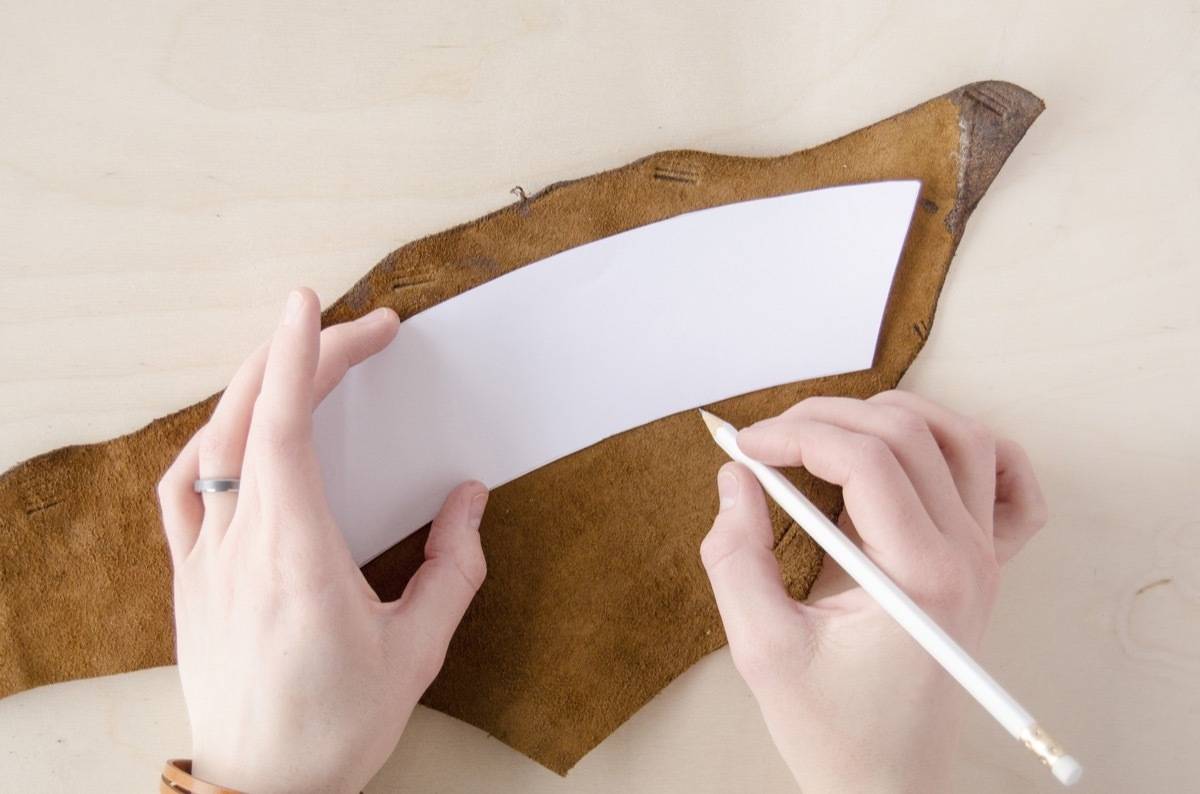
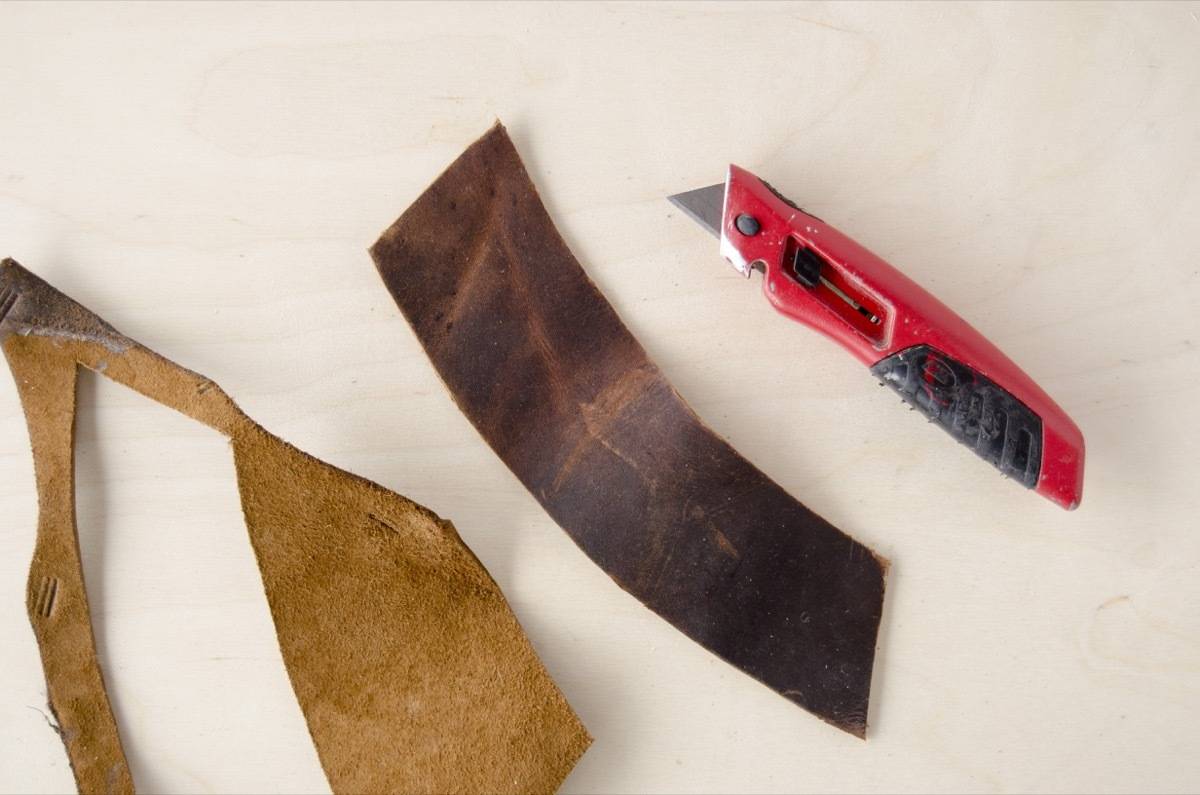
Print out the Leather Coffee Sleeve template, cut out the template, and trace the shape of the cup sleeve onto to the back of a piece of scrap leather. Step
Use a sharp utility knife (or a sharp pair of scissors) and cut out the shape of the sleeve. Step
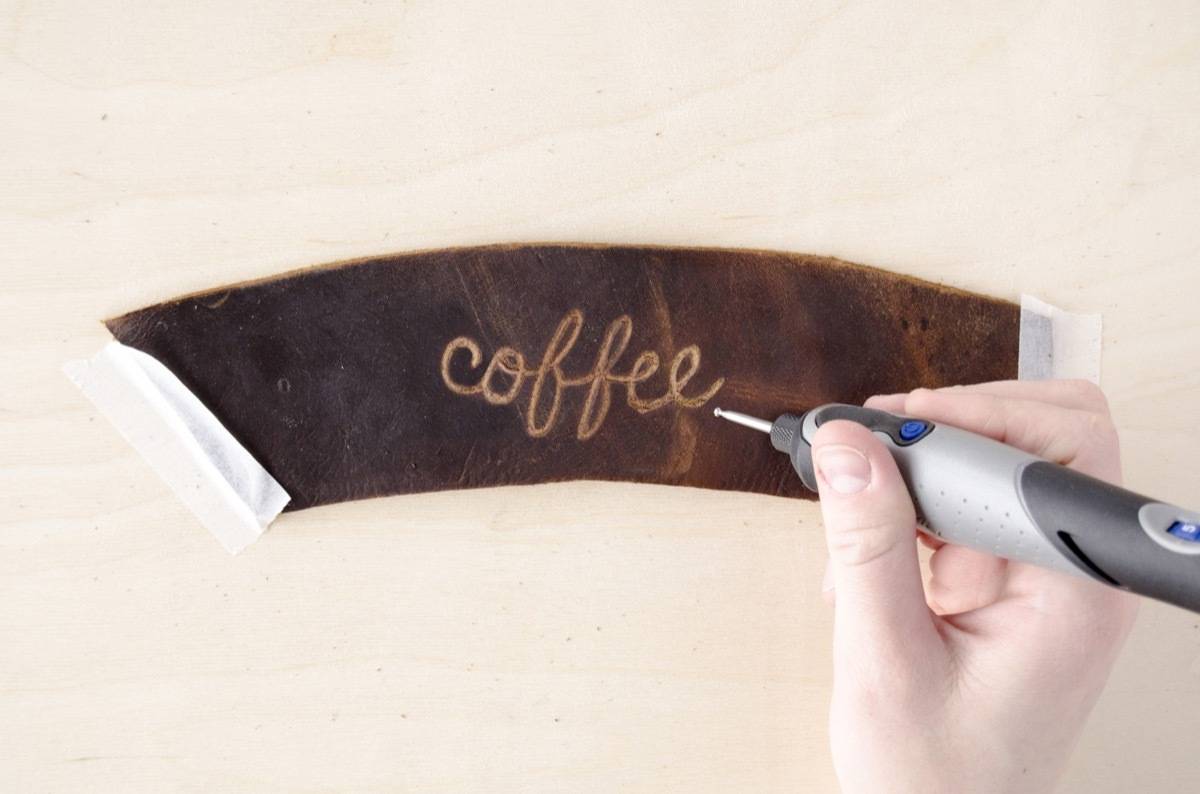
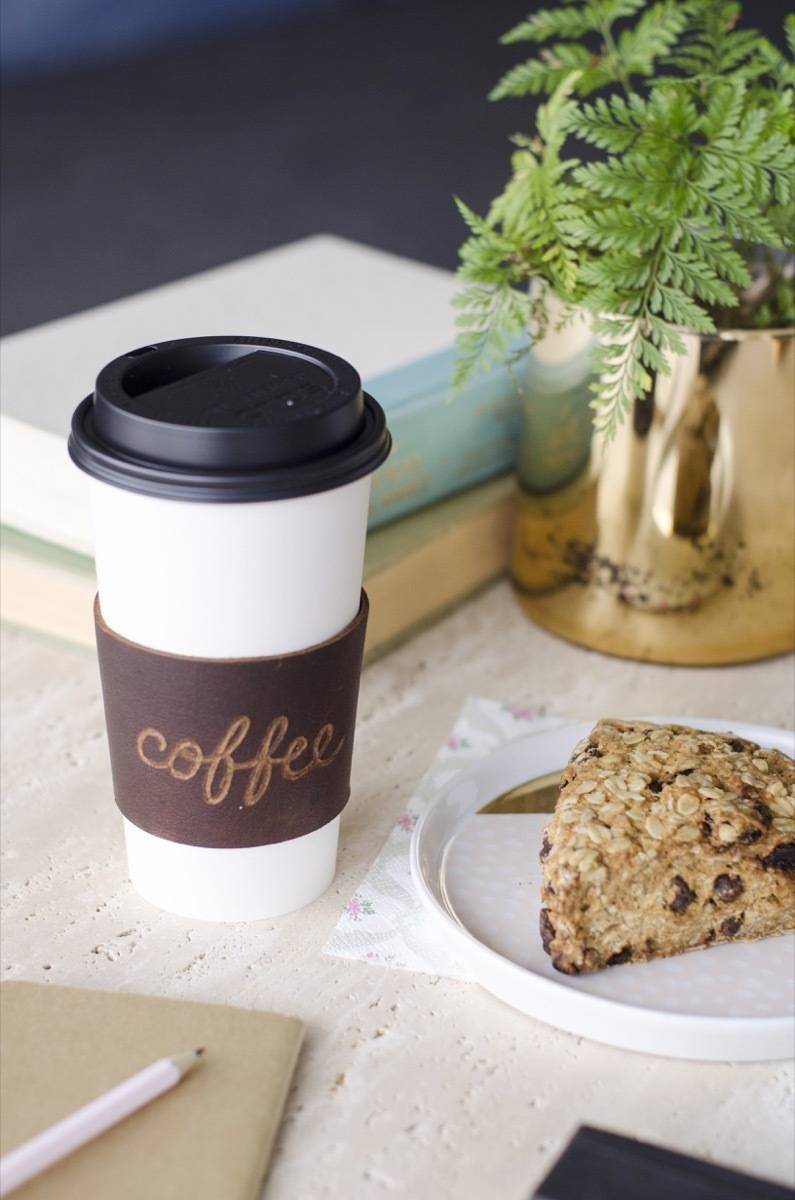
Line the template back up with the cut piece of leather, both the leather and the template facing right side up. Trace over the lettering lightly with a pencil. This will leave an indentation in the leather. Affix the leather to your work surface (using clamps or tape, just so it doesn’t move while you’re trying to work on it), and throw on a pair of safety goggles. Following the indention, etch over the design using the Dremel® Stylo+ tool.
While this tool is small, take the same precautions as you would with a larger power tool (because while it’s small, it’s still powerful!). When switching out the accessories, make sure to unplug the Dremel® tool. And always wear some type of protective eyewear. Safety first! Step
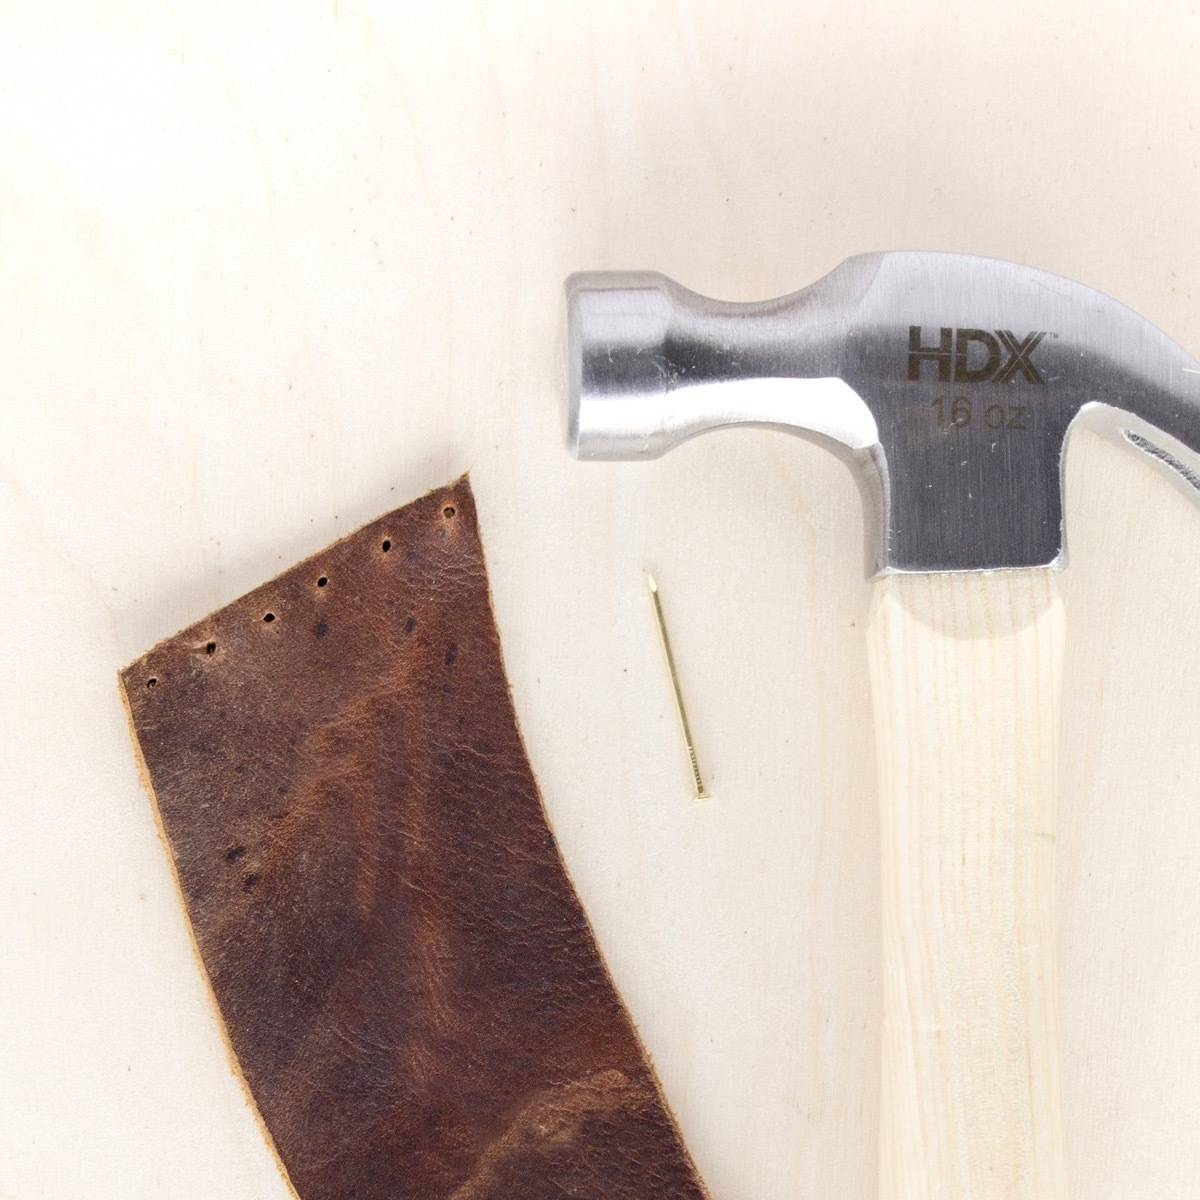
Lay the leather on a scrap piece of wood, and use the small nail to press a few equally-spaced holes along the edge of strap. After you’ve marked your holes, hammer the nail through each mark to puncture the leather and create a hole to stitch through. Line up the other edge of the strap with the punctured one, and press the same number of holes onto the other side. Puncture through these holes with a hammer and nail as well. Step
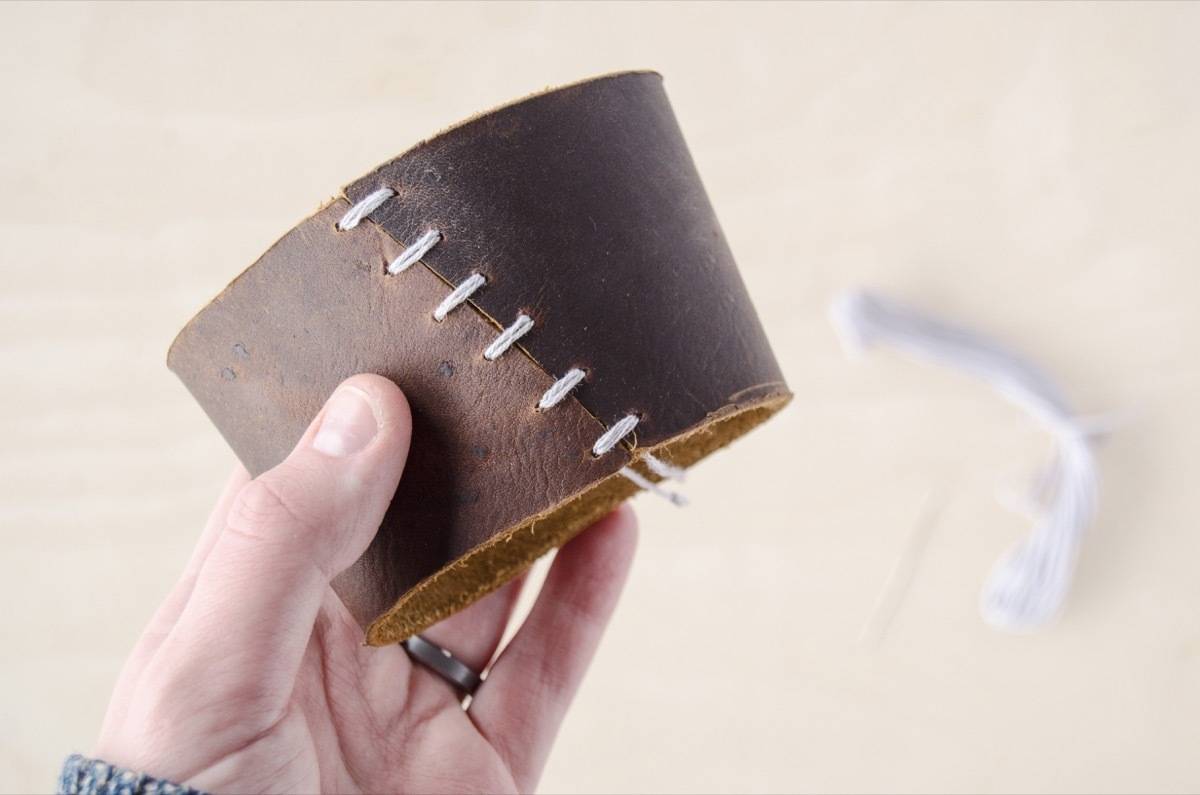
Thread your needle with embroidery floss, and stitch into one of the bottom holes. Leave a few inches of floss at the first hole (so you can tie it up at the end). Stitch across as you go up the edge of the cuff, joining the strap together. Once you’ve reached the top, turn around and stitch down, going through each pair of holes again. Once you’ve reached the bottom, tie the ends of the thread together in a knot.

Oh, coffee. I really do love you. There are few things that I will always agree to no matter the time or place, but coffee is one of those things. It doesn’t even matter the kind of coffee. Espresso shots, mochas, drip coffee, crappy gas station cappuccinos… just give me caffeine. I’m drinking an almond milk latte right now as I write! What a coincidence. This post is sponsored by The Home Depot, but all opinions are mine alone. Working with great brands like The Home Depot enables us to pay for all the content you see on Curbly. Thanks for supporting us, and them! The post Make This Leather Coffee Sleeve to Keep Your Hands Cool and Your Drink Hot appeared first on Curbly. Via https://www.curbly.com/leather-coffee-sleeve 
If you happen to kill every plant you’ve ever had, I have a trick for you: hang them at eye level! Sure, it’s not much, but having your plants at eye level is a great way to remember to water them. And if you’re new to plant ownership, there’s no better place to start than with an air plant and this 15 minute DIY! What you’ll need – bell cup 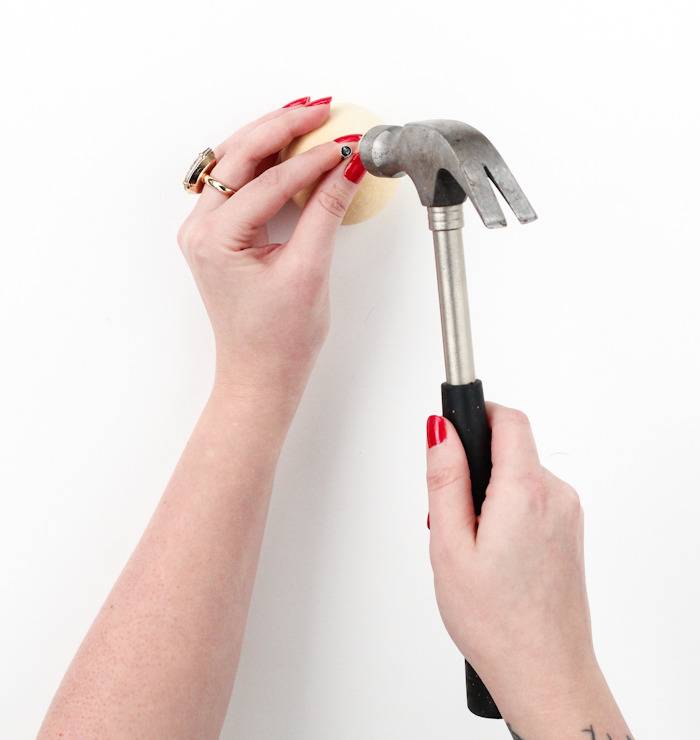
On the bottom on your bell cup, hammer a nail into the center to create a hole. There should already be a divet on the bottom from where the stem was removed, so making the hole will be easy. 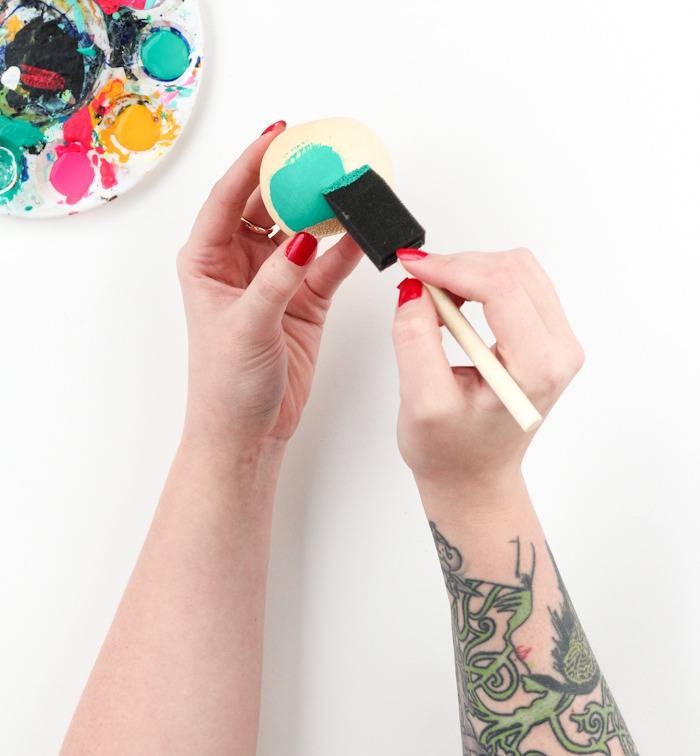
Paint both the inside and outside of your bell cup and let dry. 
Tie a knot around the end of the air plant and string up. To add another pop of color, add some painted wooden beads before hanging! To water, untie and pull air plant out of pod. You wont need to untie the knot, just make sure you pull the plant out enough to water. Avoid getting the pod wet and let plant dry completely before putting back in pod and stringing up. 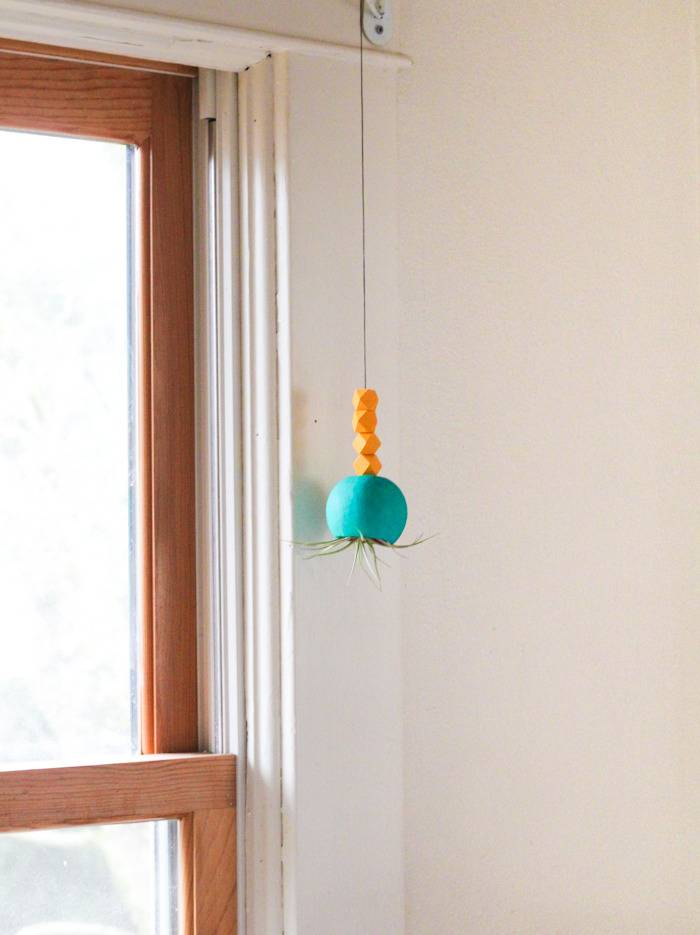


The post How to: Make an Easy + Colorful Hanging Air Plant Holder appeared first on Curbly. Via https://www.curbly.com/16863-how-to-make-an-easy-colorful-hanging-air-plant-holder
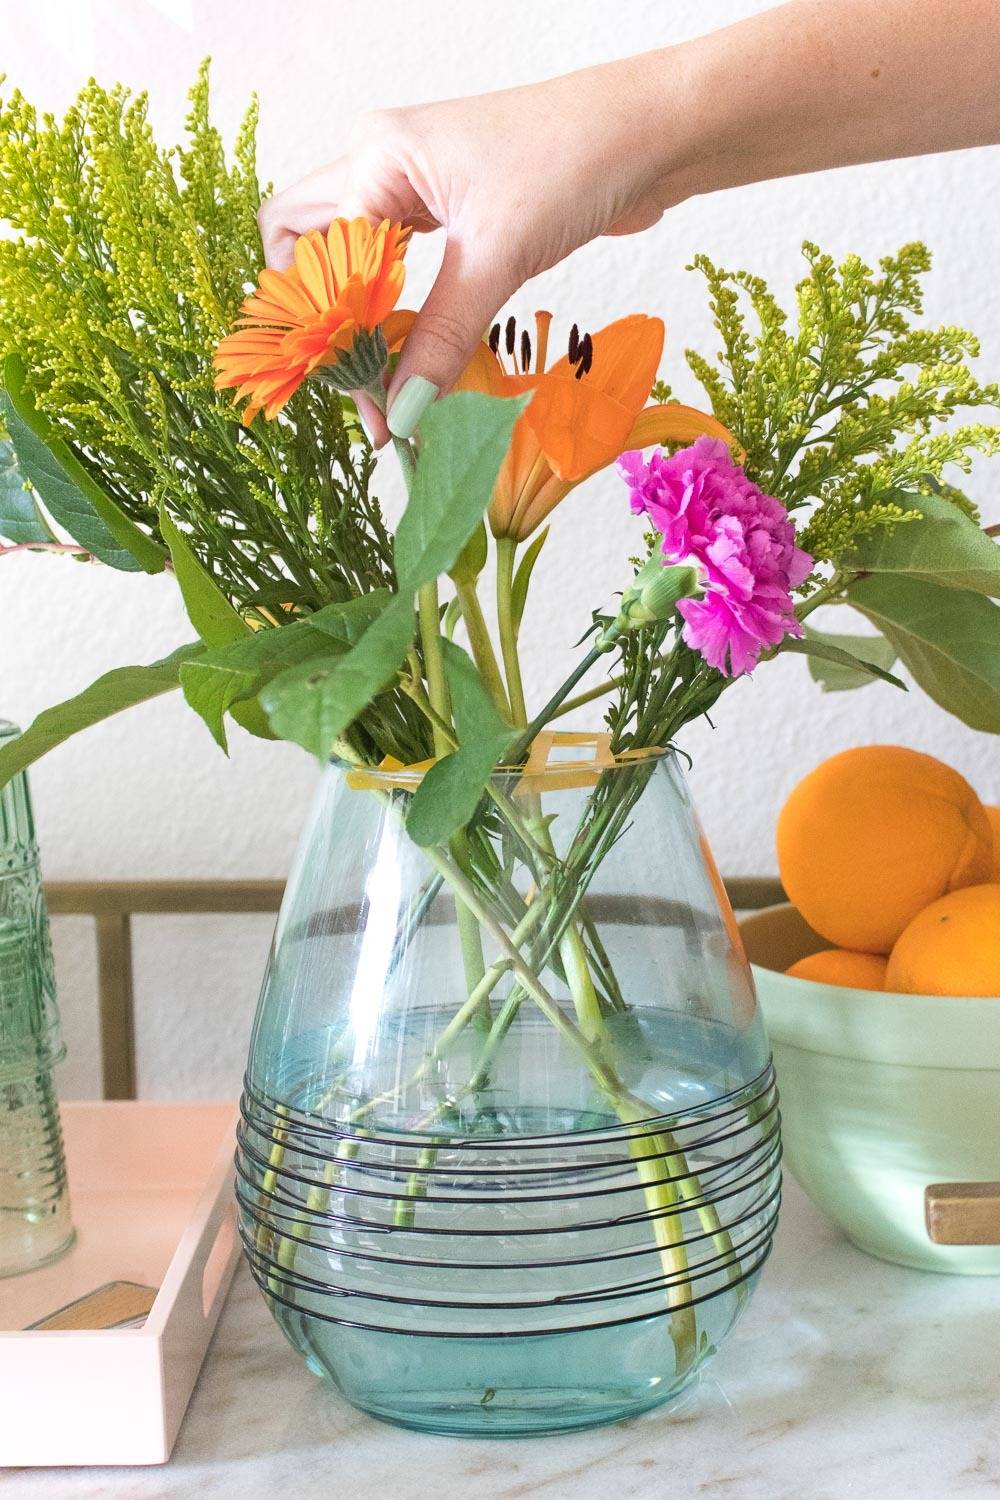
Having fresh flowers on my dining room table makes my whole day better, but I can’t always afford to have an amazing arrangement from my local florist. Instead, I’ve found ways to make standard grocery store bouquets look like unique floral arrangements made just for me! If you enjoy playing with flowers (who doesn’t?!) then you’ll love this simple way to make fabulous floral arrangements with the bouquets you find in your local grocery stores. Depending on the store, you may see that some locations with larger floral departments carry bouquets of all one type of flower as well as the usual variety bouquets that most stores carry. Either can be turned into a beautiful arrangement, but I’d recommend combining a variety bouquet with a bouquet of one flower that you like the most so that you can make it the centerpiece of the arrangement. I personally love lilies and always choose bouquets with lilies as the star.
Materials:Divide the bouquet by flower/plant type (see above, from left to right):
You will also need:
All of these flowers came from a single large grocery store bouquet. In this case, the arrangement revolves around the single stem of lilies. StepChoose a vase of the appropriate size and fill with water as well as the feed packet included with your bouquet.
StepApply thin pieces of tape in a grid pattern on top. Note, I’ve used yellow so that it’s easy to see in photos, but you should use clear so that it is not visible.
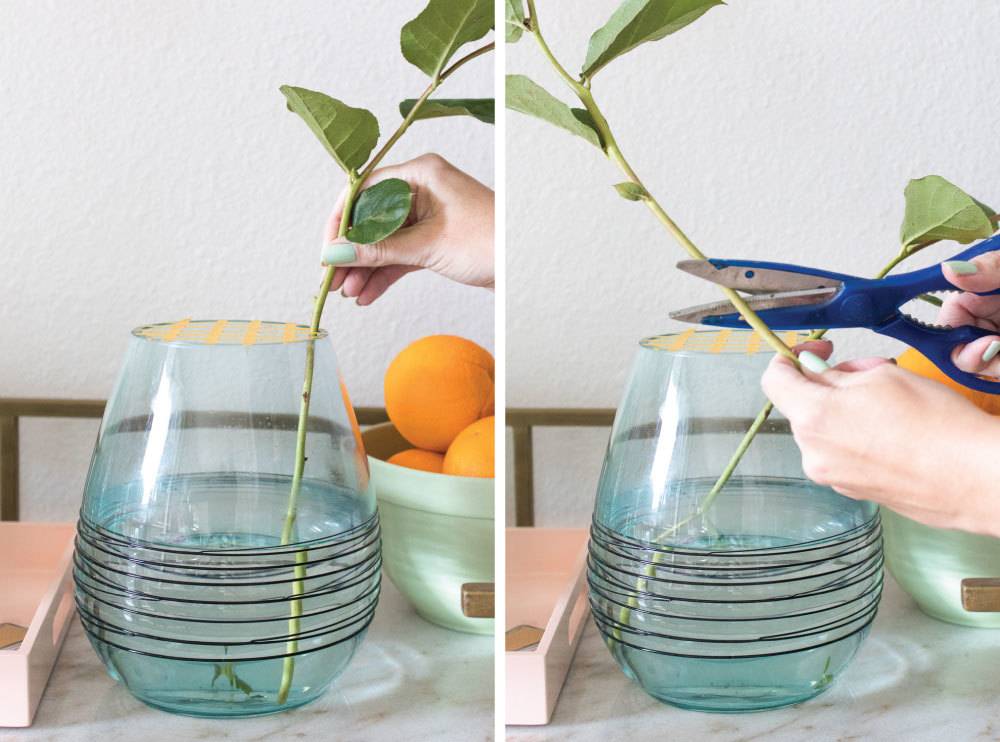
StepTrim stems at an angle and start adding some (not all) of the greenery in the outside edges of the grid, letting them cascade out of the vase as desired. Remember, you can always cut more off but you can’t bring it back once cut!
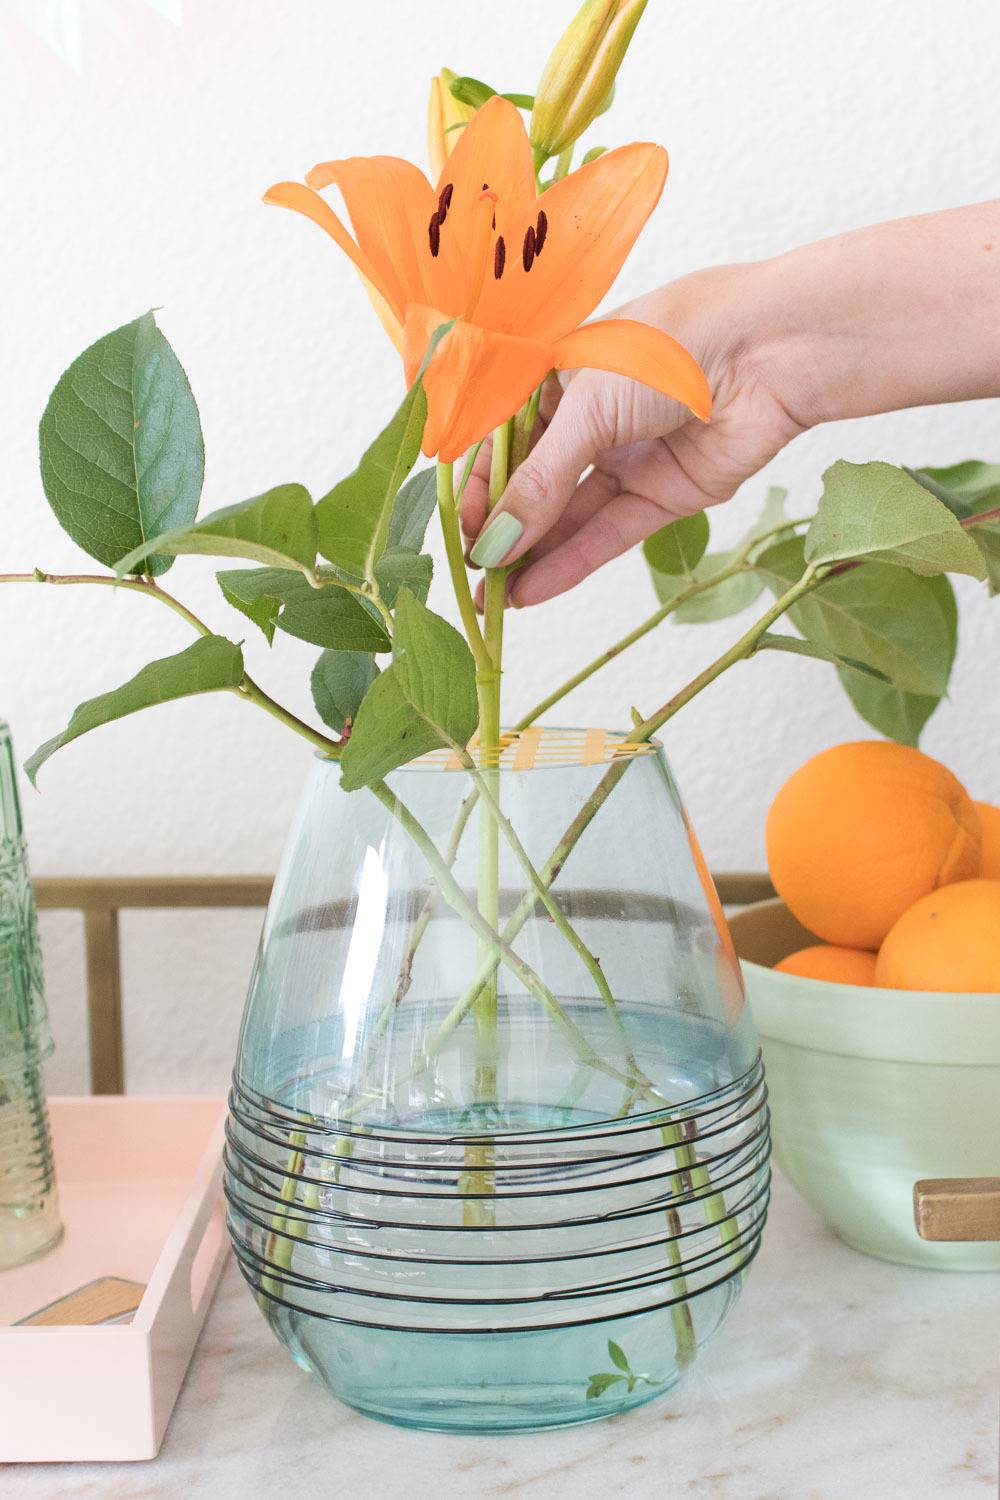
StepPlace the centerpiece flowers at the center of the grid. In this case it is one stem of multiple lilies that have yet to bloom. StepThen space out a few pieces of the filler and small flowers around the inside of the grid, next to the greenery.
StepYou can slowly see the vase filling up. Around the middle, add the medium flowers, like carnations, daisies or spider mums.
Lastly, fill in gaps with remaining filler and greenery so that the arrangement appears even and full. No one will ever guess that this was one of those classic grocery store bouquets once you put your personal touch on it! The post How to Make Fabulous Floral Arrangements with Grocery Store Bouquets appeared first on Curbly. Via https://www.curbly.com/how-to-make-fabulous-floral-arrangements-with-grocery-store-bouquets 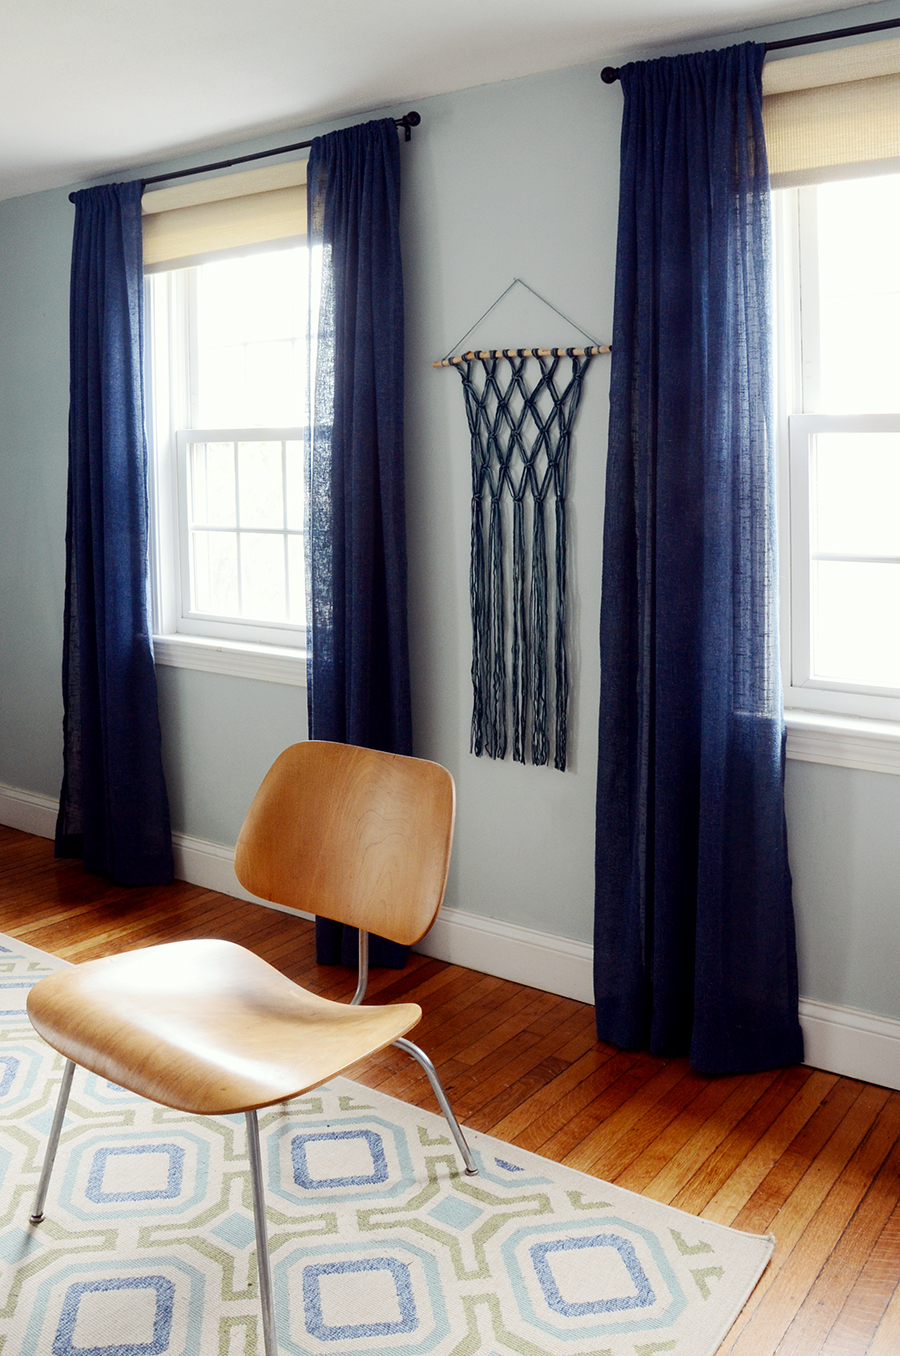
Boho style decor has taken on a life of its own lately, popping up in homes in all corners of the world. And what’s one popular element often found in bohemian style spaces? 70’s textile craft macrame, of course! So today we’re teaching you how to make a simple macrame wall hanging out of yarn.
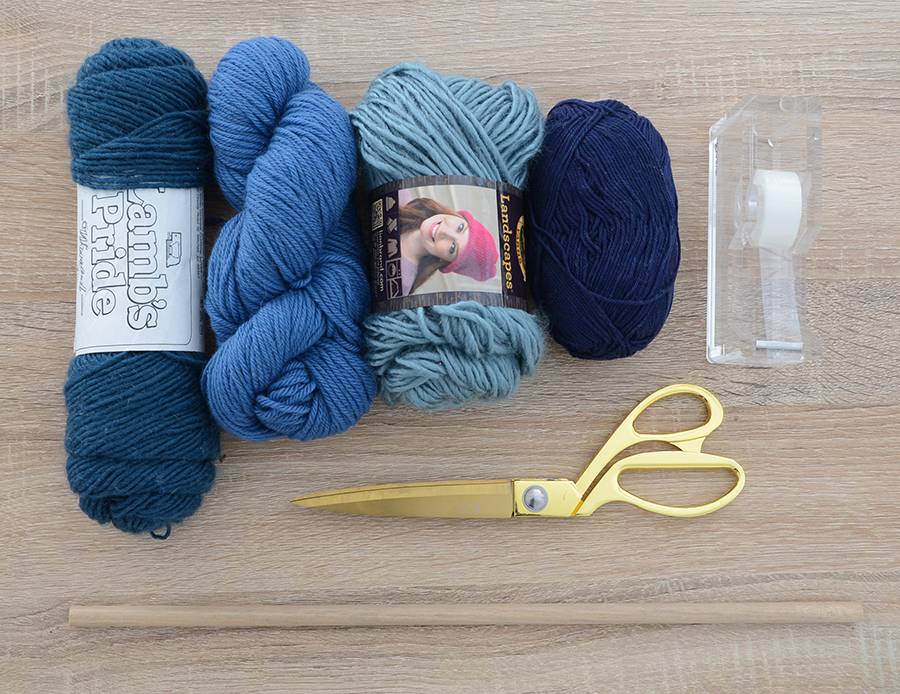
Materials
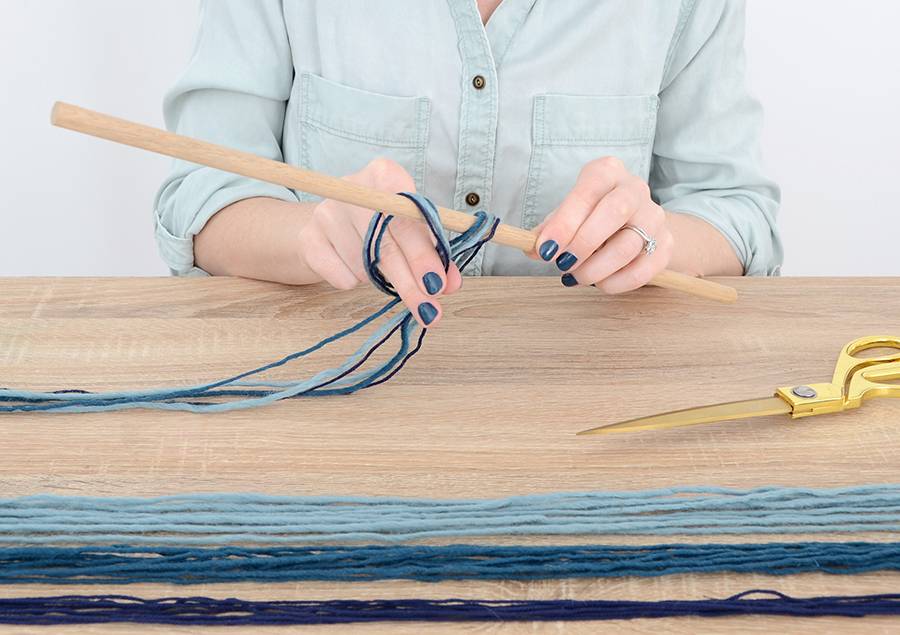
StepBegin by cutting your yarn into pieces that are 3 yards long each. You’ll need 10 pieces of each color. Select one of each color and fold them in half, placing the folded end over the dowel and pulling the tails through the hole as shown above. Repeat this process for the remaining yarn. 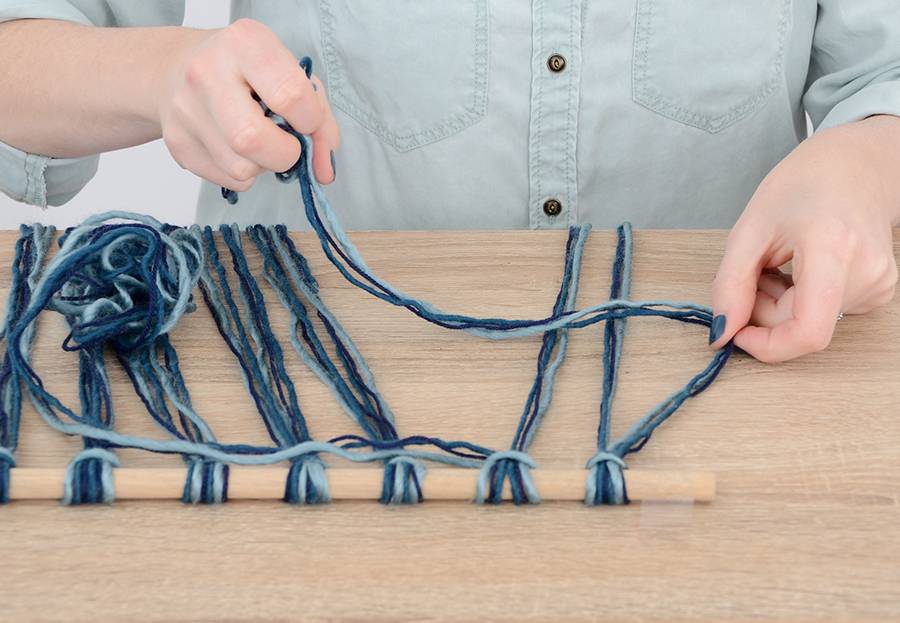
StepNow that you have all 10 clusters attached to the dowel, tape it down to your work surface. Each set of three colors will act as one strand… you’ll never use one individual piece of yarn. Take the outside cluster of the three colors and fold it in a “4” shape over the next two clusters as shown above. 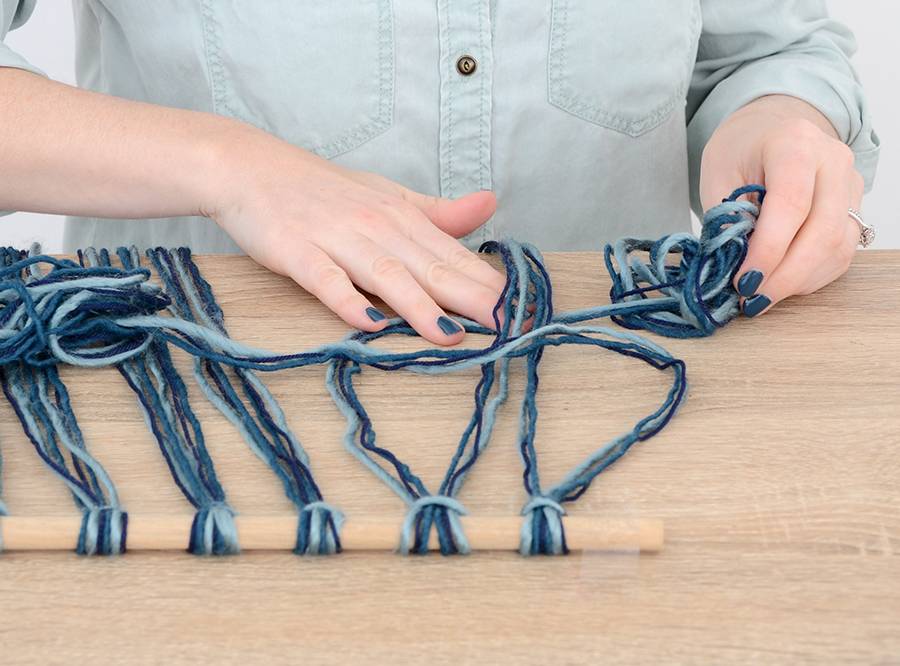
StepTake the fourth cluster and fold it in a backwards “4” shape underneath the middle pieces (so the opposite of what you did in the previous step). It helps to bunch the tails up into a ball so you can maneuver them better. 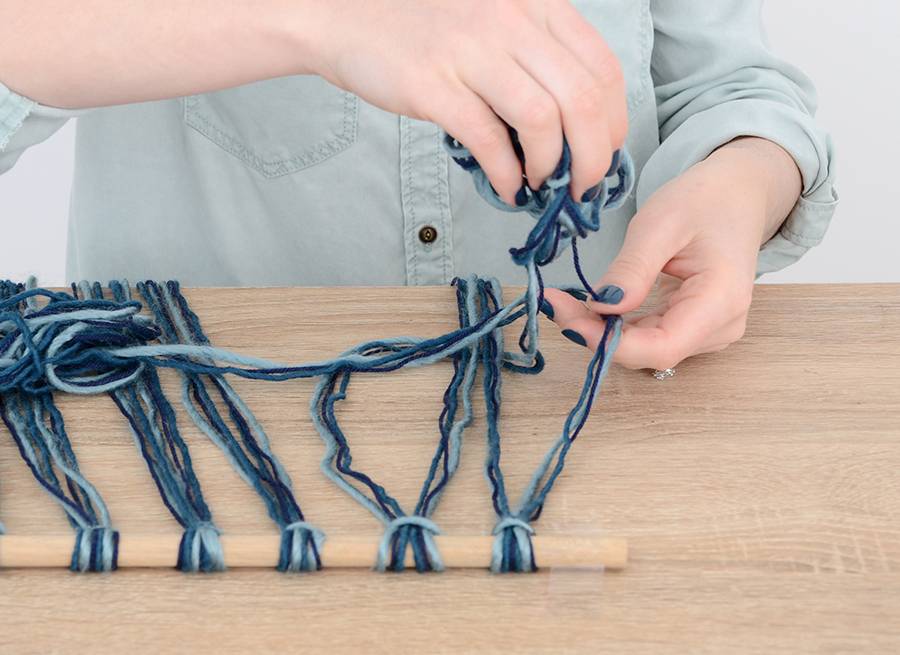
StepBring those tails up through the hole in the first “4” shape. 
StepPut the opposite set of tails down through the backwards “4” shape. Pull the tails taut so they end up about 2 inches from the dowel. Repeat this same knot in reverse, so start by putting the right piece over to the left in a backwards “4” shape and then put the left piece under to the right side, etc. For a general instructional diagram, check out this post. Continue across in the same manner. 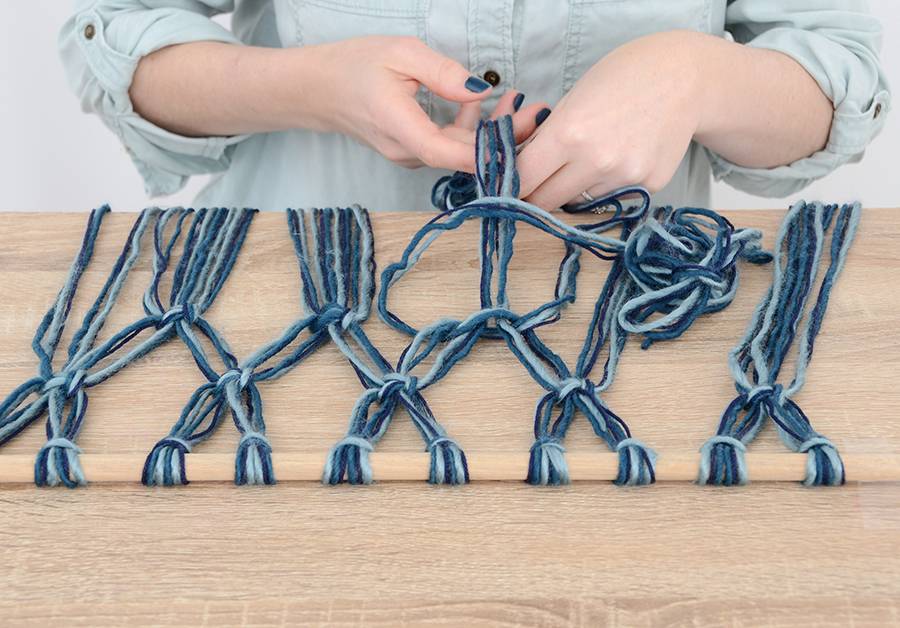
StepOn the next row, do the opposite pieces so that you start to form diamond shapes. (Leave the end two strands alone – you’ll use them on the next row.) Do 5 rows and then trim the ends to your desired length. I like fringe, so I left about 2 feet on the bottom. Tie a 2 foot long string across the top from one end of the stick to the other, and secure with a bit of super glue. 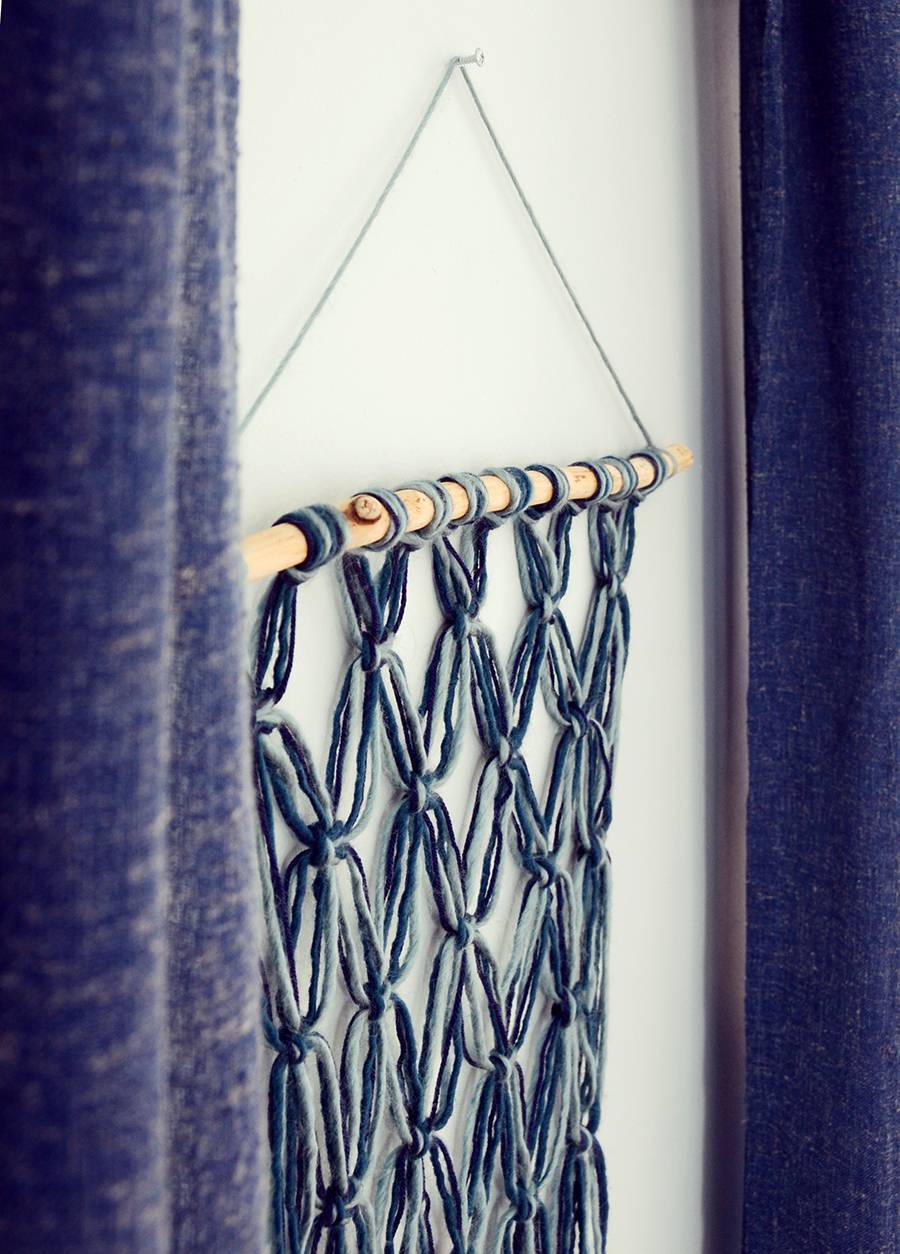
Hang it on the wall using a nail or screw. It’s a very light piece, so you most likely won’t need to insert a wall anchor. 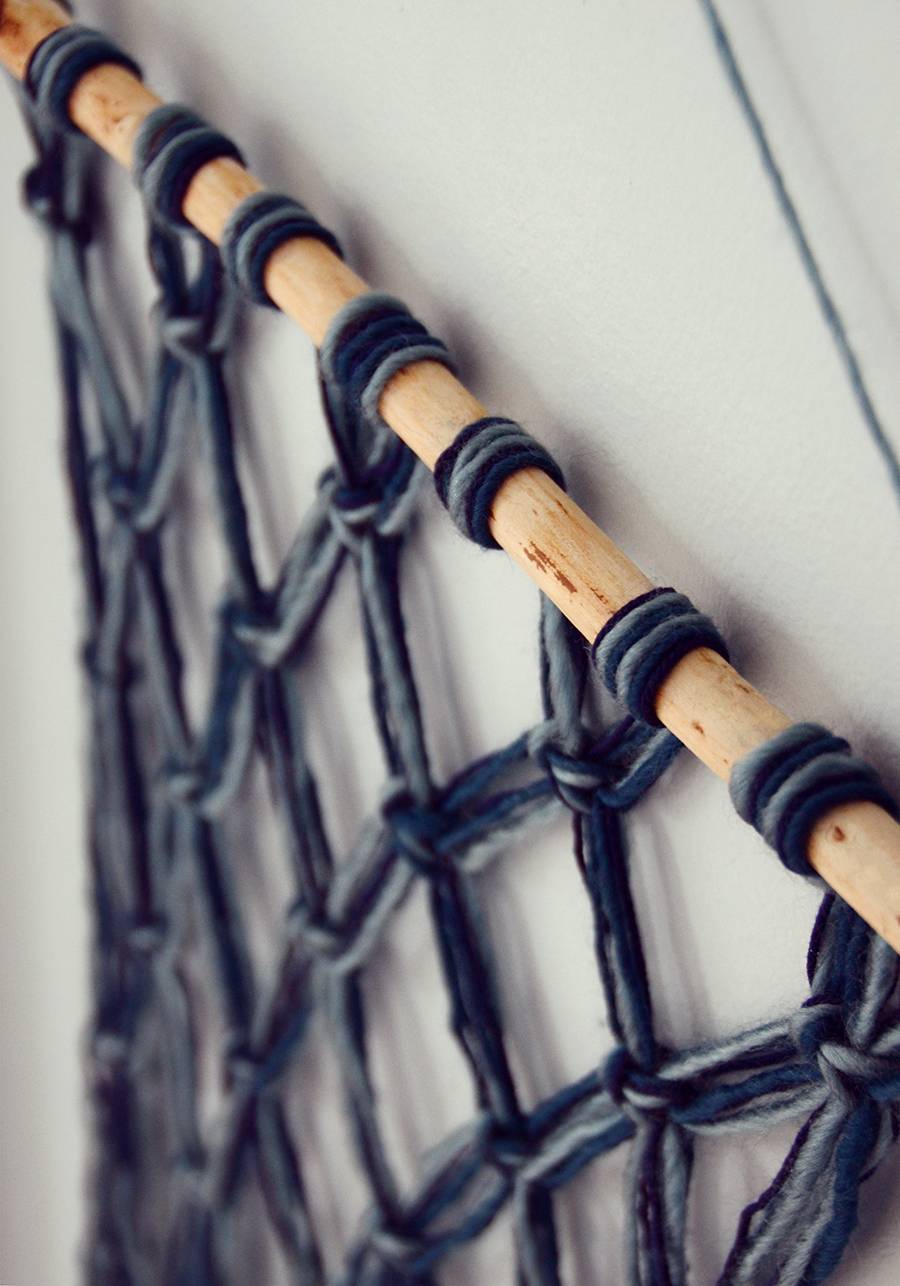
The final product is a bit unusual, thanks to the materials (traditional macrame is made with rope or cord, not clustered yarn). And you can really customize the colors this way too! Imagine what it might look like with neon pink? Or a mix of cool and warm colors? 
You can also customize it by changing the scale… use 4 or 5 yarn colors per cluster and loop 16 clusters around the stick for a larger version of this piece. Have fun with it! 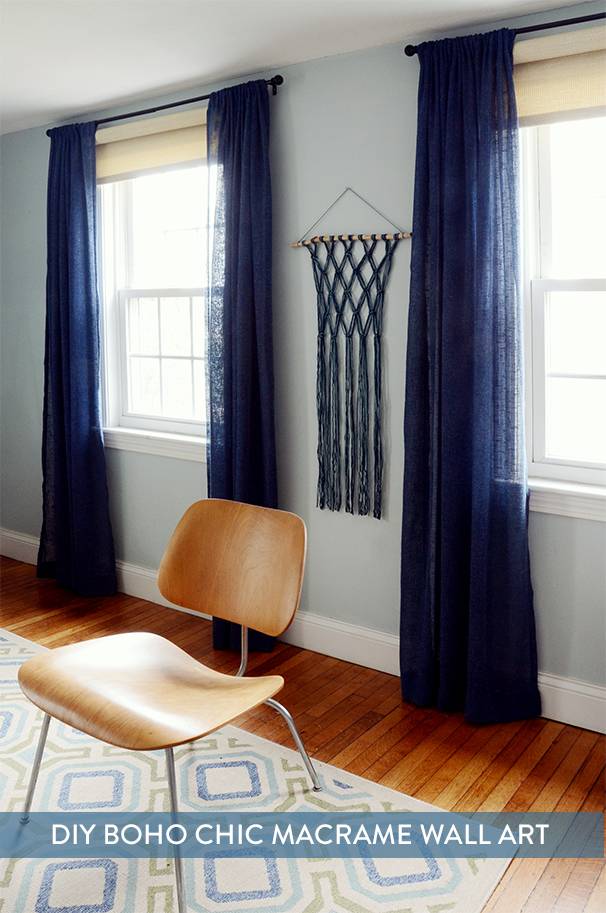
The post DIY Boho Chic Yarn Macrame Wall Art appeared first on Curbly. Via https://www.curbly.com/boho-chic-yarn-macrame-wall-art
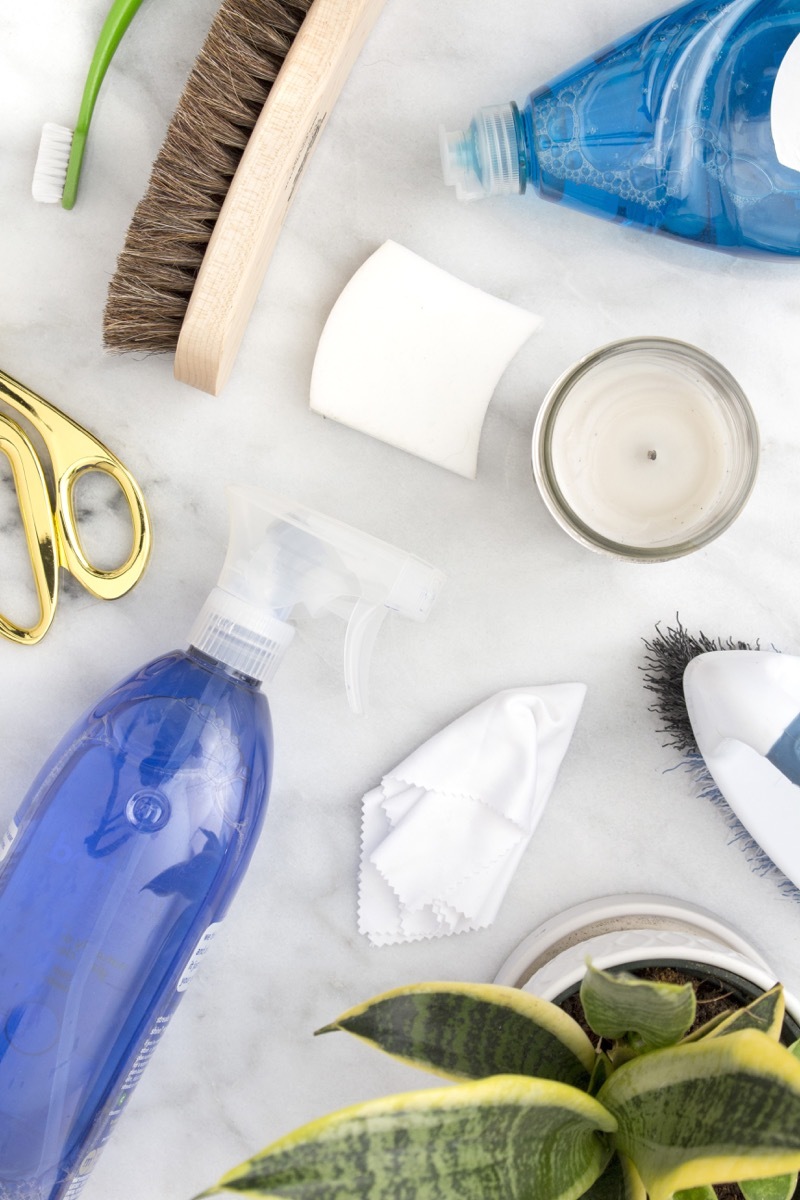
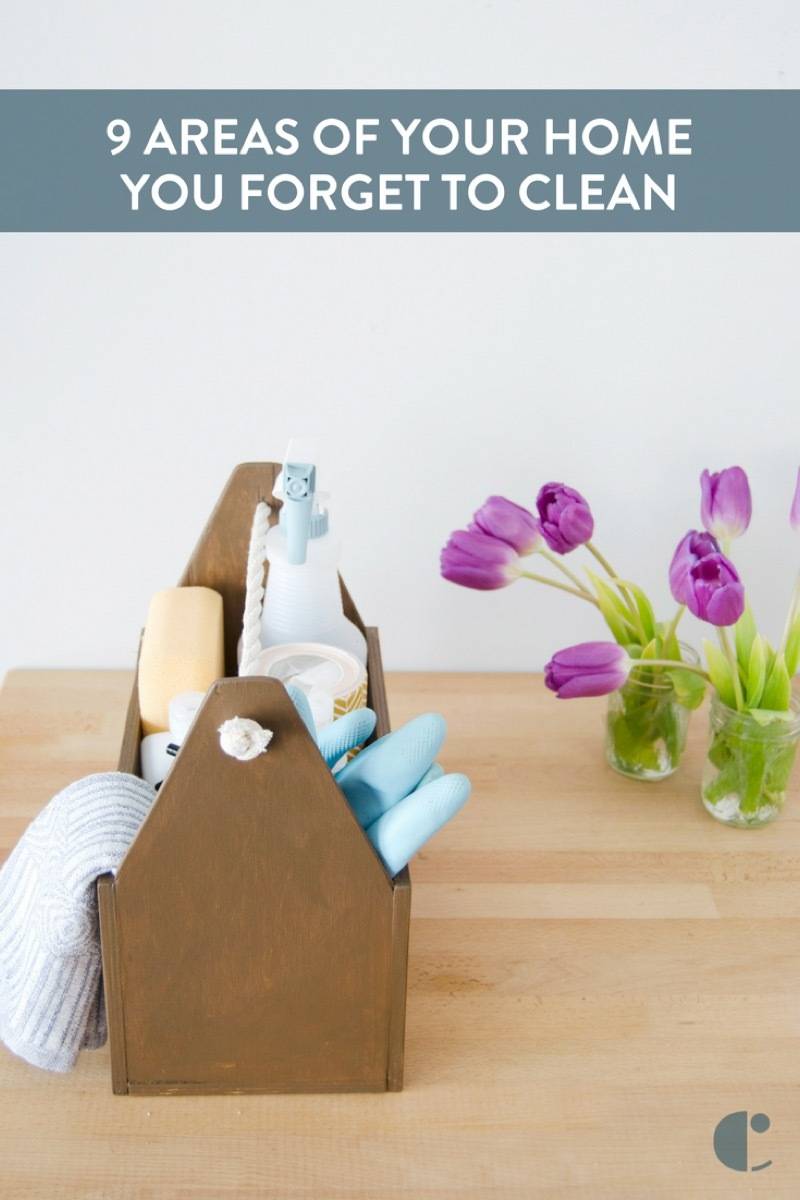
Occasionally you won’t notice how dirty something in your house is until it’s that dirt is called out. You drop something under your couch and discover a gang of dust bunnies living underneath. You throw open your curtains and find yourself in a front-row seat to a dust dance-off floating right in front of your face. Since it’s spring cleaning season, now is as good a time as any to tackle those forgotten areas of your home. And don’t feel bad: everyone forgets them! So let’s look together at these nine areas of the home that are often neglected, and explore how to give them the care they need. 1. BaseboardsWhile you may remember to vacuum your baseboards and trim regularly, they probably haven’t had a good scrub in a while. To tackle this chore, start by vacuuming your baseboards to remove any dust and dirt. Next, fill a bucket with warm water and a bit of dish soap, and dunk an old rag into the mixture. Ring out the rag as much as possible, and wipe away the dirt. If you have unpainted baseboards and want to protect the wood, use a wood cleaner in lieu of the dish soap and water. If you’re dealing with tougher stains on painted trim, try a melamine sponge. Clean nooks and crannies with an old toothbrush. Wipe your baseboards dry with a cloth when you’re finished. 2. Ceiling fans and light fixturesYou’ve just finished cleaning your living room. It’s spotless, you think. Until you look up. Oh no! Those fan blades can collect a lot of dust. Before you to turn them on in the warming weather, give them a wipe down. First switch off the light. Next, grab a ladder and your dusting vacuum attachment (the one with the bristles) to remove the bulk of the dust first. Next, simply wipe clean with a slightly damp cloth. This goes for both the light fixtures in your home and fan blades. While you’re up there, go ahead and change the direction of your ceiling fan since it’s warming up (for summer, they should rotate counterclockwise to pull cool air down). 3. Light switchesYour hands come in contact with a load of surfaces over the course of the day, and a lot of those surfaces carry bacteria. To eliminate the grime buildup, the best way to clean light switch plates is to use a disinfectant spray or disinfectant wipes. If you’re using a spray cleaner, spray onto a cloth – never directly on the switch plate. Wipe the light switch clean with a cloth, and detail clean with a Q-tip. Once your switch is clean, buff dry with a cloth. While you don’t touch wall outlets with the same frequency you do light switch plates, sometimes these get dirty, too. Before cleaning your dirty outlets, consider turning the power off first as an extra safety measure. Of course, do not spray directly onto the outlet. Additionally, do not clean inside the outlet – just the surface, and preferably just the plate. After buffing dry, wait a while before turning the power back on to ensure the surface has completely dried. 4. DoorsI don’t know how I forget this chore so frequently, and hopefully you can relate so I don’t feel so guilty. My doors are always dirty! The ledges on the door are frequently covered in dust and pet hair, and the bottom half is covered in scuff marks. To clean your doors, use a vacuum to remove excess dust, and a dish soap/water mixture with a cloth to clean. Here are the areas of your doors you should be giving attention to:
Just like with the baseboards of your home, if you are worried about damaging the door, use a wood cleaner. If your door is painted, you can use a melamine sponge to clean tougher scuff marks. 5. Electronic screensTo clean the electronics in your home and life, grab a clean microfiber cloth. If you can power down the electronic, do so. If your electronics aren’t too dirty, circular motions with a microfiber cloth should suffice. If not, add a few drops of distilled water to your cloth and wipe. Never spray moisture directly onto your electronics, and don’t use standard household cleaners. 6. Air vents coversThe key to cleaning air vents is to clean dryly. Air vents are dusty, and using moisture could potentially smear the dust onto your walls and ceiling, creating an even bigger mess. Start by turning off the heat or A/C (you don’t want all that dust blowing into your face while you work!), then vacuum up what dust you can. Finish off by using a microfiber cloth. Scrub off particularly dirty marks using a slightly damp melamine sponge. 7. Lamp shadesLight shades seem tricky to clean because you can’t scrub them. They have to be cleaned, though, because they still attract dust like a magnet. The solution is remarkably simple. Clean your paper or fabric lamp shades is with a lint roller. A couple swipes and it’s sayonara, dust! 8. Kitchen trash canIt might look fine from a distance of a few feet, but if you need further convincing that your trash can is nasty, put your face up to it. Yeah, it’s gross. Move your can outside (or to your bathtub if you don’t have a yard), and hose it down with water. Fill up the bottom with a bit of hot water, then add a cup of white vinegar. Use this water/vinegar solution to scrub the can with a bristled brush. Rinse, and towel dry (or let dry in the sun!). 9. Under the bedTo clean under your bed, you really have to move your bed. This sounds like a lot of effort, but once you uncover how much dust and dirt you’ve been sleeping just inches away from, you’ll be grateful you made the effort. Don’t forget to check behind the headboard, too! Use a vacuum and/or a mop to get all those dust bunnies.
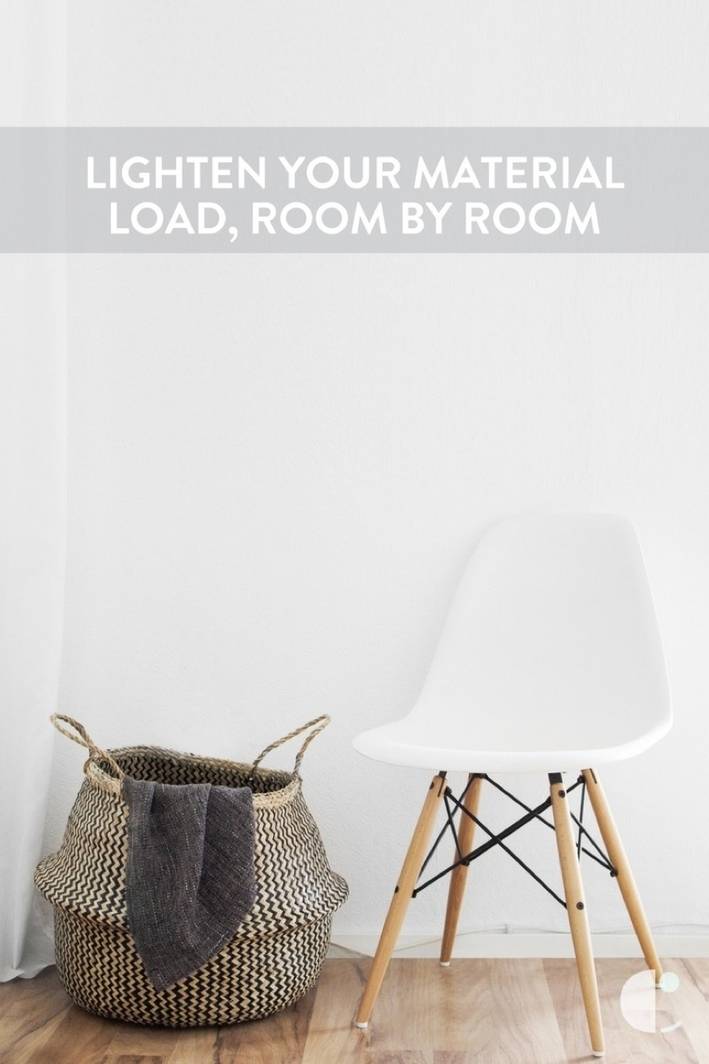
Share this spring cleaning checklist on Pinterest! Do you participate in Spring Cleaning? Or do you prefer to do your deep cleaning at a different time of year? What areas of your home slip your mind when you’re cleaning? Let me know in the comments! In the mood for more spring cleaning tips? Thin out your material possessions with this checklist!
The post 9 Areas of the Home You Commonly Forget to Clean, and How to Deal With the Dirt appeared first on Curbly. Via https://www.curbly.com/forgotten-cleaning-list |