|
We’ve reached the weekend of BBQs and graduation parties! It’s kind of like the official kick-off to summer. Celebrate with some simple and custom wood coasters!
Cut from wooden blocks and painted black and white, these coasters are simple enough and match any party color scheme. Head over to Jade & Fern for the full tutorial! DIY Wood Hexagon Coasters by [Jade & Fern] The post Do-It-Yourself Wooden Hexagon Coasters For Your Memorial Day BBQ appeared first on Curbly. Via https://www.curbly.com/16143-do-it-yourself-wooden-hexagon-coasters-for-your-memorial-day-bbq
0 Comments

Today we’re checking out the RIDGID 18-Volt Impact Driver, which you can buy alongside a cordless drill in a combo kit for $179 at The Home Depot. I’ve built up a lot of trust for the Ridgid brand over the years. In fact, my very first (ever) impact driver was a Ridgid (the great-grandaddy of this model). But beyond that, I’ve owned several of their products, including a circular saw (indestructible) and a wet/dry vacuum (unbelievably versatile). So I was excited to get this combo kit in the mail last week, because I feel a guy can’t ever have too many impact drivers. Sure, having the drill is nice too, but to be honest, I only reach for a normal drill in rare occasions. The impact driver is just so much more versatile and useful, not to mention light and maneuverable.
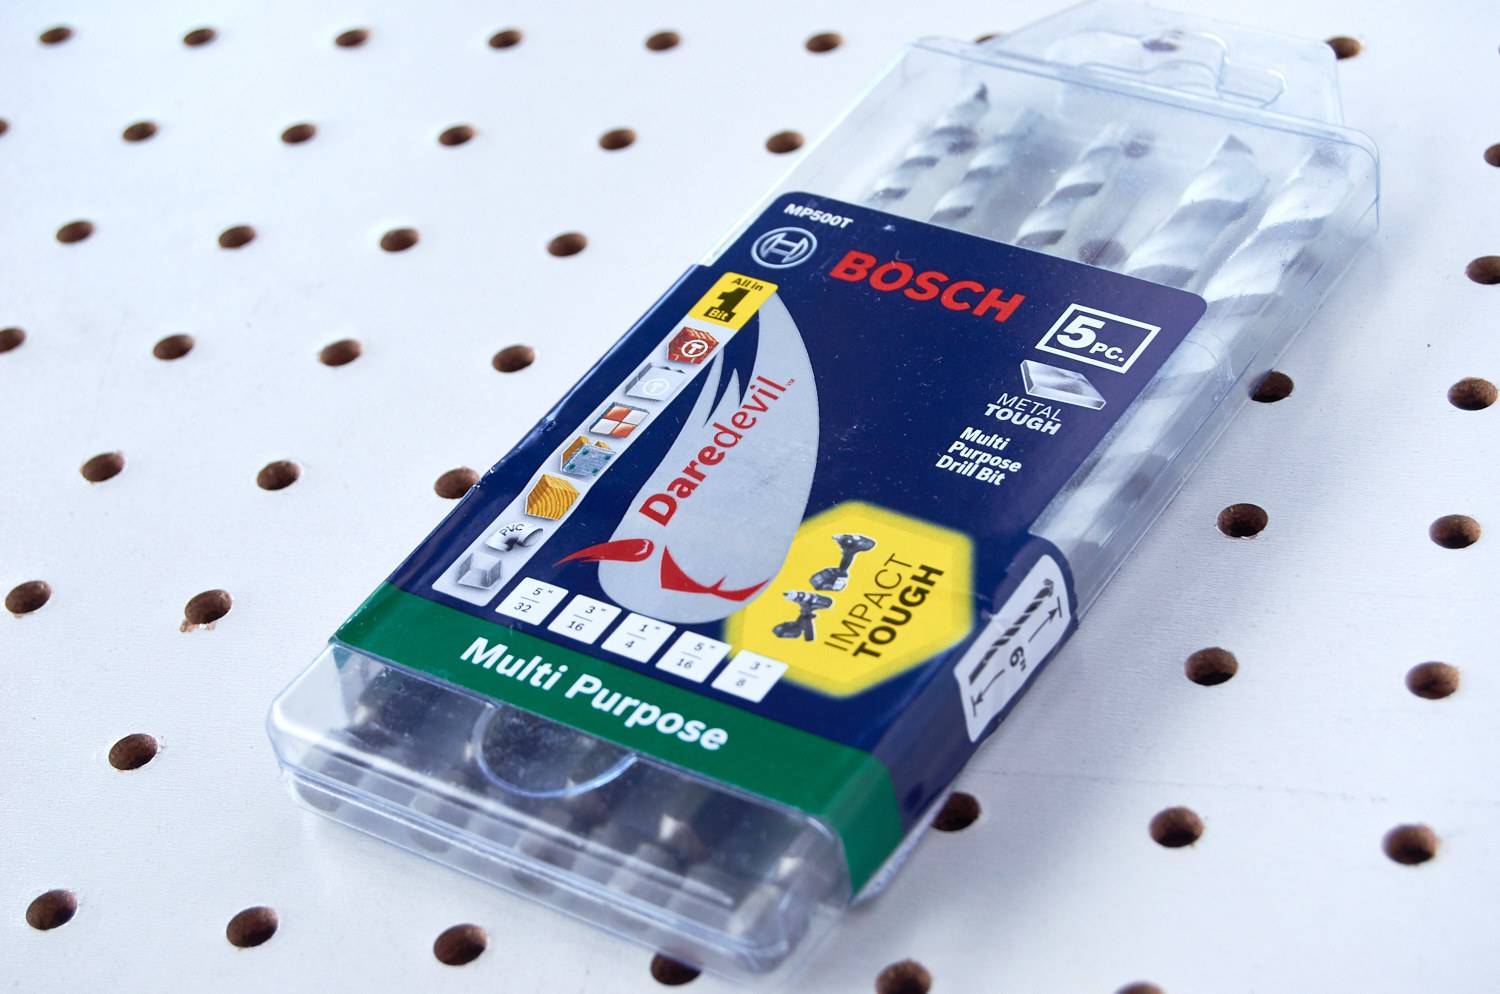
Along with the tool, The Home Depot sent us a multi-purpose drill bit set from Bosch. These tungsten carbide-plated bits have a hex shank (big plus) for compatibility with quick change chucks (like, every impact driver on the market), and they’re meant to go through almost any material (namely: tile, masonry, wood, metal, and concrete). I have an absolute jungle of drill bits in my tool bags right now, primarily because I never know what type of material I’ll be drilling into. So if these work as advertised, I’ll be excited to toss out a bunch of redundant bits. So, What Is An Impact Driver, Anyway?A normal drill uses a motor to turn the shank with a constant torque (you can change the speed, but for each speed you’re at, you get an even output of torque). Then the shank turns the screw, or drill bit, rotating it into the material. An impact driver is different: it has an internal mechanism which uses a spring to store up and release energy in a burst, twice for each rotation. This generates much more torque. Why is torque so great? Well, with a normal drill, you need to push down onto the tool to get it to continue moving through the material. With an impact driver, the torque bursts do all the work for you, so you just need to hold the drill in place. With a power drill, you always have to worry about the bit getting caught in dense material, which causes the tool to kick back (potentially injuring your arm!). Impact drivers don’t kick back that way. The RIDGID 18-volt Impact Driver: Brushless Technology at an Entry-Level PriceLet’s start with the driver. This combo kit comes in a neatly packed, rugged contractor bag. The kit includes two batteries and a charger, so, it’s pretty much everything you need to get going. As with all power tools, your choice of battery platform is going to influence what you buy, but as I said before, I’ve had great experiences with the Ridgid brand, so I’d feel very comfortable locking into that platform. The impact driver has three speed settings, which is a feature I haven’t see on impact drivers before. That said, most of what I end up using this tool for is heavy duty work, so I’d be surprised if I often use more than one speed. Some other features:
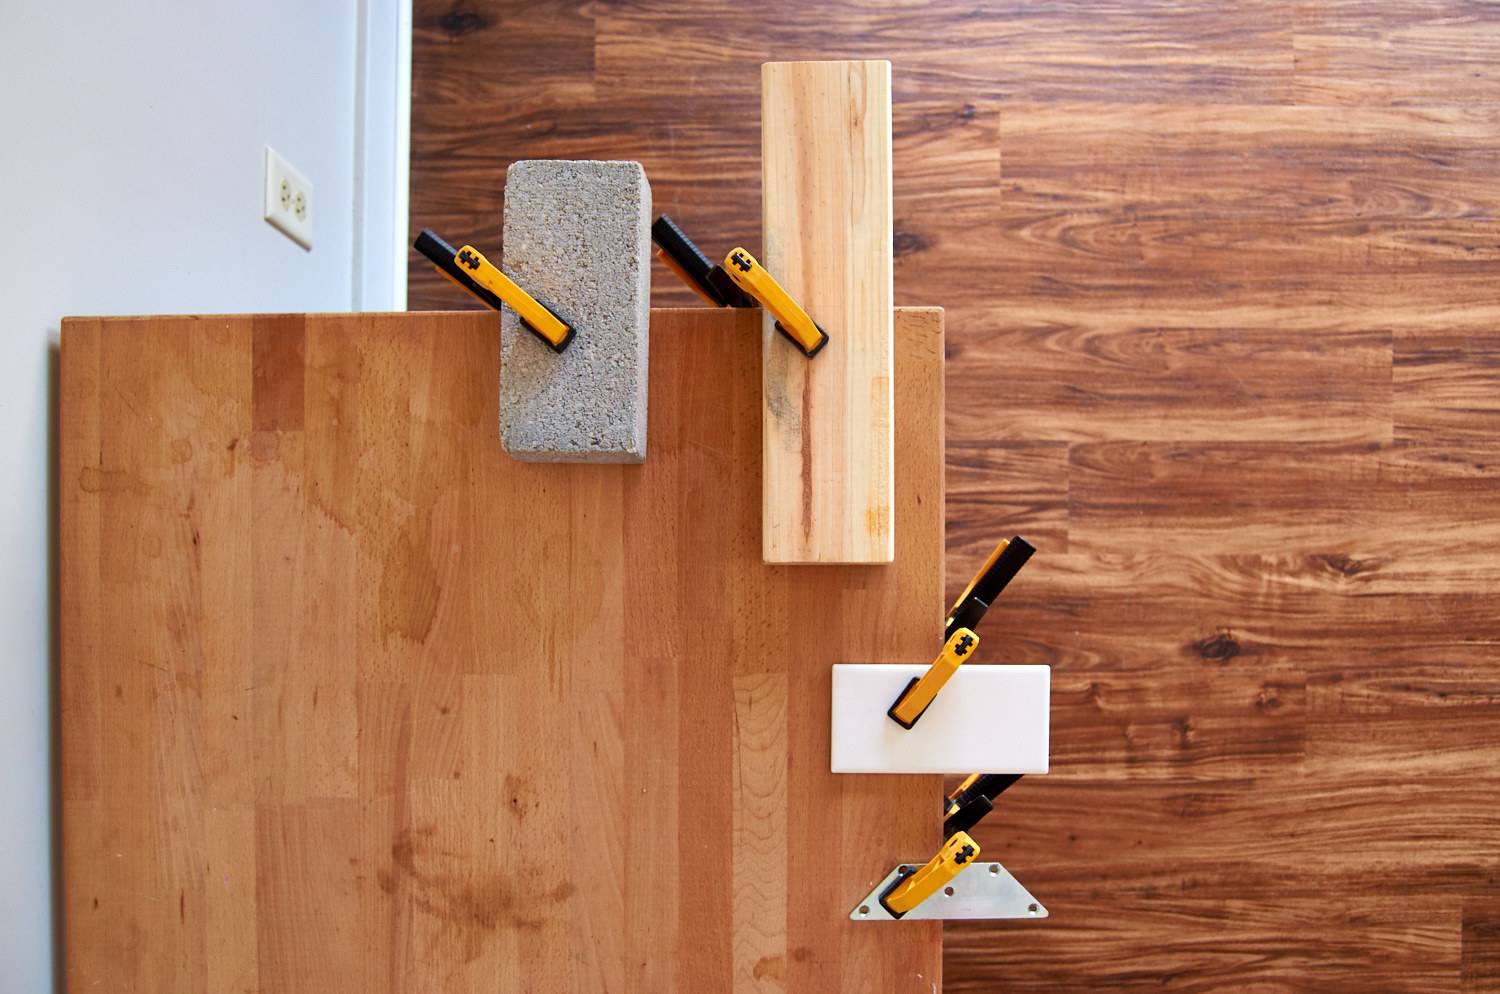
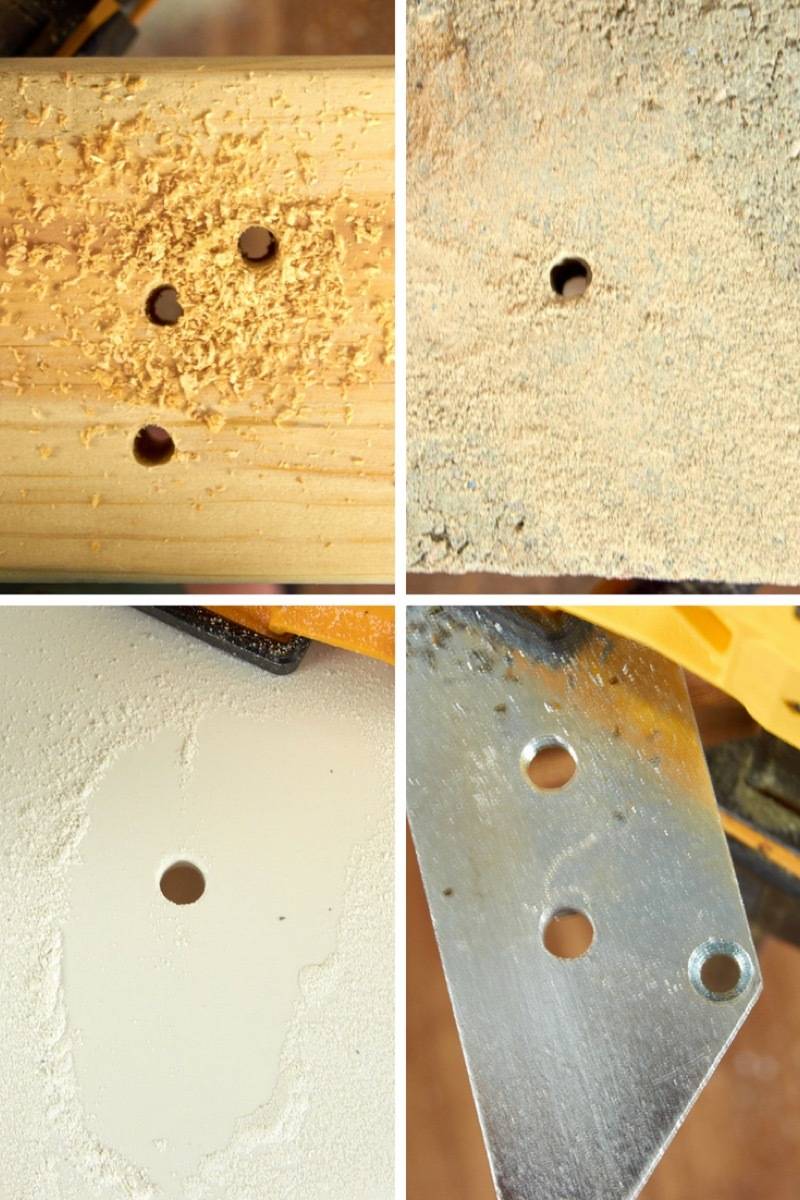
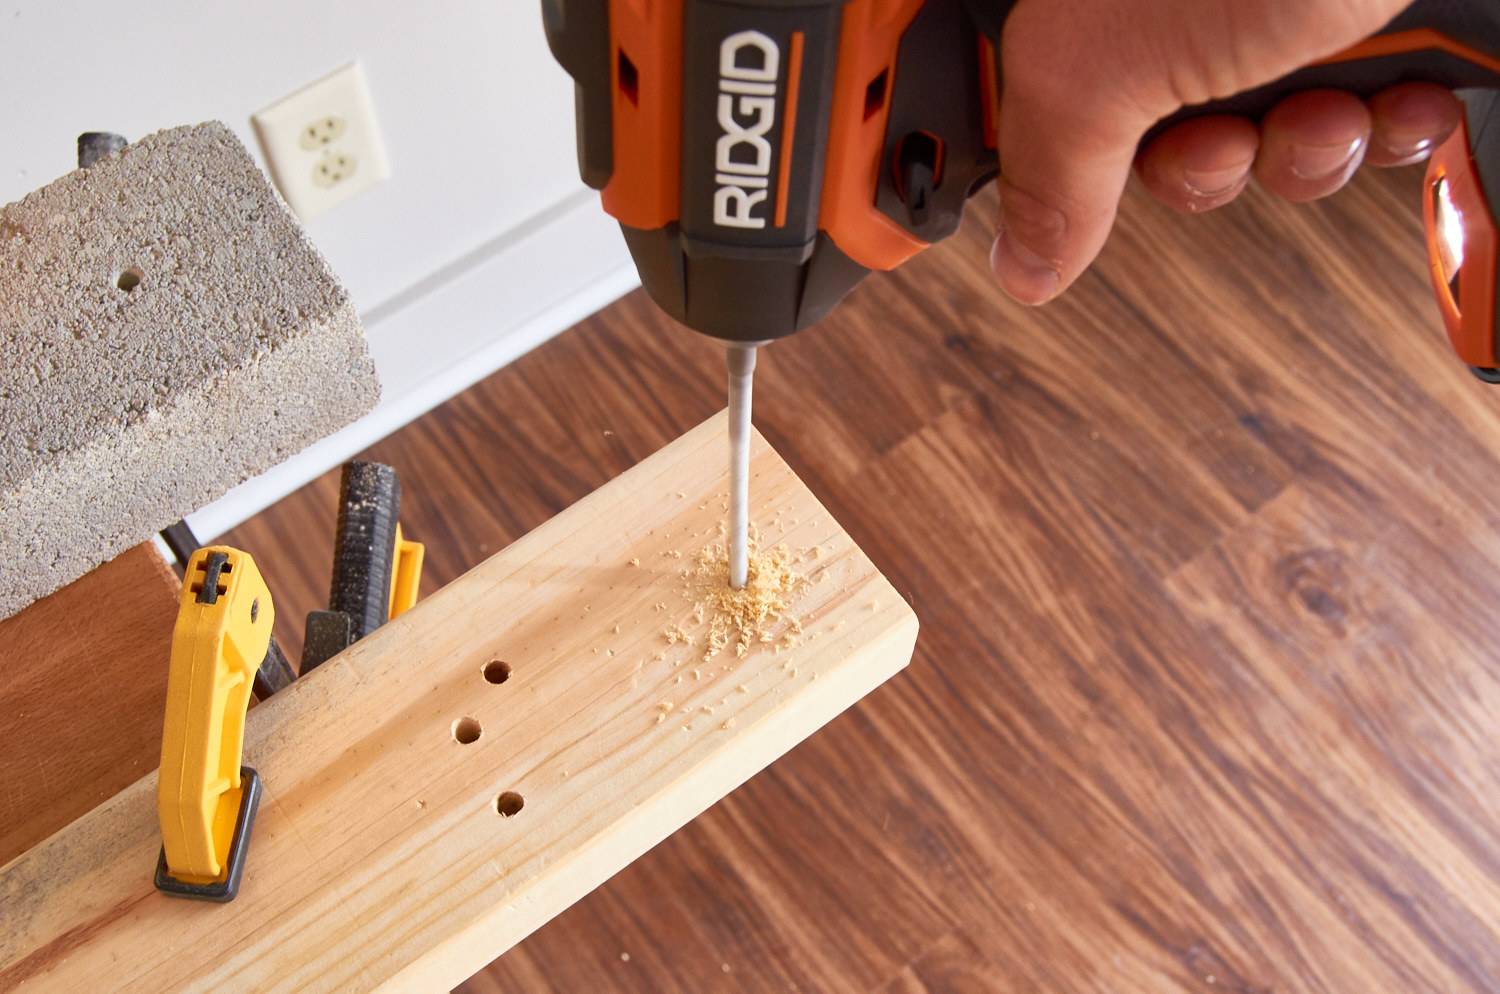
So how’d it do?No complaints here, friends. The RIDGID impact driver, paired with Bosch’s Daredevil bits, blasted through all the materials I tried it on. No difficulty, whatsoever, even when drilling through 4mm of stainless steel. As expected, I received no kickback from the tool, and was able to operate the drill one-handed on all the materials except metal (there, I needed two hands just to keep the bit from wandering).
Do I need an impact driver? I already have a drill!Yes. You do. Sorry. That’s the only correct answer. A drill is super useful and great for a lot of tasks, but just can’t match the power and torque of an impact driver. Without an impact driver, you’ll never be able to free rusted bolts, bore through thick hardwoods, or fix bolts into masonry. And that would just be sad, right? 
What else should I know?Hmm… let’s see. An impact driver is not a precision tool. It’s hard to control the rotation at low speeds, and therefore easier to strip screws and bolts with it. Don’t use one for fixing your mother-in-law’s reading glasses (or, if you do, take a video and let me know ’cause that would be some intense #impactdriverskills). Eye protection is, believe it or not, important when using one of these. You never know when a piece of material will catch and come flying out toward your face. Likewise, while you can operate an impact driver with one hand, you should try not to. Having a second hand on the tool makes it less likely that it’ll slip free and land on your foot. Or your mother-in-law’s foot.
We tested all the drivers in my collection in a thoroughly unscientific (and therefore, fun) roundup. Read all about it here.
This post is part of our new tool school series! This post is sponsored by The Home Depot. All opinions are mine alone. Thanks for reading, and for supporting the brands that make Curbly possible. I acknowledge that The Home Depot is partnering with me to participate in the ProSpective 2018 Campaign. As a part of the Program, I am receiving compensation in the form of products and services, for the purpose of promoting The Home Depot. All expressed opinions and experiences are my own words. My post complies with the Word Of Mouth Marketing Association (WOMMA) Ethics Code and applicable Federal Trade Commission guidelines. The post Tool School: Why an Impact Driver is So Freakin’ Awesome appeared first on Curbly. Via https://www.curbly.com/impact-driver 
As a borderline obsessive flower lover, I’m always on the hunt for new vases and centerpiece ideas. So when I ran across a beautiful rectangular glass container on Amazon, I knew I had to have it (and make something out of it, of course). Click through to check out the resulting trough-style vase that I came up with.
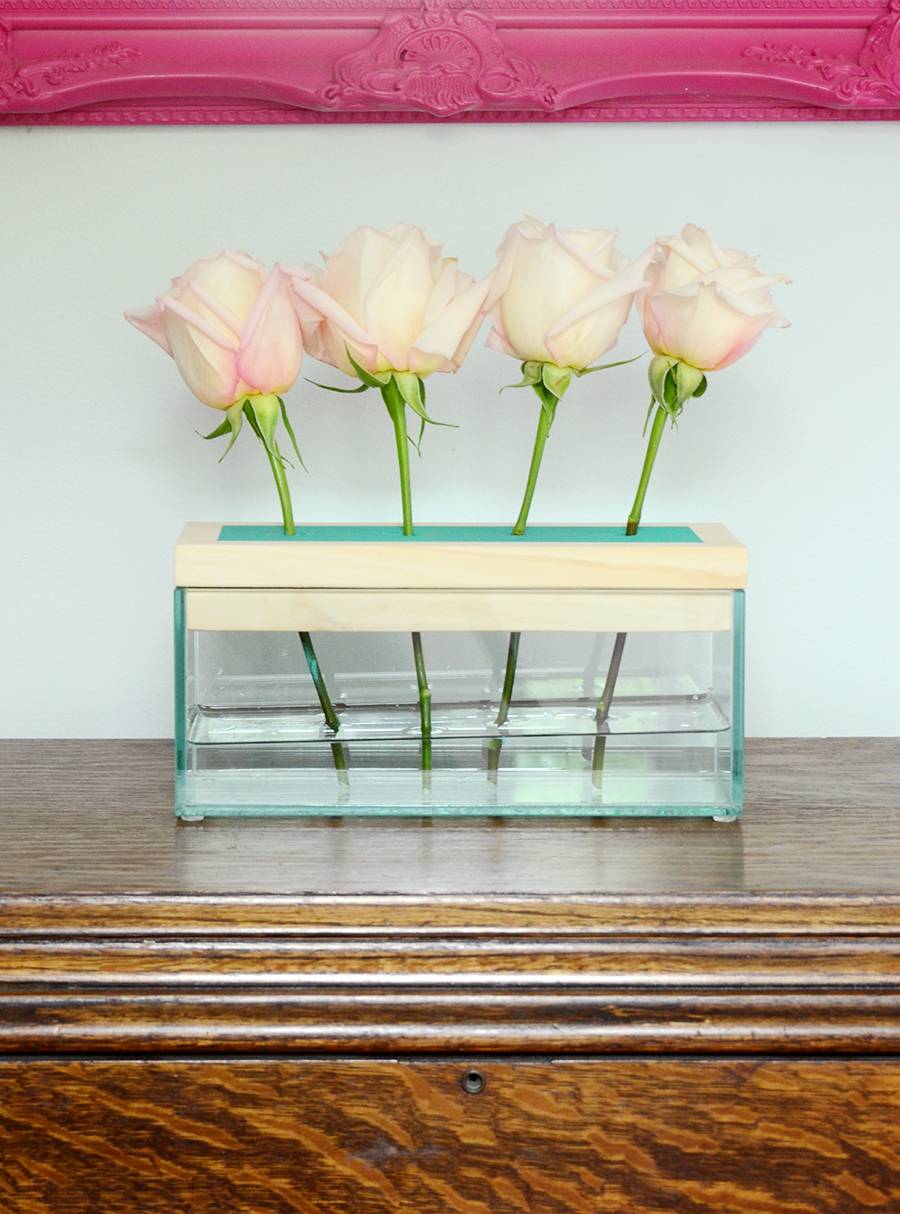
It has space for four stems, and all four draw from the trough of water below. The wooden top is removable, and keeps the stems securely in place. And it’s really quite simple to make! So let’s get started. 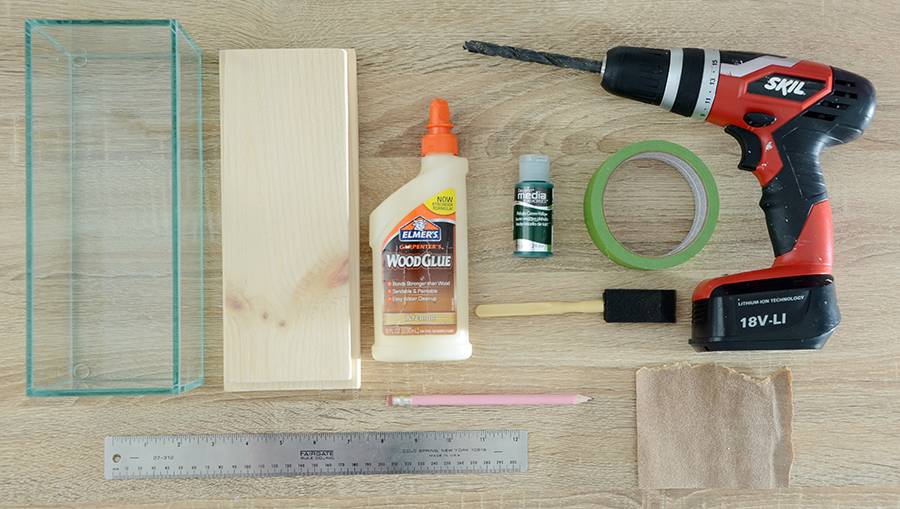
Here’s what you’ll need for your trough vase:
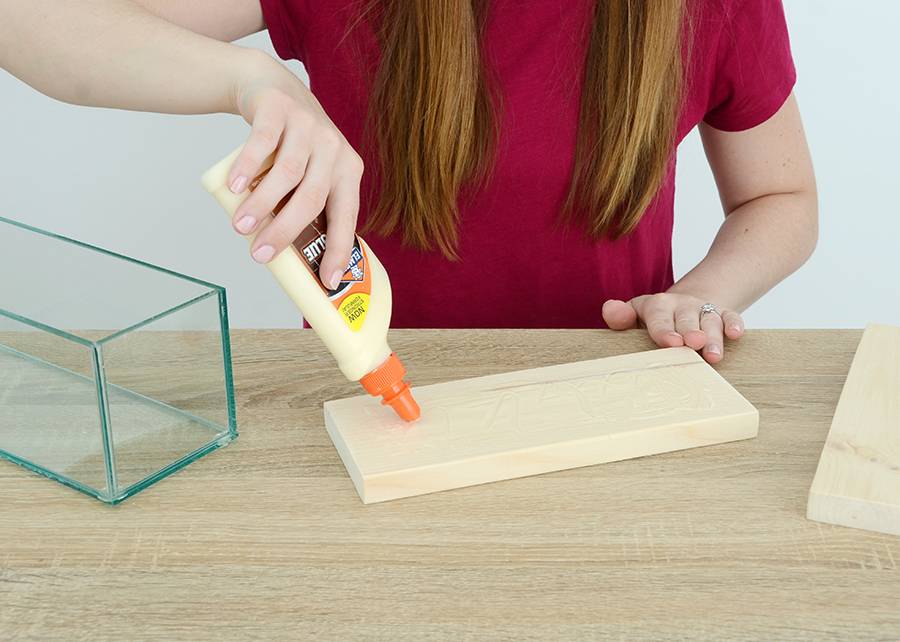
Before you begin, make sure that the larger piece of wood has the exact same measurements as the outside of the glass centerpiece vase and that the smaller piece fits snugly in the interior of the top of the glass vase. If not, sand it down so that it fits nicely. Apply a healthy dose of glue to the larger piece of wood, leaving about a 1/2 inch glue-less around the edges. 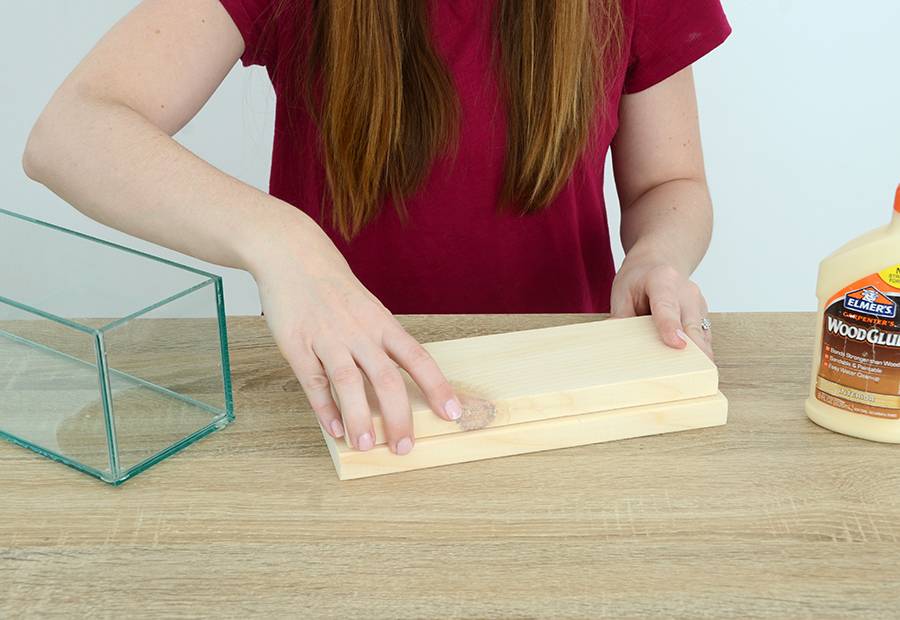
Place the smaller piece of wood on top of the larger one, pressing down firmly. Make sure it is centered. Let it dry for a minute or two until it is quite tacky but not completely adhered. 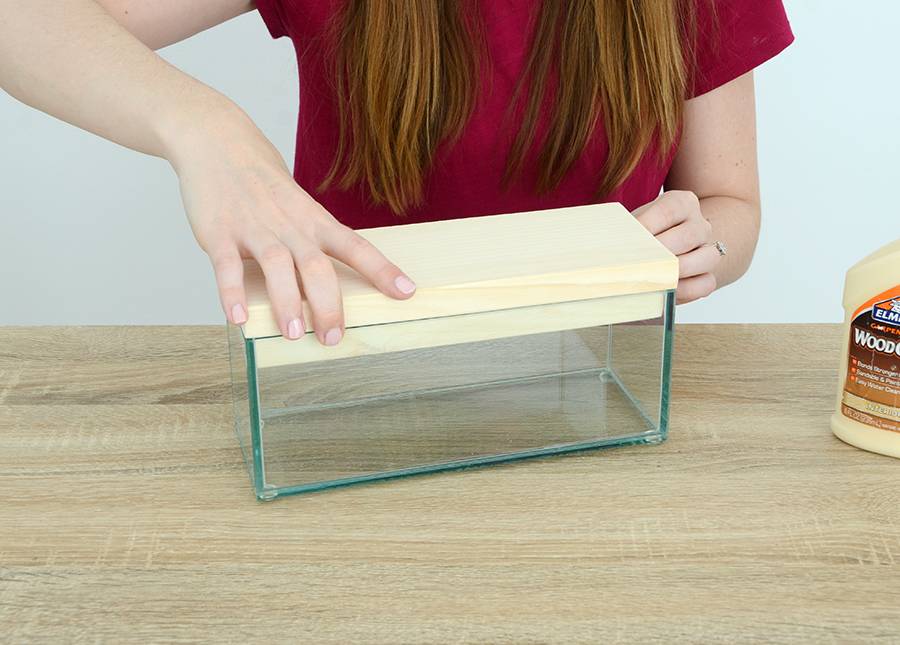
Place it on top of the glass centerpiece vase to make sure that the wood pieces are aligned so that they fit perfectly into the top of the glass vase. Remove it and let it dry for a couple of hours. 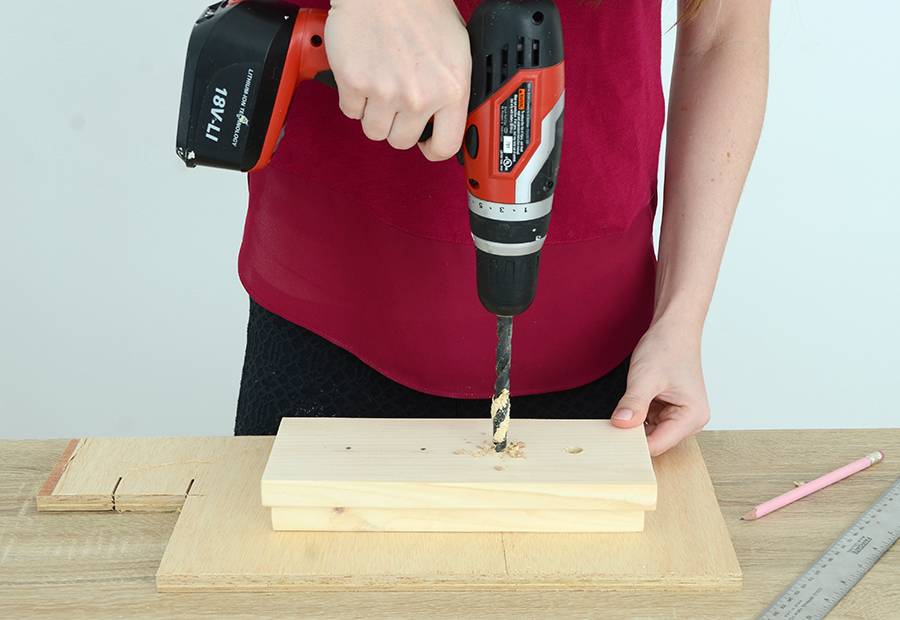
Next, find the horizontal center line of the wood and place four dots along that line as shown above. They should be evenly spaced, with two inches between each dot. Drill a hole down through each mark. Don’t forget to place a piece of scrap wood underneath. Sand any rough edges. 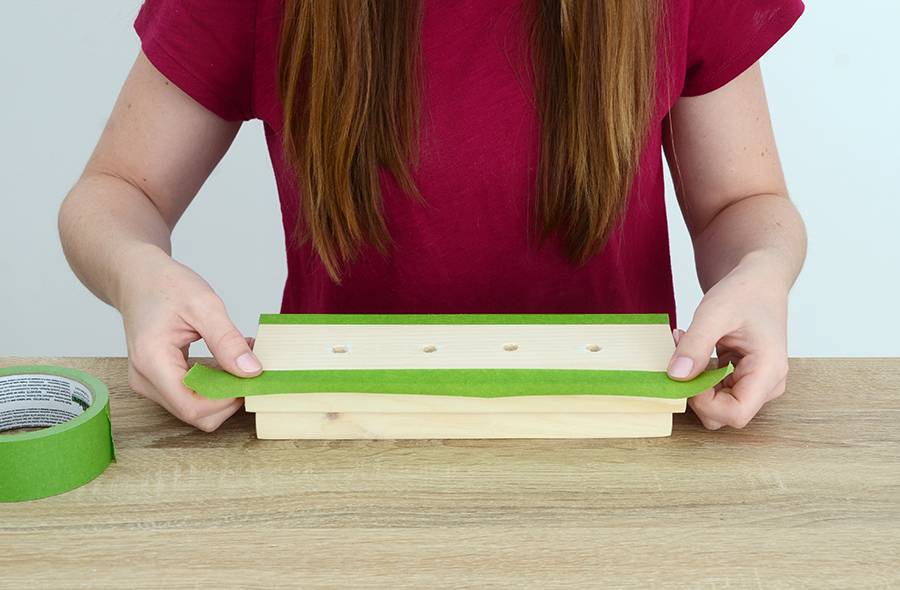
Mask off a 3/4 inch perimeter around the top using painter’s tape. Press firmly around the edges so that they form a strong bond to the wood. 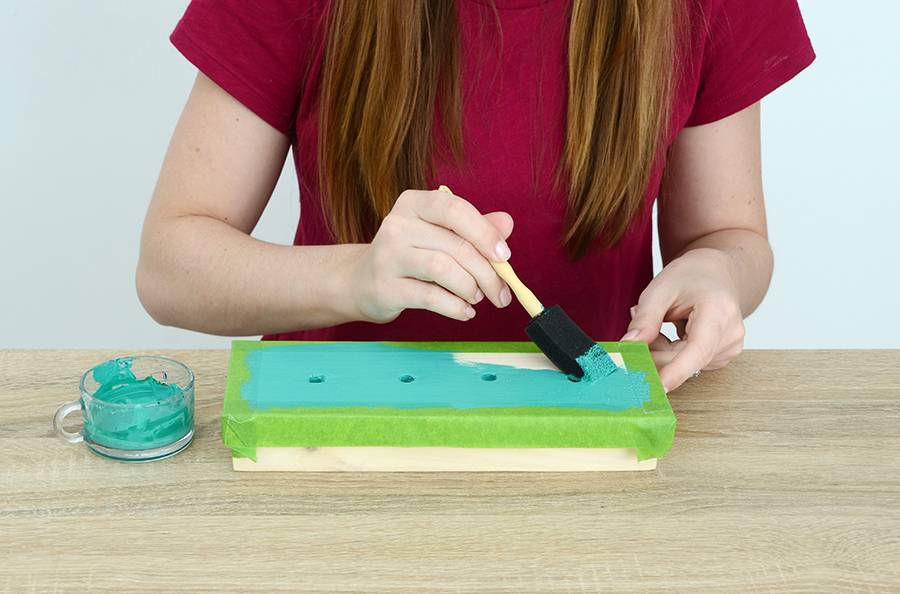
Paint inside this taped-off rectangle with acrylic craft paint in the color of your choice. 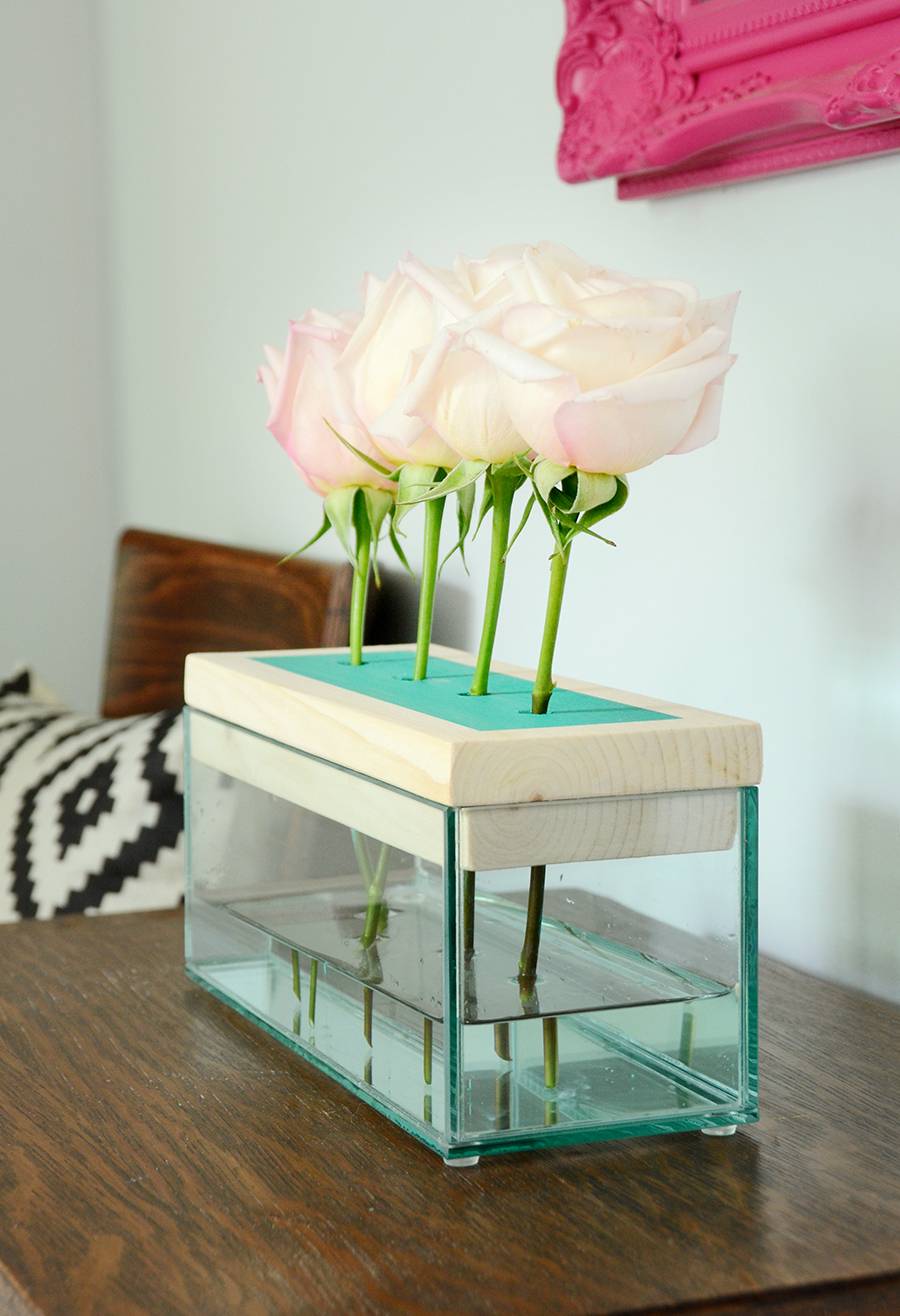
Remove the tape, let the paint dry, and you’re finished! Fill the glass vase with water and insert four stems for a unique centerpiece for your dinner table, kitchen island or accent table. 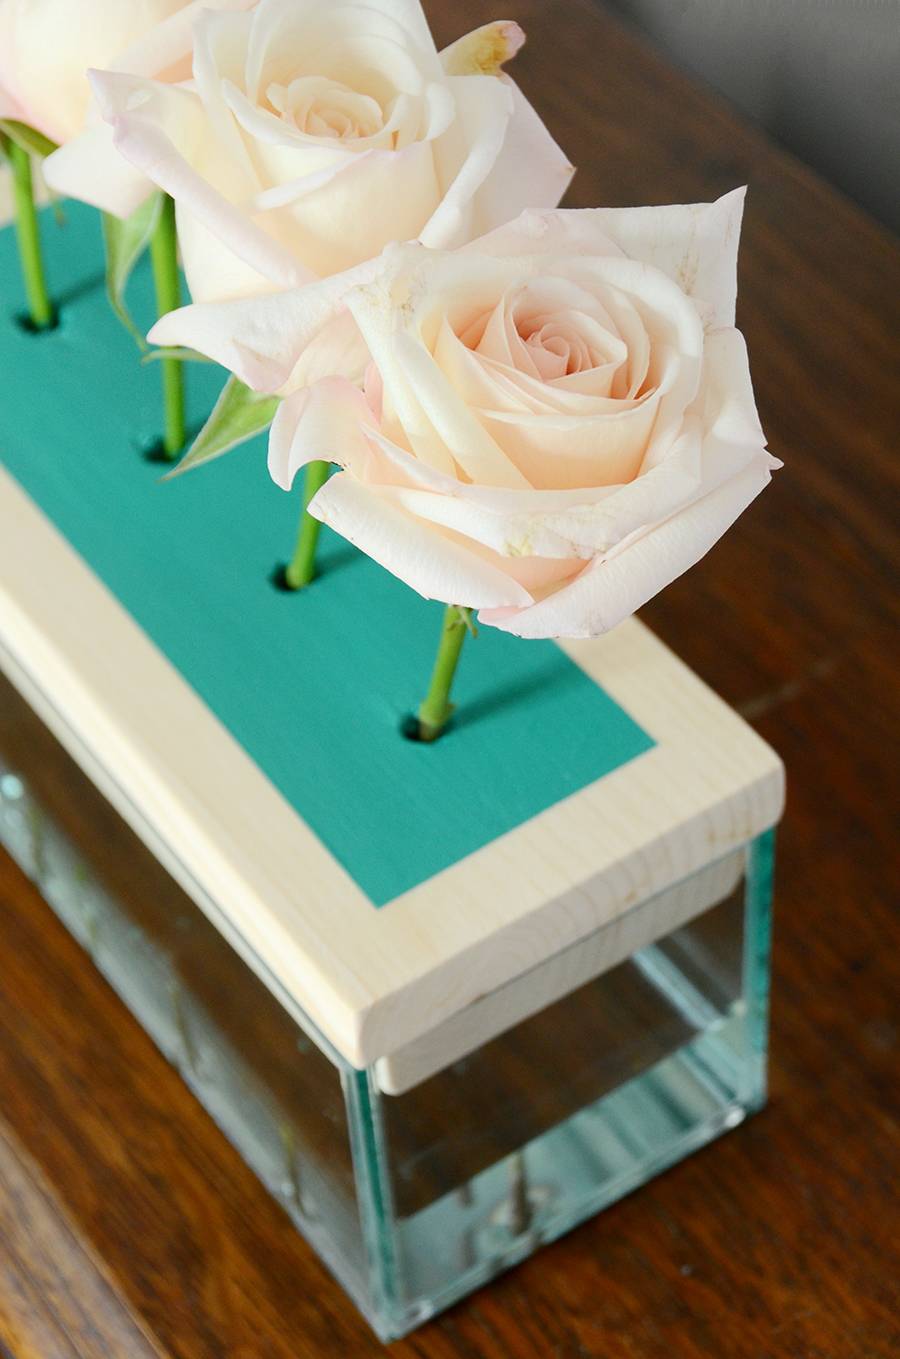
This is sure to be a conversation starter, thanks to its unusual design and contemporary vibe. You can change the look of it by trying different types of flowers… calla lilies would lend a modern feel, while daisies would give it a more rustic sensibility. 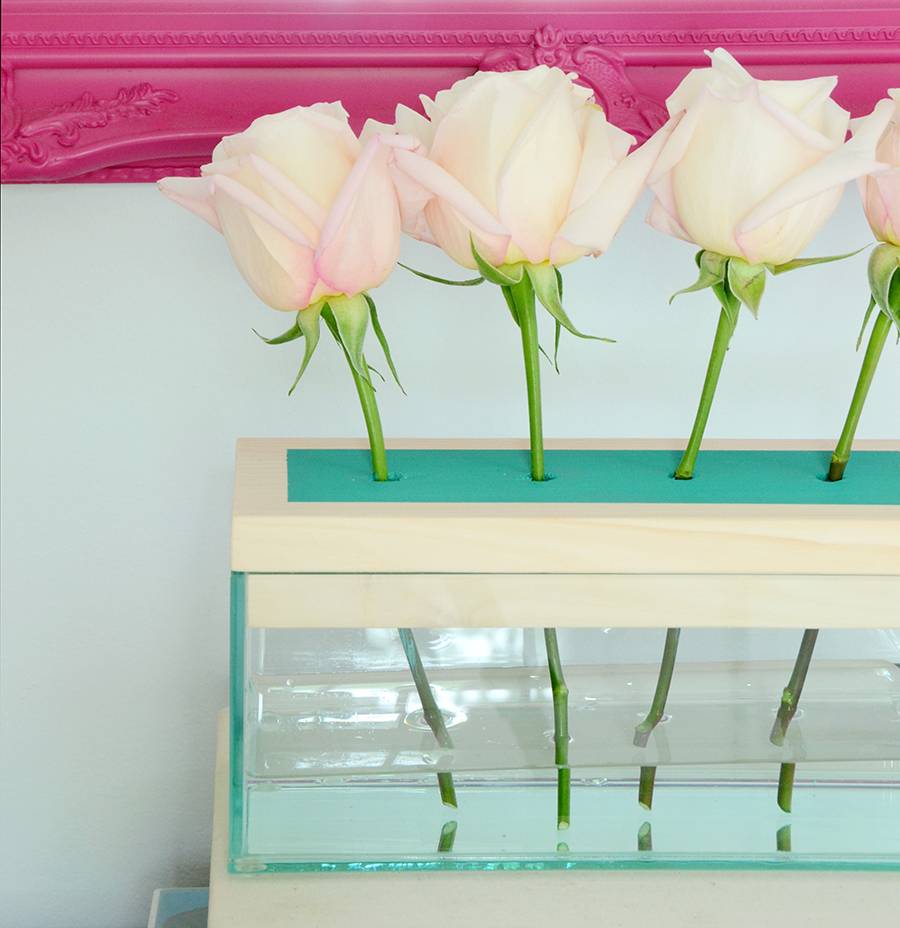
You might also consider a different color or even a different finish for the top part – a dark stain would be beautiful, or a metallic rose gold would look super glam. 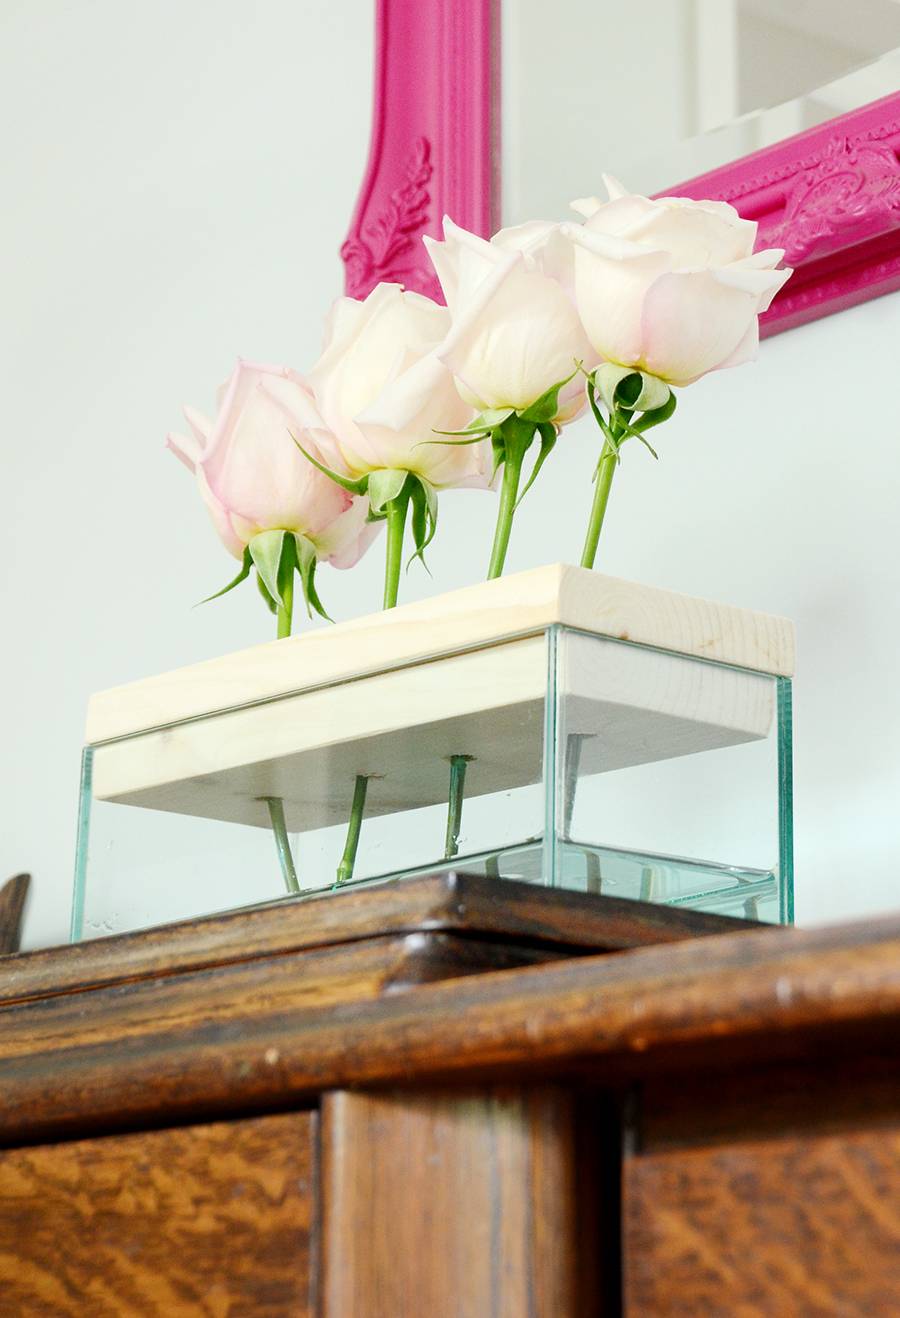

While this project looks like it would be difficult to complete, it’s actually surprisingly simple and quick to finish. You should be able to do it in an hour or two (not including drying time), depending on how quickly you work. Feel free to post questions or links to your own versions in the comments section below! 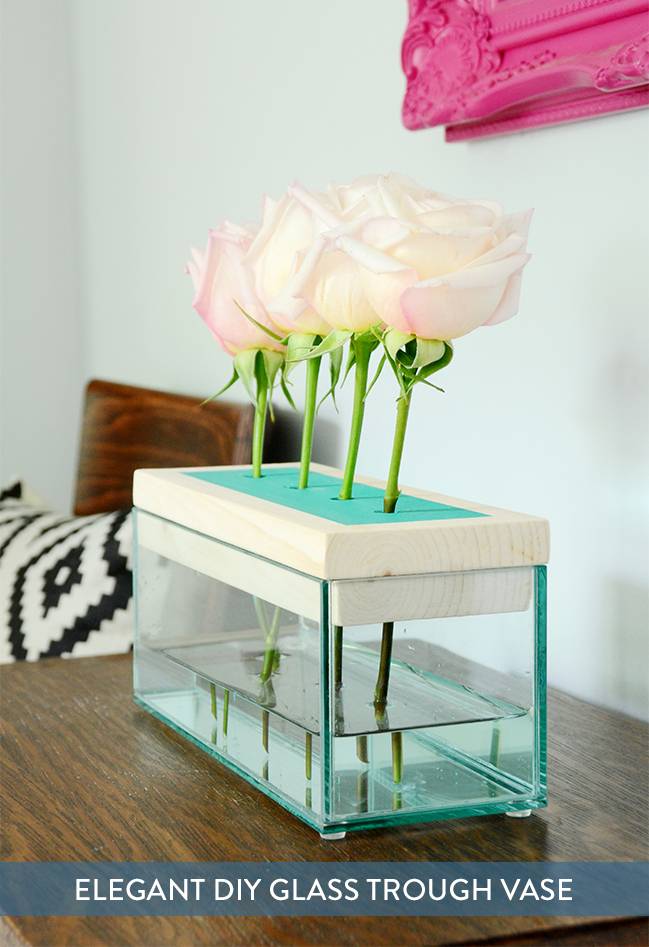
The post Elegant DIY Wood and Glass Trough Vase appeared first on Curbly. Via https://www.curbly.com/elegant-diy-glass-trough-vase 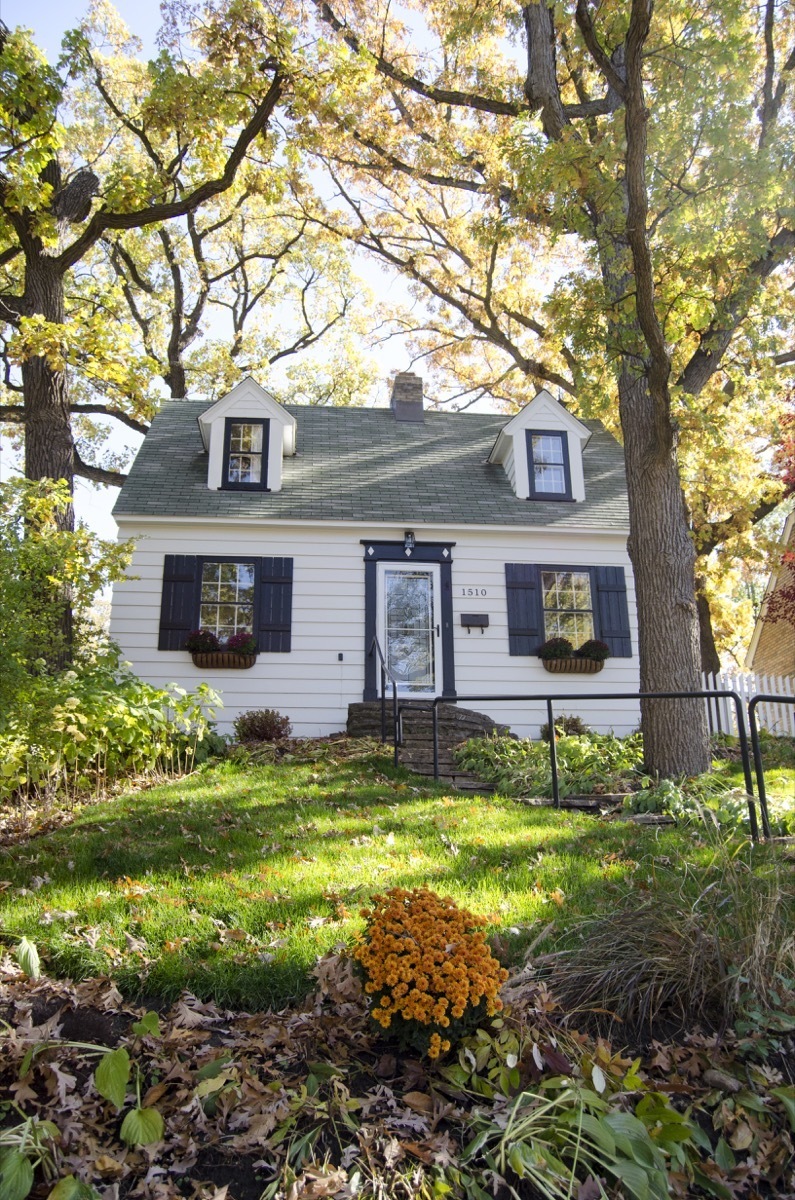
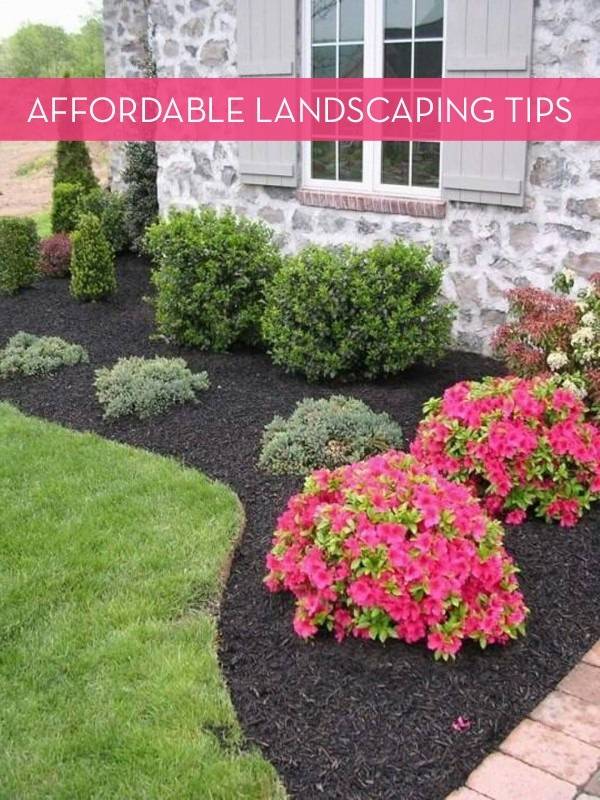
Being a homeowner is a big responsibility, and while there’s plenty to take care of inside you home, don’t forget about the outside, either. If you’ve ever looked into the cost of hiring a professional landscaper, you know they’re not cheap. Fortunately, there are a slew of inexpensive and affordable DIY landscaping ideas at your disposal, so long as you’re willing to get your hands a little dirty. From the front yard to the back, barbeque pits to bistro lights, here are 59 ways you can affordably improve your outdoor space. Front Yard Ideas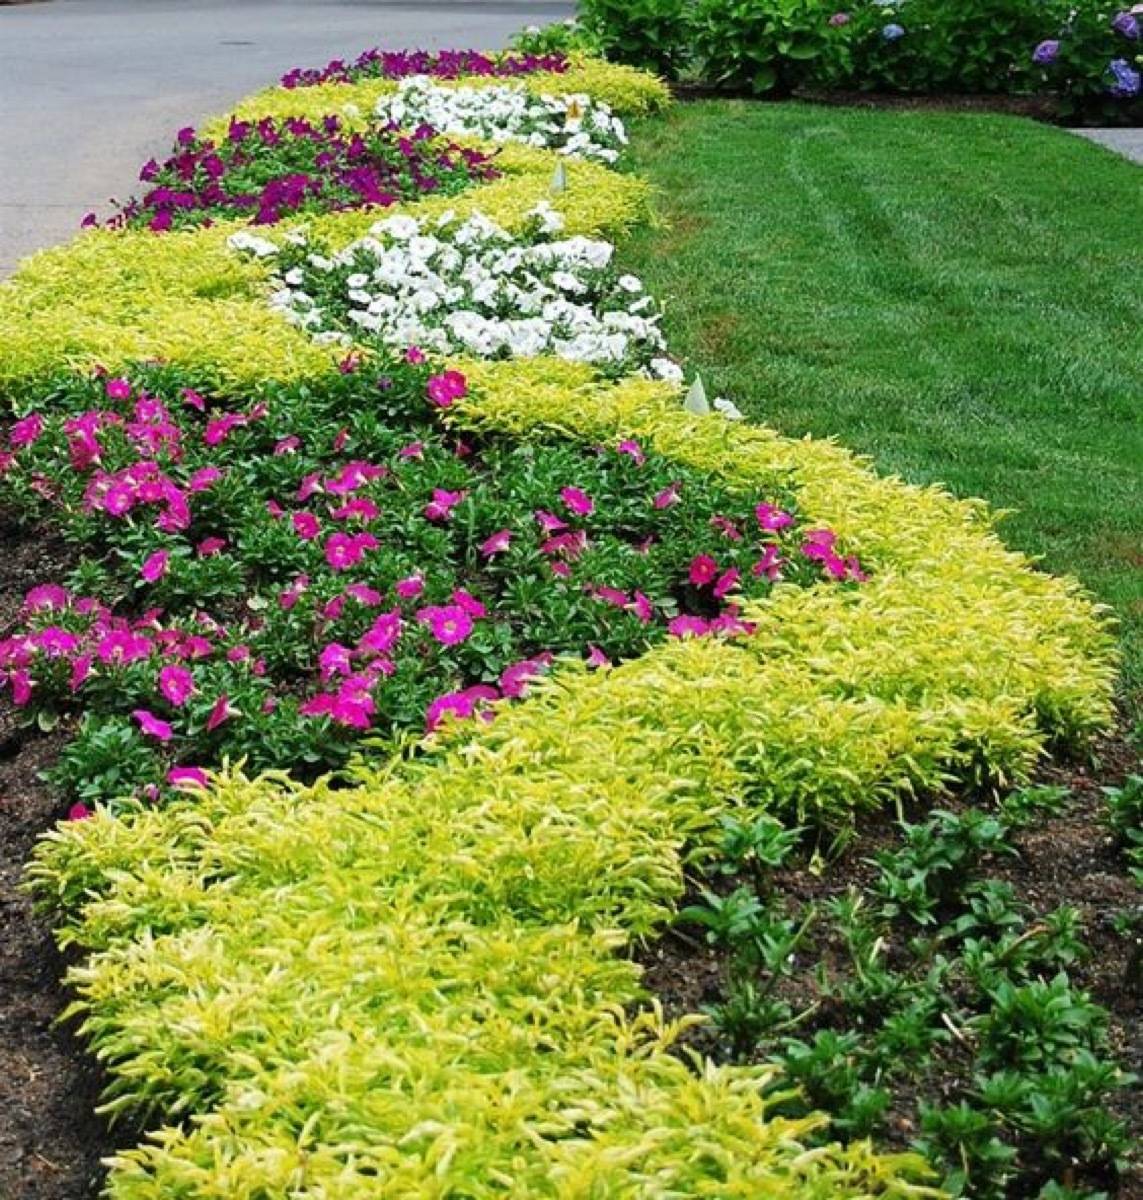
1. To create dynamic visual impact with little long-term commitment, try layering flowers and low-growing greenery in your front yard. These plants are arranged in the ground in a curving pattern, rather than just straight across the lawn. 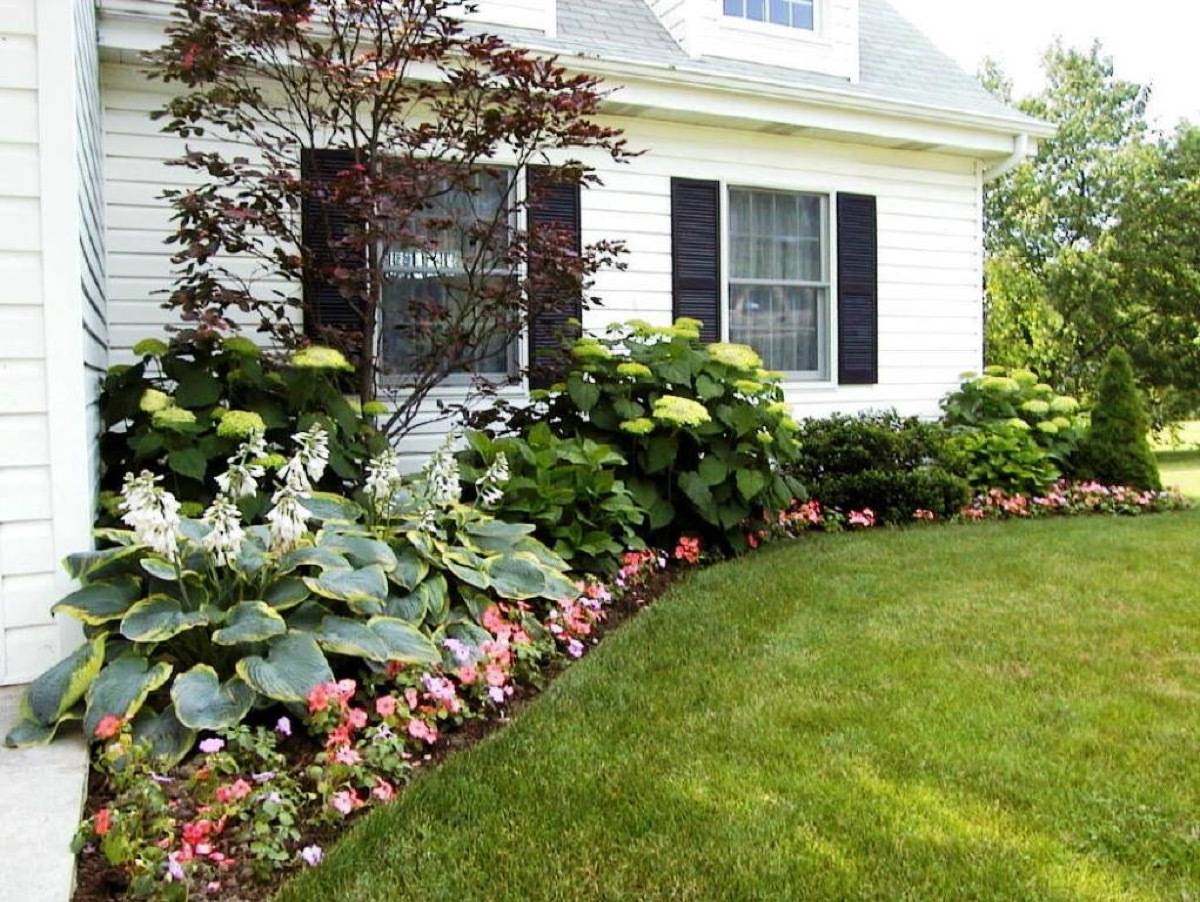
2. Add drama by layering the height of your plants. Big in the back, small in the front. 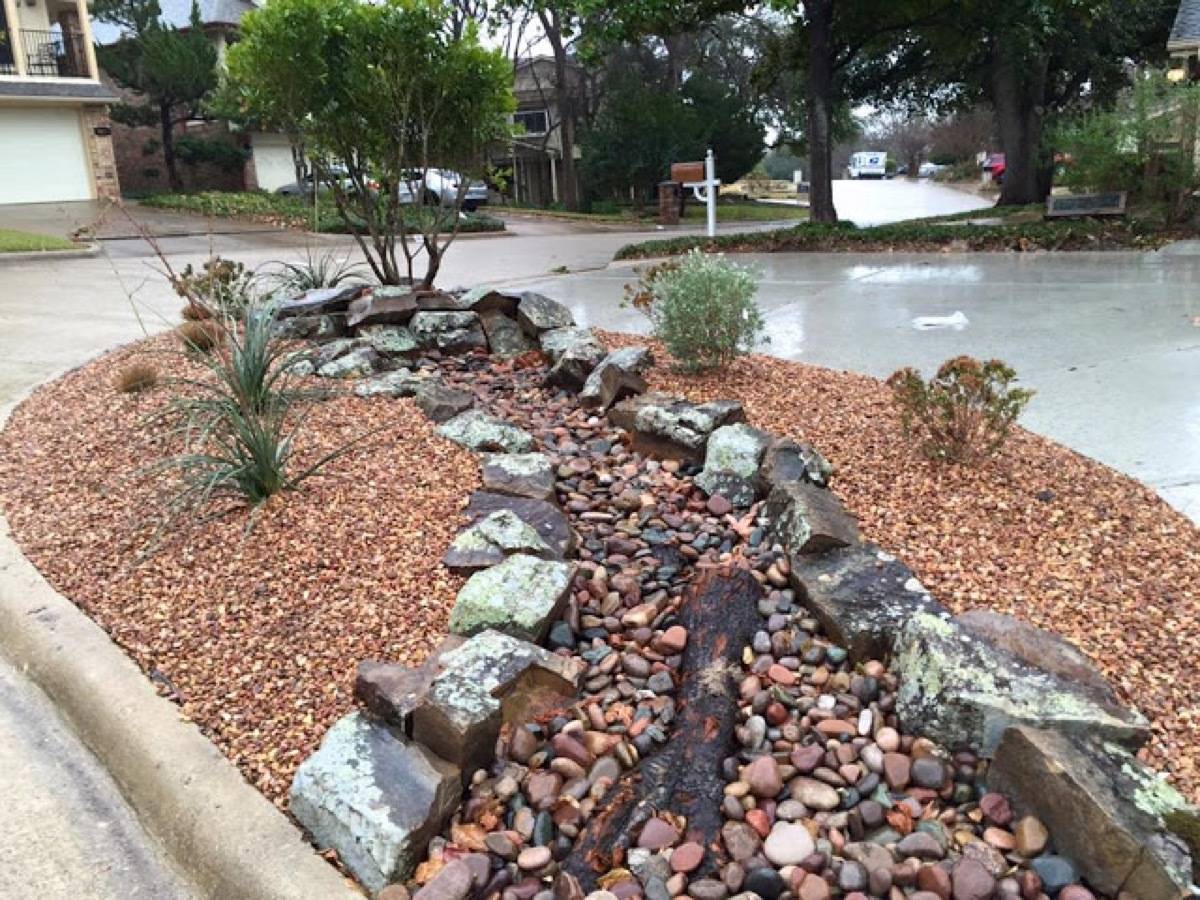
3. Have a section of your front yard that’s too awkward to mow? Fill it with rocks. Problem solved. 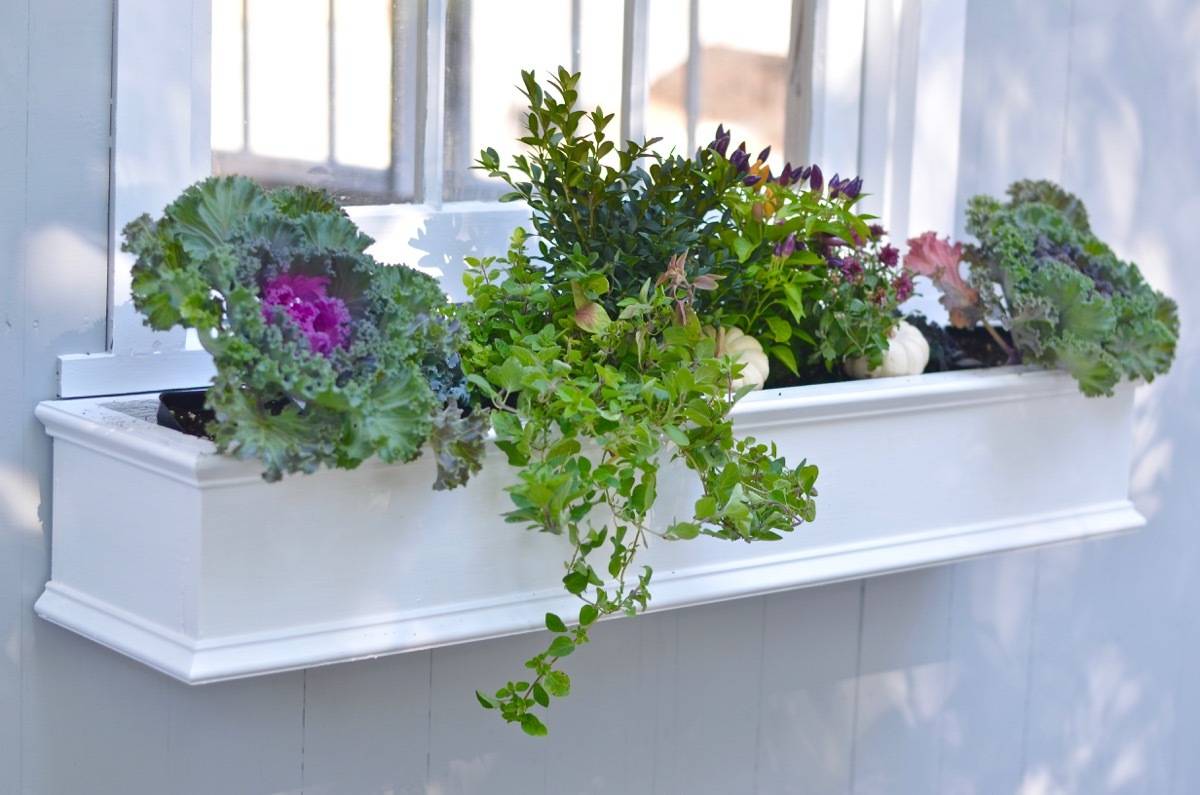
4. Take the DIY landscaping ideas off the ground and to the house by installing a few window boxes (they’re surprisingly easy to build). 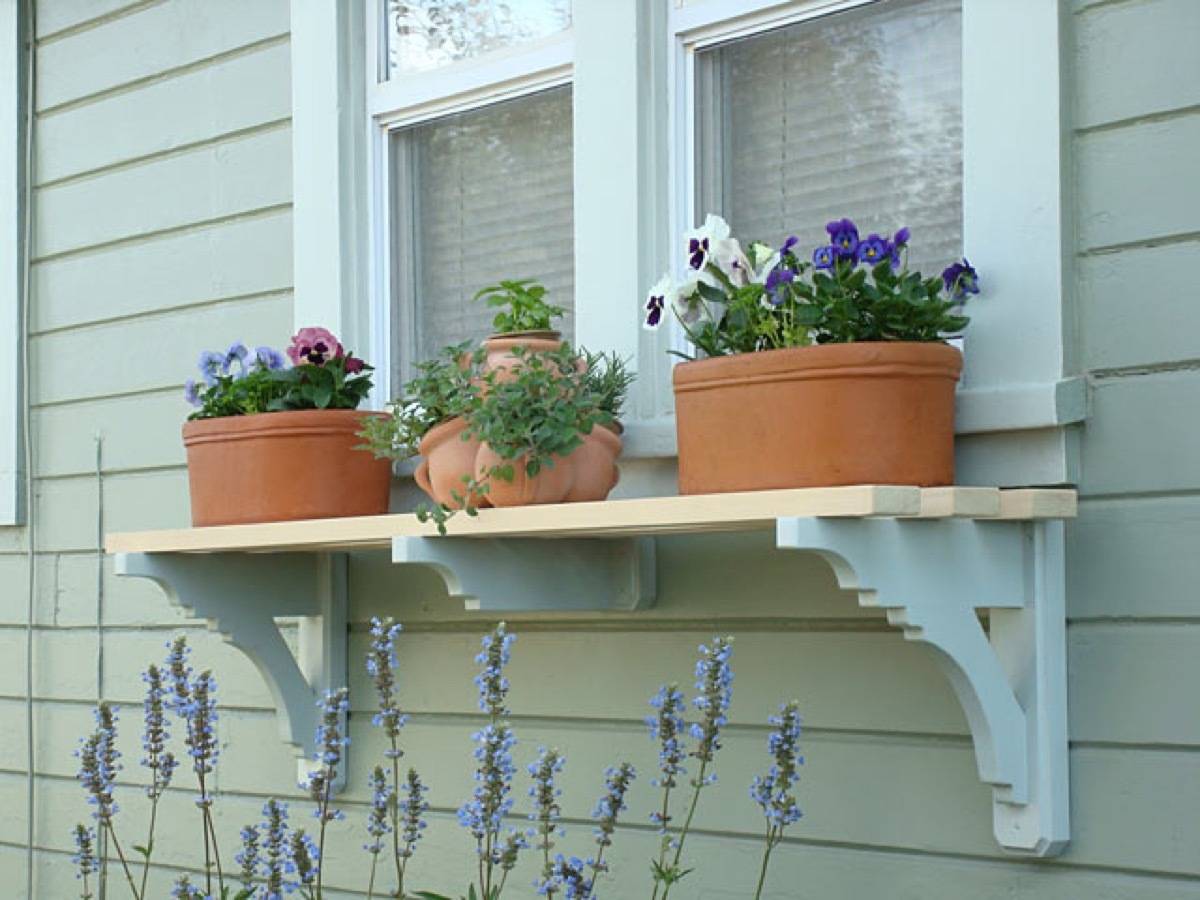
5. Or try an outdoor shelf instead. 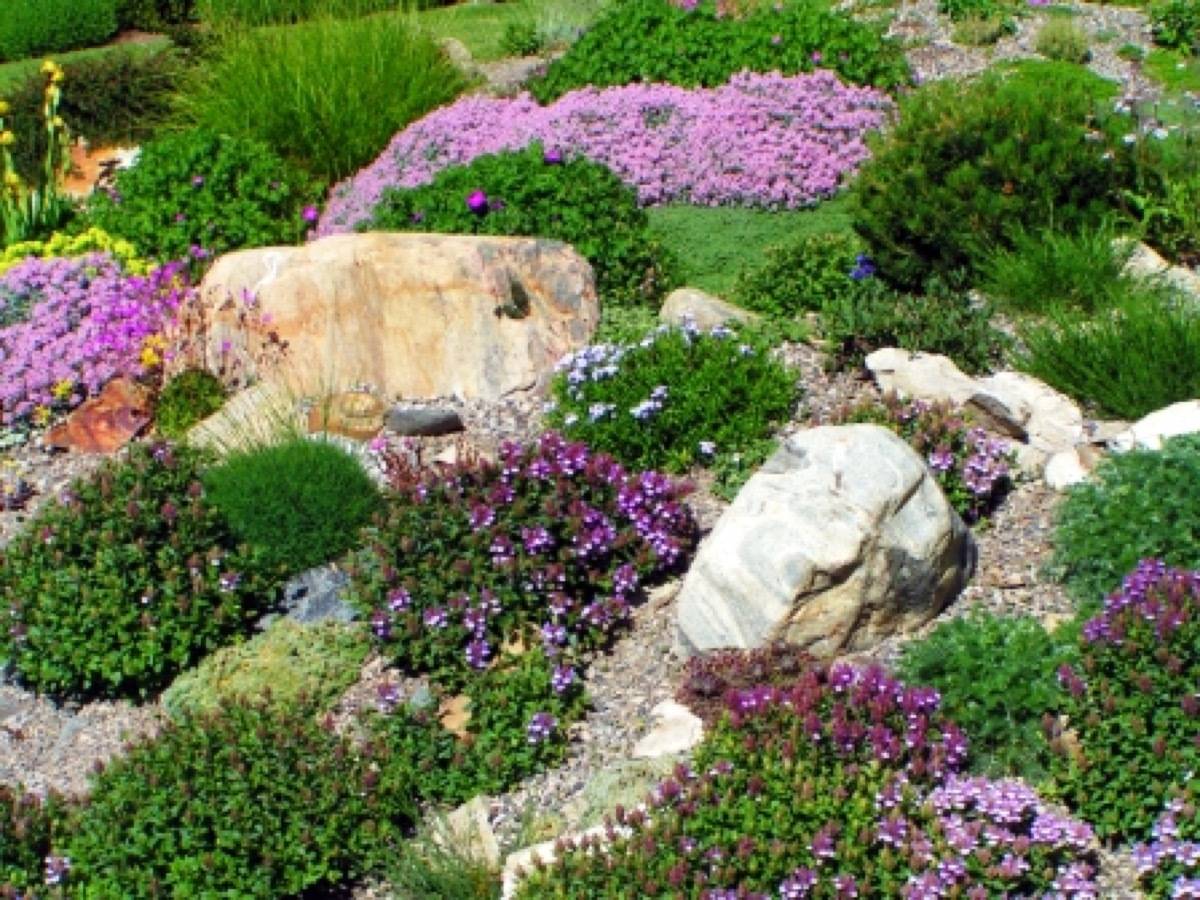
6. If you have a large front yard with little dynamism, add large boulders and rocks for variety. 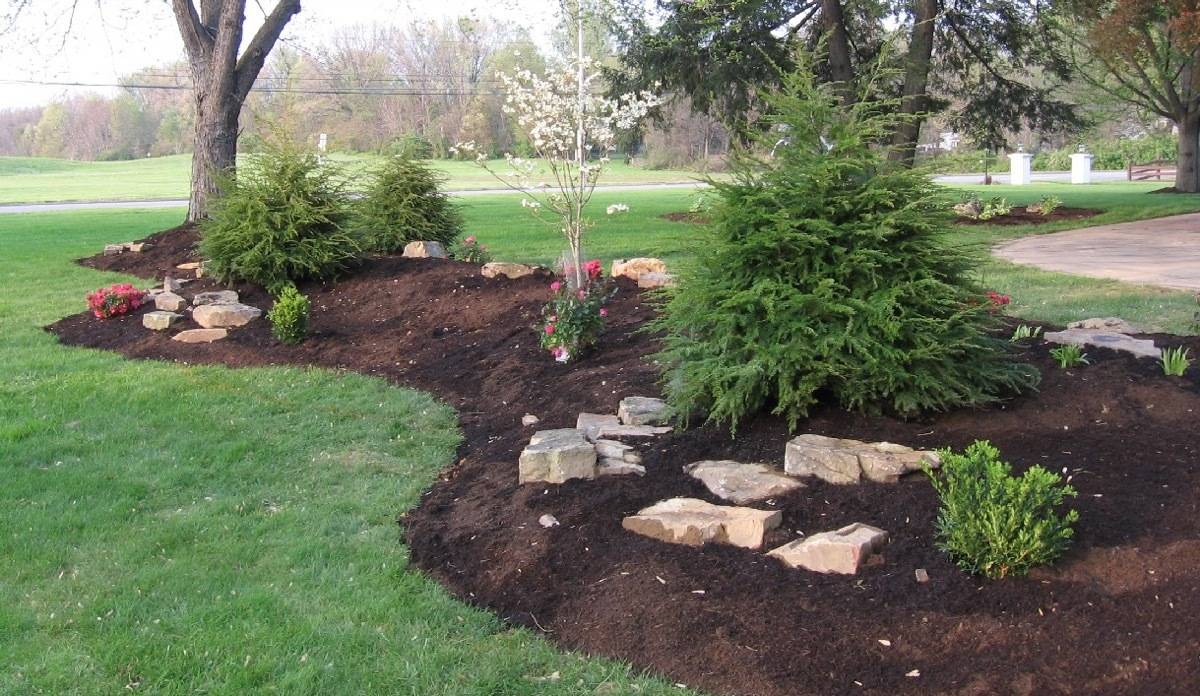
7. How about creating a berm? What’s a berm, you ask? It’s when you transform your totally flat yard by creating mounds of interest. Easy, and totally affordable. Be sure to do your research first before create a berm around the base of any tree, as too much dirt can suffocate the tree. 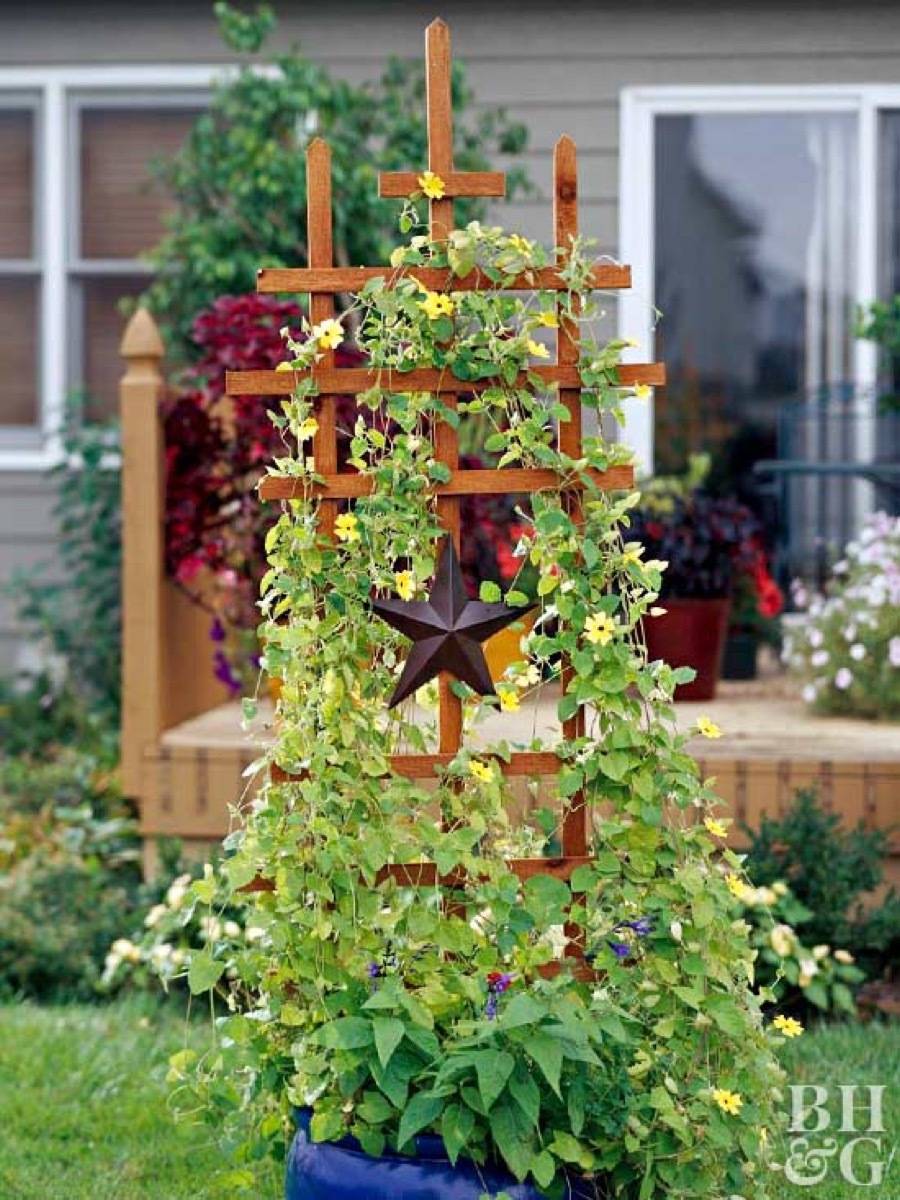
8. No trees on your lawn? Build a trellis or two for your front yard flowers to climb (they are also fairly inexpensive to purchase). 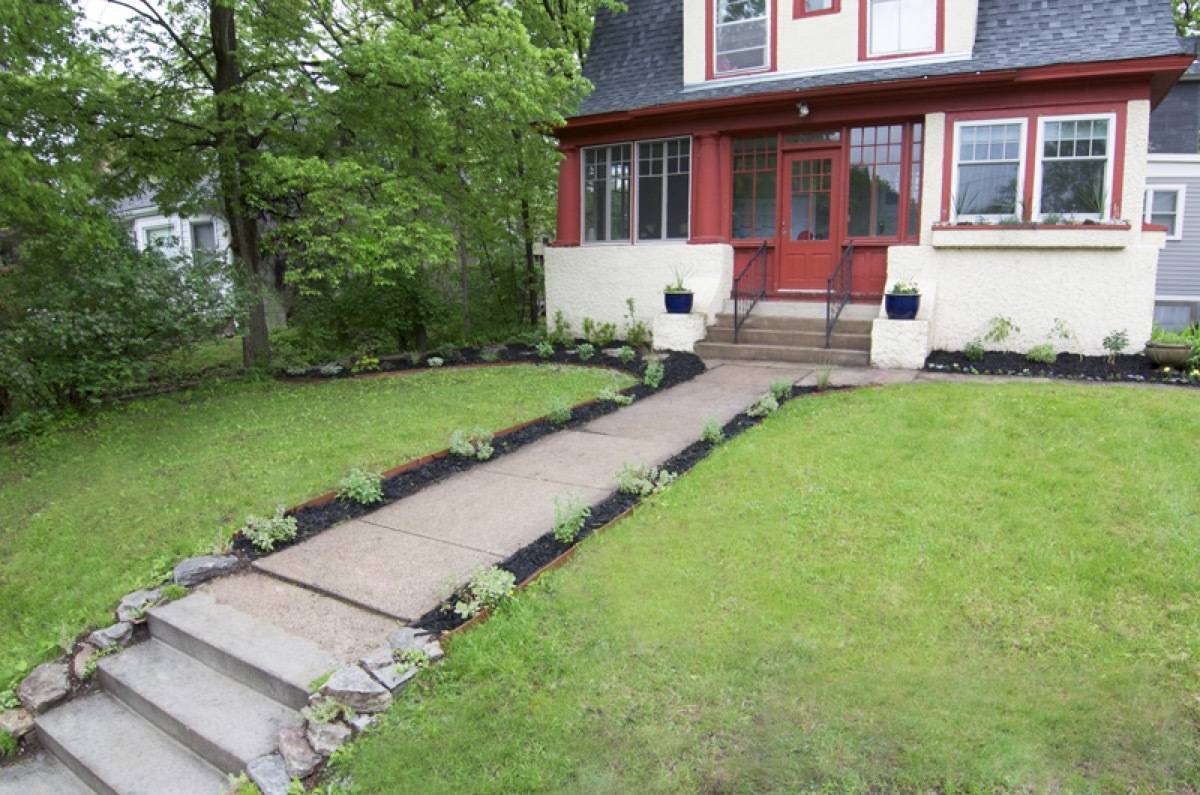
9. Looking for inexpensive ways to create borders or edging? Border your walkway with plants and flowers to define lines in the front yard. 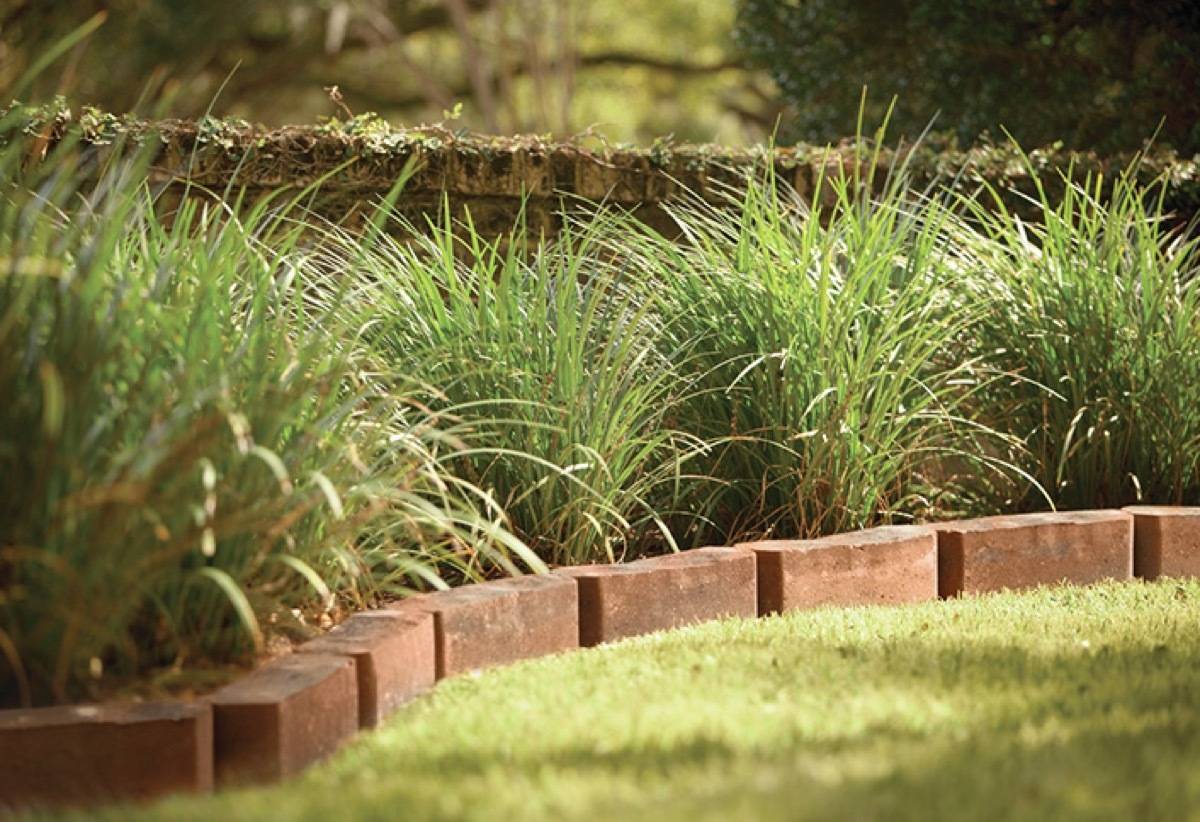
10. DIY landscaping ideas don’t get much more affordable than this: install brick edging to outline areas of your yard using salvaged or recycled brick. 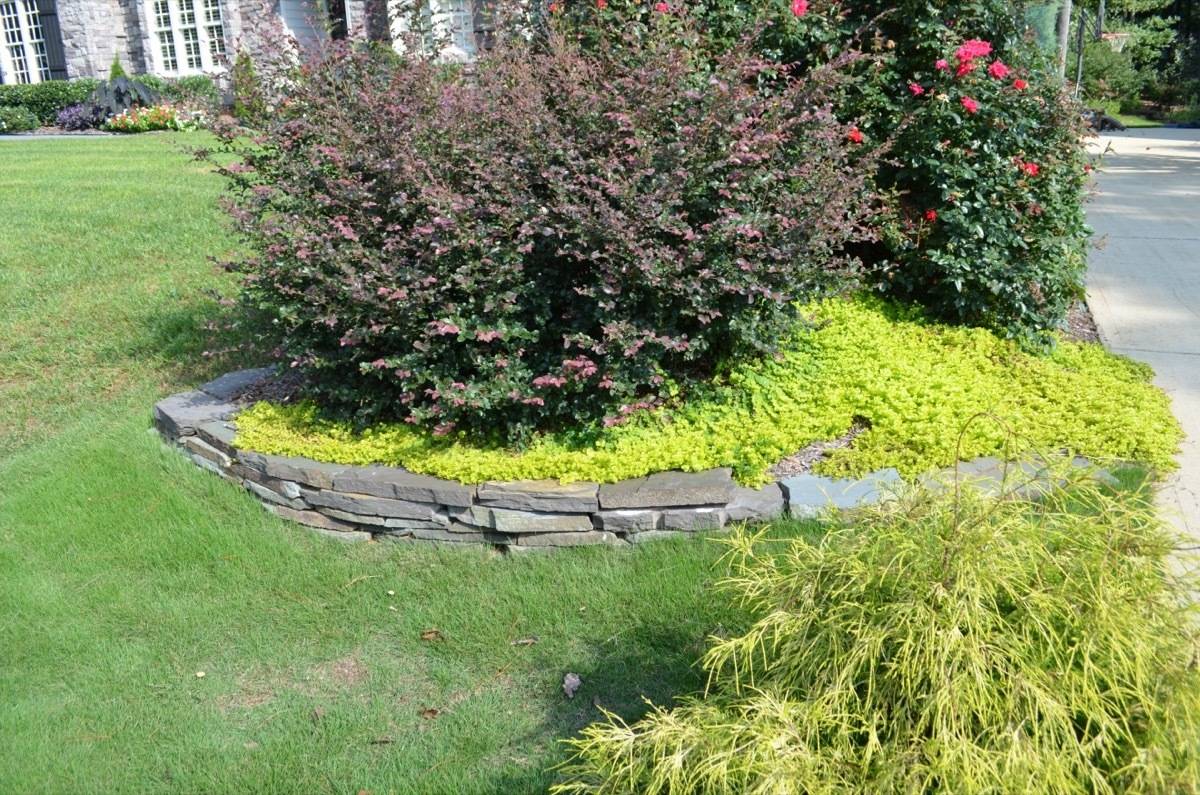
11. Go for a more natural look by using stone to edge your plants. 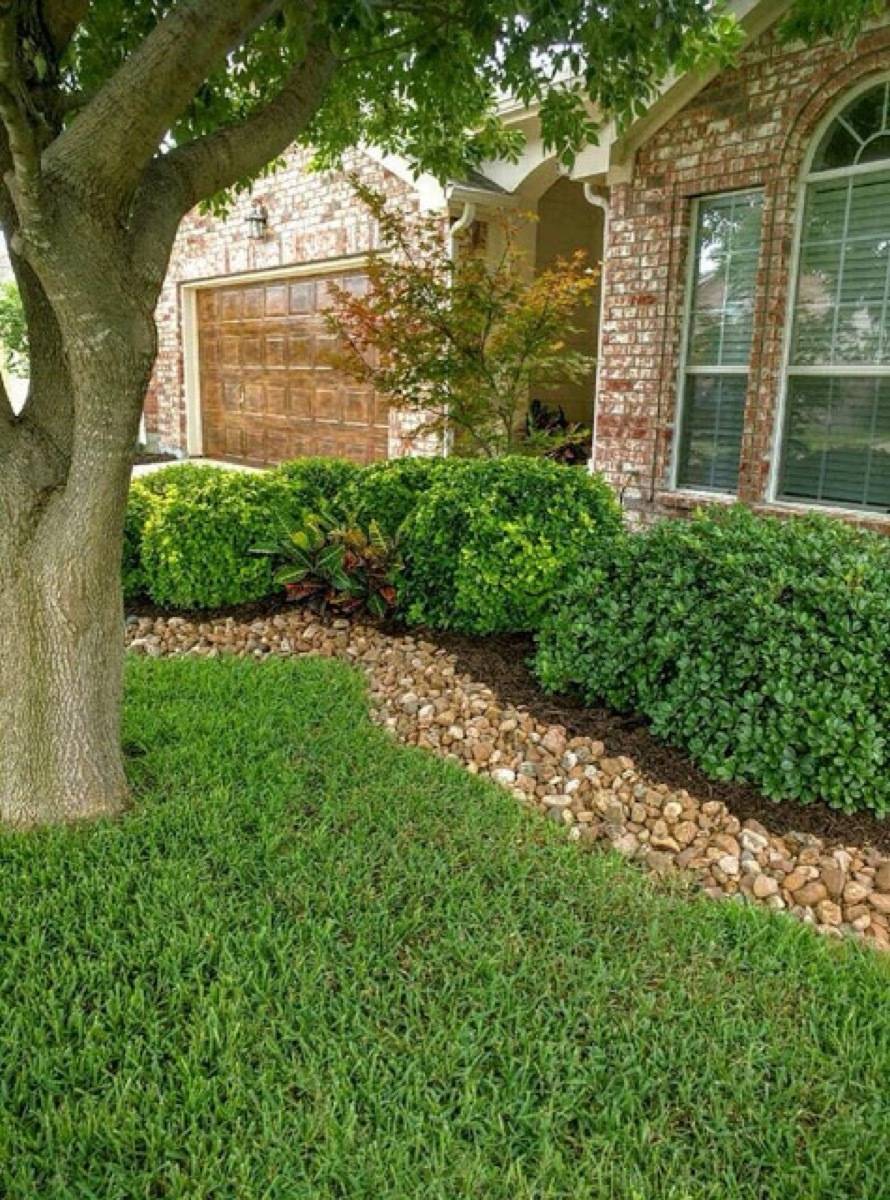
12. Or, edge flower beds with river rock. How easy is that? 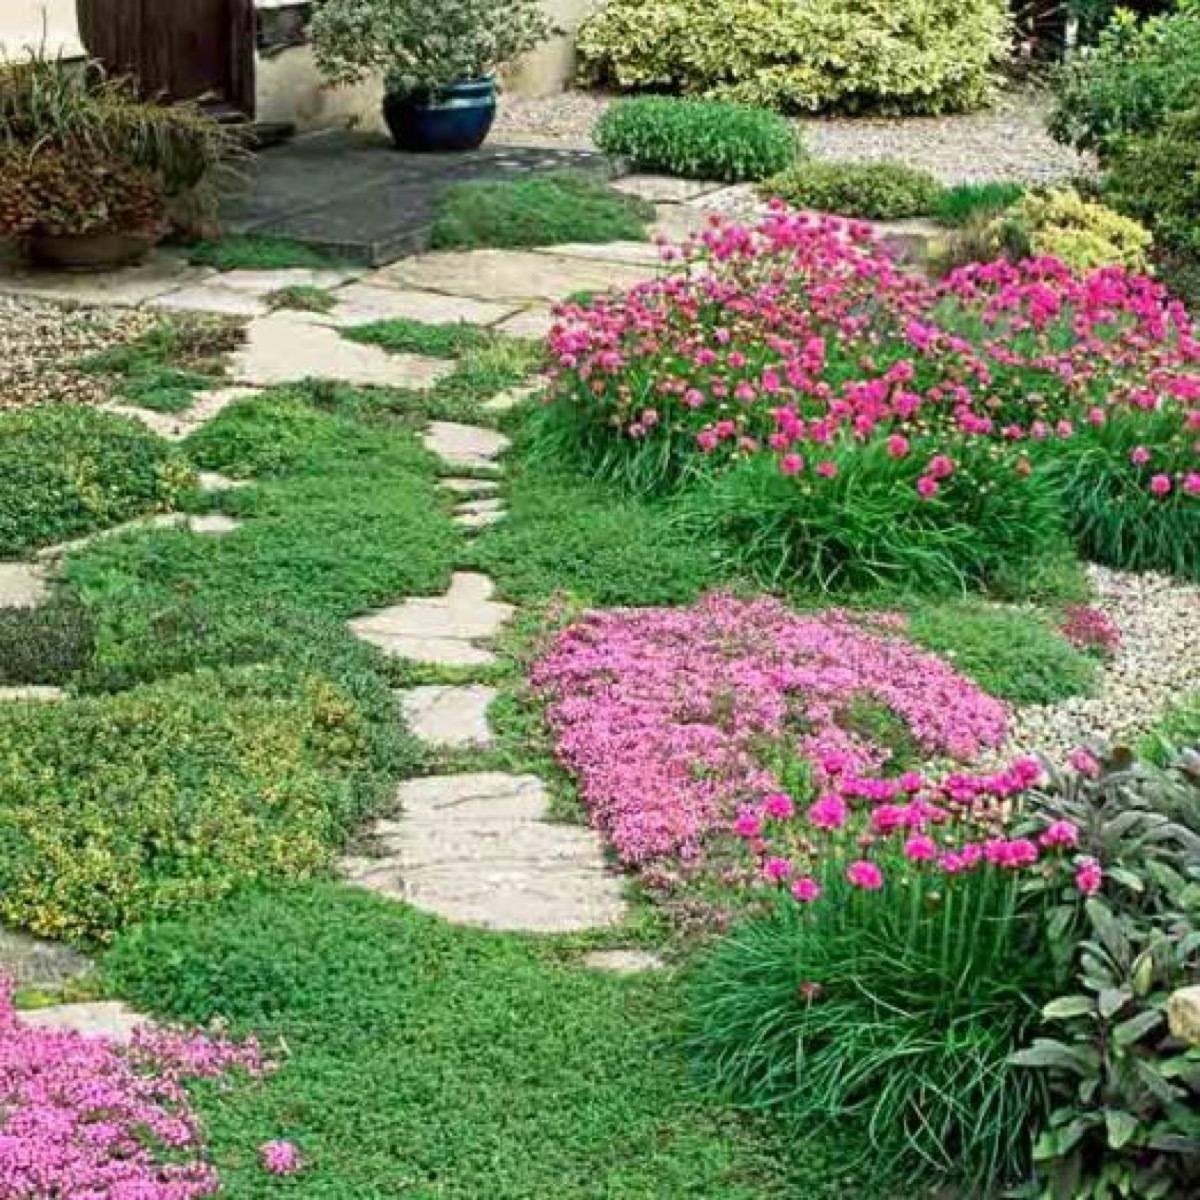
13. If you want to keep your yard tame but still want contrast, consider a ground cover plant. Add a few of these low-growing ground cover plants to add variation and color. 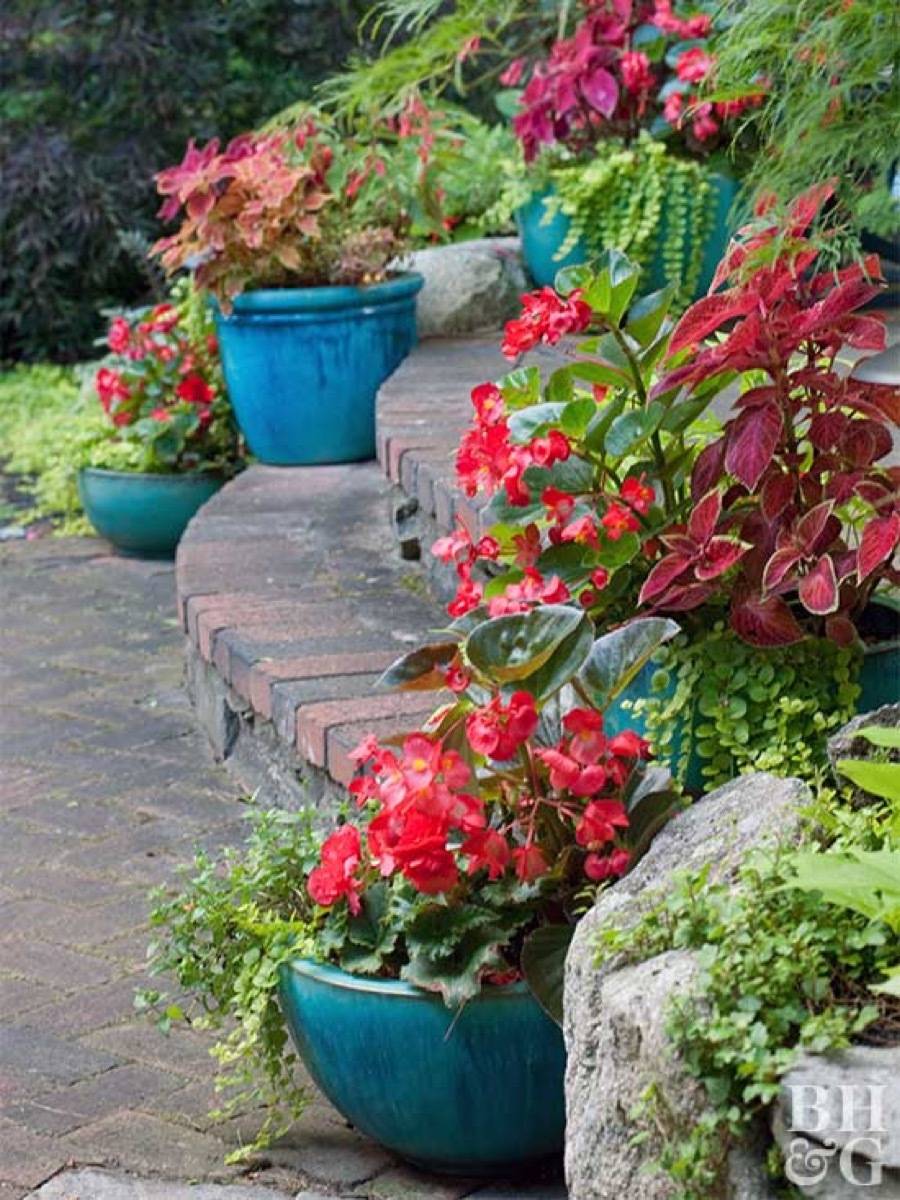
14. Display flowers in containers along steps, walkways, or on ledges. This is a great way to add visual interest if you have a lot of brick or asphalt in your front yard. 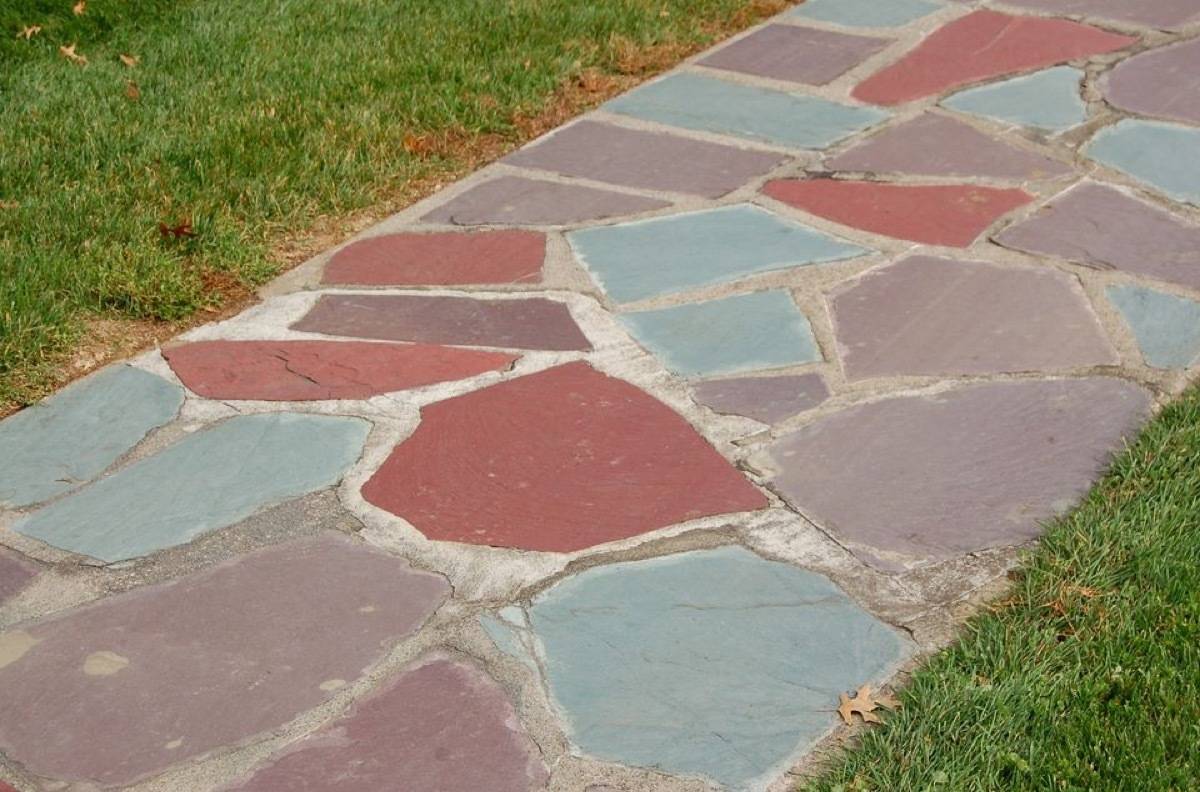
15. You don’t need a professional – learn how to add a pretty stone walkway that leads right to your front door. 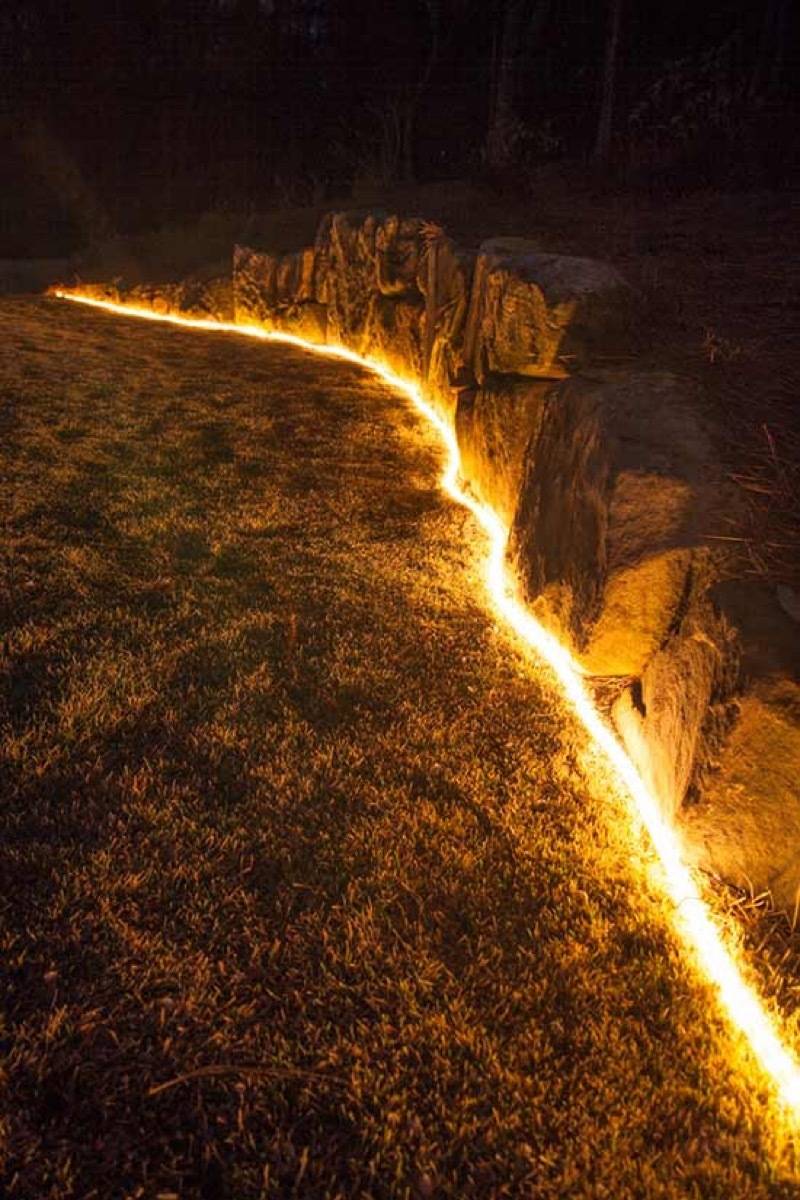
16. Use rope lighting to create illuminated borders to your front yard for a bright footpath at night. 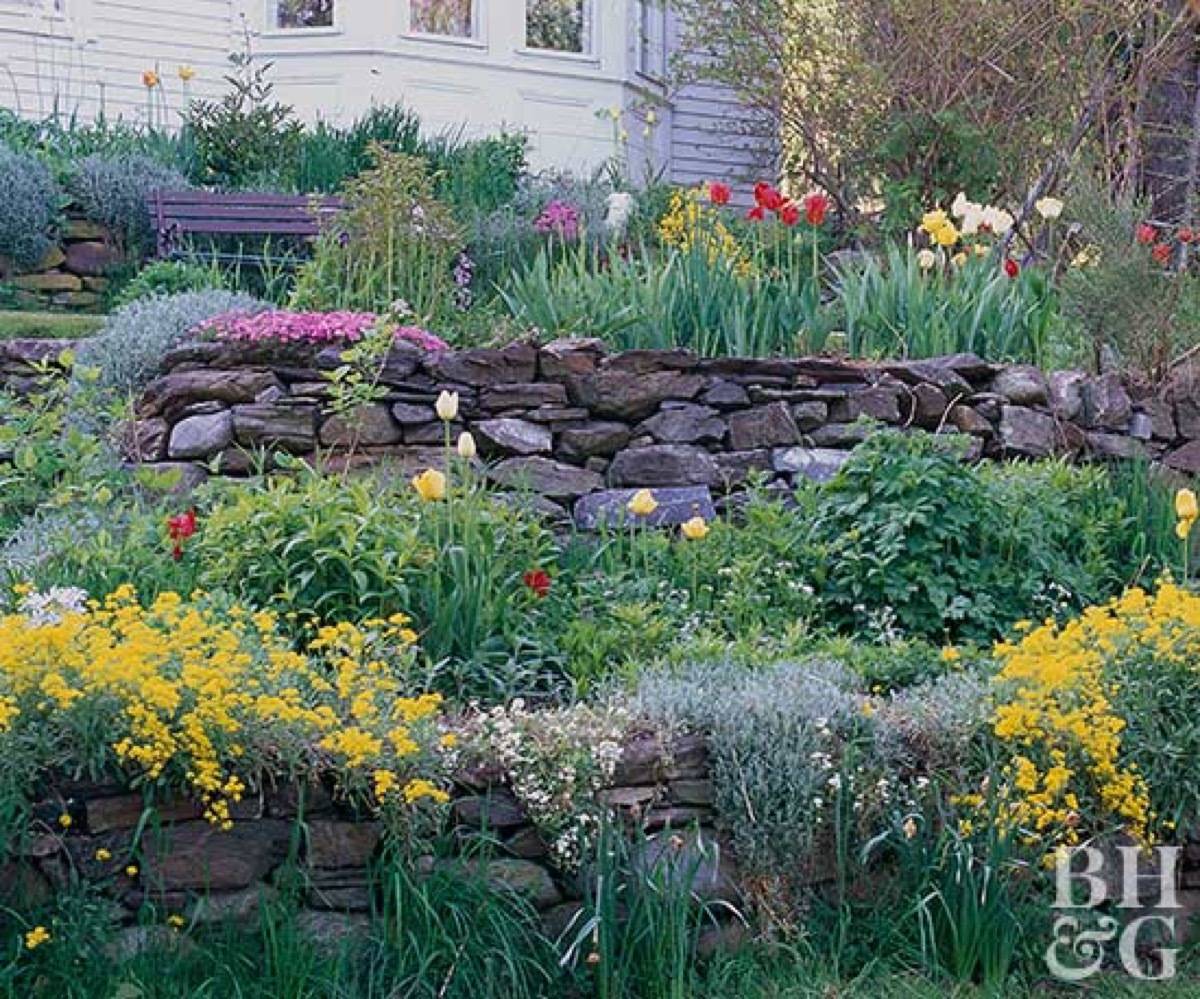
17. Have a steep front yard? Try creating cliffs with stone and native flowers to eliminate the need to mow. Ways to Improve Your Backyard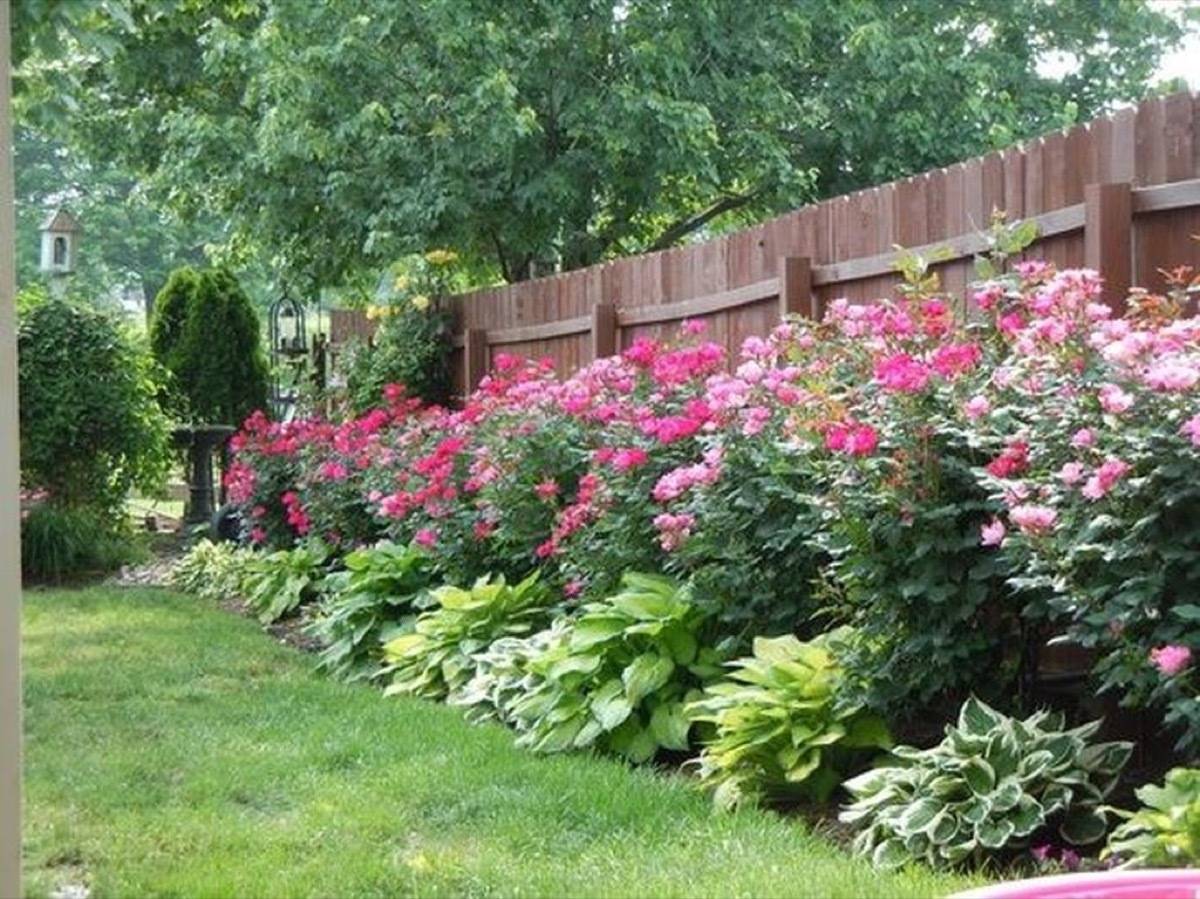
18. Ugly or boring fences no more! Create layers of plants and bushes to frame out the edges of your backyard. 
19. Grow marigolds in your back yard to deter mosquitos and aphids (you can also grow chrysanthemums, lavender, and basil). 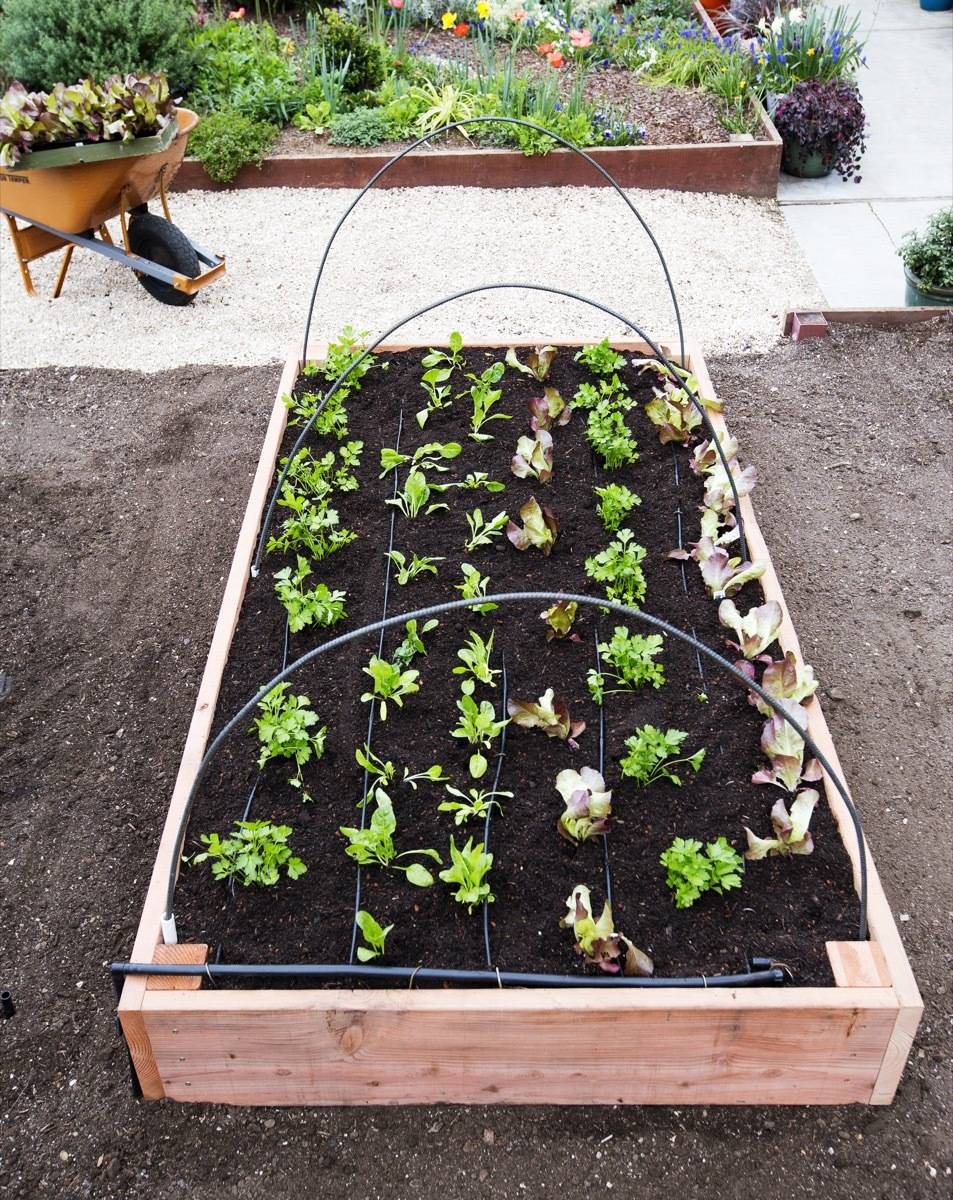
20. Create a raised garden bed to grow your own veggies (or buy an inexpensive one). It will add visual appeal, and you’ll be able to reap the benefits of your labor. 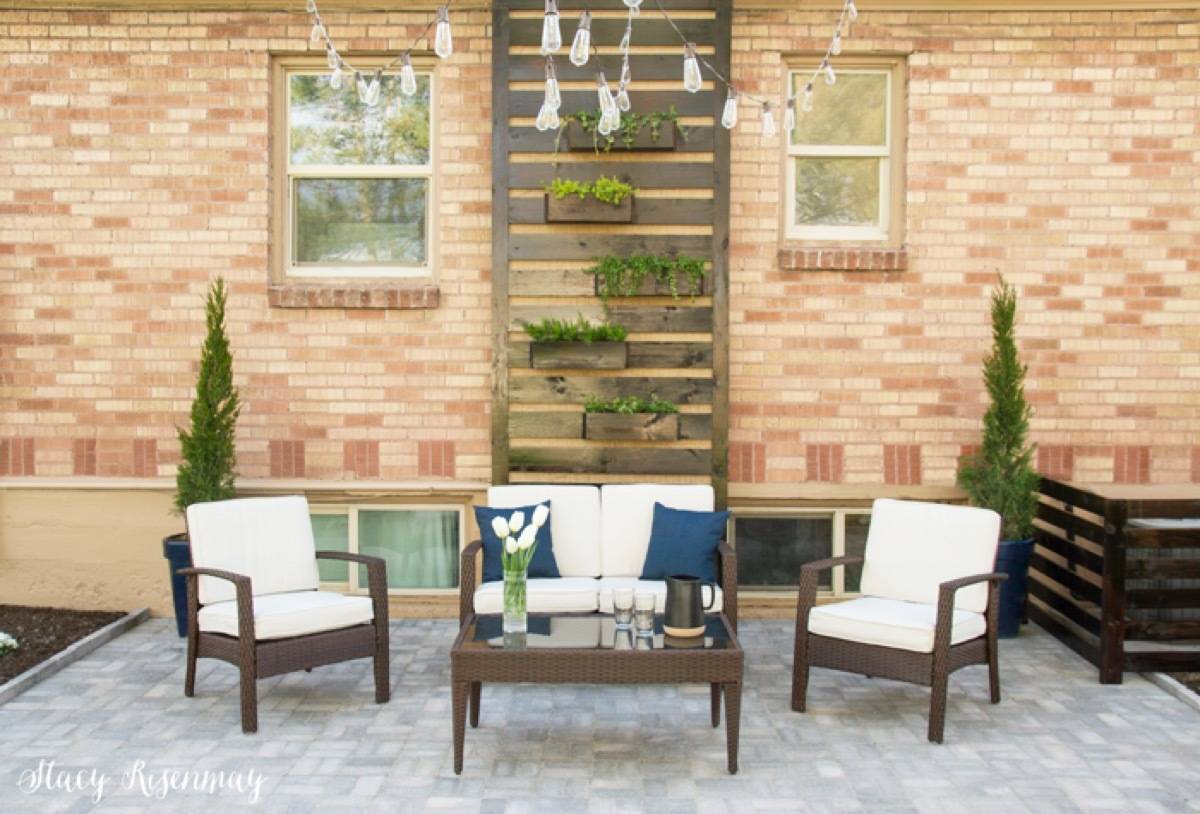
21. Give your back yard some interest by building your own paver patio. 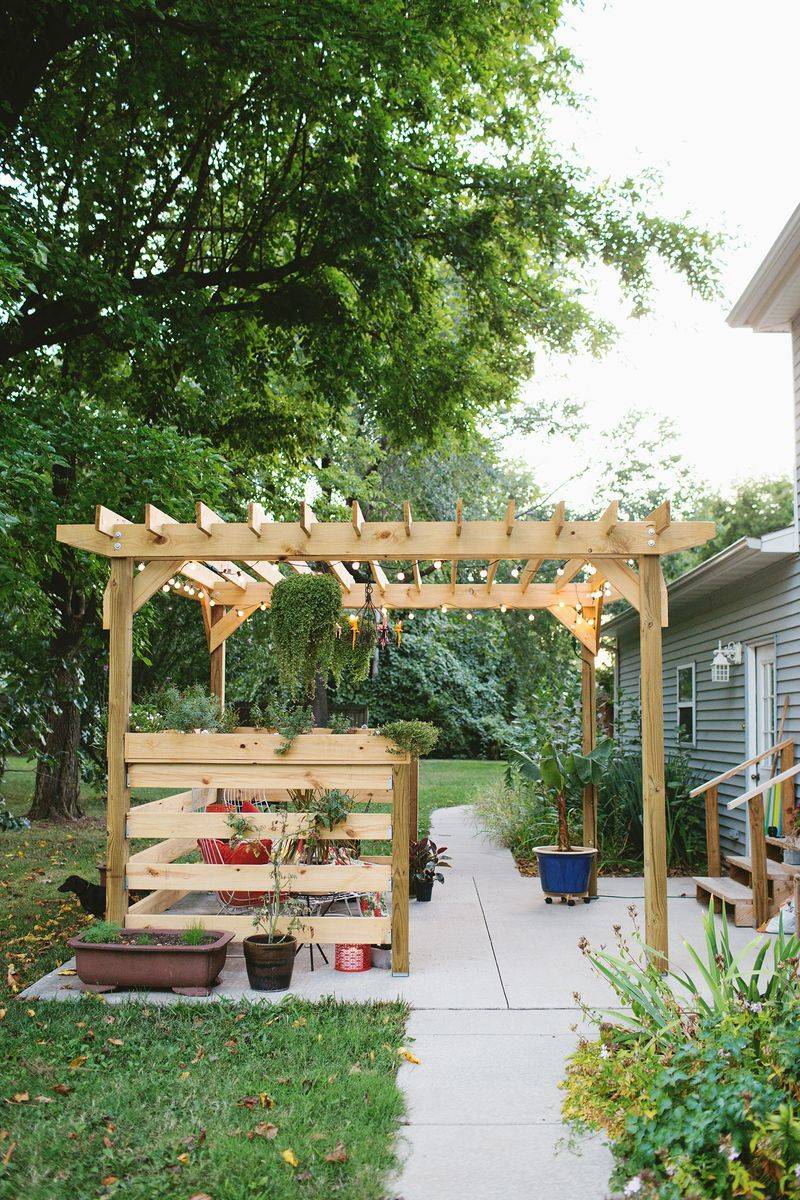
22. Or go for a full-blown pergola! A bigger back yard project, but much more affordable if you do it yourself. 
23. Hang some outdoor bistro lights on these easy-to-build light stands to illuminate your yard. 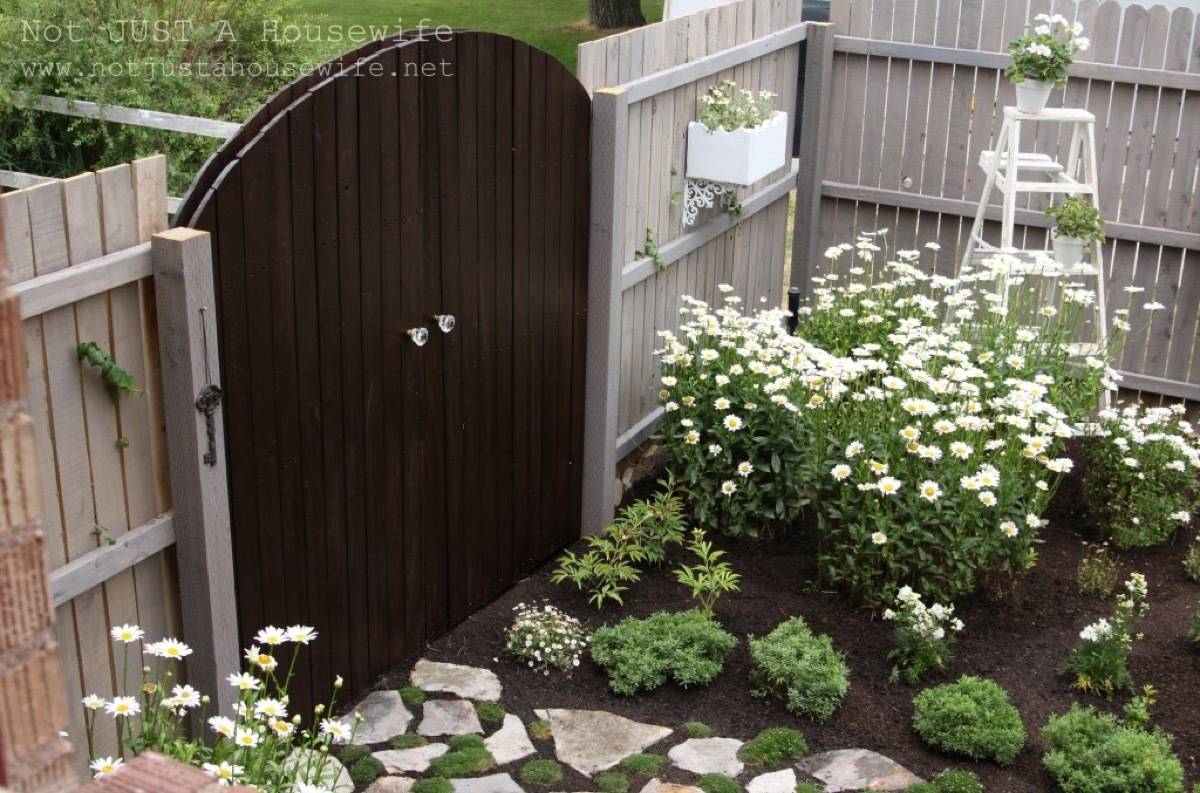
24. Get ready for DIY landscaping ideas straight out of childhood. Why not create a secret garden in your back yard? The 9-year-old in me is absolutely giddy over this idea. 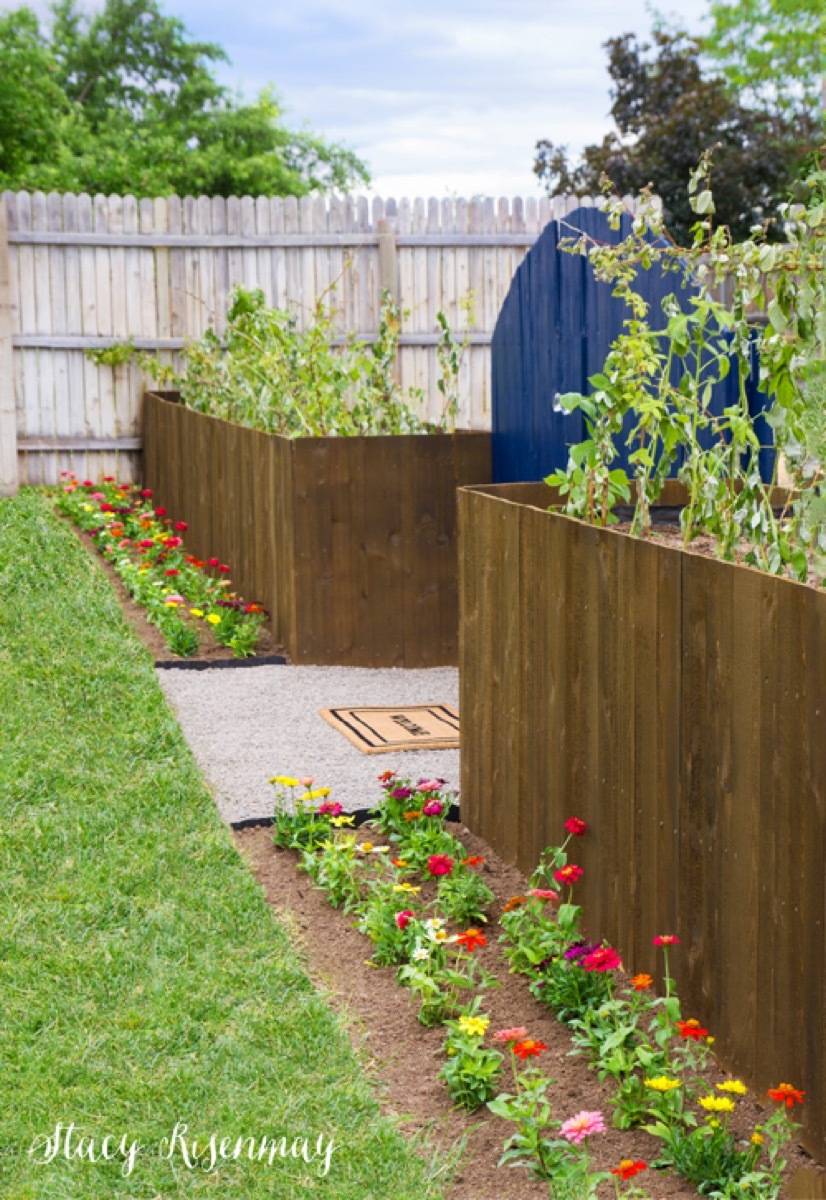
25. Create a flower-filled fence line. Here are some plans a fence with built-in flower planters. DIY Fire Pits You Can Create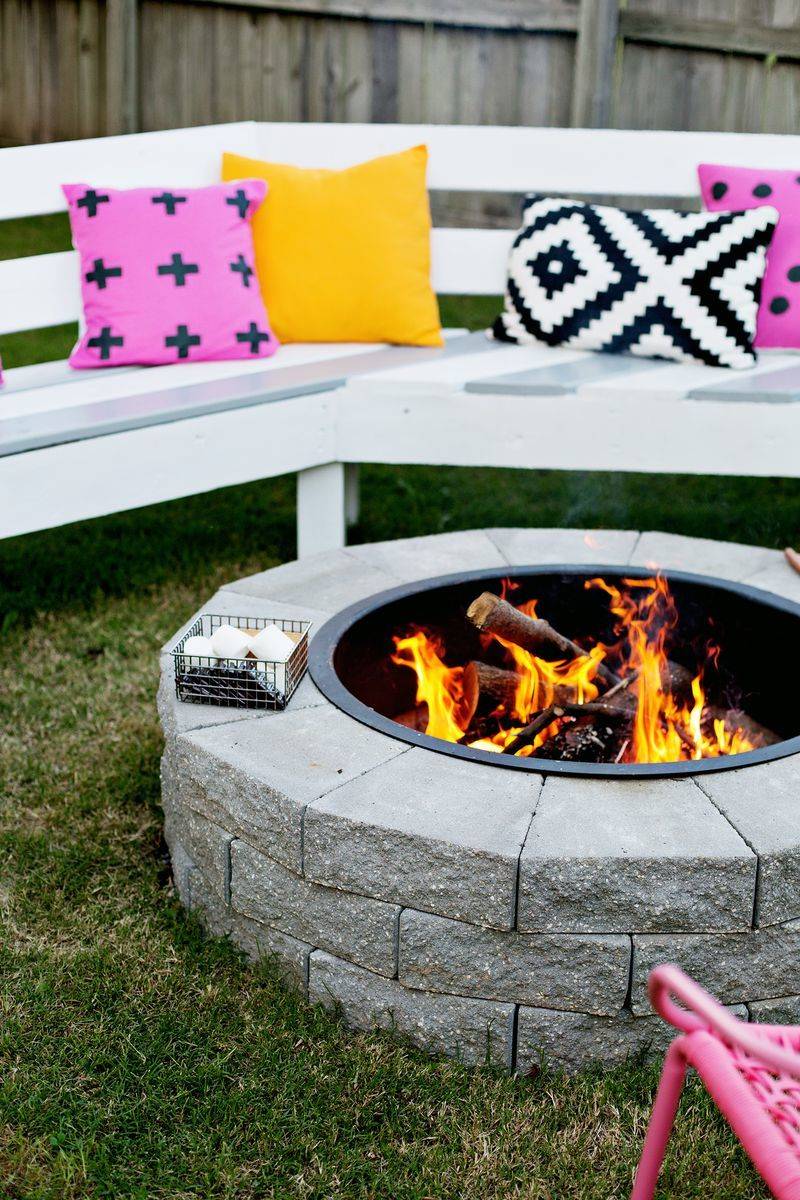
26. First time fire pit builder? Here’s how to make this one in four easy steps. 
27. Follow this tutorial for a more modern fire pit. 
28. If you have an old washing machine lying around, you can create this one-of-a-kind upcycled fire pit. 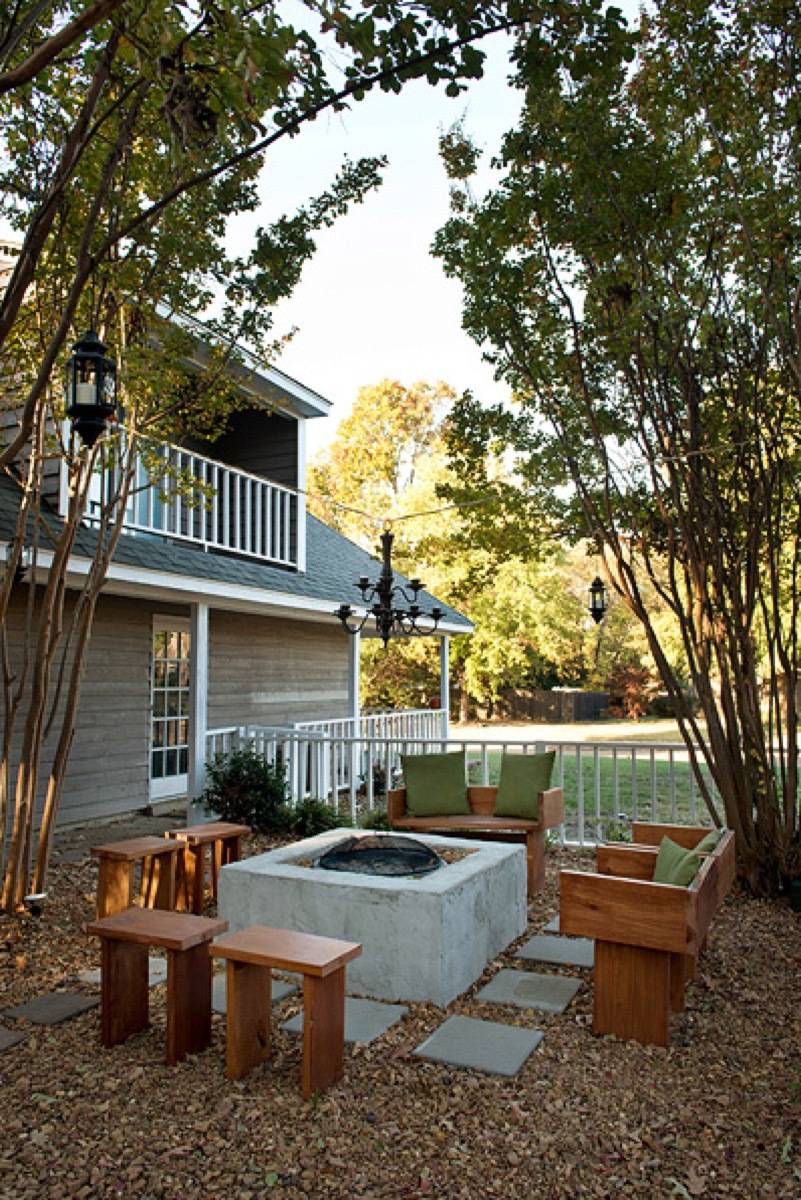
29. Would you have guessed that this fire pit was initially made out of cinder blocks? Learn how to skim-coat to create this clean look. 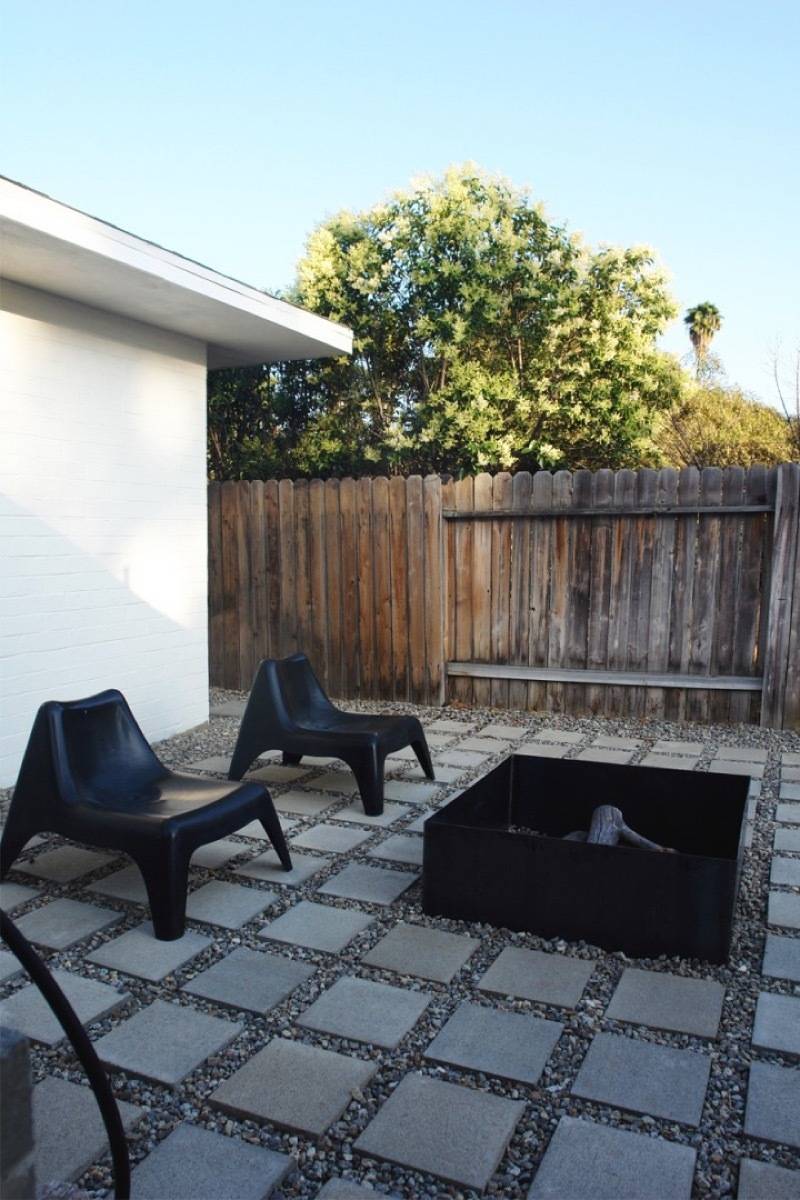
30. If you’re handy with a welding torch, you can make a minimal fire place from metal. 
31. Maybe you don’t want a whole fire pit, but a little glow would be a nice touch to your back yard. Here’s how to create a mini glass fire feature. 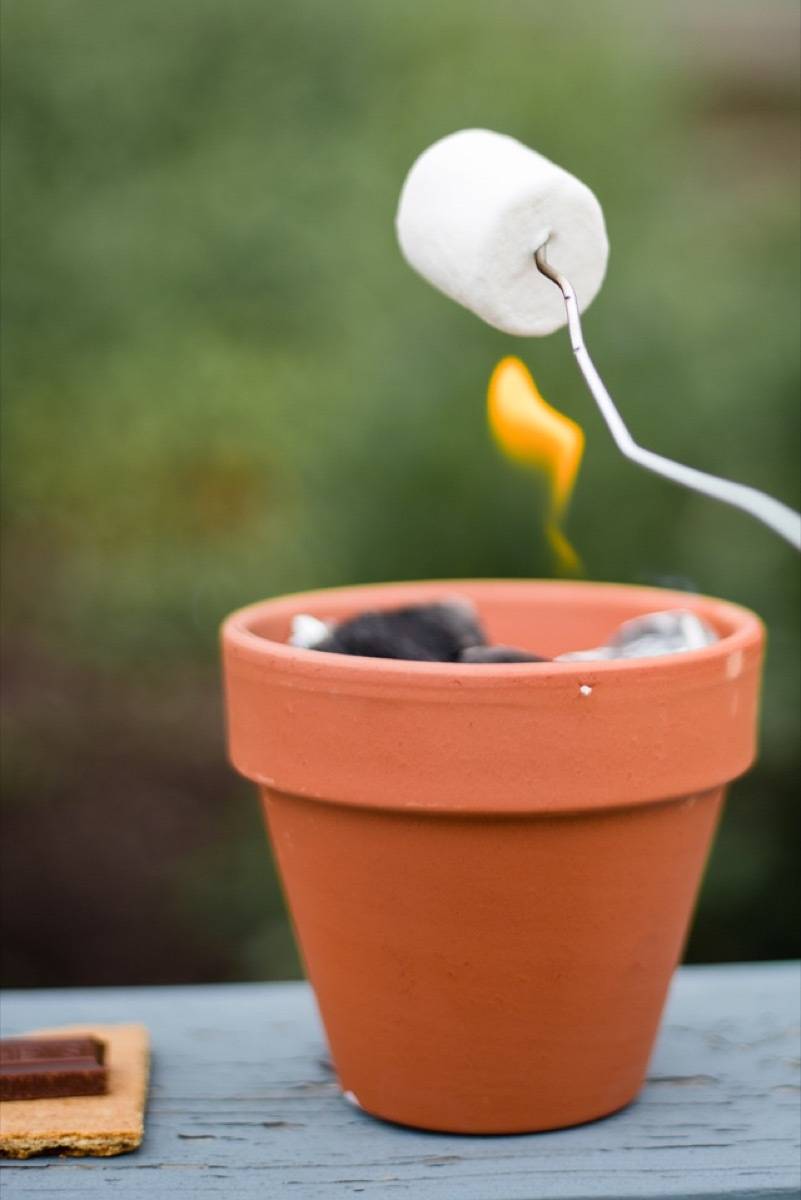
32. No back yard to build a fire pit? No problem. You can still toast marshmallows in a terra cotta pot. Water Features to Add Appeal Outdoors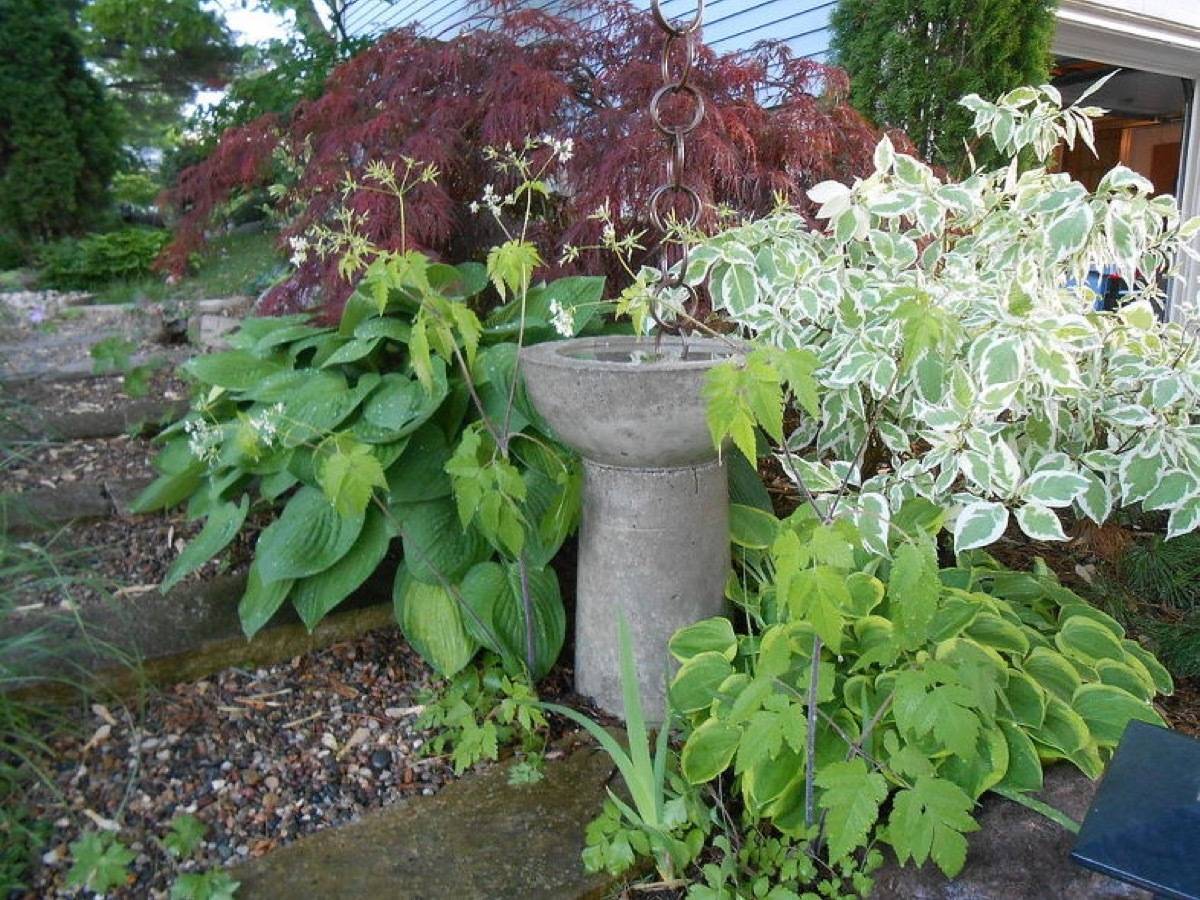
33. Water features don’t have to be complicated, or even powered. They can be as simple as a bird bath. Build your own, or purchase an inexpensive one. Give your yard something of interest, and beautiful song birds, too. 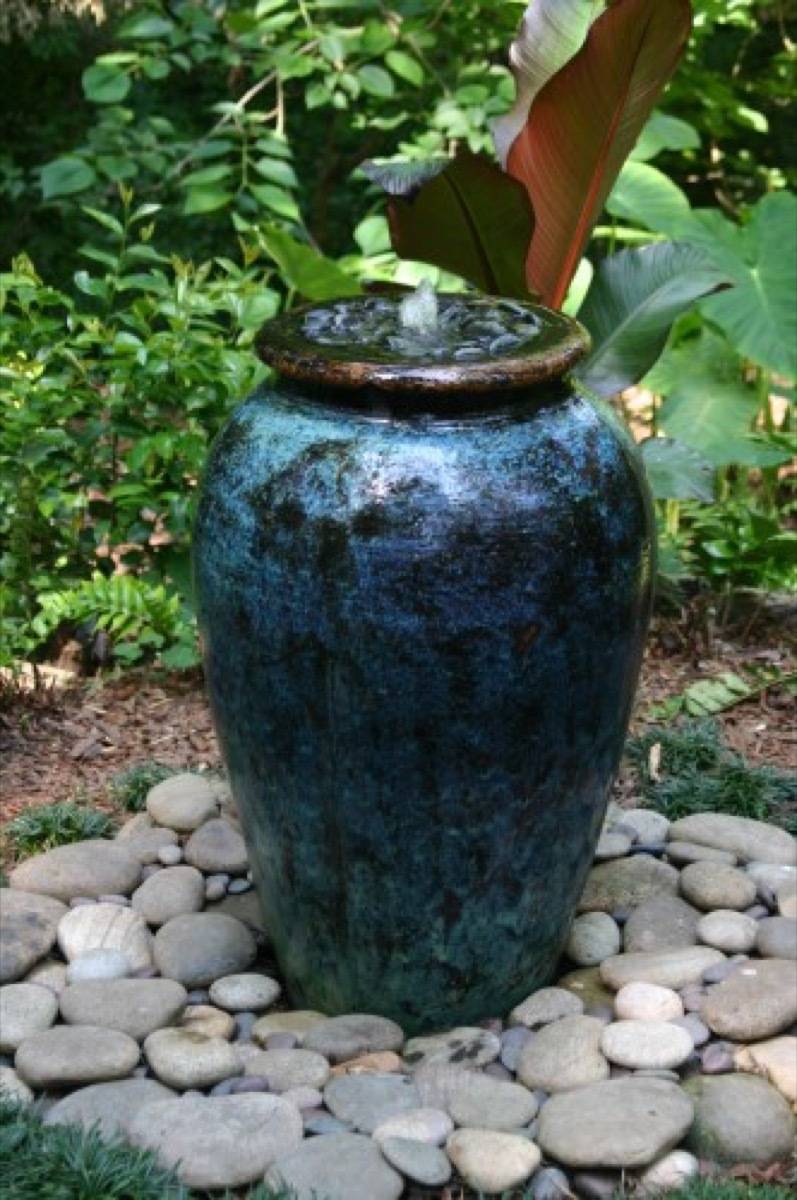
34. Create visual appeal in your yard by building your own urn water feature from a ceramic vase. 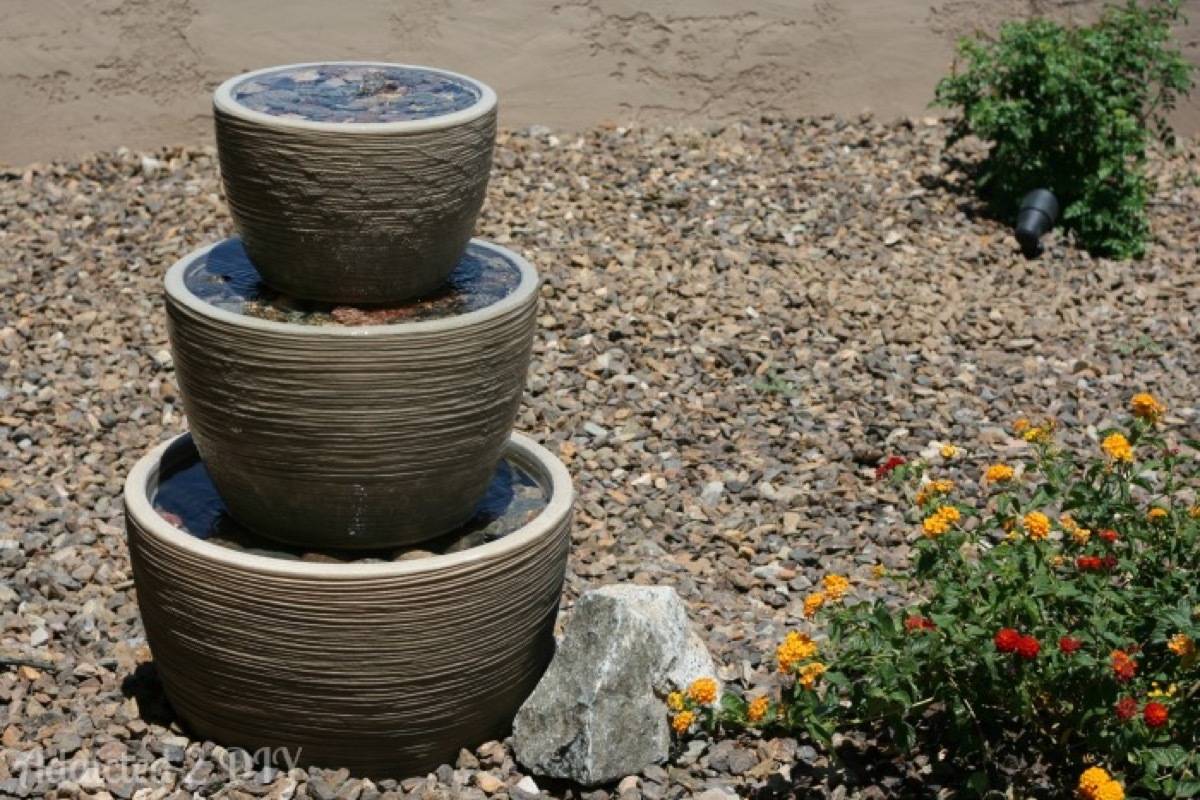
35. Stack ’em up! With a little extra effort, you can transform the previous project on this DIY landscaping ideas list into a multi-level water feature. 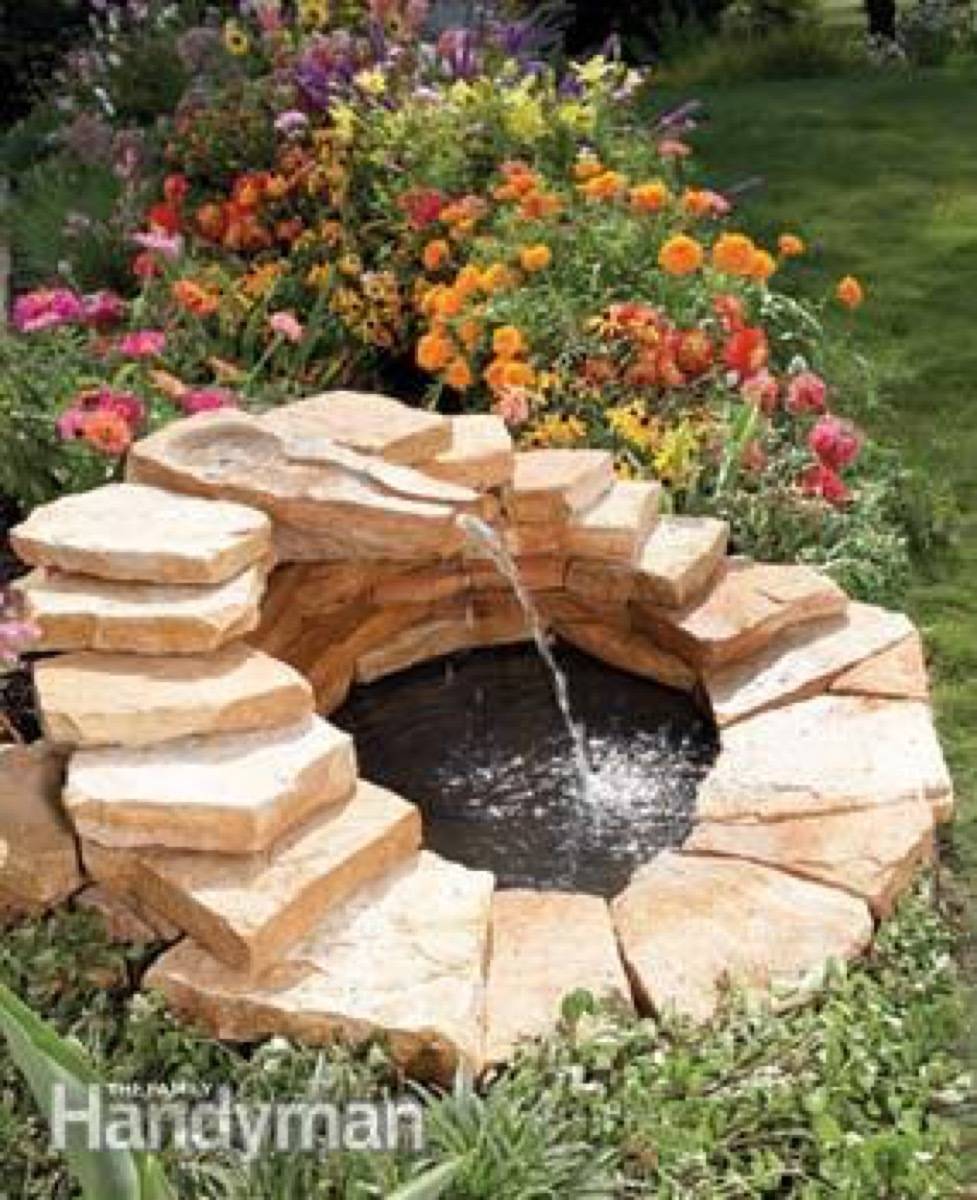
36. You don’t need special skills to build a water feature, just a bit of time and the right tools. Here’s how to build one from stone. 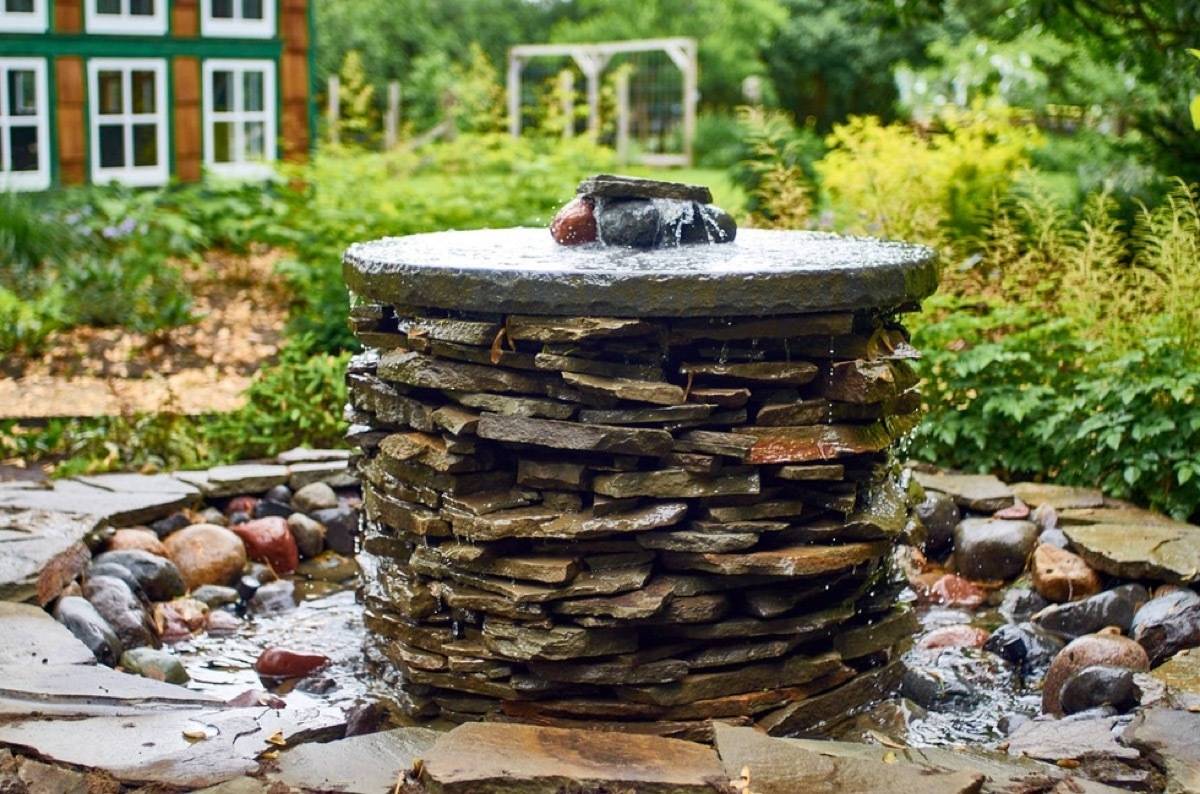
37. This is one of those DIY landscaping ideas that is going to require the help of a friend, but if you’re into drama, consider building a stone pond fountain. 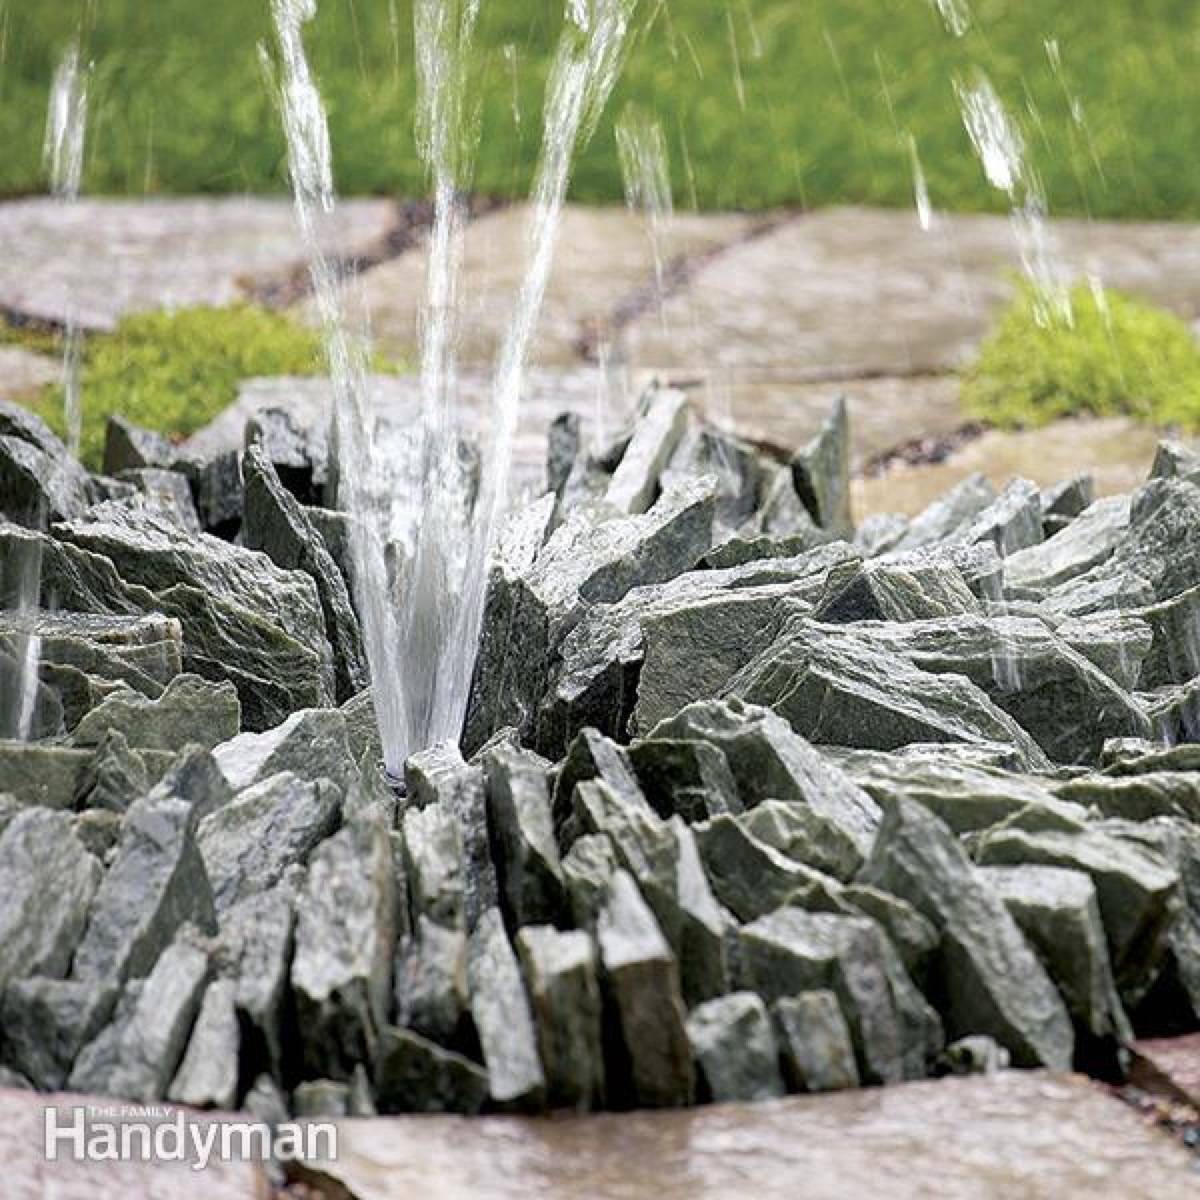
38. Don’t you love this low-to-the-ground look of this stone fountain? 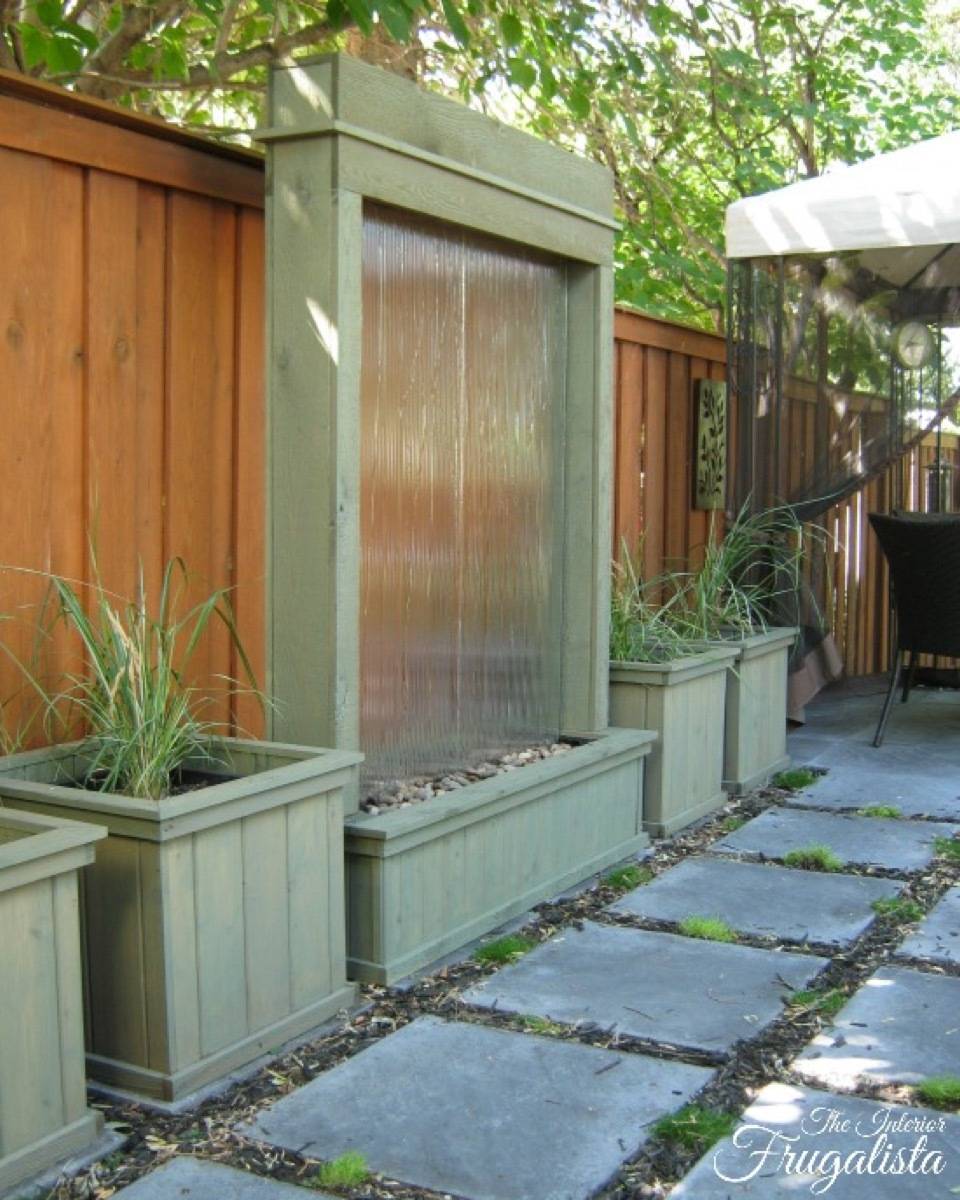
39. Big impact at a little cost! Check out this tutorial for making a waterfall wall for under $300. 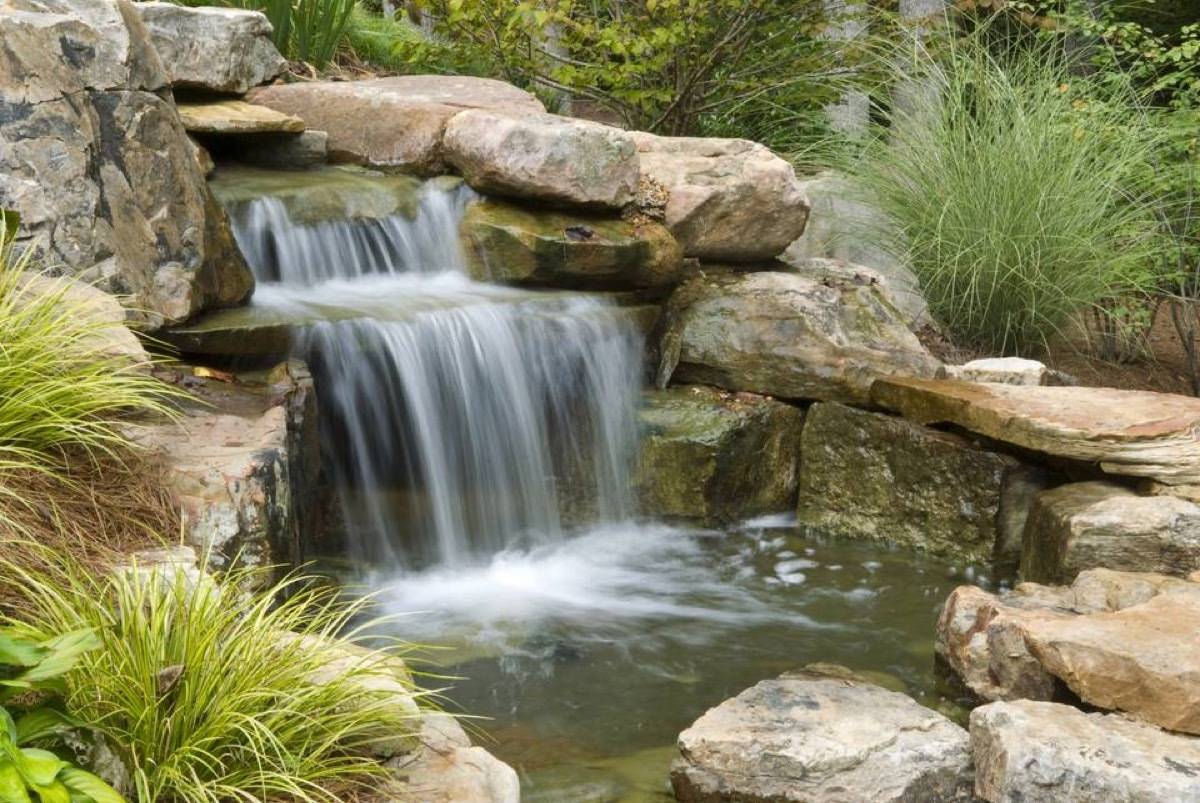
40. For the ultimate “wow factor,” accent your outdoor space with an outdoor waterfall. Hedges, Fences, and Other Privacy Features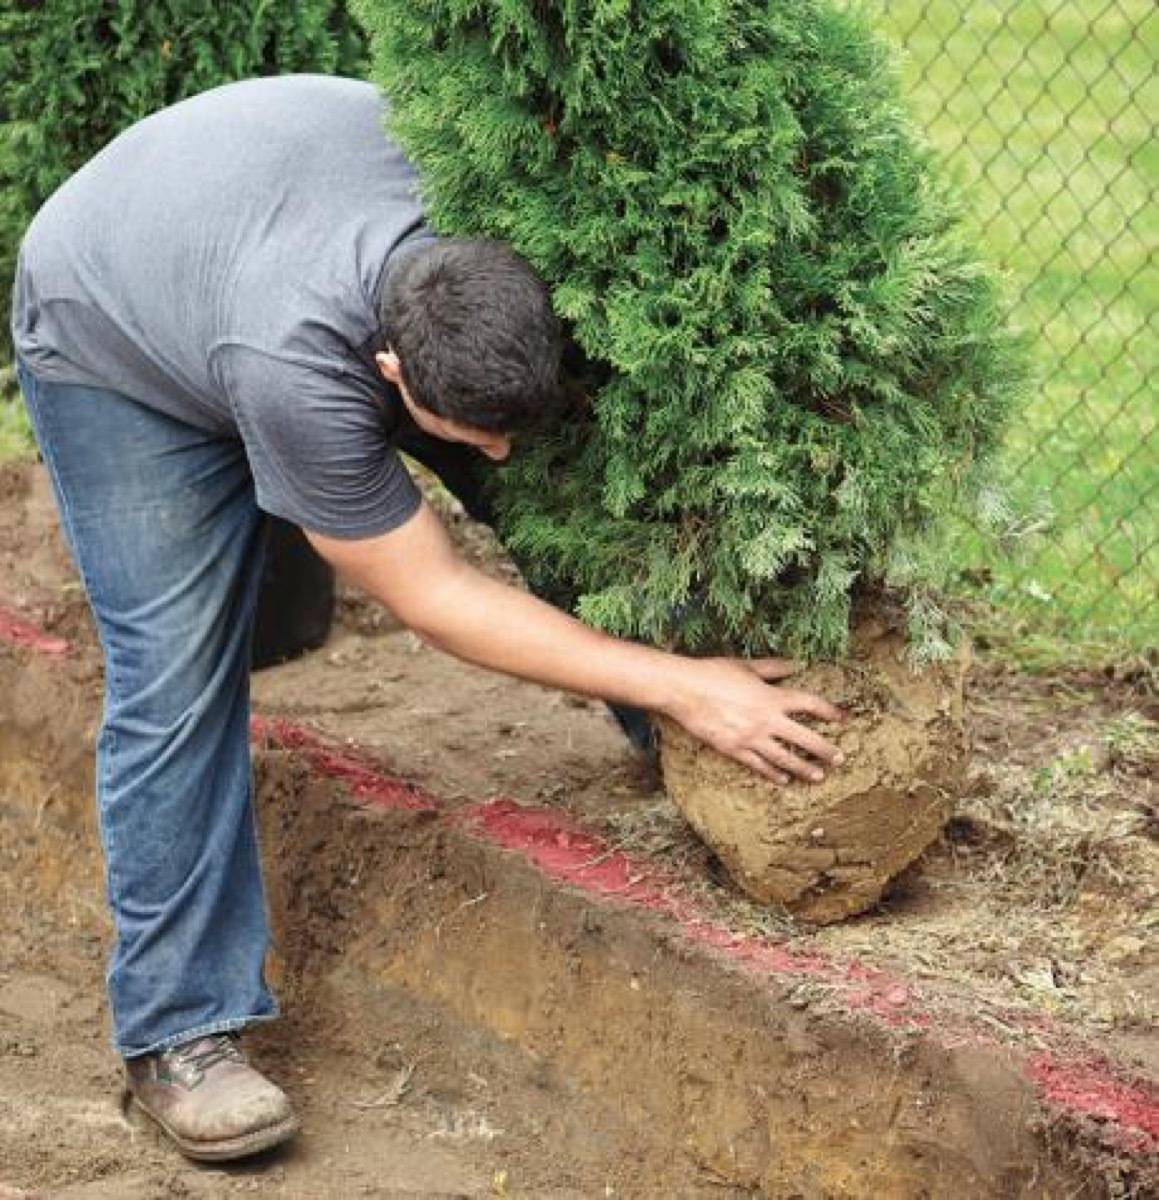
41. Add privacy by planting some shrubbery yourself. It’s as easy as digging a trench, dropping the plants in, teasing out the roots, and watering. 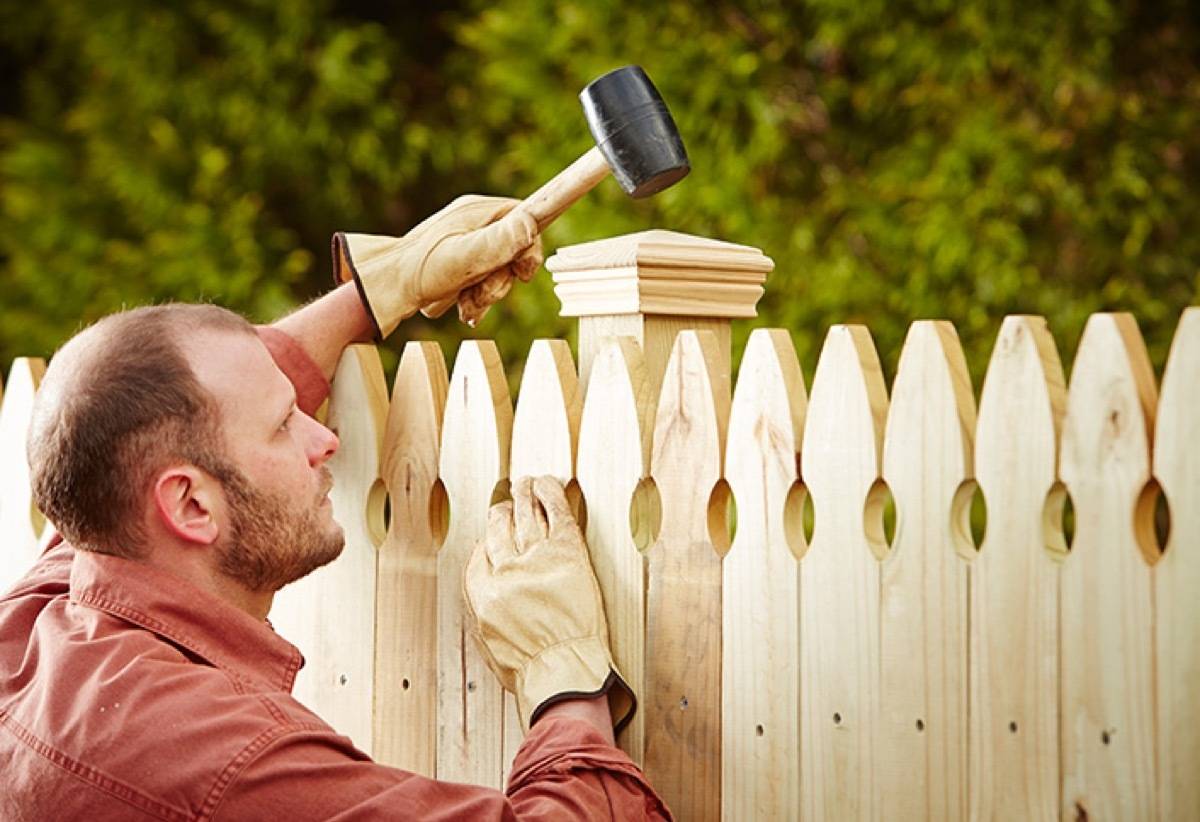
42. Nothing beats the backyard privacy of your own fence. Before you begin the building process, you’ll need to be sure of a few things: Verify your property line, check with your city or township about the limitations and height-restrictions of your fence, have someone from the city come and check for gas lines, and have a neighborly chat with anyone you’ll be sharing the fence line with. 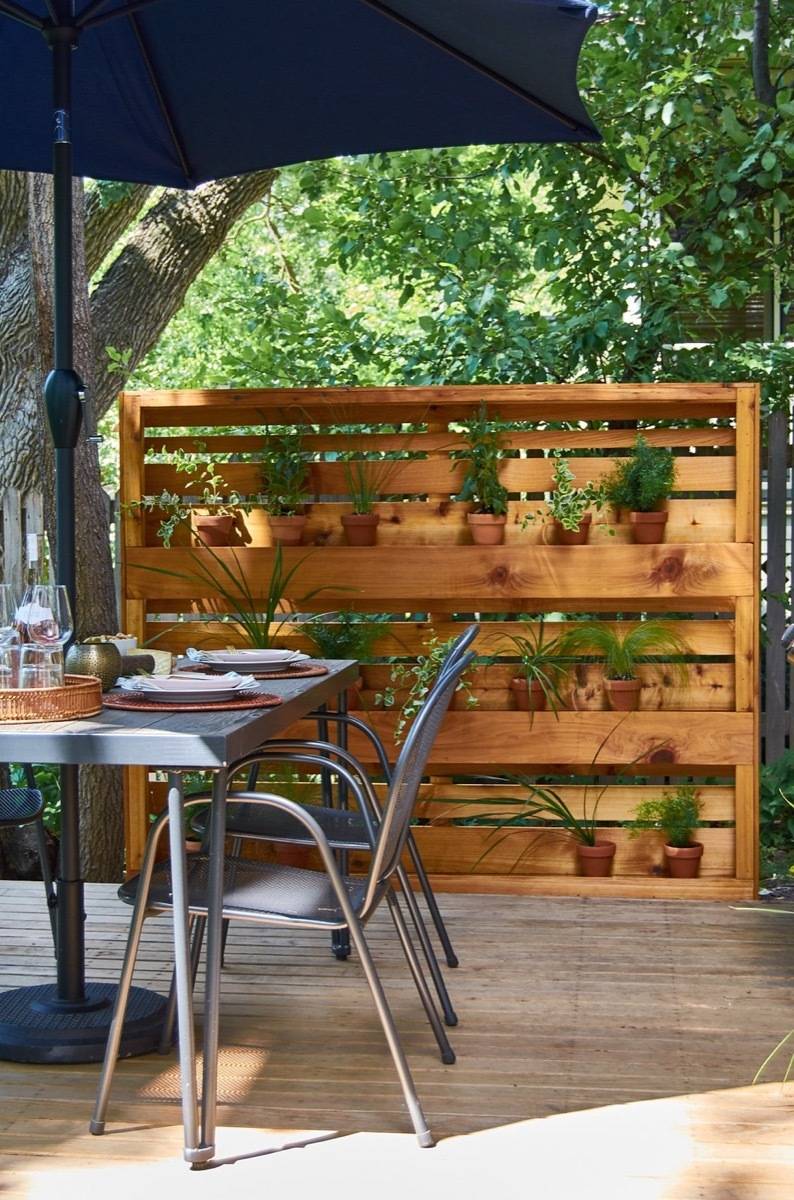
43. Need just a bit of privacy? Build this floating garden wall. It comes complete with shelving for plants. 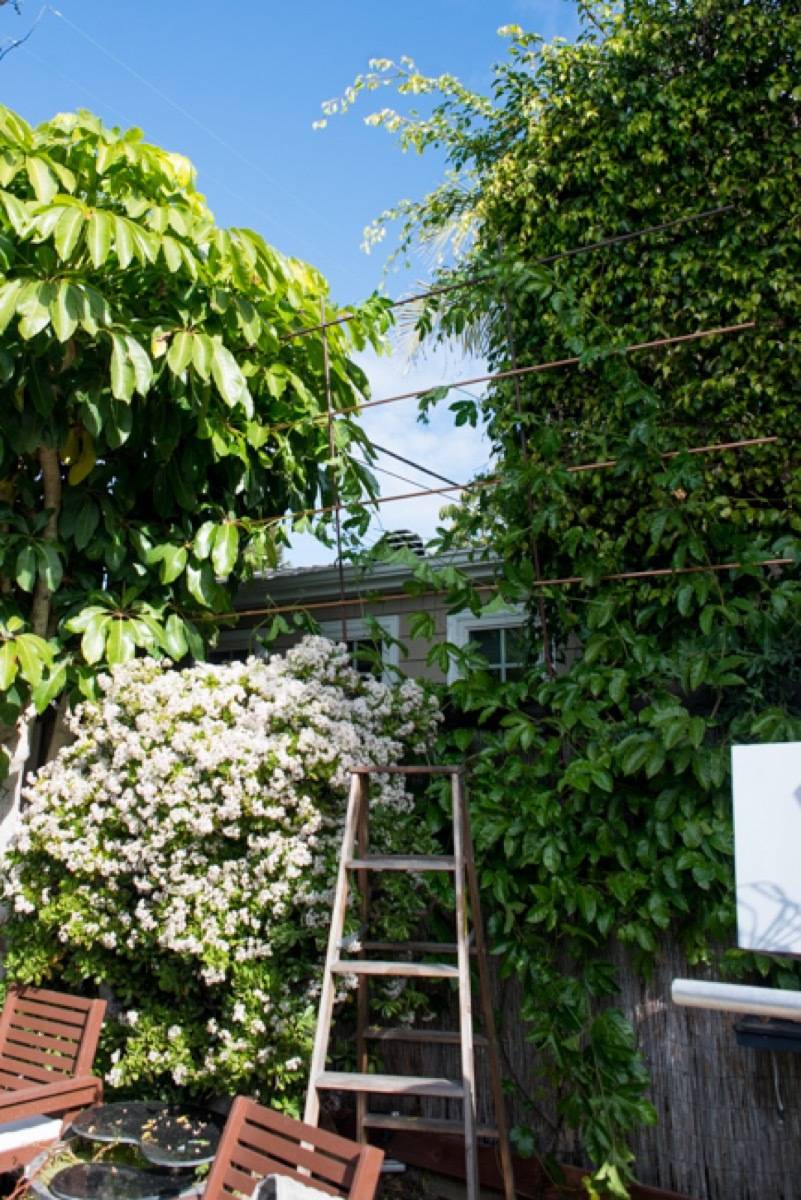
44. For natural privacy, build a trellis wall out of copper pipe to create a green barrier over time. 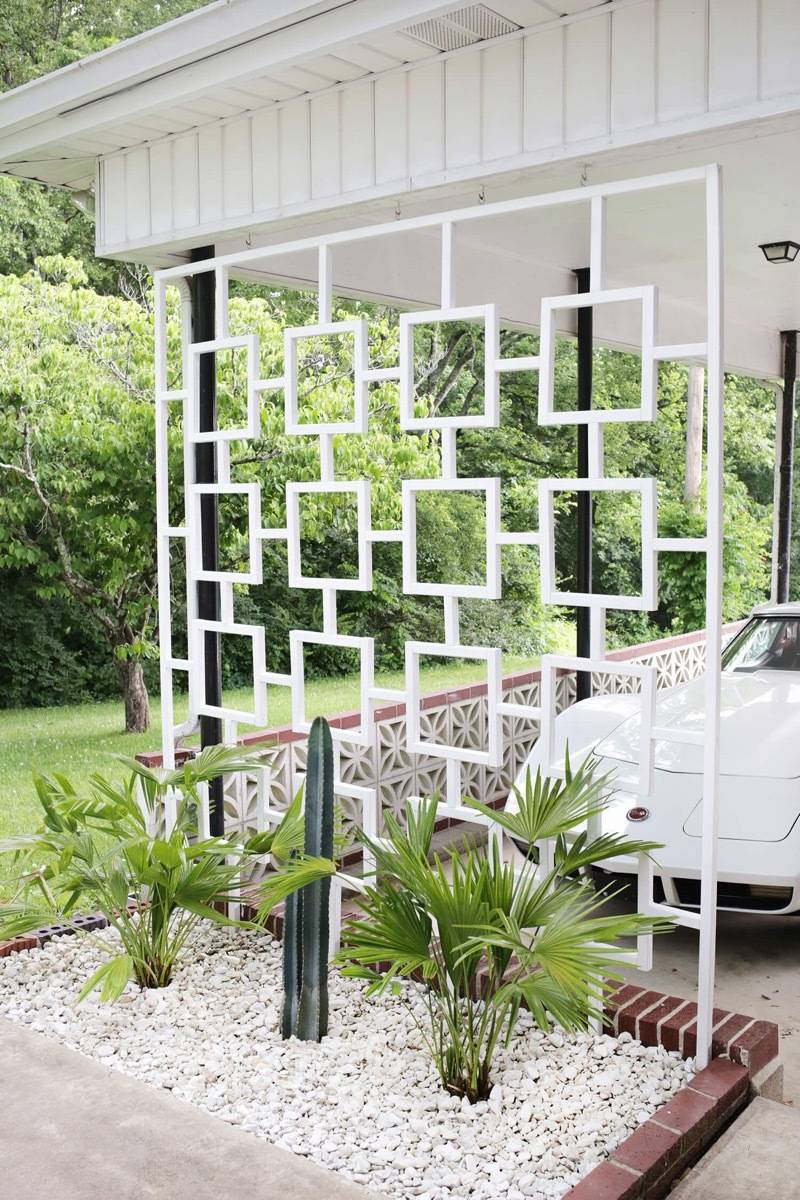
45. Create a visual divide and build a mod trellis. 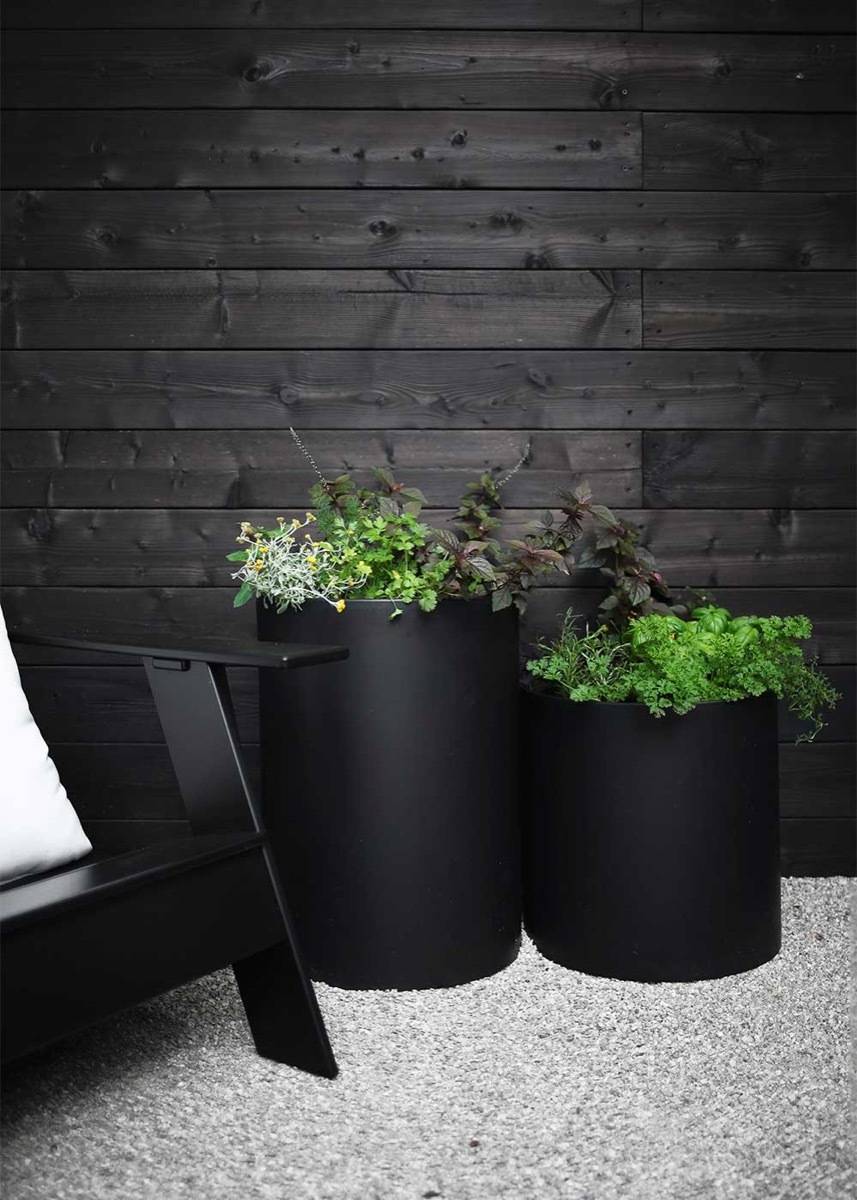
46. Transform your privacy wall using shou sugi – the process of burning wood, making it water-resistant. Side effect, the shou sugi treatment transforms wood to a beautiful, rich black color. 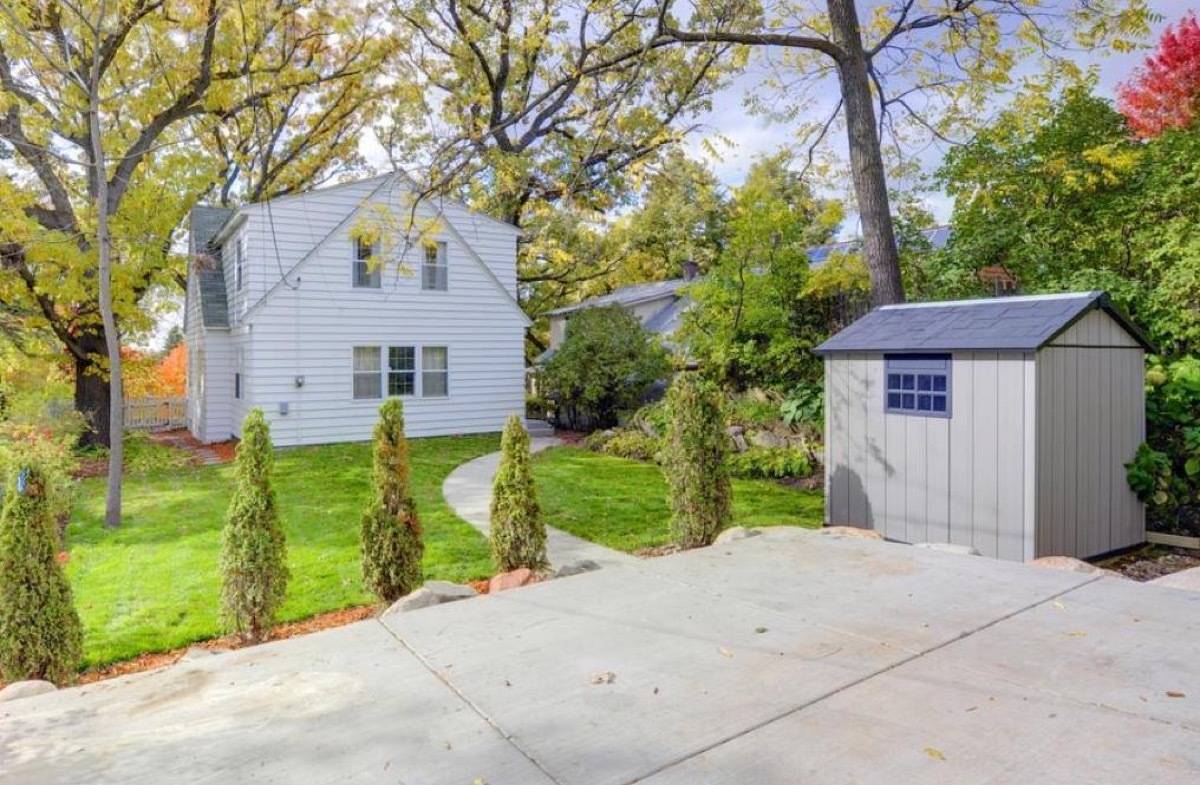
47. Create an implied wall to divide your yard using small trees or shrubs. 
48. Need lots and lots of privacy? There are cheap trees you can buy that over time will block out the neighbors, like the inexpensive Leyland Cypress. How to Create Shade in Your Yard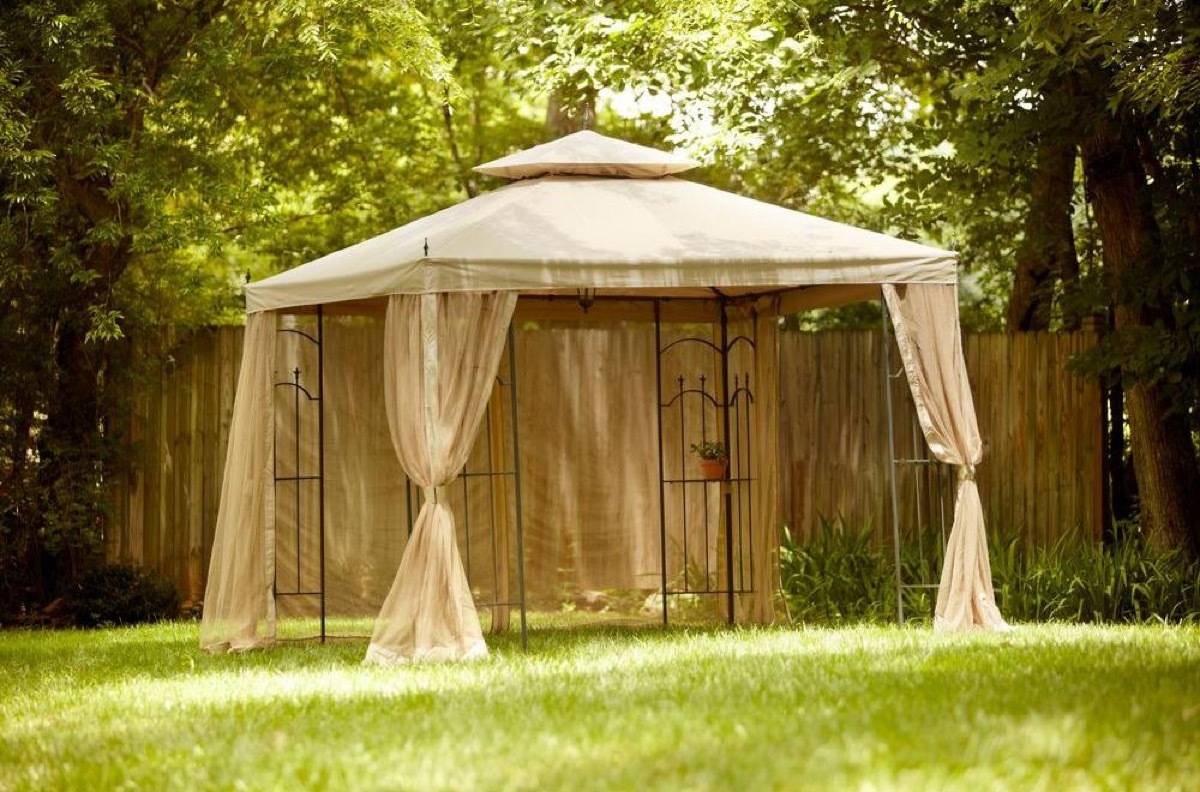
49. No shade? Create an outdoor hangout space by getting an affordable fabric gazebo. 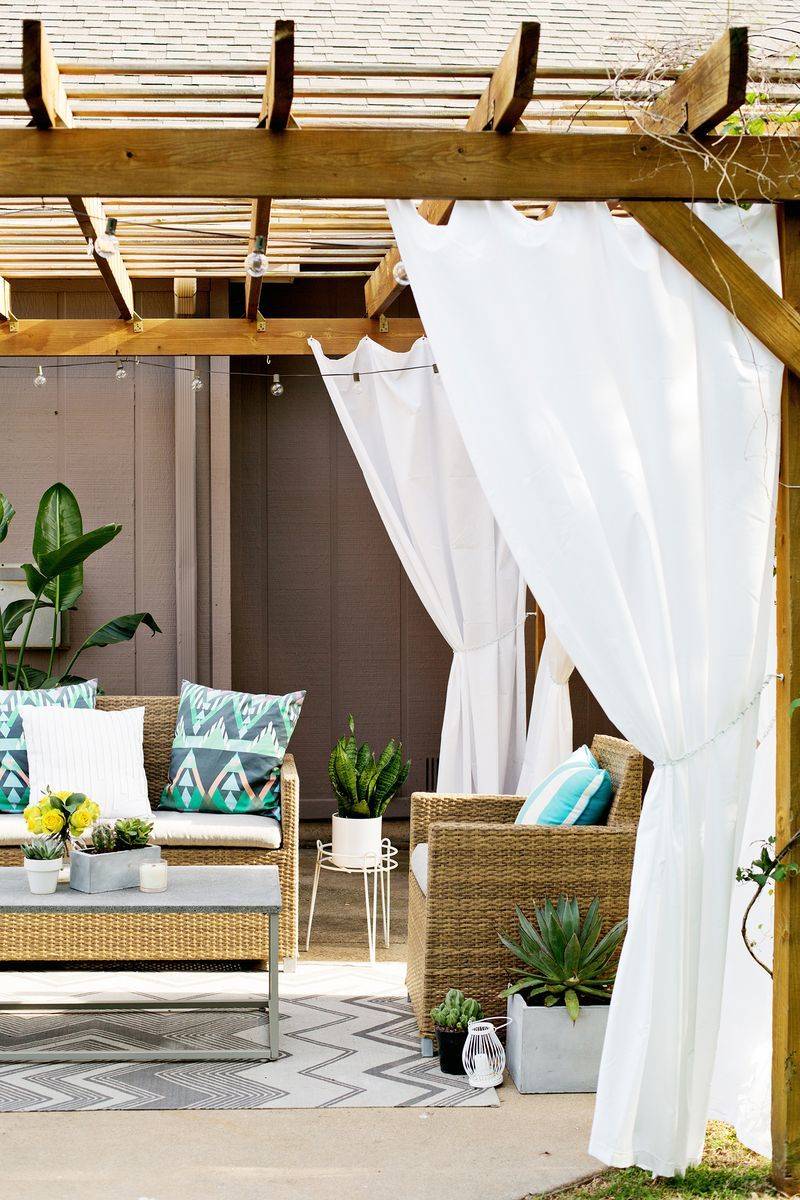
50. Or sew curtains to hang from your pergola to block a little light when needed. 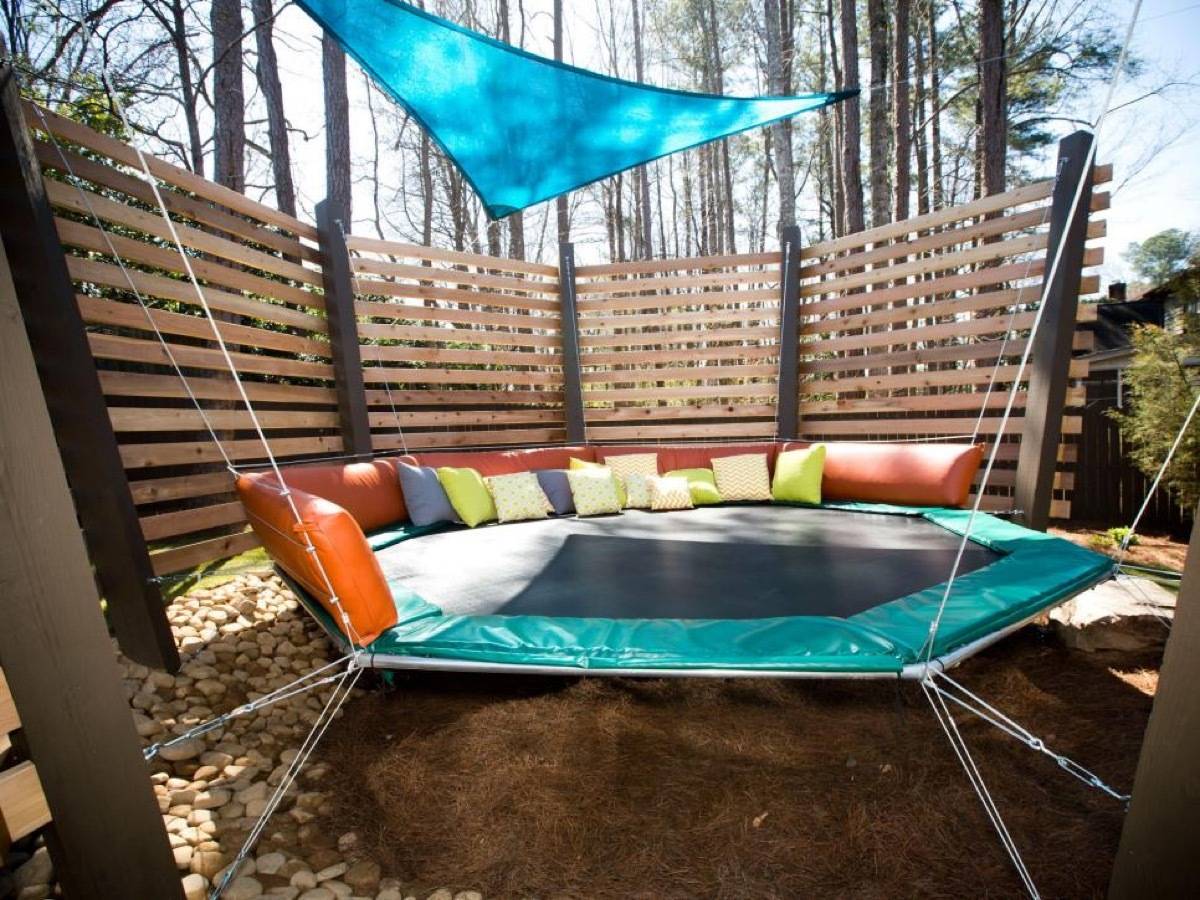
51. Add a sun sail for immediate shade (bonus if you hang it over your own trampoline lounge!). 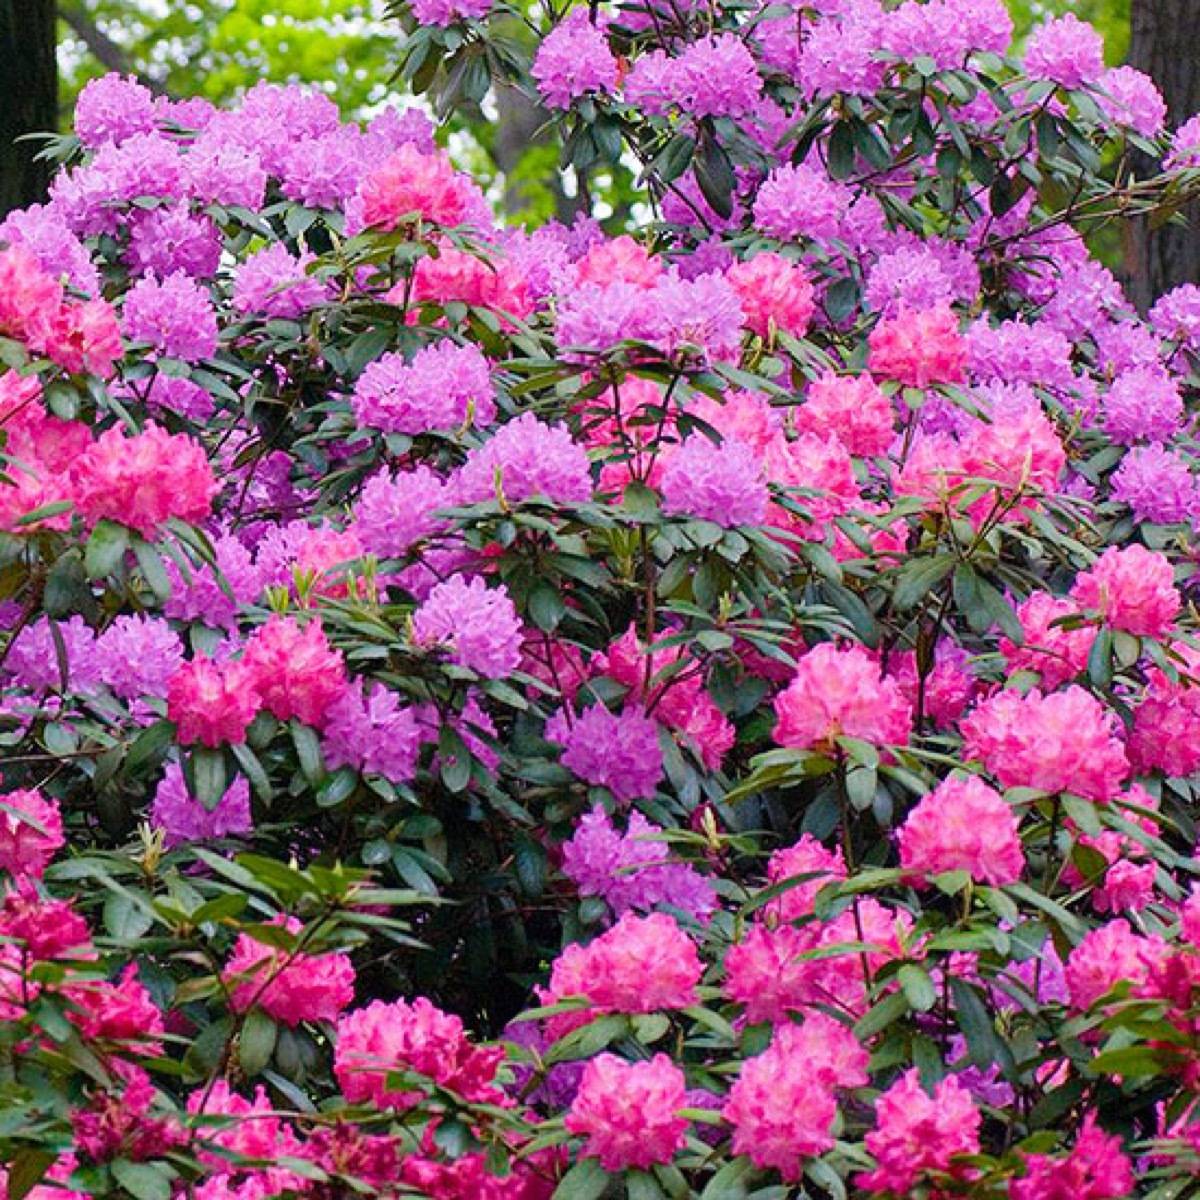
52. Grow shade by planting rhododendron in your yard. They’re a dense evergreen with broad leaves, and the flowering in the springtime is lovely. 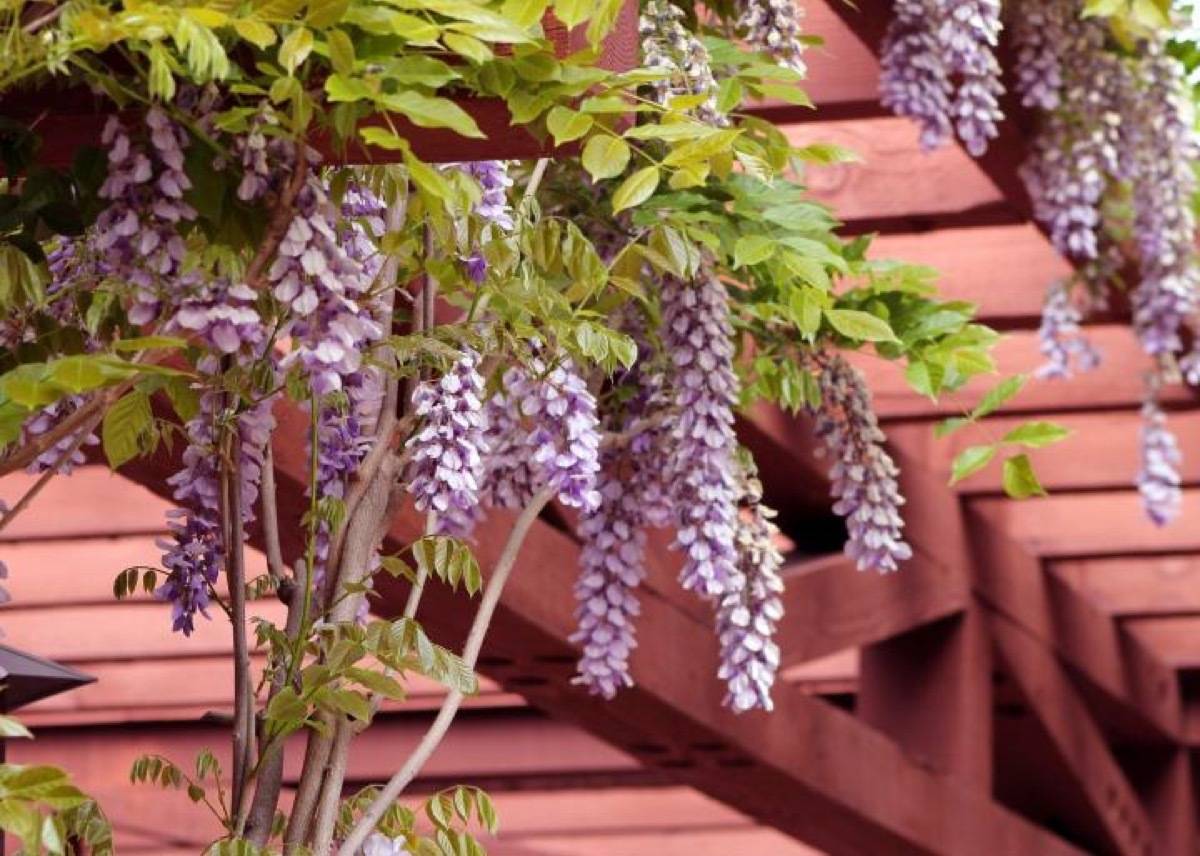
53. Grow Chinese Wisteria on an existing structure or trellis to block light (be mindful – this plant is known as an invasive plant in some areas). Creating Visual Interest Around Trees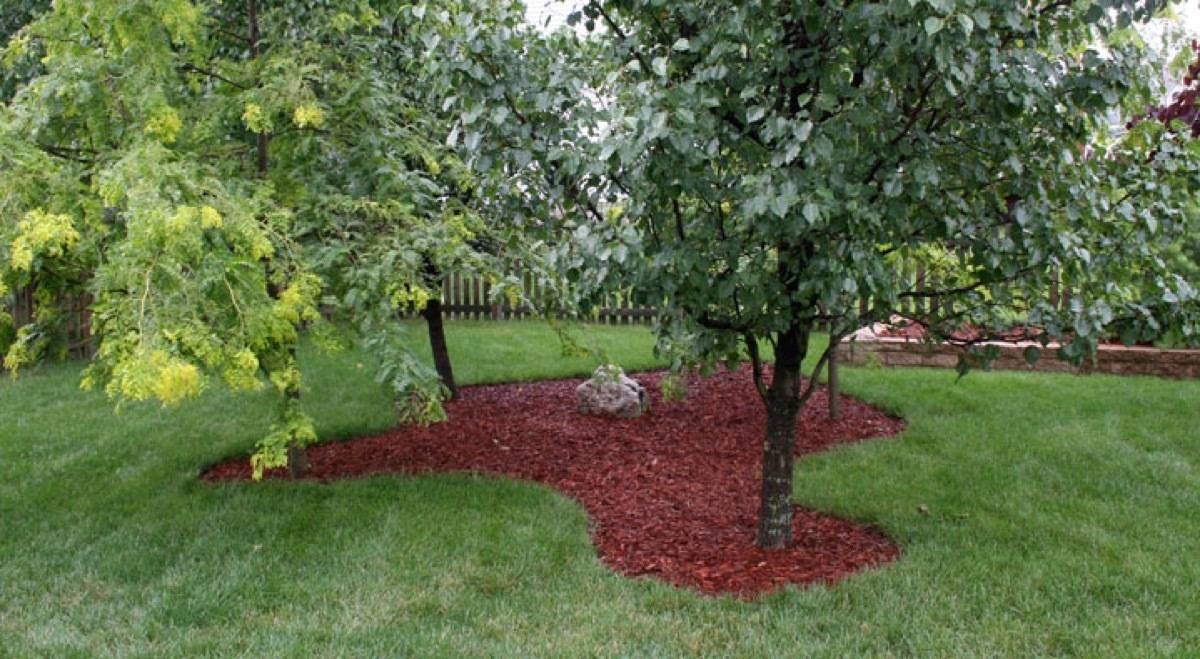
54. Add mulch to cover the most shaded parts of your lawn. 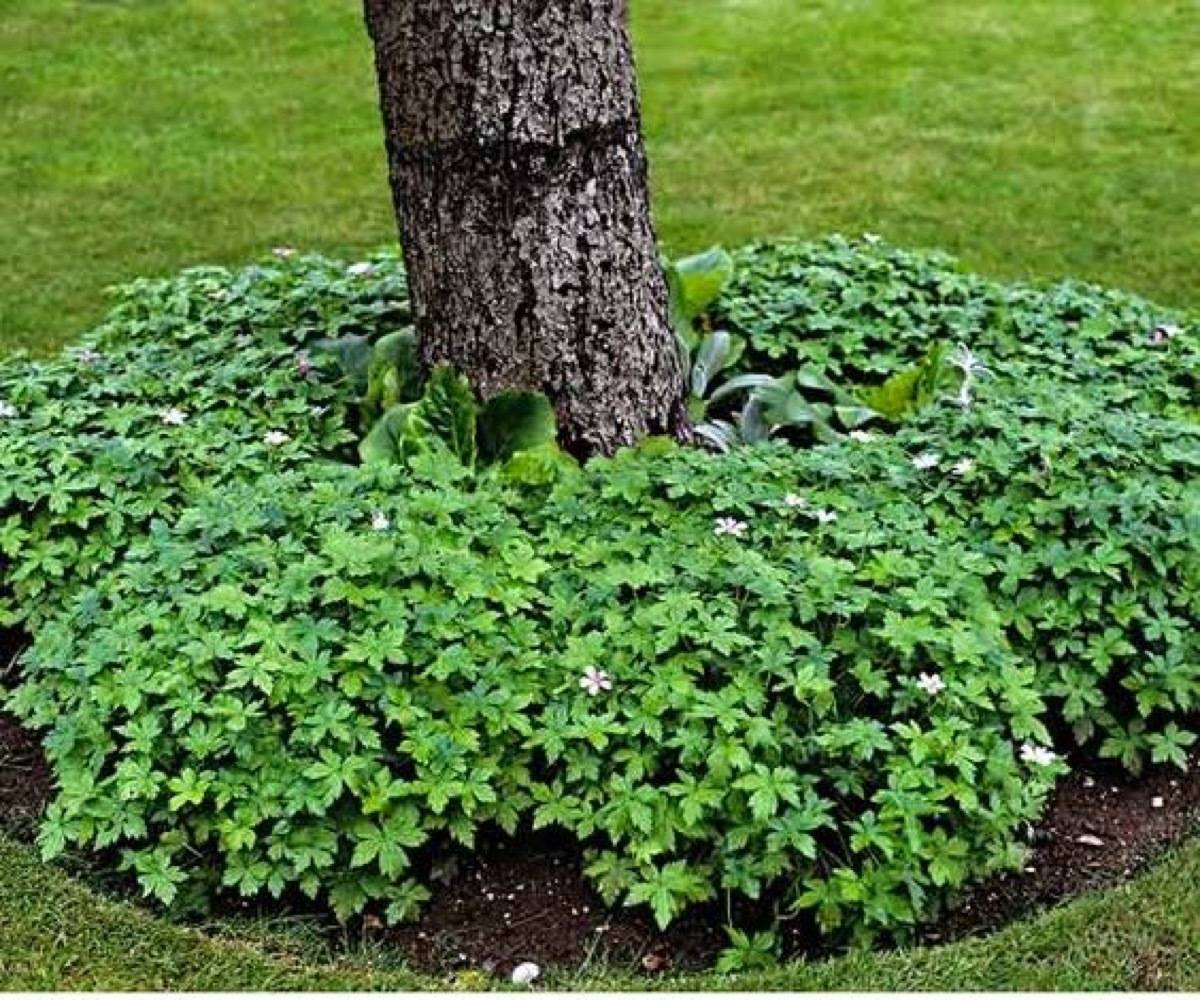
55. Another genius (and affordable) of the DIY landscaping ideas: Add ground cover plants to hide gnarly roots. 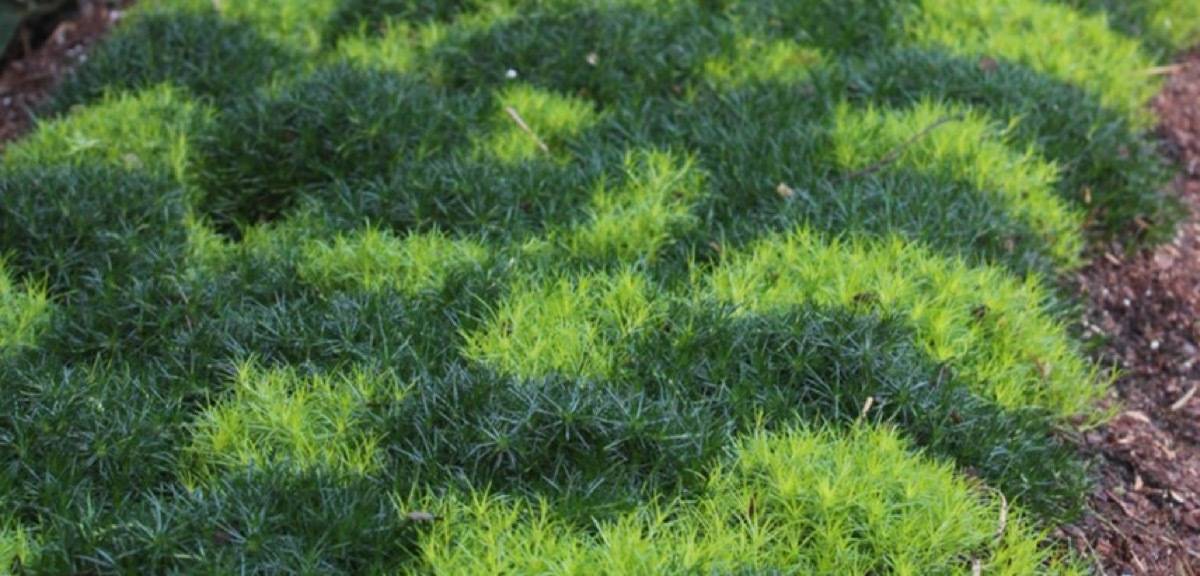
56. Or, opt to grow some moss instead. 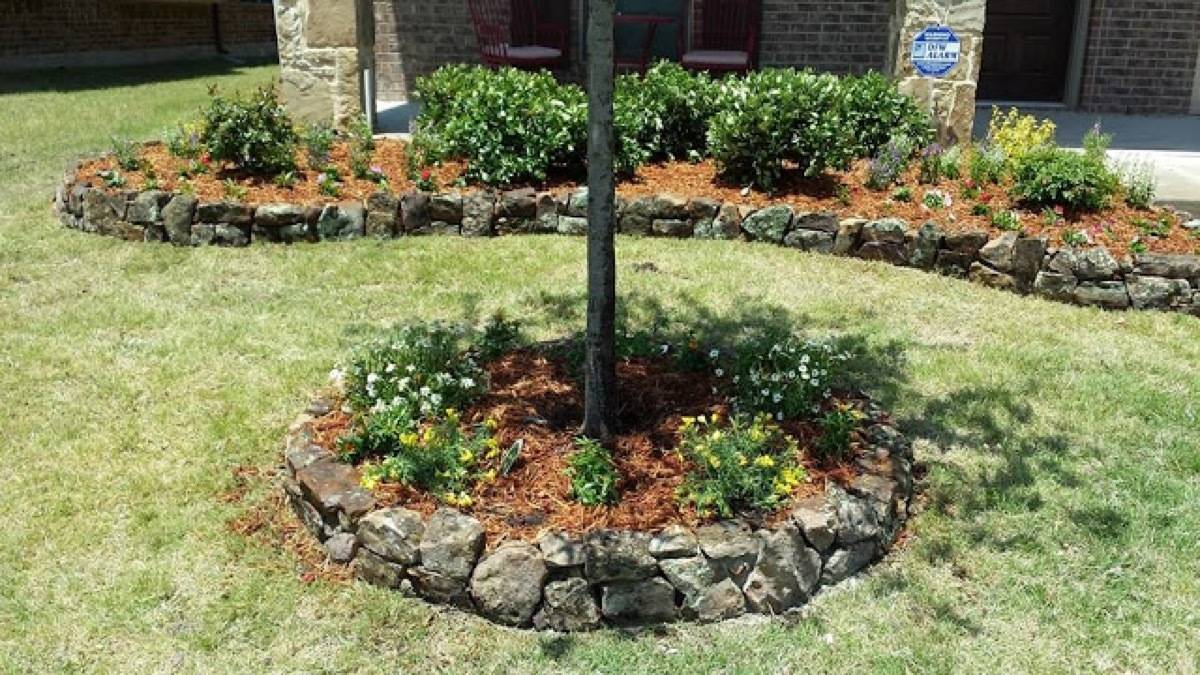
57. Use stone to edge the area around the base of your trees. 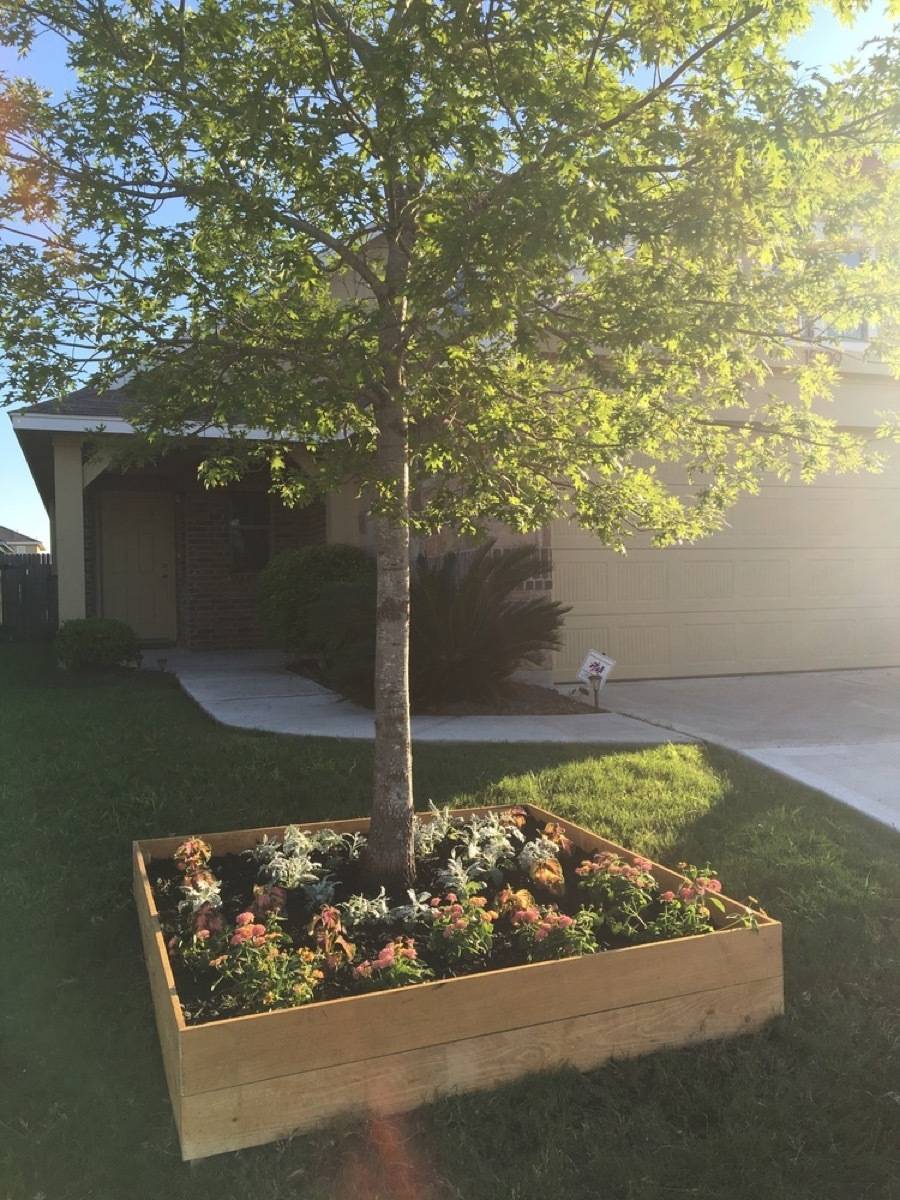
58. Or build a raised flower bed at the base of the tree (be careful not to add too much dirt around the base of the tree, as you could hurt or kill it). 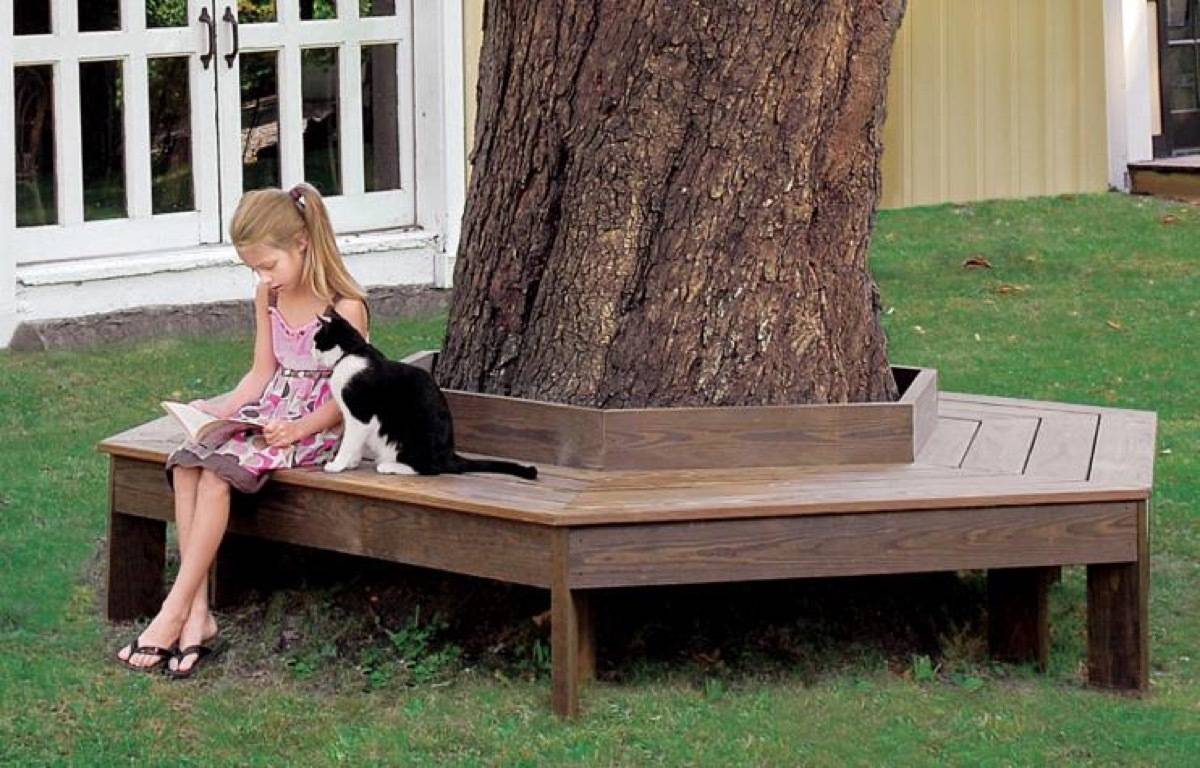
59. For extra seating, create a one-of-a-kind tree bench. 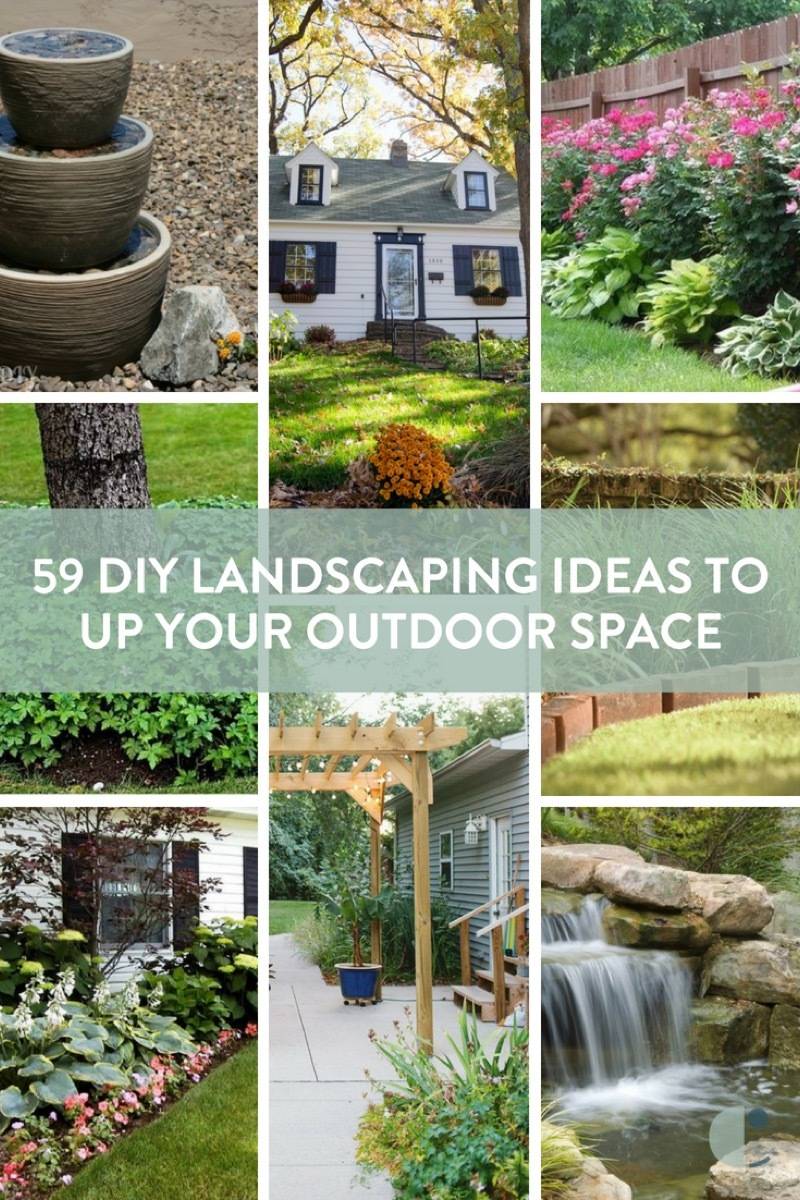
Want more DIY landscaping ideas? Here are 13 more tips for landscaping on a budget.
The post 59 DIY Landscaping Ideas and Tips to Improve Your Outdoor Space appeared first on Curbly. Via https://www.curbly.com/diy-landscaping-ideas
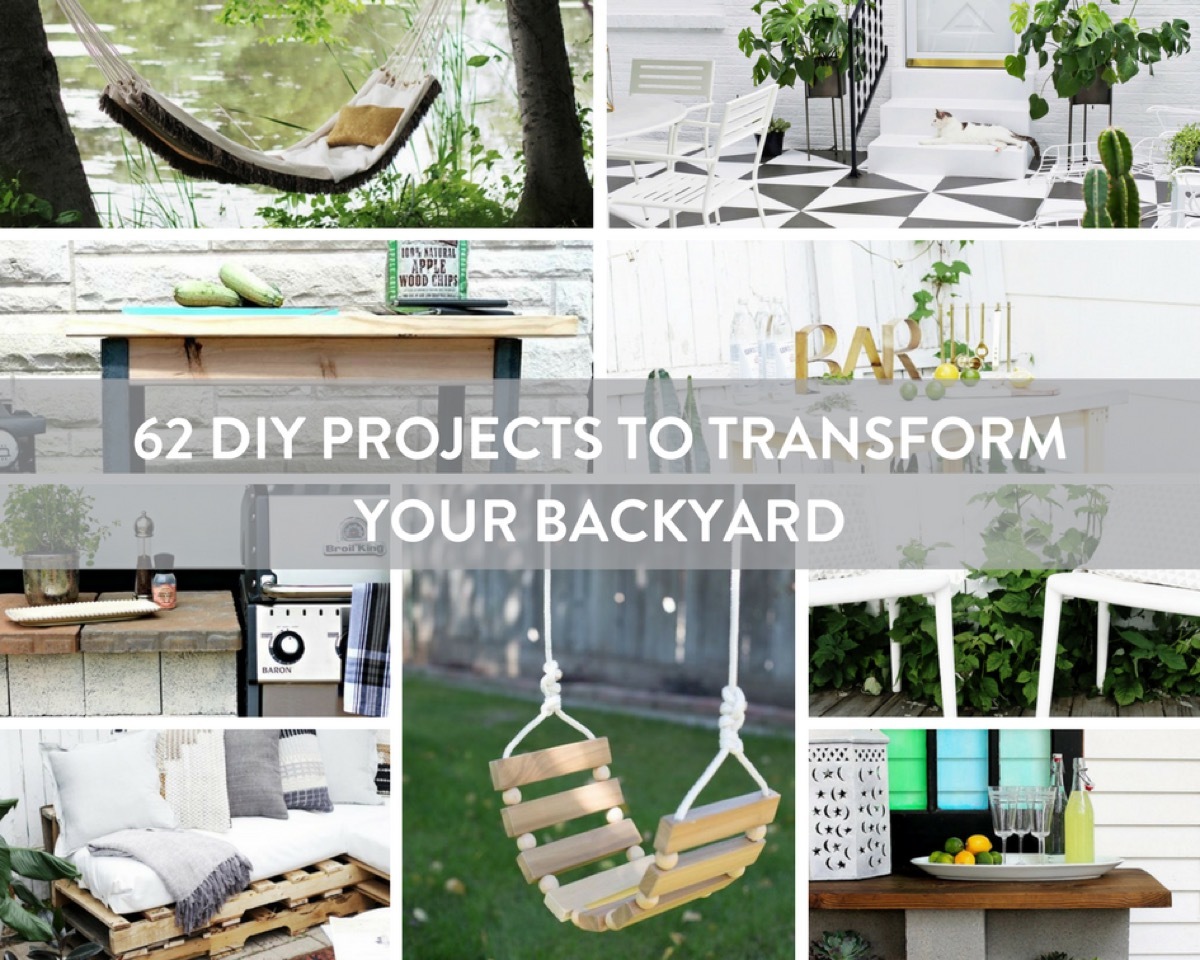
Blooming flowers and fresh rain can only mean one thing: spring has definitely sprung! That means summer will be here before you know it. If getting your backyard in order is on your to-do list but you’re having trouble getting started – don’t fret! You don’t need a total landscaping overhaul for your yard to feel refreshed and inviting. Sometimes it’s just a matter of hanging up some string lights or creating a simple fire pit. We’ve rounded up 62 outdoor DIY projects to get you excited to be outside again as the weather warms up. From plants to playhouses, keep scrolling for more inspiration! What ways do you want to transform your backyard? Let us know in the comments!OUTDOOR SEATING
1. Pallet Couch: Doesn’t this space look inviting? The good news is that it’s made from free pallets and a few cushions! 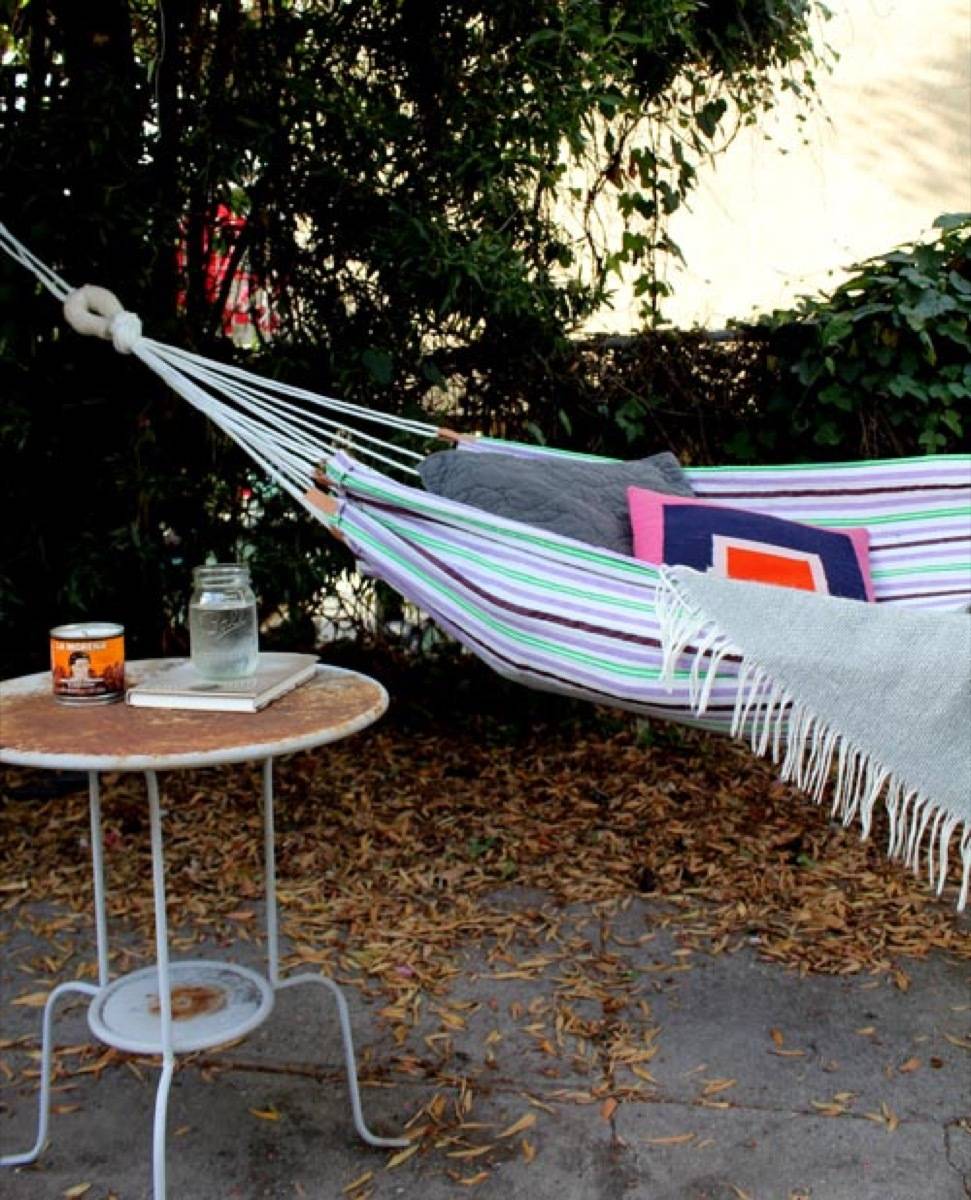
2. Summer Hammock: Nothing says “ahhhhhhh” like a gently-swinging hammock. Get ready to relax in the fruits of your labor with this DIY. 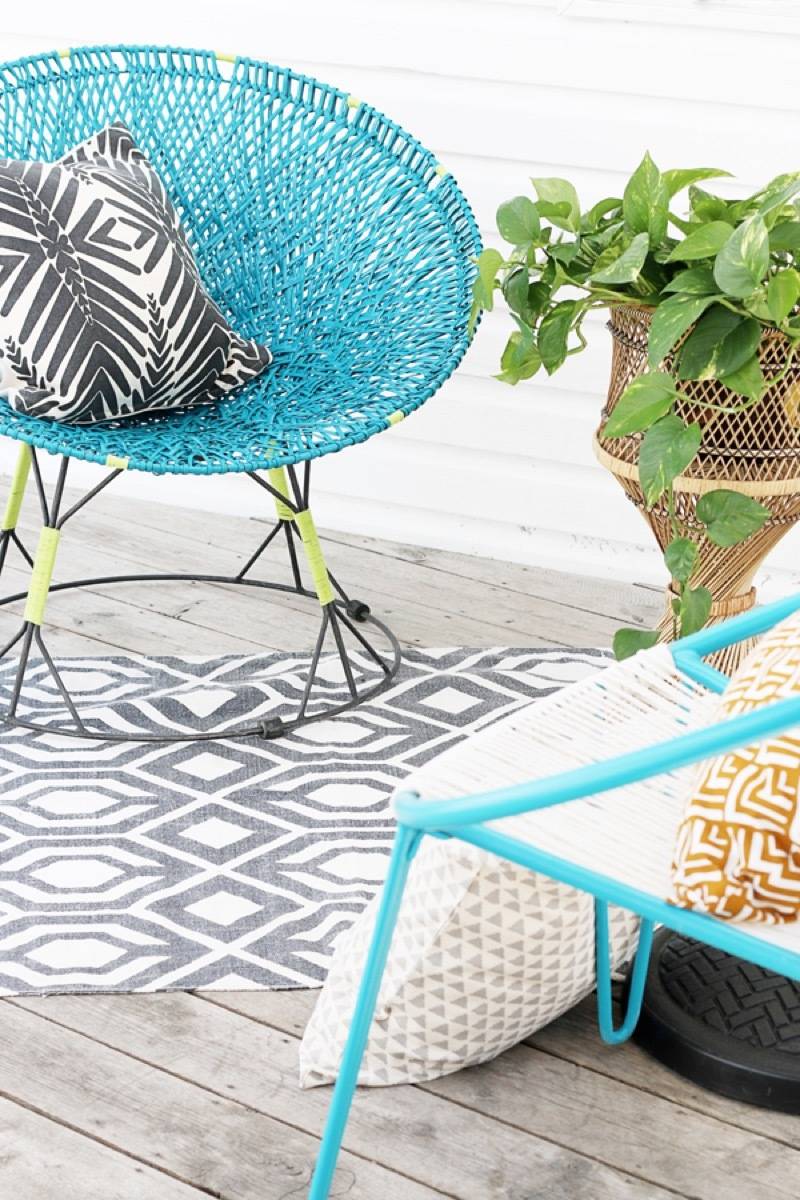
3. Colorful Chair Makeover: There are no rules to how bright colors can be outside. See how these once bland lawn chairs got their day in the sun. 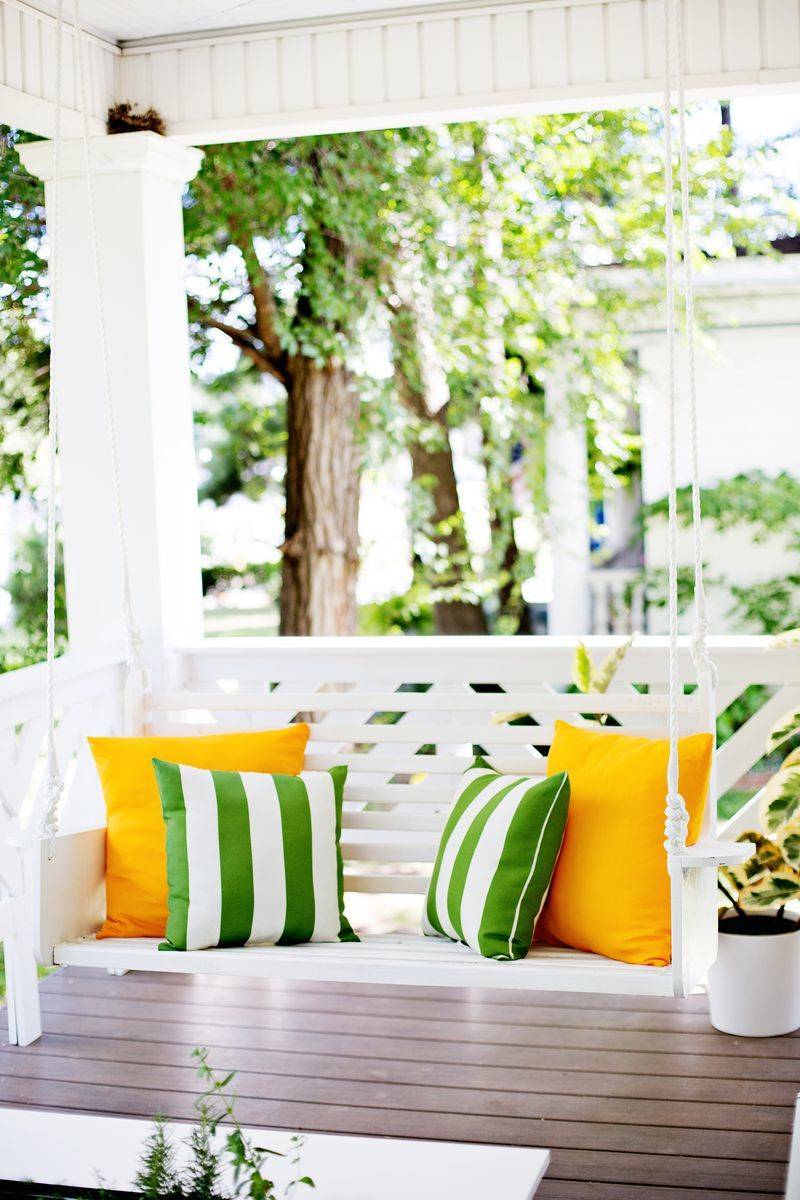
4. DIY Porch Swing: As Liz Lemon says, “I want to go to there!” Swinging in the spring breeze is a total DIY reality with this project from A Beautiful Mess. 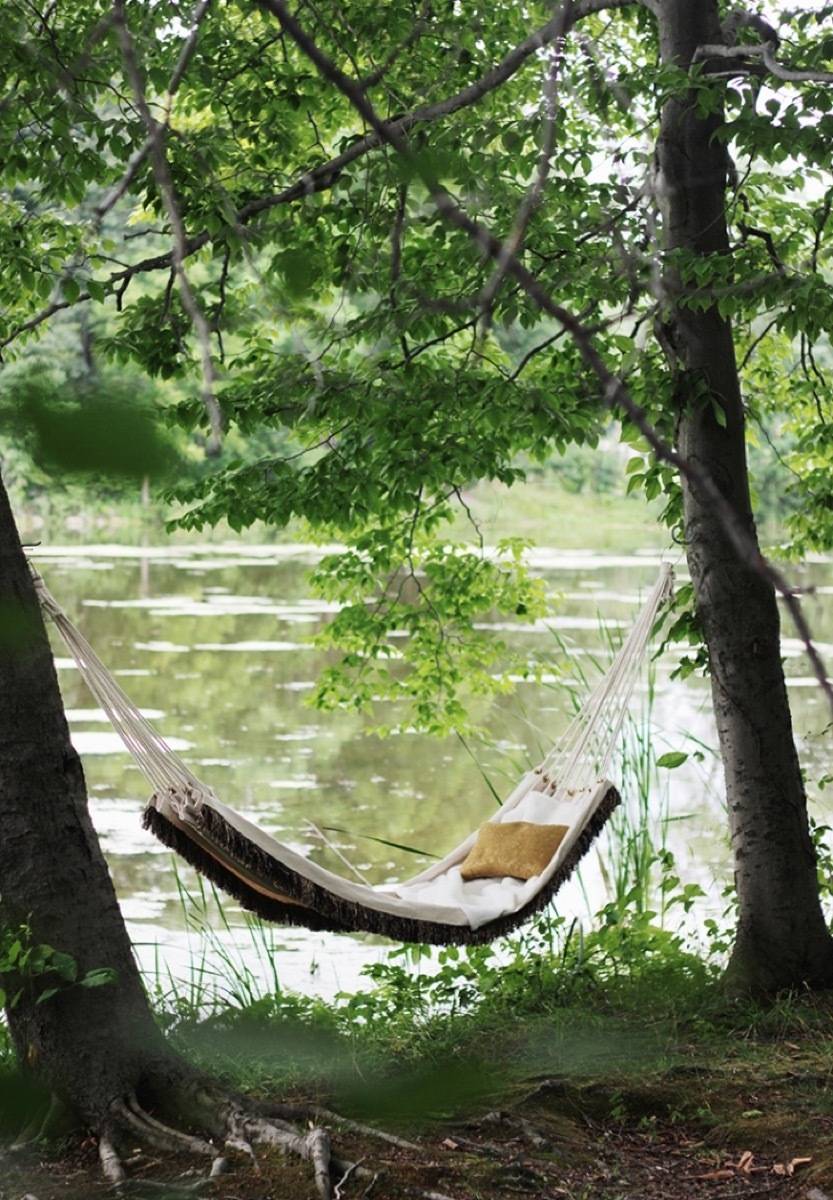
5. DIY Fringed Hammock: This hammock brings boho to the backyard with the addition of fringe. 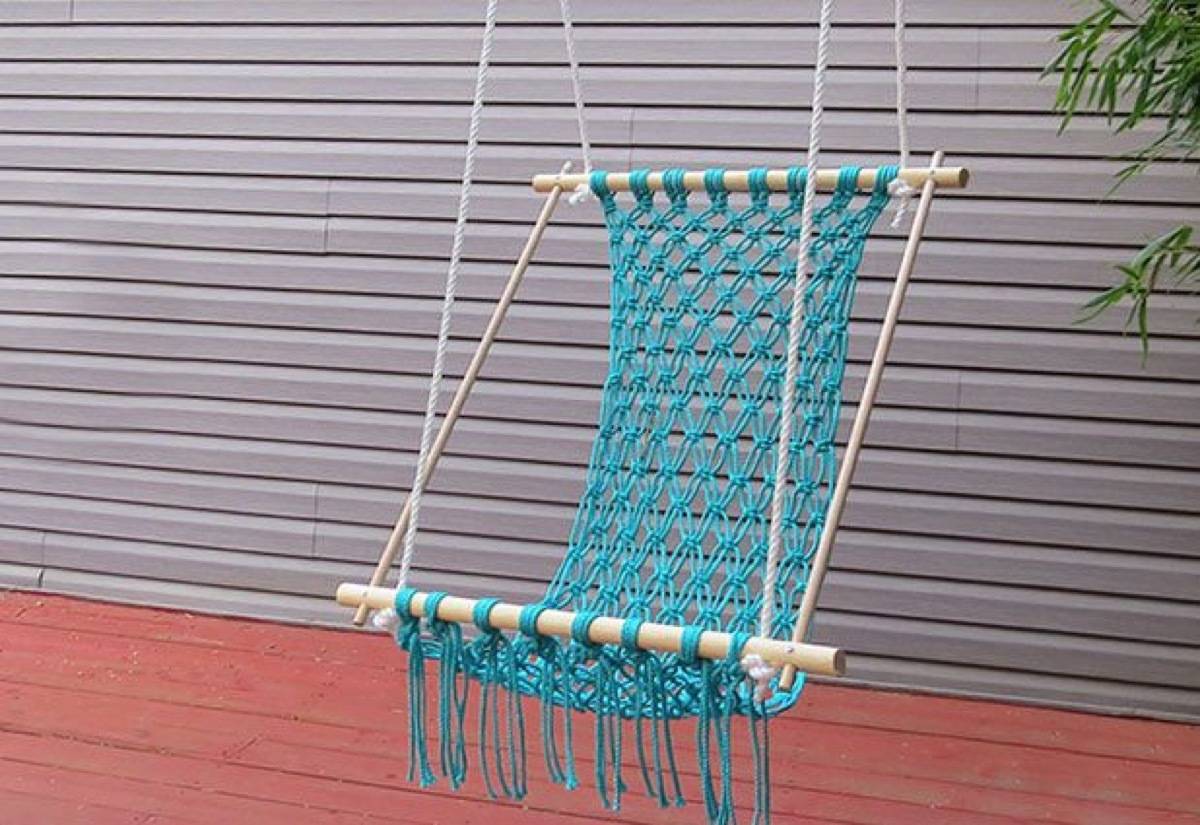
6. Macramé Hammock Chair: I can”knot” get over how gorgeous this hammock chair is! 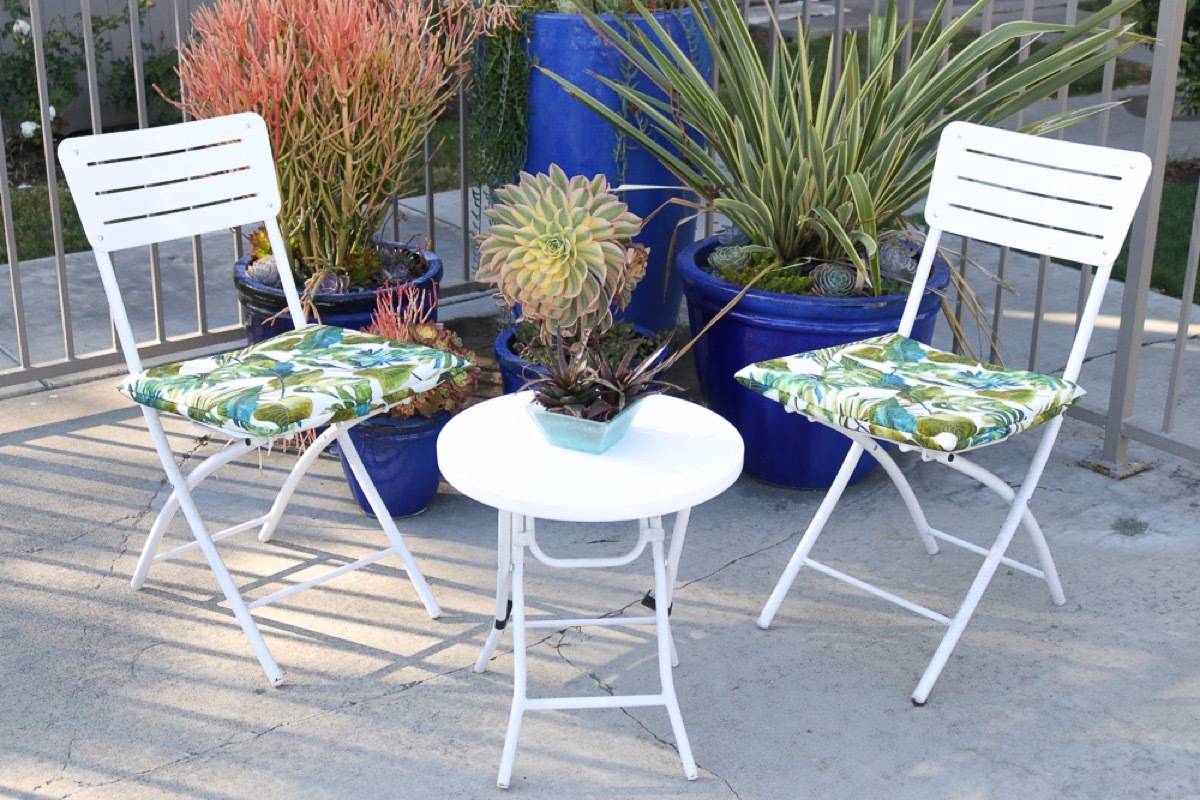
7. DIY Outdoor Cushions: Update your existing patio furniture by stitching up some of these quick and easy DIY outdoor cushions. 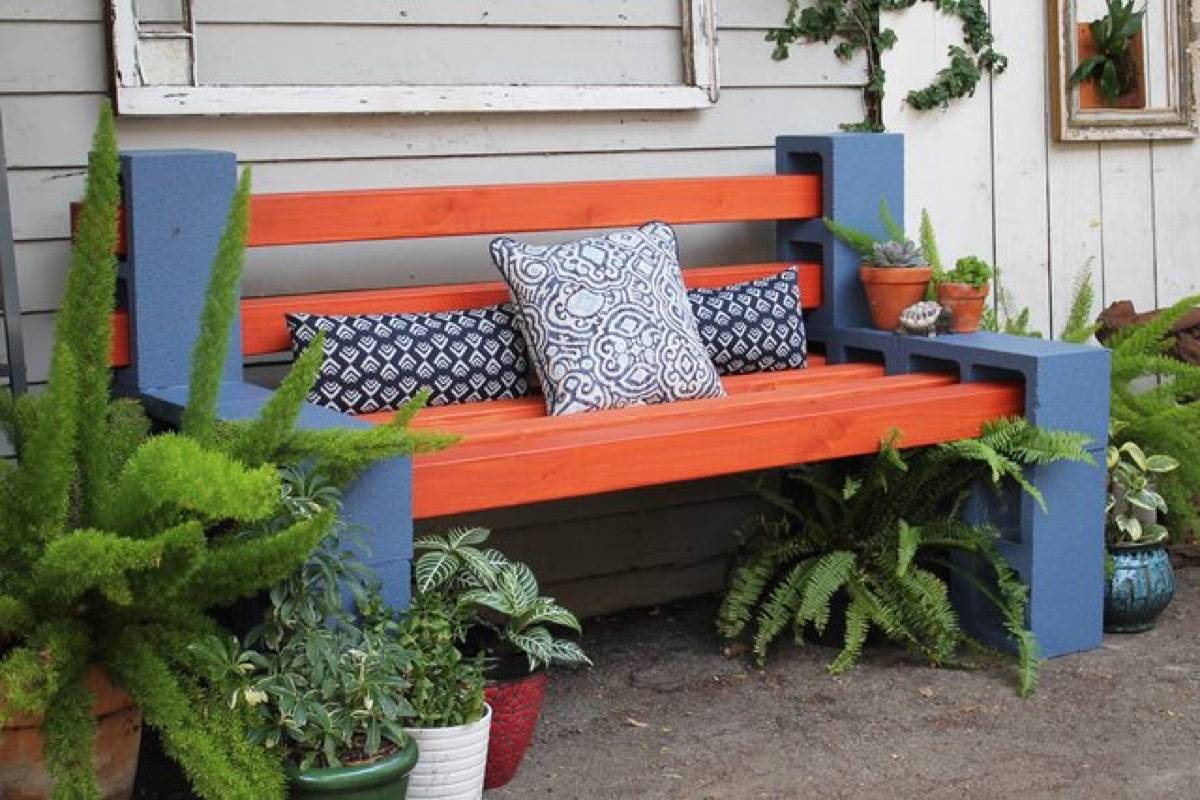
8. Easy Outdoor Bench: Emphasis on “easy!” Instant seating comes to life with wood beams, concrete blocks, and a bit of paint. 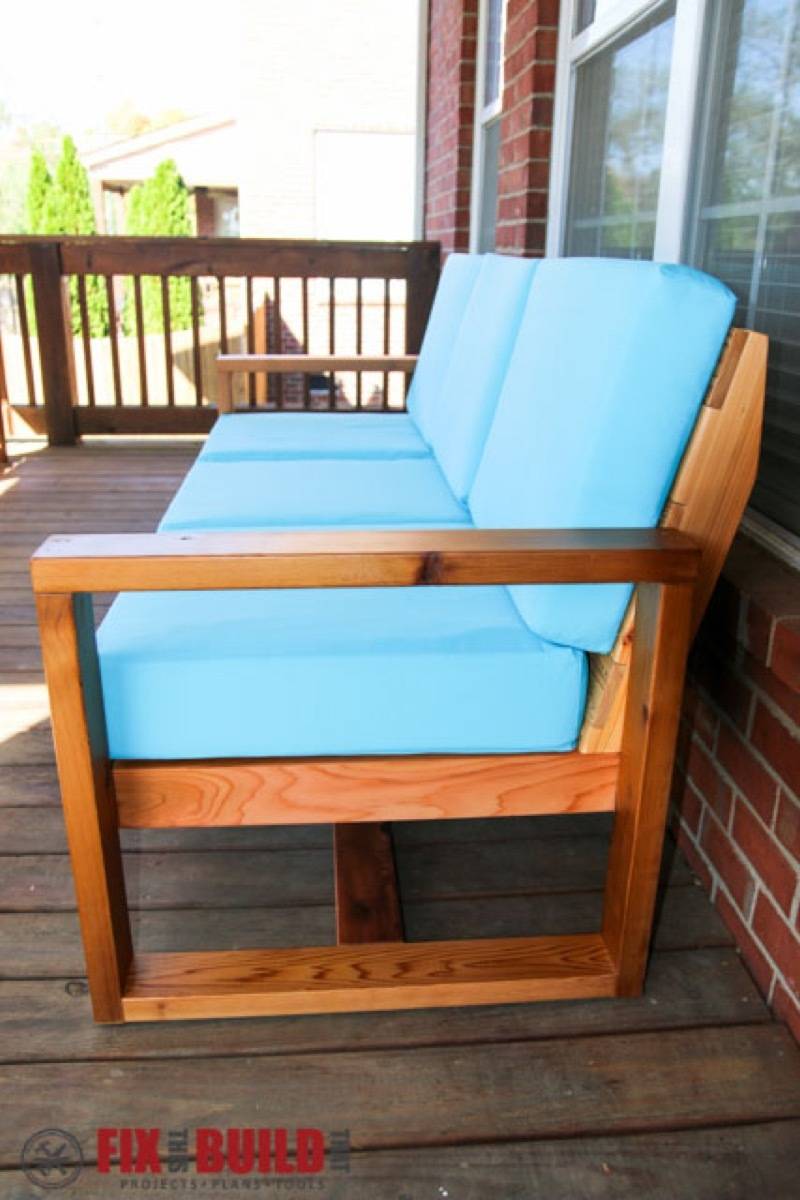
9. Modern Outdoor Sofa: This number is so sleek I might want to bring it inside my house! The good news is it’s built to withstand the elements, which means you can make your back deck super classy. OUTDOOR ENTERTAINING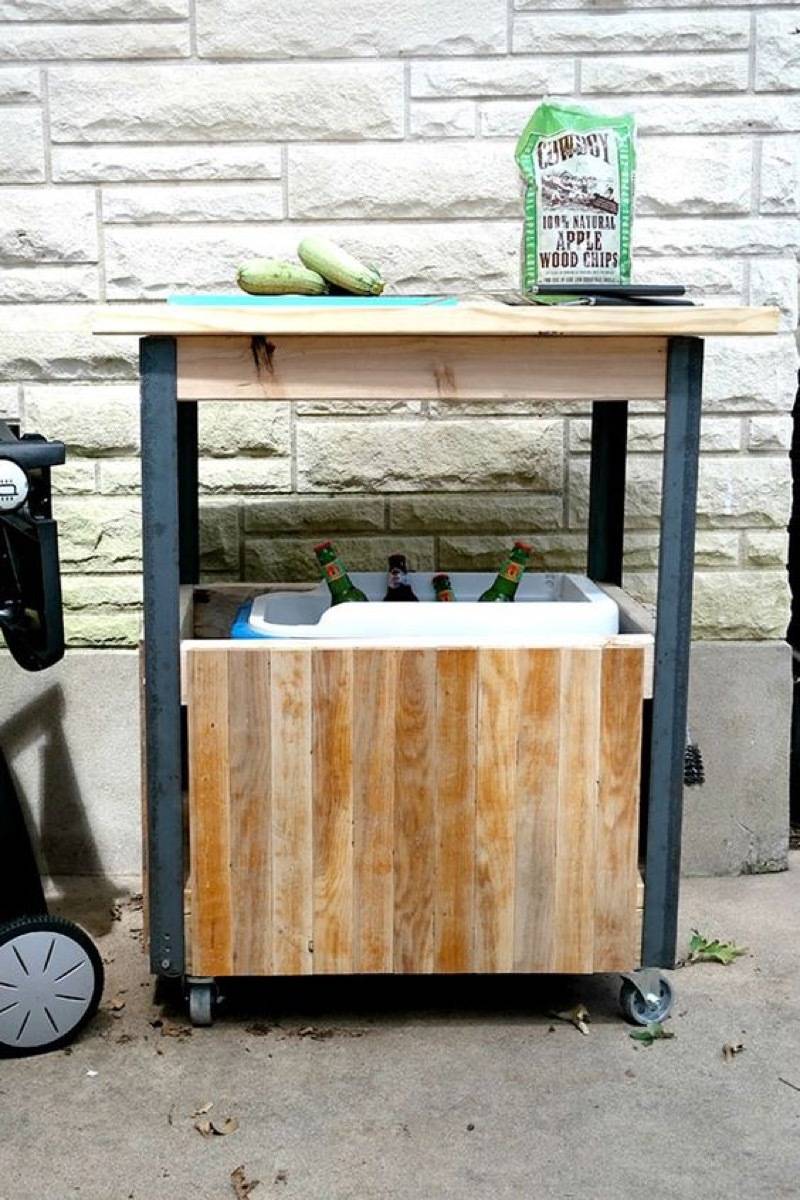
10. Simple Grilling Cart: Grillin’ on the go! With a built-in drink cooler, what more could you ask for out of an outdoor DIY project? 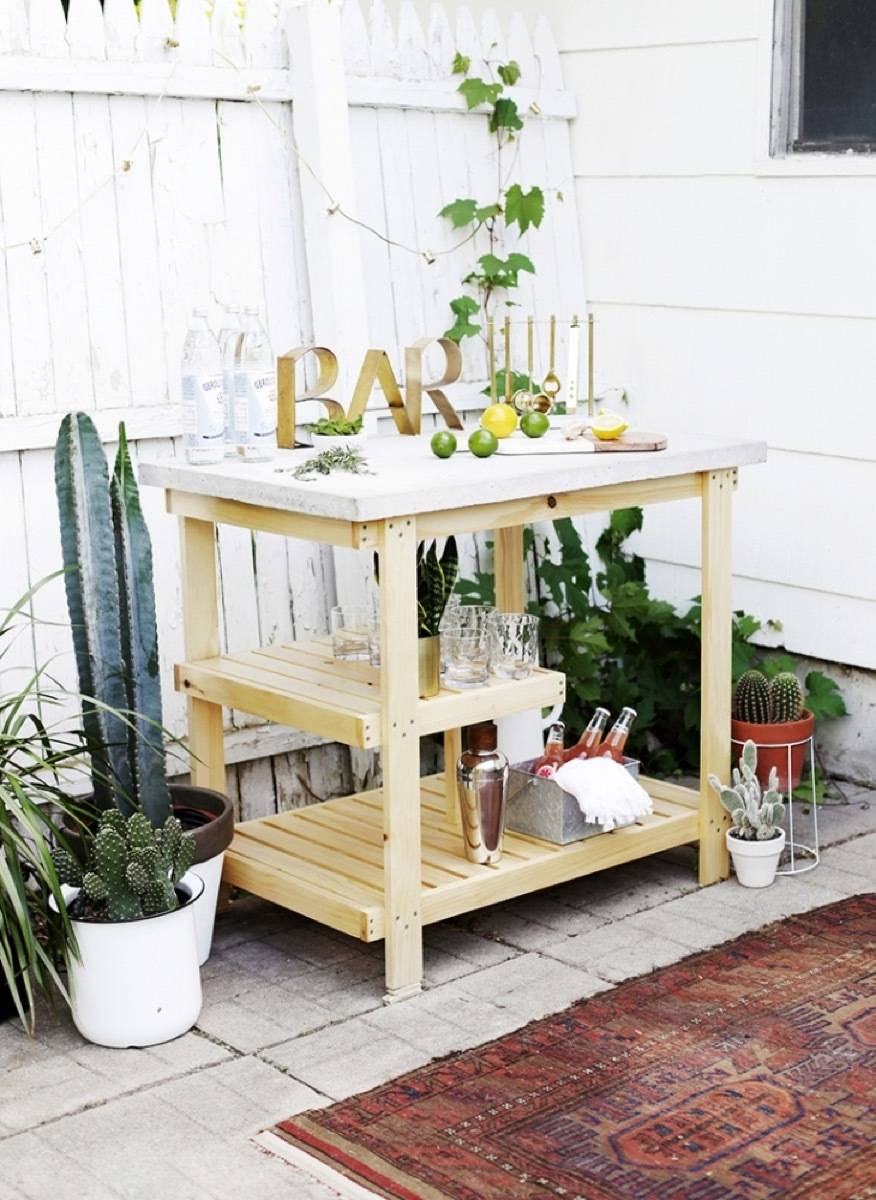
11. Outdoor Bar: If you’re not really the grill master type, but more of a whiskey woman, why not make a drink bar for your backyard? 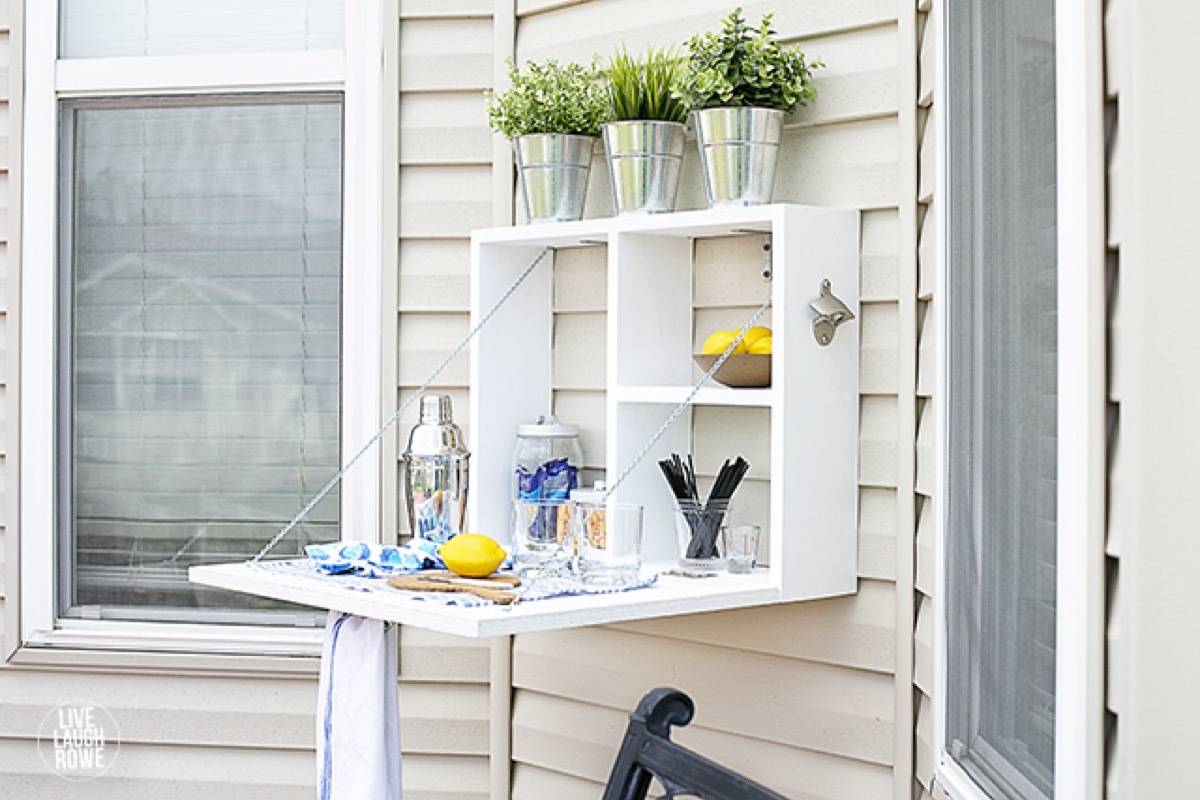
12. Wall-Mounted Serving Station: Want to entertain but don’t have space for a full outdoor kitchen? Go vertical by building this simple serving station with drop-down tabletop! 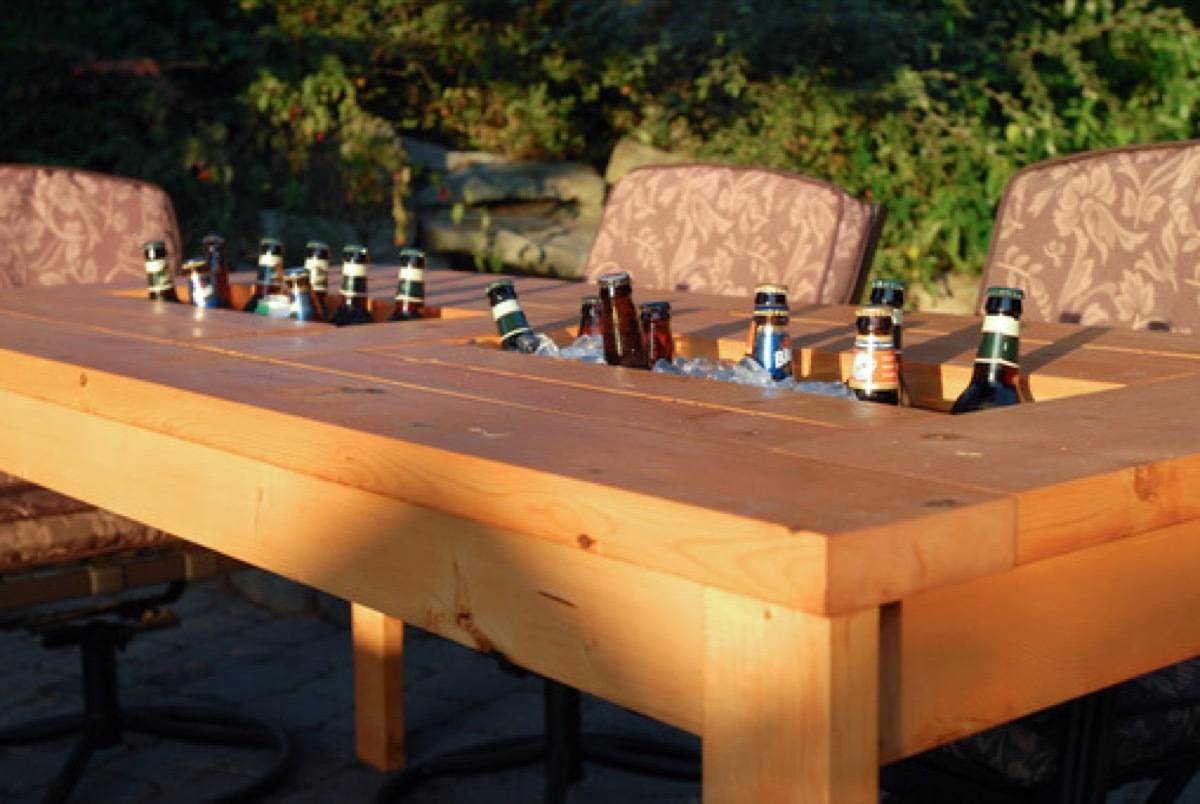
13. Built-in Beer Cooler Table: Woah Nelly, what is this ingenious contraption? Never get up from your chair again with this DIY. 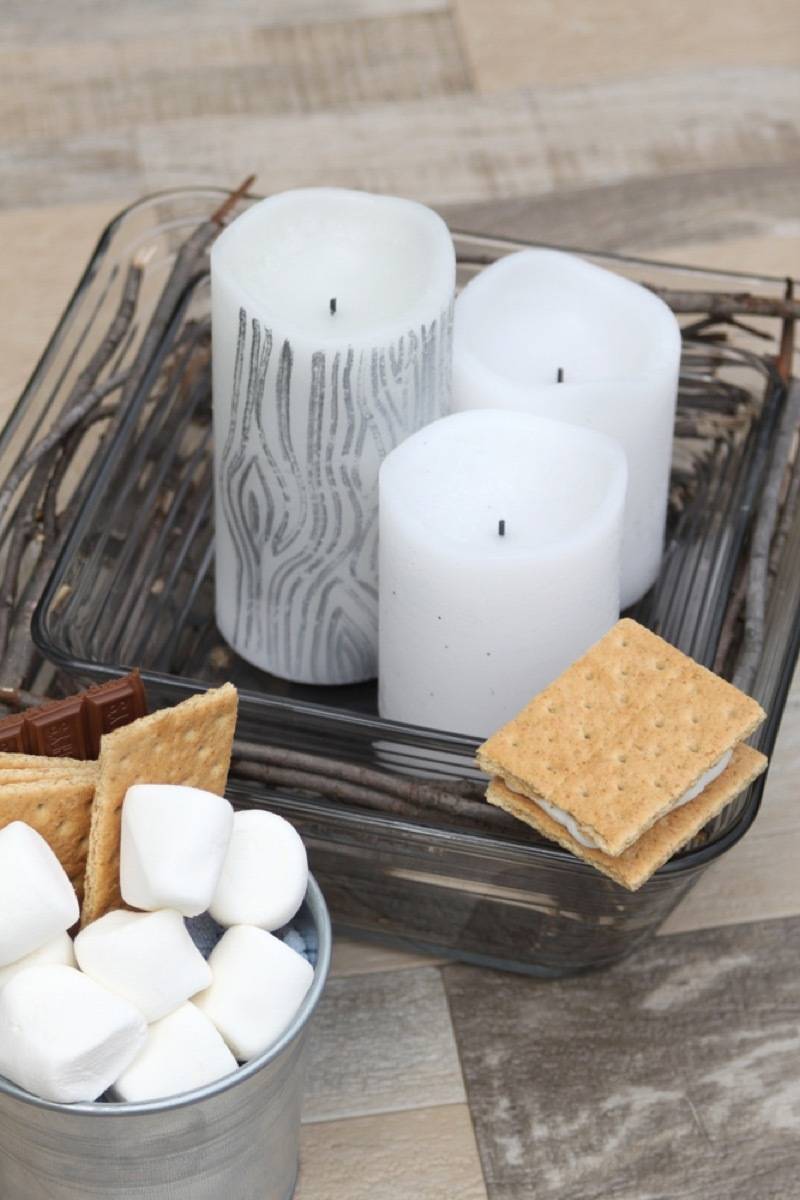
14. S’mores Station Centerpiece: Acting as both a lovely centerpiece and a warming station for marshmallow and chocolate, party guests are sure to be impressed by this s’mores machine (made from glass dishes!). 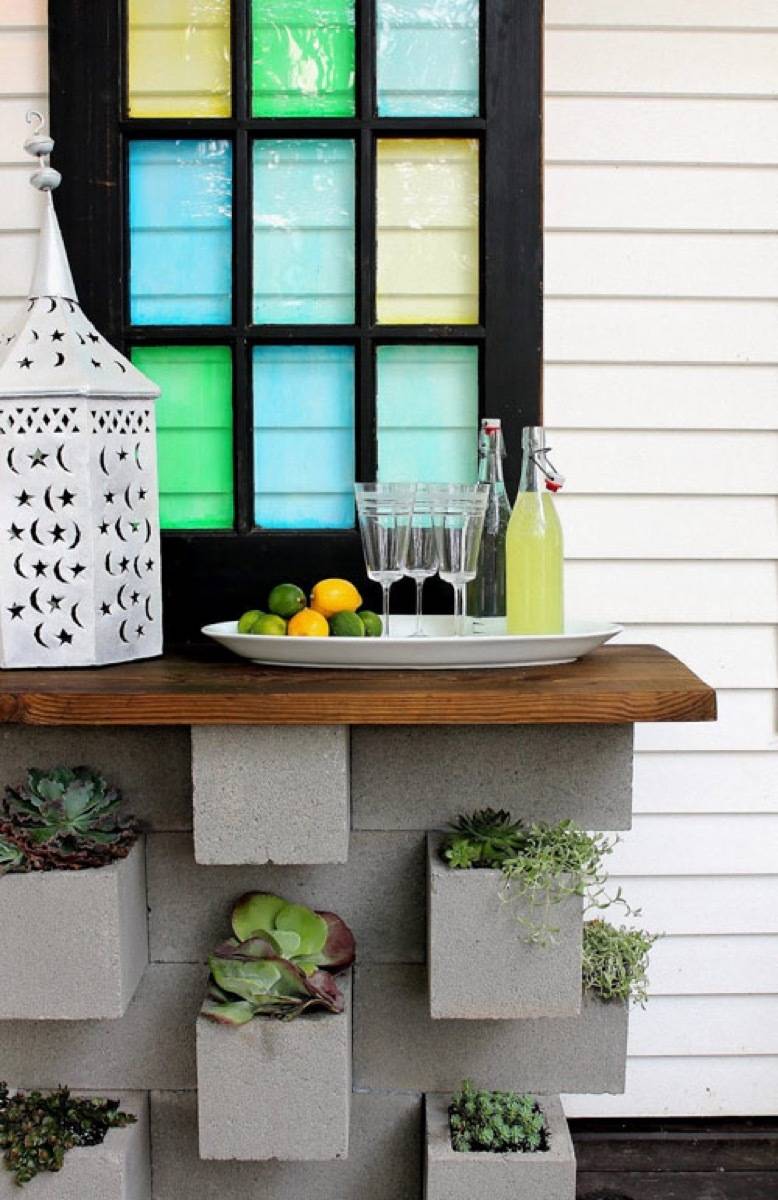
15. Cinder Block Bar: Combining two awesome things (plants and booze), this bar provides an easy builder’s solution. 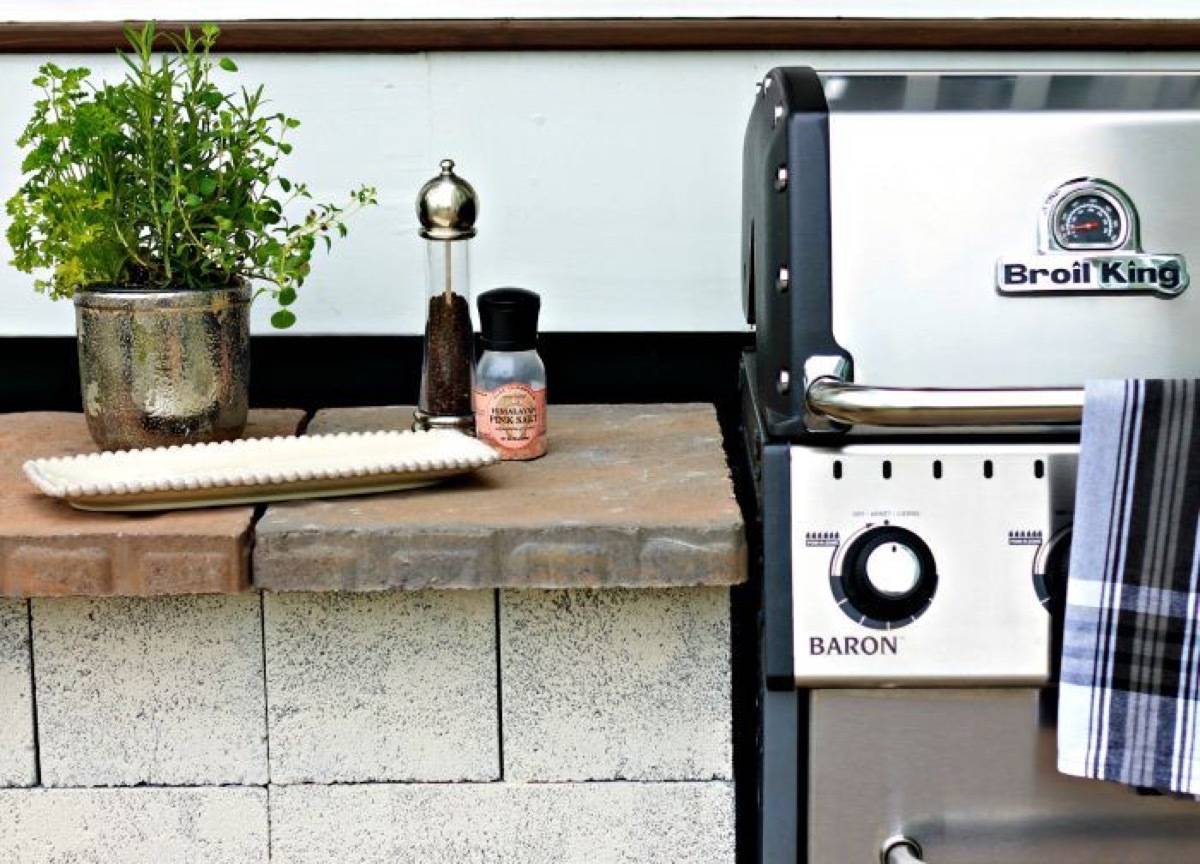
16. DIY Grill Countertop: Basically like having an outdoor kitchen, this brick counter space built around a grill surely makes outdoor entertaining a breeze. 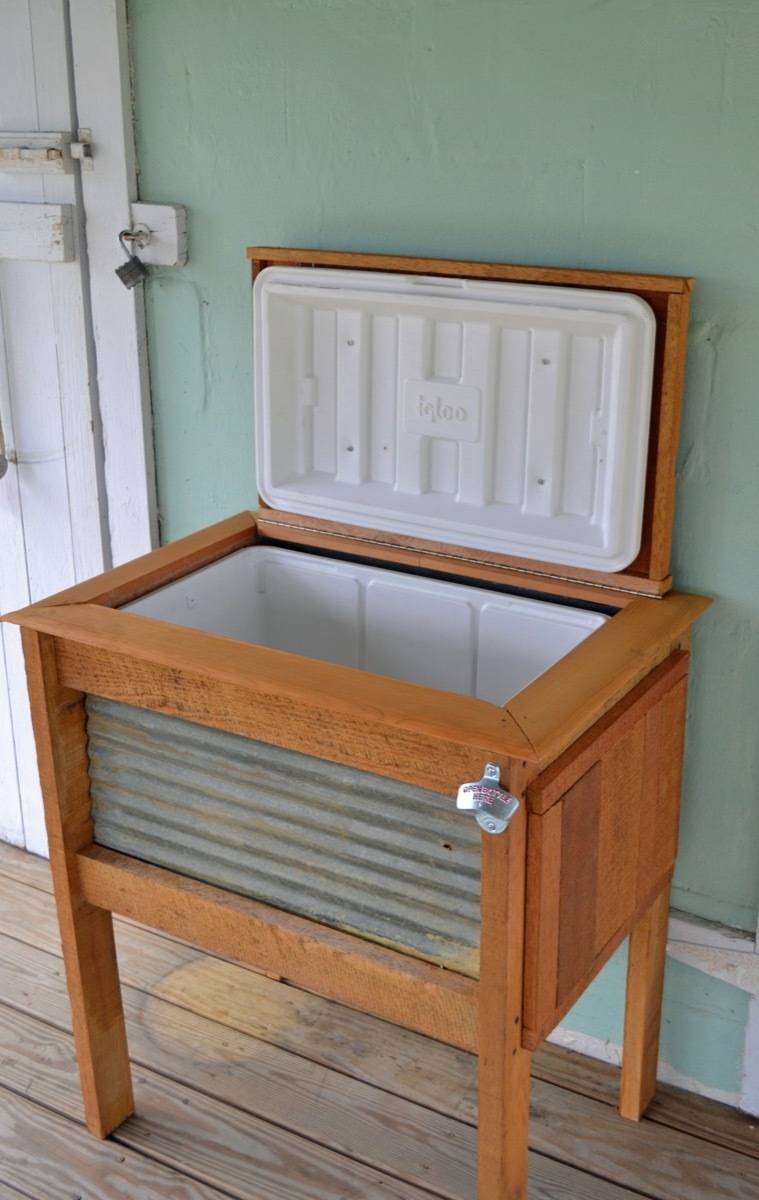
17. Drink Cooler Stand: If you’re constantly entertaining outside, or if you just enjoy having a cold beverage available whenever, this drink stand provides a classy solution to the standard cooler. 
18. IKEA Outdoor Bar Cart: This entertaining station falls under the category of “why didn’t I think of that?” 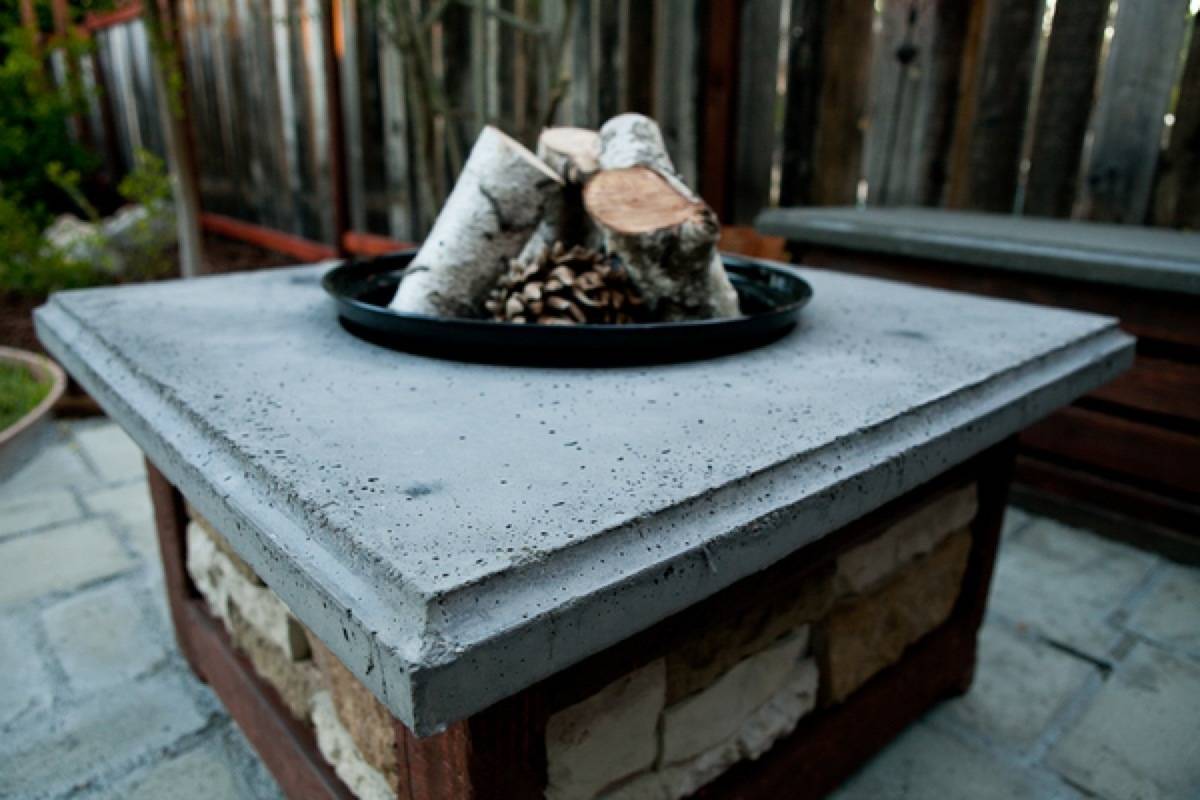
19. Built-To-Last Concrete Fire Pit: With a little elbow grease, you can build your own fire pit that you can enjoy for many summers to come. 
20. Minimal Fire Pit: If clean lines are more your style, explore this fire pit put together by The Brick House. 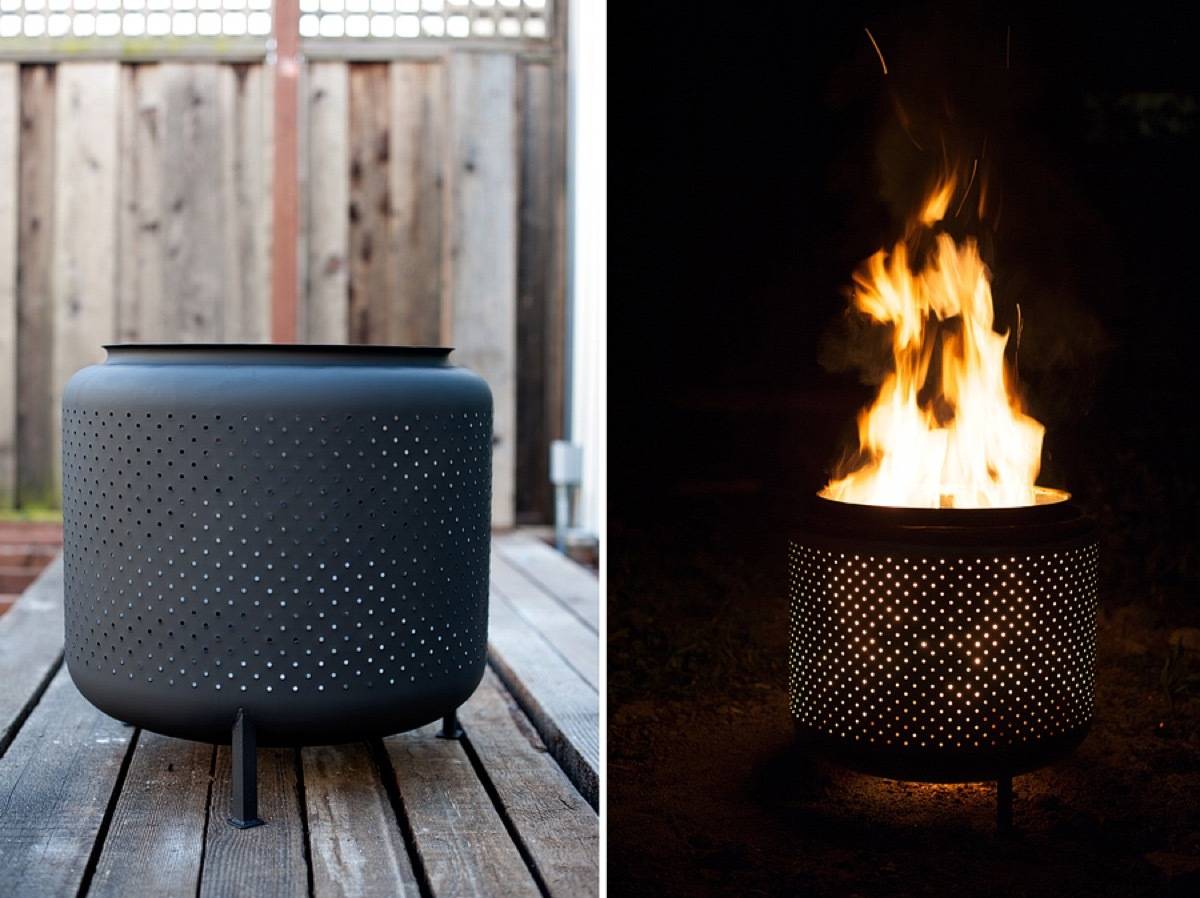
21. Upcycled Fire Pit: I don’t want to pick favorites, but this outdoor DIY project is high on the list. See what unusual upcycled material this flaming beauty was made from! OUTDOOR LIGHTING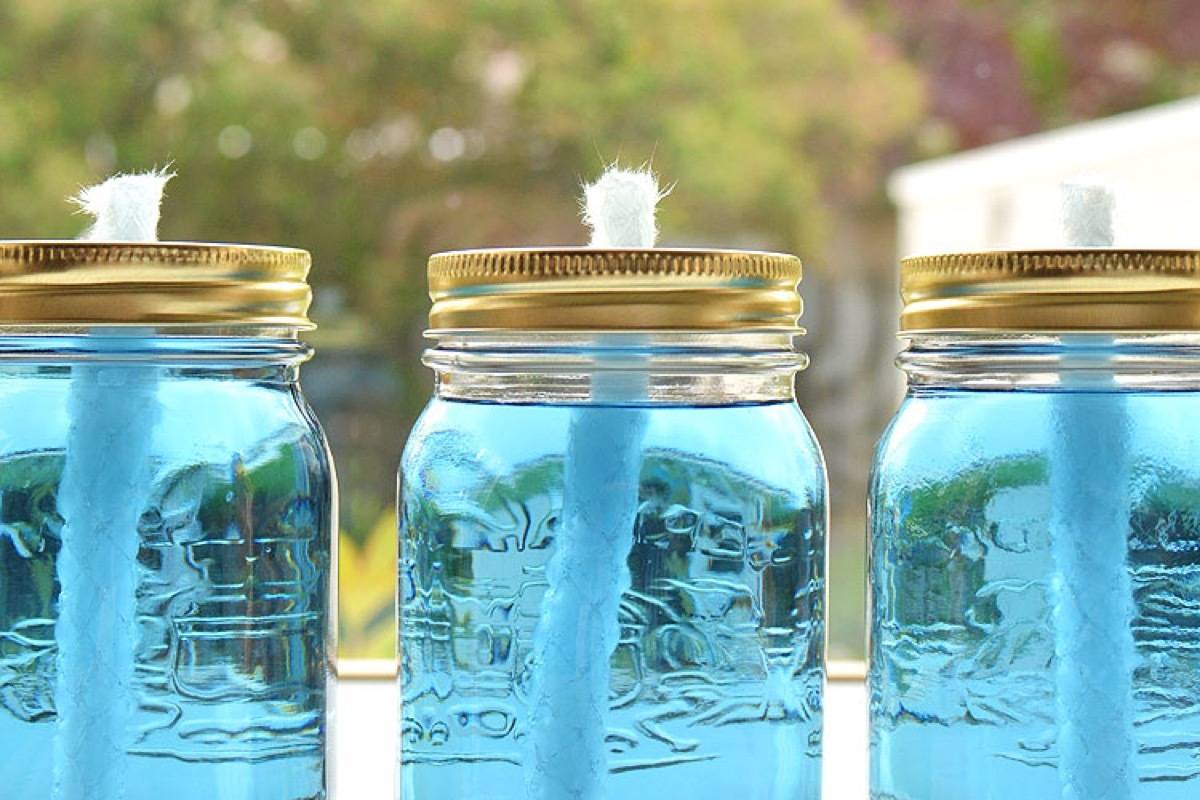
22. Bug-Repelling Citronella Candles: These outdoor lights do double-duty by providing light and shooing away unwanted pests. 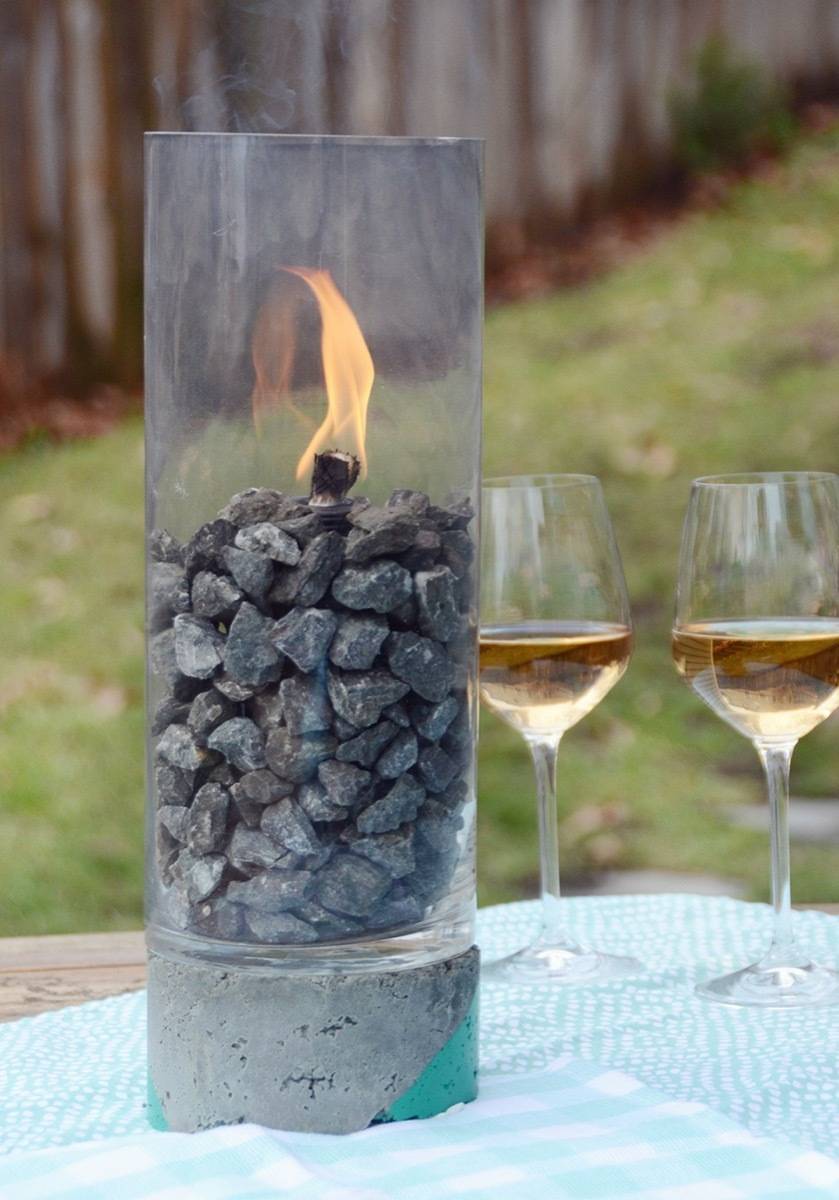
23. Fire Column: Nothing says “class” like fire in glass. Shed a little light in your outdoor dining space with this simple DIY project. 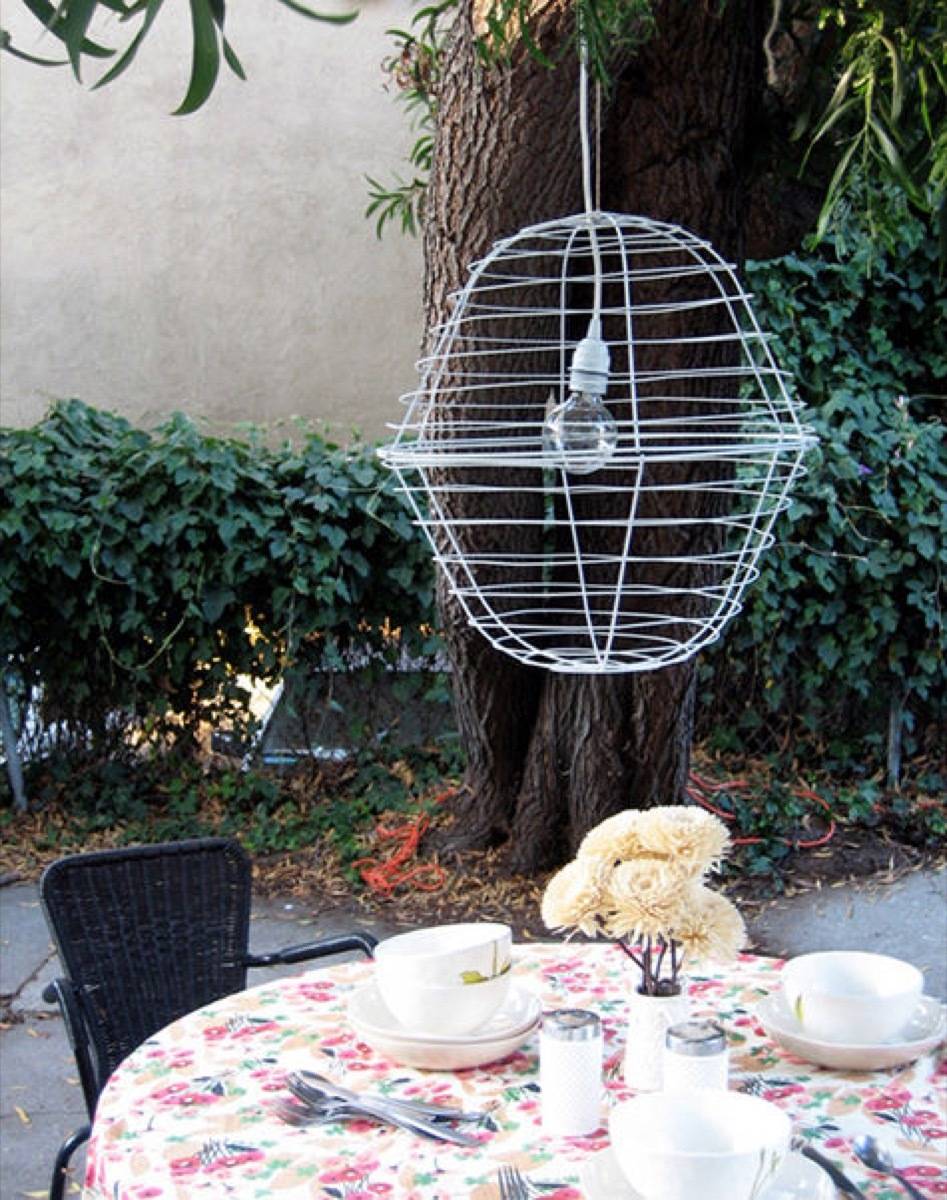
24. Pendant Light: This DIY might make you want to eat outside for every meal! Create a classy dining nook by hanging some proper light fixtures. 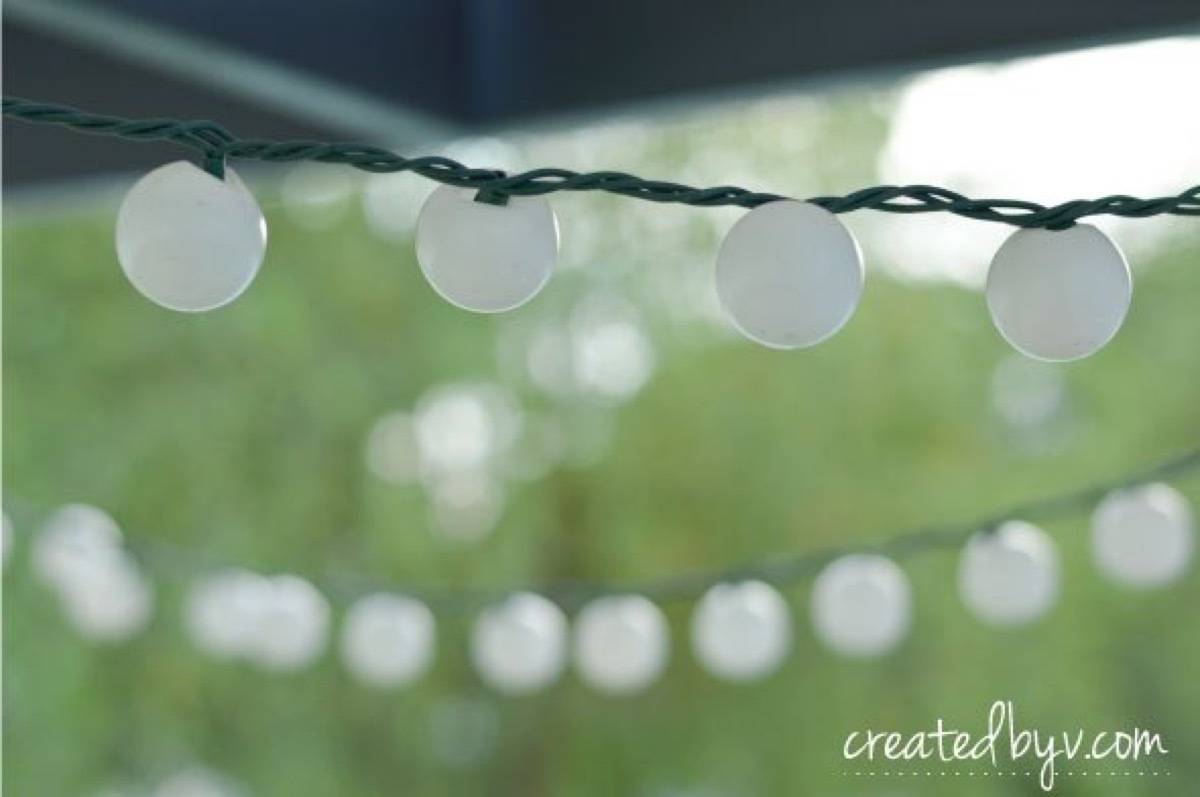
25. Ping Pong Ball Lights: Maybe the easiest outdoor DIY project on this list, these ping pong ball lights instantly add charm to any space. 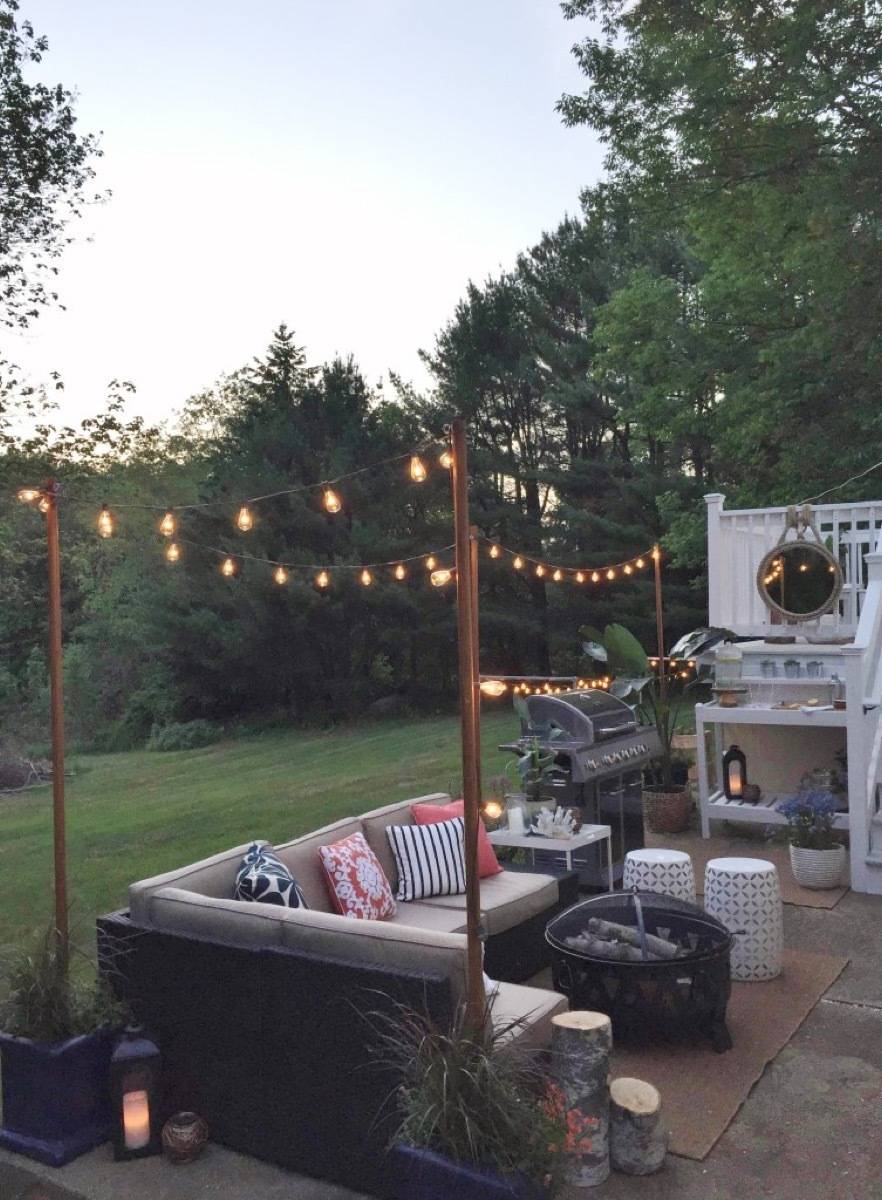
26. String Light Hanging Poles: If you want to hang string lights outside but don’t have anywhere to put them, City Farmhouse has an easy solution that also involves plants! 
27. Portable Fire Pit: This flame is on the move! Which is perfect if you are an renter or apartment-dweller. 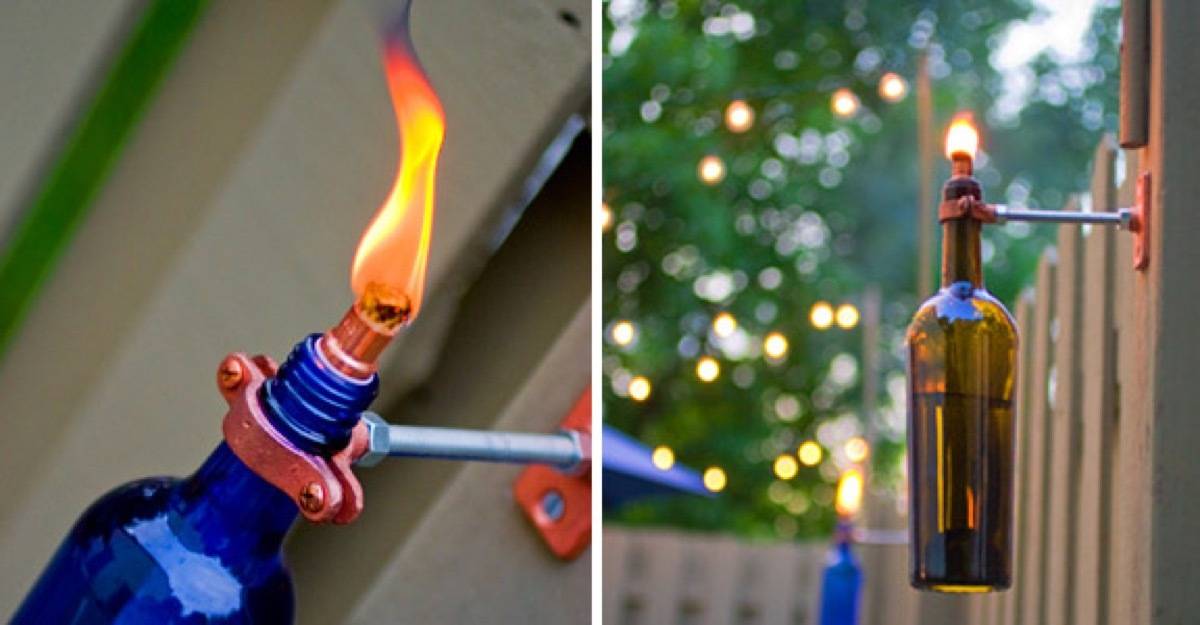
28. Recycled Bottle Tiki Torch: Old wine bottles get new life as mounted tiki torches with this outdoor-friendly DIY! 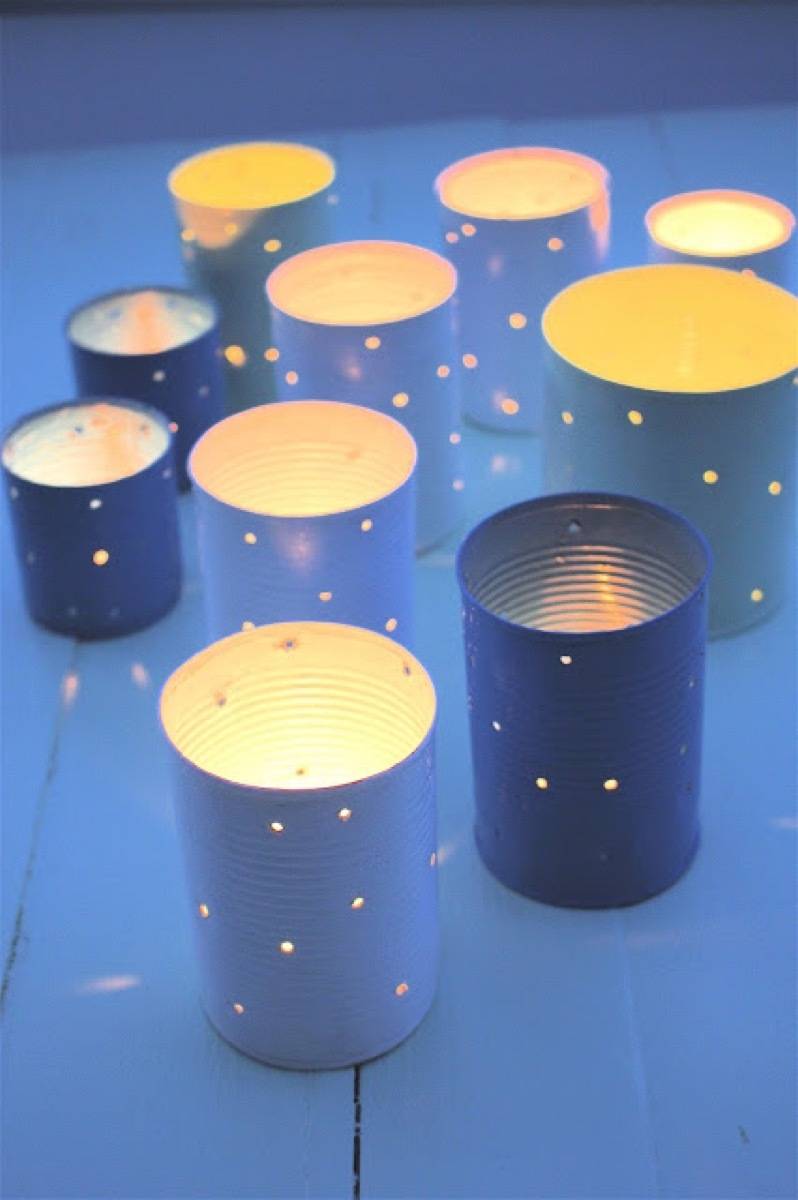
29. Tin Can Lights: This project is a classic, and couldn’t be left off the list! If you need a quick, easy, and cheap solution for your outdoor lighting situation, grab some tin cans, tea lights, a hammer and a large nail, and get to punching! 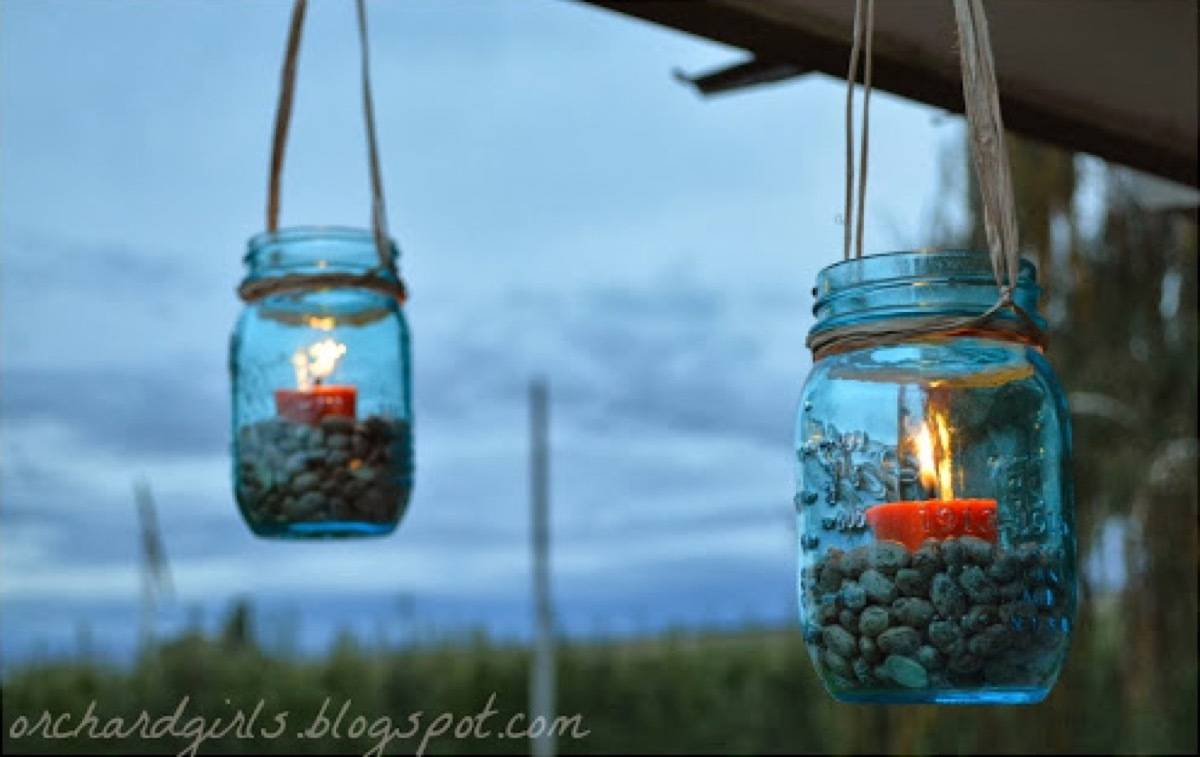
30. Mason Jar Lamps: Another classic, these jar lights are a simple and sweet way to brighten your backyard. 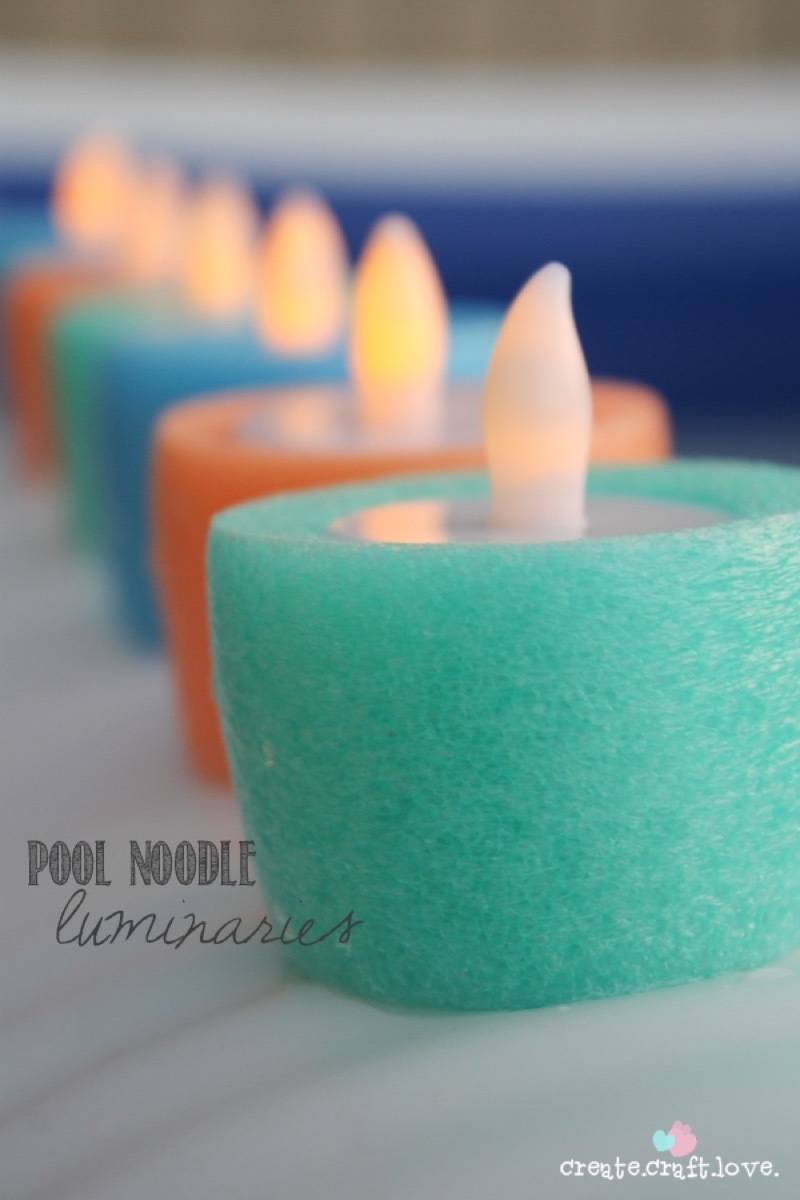
31. Pool Noodle Luminaries: Even if you don’t have a pool, you can set these floatable candles off in a large container of water to add ambiance to any space. 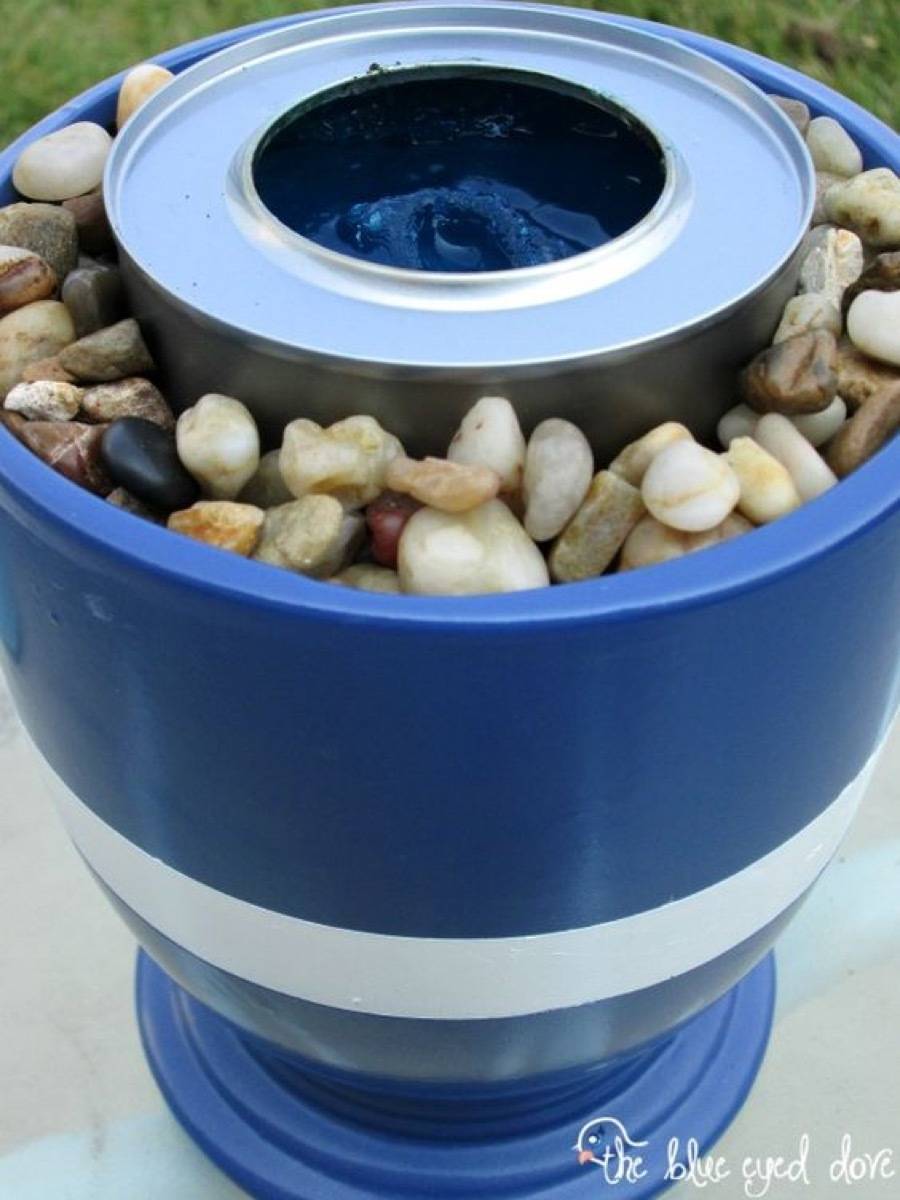
32. Flower Pot Fire Pit: Who says fire pits can’t be cute? Beautiful in blue, this outdoor DIY project only requires a flower pot, stones, and a little flame. OUTDOOR PLANTING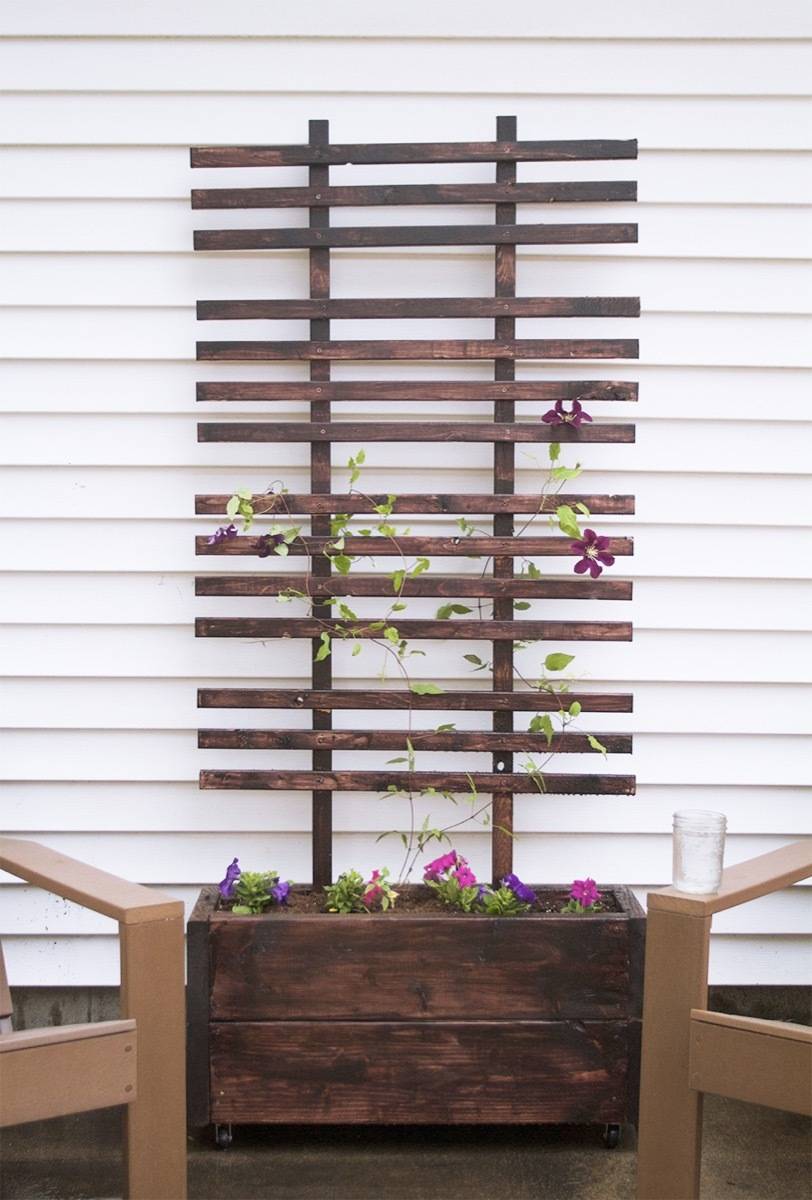
33. DIY Trellis with Planter Box: Give crawling plants somewhere to go by building them a trellis. This project is also great if you’re looking to fill visual space in your patio or deck area! 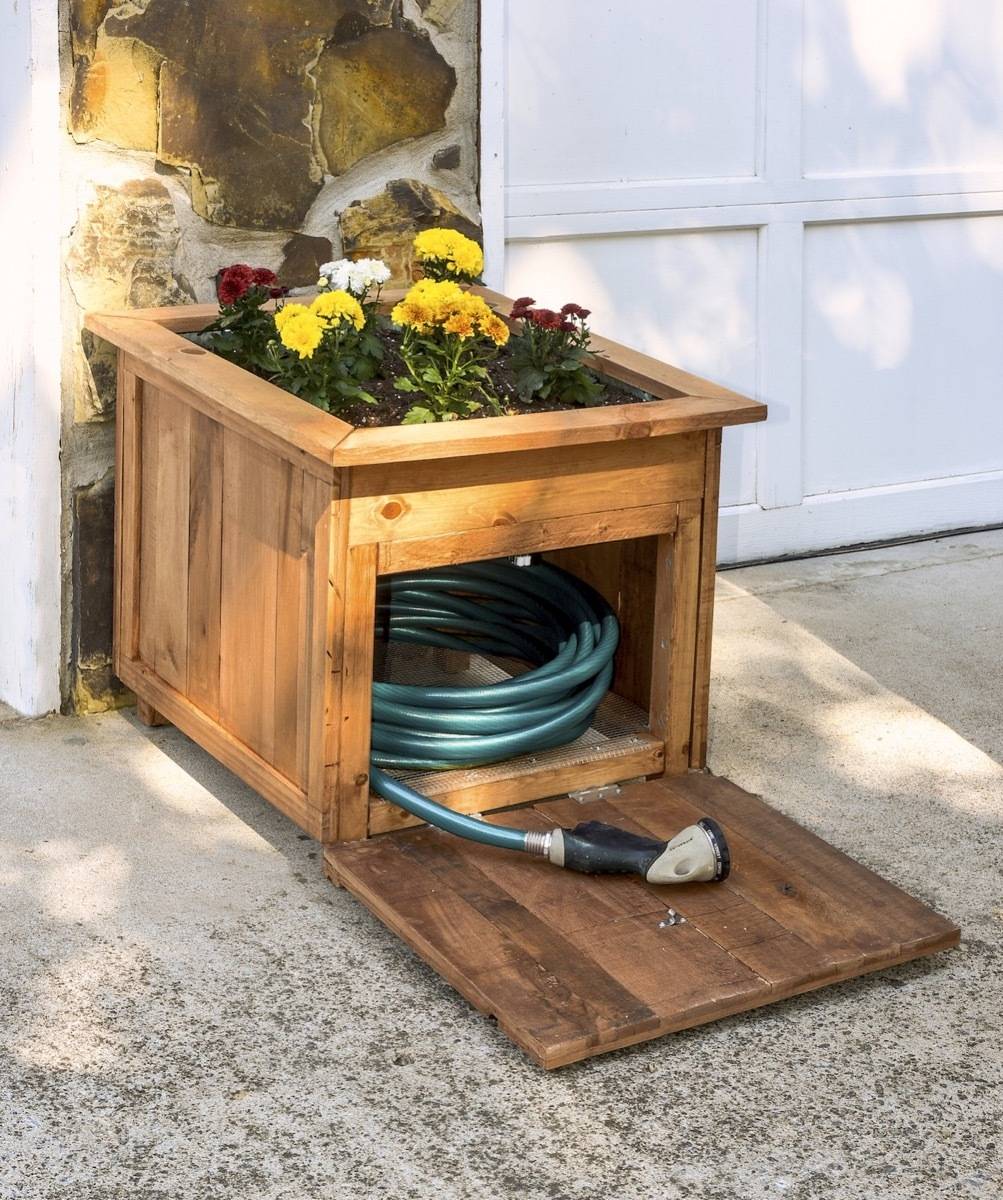
34. Hose Housing Station with Built-In Planter: Gardening hoses are hard to keep neat and pretty. This project solves that solution by keeping the hose hidden! Plus there are flowers involved, which is always a bonus. 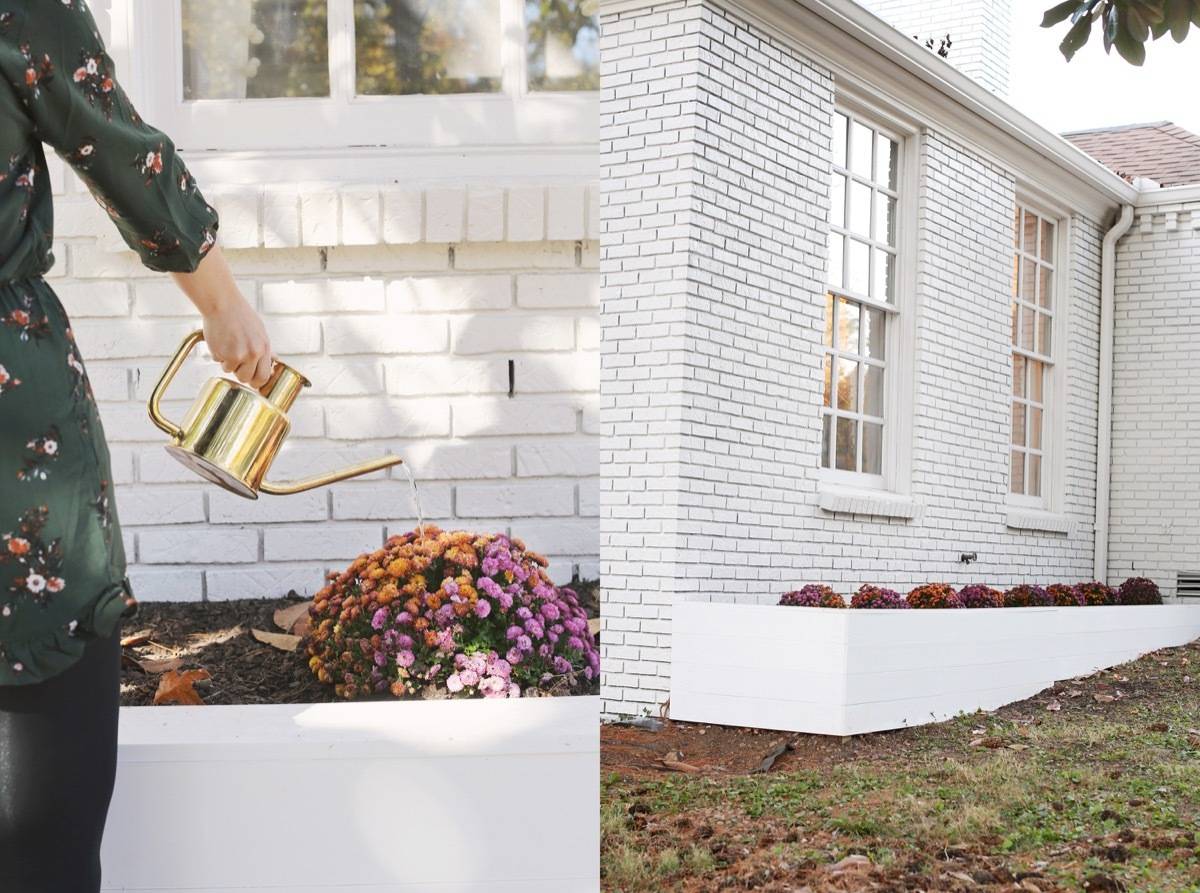
35. Homemade Flower Beds: Bump up your home’s curbside appeal by installing these flower beds you can make on your own. 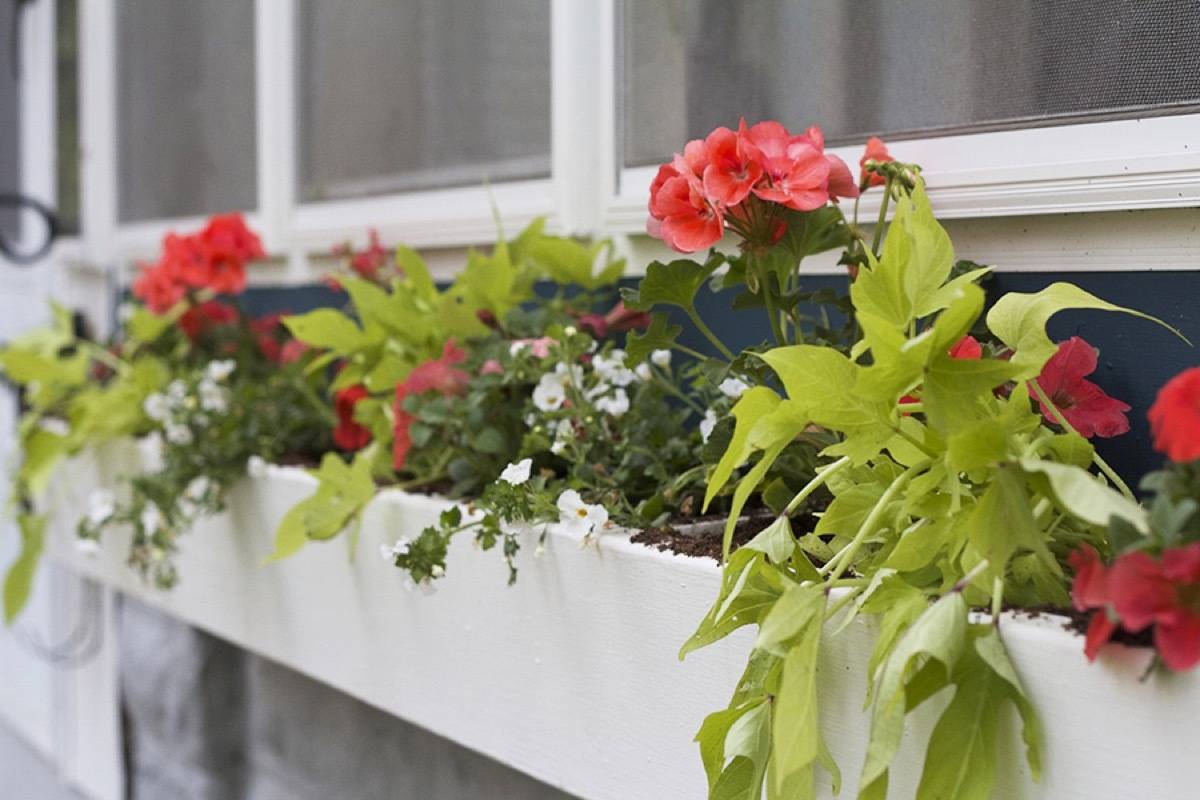
36. Window Boxes: Aren’t these just the sweetest? Deuce Cities Henhouse (local gal to us!) has tips on creating the perfect window boxes. 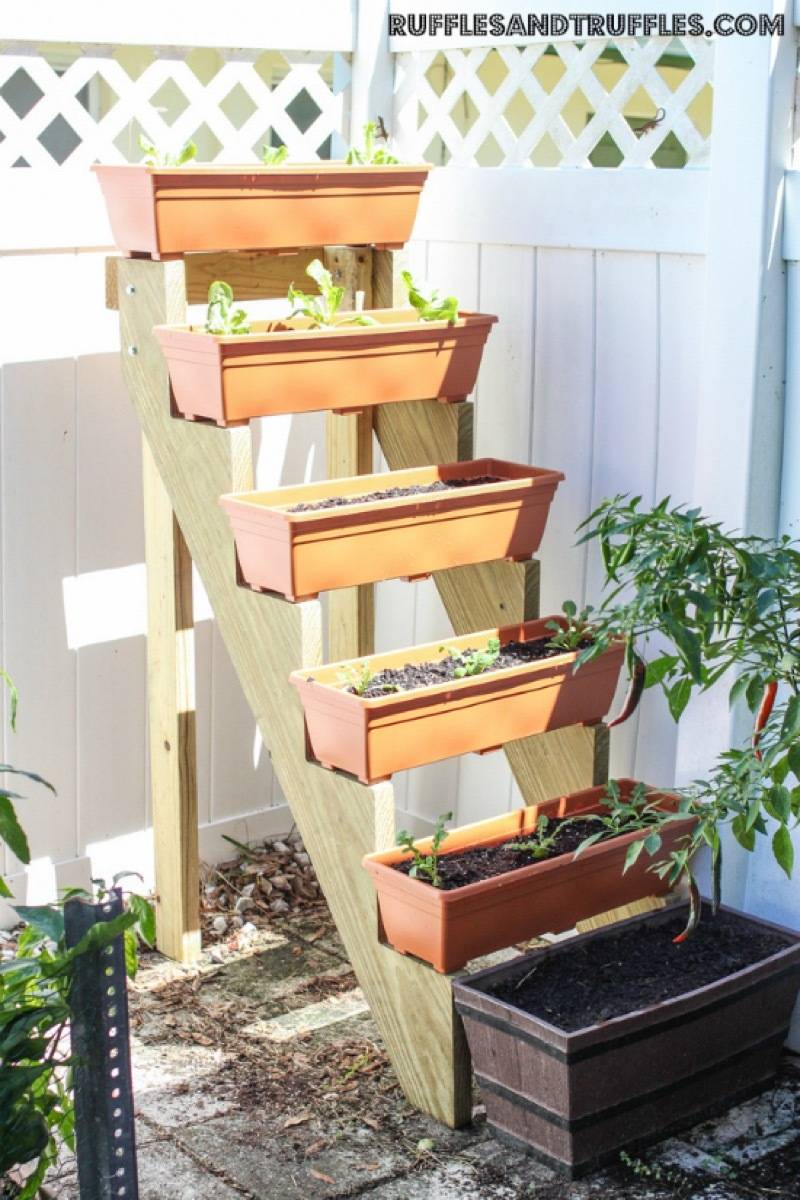
37. Vertical Planter: Take your plants a step up. Perfect if you’re low on space but big on greenery! 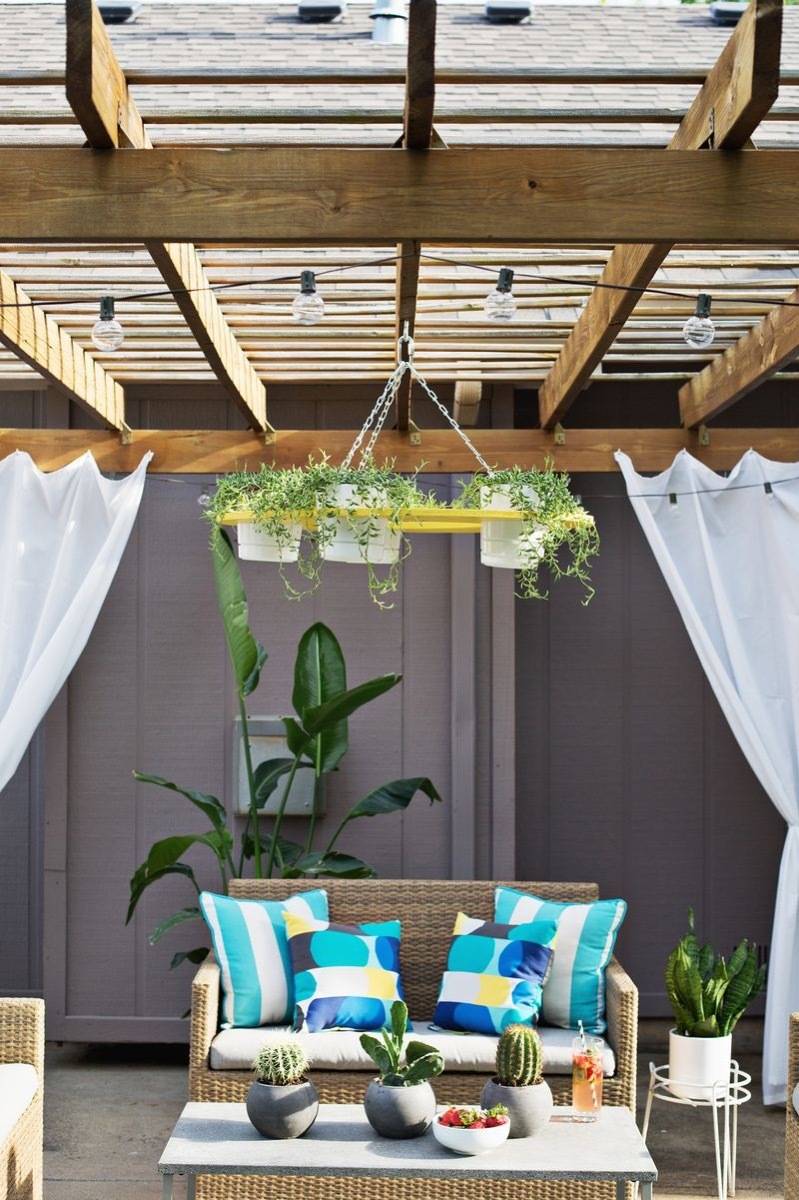
38. Plant Chandelier: Ooh la la! Who needs lights when you can have leaves? 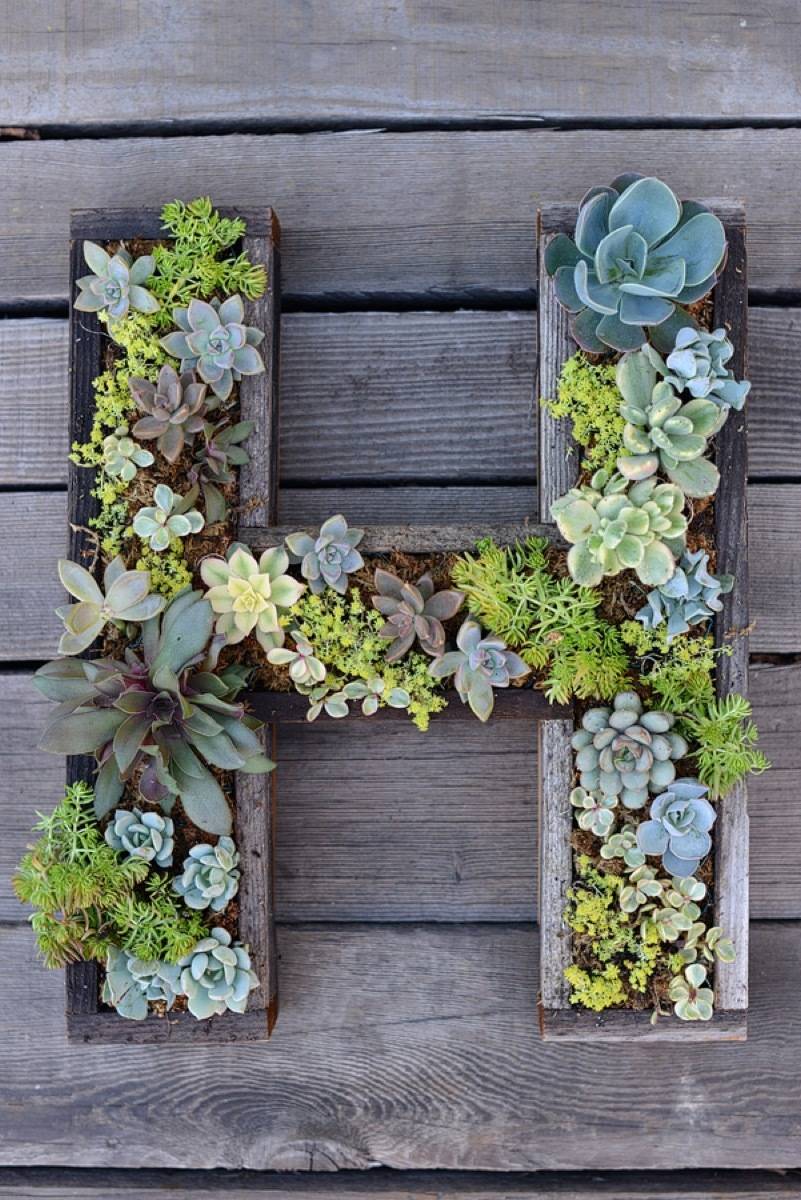
39. Succulent Letters: Say it with succulents! Create “wall art” to hang in your outdoor space. 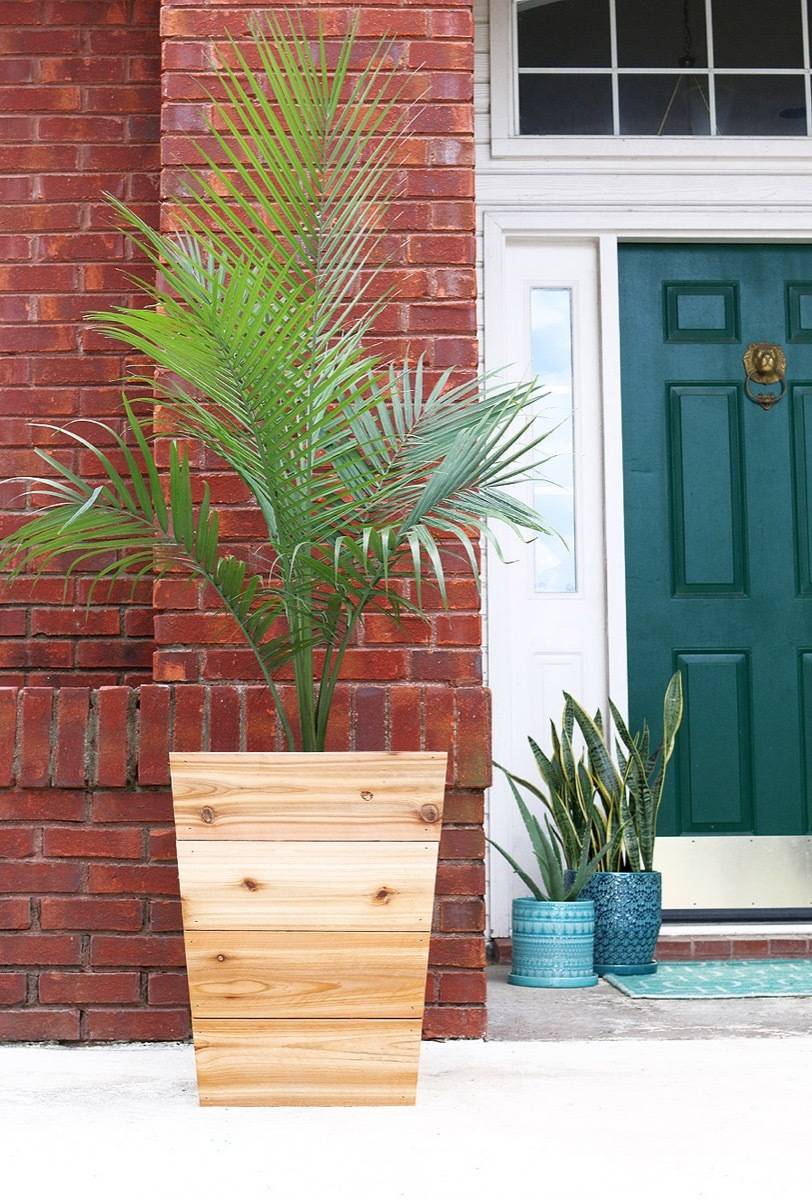
40. Tapered Cedar Planter: Giant planters are not cheap, but with a little woodworking you can craft your own from cedar. 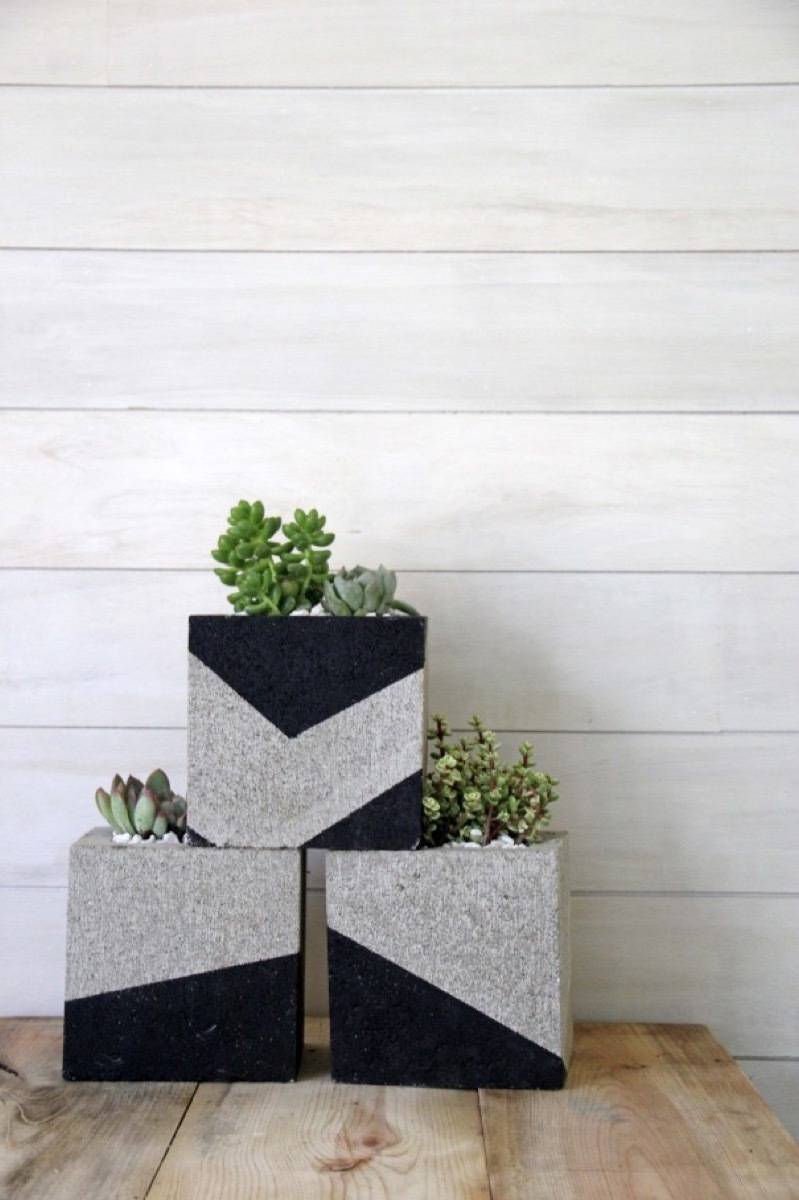
41. Geometric Cinder Block Planters: Cinder blocks are at it again! With a simple paint job, you can create a modern-looking planter to house all kinds of greenery. 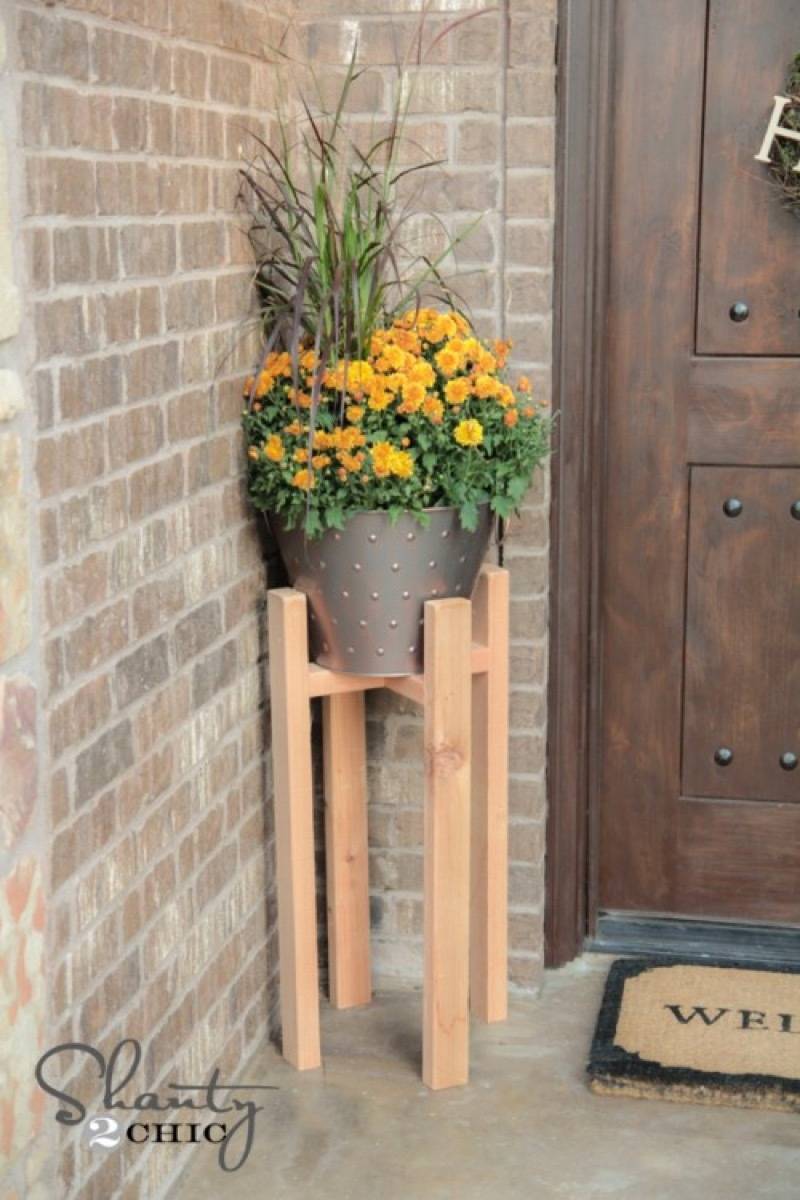
42. Wooden Plant Stand: If you’re looking for ways to add visual height to your plant-scape, Shanty 2 Chic has the plans to build a wooden plant stand. 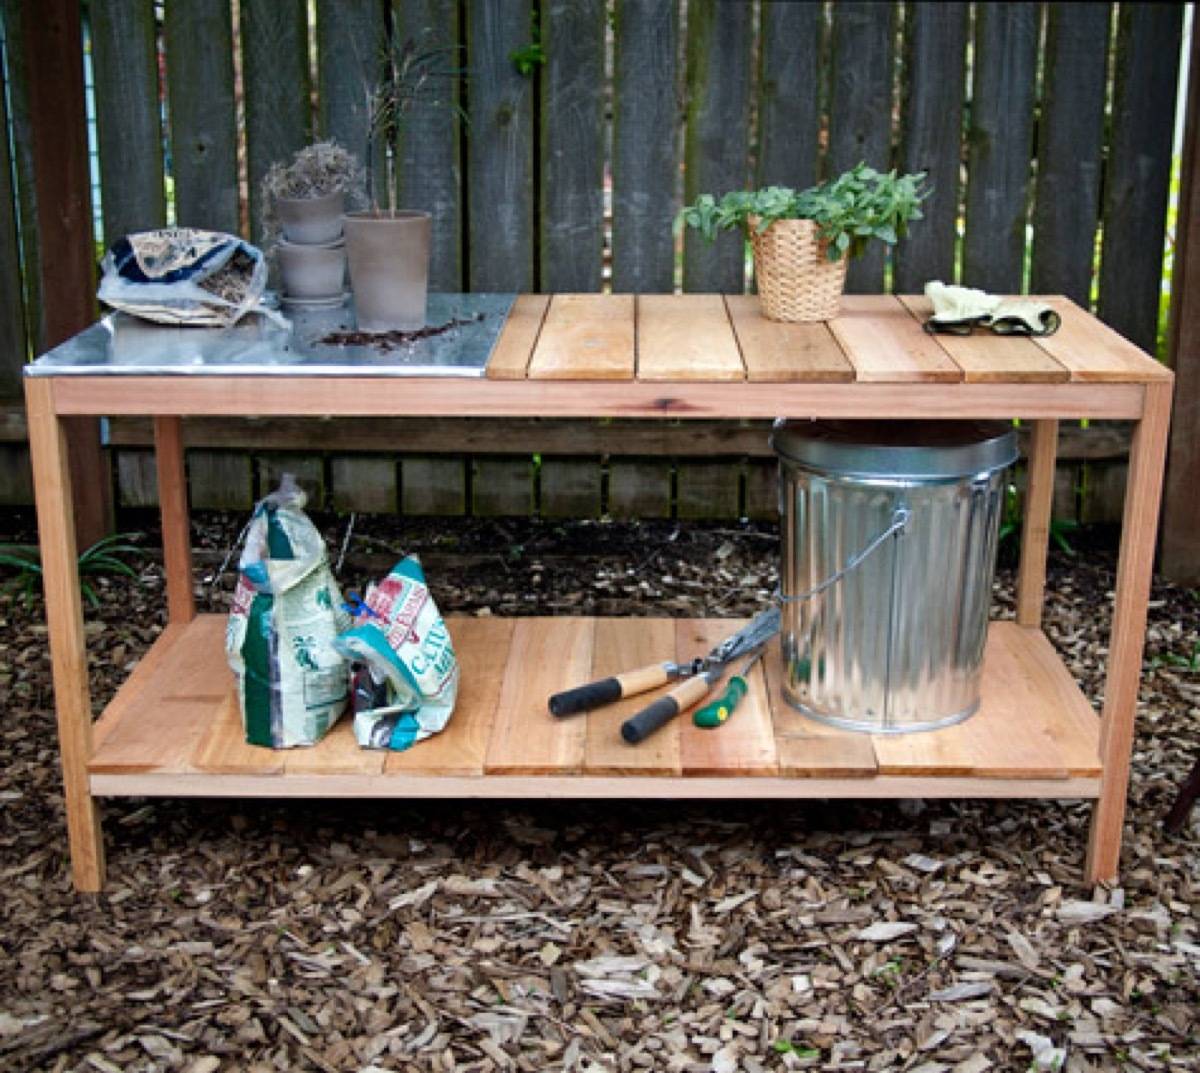
43. Gardening Table: Got a green thumb? You’re going to need a place to work! Learn how to make your own gardening table, courtesy of Design Sponge. OUTDOOR FLOORING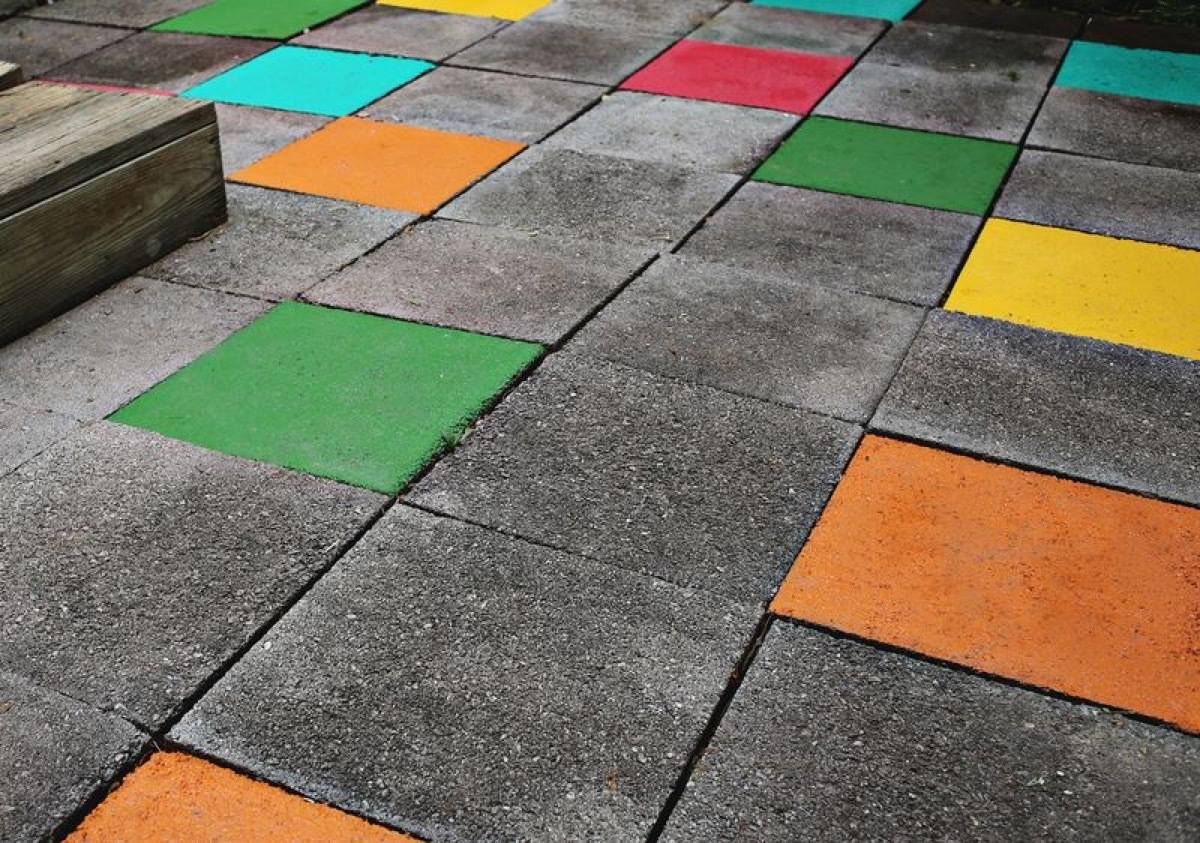
44. Colorful Patio Tiles: I can’t get over what a simple and transformative idea this is! If you can’t commit to painting your patio, try chalk for a temporarily colorful time! 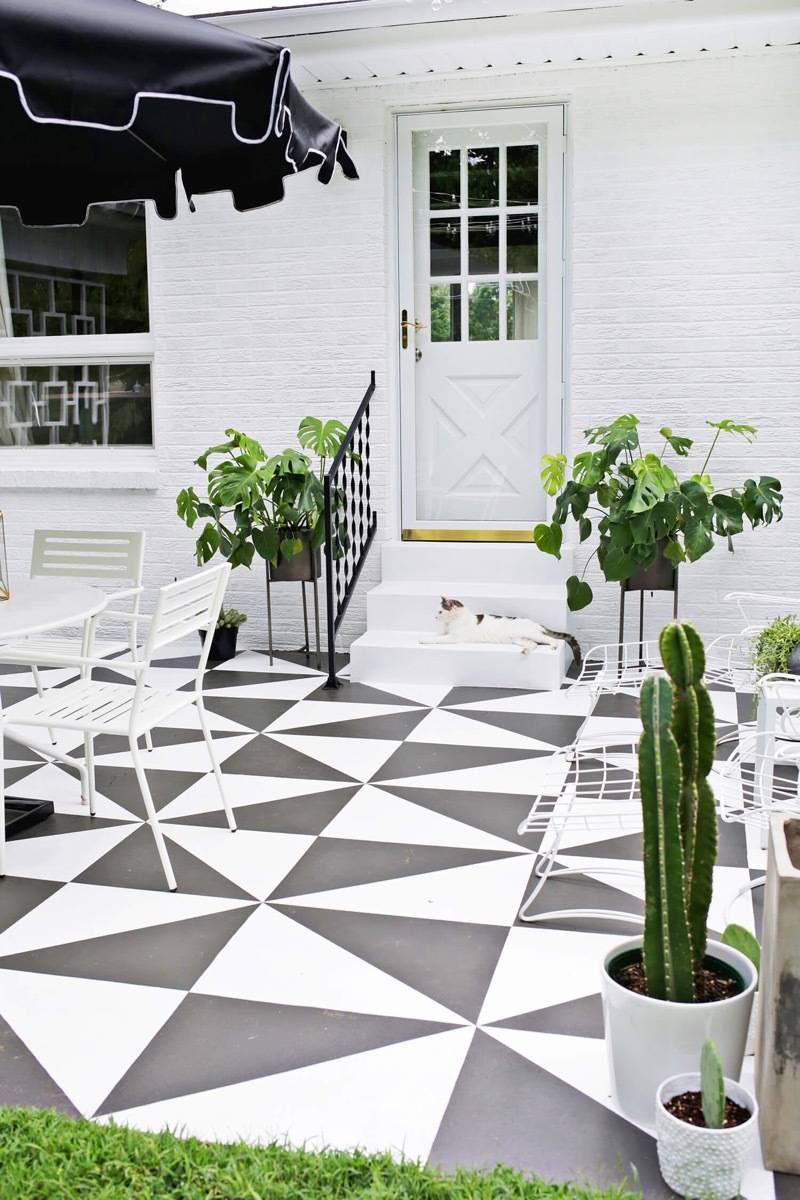
45. Painted Patio: If you’re looking for a way to bring bold to the backyard, this paint job takes the cake. 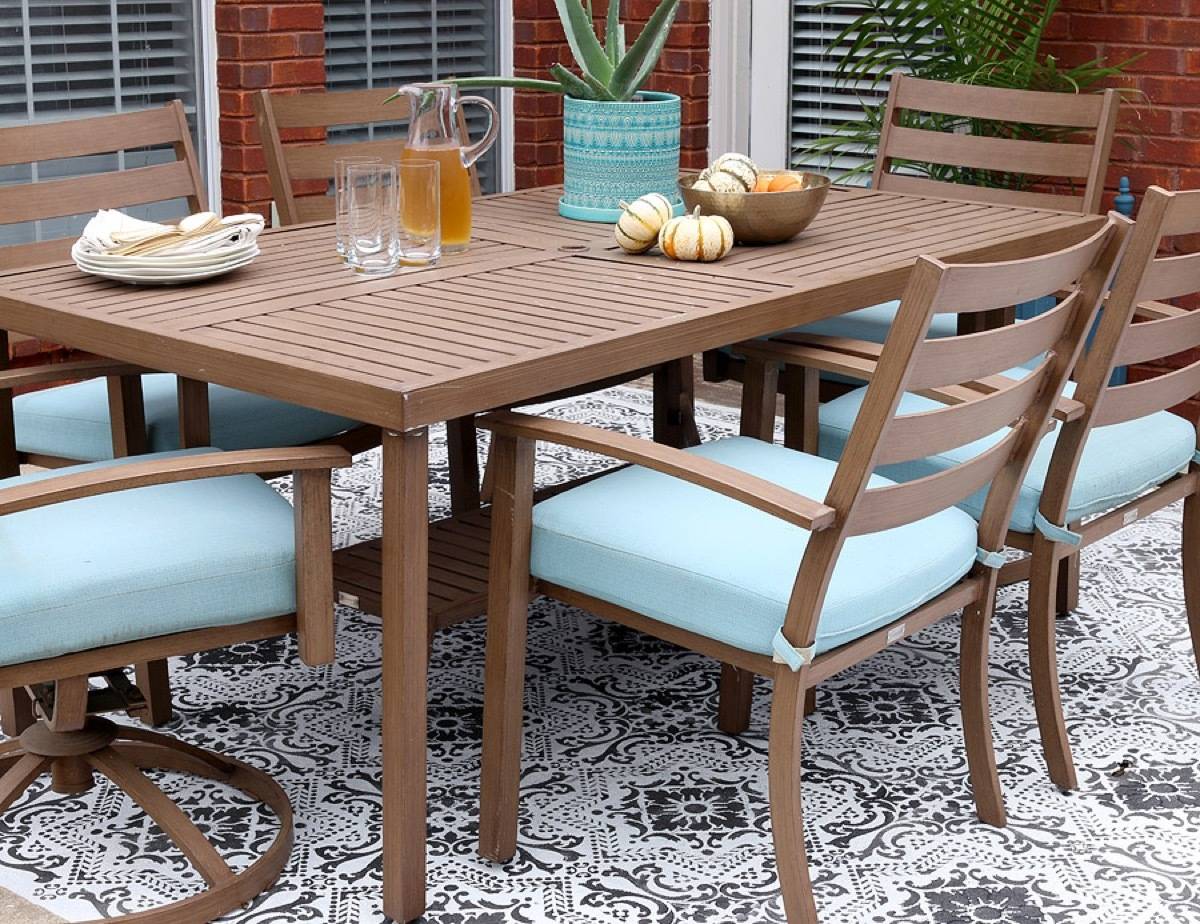
46. Stenciled Concrete: This stencil job mimics the look of a rug with the low-maintenance factor of concrete! Try this look on for size if you’re trying to create a more intimate outdoor living space. 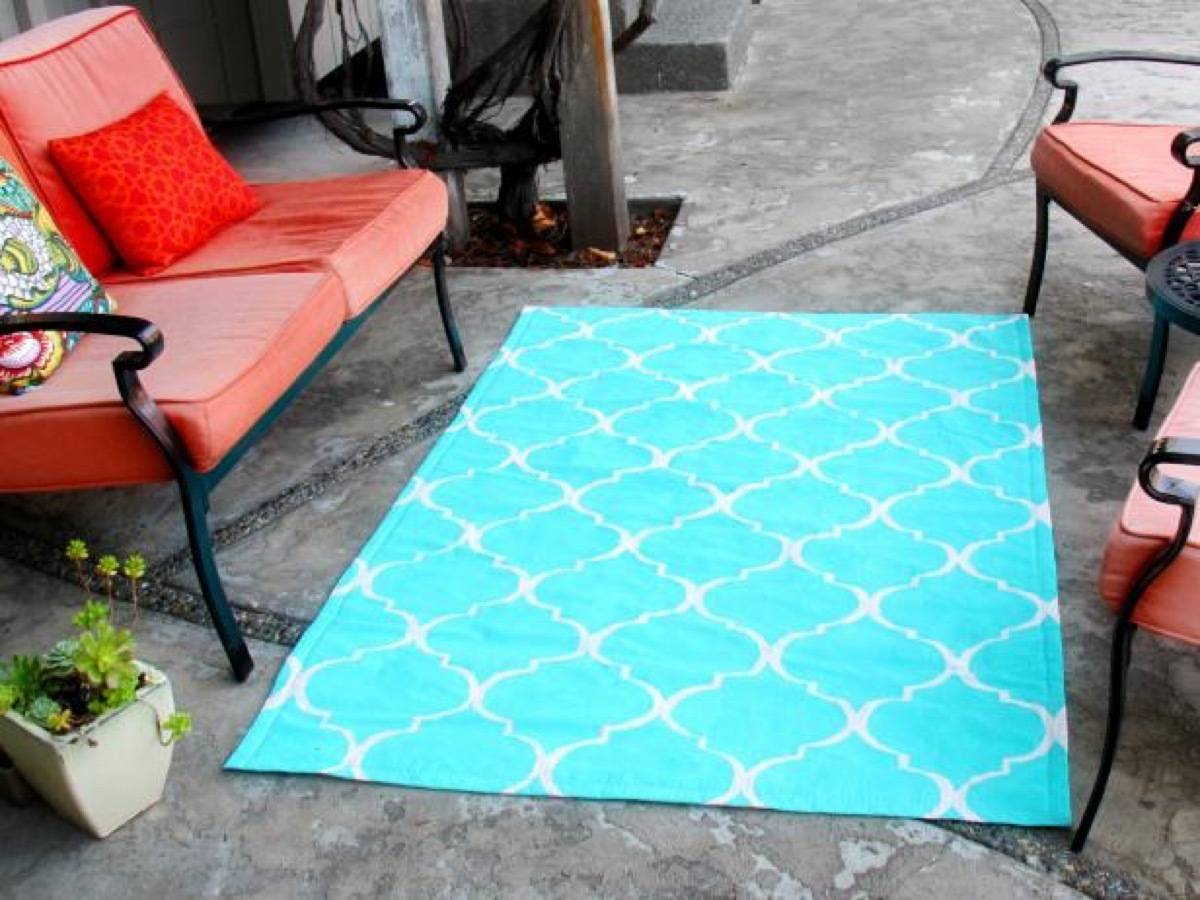
47. DIY Rug from Drop Cloth: Personalize the patio by making a rug from a drop cloth. It’ll withstand the elements, too! 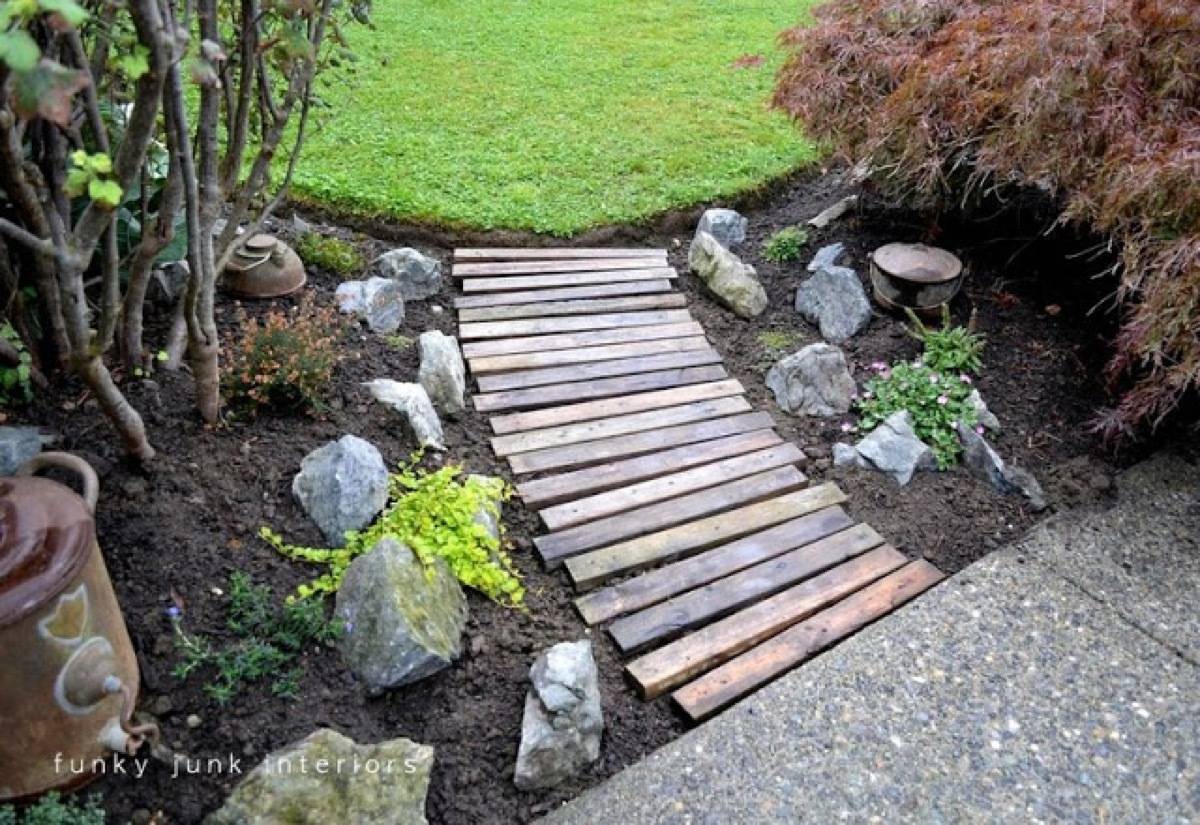
48. Pallet Walkway: A couple of pallet boards bridge the gap in this DIY. Totally doable, and totally cheap! 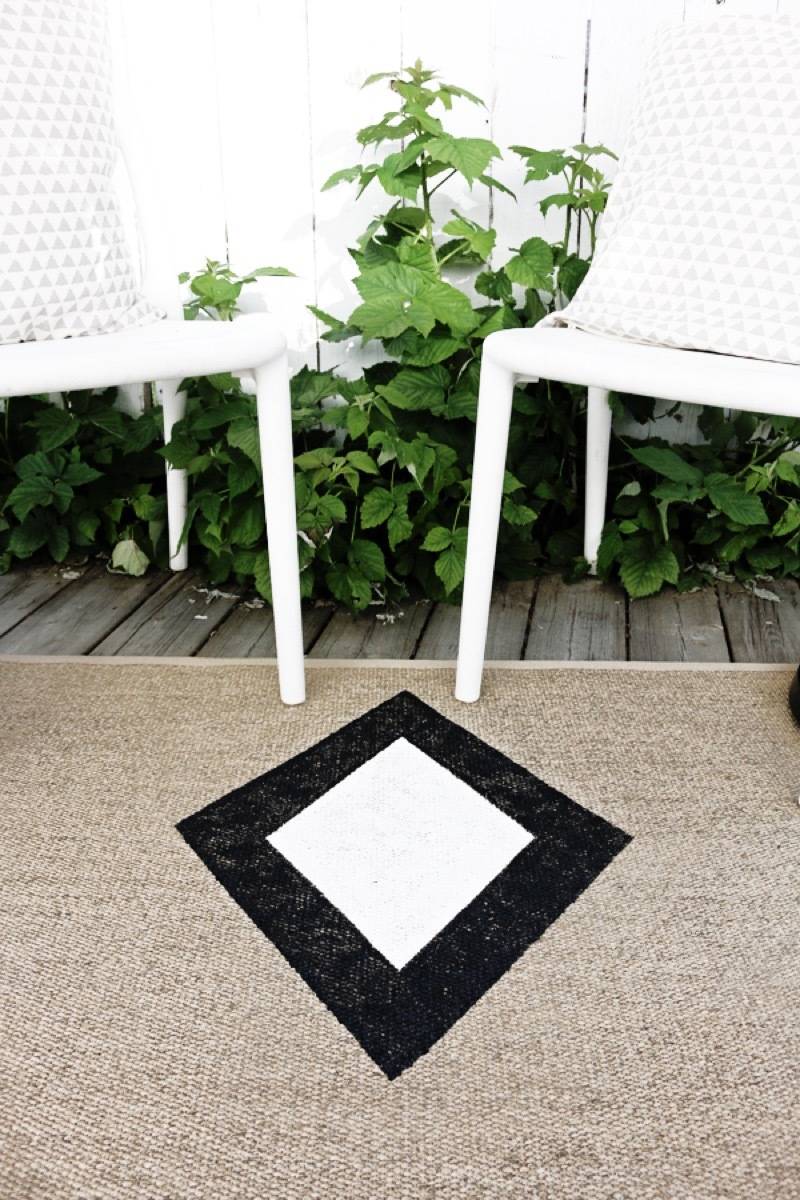
49. Painted Outdoor Rug: Most outdoor rugs are “blah,” but painting them is easy enough. See how with our tutorial for this modern and simple design! 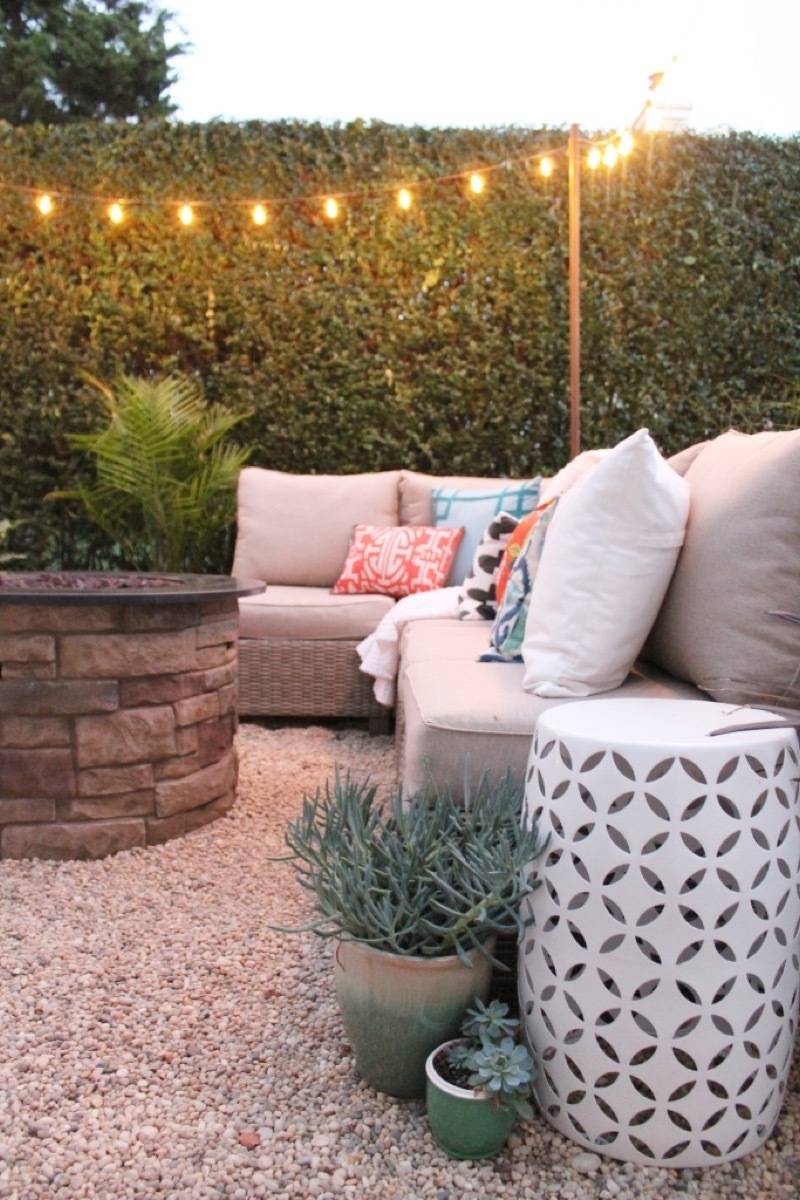
50. Pea Gravel Patio: Want to build your own patio? Pea gravel makes it easy to create a patio space without all the pavers. OUTDOOR PLAYING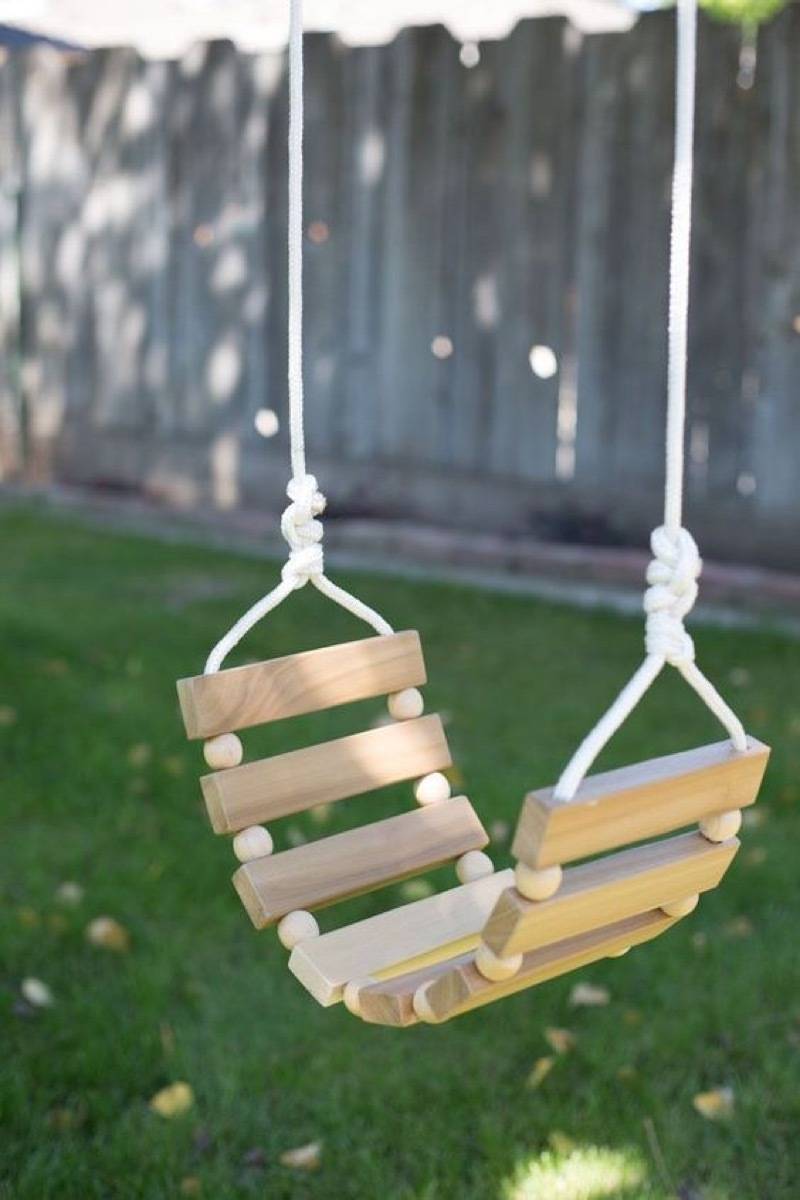
51. Tree Swing: How sweet is this swing? Even if you’re grown, there’s nothing quite like swaying under a tree. 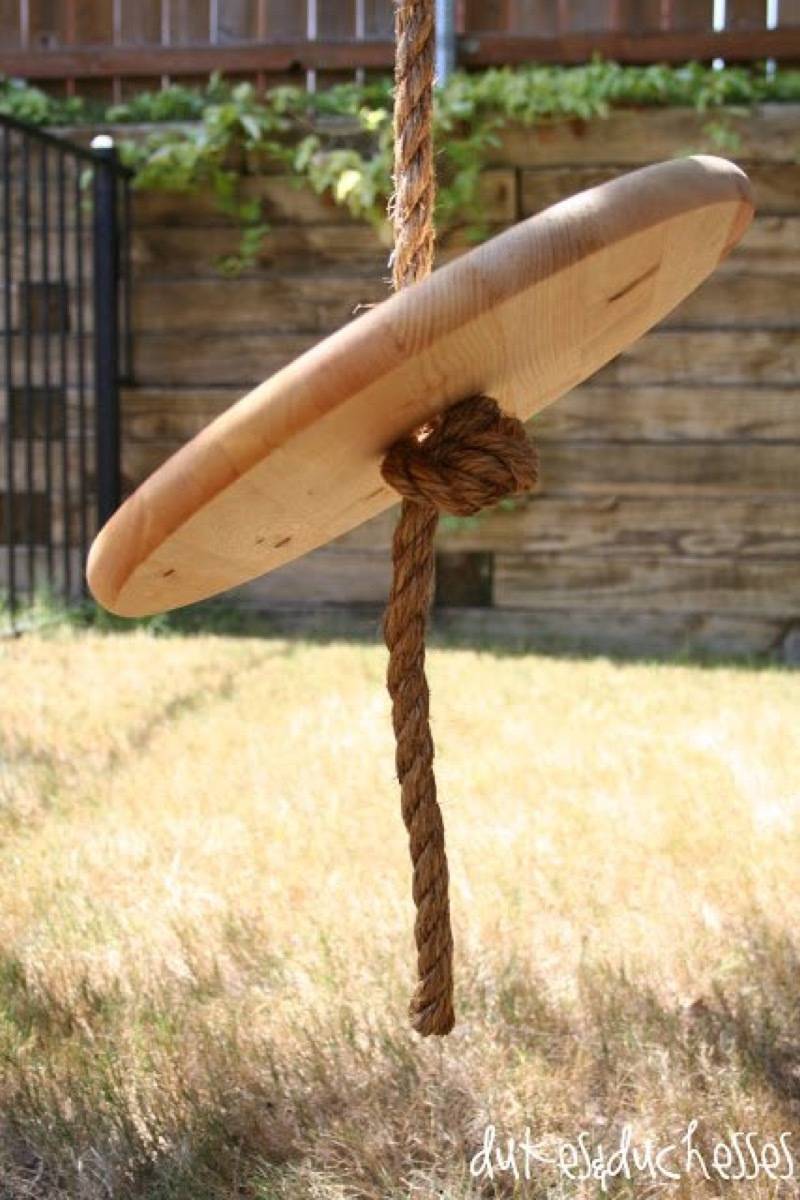
52. Circular Rope Swing: If you’re working on your balance, try this swing on for size! 
53. Sandbox with Lid: It’s a gross reality, but if you have cats, you have to have a sandbox with a lid. Ana White has the plans for how to build one of your own. 
54. Sandbox with Seating and Awning: Keep the kiddos safe from the sun by adding an awning to your sandbox. Plus these plans come with adorable seating! 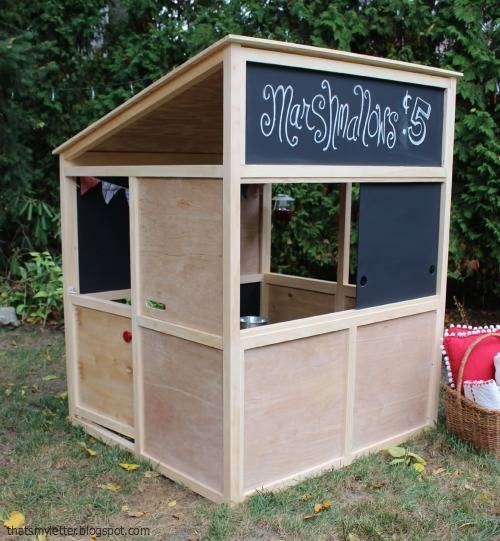
55. DIY Bungalow Play House: With chalk board panels, this playhouse can be imagined into any space. 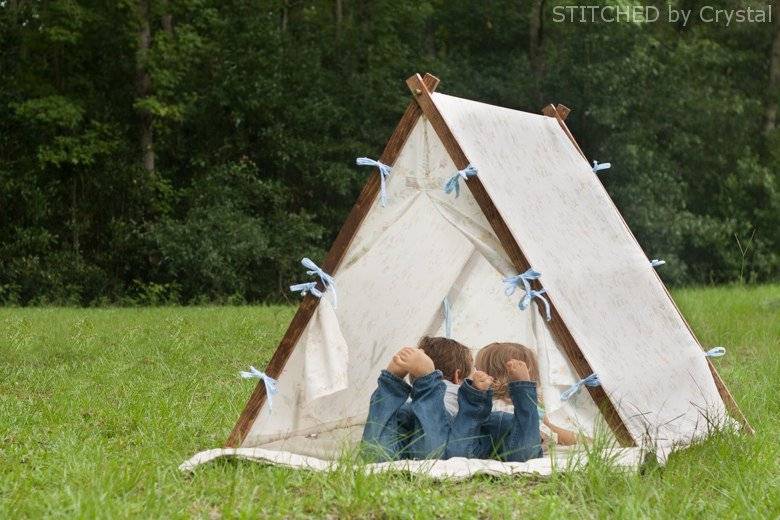
56. Play Tent: Can I move in? This cloth tent is also collapsible, so it’s easy to move inside and out! 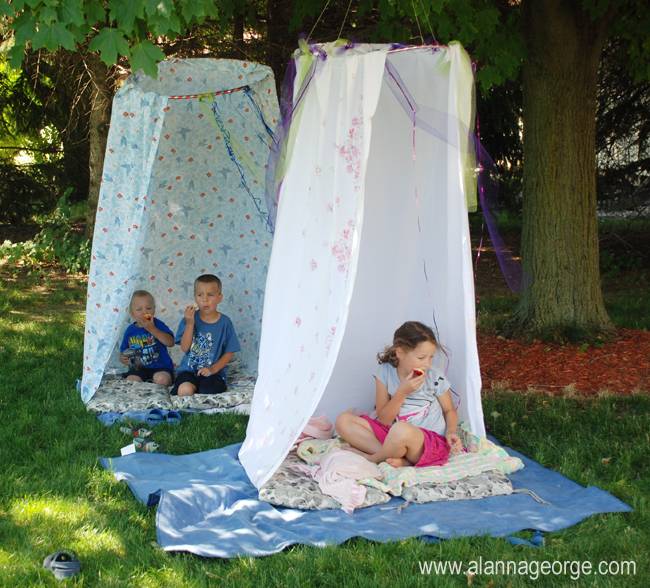
57. Hula Hoop Hideout: Give each kid their own special space with some fabric and a few hula hoops. 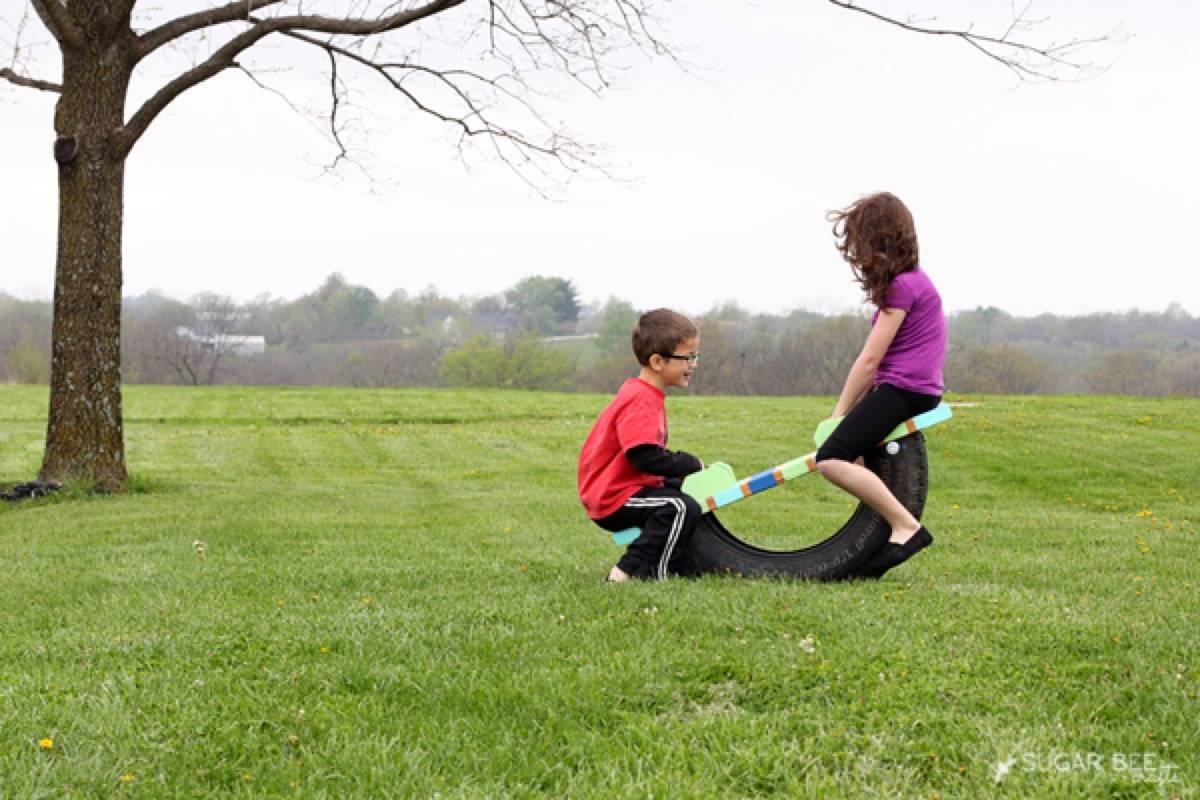
58. Tire Teeter Totter: Alliteration aside, this teeter totter is adorable. Plus it’s made from recycled materials, so it’s good for the kids and the earth. 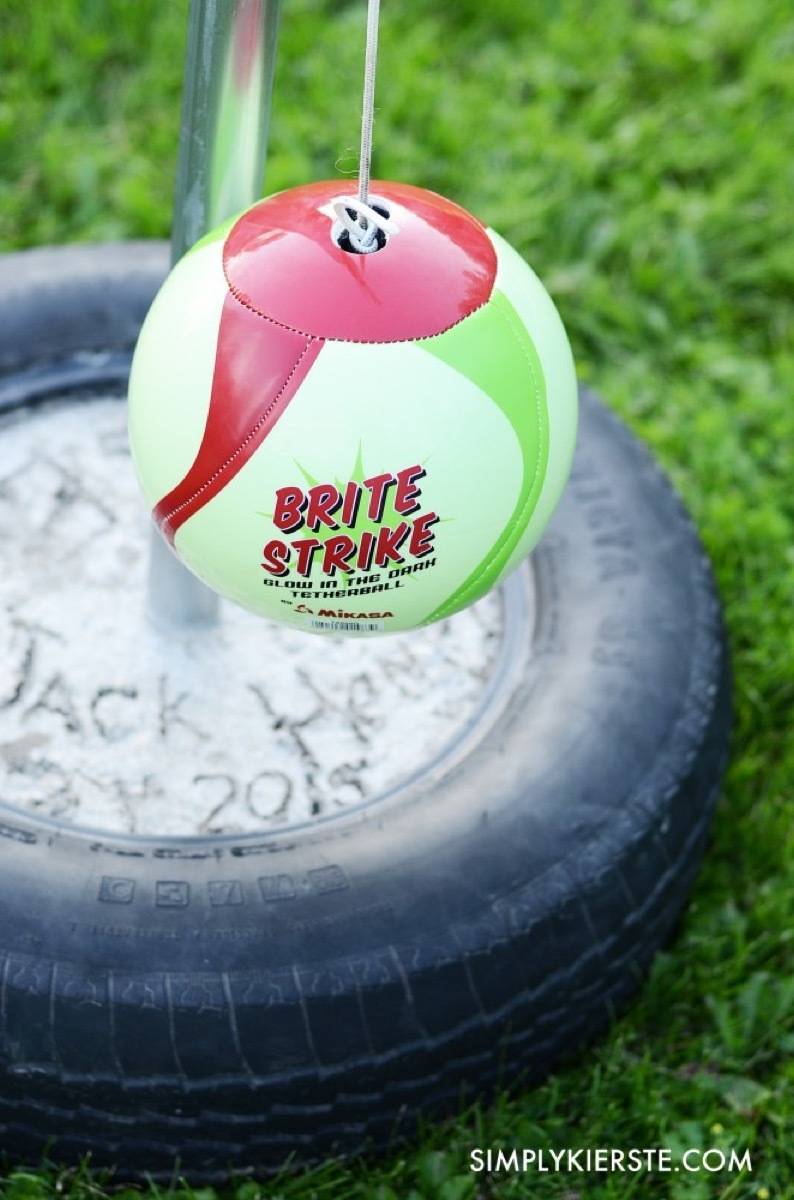
59. DIY Tether Ball: This DIY feels like a throwback! Do you guys remember playing tether ball long into the afternoon? Turns out it’s pretty easy to make one of your own for you or your offspring to enjoy! 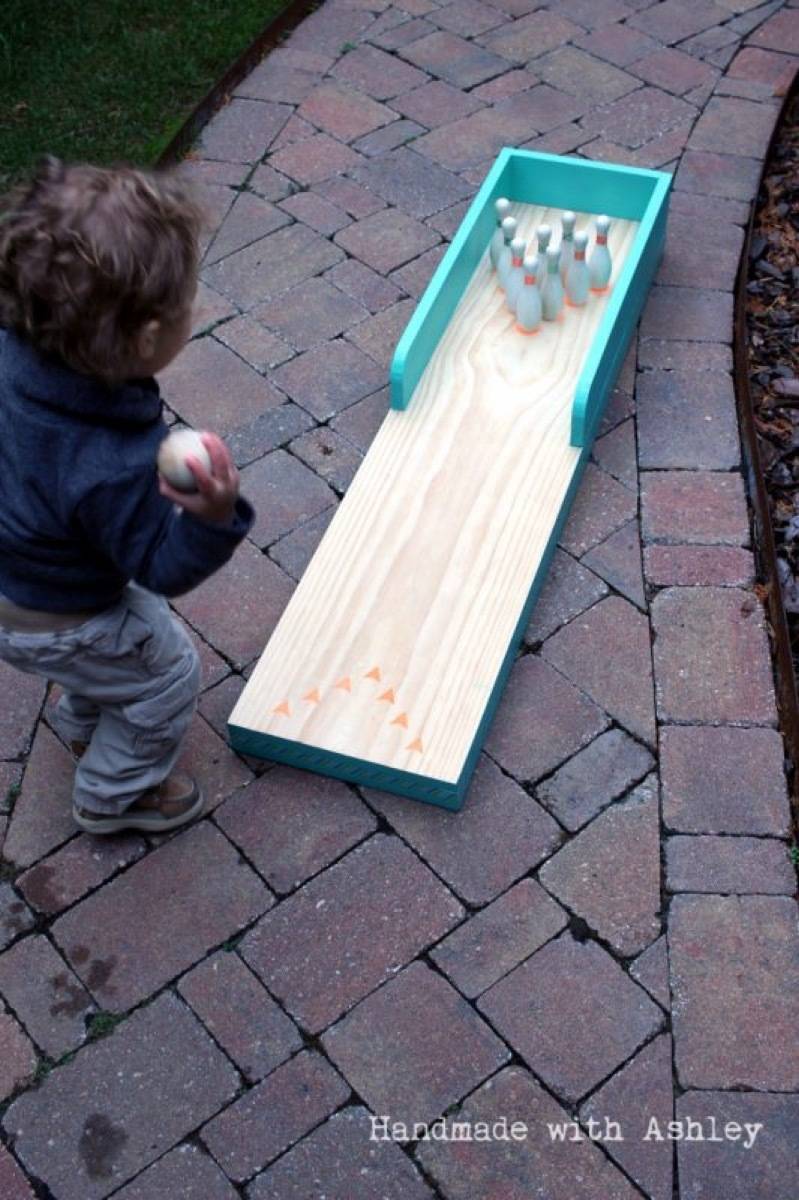
60. Mini Bowling Lane: How adorable is this?? Bowling never looked so cute, plus it’s small so it doesn’t take up a lot of space! 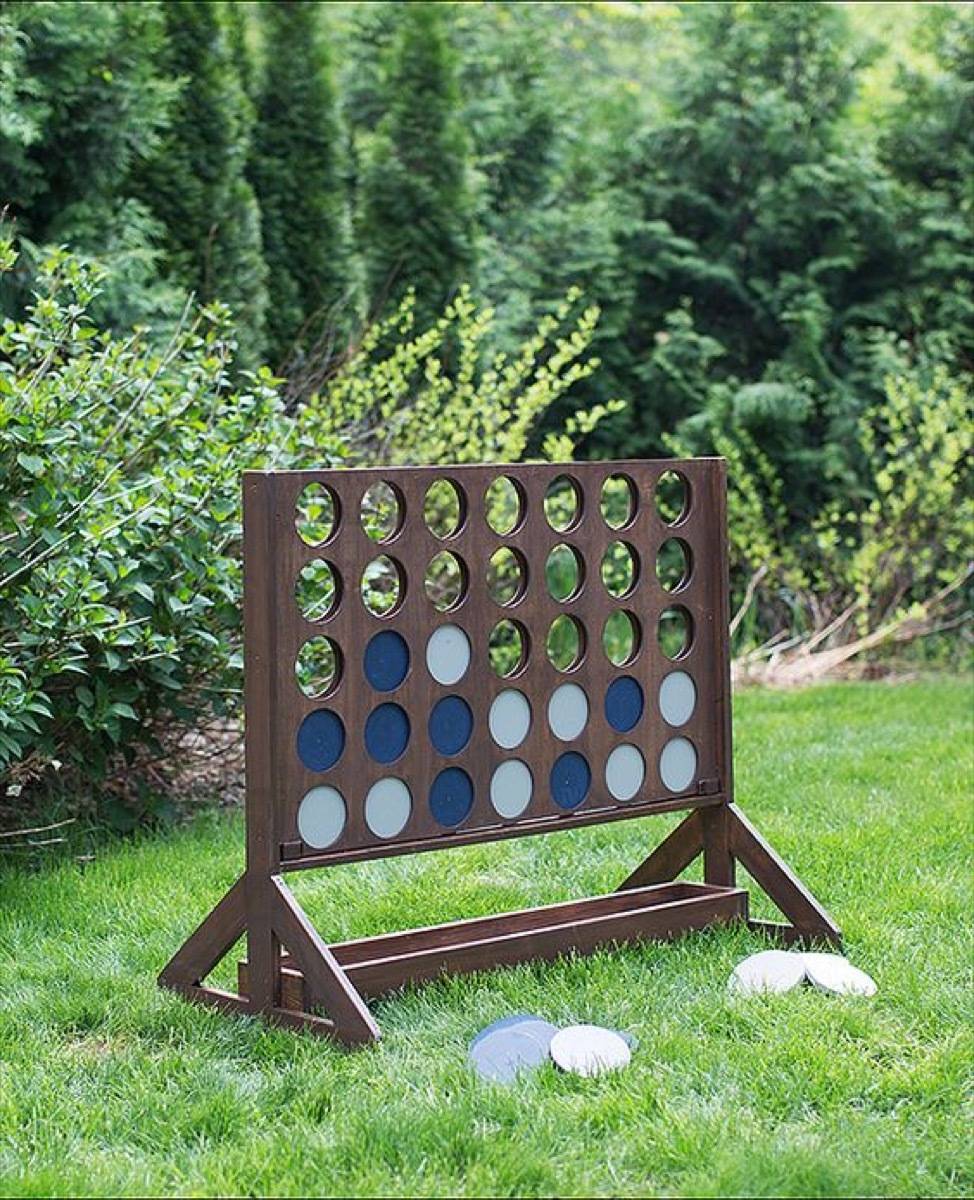
61. Giant Four-in-a-Row: Everything better when it’s bigger. Fair warning: you may end up being house-party-central if you build one of these. 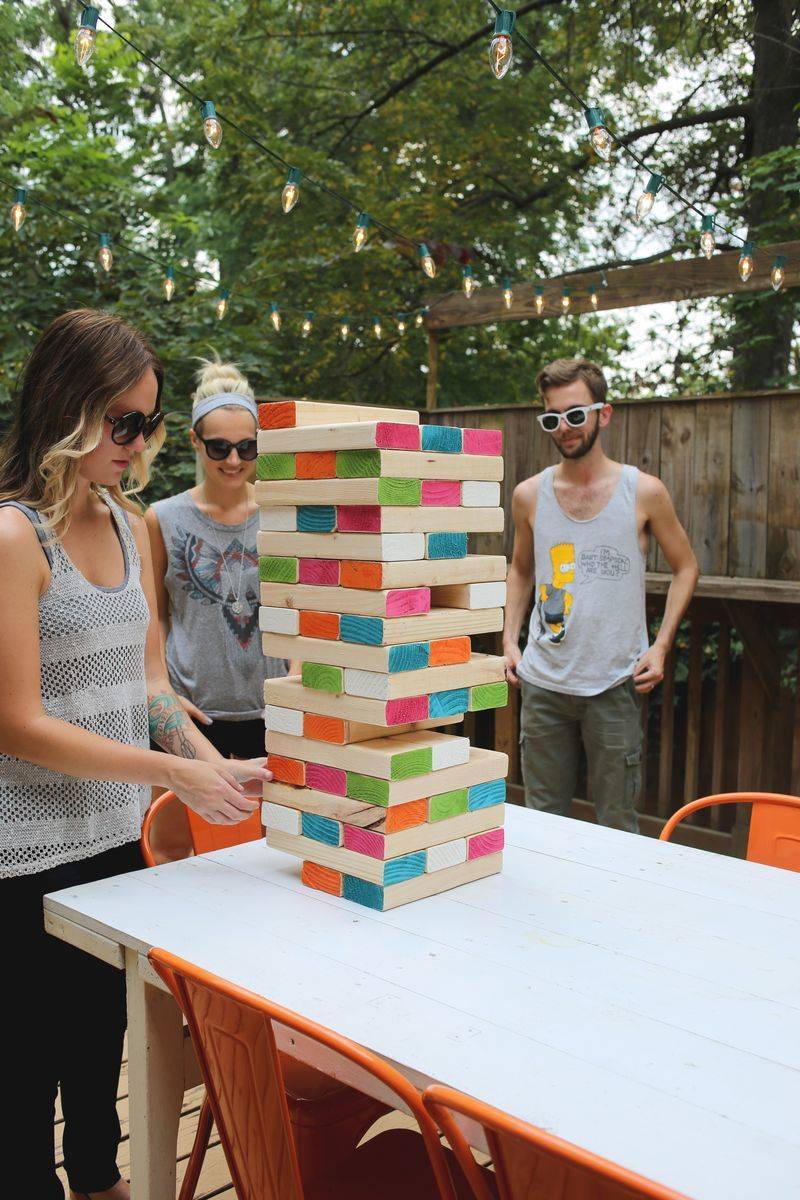
62. Giant Jenga: Last but not least, this thrilling game is the perfect addition to a summertime backyard party.
Bonus! Author Christina Pfeiffer is sharing What to plant for more drought resilient containers
By their nature, containers require more frequent watering than plantings in the ground. Smaller containers in full sun can need watering twice a day during hot spells. Go large when choosing new containers to save on time and water demands. Choose a group of plants that are compatible in looks and culture. Match up their needs for light and water first, then play with combining colors and texture. Sedums These perennials are my first ‘go-to’ s for drought tolerant containers. They come in a variety of sizes, shapes and colors with blooms that benefit pollinator insects and ask for little in terms of water and fertilizer. Most will overwinter and also combine well with other drought tolerant plants. Herbs for garden and kitchen Culinary and ornamental herbs are another group happy in well drained soil and sun. Those with variegated foliage are stunning accents planted solo in a container. Among my top favorites are: Variegated lemon thyme
These garden perennials make a successful leap between garden beds and containers and back again: Coral bells, Heuchera ‘Green Spice’, ‘Peppermint Spice’ and ‘Moonlight’ Add these grasses and grass-likes for contrasting texture New Zealand Flax, Phormium and variegated iris both offer tall, strappy, striped leaves. Annuals that can take the heat (and a bit of drought) Many of the popular annuals used for seasonal color do best with regular water and fertile soil. Be sure to keep these birds-of-a-feather together. Here are some great annuals that don’t like as much water and fertilizer and that combine well with other types of plants listed in this article: African daisy, Osteospermum Symphony series 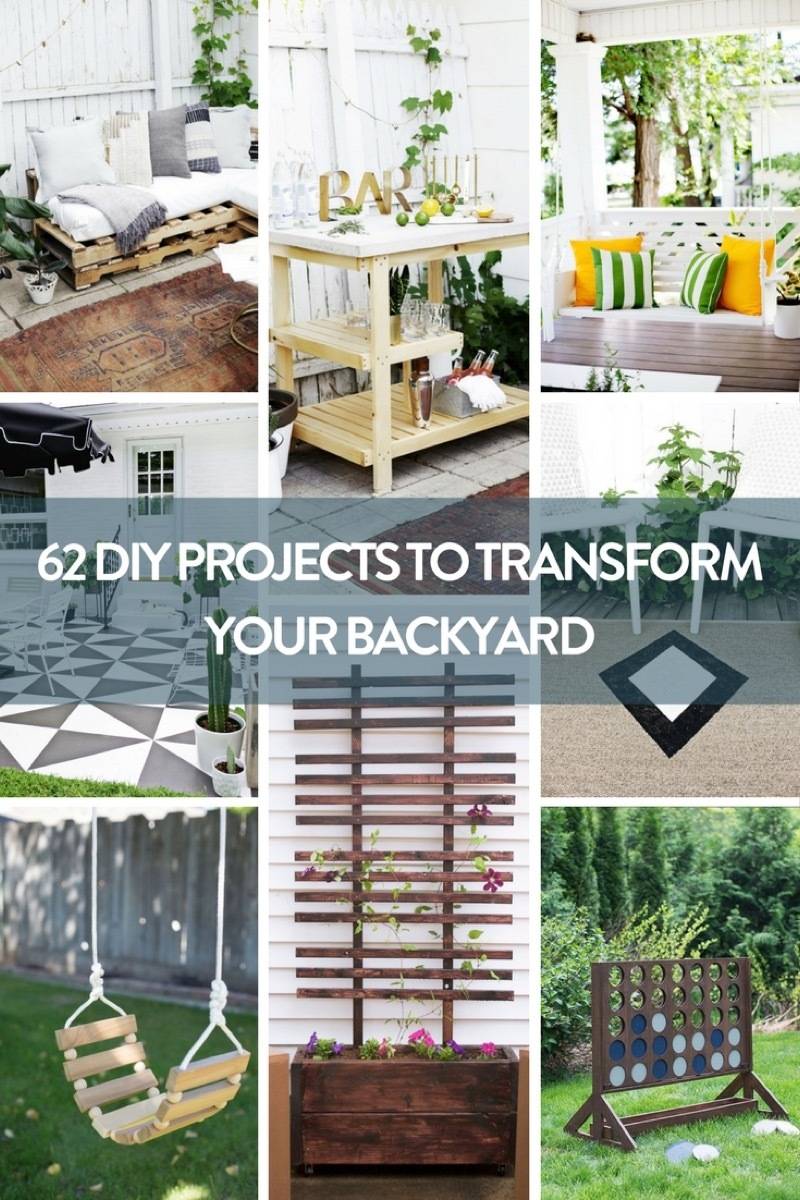
Looking to freshen up your indoor space instead? Check out these 72 organization tips!
The post 62 DIY Projects To Transform Your Backyard appeared first on Curbly. Via https://www.curbly.com/outdoor-diy-projects 
Growing herbs is an easy way to get into gardening, and there are plenty of ways to make an herb garden even if you’re short on space. So to get you inspired, today we’re sharing 22 of our favorite creative herb garden ideas – both indoors and out. Click through to check ’em out!
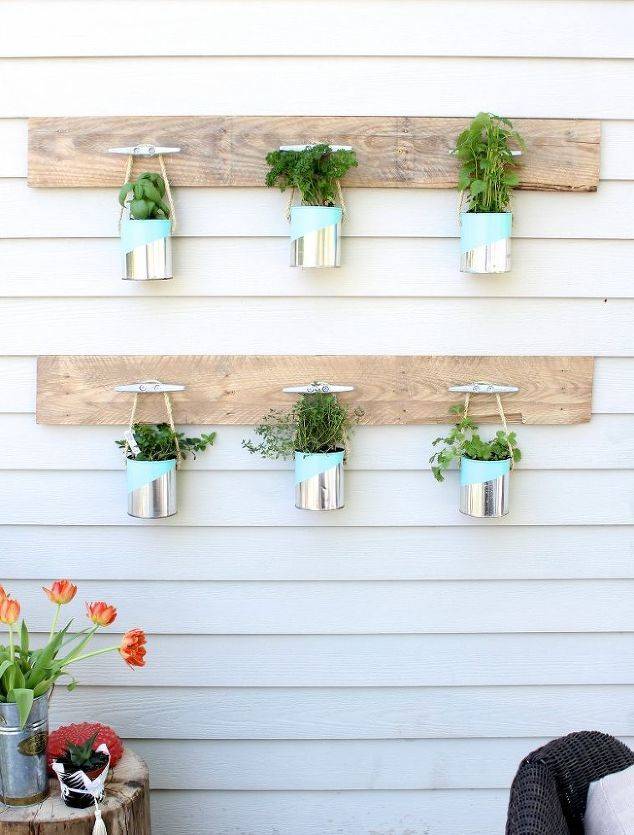
1. Take advantage of the vertical space on the side of your house by making this fun wall-mounted herb garden out of cans and metal cleats. Get the how-to here. [Photo: Simple Stylings] 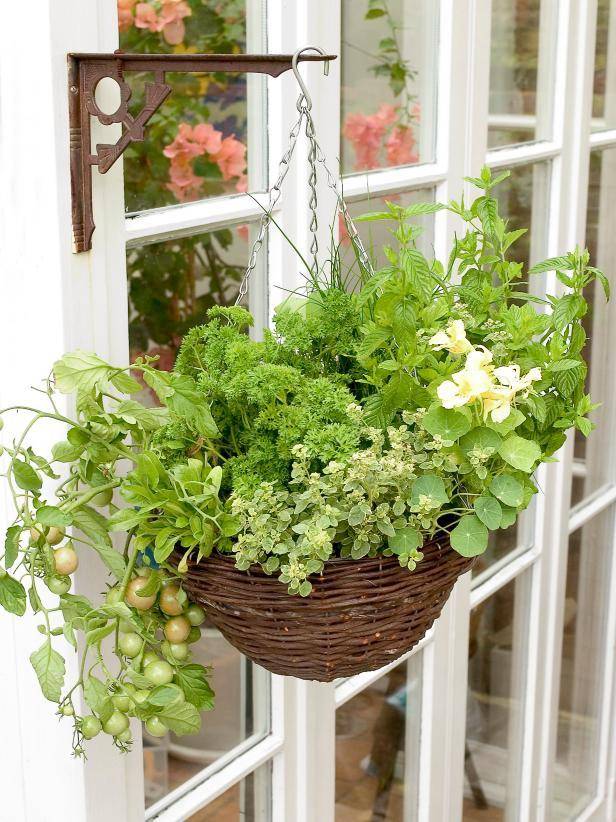
2. Create a beautiful hanging planter out of a basket, and fill it with all of your favorite herbs and even some cherry tomatoes. Get the tutorial over at HGTV. [Photo: HGTV] 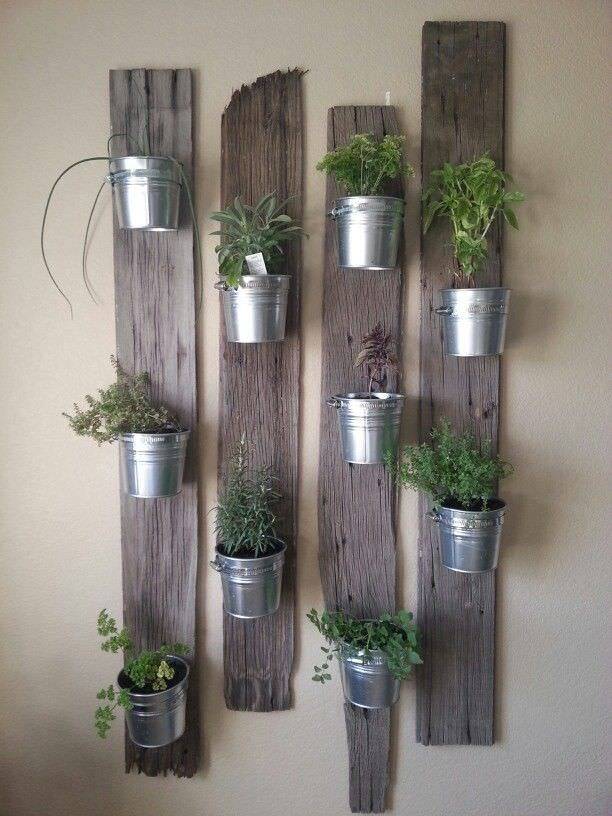
3. Reclaimed wood makes the perfect backdrop for small potted herbs. Just attach little metal buckets to the wood and plant your favorite herbs inside. Found over at Decorating Your Small Space. [Photo: Decorating Your Small Space] 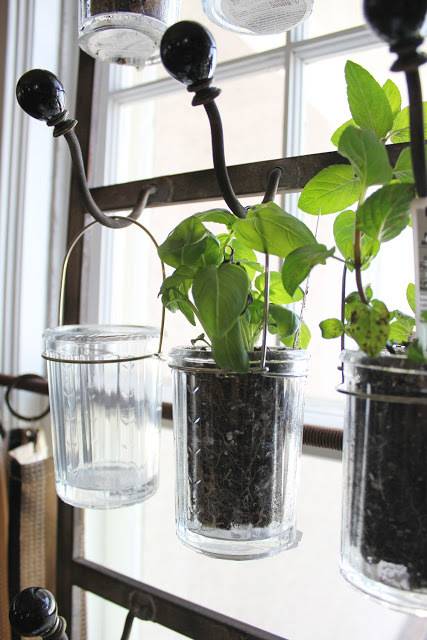
4. Mount a wall rack over a window and hang small planters on each hook… genius! Learn more at Itsy Bits and Pieces. [Photo: Itsy Bits and Pieces] 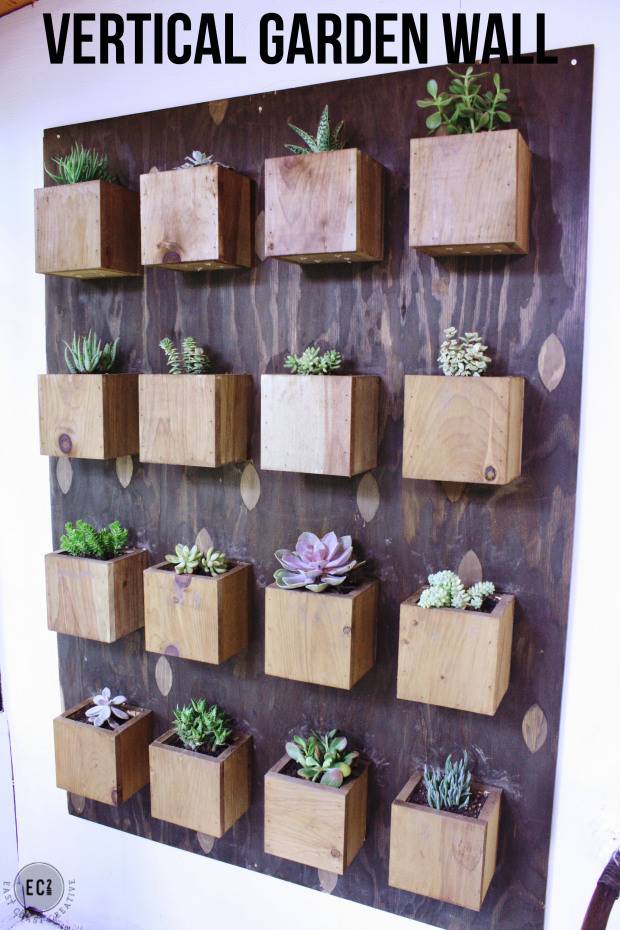
5. If you’re into woodworking, give this vertical herb garden a try. Head on over to East Coast Creative to check out the full tutorial. [Photo: East Coast Creative] 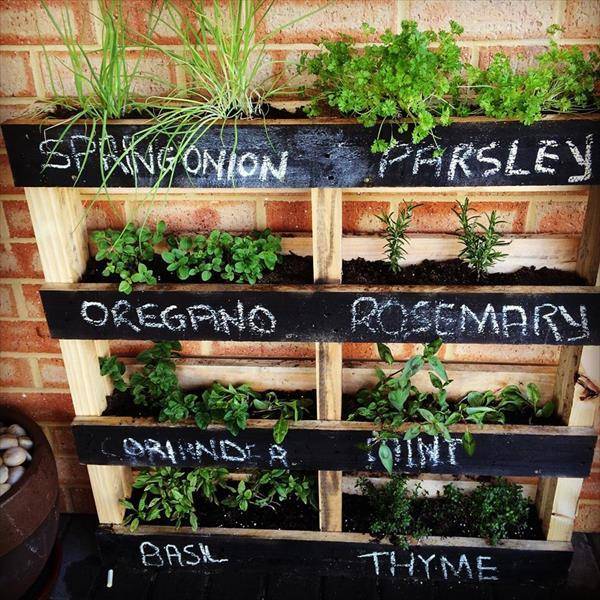
6. Pallets are always a great option… find out how to turn a pallet into a fun chalkboard-labeled herb garden here. [Photo: 99 Pallets] 
7. Here’s a fun one… turn a couple of baskets or reusable bags into unique herb planters! Find out more over here. [Photo via: Ideal Home] 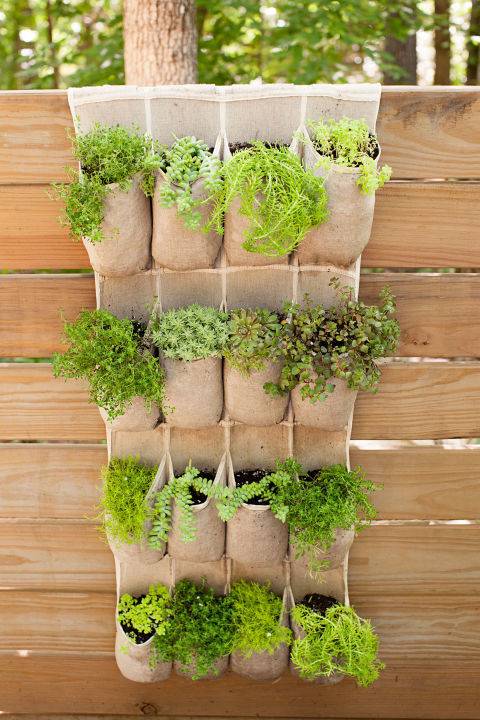
8. Turn a hanging shoe organizer into an herb garden! This is a great option for those with very limited space. Learn more here. [Photo: Good Housekeeping] 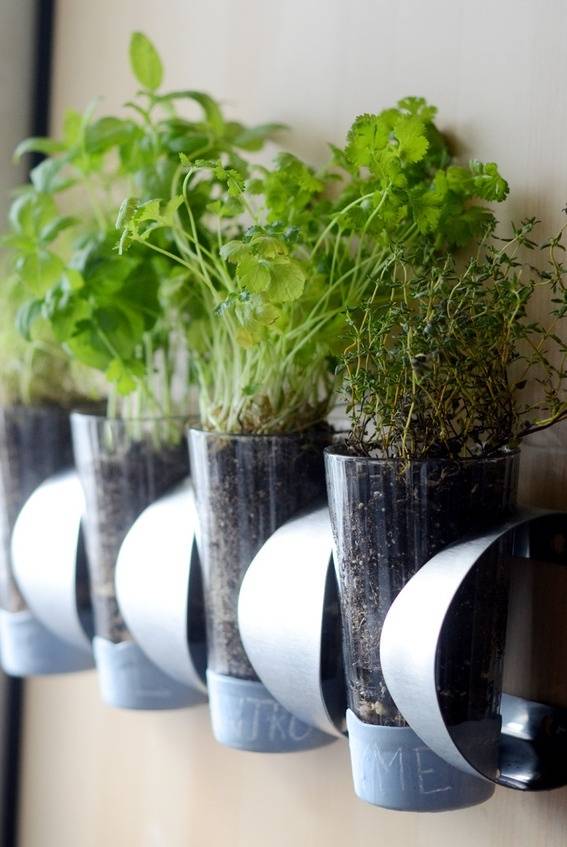
9. This IKEA hack by yours truly is a clever way to reinvent the IKEA Vurm wine rack… check out the full tutorial here. [Photo: Faith Towers Provencher] 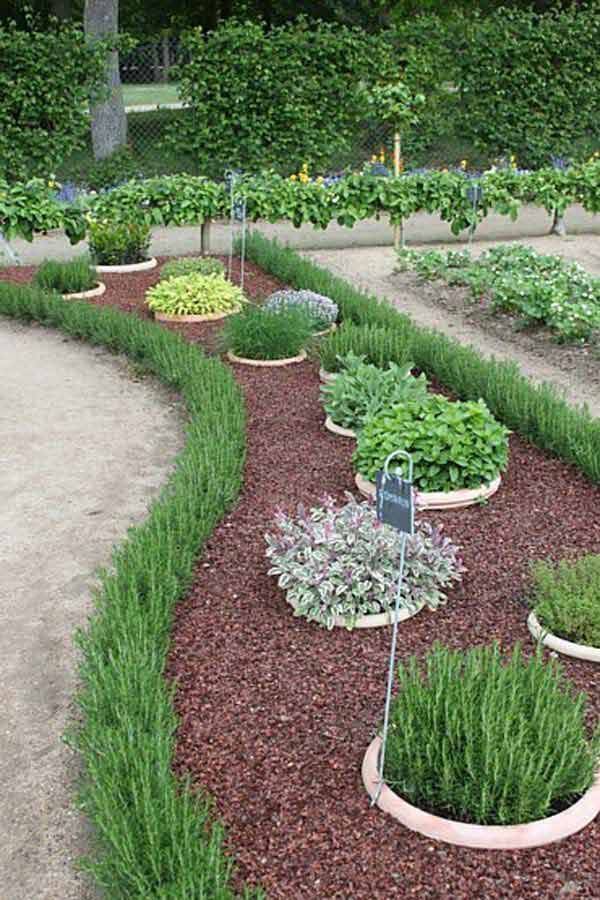
10. Here’s a modern way of planting herbs in the garden, containing them in large planters submerged underground. [Photo via: Do It Yourself] 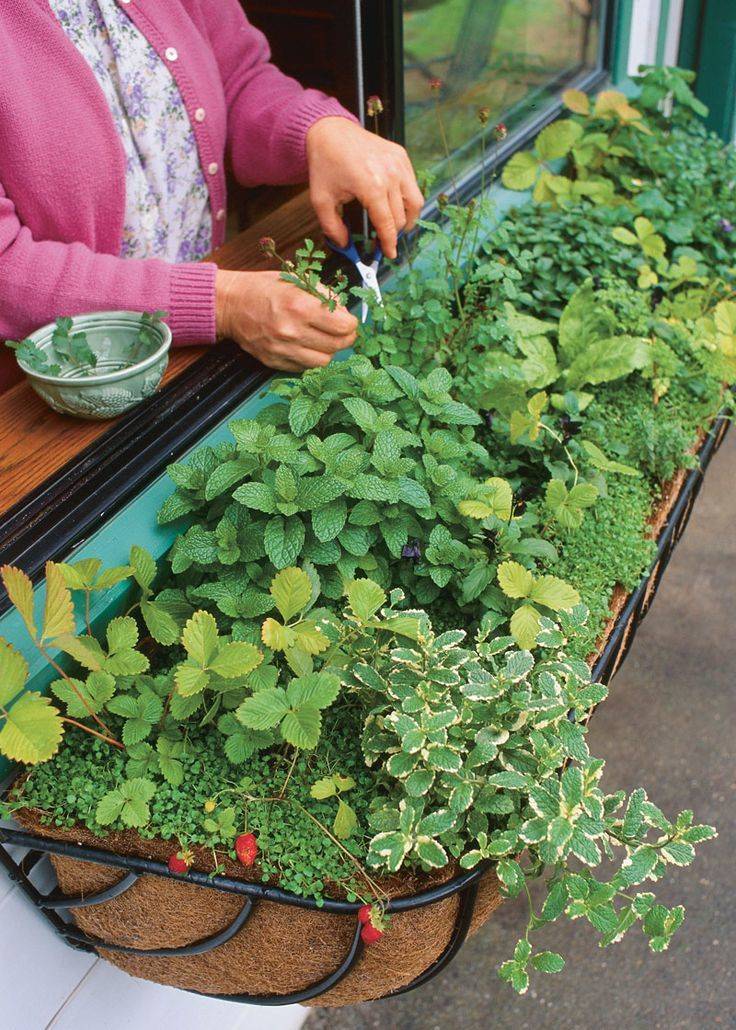
11. A window box is another great herb garden idea… it adds greenery to the outside of your house, and you can also easily access it from inside. [Photo: Bless My Weeds] 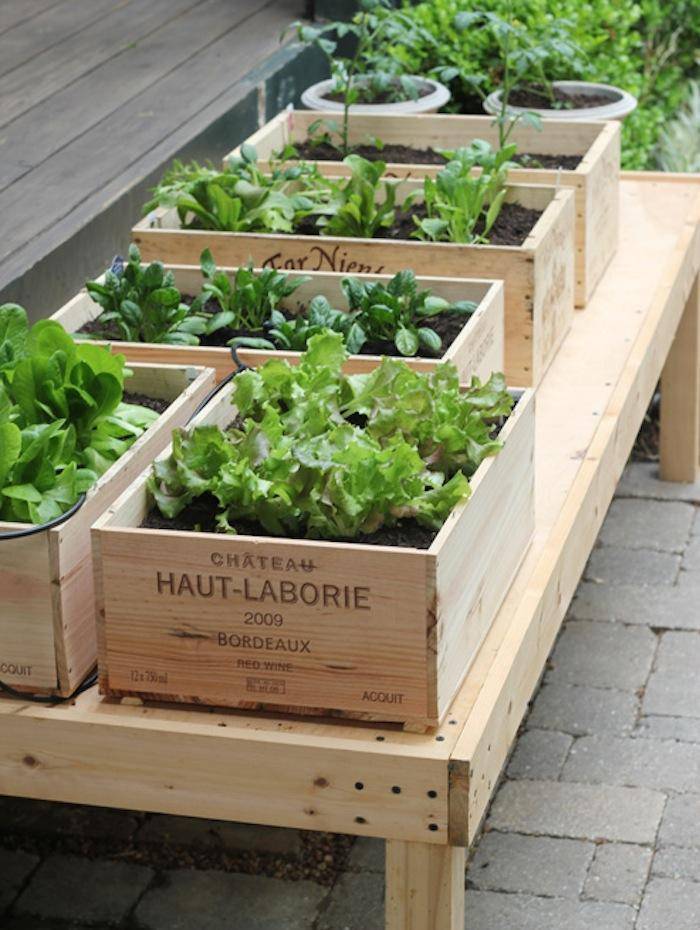
12. Wine crates make great planters too… ask your local wine shop if they have any they’re throwing out. [Photo via: Natural Garden Ideas] 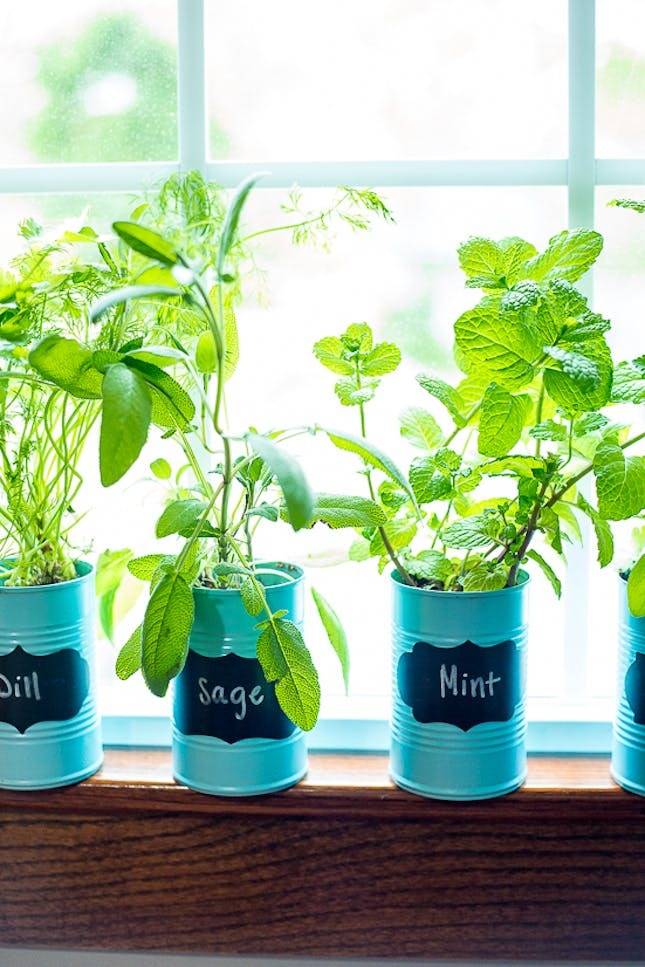
13. Plain old tin cans can be painted and turned into fun windowsill planters. Check out the Glass Garden for the tutorial. [Photo: Glass Garden] 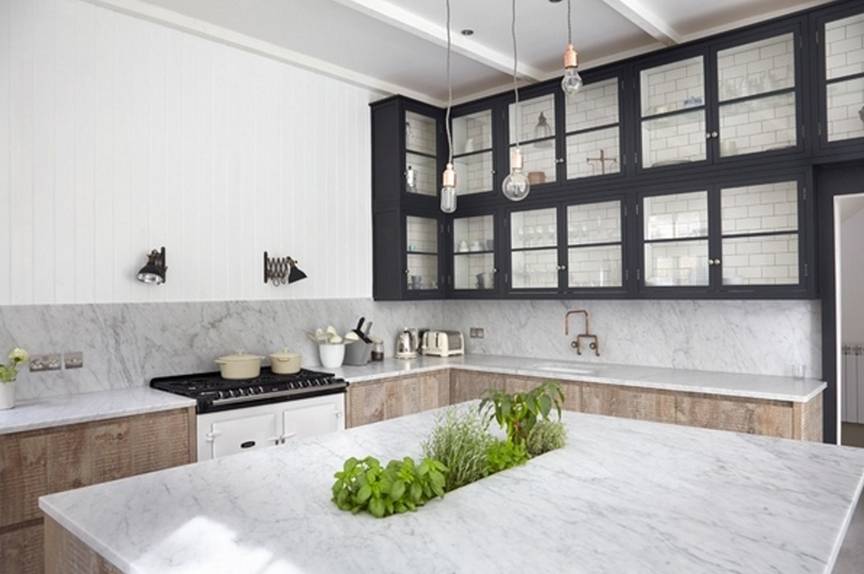
14. Renovating your kitchen? Have your contractor create a small planter in the center of your island! [Photo via: Deavita] 
15. For a modern, space-saving vertical garden idea, follow these instructions from Susie Frazier. [Photo: Susie Frazier] 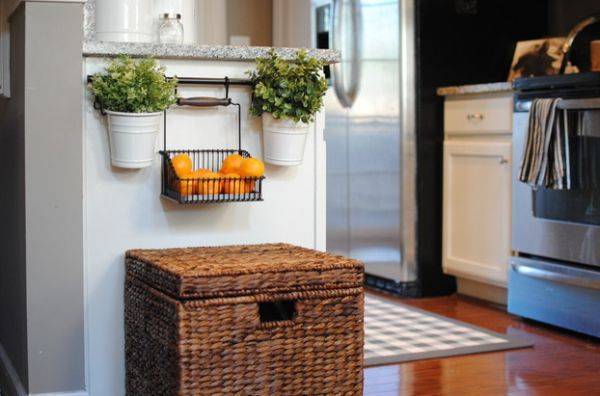
16. Take advantage of the unused space at the end of your kitchen cabinets, by hanging a rail with potted herbs. [Photo via: Top Inspirations] 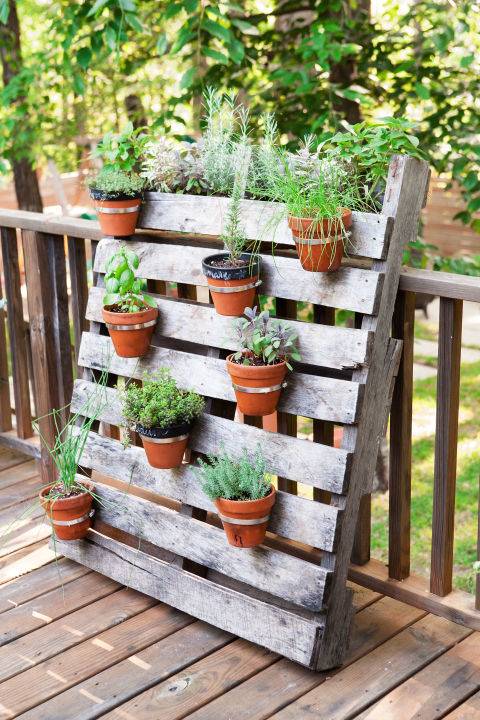
17. Here’s another great way to use a pallet… simply mount potted herbs to it and lean it up against a railing. [Photo: Good Housekeeping] 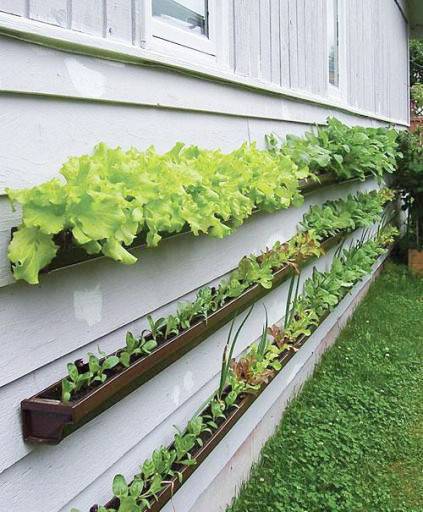
18. This might be my favorite… attach rain gutters to the side of your house and plant herbs inside. Just don’t forget to punch drainage holes in the bottom! [Photo via: Inspire Bohemia] 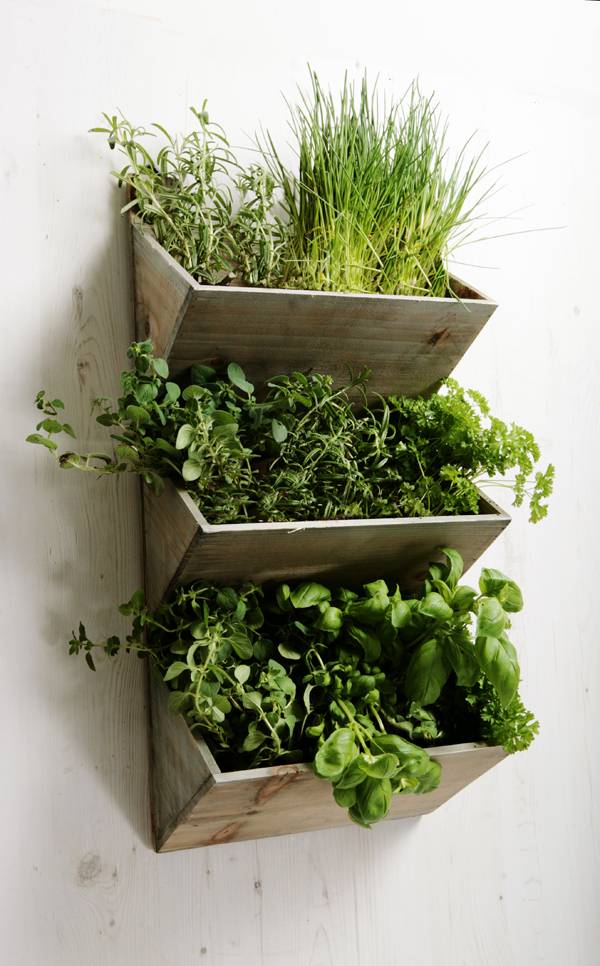
19. If you’re not in the mood to DIY, you can buy this wall-mounted garden pre-made here. [Photo: Primrose] 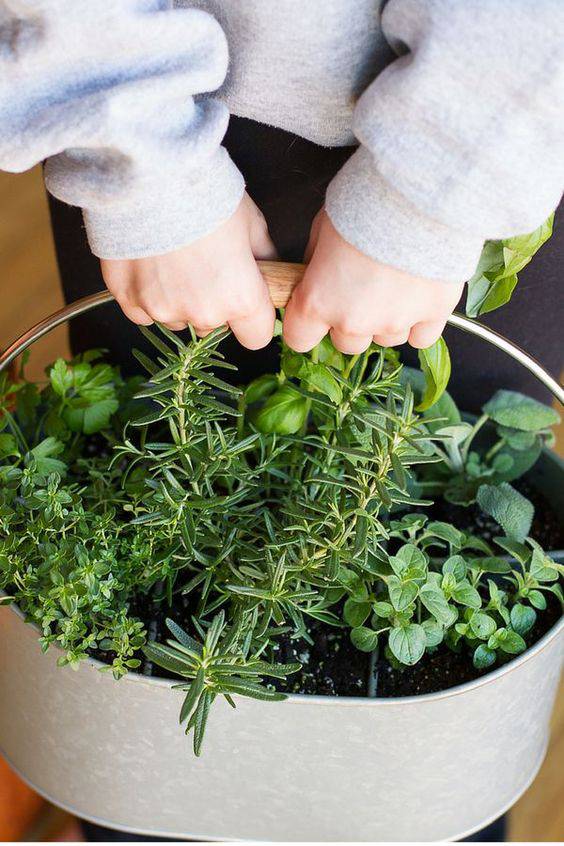
20. Here’s another clever one… fill a caddy with plants, putting a different herb in each section. This one is handy because you can carry it inside to harvest the herbs. [Photo: Backyard Boss] 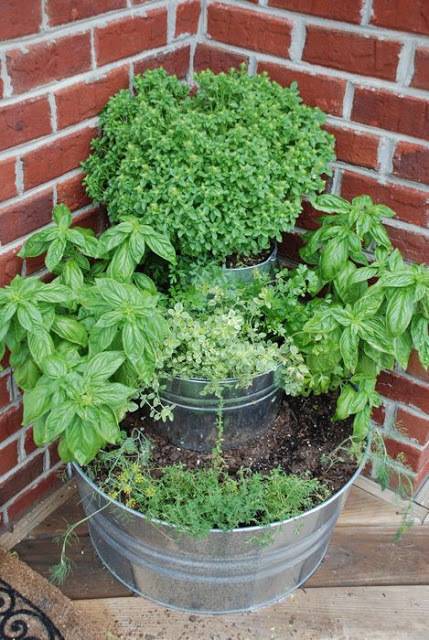
21. Stack different sized buckets on top of one another for this clever tiered herb garden. Check out the tutorial here. [Photo: The Vintage Wren] 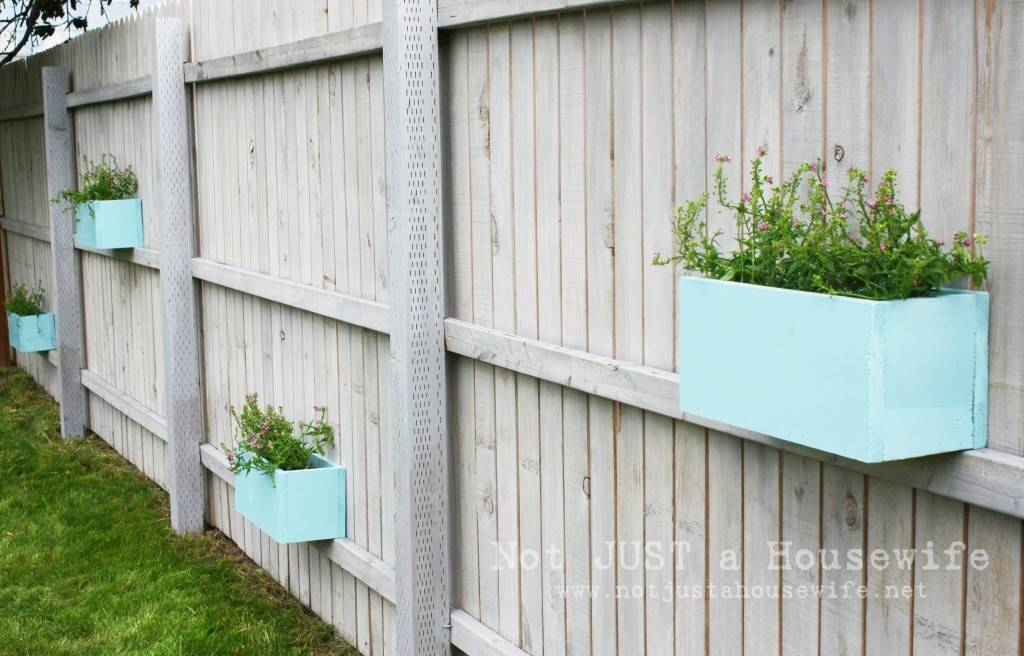
22. And last but certainly not least… add some pizzazz to your boring fence with colorful herb planter boxes! Get the how-to here. [Photo: Not Just A Housewife] 
The post 22 Creative Herb Garden Ideas appeared first on Curbly. Via https://www.curbly.com/22-creative-herb-garden-ideas 
If you’re searching for the perfect handmade (and last minute!) gift for mom, this is it. I’d want these beautiful bowls as a gift even if it weren’t Mother’s Day! Bonus: the kids can help!

The marbling is so pretty and each bowl will definitely be one-of-a-kind! Check out the video tutorial (and step-by-step photos) over on hello, Wonderful! DIY Kid-Made Marbleized Bowls by [hello, Wonderful] The post Make It: Kid-Made Marbleized Bowls For Mother’s Day appeared first on Curbly. Via https://www.curbly.com/17150-make-it-kid-made-marbleized-bowls-for-mother-s-day
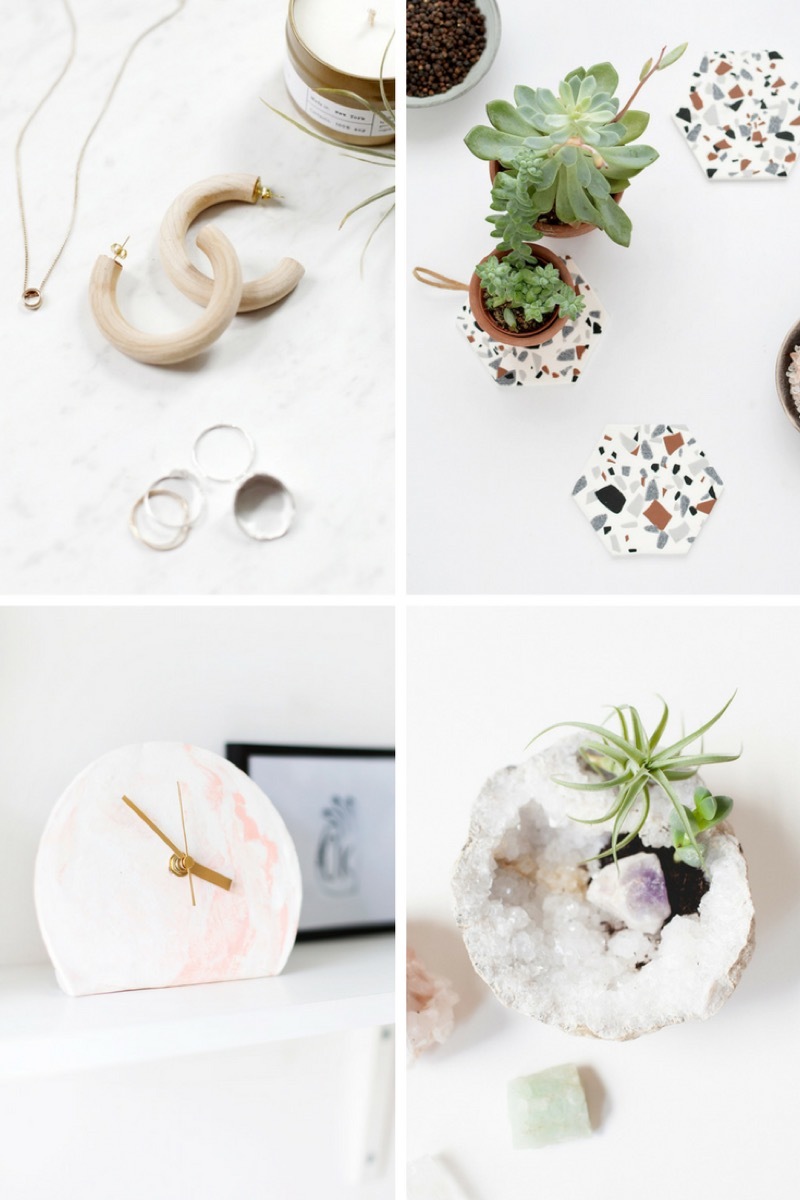
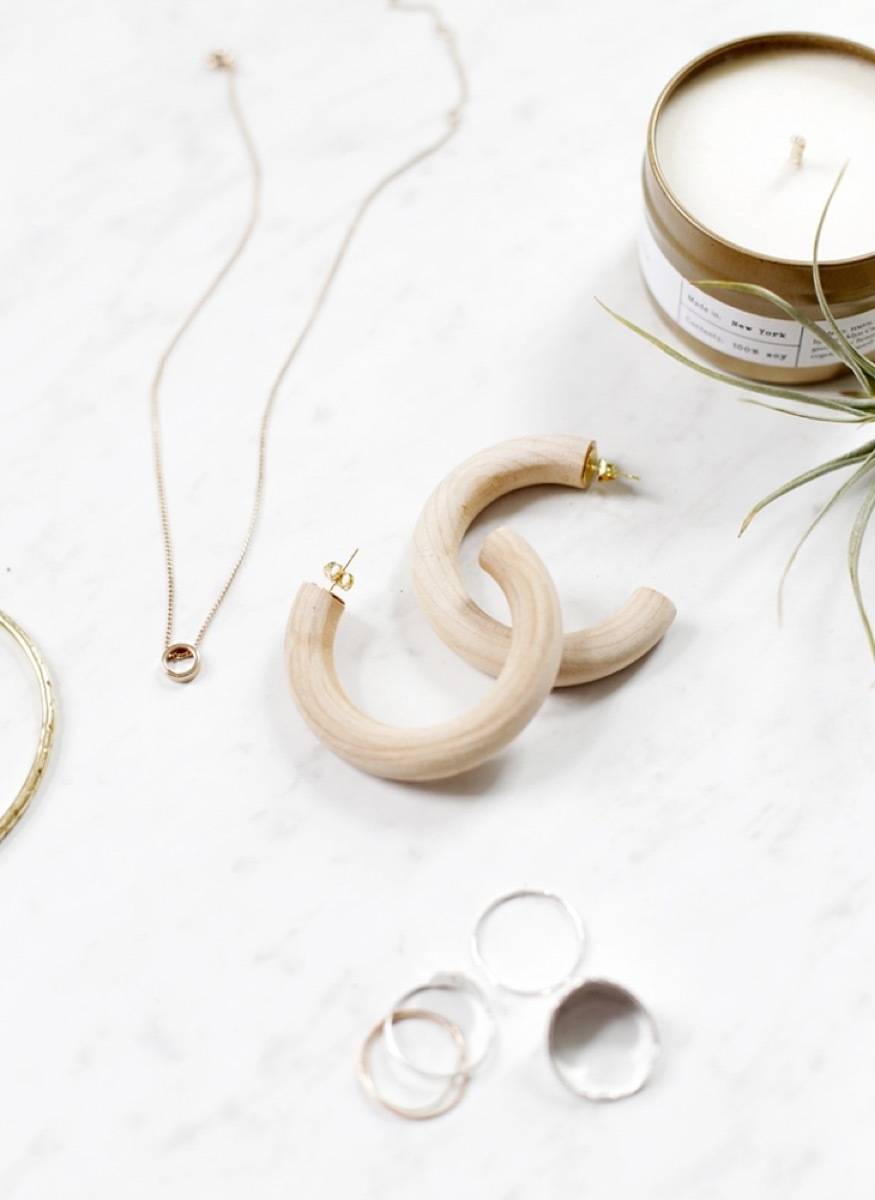
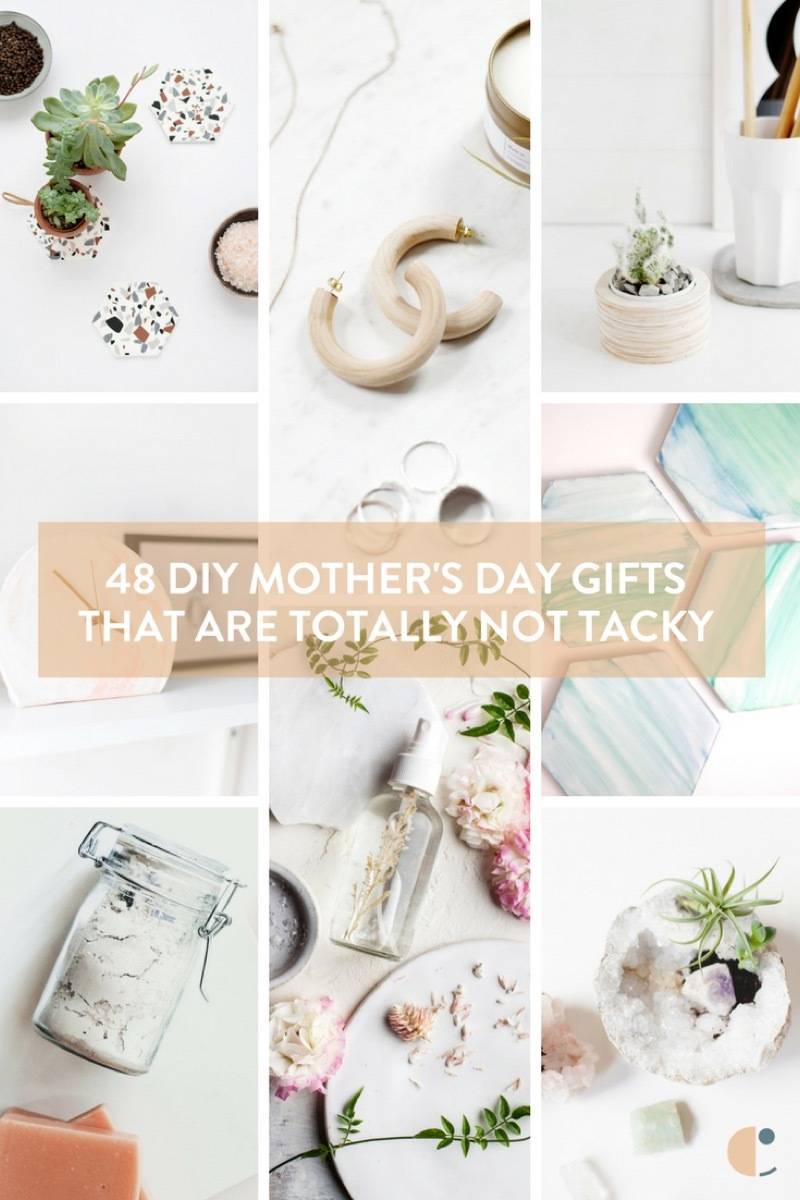
Mother’s Day is just around the corner, and you know what’s better than a mom? Nothing! If you want to show your momma you care for her in a special and unique way, then handmade is the way to go. We’ve rounded up 48 doable Mother’s Day ideas you could craft for your mom, or for the other mothers in your life. Maybe you’re a mom too, and you want to treat yourself – go wild. It’s your day. Mom will love the care and thought put into her homemade gifts, and not only that, but all these DIY Mother’s Day gifts are totally not-tacky. She might even think you picked her gift up at a store! What do you do to celebrate Mother’s Day? Let us know in the comments!HOMEMADE JEWELRY
Source: The Merrythought 1. These simple wood hoop earrings totally look store bought!
Source: A Pair and a Spare 2. Does mom prefer more color? These fun fringed earrings should do the trick.
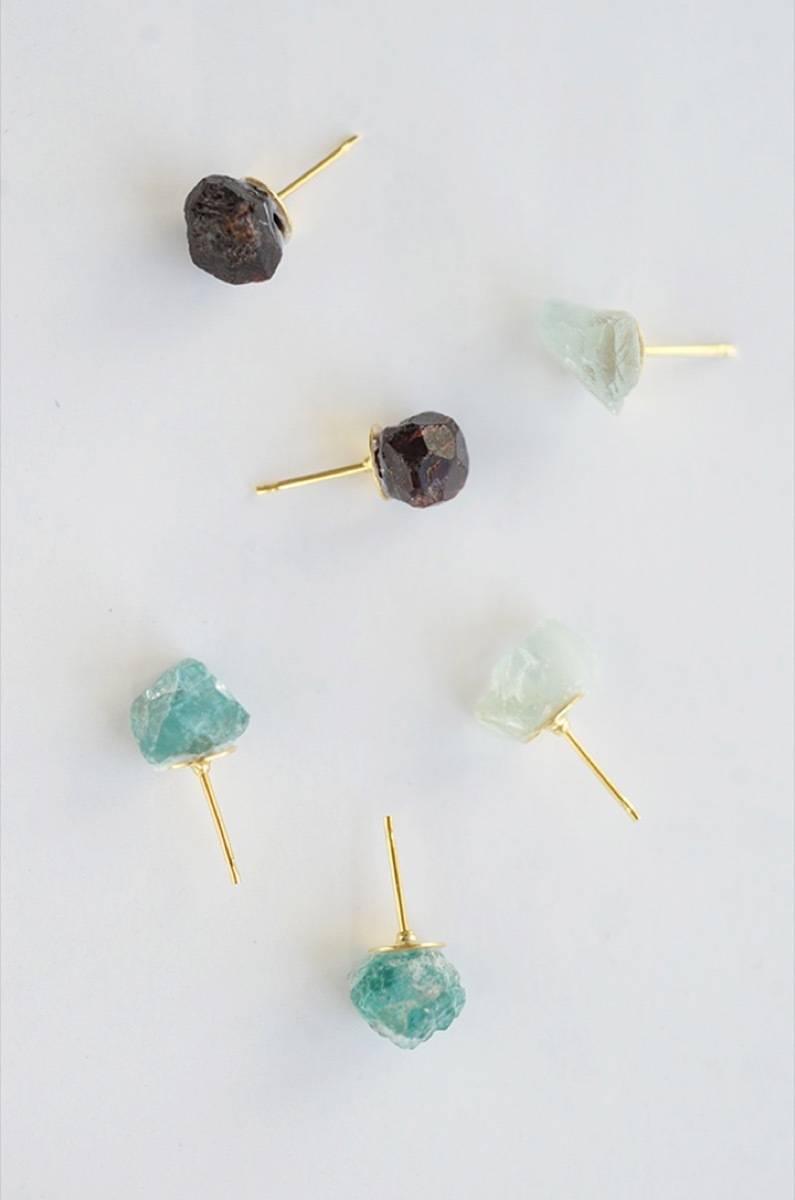
Source: Alice and Lois 3. These raw stone earrings make thoughtfully simple last minute DIY Mother’s Day gifts.
Source: Paper and Stitch 4. You gotta hand it to ’em, moms are the best.
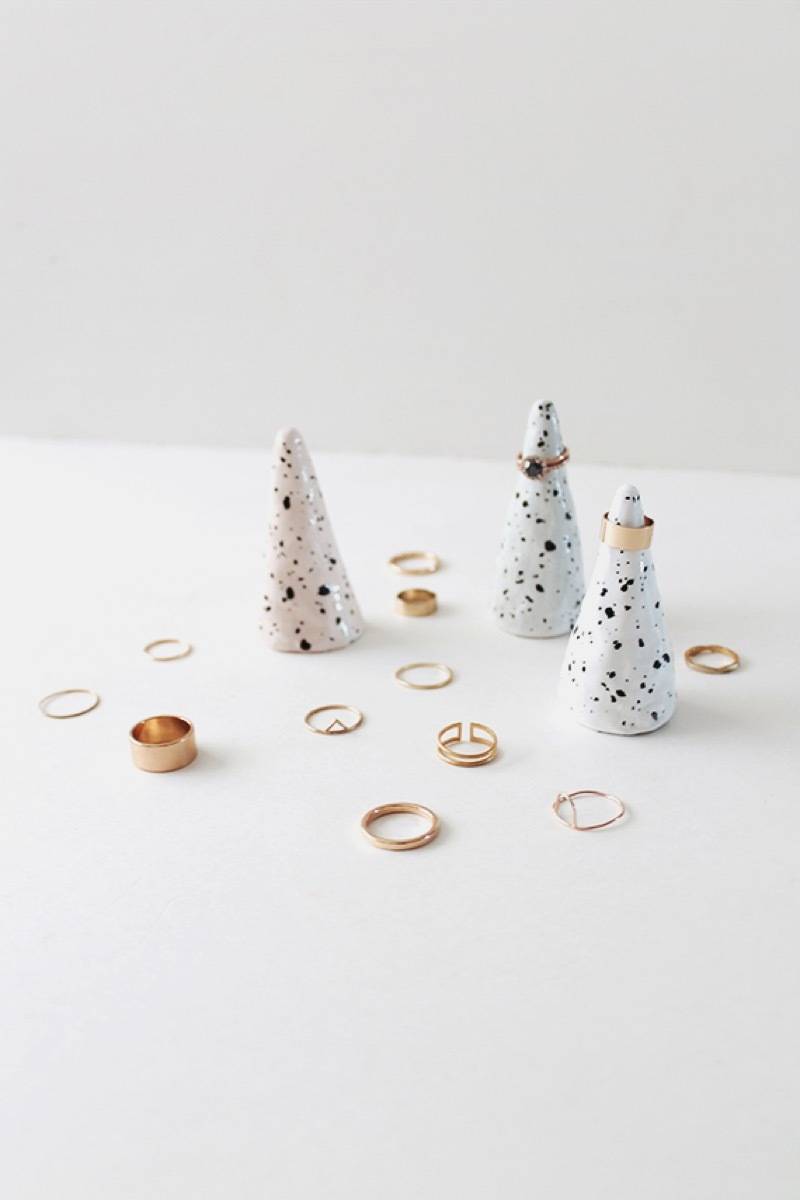
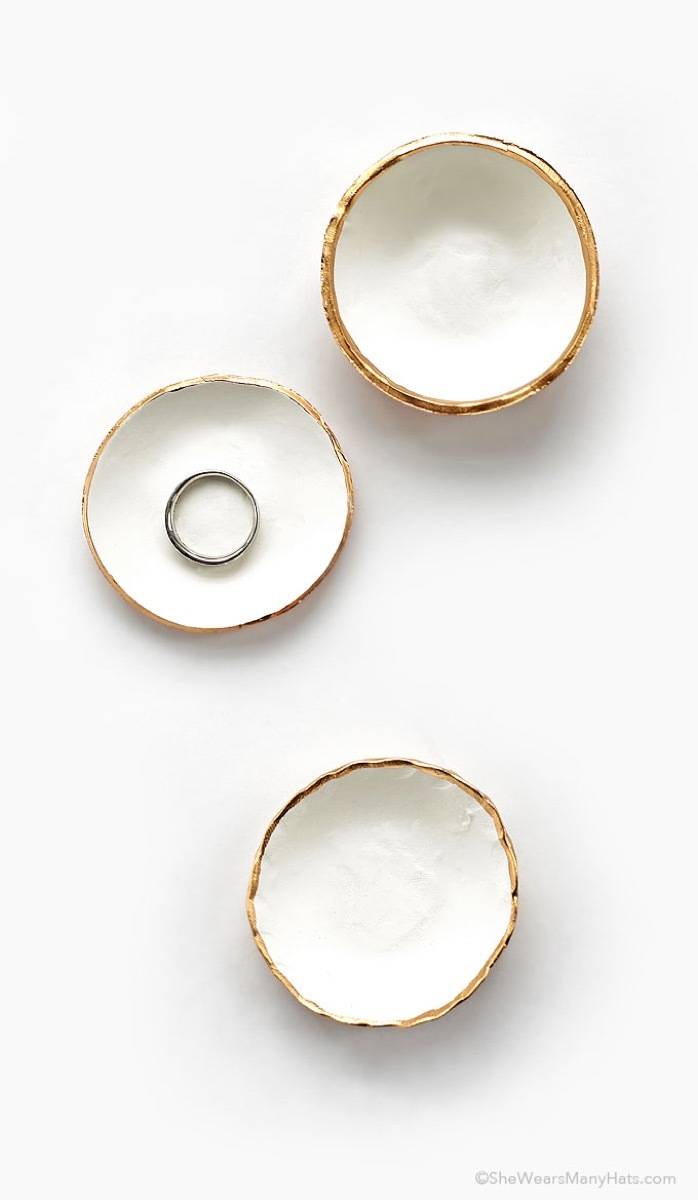
Source: Almost Makes Perfect 5. If you told me you bought one of these cone ring holders at the store, I’d believe you. And so will mom.
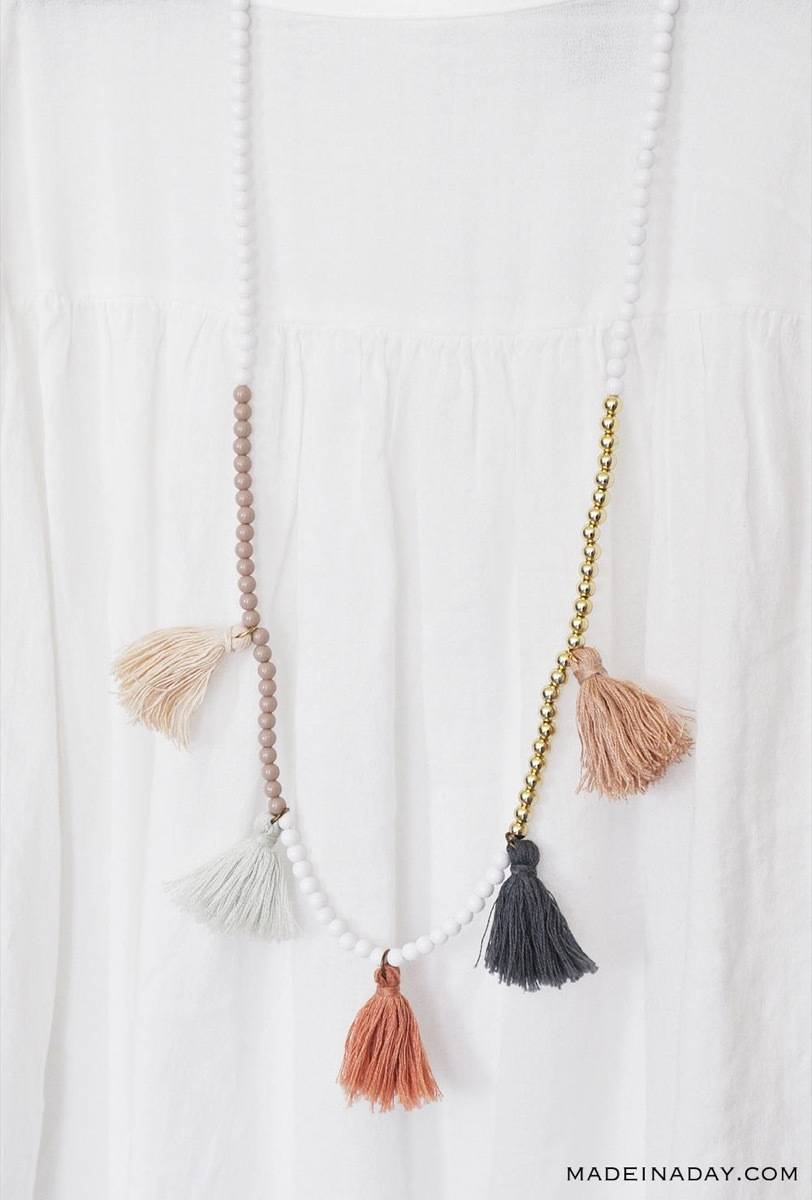
Source: Made in a Day 6. Nothing says “I’m a fun mom” quite like tassels!
Source: Lovely Indeed 7. You’d have to be a prick to not appreciate getting this cactus ring holder as a gift!
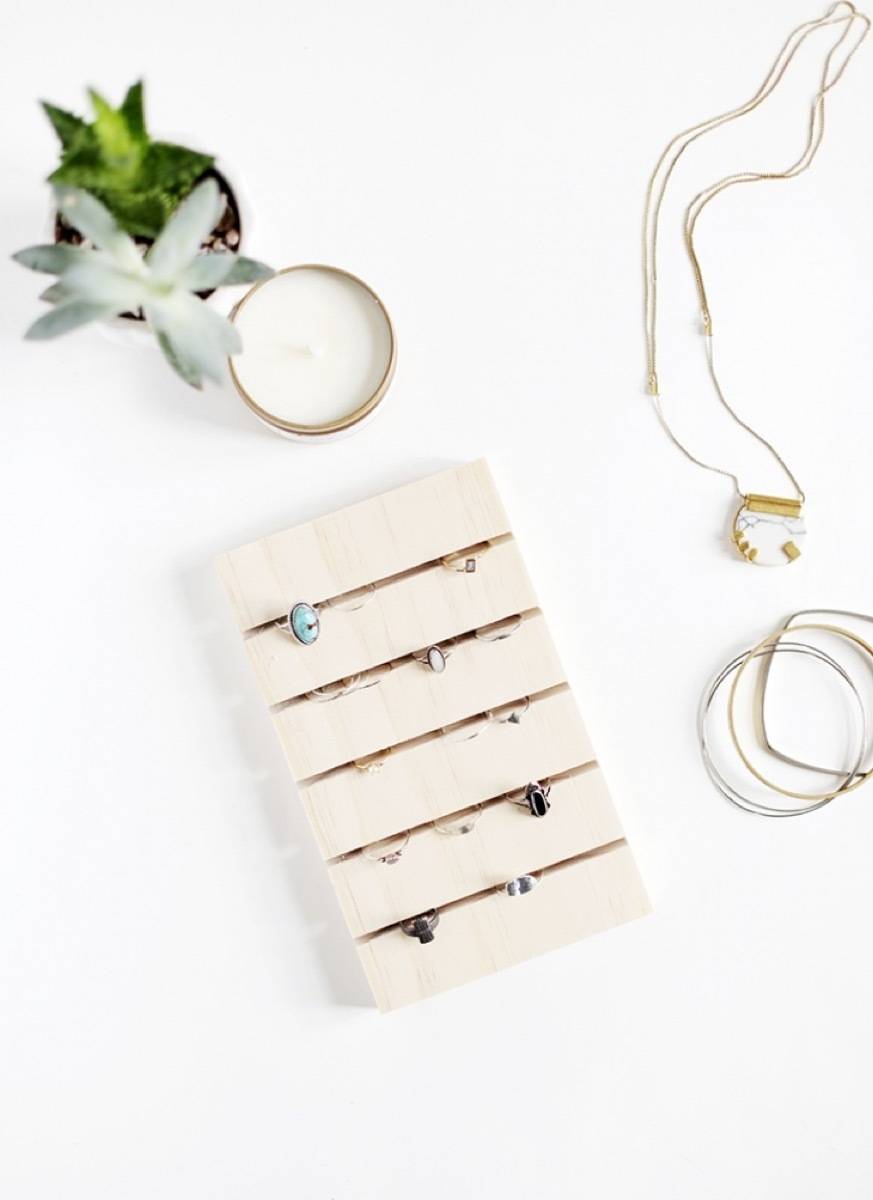
Source: The Merrythought 8. Does she love organization? Gift her a wooden ring display. It’s unique and helpful.
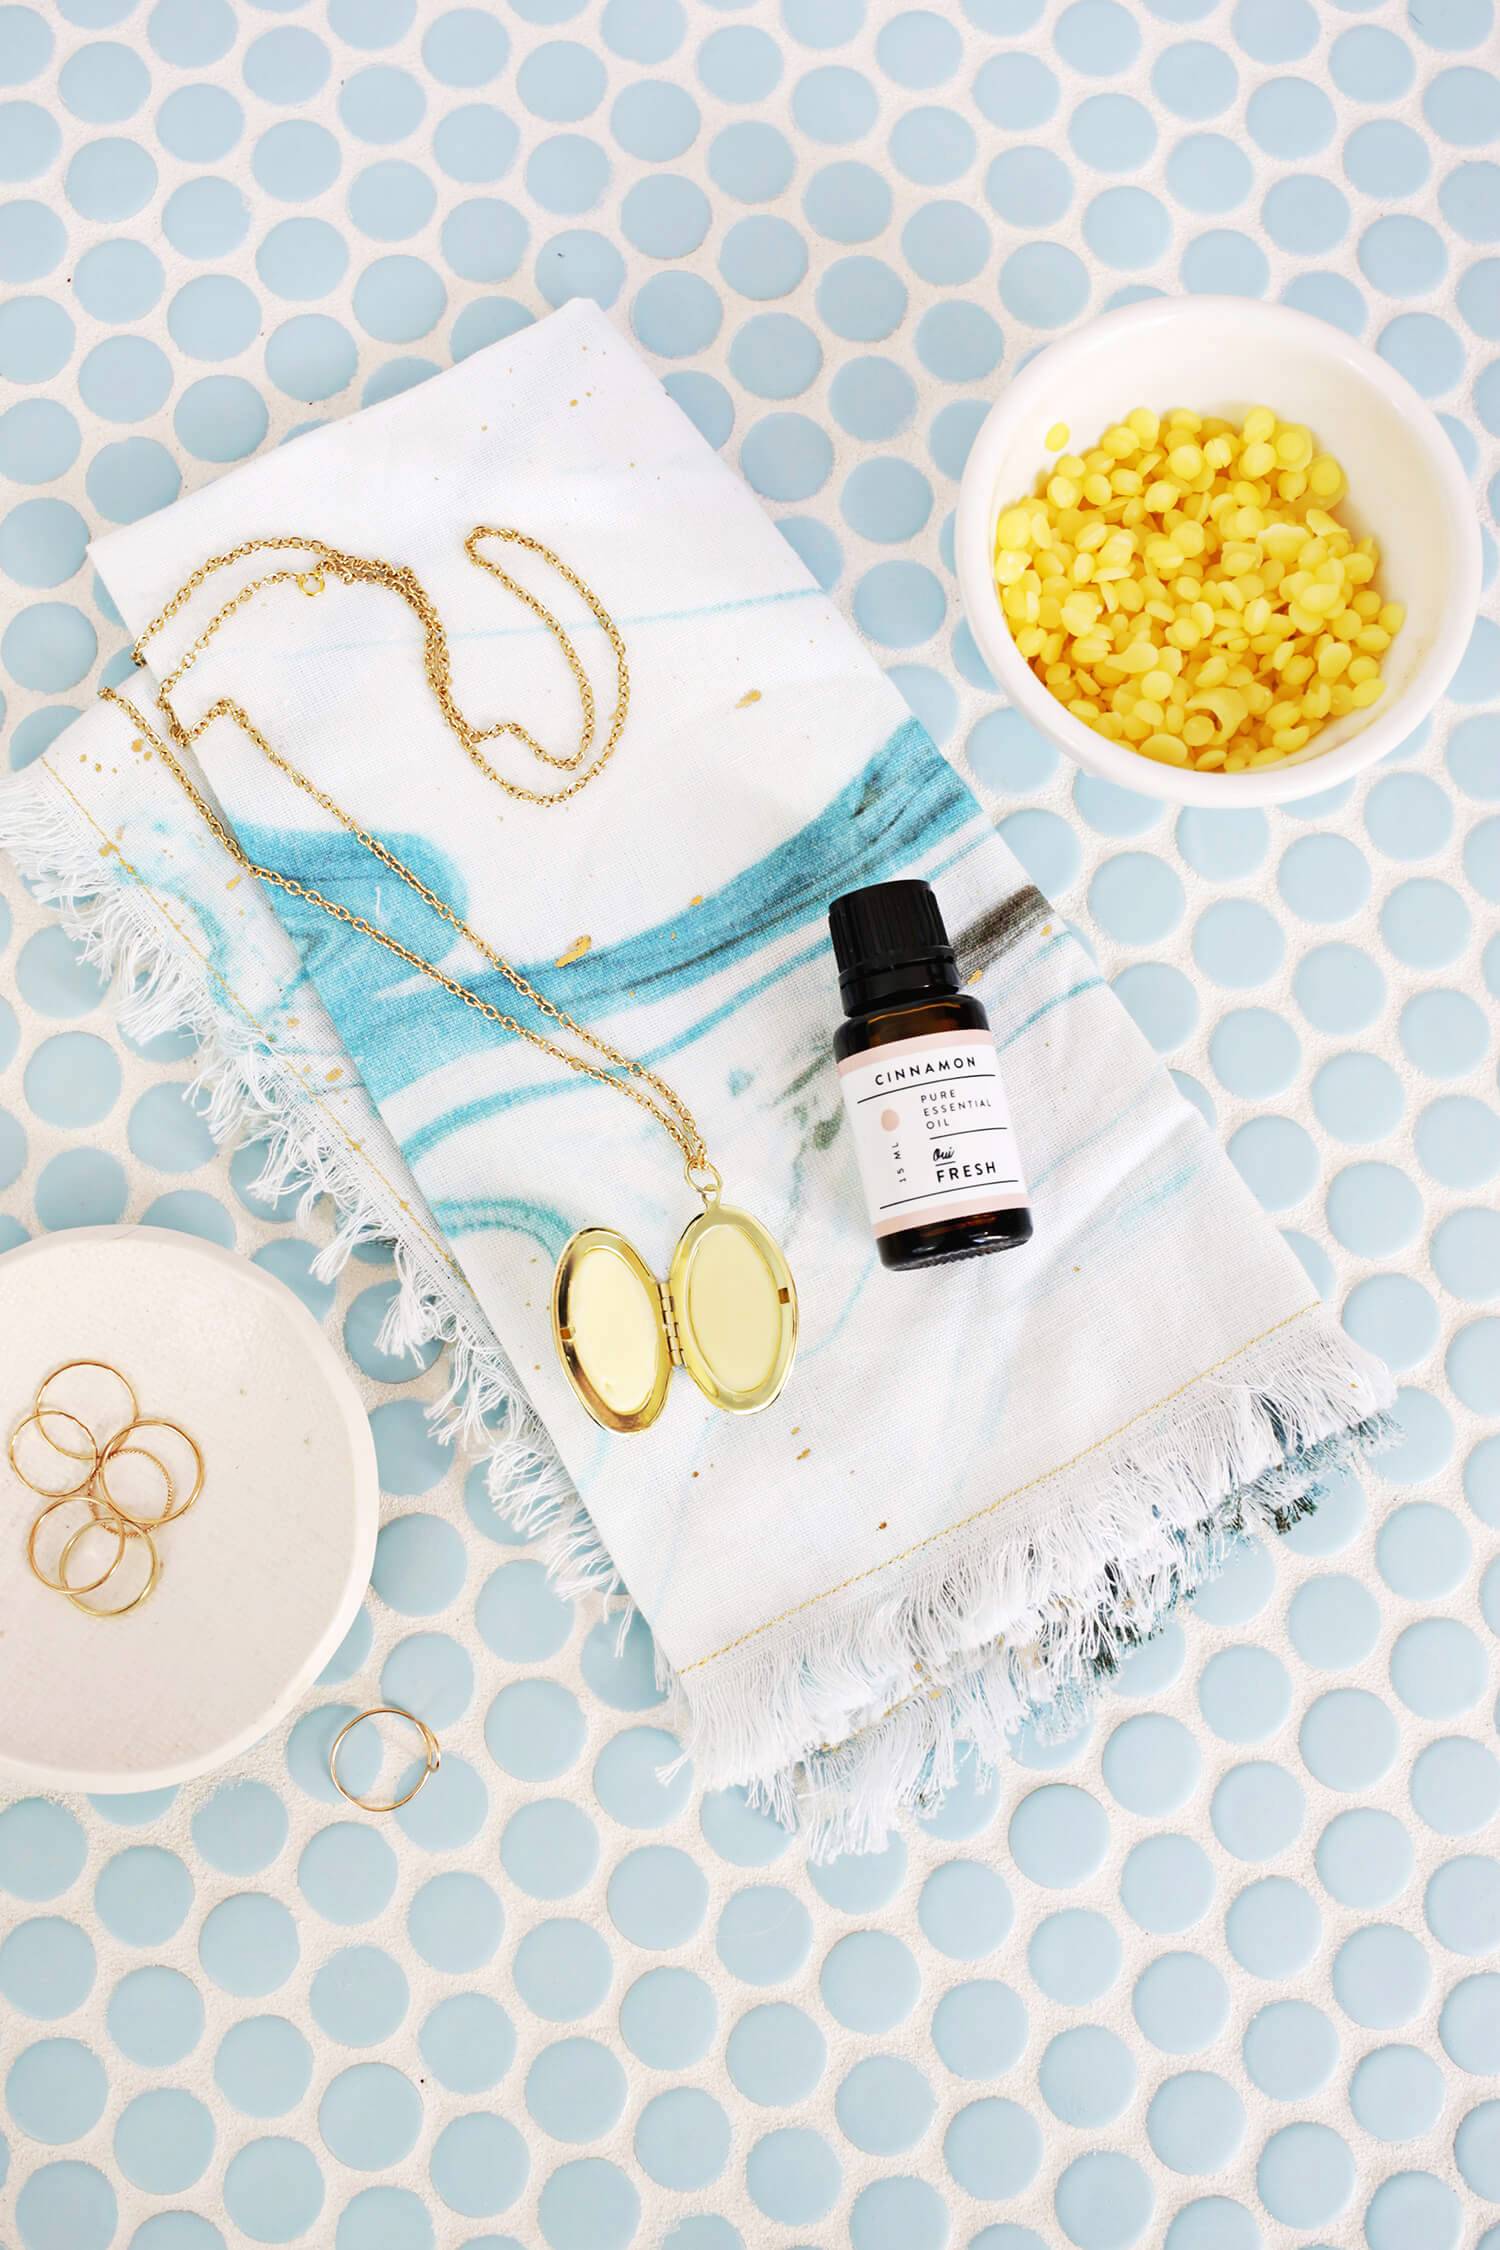
Source: A Beautiful Mess 9. Get ready, mom! It’s a lip balm locket! Have you ever seen a cooler combination? HANDMADE BODY CARE
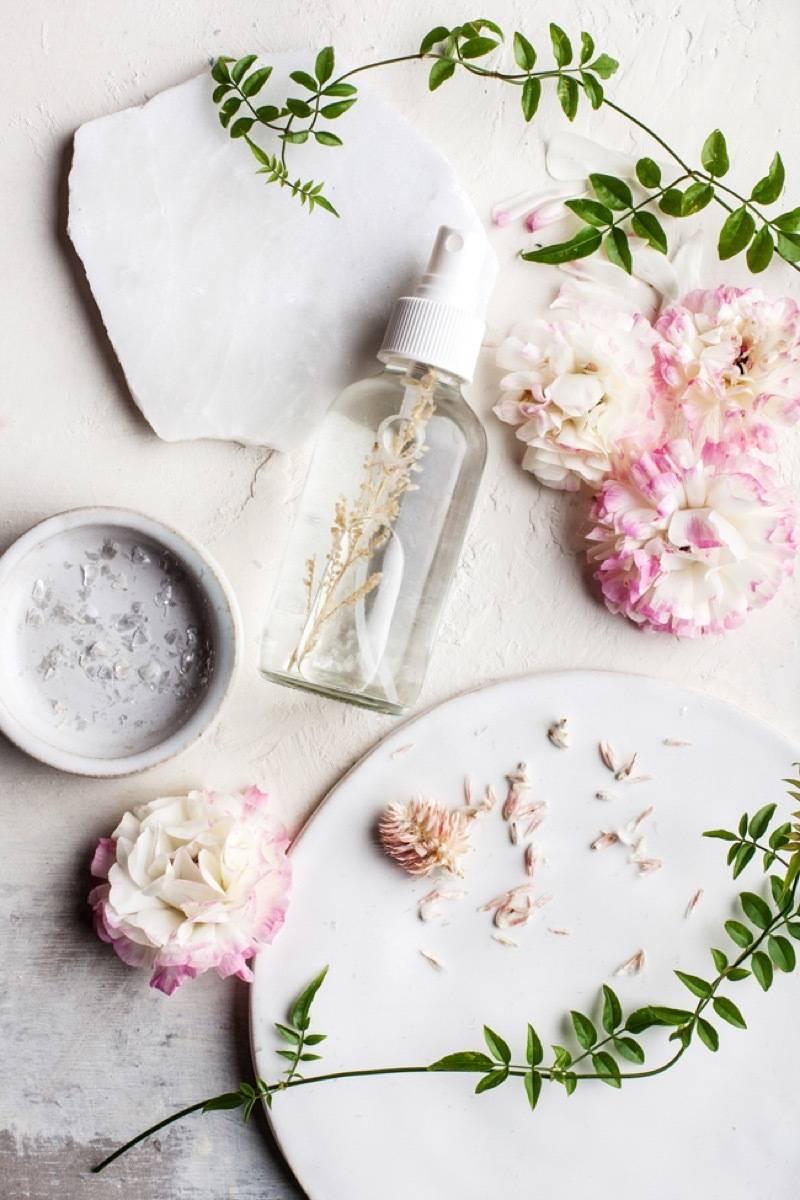
Source: Hello Glow 10. Mix up some jasmine and aloe perfume body spray to keep mom feeling refreshed. You know it’s gotta smell amazing.
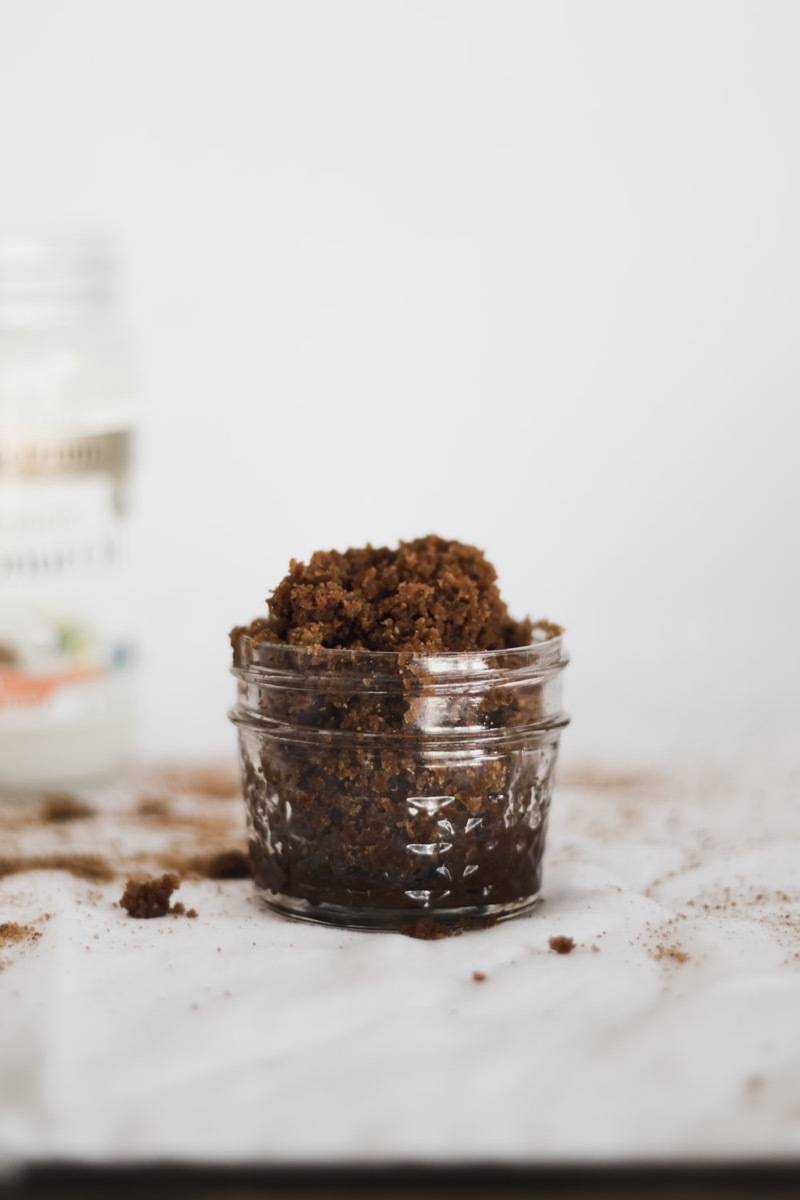
Source: The Free Spirited 11. This recipe for coconut lip scrub makes yummy and easy DIY Mother’s Day gifts (plus you can just make double and save some for yourself!).
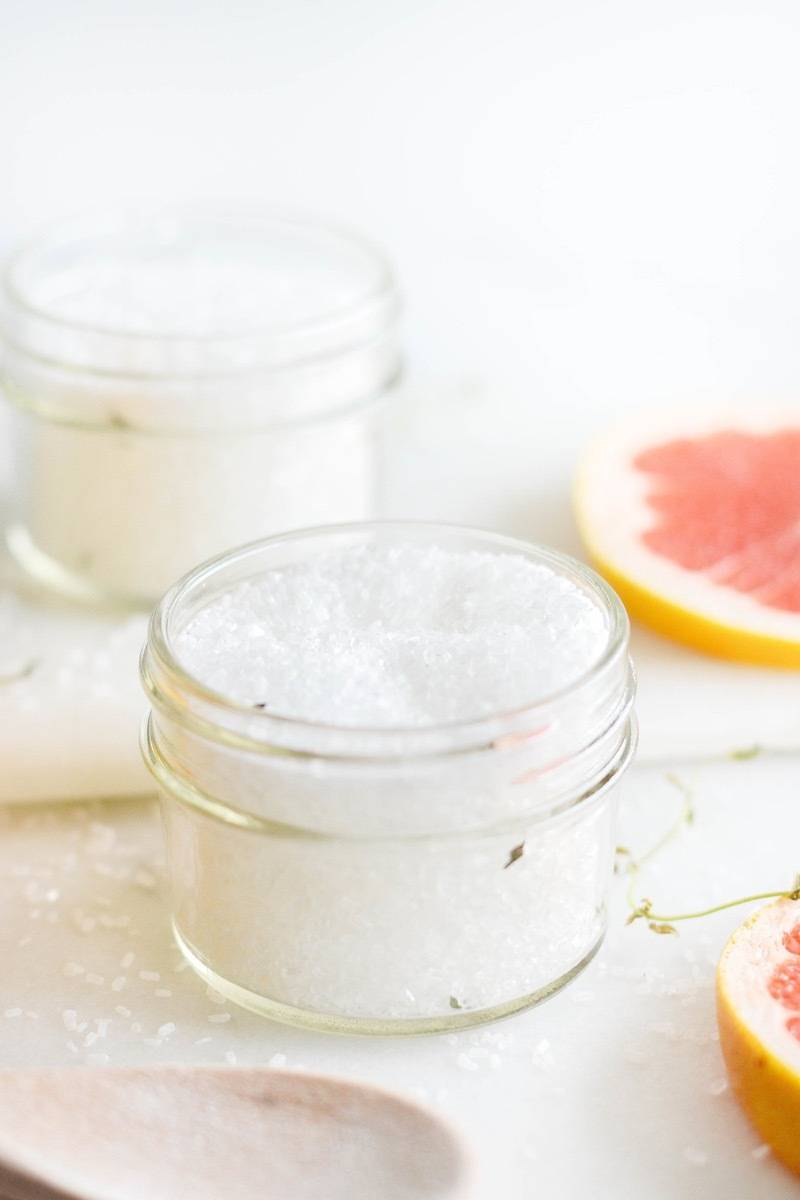
Source: Boxwood Avenue 12. Gift a mini spa experience with a pampering grapefruit and thyme epsom salt bath soak. Ahh – relaxation.
Source: DIY in PDX 13. You know what this DIY Mother’s Day gift says?: “Mom – you rock.”
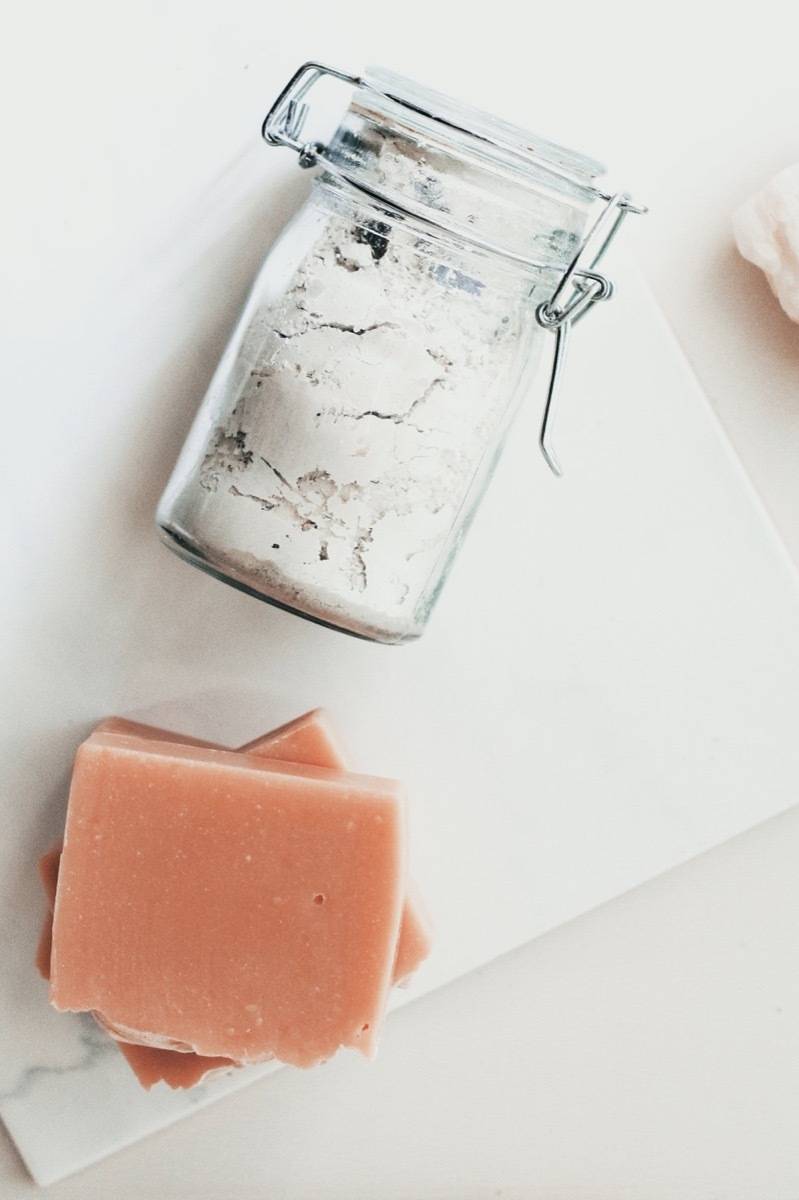
Source: The Free Spirited 14. Pamper her with a jar of this indulgent clay face mask.
Source: Homey Oh My 15. The great thing about giving grapefruit and rosemary bath salts as gifts for Mother’s Day is that you can make it in bulk and gift it to all the special moms in your life. Every mom needs a little me-time in their lives. DIY HOUSEWARES
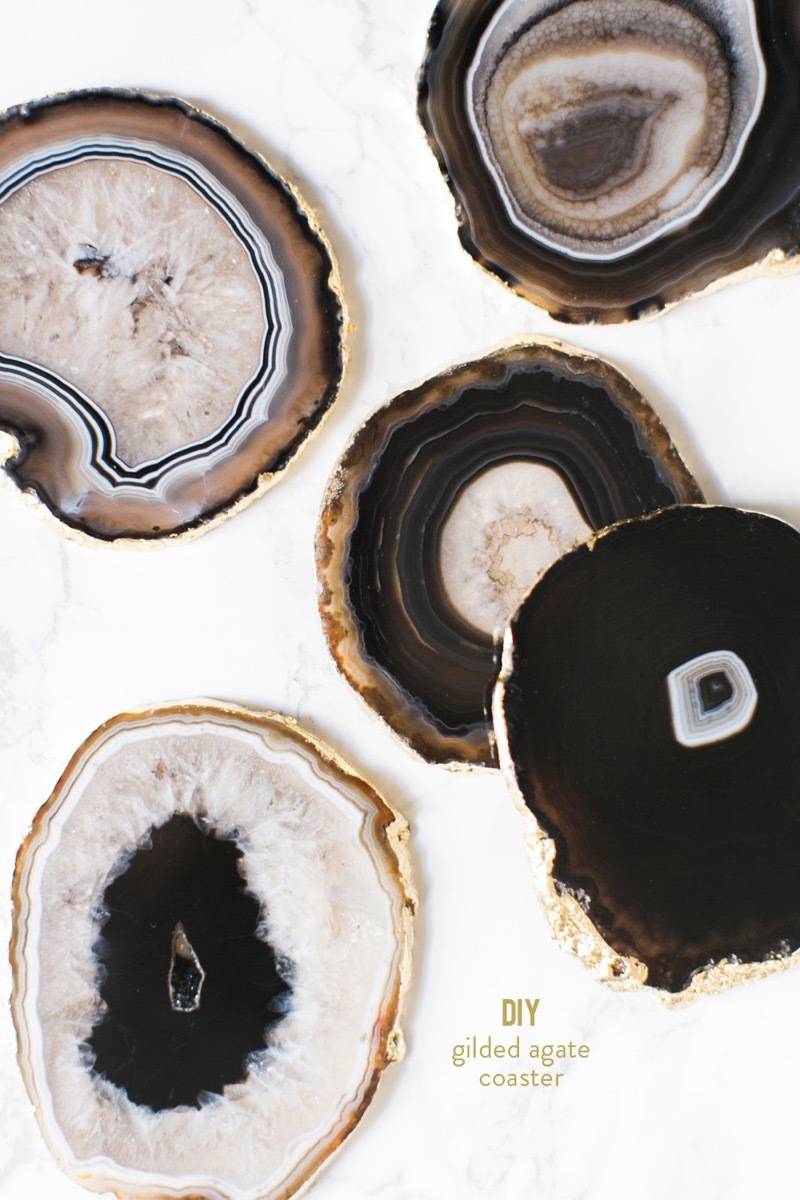
Source: Style Me Pretty 16. Gorgeously gilded coasters made from precious stone? Don’t mine-d if we do.
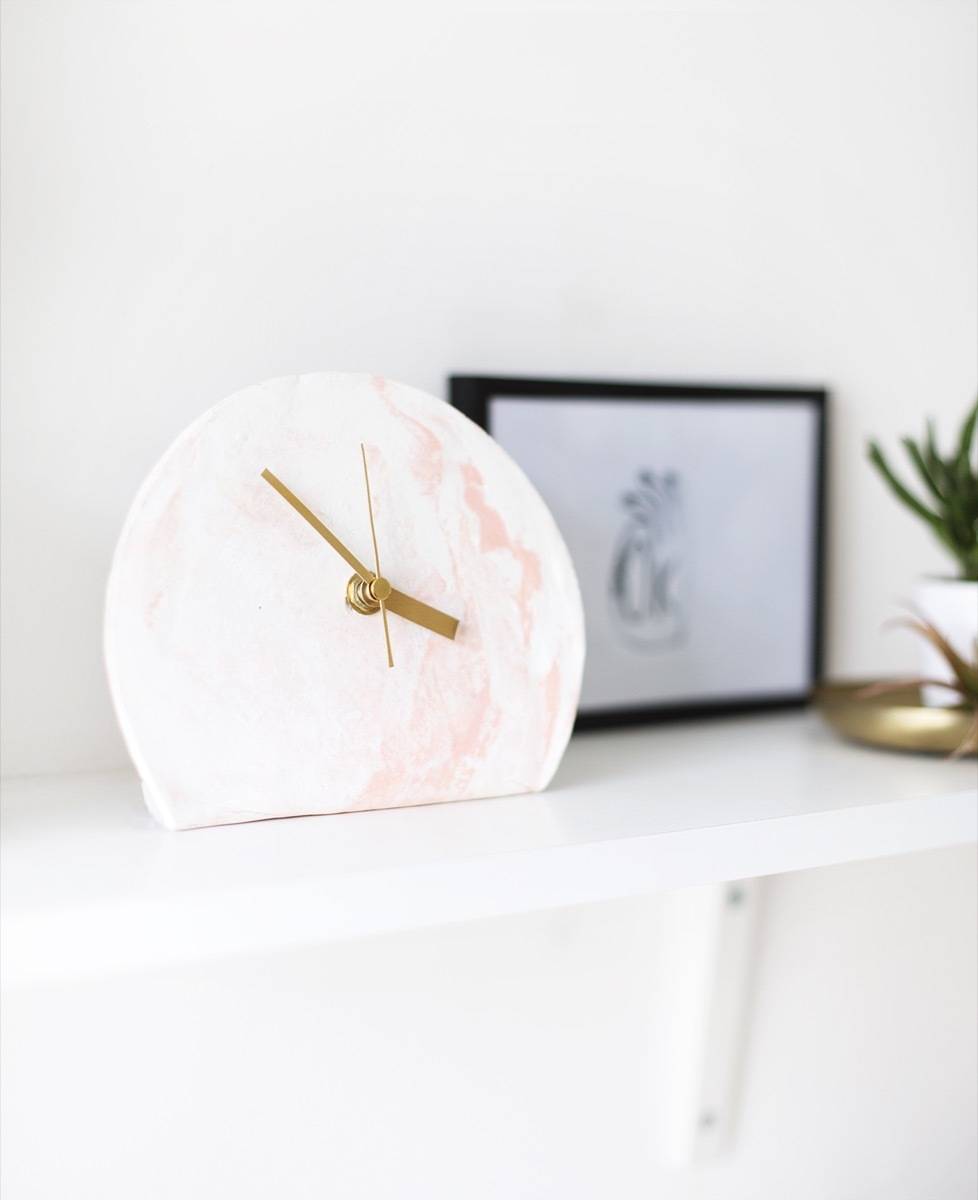
Source: The Lovely Drawer 17. A little Dali mixed with minimalism, this marbled standing clock is so unique! Any mom would be pleased to be gifted this.
Source: Always Rooney 18. Make your momma a classic, heartfelt wood cutting board. Mom will love the thought and time put in.
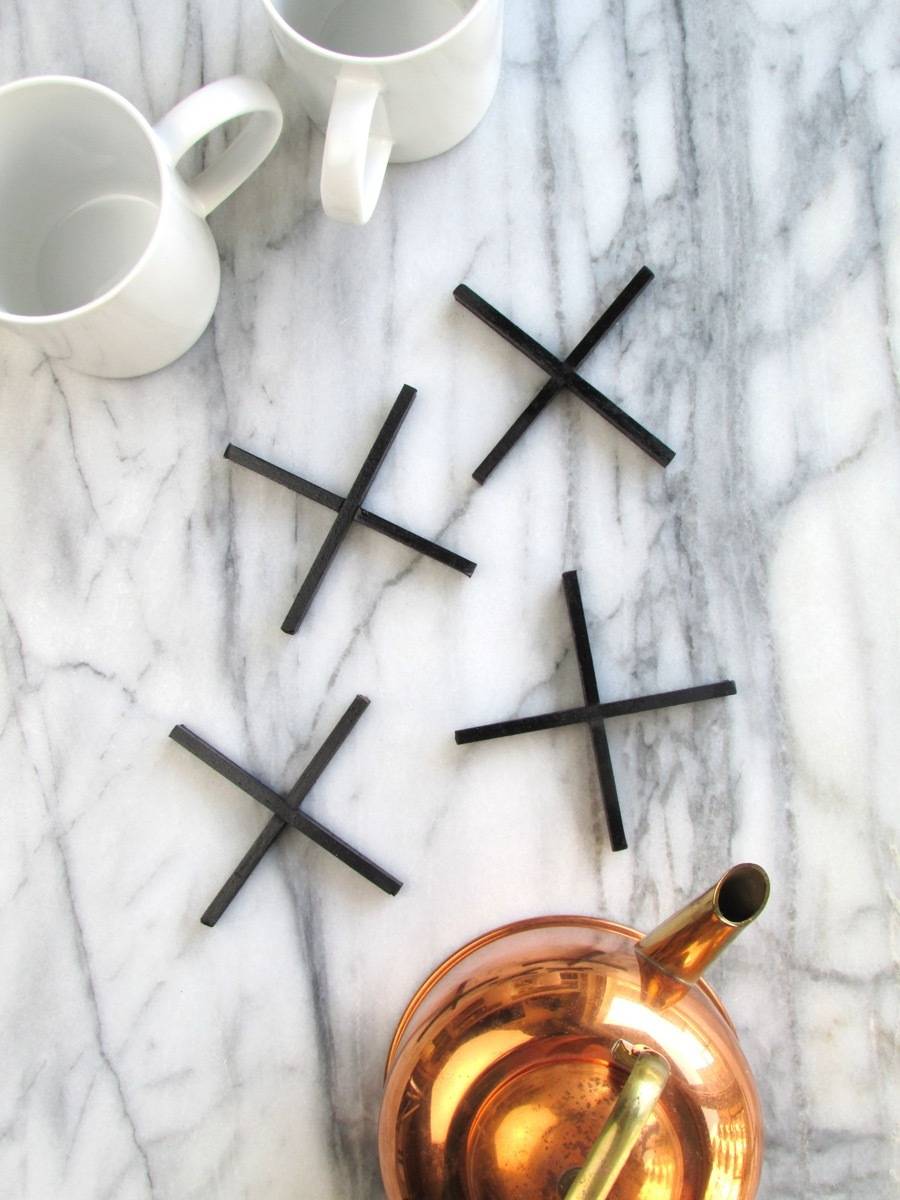
Source: Francois et Moi 19. Let your mom know what a positive influence she is on your life by making her these plus-sign minimal coasters.
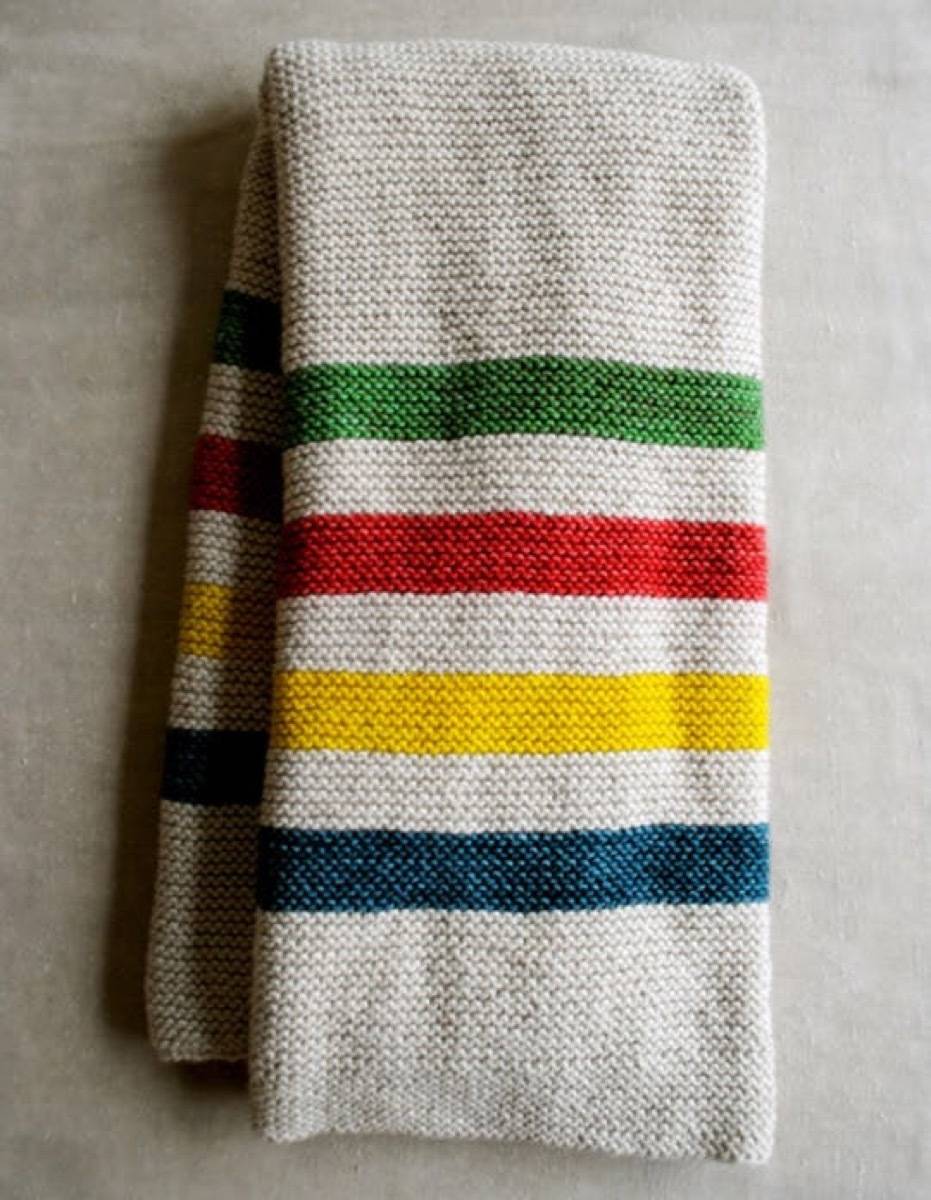
Source: Apartment Therapy 20. Nifty with the knitting needles? Try this Hudson Bay blanket – the pattern is for a baby blanket, but could easily be a comfy throw.
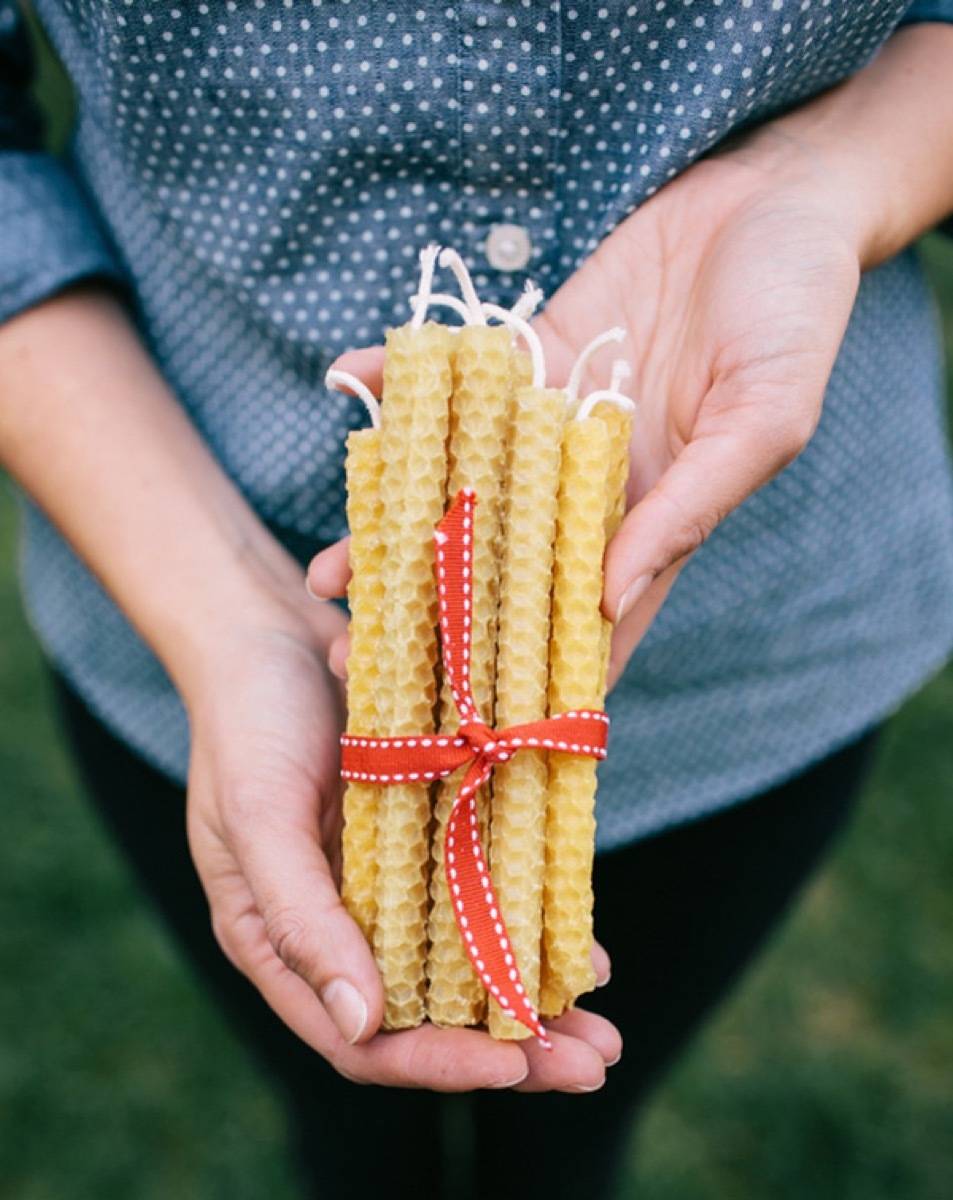
Source: Oh Happy Day 21. Is your mom the bees knees? Try giving your mom some handmade beeswax candles.
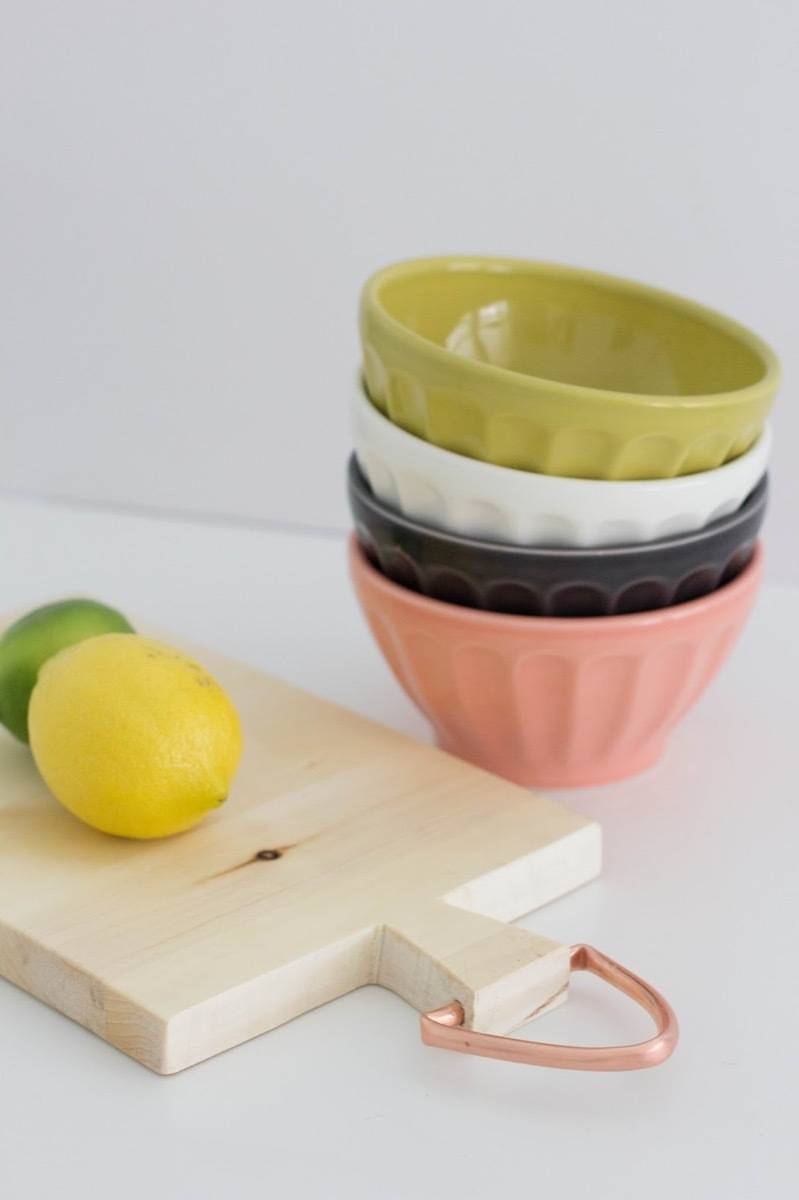
Source: She Wears Many Hats 22. Homemade Mother’s Day gifts don’t have to be complicated – try your hand at a set of minimal clay bowls.
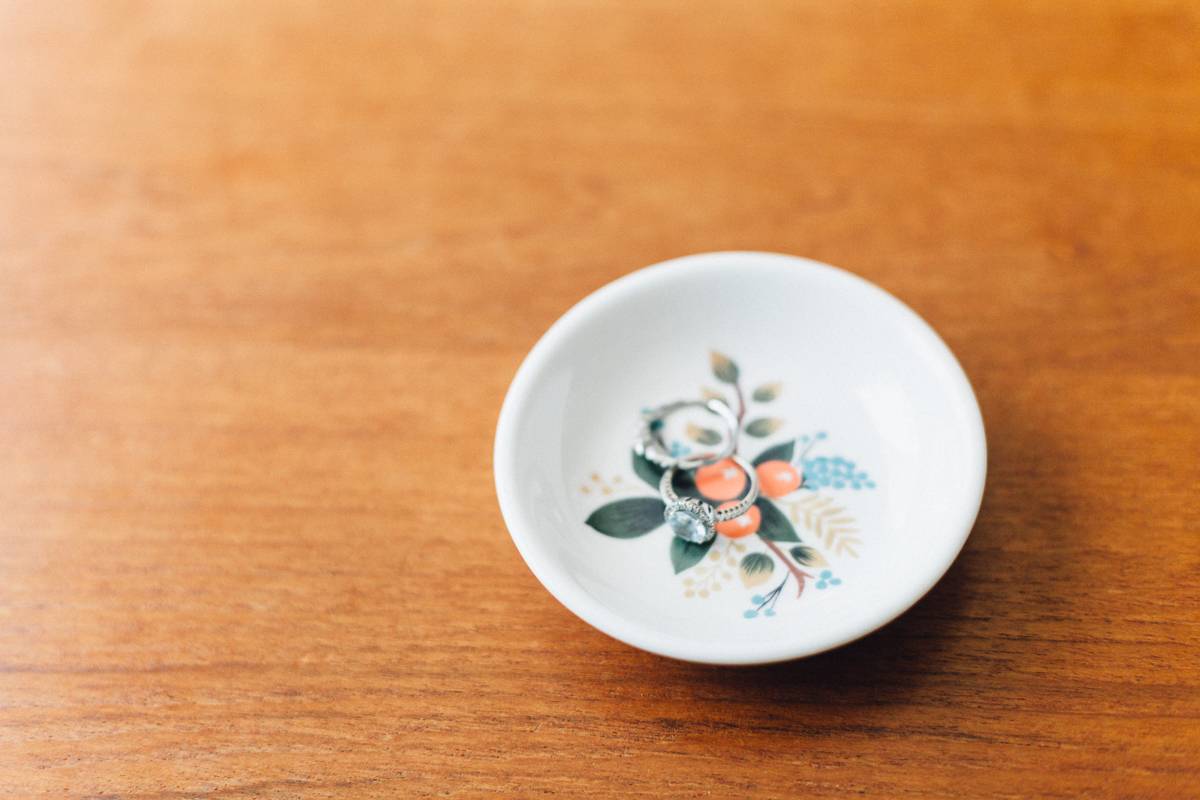
Source: Alyssa and Carla 23. If you’re short on time, this floral ring dish can be crafted in just a few minutes with the help of temporary tattoos – making it totally personalized and last-minute-friendly.
Source: Burkatron 24. Terrazzo is making a major comeback. Your mom’s a trendy lady – gift her these terrazzo serving trays.
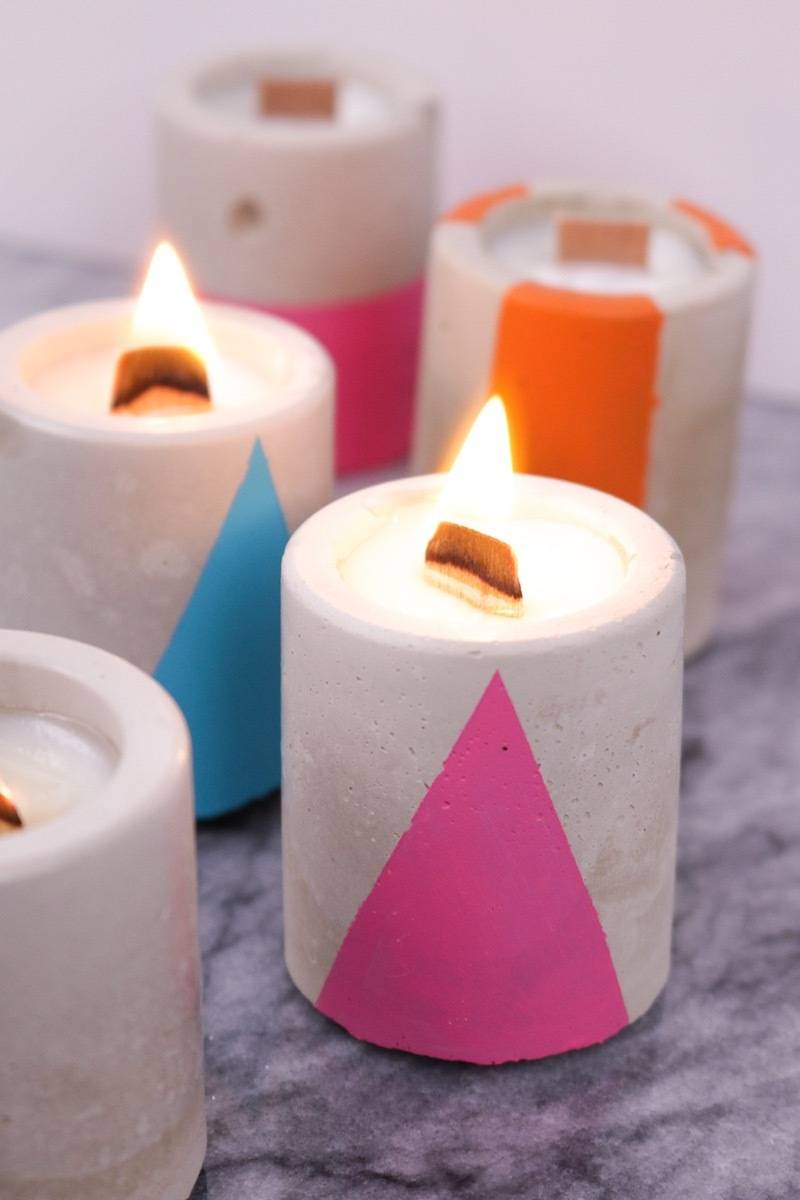
Source: Curbly 25. She’s the light of your life, and she deserves some hand-poured concrete candles.
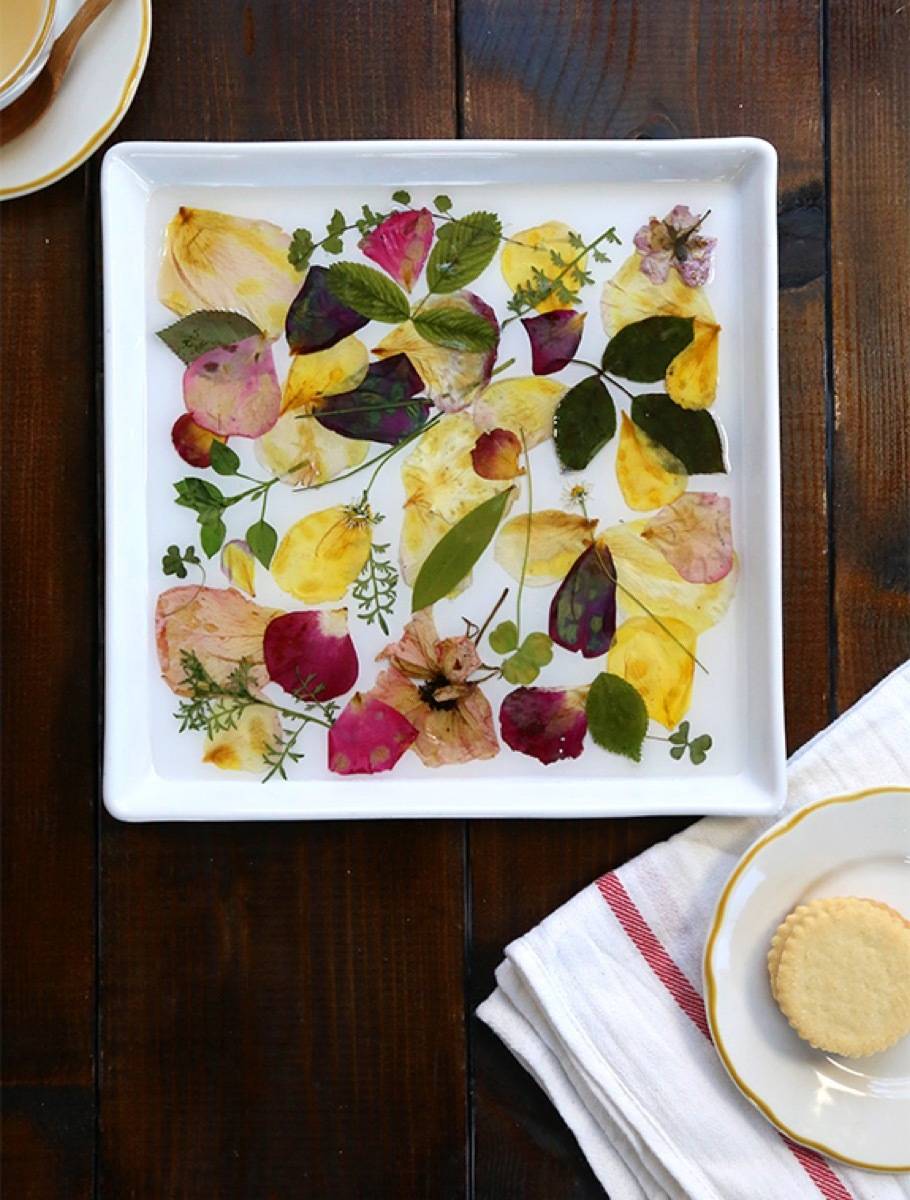
Source: Say Yes 26. It’s one of the more time-intensive Mother’s Day crafts, but how sweet is this rose petal tray?
Source: Curbly 27. For the caffeine queens, a hand-painted mug makes a perky present.
Source: Fellow Fellow 28. Or try a similar treatment on IKEA bowls.
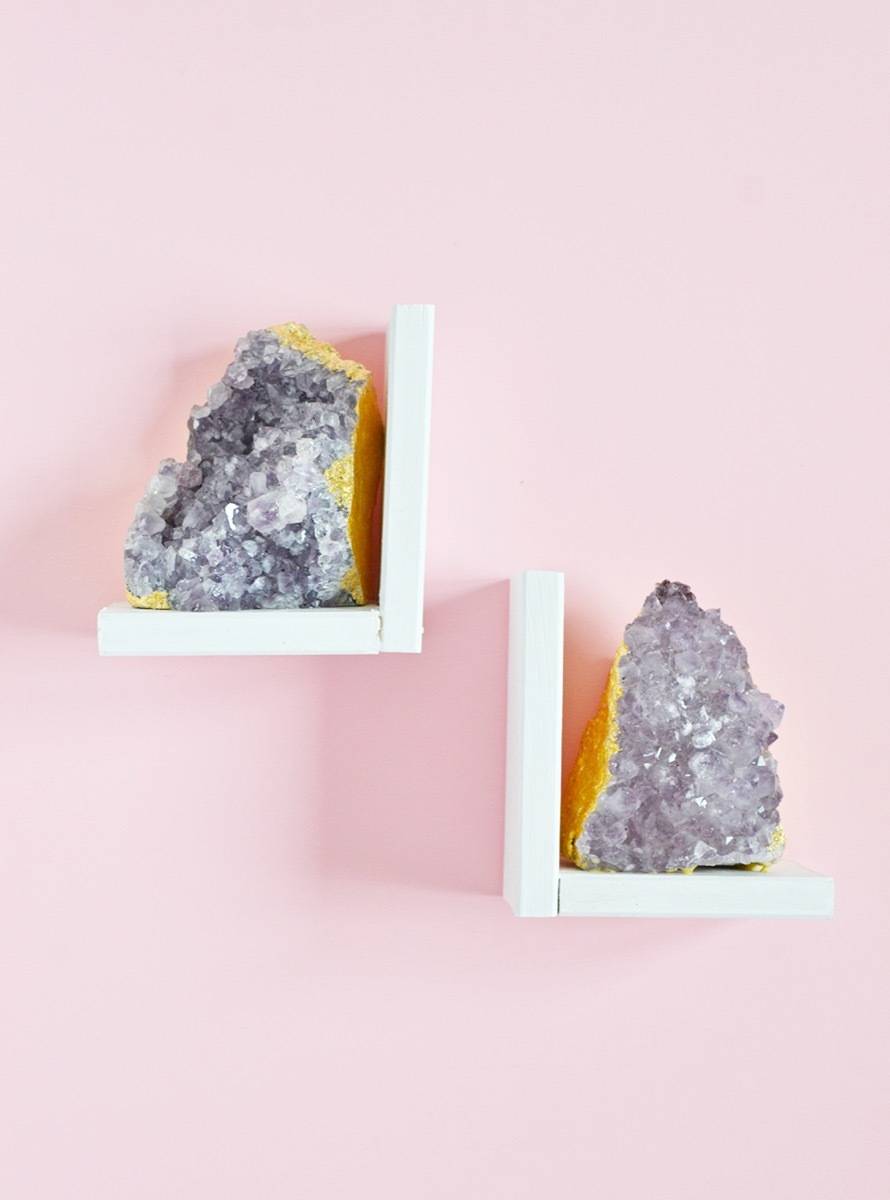
Source: Curbly 29. For the bookworm-mamas, hook her up with some glam amethyst bookends.
Source: Sugar and Cloth 30. Not satisfied yet with any of these other Mother’s Day ideas? How about this gorgeous, one-of-a-kind watercolor throw?
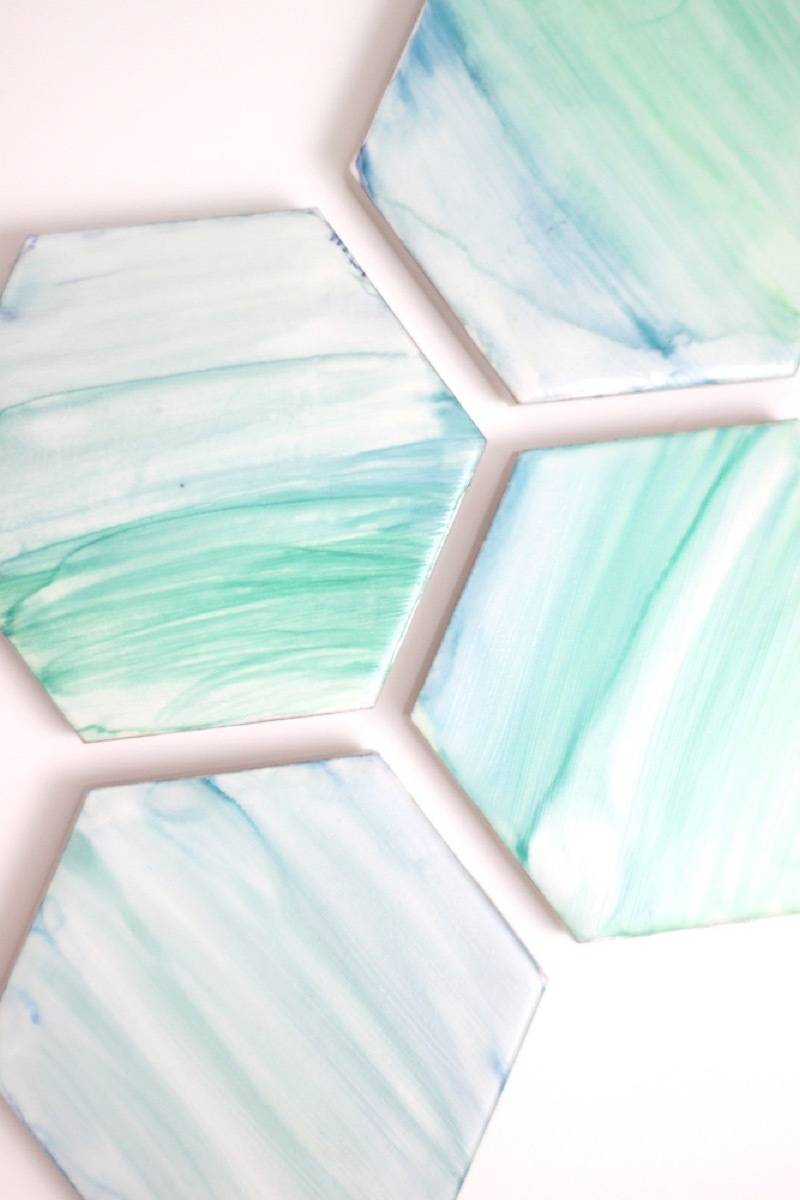
Source: Curbly 31. Gift your mother some DIY watercolor coasters so she knows, yes, you heard her all those times she told you to get your drink off the coffee table. PLANTS & POTS
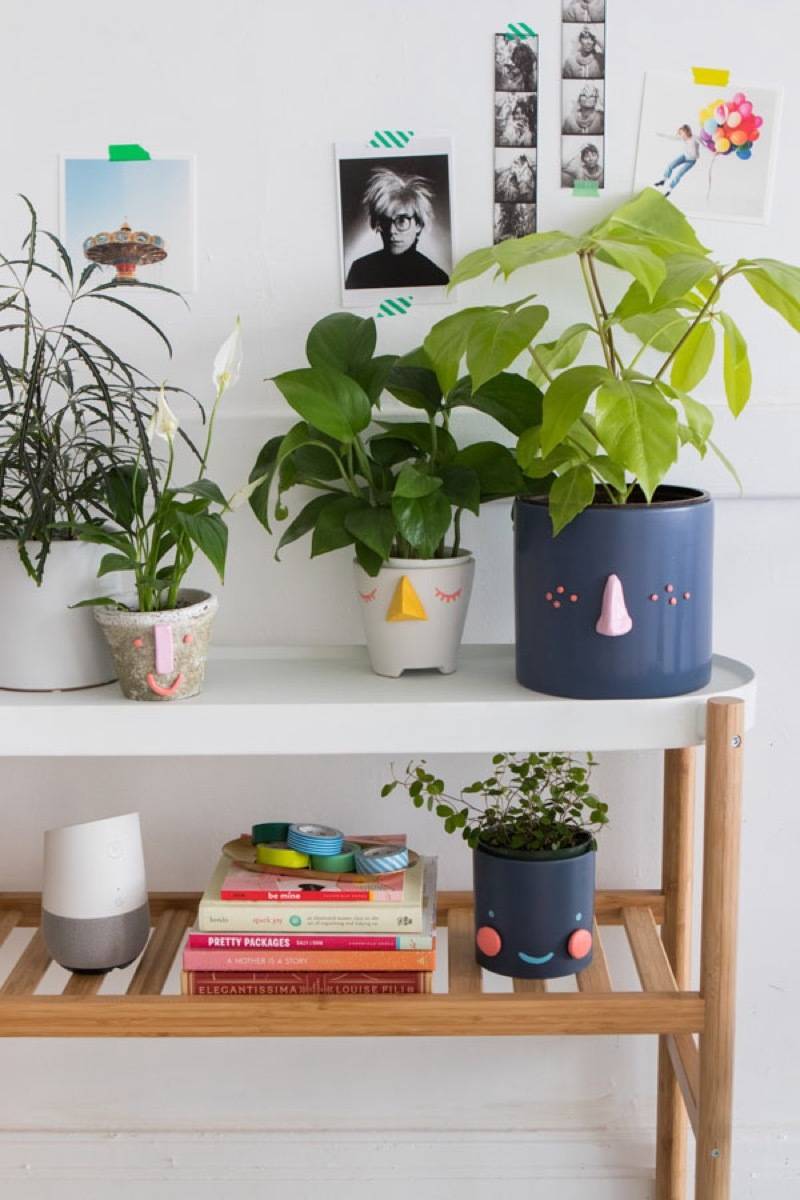
Source: Oh Happy Day 32. Gift a happy little face planter! Seriously, how adorable are these??
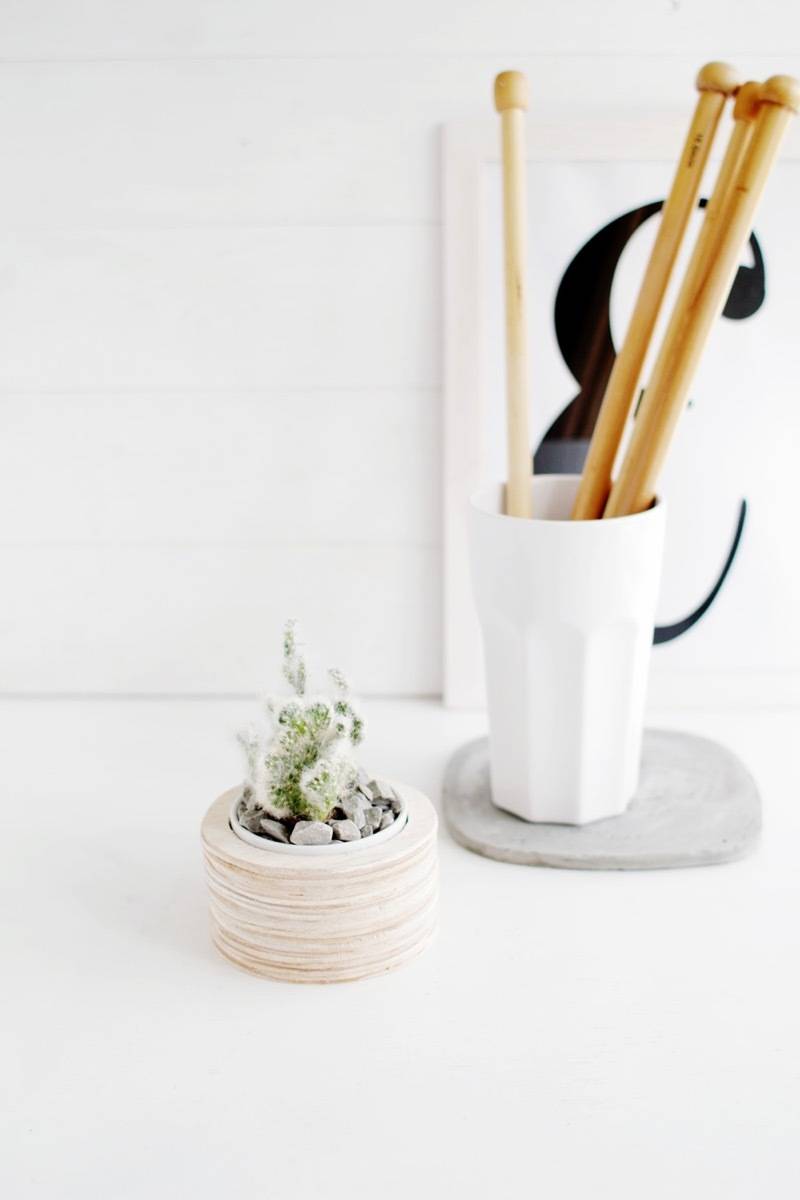
Source: Fall for DIY 33. Know a minimal mama? This balsa wood planter would make a sweet DIY Mother’s Day gift.
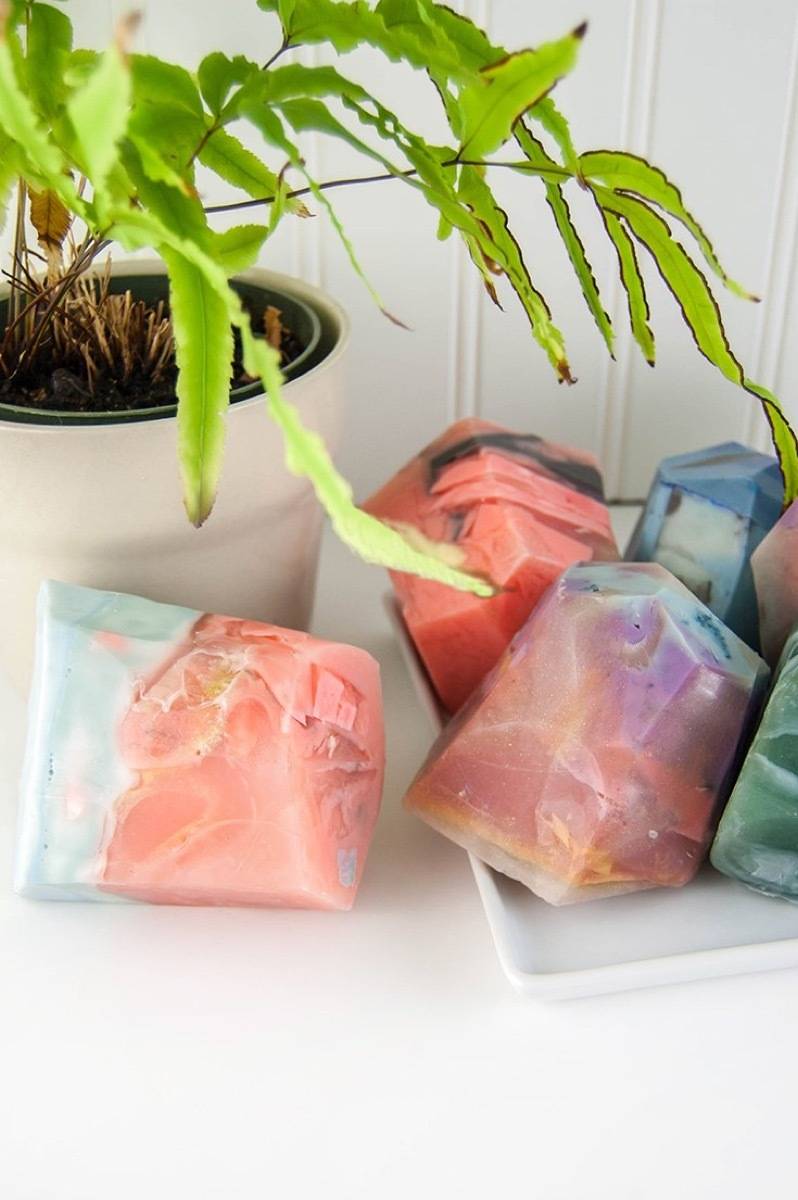
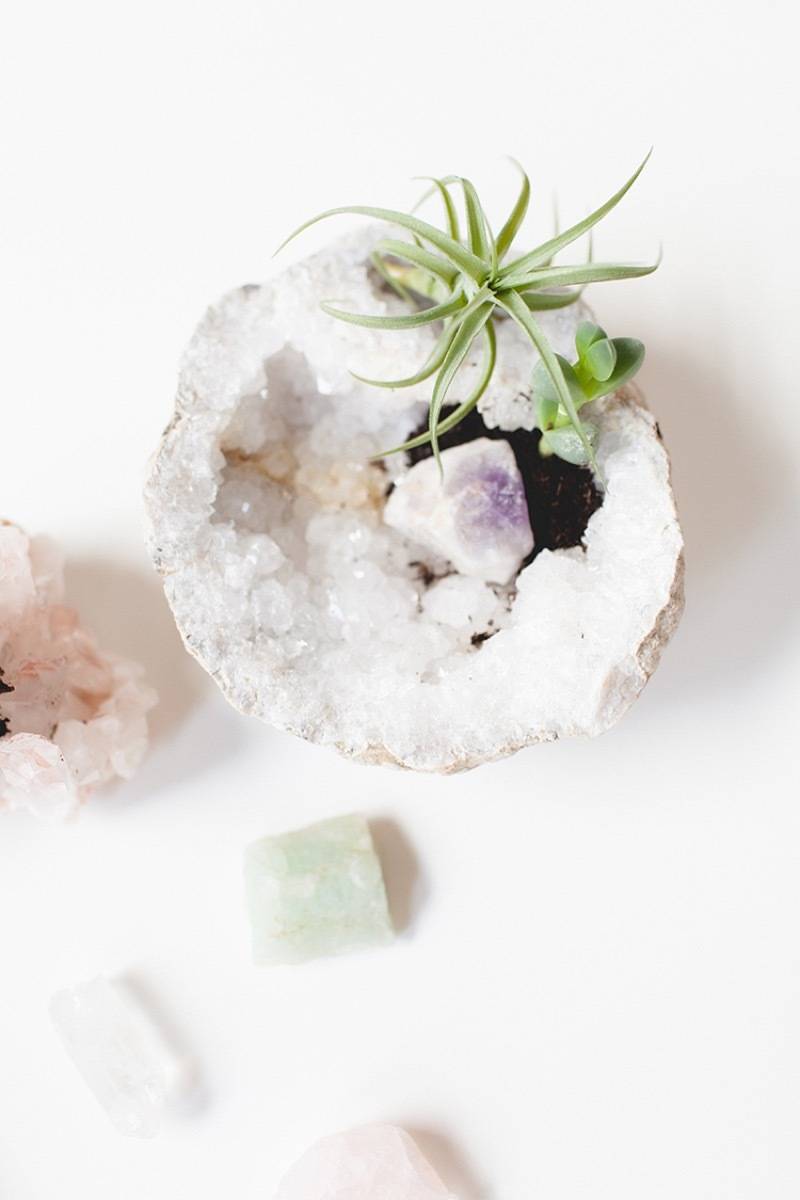
Source: Jojotastic 34. Shoo, negative energy! Gift some good vibes with a simple crystal planter. When you’re giving your mom this present, don’t forget to include some air plant care instructions!
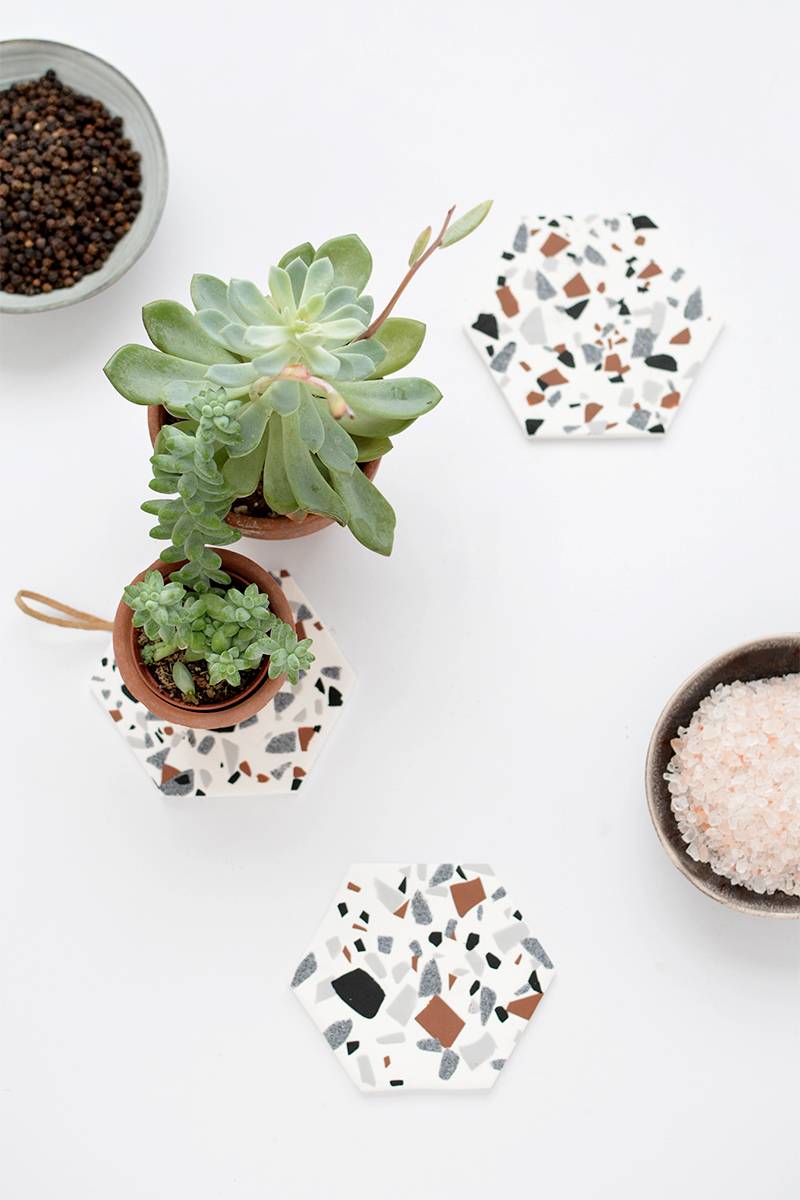
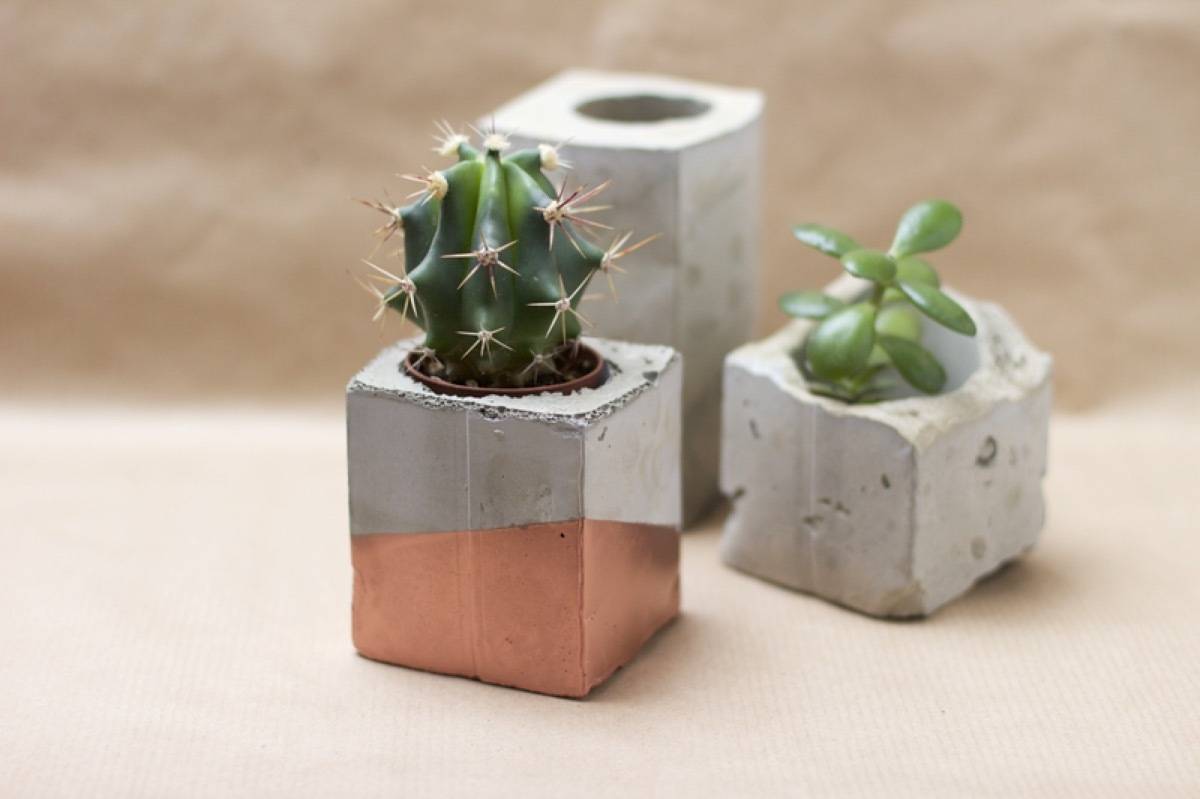
Source: Paper and Stitch 35. With a little concrete and a lot of succulents, you have a gift for every mom on the block!
Source: We Love Handmade 36. Can’t get enough of concrete? These planters are mixed with copper (FYI, this tutorial is in German, but the images make it easy to follow along!). HAND-CRAFTED ACCESSORIES
Source: A Pair and a Spare 37. Your mother will be so impressed you made this canvas bag! Seriously, how is this not store-bought?
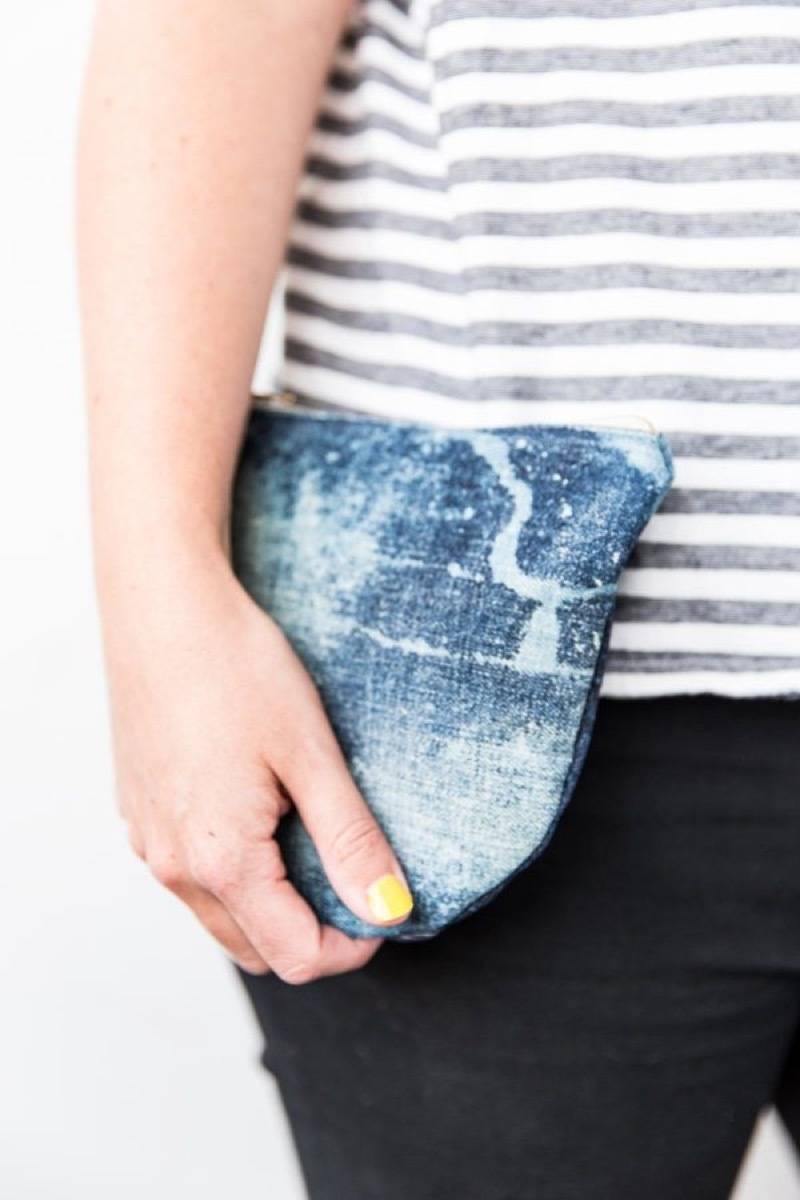
Source: Paper and Stitch 38. For those 80s mommies, a bleached denim clutch makes a great DIY Mother’s Day gift!
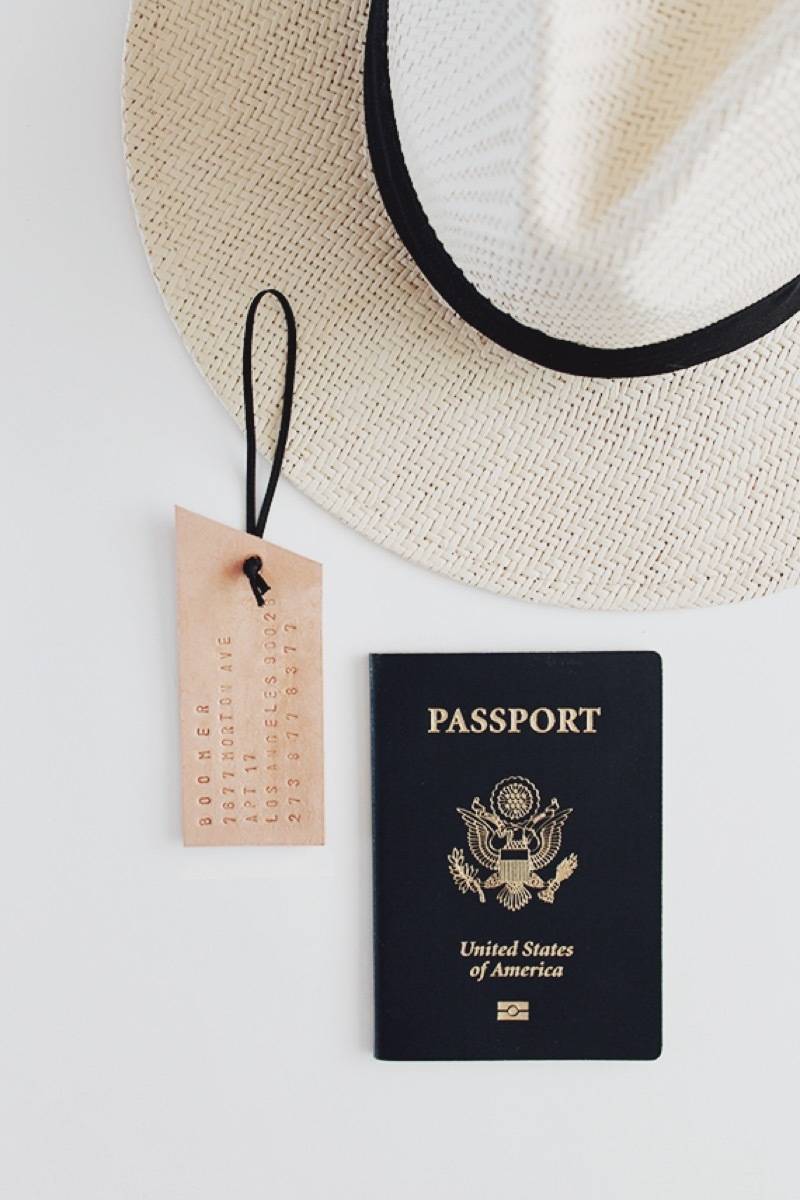
Source: Almost Makes Perfect 39. Does mom have a touch of wanderlust? Get personal with this stamped leather luggage tag tutorial.
Source: Sugar & Cloth 40. A perfectly personalized DIY Mother’s Day gift for mom’s special day.
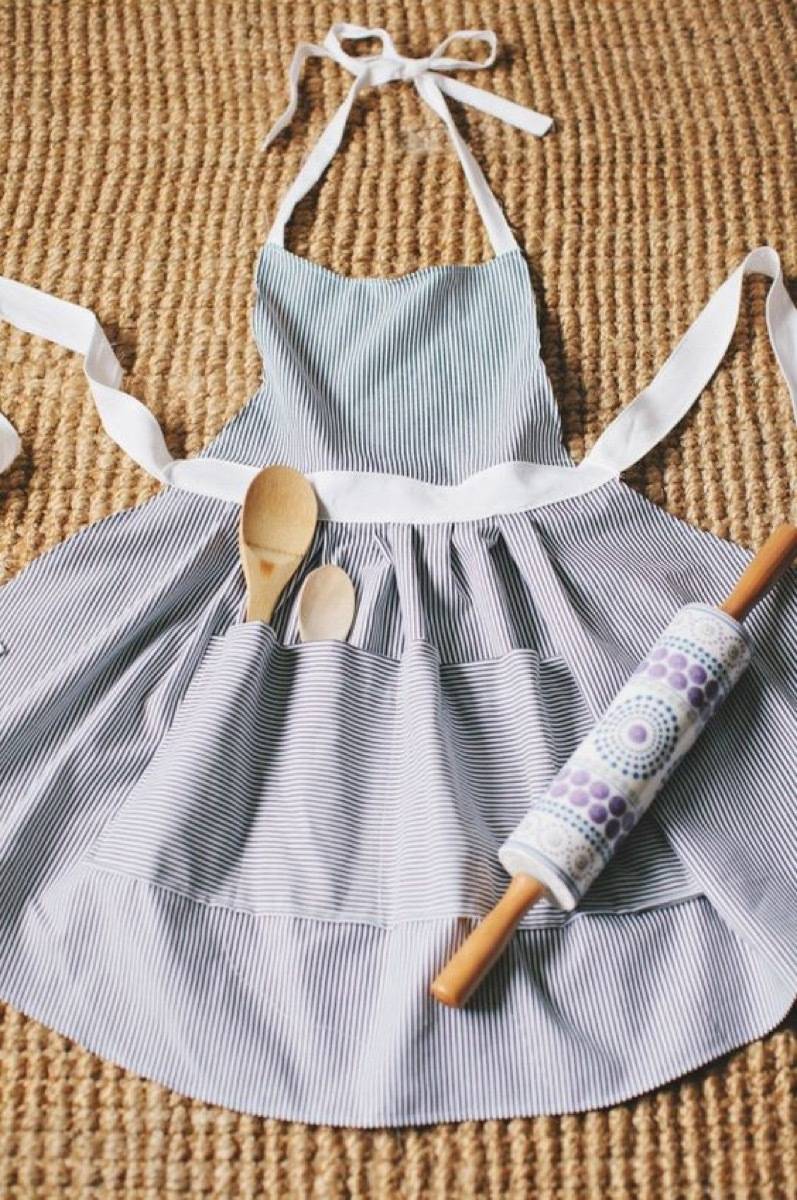
Source: Curbly 41. Mom’s cooking is simply the best, there’s no argument against that! Compliment her culinary skills with a handmade half apron (this one can be sewn in just half an hour!).
Source: Style Me Pretty 42. Does a half apron feel like half the love? Go for a full-blown hostess apron!
Source: My Poppet 43. Flex your sewing skills and make a batch of wash bags for all your mom-friends.
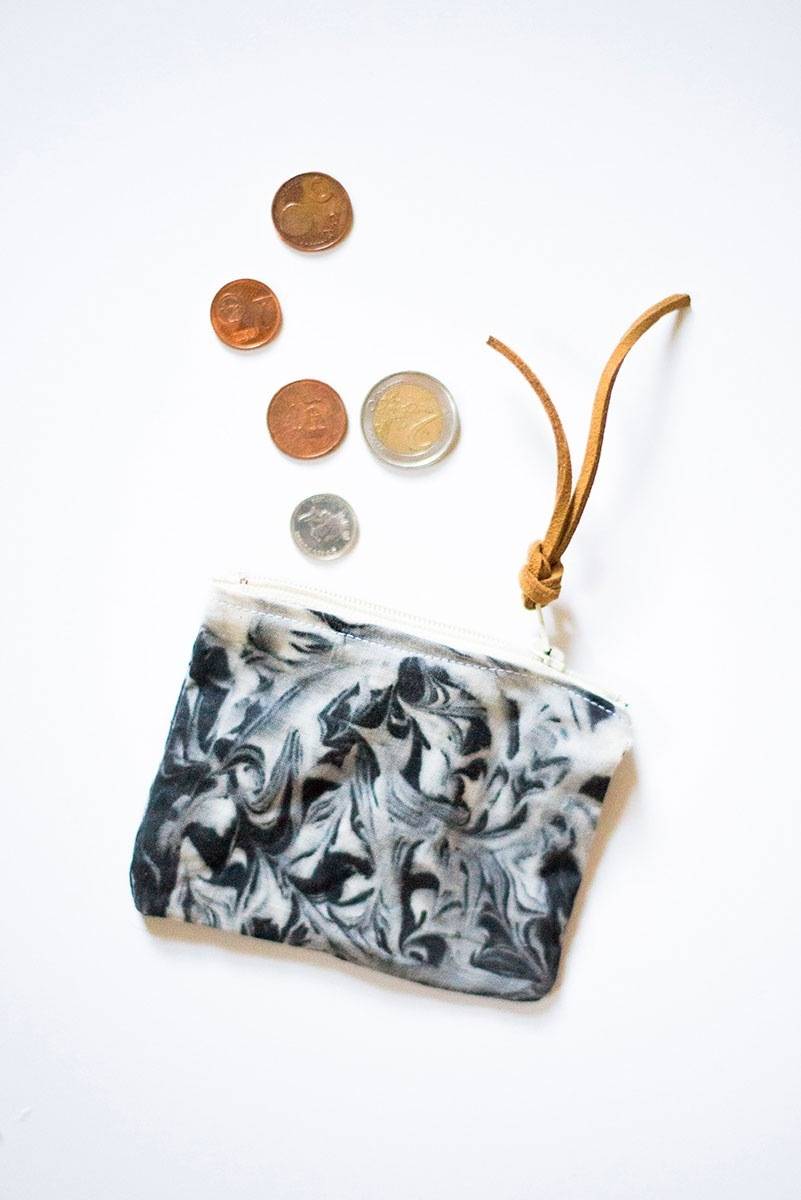
Source: The Homesteady 44. If you’ve ever wanted to learn how to marble fabric, this is a great excuse to give it a try!
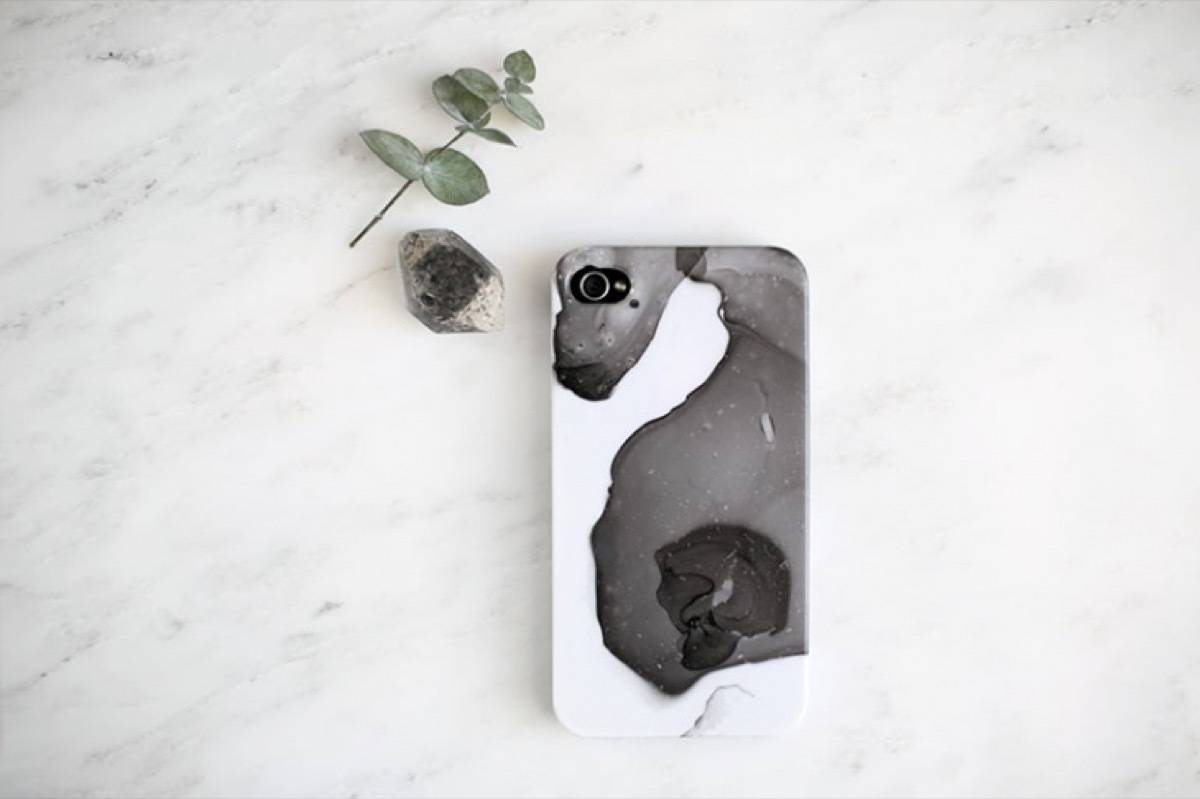
Source: The Merrythought 45. Or maybe you want to make a marbled phone case instead?
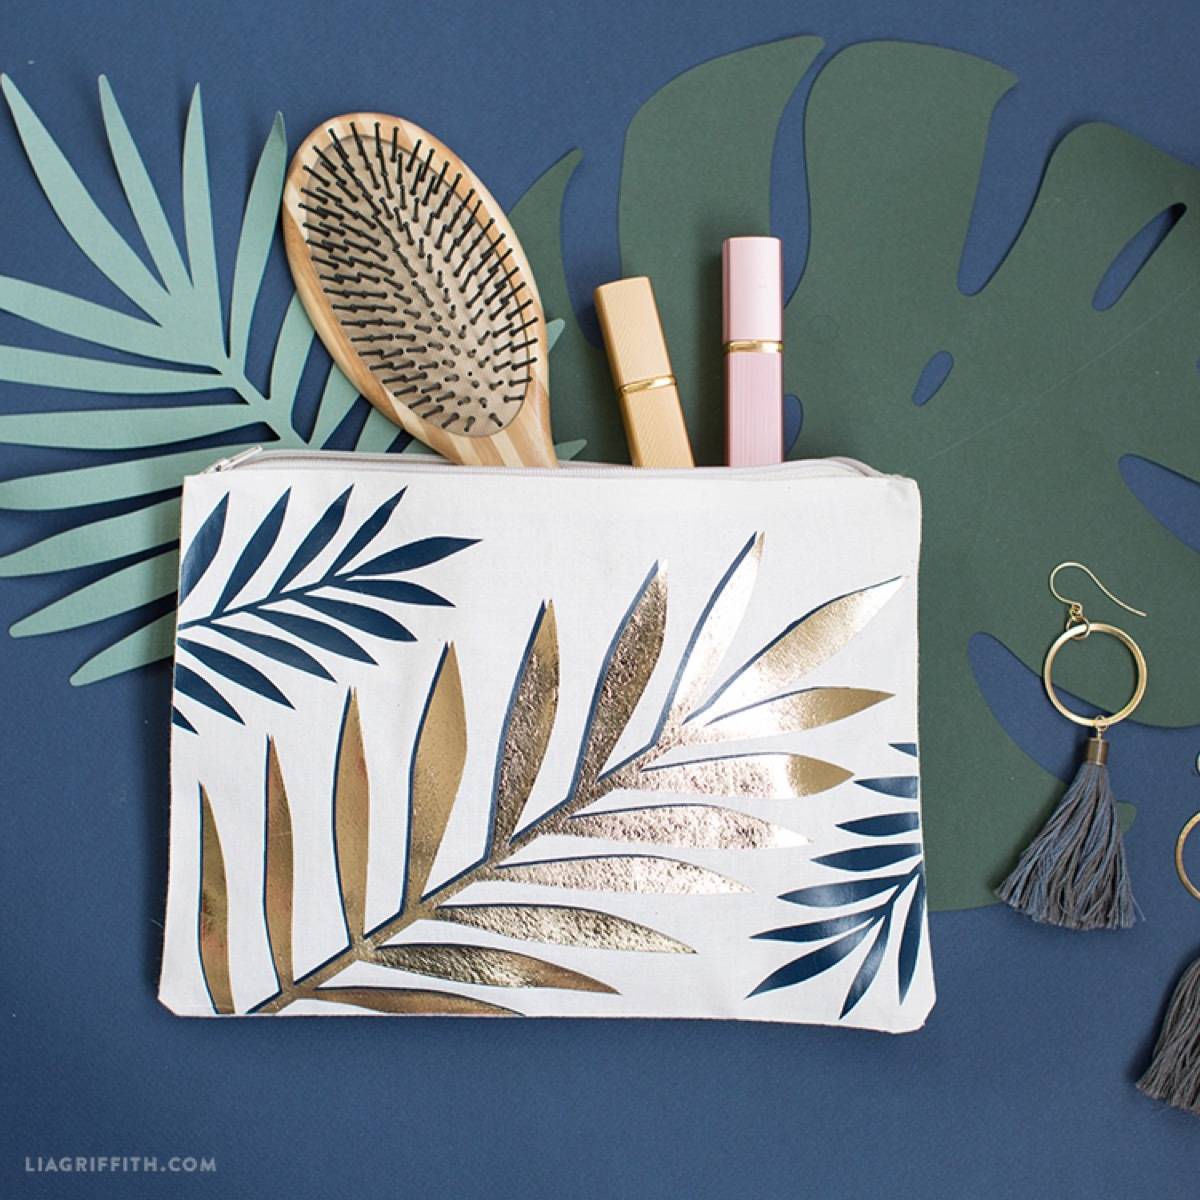
Source: Lia Griffith 46. Printable templates bring this tropical pouch to life – anybody would be happy to receive this DIY Mother’s Day gift.
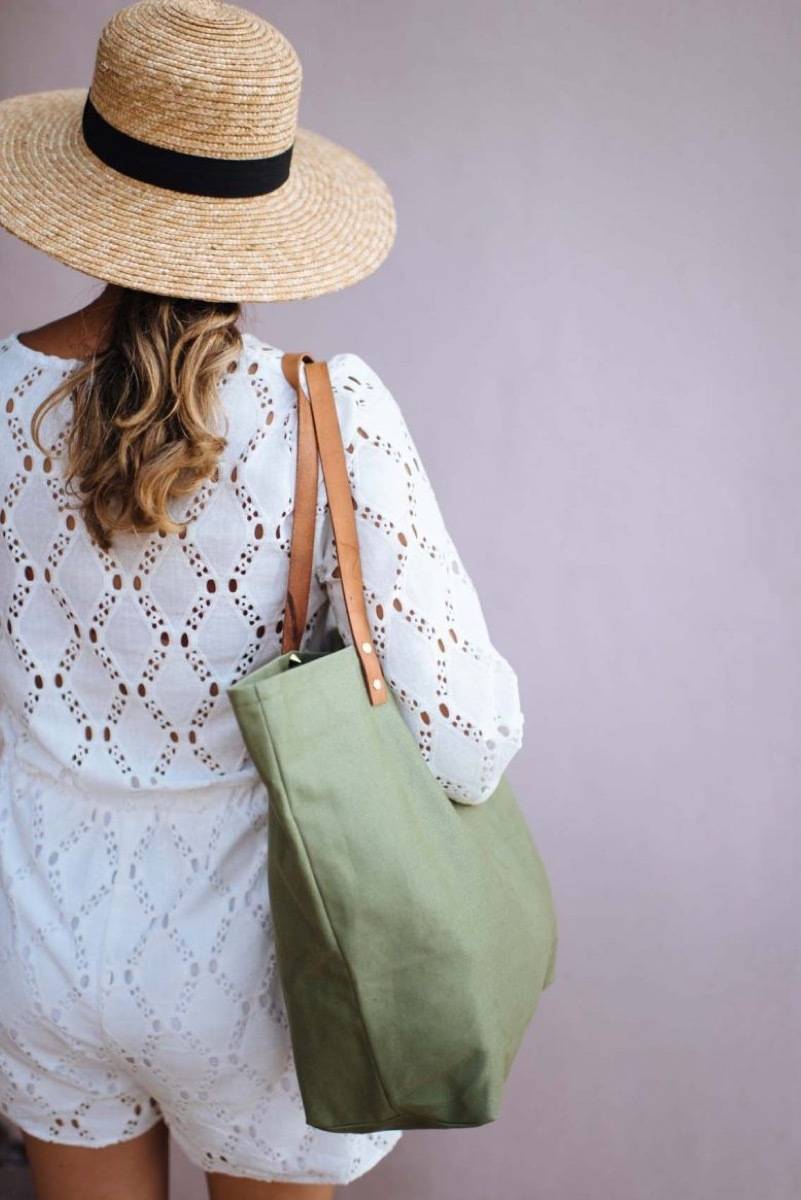
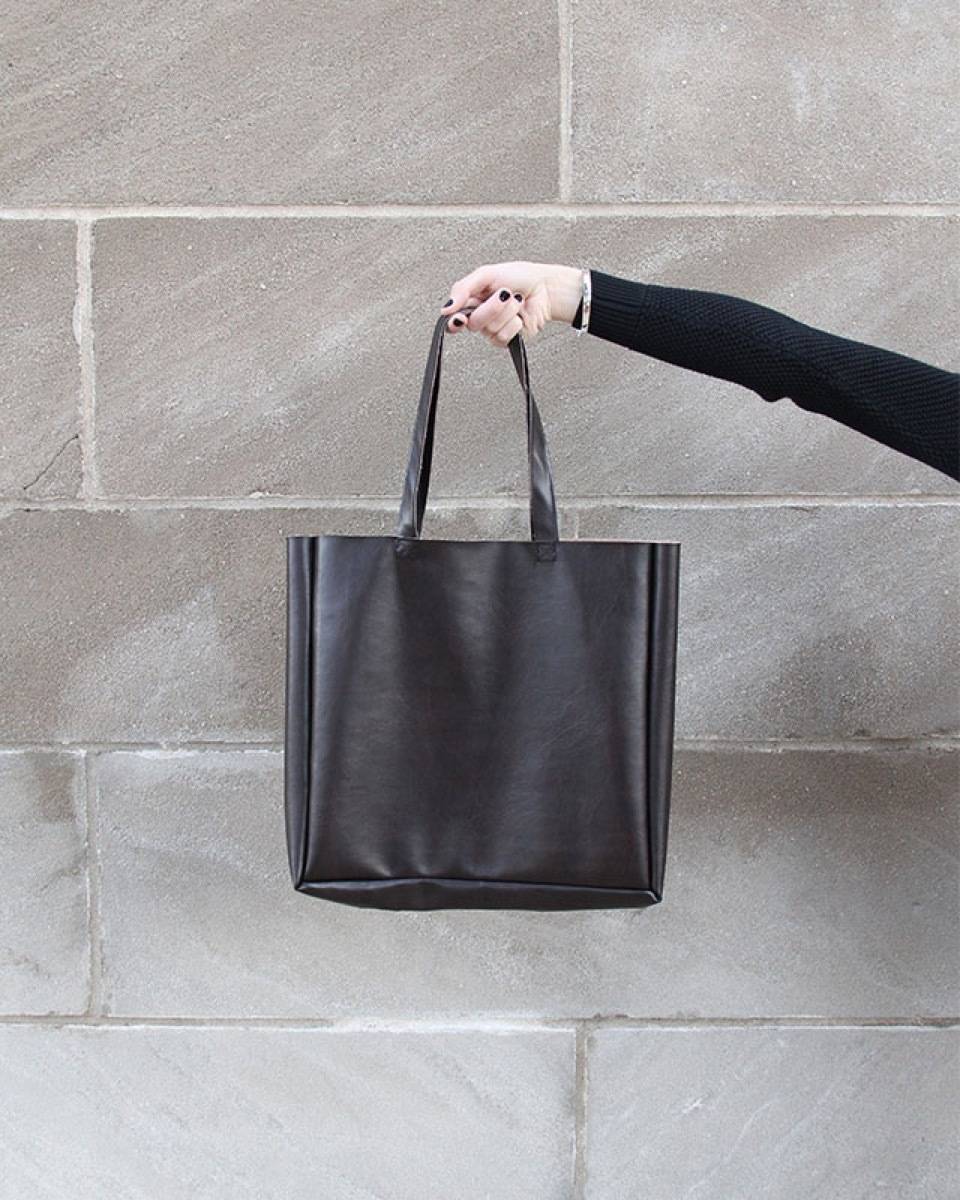
Source: We Can Make Anything 47. Create an everyday shoulder bag for your not-so-everyday mother.
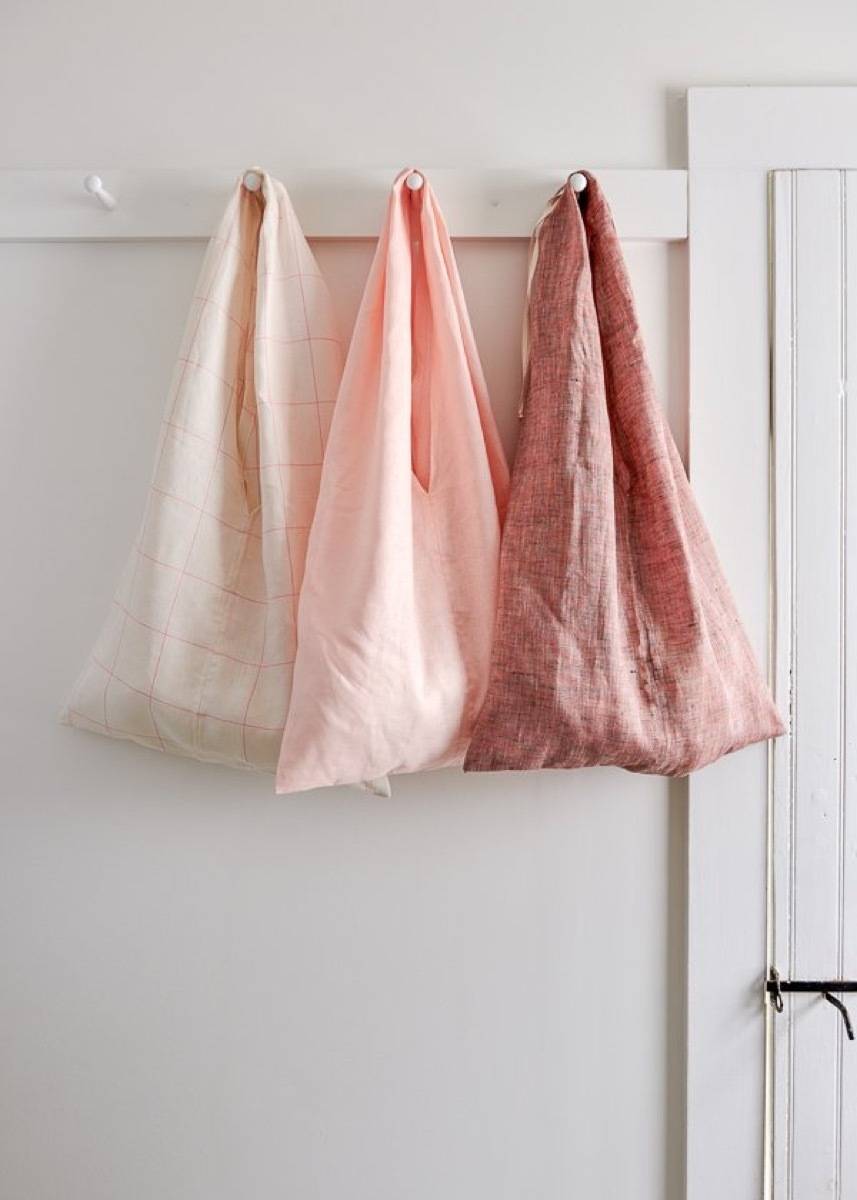
Source: Purl Soho 48. These market totes fold right up, making them cute and space-saving.
Share this roundup on Pinterest! Visit this article to find printable Mother’s Day cards to go with your DIY Mother’s Day gift!
The post 48 DIY Mother’s Day Gift Ideas That Aren’t At All Tacky appeared first on Curbly. Via https://www.curbly.com/diy-mothers-day-gift-guide
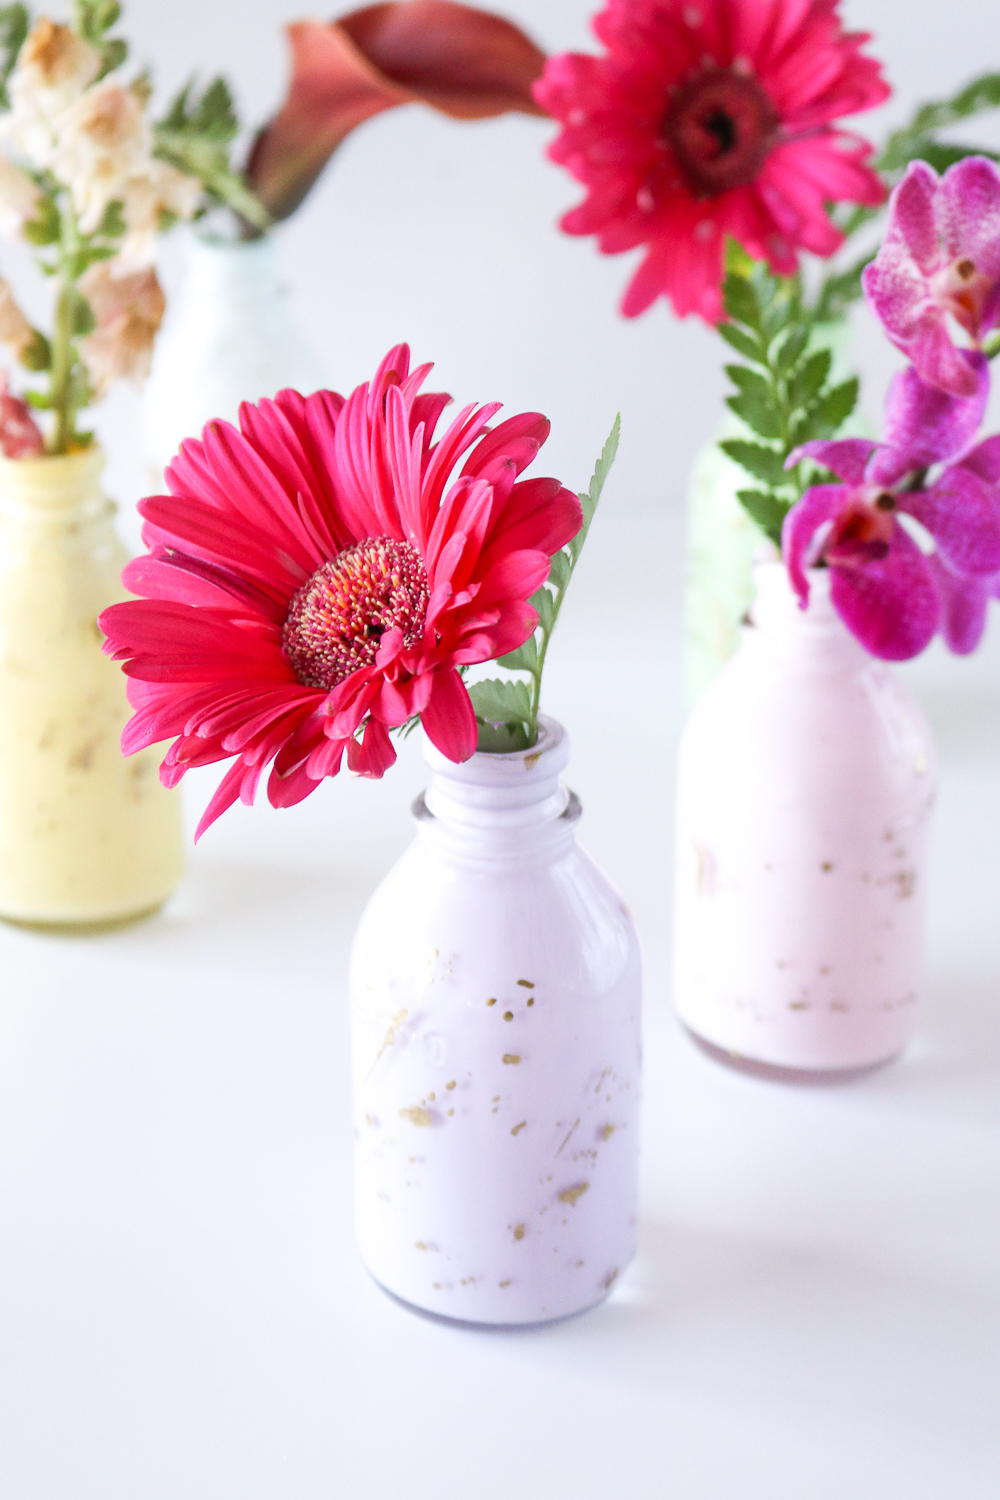
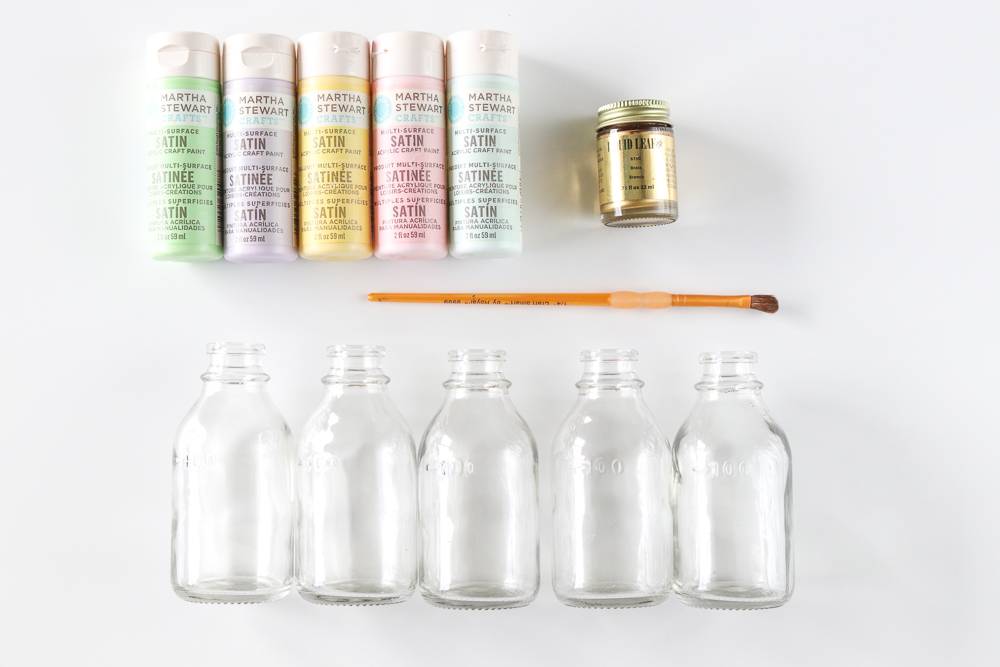
Spring is in the air! To me, spring is always, first and foremost, about color. It’s also my favorite time of year to keep flowers in the house, but this can be a very expensive habit. Instead, I’ve committed to getting my flower fix by picking one or two flowers from my daily walks to display in small bud vases. To honor each bloom, I wanted to whip some special bud vases to give them just-the-right place to live. I found these pretty little glass jars at Michaels, and used standard acrylic paint to paint the insides of the vases and then splattered them with liquid gold leaf, which gives them a beautiful shimmer unlike plain gold paint.
Materials:
StepFirst, cover your workspace with spare papers or even plastic to protect it from paint. Be cautious and use several layers of paper for maximum protection.
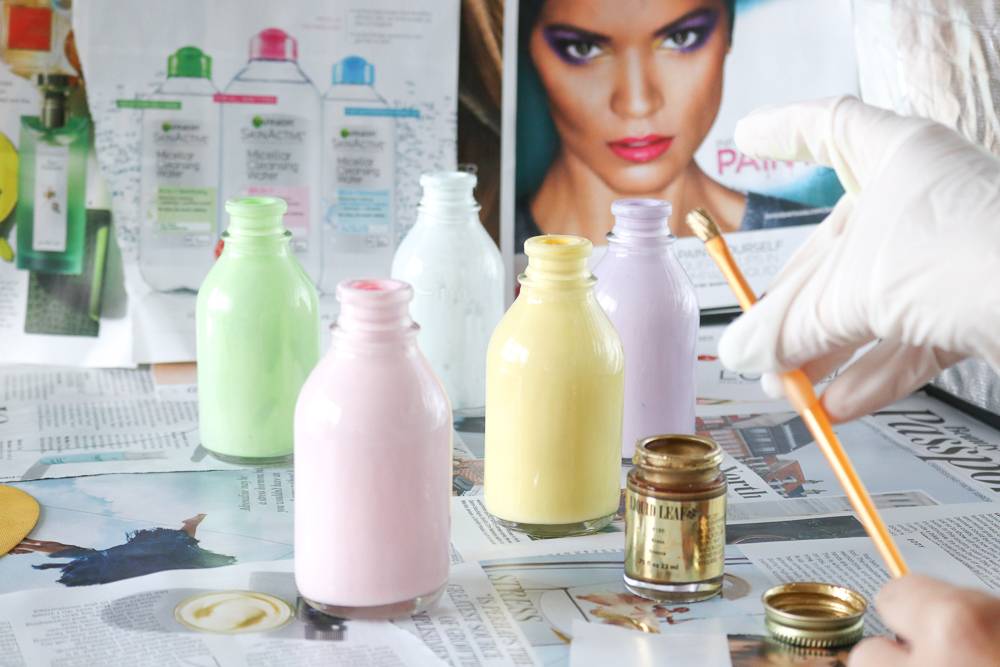
StepAdd several drops of the desired paint colors to each small vase. Then add 1-2 drops of water and shake to combine. (This waters the paint down enough to move easily without changing its effect.) Carefully shake and move the paint around the inside of the vases until entirely covered. Then place top-down onto the paper for the excess paint to drain. StepAllow the paint to drain and dry for several hours or overnight.
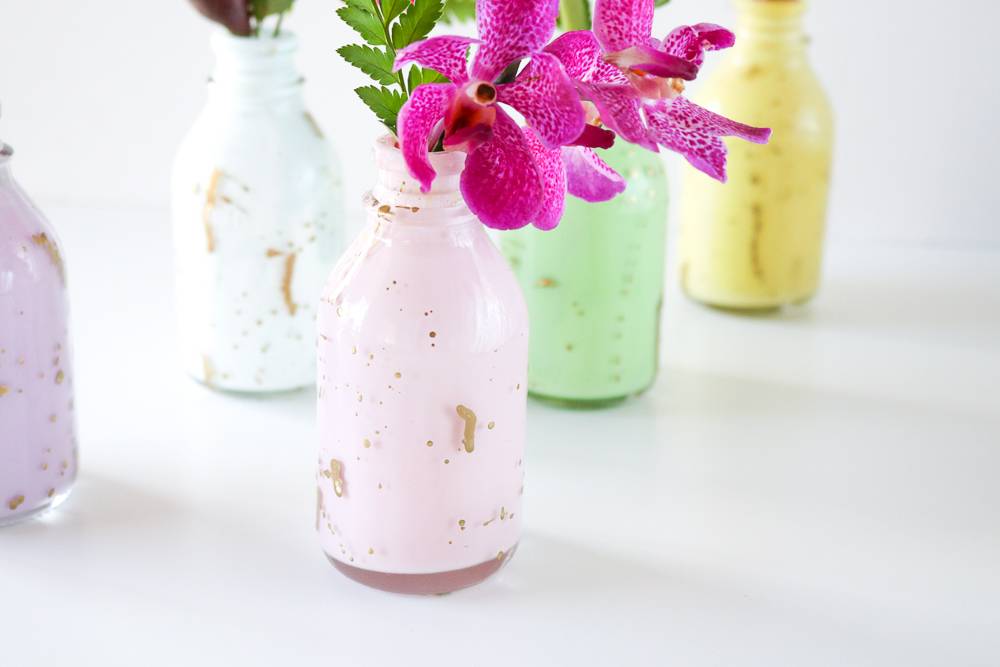
StepTurn the vases right-side up several inches apart and replace the paint-covered paper with new layers. Put on gloves to protect your hands. Dip the paint brush in the liquid gold leaf (may need to shake vigorously before opening) and lightly tap the paint onto the vases to create a speckled or splattered appearance. Repeat until satisfied with the pattern and set aside to dry completely for several hours. *In my experience, liquid gold leaf will stain your hands and surfaces very easily so take extra precaution as it may not be washable.
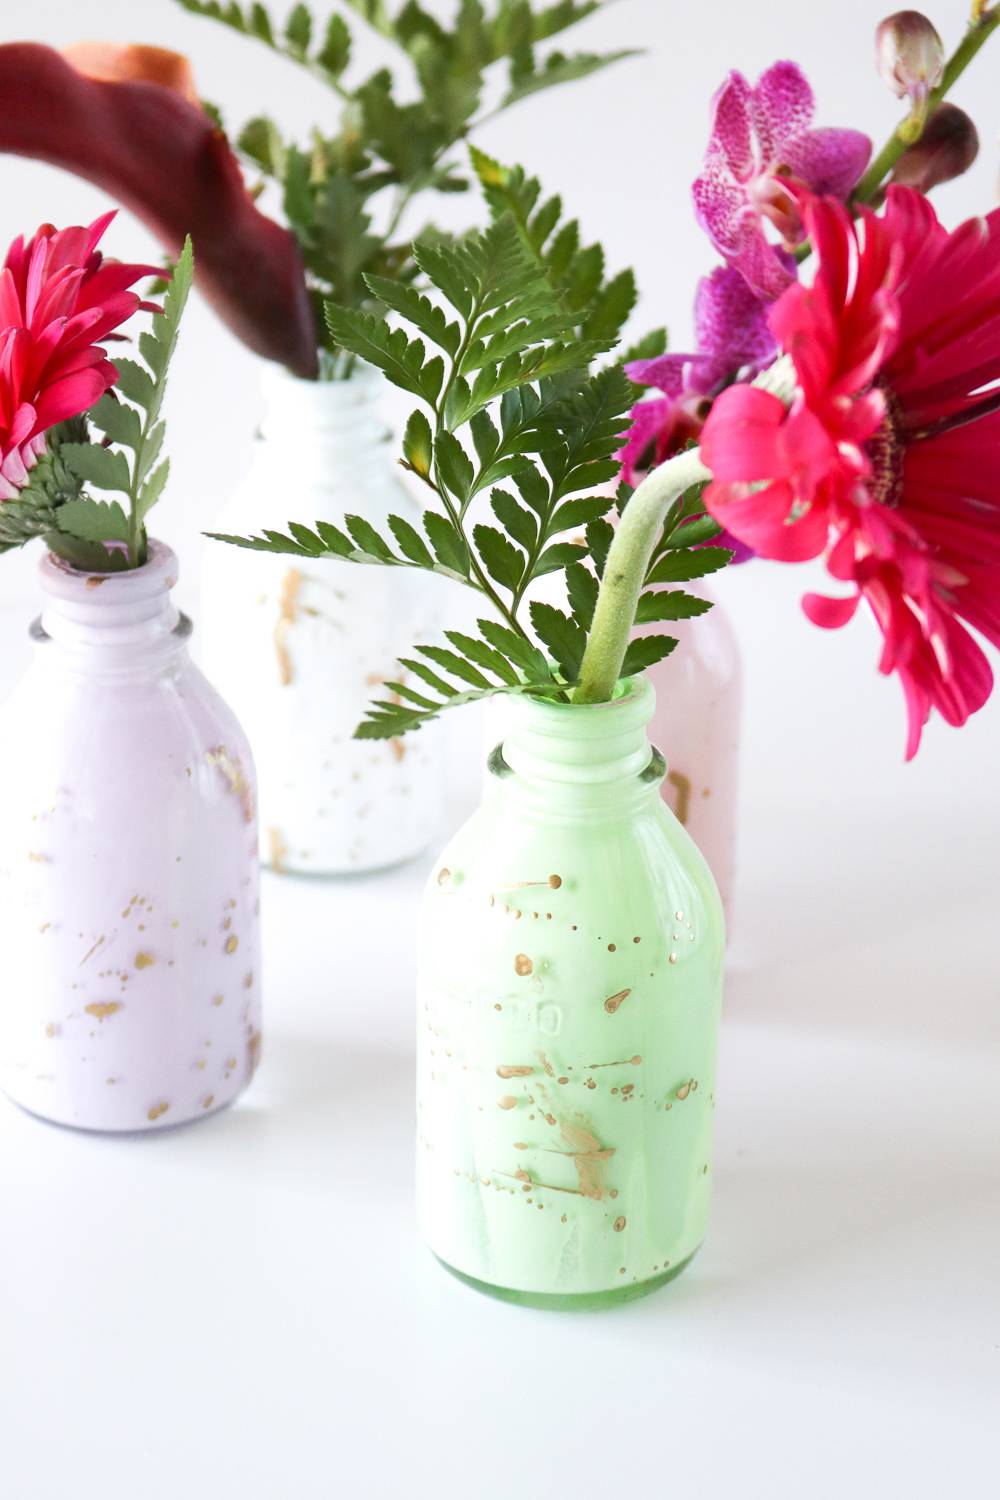
Once the paint has all dried, insert flower buds or plain leaves to add color and life into your decor. With bud vases, there’s no need to buy a whole bouquet (unless you want to, of course)! Simply place bud vases around the house and add one stem to each to instantly update the space. The post Simple Spring Decor: DIY Pastel Gold Splatted Bud Vases appeared first on Curbly. Via https://www.curbly.com/simple-spring-decor-diy-pastel-gold-leaf-bud-vases |